![ii
Table of Contents
Introduction ..............................................................................................................1
Welcome to Ozone 5 ................................................................................................1
Authorization ..........................................................................................................2
What is Ozone? .....................................................................................................11
New Features in Ozone 5........................................................................................13
Getting Started .....................................................................................................15
Mastering Modules....................................................................................................17
Standard Module Controls.......................................................................................17
Using Multiband Modules ........................................................................................20
Mid-Side Processing...............................................................................................25
Equalizer ..............................................................................................................28
Matching EQ .........................................................................................................37
Mastering Reverb ..................................................................................................40
Harmonic Exciter ...................................................................................................45
Dynamics .............................................................................................................49
Stereo Imaging .....................................................................................................58
Maximizer.............................................................................................................61
Dithering..............................................................................................................66
Meter Bridge [Ozone Advanced] ..............................................................................69
Mastering Meters......................................................................................................80
Spectrum Analyzer ................................................................................................80
Correlation Meter ..................................................................................................83
Vectorscope..........................................................................................................84
Dynamics Meters...................................................................................................87
Input and Output Meters ........................................................................................91
Dithering Meters....................................................................................................98
Preset System ....................................................................................................... 101
Preset Manager ................................................................................................... 101
Selecting Presets................................................................................................. 103
Adding and Removing Presets ............................................................................... 105
Changing Where Presets Are Stored....................................................................... 107
Module Preset System.......................................................................................... 108](data:image/gif;base64,R0lGODlhAQABAIAAAAAAAP///yH5BAEAAAAALAAAAAABAAEAAAIBRAA7)
Recommended
More Related Content
Similar to izotope-ozone5-help.pdf
Similar to izotope-ozone5-help.pdf (20)
Recently uploaded
Recently uploaded (20)
izotope-ozone5-help.pdf
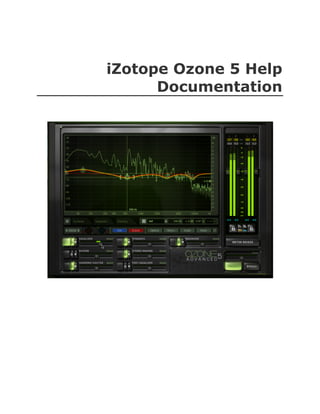
- 1. iZotope Ozone 5 Help Documentation
- 2. ii Table of Contents Introduction ..............................................................................................................1 Welcome to Ozone 5 ................................................................................................1 Authorization ..........................................................................................................2 What is Ozone? .....................................................................................................11 New Features in Ozone 5........................................................................................13 Getting Started .....................................................................................................15 Mastering Modules....................................................................................................17 Standard Module Controls.......................................................................................17 Using Multiband Modules ........................................................................................20 Mid-Side Processing...............................................................................................25 Equalizer ..............................................................................................................28 Matching EQ .........................................................................................................37 Mastering Reverb ..................................................................................................40 Harmonic Exciter ...................................................................................................45 Dynamics .............................................................................................................49 Stereo Imaging .....................................................................................................58 Maximizer.............................................................................................................61 Dithering..............................................................................................................66 Meter Bridge [Ozone Advanced] ..............................................................................69 Mastering Meters......................................................................................................80 Spectrum Analyzer ................................................................................................80 Correlation Meter ..................................................................................................83 Vectorscope..........................................................................................................84 Dynamics Meters...................................................................................................87 Input and Output Meters ........................................................................................91 Dithering Meters....................................................................................................98 Preset System ....................................................................................................... 101 Preset Manager ................................................................................................... 101 Selecting Presets................................................................................................. 103 Adding and Removing Presets ............................................................................... 105 Changing Where Presets Are Stored....................................................................... 107 Module Preset System.......................................................................................... 108
- 3. Table of Contents iii Migrating Presets from Ozone 4............................................................................. 110 General Functions .................................................................................................. 112 Setting the Order of the Mastering Modules ............................................................ 112 Input and Output Gain ......................................................................................... 115 Undo and History Comparisons.............................................................................. 117 Gain when Bypassed Function ............................................................................... 118 Buffer Size Viewer ............................................................................................... 119 Options................................................................................................................. 120 General Options .................................................................................................. 120 Spectrum Options................................................................................................ 123 I/O Options ........................................................................................................ 125 EQ Options ......................................................................................................... 127 Reverb Options ................................................................................................... 129 Exciter Options.................................................................................................... 130 Imager Options ................................................................................................... 131 Dynamics Options................................................................................................ 133 Maximizer Options ............................................................................................... 135 Tips and Shortcuts ................................................................................................. 136 CPU Optimization ................................................................................................ 136 Buffer Sizes ........................................................................................................ 137 Automation......................................................................................................... 139 Shortcut Keys and Mouse Support ......................................................................... 141 iZotope Customer Support.................................................................................... 145
- 5. 1 Introduction Welcome to Ozone 5 © 2001-2011 iZotope, Inc. All rights reserved. iZotope, iZotope.com, the iZotope logo, and Ozone are either registered trademarks or trademarks of iZotope, Inc. in the United States and/or other countries. V 5.0.3.733
- 6. Ozone 5 Help Documentation 2 Authorization Each purchased copy of Ozone 5 contains a unique serial number printed on the installer DVD sleeve. If Ozone 5 has been downloaded directly from iZotope or another re-seller the serial number will be e-mailed along with the link to download the product. The serial number should resemble: SN-OZONE5-XXXX-XXXX-XXXX-XXXX Launching the Authorization Wizard The first time you open Ozone 5, the Authorization Wizard will appear. You can choose to either authorize Ozone or use it in Trial mode for evaluation purposes. Please use your supplied Ozone 5 serial number to fully authorize your product. Trial vs. Demo Mode For the first 10 days after installation, Ozone will run in Trial mode, which offers full functionality with the exception of saving and batch processing. After 10 days, Ozone will revert to Demo mode. In Demo mode, Ozone will intermittently mute audio output. You may alternate your Trial/Demo of Ozone 5 between Basic and Advanced versions with the 'Choose Demo:' drop-down menu under 'Auth & Updates' in the General Options tab. Authorizing Your Copy of Ozone 5 Online After opening Ozone 5 and launching the Authorization Wizard, the following steps will complete the authorization process online: 1. First, click on 'Authorize'. 2. Next, enter the serial number in all capital letters as it it shown on your DVD sleeve or e- mailed to you.
- 7. Introduction 3 SN-OZONE5-XXXX-XXXX-XXXX-XXXX 3. You must also enter your name and a valid e-mail address. Note: Clicking the 'Advanced' button reveals a set of options that allow you to store your Ozone authorization on a portable hard drive or flash drive. Click here for more information on these options. Make note of the e-mail address you use to authorize your license. Your license and iZotope account will be linked directly to this e-mail address. 4. When you have confirmed that your serial number and e-mail information is accurate, click once more on 'Authorize'. 5. Lastly, click on 'Submit' in order to send your authorization message to the iZotope servers.
- 8. Ozone 5 Help Documentation 4 If the authorization is accepted, click on the 'Finish' button to complete the authorization. Authorizing Your Copy of Ozone 5 Offline Some customers choose to keep their audio workstations offline, and a simple offline authorization option has been included. After opening Ozone 5 and launching the Authorization Wizard, the following steps will complete the authorization process offline: 1. When first prompted to authorize Ozone 5, click on 'Authorize'
- 9. Introduction 5 2. Next, click on the option for 'Offline Authorization' at the bottom of the authorization window. 3. You will be given a unique Challenge Code that is specific to your computer only. Write down or make a copy of the exact Challenge Code. It will look like this: IZ-OZONE5-XXXXXXXX-XXXX-XXXX 4. Next, using a system with internet access, login to your customer account at the iZotope
- 10. Ozone 5 Help Documentation 6 website. http://www.izotope.com/store/account.asp 5. Click the 'Activate Software with a Serial Number' button, enter your full serial number and click 'Submit'. 6. Select the 'Challenge/Response' option and click on 'Submit'. 7. Now enter your full Challenge Code copied in step 3.
- 11. Introduction 7 8. After submitting your Challenge Code, you will receive a unique authorization file named 'Ozone_5.izotopelicense.xml' that you then need to move to your offline computer. 9. Once the authorization file is copied over to your offline computer using a network, hard drive or USB stick, click the 'Choose File...' button in your authorization wizard.
- 12. Ozone 5 Help Documentation 8 10. Navigate and select the authorization file and click 'Next' to authorize your machine. 11. You should now receive a message that your authorization has been successful and may click Finish to begin using Ozone 5. iLok Support Ozone 5 does support iLok. Our plug-ins will be able to detect iLok keys and assets if you already use iLok and PACE software on your system. If you don't already have PACE or iLok, we will not install any PACE or iLok software to your system, and iLok authorizations will be unavailable. Authorizing Ozone with iLok 1. When first prompted to authorize Ozone 5, click on 'Authorize' 2. Next, enter the serial number in all capital letters as it it shown on your DVD sleeve or e- mailed to you. SN-OZONE5-XXXX-XXXX-XXXX-XXXX 3. You must also enter your name and a valid e-mail address. Make note of the e-mail address you use to authorize your license. Your license and iZotope account will be linked directly to this e-mail address. 4. Select 'Use iLok Authorization' and enter your iLok ID.
- 13. Introduction 9 5. When you have confirmed that all your information is accurate, click once more on 'Authorize'. 6. Lastly, click on 'Submit' in order to send your authorization message to the iZotope servers. 7. You will now be instructed to log in to your iLok account and transfer your Ozone 5 license to your iLok.
- 14. Ozone 5 Help Documentation 10 8. When you have completed this step and have your iLok connected to the computer on which you want to use Ozone, click 'Next'. 9. You should now receive a message that your authorization has been successful and may click Finish to begin using Ozone 5. Help We have created an online article to help with common questions about our authorization system. Removing Your Current Authorization Use the authorization menu in Ozone's General Options panel to remove your current Ozone authorization, for example if you have upgraded to Ozone 5 Advanced and have already authorized Ozone 5 Basic. After removing your authorization, Ozone's authorization screen will pop up when you restart the program. Now you can re-authorize the application using a new serial number. You may also remove your Basic authorization at any time in order to run Ozone 5 Advanced in Trial or Demo mode. Note: If you have downloaded Ozone 5 Basic and then purchased an upgrade to Ozone 5 Advanced, you will need to download Ozone 5 Advanced here and reinstall first.
- 15. Introduction 11 What is Ozone? A Complete Mastering System Ozone is all you need to completely master your audio. Ozone 5 combines eight essential mastering processors into one complete system, letting you give your mixes a finished, full and professional sound. Ozone’s critically acclaimed IRC™ (Intelligent Release Control) Loudness Maximizer gives you commercial volume and fullness without distorting or coloring your mix. Two independent eight-band Paragraphic EQs combine linear phase precision with the warmth and character of analog equalizers and even let you intelligently match your mix to reference tracks. Innovative multiband Dynamics, Harmonic Exciter and Stereo Imaging tools add depth and polish to your projects and because these modules are integrated in a single powerful interface, Ozone maintains the highest quality processing throughout the entire signal chain while also making the mastering process more efficient and intuitive than ever before. What’s New? Ozone 5 adds many quality and workflow improvements to every Ozone module, including new DSP algorithms and a wealth of visual tools to help you track and monitor changes made throughout the mastering process. Ozone Advanced includes additional processing tools in each module, a configurable Meter Bridge that can display relevant meter information in a separate, full screen window, and individual plug-ins for each of Ozone’s modules. When you see a in the following documentation, this denotes a feature that is exclusive to Ozone 5 Advanced. Key Features in Ozone • Complete mastering system available in a single plug-in • Includes eight essential mastering tools: Maximizer, two Paragraphic EQs, Dynamics, Stereo Imaging, Harmonic Exciter, Dithering, and Reverb • Analog-modeled processing combined with linear phase precision • Elegant, highly efficient user interface • Extensive metering and visual analysis tools help you get better results • Comprehensive preset system with over 100 professionally designed presets • Module presets for mixing and matching settings between modules • Integrated undo history with comparison tools • User-definable signal routing • Extensive automation support • CPU-efficient and optimized for today’s low-latency DAW environments
- 16. Ozone 5 Help Documentation 12 • Supports sampling rates up to 192kHz Highest Audio Quality Ozone uses highly optimized audio signal processing to achieve the highest resolution and sound quality possible. All of the mastering modules in Ozone are specifically designed to work together. By carefully matching crossovers and other internal processing, Ozone eliminates phase and artifact problems encountered when chaining together separate plug- ins. In addition, the sound quality and characteristics of each of the mastering modules is tuned to complement the others, providing consistent and high quality results. Ozone uses analog modeling to give each of the mastering modules a smooth natural sound. For example, the equalizer recreates the soft limiting exhibited by a vintage valve equalizer, while the harmonic exciter mimics the musically pleasing harmonic saturation of a vacuum tube component. Whenever there was a choice of CPU vs. sound quality, we chose sound quality. There are easier (less CPU intensive) ways of doing some of the processing that Ozone does, but the sound quality can suffer. Since Ozone is meant to be used for mastering, you would typically only have one instance of Ozone running on the main bus of a session, or in a 2 track editor, which should allow you to utilize Ozone even on lower powered CPUs. Powerful Audio and Visual Feedback We wanted to provide visual feedback wherever possible. Your ears and your eyes can be a powerful combination when you're mastering, and each processing module is complemented with useful spectrums, phase meters, and level histograms. Each module also has switchable views that highlight different aspects of how your mix is affected throughout mastering. We also wanted to make it easy to get audio feedback by providing extensive solo/bypass controls and histories with functions for A/B comparisons. The Alt-click function on the EQ is an example of this as well. Wherever possible, we wanted to give you new ways to really hear what you are doing. Intuitive Design and Easy to Use We tried to make Ozone as easy and intuitive as possible from including a complete set of mastering modules in a single plug-in system, to context sensitive help, to the little things like mouse wheel support. There is a lot of power in Ozone, but we think that in no time at all you'll be making the most of it and getting great results with ease. Whether you’re a seasoned professional or you’re simply ready to take your productions to the next level, Ozone is the complete solution you need. Your mix isn’t finished until you put it through Ozone. This help file is a quick reference for basic Ozone functions and controls. We have written a separate Ozone Mastering Guide that provides tips and techniques for mastering with Ozone.
- 17. Introduction 13 New Features in Ozone 5 If you're moving up from Ozone 4 to Ozone 5, we thank you for your continued support! Here are some changes and new features that you'll find in Ozone 5! New Intelligent Workflow Updated Interface Ozone has been redesigned with a larger interface to make even more controls accessible on the front of the plug-in. Multibands are now color-coded with interface highlight colors that reflect the band you are currently viewing and/or adjusting a control for. The dynamics module now features a Show All Bands mode from which you can view and adjust all relevant settings for every dynamics stage of every band in one simple window. These updates allow for a more seamless workflow when performing multiband processing and streamline tasks that can be arduous in other plug-ins. Module Presets Ozone 5 has been updated with the added functionality to load and save presets for individual modules. You may apply settings to one module then mix and match presets from different modules to better address the needs of your mix. New Intelligent Module Amount Controls Ozone 5 now allows you to dynamically alter the settings of a module with configurable amount controls. This allows you to intelligently tweak the global settings of each individual module at any time from Ozone's main interface. Meter Bridge and Meter Taps Ozone 5 Advanced's powerful new Meter Bridge provides a full suite of audio analysis tools, perfect for visualizing changes made during the mastering process, troubleshooting problematic mixes, and comparing your mixes to reference tracks. Included Meter Tap plug-ins allow you to route audio streams from anywhere in your mix and compare them with the output of Ozone. Component Plug-ins Ozone 5 Advanced includes individual component plug-ins of each module in Ozone. Now you can selectively load individual modules into your session, each with their own dedicated module preset system. New Processing Innovations
- 18. Ozone 5 Help Documentation 14 IRC™ Loudness Maximizer/ Intelligent III Mode Ozone 5 includes a new processing mode in the Loudness Maximizer called "Intelligent III". This mode is optimized to preserve transients, so they sound sharper and clearer in the output signal, even when aggressive limiting is taking place. The new Intelligent III Loudness Maximizer mode listens to incoming audio to determine how much limiting can take place before any detectable distortion occurs. Try this on your mixes and hear the difference. Harmonic Exciter/ Triode Modes We have updated the Harmonic Exciter to include new "Triode" modes. The Triode modes are modeled after tube circuits add the warm sound of a vintage preamplifier on up to four frequency bands, producing subtle dynamic and distortion effects. Upward Dynamics processing and Soft Knee Compression We have updated the Dynamics module to allow for ratios less than 1:1 at the gate, compressor, and limiter stage. This allows you to perform upward compression and upward expansion on your mix, giving you enhanced control of dynamic range. Additionally, we've added Soft Knee Compression to Ozone and Variable Knee Compression to Ozone 5 Advanced. Both allow you to perform more subtle and transparent compression on your mix. Enhanced Hybrid Reverb module New reverb processor utilizes both convolution technology to provide accurate early reflections of real acoustic spaces as well as algorithmic technology to give you greater control of your reverb’s late tails. Together the two technologies give you enhanced control to fine tune the reverb to your mix. Add subtle “room tone” without an obvious reverb effect or thicken a mix with longer reverb decay times.
- 19. Introduction 15 Getting Started Using Mastering Presets in Ozone 5 Ozone’s presets are designed to give you a quick starting point for mastering your own projects. Every mix is different so no preset can perfectly master your project. However we have attempted to provide a wide range of presets that will help you find a good starting point for mastering your own material. By starting with a preset and using the Amount controls in Ozone’s interface, you’ll be able to tweak these presets to make them more closely fit the session you’re working on. We recommend you download the Ozone Mastering Guide to learn the basic principles of mastering with Ozone. Presets can take you a long way, but learning how each of Ozone’s mastering modules works is key to getting the best results. You won’t regret it–your masters will sound better than ever before! Setting Your Input Level Setting the input level in Ozone can make a huge difference in how the dynamics modules in Ozone behave. Setting your input level is important when selecting presets as the presets will sound drastically different if your input level is too loud or quiet. As a starting point try setting Ozone’s input level so that the input meter is peaking in the yellow area of the meter. It is OK if the input meter occasionally goes into the red when Ozone’s Loudness Maximizer is enabled, it will keep the audio from clipping. Choosing a Starting Point Start by listening through several of Ozone’s presets. You can start with a Genre-Based Mastering Preset or simply use the General Purpose Mastering presets. Because every mix is different, we’ve aimed to give you a lot of starting points so that you can choose the best one for your project. When you’ve found one that sounds like it has what your mix needs, you can start tweaking that preset to your liking. Module Amount Controls By starting with a preset you can subtly adjust the Amount Controls to help you get your mix closer to the way you want it to sound. The Amount sliders are located at the bottom of Ozone’s interface. You can adjust them to control how much each of Ozone’s mastering modules affects your mix as well as how the module behaves. For example, turning down the Equalizer Amount slider can flatten out the EQ curve making the EQ’s effect less dramatic. Increasing the Maximizer Amount control will boost the overall level of your mix. There is also a Global Amount slider below the input and output level controls that allows you to quickly adjust how much Ozone’s modules process your mix overall.
- 20. Ozone 5 Help Documentation 16
- 21. 17 Mastering Modules Standard Module Controls At the bottom of each of the modules is a navigation bar that includes a set of buttons and controls. The function of these controls is the same regardless of which module you are using. Reset Button: Resets the control to its default value . For most mastering modules, this means setting the values of controls in the displayed module to zero or some "neutral" state. History: Clicking on the History button brings up a window which shows a history of the operations that have been performed. You can undo a single operation or sequence of operations and assign setups to keyboard shortcuts for A/B/C listening comparisons. Module Preset: Load and save presets for individual modules to mix and match different module’s settings to better address the specific needs of your mix. Launch each module's individual preset manager by clicking on the button to the right of the module's active LED. Solo: Clicking the Solo button turns off (bypasses) all the mastering modules except the one currently displayed. This allows you to audition the effect of one module without hearing the effect of the others. If you change screens by selecting a different mastering module, the solo will be automatically turned off so that you can work immediately on the new screen and hear the effect (without worrying about whether a screen that isn't displayed is being solo'd). Bypass: Clicking the Bypass button on the touchscreen turns off the processing within the currently displayed module. This allows you to compare the sound with or without the currently displayed module. Unlike the Solo button, if you change screens by selecting a different mastering module the bypass will still apply. This allows you to bypass more than one module. Note: You can also bypass modules by clicking the Active light on the Ozone faceplate as shown below. You can solo a module by holding down the Alt key and clicking the Active light for the module you wish to solo. Graph: The Graph button reveals the order in which Ozone processes audio through the main modules. Here is the default order of signal processing through the main mastering modules: • Equalizer • Reverb • Dynamics • Harmonic Exciter
- 22. Ozone 5 Help Documentation 18 • Stereo Imaging • Maximizer Clicking on the Graph button also allows you to change the order of processing, and insert the meters at any point in the signal path. You could, for example, view the spectrum before the EQ, or the phase meter after the reverb but before the stereo widening. By default, the spectrum and phase meter are based on the final output signal (the readout is the signal after all processing). The processing order of the final output stage is fixed by design. You can learn more about this in the Ozone Mastering Guide. The final output stage is as follows: 1. Output level gain control 2. DC offset filter 3. Dithering 4. Output level gain meter Options: Opens the Options screen which lets you customize the behavior of meters and set other properties. (?): Opens the Help file to the specific page or topic that relates to the mastering module shown. Slider Compare Feature: You can Shift+Click on any slider in Ozone to quickly A/B the changes that have been made to that slider. This works for all sliders on the touchscreen as well as the Module/Global Amount Sliders. Global Amount Control You can use the Global amount control in Ozone 5 to make quick changes across all Ozone modules with a single slider. Beyond just A/B-ing your mix, this control lets you intelligently dial in "more" or "less" Ozone processing across your recording. You can easily hear the overall effect of a more aggressive or more subtle approach to your entire mastering session. Use the Global Amount slider to hear the effect of adding or removing the amount of Ozone processing that is currently being applied to your session. This feature is most effectively used at the end of your mastering session or after a specific preset has been selected. When the Global Amount slider is set to 100% you are hearing the default settings for the currently loaded preset. As you lower/raise the Global Amount slider, you will see all of the active modules lower/raise as well. The range of the amount control is from 0% to 200% as shown. You can also double click on the slider to enter a numeric value. 0% - no effect applied 50% - (subtle) small amount of effect is applied
- 23. Mastering Modules 19 100% - (standard) full value of current settings are applied 200% - (aggressive) maximum value of current settings are applied Module Amount Control Each of the six Ozone modules have their own independent amount control sliders also. This lets you make the same quick changes to individual mastering modules without having to dig back into your session and refine individual parameters. This feature is controlled by the slider to the right of each module's selection/active LED and module preset button. The range of these sliders are from 0% to 200% where 100% is center (current settings-no additional processing applied), 0% is all the way to the left (bypass - no Ozone processing applied), and 200% is all the way to the right (maximum processing applied). In each mastering module, the effect of the amount control slider is represented by a green line in the edit window. For example, in the EQ module it appears as a unique yellow EQ curve that flattens or boosts the overall EQ settings. In the Harmonic Exciter and Dynamics modules it can control the mix amount across all bands. In the Reverb module it can act as a Wet/Dry control. Amount Controls can be configured in Ozone 5 to behave in various ways. For example, in the Dynamics module, the amount control could affect the Global Mix of the entire module or the threshold of the compressor. Custom configurations allow the module amount controls to best address the needs of your mix. To change the behavior of a module amount control slider, simply right click it and select the configuration option that best suits your mastering needs. Note: If you Shift+Click an amount slider, it will jump to its last position for a quick A/B comparison of your settings.
- 24. Ozone 5 Help Documentation 20 Using Multiband Modules The Dynamics, Harmonic Exciter, and Stereo Imaging modules in Ozone can be configured as multiband and therefore allow you to apply processing independently to up to four frequency ranges. The ranges (or cutoffs) of these four bands are shown at the top of the multiband modules with up to three vertical green lines. You can adjust the cutoffs by dragging the cutoff lines to the left or right with the mouse. Note: The same four bands apply to all multiband modules within the Shared Crossover section in the filter graph. When sharing a crossover, the cutoff frequencies can be adjusted from any of the multiband module screens, and the new cutoffs will apply to the other multiband modules. This results in much better sound quality, as the multiband filters are always aligned and in phase. Bypass a Band You can bypass the processing for a specific band (or bands) by clicking on the box labeled "b" in the lower left corner of the band. This allows you to hear the audio within that band, but without any processing for that band. Solo a Band You can Solo a band by clicking on the box labeled "s" in the upper left corner of the band. This allows you to adjust multiband processing by hearing only the audio within the selected band. Change the Number of Bands You can choose to split the audio into 1, 2, 3 or 4 bands. For subtle compression or when working with solo instruments, less bands can sound smoother as there is less processing required for the audio. The other benefit is that less CPU is required when working with fewer bands. To add or remove bands, right-click (under OS X you can also ctrl-click) on the mini-spectrum and select "Insert Band" or "Remove Band" as shown below:
- 25. Mastering Modules 21 Copy and Paste Settings Across Bands Using the same right-click menu, you can copy settings from one band and apply them (paste them) to another band. This is helpful, for example, for duplicating settings across bands in the multiband dynamics module. Crossover Options As multiband modules no longer have to share crossover settings, each module may have independent crossover options. Each multiband module's crossover options can be accessed from the "Crossover" section of the Exciter, Imager, and Dynamics tabs in the Options menu. You can right-click (under OS X you can also ctrl-click) the mini-spectrum and select "Options" to view these options as well. Crossover Type: Options include Analog, Digital, and Hybrid. Analog Crossover: The analog crossover option provides a natural character reminiscent of filter slopes in analog equipment. Digital Crossover: Ozone 3 first introduced the option of digital linear phase crossovers. These provide a more accurate and transparent sound. Hybrid Crossover: This perfect reconstruction IIR analog crossover is designed to reduce phase distortion and frequency distortion found in other analog crossovers while maintaining precise crossover points and the warm characteristics of analog crossovers. Crossover Buffer Size: Sets the buffer size for the digital crossover. See Buffer Sizes for more info. Crossover Q: You can adjust the bandwidth or Q of the crossover filters with this control. A higher Q results in tighter crossovers, while a lower Q provides a more gradual transition from one band to the next. This is only available for the digital crossover. Automatic Crossover
- 26. Ozone 5 Help Documentation 22 Ozone 5 includes an innovative "Learn" function which intelligently searches for a natural place to set your crossover cutoffs. To use this, right-click (under OS X you can also ctrl- click) in the crossover, select "Learn", then stream audio through the plug-in. Ozone will search for natural crossover cutoff points using a few criteria, including minima in the spectrum. Once Ozone has found a stable place for the cutoffs, the learn function will disable automatically. You can also tell it to stop learning by right-clicking and choosing "Learn" again and you can double-click to enter a value for the cutoffs numerically. Independent Crossover Settings Ozone 5 allows for each multiband module to have independent crossover settings or share crossover settings with other modules. The three multiband modules, Dynamics, Exciter, and Imager, default to all sharing one crossover. This is represented in the Filter Graph by the Shared Crossover block. However, if a module is dragged outside of this block, their crossover settings may be set independently. Below you see that the Stereo Imaging module has been removed from the Shared Crossover and is using four-band processing while the shared crossover is using three bands.
- 27. Mastering Modules 23 Crossover Features The following table outlines the different features of each crossover type. A crossover is a perfect reconstruction when the band signals sum up exactly to the original signal (not including band processing). Linear phase crossovers introduce no phase distortion when sub-band signals are individually processed and summed. Crossover Type: Analog Digital Hybrid Perfect Reconstruction √ √ Linear Phase √ Adjustable Q √ Low CPU Load √ √ Low Latency √ √ Global Crossover Options Show Mini-spectrum Handles: Provides the option of turning on or off the horizontal handles (white lines) that appear on the multibands when adjusting controls. These handles allow you to make adjustments of certain parameters across multiple bands in the mini- spectrum window. This option appears under Crossover in the General Options tab. When you select a control, horizontal lines appear on the multibands. These lines allow you
- 28. Ozone 5 Help Documentation 24 to adjust the control that you've selected for other bands, without having to switch to that band. So for example, in the screen above, the second band is the selected band, and the Limiter Threshold control is selected. You can adjust the Limiter Threshold value for the other bands by simply dragging the horizontal white line in the band you want to adjust.
- 29. Mastering Modules 25 Mid-Side Processing Mid-Side processing adds a powerful dimension to Ozone’s EQ, Dynamics, Harmonic Exciter and Reverb by letting you process the center and edges of the stereo soundstage separately. What is Mid-Side Processing? At the mastering stage, Mid-Side processing separates an ordinary stereo recording into its center and side elements (mid-side). This allows you to apply Ozone's processing to separate areas of your soundstage independently. Now that your mix is divided into it's Mid and Side components, you can easily hear the separate elements that make up your soundstage. You can think of the "Mid" channel as the phantom image between your two speakers, or center channel of your audio. This is often composed of low frequency material and lead instruments (drums, bass, lead vocal, horns, etc). The "Side" channel will contain the remaining elements of your mix that exist at the edges of your soundstage (reverberation and/or instruments that are panned to one extreme side). Standard Mid-Side Controls Stereo/Mid-Side: This button allows you to switch between "stereo" processing or the new "mid-side" processing. When "stereo" is selected, the Ozone module will perform basic stereo signal processing. When "mid-side" is selected, all mid-side features become available. Note: When the audio file is mono, the "stereo" button will be labeled "mono" and mid-side controls will be disabled. Mid: When selected, processing is applied to the center of your soundstage. The more you boost the Mid channel, the more centered (mono) the audio will be. Side: When selected, processing is applied to the edges of your soundstage. The more you boost the Side channel, the more spacious and full the audio will be. Mid/Side Link: When selected, this allows you to make changes to both the Mid and Side channels at the same time. This tool helps improve workflow. By making changes to both channels simultaneously you don't need to switch back and forth between modes. Note: Both Mid and Side channels can be bypassed and/or solo'd by selecting the little "b" or little "s" to the left and right of the mid-side icons. Separate colors for Mid and Side channels To make it easier to distinguish between "Mid" and "Side" modes, parts of the UI (interface highlights, sliders, EQ curves) will change color when each mode is selected. For example, in the Equalizer module the EQ curve for Mid will show up in the Mid color, and the EQ curve for Side will show up in the Side color. Mid is presented as orange, and Side is presented as dark blue. Copy Settings to Mid and Side channels Ozone's Mid-Side mode allows you to apply processing to Stereo, Mid, and Side channels independently. If you would like to copy your settings from one mode to another, simply right-click anywhere on the background to open a unique context menu with options for
- 30. Ozone 5 Help Documentation 26 copying your settings across modes. The available options are listed below. When Stereo mode is active: Copy to Mid Channel or Copy to Side Channel When Mid mode is active: Copy to Stereo Channel or Copy to Side Channel When Side mode is active: Copy to Mid Channel or Copy to Stereo Channel Mid-Side metering By default, the I/O meters will display the stereo mix of your audio. However, when working with Mid-Side processing, it is often very helpful to have a clear meter indication of the overall Mid and Side levels individually. To change your meters to display the Mid-Side information of your master, click on the Source button inside of the I/O Options menu. When the I/O meters are in Mid-Side mode, they will no longer display your signal in terms of stereo left and right. Instead, on the left side of the meter will be the level of the entire Mid channel, and on the right will be the overall level of the Side channel. The left and right gain sliders will still control the left and right gain of your signal however. The Mid-Side meters will still adhere to the same Type and Scale settings defined in the I/O options menu. Using Mid-Side Processing in Ozone The following is a list of the Ozone modules that support Mid-Side processing. The links will take you to some examples of how to get started using Mid-Side processing in each module. • Equalizer
- 31. Mastering Modules 27 • Reverb • Harmonic Exciter • Dynamics
- 32. Ozone 5 Help Documentation 28 Equalizer Ozone’s versatile EQ allows you to add warmth and character with analog matched filters, or precisely boost and cut frequencies with digital linear phase filters. In version 5, Ozone now offers two versatile EQs for placement within the signal chain. We’ve also added new filter shapes including Flat (Butterworth) low- and high-pass, Brickwall low- and high-pass, and vintage shelf filters. Key Features • Eight bands of bell, high-pass, low-pass, high-shelf or low-shelf filters • Fully configurable spectrum analyzer with new views that highlight mid/side and stereo spectrums in useful ways • Matching mode lets you use spectrum snapshots of recordings to create automatic EQ curves with an improved intuitive interface • Powerful Mid-Side and Left-Right processing modes give you unprecedented control over the soundstage Ozone Advanced Exclusives: • Mixed Phase mode allows you to use both linear and analog-style phase filters in one equalizer • Independent Curve Shapes for both analog-style and surgical curves in one equalizer
- 33. Mastering Modules 29 Frequency and Gain The green circles mark each of the eight EQ nodes. You can adjust an EQ band by clicking on a node and dragging the crosshairs to change the frequency and gain of the band. You can also use the arrow keys to adjust a selected band, or the Shift key in combination with the arrow keys to adjust in larger increments. Q/Bandwidth If you move the mouse over the "handles" on the side of the band, you can adjust the Q or bandwidth of the EQ by dragging with the mouse and widening the band. If you have a wheel mouse, you can use the mouse wheel to widen/narrow a selected band. Visuals As you adjust a band you will see two EQ curves. The bright red curve is the composite of all EQ bands while the darker red curve shows the EQ curve of the selected band. Spectrum Overlay A spectrum by default is overlaid on the EQ module for visual feedback of the mix. You can turn off the spectrum to conserve CPU or if you just don't want to see it using the Options screen. You can also set options such as average or real time spectrum, show peak spectrum, Mid/Sid difference spectrum, etc. These are available in the Spectrum Options screen. In the background you'll see the gain scale for the EQ on the right in green. This will change as you zoom the EQ in or out. You'll see the scale for the spectrum along the left in green.
- 34. Ozone 5 Help Documentation 30 Note: The scales for the EQ and spectrum are different, by design. If they were made to match, you wouldn't see enough of the spectrum for it to be useful. The frequency scale in grey applies to both the EQ and the spectrum. Selecting Filter Shapes Ozone provides the ability to set the type or shape of any of the eight EQ nodes. Any node can be a lowshelf, lowpass, bell, highshelf or highpass filter. When in analog mode, or in Ozone 5 Advanced in non-surgical digital mode, a number of new filters are available: Flat Lowpass/Highpass – These are Butterworth filters; optimized for maximum flatness without ripple or resonance in the passband or stopband. Brickwall Lowpass/Highpass – These are elliptic filters; optimized for steepness with minimal ripple in the passband and stopband. Vintage Lowshelf/Highshelf – These high and low shelf filters exhibit a complimentary frequency dip modeled after the renowned Pultec analog equalizer creating a complex slope with one node. To change the shape select a node and click on the drop down menu in the bottom right or
- 35. Mastering Modules 31 simply right-click the node. To worked in the expanded info view, click on the "+" button. From this table, you can specify a different filter shape for each node. If you had selected a node in the main screen before opening the expanded screen, that node is shown as selected in the table (i.e. Node 5 has brackets around it, indicating that this was the EQ node that is currently selected). Note that you can also use the dialog boxes to enter values for the EQ bands directly. You can also disable bands with this table by clicking on the square number box to the left of a band in the table. Selecting Analog or Digital Curve Shapes Ozone offers a choice of analog curve shapes, modeled after classic equalizers using IIR filters, or more precise “surgical” shapes reminiscent of digital equalizers using FIR filters. The choice is a matter of subjective taste, although as a guideline the analog shapes provide a classic sound for general mastering, while the digital filters provide more precise control. Matching EQ A third EQ mode is the matching mode. This allows you to automatically equalize a mix
- 36. Ozone 5 Help Documentation 32 based on the spectrum or frequency response of another recording. The matching EQ is a digital linear phase EQ, with the ability to use over 8,000 bands of frequencies for very precise matching. For step by step instructions on using the Matching EQ, see here... As would be expected, the Matching EQ works hand in hand with spectrum snapshots to "borrow" the spectrum of one audio clip and apply it to another. Post Equalizer Ozone now includes a second Equalizer for placement anywhere in your signal chain. Balance frequencies after multiband processing or perform Stereo and Mid/Side or Left/Right EQ processing simultaneously all from within Ozone. Selecting Phase Ozone now offers filter phase control when in digital mode with three selectable phase modes: Minimum phase filters that have a transient response similar to analog EQs in that most of the ringing is concentrated after the transient. Linear phase filters that maintain symmetric response, meaning equal pre- and post- ringing, as is often characteristic of digital EQs. Mixed phase mode allows each individual band to have a phase response varying between minimum phase (-1), linear phase (0), and maximum phase (+1). Maximum phase filters concentrate all ringing before the transient where it is most audible. In mixed phase mode the phase response of a given node can be adjusted with vertical handles that appear on a selected node when Mixed phase mode is selected. These behave much like the horizontal handles which affect Q/bandwidth. Alternatively, phase response values may be entered manually in the Show Info table. Different phase responses will often produce quite subtle sonic differences unless you are doing very steep filtering. Surgical Mode Ozone now allows you to turn off surgical mode and recreate analog shapes with digital phase response. Surgical mode must be off to use new filters like Vintage High/Low Shelf in digital mode. When surgical mode is off however, you will not be able to make as precise and targeted cuts and boosts.
- 37. Mastering Modules 33 Mid-Side and Left/Right Support Stereo/Left-Right/Mid-side: This button allows you to switch between "stereo" processing, the new “Left/Right” processing, and "Mid/Side" processing. When "Stereo" is selected, the Ozone module will perform basic stereo signal processing. When "Mid/Side" is selected, the center and spatial information may be processed independently. When “L/R” is selected, the left and right channels may be processed independently. Colors To make it easier to distinguish between Mid and Side modes, the EQ curve for Mid will show up in the mid color, and the EQ curve for Side will show up in the side color. Mid is presented as orange, and Side is presented as dark blue. If the Mid channel is selected, we'll show the Side EQ curve faintly in the background, and vice-versa. To distinguish between Left and Right modes, the EQ curve for Left channel will show up in the left color, and the EQ curve for Right channel will show up in the right color. Left is presented as light green, and Right is presented as turquoise. If the Left channel is selected, we'll show the Right channel EQ curve faintly in the background, and vice-versa. These colors are also featured in the table of EQ nodes and their settings. Note: In all cases of Mid-Side and Left-Right processing, you have the same filter controls available as the rest of the EQ module. To learn about the new Mid-Side Processing controls, see here... Example using "Mid" Processing in Ozone EQ Select Mid-Side mode in the EQ module and Click "Mid" to reveal an orange EQ curve. Then click the small "s" to solo the Mid channel. When you play an audio file in this mode, you will only hear the content assigned to the center of your soundstage, which is typically your lead
- 38. Ozone 5 Help Documentation 34 vocal (other lead instruments, etc). Now select an EQ node around 1kHz and boost the orange EQ curve about 6dB. This frequency specific boost at 1kHz will only be applied to the center of your soundstage and can bring up the lead vocal in the mix without affecting the other instruments or the stereo separation of the entire frequency range. Example using "Side" Processing in Ozone EQ Select Mid-Side mode in the EQ module and Click "Side" to reveal a blue EQ curve. Click the small "s" to solo the Side channel. When you play an audio file in this mode, you will only hear the content at the edges of your soundstage which is typically reverb tails or instruments that are panned to an extreme side. Now select an EQ node around 6kHz and boost the blue EQ curve about 6dB. This frequency specific boost at 6kHz will only be applied to the edges of your soundstage. The effect when applied will result in greater stereo widening and a richer fuller sound. Example using "Left/Right" Processing in Ozone EQ Select Left/Right mode in the EQ module and Click "Right" to reveal a turquoise EQ curve. Click the small "s" to solo the Right channel. When you play an audio file in this mode, you will only hear the content on the right side of your soundstage. Now select an EQ node around 8kHz and cut the turquoise EQ curve about 1dB with a Q value of around 6. This frequency specific cut at 8kHz will only be applied to the right side of your soundstage. For example, this can be useful if the sound of a high-hat is too bright only in the right channel of the stereo signal. Independent equalization in the left and right channels should be very subtle though in order not to offset the stereo image. Amount Control The amount control for the EQ module is a quick and easy way to increase or decrease the amount of equalization added or effect the bandwidth of a filter. This is not a simple wet/dry control, as the amount control intelligently changes the EQ's internal parameters when the level is increased or decreased. The resulting effect of the amount slider is displayed by a yellow curve in the main edit window. The Alt-Solo Feature If you hold down the Alt key and click on the spectrum, you have an "audio magnifying glass" that lets you hear only the frequencies that are under the mouse cursor, without affecting your actual EQ settings. This is useful for pinpointing the location of a frequency in the mix without changing your actual EQ bands. Releasing the mouse button returns the sound to the actual EQ. You can set the default bandwidth of this filter in the Options screen under "Alt-Solo Filter Q" or simply use your mouse's scroll wheel. Once you've pinpointed a particular frequency using the Alt-Solo feature, double-click that area to activate a new node in that exact location.
- 39. Mastering Modules 35 Additional Mastering Tips using Ozone's Paragraphic EQ 1. The Paragraphic EQs scales are now freely zoomable and scrollable, allowing you to focus on a specific frequency and dynamic range. While hovering over the dB meter on the right of the spectrum, you may use your mouse wheel to zoom in on a more focused dynamic range, then click and drag to scroll the dB scales. Additionally, while hovering over the frequency scales at the bottom of the spectrum, you may use your mouse wheel to zoom in on a particular frequency then click and drag to scroll the scales. 2. If you hold down the Shift key and drag an EQ band, the EQ band will be "locked" in the direction that you're dragging. So if you just want to change the gain without affecting the frequency (or vice-versa) just hold the Shift Key while you drag. 3. If you hold down the Ctrl key under Windows or the Command key under OS X, you can click and select multiple bands. Once selected, you can adjust them as a group by clicking and dragging on the first band you selected in the group. 4. If you'd rather use numbers as opposed to visual EQ bands, clicking on the "+" button gives you a table view of the EQ band settings. You can enter values for the EQ bands directly in this table. You can also disable bands with this table by clicking on the square box to the left of a band. 5. If you've chosen to display an averaging spectrum or a peak hold spectrum (using the Spectrum Options screen) you can reset the peak hold or the averaging by clicking on the spectrum. 6. Right click on the spectrum to bring up an options dialog to control the spectrum display.
- 40. Ozone 5 Help Documentation 36 Component Equalizer Plug-in If you are using Ozone 5 Advanced you will also have the ability to instantiate Ozone 5's Equalizer module as an individual component plug-in. Ozone 5 Advanced includes component plug-ins for all six of Ozone's modules complete with all the same features as the module within Ozone. Any module presets saved within Ozone will open within the component plug-ins' module preset system.
- 41. Mastering Modules 37 Matching EQ The matching EQ allows you to automatically equalize a mix based on the spectrum or frequency response of another recording. The matching EQ is a digital linear phase EQ, with the ability to use over 8,000 bands of frequencies for very precise matching. The following steps explain how to use the Matching EQ. Capturing your Reference and Apply To spectrums and applying matching EQ The Matching EQ works hand in hand with spectrum snapshots to "borrow" the spectrum of an audio clip and apply it to another. Therefore, the first step is to take snapshots of two spectrums - the mix you want to EQ and the recording that has the spectrum you want to match. 1. Select the Snaphots tab in the lower-left of the spectrum window and select Matching under EQ Mode. 2. Load the recording that you want to use for your EQ curve in your host audio application. 3. Now, while the recording is playing back, hit the Start Capture button to begin capturing the spectrum and Stop Capture when you have captured the portion of the recording you wish to apply to another mix. This snapshot will now be added to the list on the right where it may be renamed and have its color and opacity in the spectrum display adjusted. Snapshot Time: This new setting allows you to determine how the spectrum is averaged. Instead of displaying only the infinite average of the spectrum, it will also calculate and display an overall average spectrum for your mix using either real-time or a 1, 3, 5, or 10 second average. While this isn't technically necessary for using the Matching EQ, you most likely want to match the overall spectrum of a mix, as opposed to an instantaneous spectrum. 4. Now repeat the previous steps with the new mix that you would like to match
- 42. Ozone 5 Help Documentation 38 with the recording you captured previously. You will now have two snapshots listed in the snapshots menu. 5. Now click on the Matching tab and select “Reference” next to the first snapshot of the recording with the desired spectrum or frequency response and select “Apply To” next to the snapshot of the second mix that you want to be affected by the matching EQ process. 6. Click Match and a new red filter curve will appear which will conform the spectrum of the second mix to the spectrum of the first mix. 7. Use the Amount and Smoothing tools to adjust how aggressively your mix will be matched to the originally captured recording as well as the sharpness of the EQ curves’ peaks and valleys. Matching Tips • As you increase the Matching amount, you'll notice a red EQ curve appearing. Most likely, the more you increase the Matching amount the more "jagged" this Matching EQ curve will become, with increasing peaks and valleys. • A Matching amount of 100% and a Smoothing amount of 0 might be technically the closest match to your “Apply to” mix, but in reality it's probably not the most effective combination of settings. Those settings will try to capture every peak, valley and level, which can result in extreme (unnatural) EQs. • We suggest working with the Matching amount around 50%. If your Matching EQ curve has narrow peaks and valleys, increase the Smoothing parameter to smooth them out. Your goal is to capture the overall tonal shape of the Reference as opposed to an exact match. • Adjust manually as necessary. Close the Snapshots window, and you'll notice that you can still use the manual EQ nodes to further adjust the equalization. It may not be necessary, but feel free to further "season to taste" manually.
- 43. Mastering Modules 39 • Matching settings are universal for both of Ozone 5’s Equalizers so you may only perform matching with one EQ in the signal chain. However, each instance of Ozone 5 or Ozone 5 Advanced's Component EQ may load and save its own snapshot sets.
- 44. Ozone 5 Help Documentation 40 Mastering Reverb Ozone includes a high quality hybrid reverb module that can add a consistent sense of depth and space to a mix. Utilizing both convolution and algorithmic technologies, the improved reverb module features the warm early reflections of a real acoustic space as well as dense and flexible reverb tails. It is designed to put a final gloss or sheen on the entire mix while still preserving the sense of space that may have been created by using reverbs on individual tracks. Key Features • Hybrid reverb processing utilizing both convolution and algorithmic technology • Choose between various room modes • Plate mode derived from the classic EMT 140 • Mid/side controls allow you to apply ambience to different parts of the soundstage Ozone Advanced Exclusives: • Crossmix control allows you to adjust the amount of stereo spread between the left and right channel’s reverb signals • Early reflection control to better fine tune reverb Note: When using the Reverb module, Ozone will consume a significantly higher amount of CPU, especially during parameter changes. To help make Ozone more usable in real time, you can offload some of these changes to prevent the audio from dropping out. See the Reverb Options Tab for more info.
- 45. Mastering Modules 41 Early Reflections Ozone 5 features a number of room modes that control the reverb’s early reflections. Convolution technology is used to reproduce the acoustics of real spaces. Early Reflection Modes: Room – smaller acoustic space with strong and distinct early reflections Plate – classic reverb effect which captures the vibration of a sheet metal plate when audio is played onto it creating a clean distinctive reverb tone. Ozone 5’s plate reverb mode was derived from the characteristics of the definitive plate reverb unit, the EMT 140. Hall – large acoustic space with darker warm reflections Theater –medium sized acoustic space with dampened early reflections (Ozone 5 Advanced) Cathedral – larger acoustic space with pronounced bright reflections (Ozone 5 Advanced) Arena –massive deep acoustic space with expansive density (Ozone 5 Advanced) Early Reflection Options: Once an early reflection mode is selected you may adjust the following options that affect it: Pre-delay: Sets the "pre-delay time", or the amount of delay in milliseconds between the original signal and the beginning of the reverb in order to simulate depth. Early Reflection Control: Lowers the level of early reflections in the reverb signal and can be used with pre-delay to create the perception of depth. (Ozone 5 Advanced) Late Tails After the initial early reflection, Ozone 5 uses algorithmic technology to simulate late reverb tails. This allows you to couple the early reflections of one type of space with late reflections associated with another to create unique but realistic sounding reverb. Once you have chosen an appropriate early reflection, you may adjust the following characteristics of the late tails: Decay Time: sets the amount of time it takes for the reverb to fully decay Low Decay: adjusts how quickly the low frequencies decay High Decay: adjusts how quickly the high frequencies decay
- 46. Ozone 5 Help Documentation 42 Global Reverb Settings After the early and late reflections have been defined, the following settings affect the entire reverb signal: Wet and Dry: These control the mix between the processed reverb signal (Wet) and original unprocessed signal (Dry). Width: Controls the stereo spread of the reverb signal. Solo Reverb Signal: This check box lets you solo just the reverb signal. Low and High Frequency Cutoff filters You can control the bandwidth of the reverberated signal using the low and high frequency cutoffs. On the spectrum at the top of the module there are two nodes that create a curve that corresponds to these cutoffs. You can drag the nodes to the left or right to control the bandwidth of the reverb. Mini-Spectrum Window The window at the top of the module defaults to a display of the signal spectrum which also features the Low and High frequency Cutoff filters. However, with a selection on the left it may also display the Reverb Character view. Reverb Character view displays a graph that illustrates the character of the reverb signal over time given the settings you have selected. This display can help you visualize how different settings affect the overall character of the reverb signal.
- 47. Mastering Modules 43 Crossmix: Adjusts the amount of stereo spread between the left and right channels’ reverb signals. Mid-Side Support Stereo/Mid-side: This button allows you to switch between "stereo" processing or "mid- side" processing. When "stereo" is selected, the Ozone module will perform basic stereo signal processing. When "mid-side" is selected, all mid-side features become available. Colors To make it easier to distinguish between Mid and Side modes, the interface highlights and Reverb Character view have designated colors. Mid mode is presented as orange, and Side mode is presented as light blue. Example using Mid-Side Processing with Mastering Reverb Mid-Side processing allows you to separate a specific frequency range into its Mid and Side components and apply processing separately to the Mid (center) channel, or the Sides of your mix. When using the Mastering Reverb this allows you to tailor the reverb to more accurately depict your desired soundstage. For example, you can add both space and ambience to your mix by applying the reverb only to the sides of your soundstage. To do this, begin by enabling the Side channel (light blue). Select the frequency bands for the instrument(s) that you want to apply the reverb to. Finally adjust your wet/dry mix to taste. Using Bypass in the Reverb module, try switching back and forth to hear the difference in your mix. In other cases, you may actually use this feature to reduce the amount of reverb in the Mid channel to make the lead components sound more clear. To learn more about the new Mid-Side Processing controls, click here... Component Reverb Plug-in If you are using Ozone 5 Advanced you will also have the ability to instantiate Ozone 5's
- 48. Ozone 5 Help Documentation 44 Reverb module as an individual component plug-in. Ozone 5 Advanced includes component plug-ins for all six of Ozone's modules complete with all the same features as the module within Ozone. Any module presets saved within Ozone will open within the component plug-ins' module preset system.
- 49. Mastering Modules 45 Harmonic Exciter Harmonic exciters can give a sparkle or shine to the upper frequencies of a mix. They can also be used in mid and even low frequencies to add a boost or presence. Add warmth, sparkle and shine with four separate bands of excitation. Like other multiband modules in Ozone, the multiband harmonic excitation is based by default on the four bands set in the multiband section. Key Features • Choose from tube or tape-modeled saturation with adjustable mix controls for each band • Unique multiband time offset controls for tightening and adding attack to bass and kick • Mid/side processing lets you add color to different parts of the soundstage separately • New Saturation meter highlights affected frequencies and a post filter to sculpt the frequency output of the exciter Ozone Advanced Exclusives: • New Triode modes simulate the analog warmth of vintage preamplifiers Note: Each band has its own sliders to control the amount of harmonic excitation and the mix of the excited signal with the original signal.
- 50. Ozone 5 Help Documentation 46 Exciter Modes: Retro: Retro mode is based on characteristics of transistors with a slowly decaying row of odd harmonics. Tape: Tape modeling can be recognized as a brighter sound due to the odd harmonics found in tape saturation models. Tube: Tube modeling is characterized by its clear "tonal" excitation with an emphasis on dynamic or transient attacks. Warm: The Warm exciter mode is similar to Tube, but is unique because it generates only even harmonics that decay quickly. Triode: Triode mode is accurately modeled after a tube circuit for realistic analog warmth. Triode mode uses one half of a tube circuit for a subtler overdrive than Dual Triode mode. Dual Triode: Like Triode mode, the Dual Triode mode models a full circuit using a vacuum tube introducing more pronounced overdrive with a slightly warmer tone. Exciter Controls Amount: Controls the amount of the harmonic excitation for the selected band. Mix: Allows you to control the mix of the excited signal with the original mix. Delay: Setting the delay for a band offsets this band relative to the other frequencies. To learn how and why this works as an exciter, refer to our online mastering guide. In general, try offsetting the delay for a low band (<150 Hz or so) by about 1 msec. The low band will get tighter, but probably lower in perceived volume. Because it is tighter in time, though, you can usually compress or increase the gain of that band in the multiband dynamics module to get "punch" without a ringing or "flabby" sound. Like controls on other screens, you can use arrow keys to adjust a selected slider, or the wheel of a wheel mouse, or double-click on the numeric label and directly enter a value with the keyboard. You can reset a slider by double clicking on it. Oversampling: Utilizes more processing power to increase quality (CPU intensive). Mini-Spectrum Window The meter at the top of the module defaults to a display of the signal spectrum. However, with a selection on the left it may also display the Saturation Meter. Saturation meter: displays the spectrum of the incoming signal, but additionally highlights particular frequencies being affected by the exciter and features the post filter curve. The frequencies being affected by the exciter are shaded in solid green across the spectrum. The post filter is an adjustable high shelf filter on the saturation meter that allows you to adjust the frequency output of the exciter module.
- 51. Mastering Modules 47 Mid-Side Support Stereo/Mid-side: This button allows you to switch between "stereo" processing or "mid- side" processing. When "stereo" is selected, the Ozone module will perform basic stereo signal processing. When "mid-side" is selected, all mid-side features become available. Colors To make it easier to distinguish between Mid and Side modes, the interface highlights have designated colors. Mid mode is presented as orange, and Side mode is presented as dark blue. Example using Mid-Side Processing in Ozone's Harmonic Exciter Mid-Side processing allows you to separate a specific frequency range into its Mid and Side components and apply processing separately to the Mid (center) channel, or the Sides of your mix. For example, using the Side channel in the Harmonic Exciter module (blue), try selecting the upper frequency bands for your mix. By increasing the amount sliders for the upper frequencies you will be applying the exciter to the extreme edges of your mix only and leaving the Mid (center) channel as-is.
- 52. Ozone 5 Help Documentation 48 To learn more about Ozone Mid-Side Processing controls, click here... Component Harmonic Exciter Plug-in If you are using Ozone 5 Advanced you will also have the ability to instantiate Ozone 5's Harmonic Exciter module as an individual component plug-in. Ozone 5 Advanced includes component plug-ins for all six of Ozone's modules complete with all the same features as the module within Ozone. Any module presets saved within Ozone will open within the component plug-ins' module preset system.
- 53. Mastering Modules 49 Dynamics One of most powerful modules in Ozone is the dynamics section. You can use this module to shape the dynamics of your mix with up to four bands of analog-modeled compression, limiting, gating and expansion. Key Features • Apply dynamics processors selectively to different frequency ranges, and even to the center and edges of the sound stage with mid/side processing • Automatic Gain Compensation provides automatic makeup gain, and also allows you to easily compare your mix with and without dynamics processing applied • New metering features including interactive Threshold Control with input/output gain reduction and histogram options, and the Gain Reduction Trace Meter • Hard or soft knee operation Ozone Advanced Exclusives: • Detection Filter with high-pass and tilt modes for fine control over how the dynamics module responds to incoming audio (especially useful for single-band operation) • Advanced detection circuit modes with Peak, RMS, and True Envelope detection as well as variable Look-ahead time • Variable knee for detailed control over hardness or smoothness of gain reduction How to use Ozone Multiband Dynamics
- 54. Ozone 5 Help Documentation 50 Each band has its own controls for controlling the dynamics. There can be up to four bands, as shown by the sections in the multiband section at the top. To select a band, click on its corresponding section in the multiband spectrum or its corresponding band number in the top right of the window. The controls and dynamics meters will be updated to display the currently selected band. Each band of dynamics is capable of three types of dynamics processing. Limiting, compressing, and expanding. This allows you, for example, to aggressively limit high level signals, apply more gentle compression to medium level signals, and/or boost (expand) the level of soft signals. The combination is such that you can tighten the dynamic range by compressing "from the top", by expanding "from the bottom", or a combination of both. Band/Global: This toggles the Gain and Mix settings between "global" mode and "band" mode. Global mode affects the entire frequency range of your mix while band mode will only affect the frequency range of the currently selected band. Mix: This is a wet/dry mix for compressor output. This is available for individual bands and/or globally for the entire frequency spectrum. Gain: Adjusts the output gain of either the band or the entire module. This is useful, for example, after compressing or limiting a band to makeup the decrease in volume. Auto gain compensation: When selected, AGC calculates RMS levels of both the input and output signals of the compressor for each crossover band and applies the appropriate gain to the output signal to compensate for the difference. This automatically brings audio levels to a level comparable to the unprocessed audio, and acts as a smart “make-up gain” control that adapts to the mix over time. This is also a useful tool for A/B'ing various settings in the multiband dynamics module without having gain changes affect your perception. Threshold: Set the point where the dynamics processing takes place. Ratio: Sets the ratio for the limiting. Higher ratios will result in more extreme compression or expansion. The expander can have a ratio greater or less than 1.0. When the ratio is greater than 1, it is operating as a gate and any signals below the threshold will be decreased in volume. With a high positive ratio it can act as an effective multiband noise gate, as shown below.
- 55. Mastering Modules 51 Attack and Release: Adjusts how quickly the dynamics processor reacts to the threshold. Attack determines how quickly the dynamic processor reacts when the threshold is reached. Release determines the amount of time before the dynamics processor returns the level to normal once the signal no longer reaches threshold. Note: Each section (limiter, compressor, and expander) of each band can have its own attack and release settings. Show All Bands mode: Ozone 5 now allows you to view and adjust the dynamics settings for all bands in one easy to use window. Clicking Show All next to the band selection buttons in the top right reveals a window that displays the threshold, ratio, attack, and release for the limiter, compressor, and expander for each individual band in one screen.
- 56. Ozone 5 Help Documentation 52 Linked Bands Mode: Selecting Linked Bands Mode allows you make changes across all bands by adjusting the settings of one band. Visuals The Threshold Control is a meter that allows you to adjust the thresholds of the expander, compressor, and limiter with sliders on the left and right side. Additionally, the Threshold control allows you to monitor how the incoming signal is being affected in real time. The Threshold Control can display gain reduction as it is taking place with level meters. To enable the gain reduction meters, right- (or control-) click on the threshold control’s meter window and select Dynamics options. From the Dynamics options page select Gain Reduction from the Threshold Meter drop-down menu. Two meters display the levels of the incoming signal and as gain reduction begins to take place, a gain reduction meter appears in red between the two level bars. The Threshold meter also displays the amount of gain reduction in real-time with a dB readout at the bottom. The Threshold Control can also display a Histogram, a history of level over time. To enable the histogram, right- (or control-) click on the threshold control’s meter window and slect Dynamics options. From the Dynamics options page select Histogram from the Threshold Meter drop-down menu. This allows you visualize the overall "level content" of the audio by providing a running display of the history of levels in the audio. Learn more about gain reduction meters and histograms here. The button at the bottom of the Threshold Control allows you to adjust level detection mode which is explained later. Dynamic Curve Meter shows the input signal (x axis) plotted against the output (processed) signal (y axis). More horizontal compression curves means the signal is being flattened (compressed) more. You can zoom in and out on the meter by clicking buttons in the bottom right.
- 57. Mastering Modules 53 Nodes: The meter features individual nodes for the limiter, compressor, and expander as well as nodes surrounding these that represent input and output. These nodes are linked to the Threshold and Ratio controls, and can be used to adjust the curve in a visual way, rather than setting them with the standard controls. Advanced Nodes: You may variably adjust the knee of each stage of the dynamics process from hard to soft with horizontal handles that appear when a node is selected. Additional Metering and Controls At the top of the dynamics module is the meter that as a default displays the Mini Spectrum and the crossovers used for multiband processing. You can also click the buttons to the left of the window to view Gain Reduction Trace meter and Detection Filter (Ozone Advanced). Gain Reduction Trace: a scrolling meter that displays the incoming signal’s waveform with a superimposed curve that illustrates the amount of gain reduction taking place in real-time. When using multiband processing, the current selected band’s gain reduction is drawn imposed on a waveform of only that band's signal. The Gain Reduction Trace can help you to set attack and release controls appropriately and monitor the envelope of gain reduction.
- 58. Ozone 5 Help Documentation 54 Note: You can adjust the scale on the left by hovering over it and using your mouse wheel. Detection Filter This feature new to Ozone allows you to specify the frequency response of the detection circuit used by the dynamics processor so it is less sensitive to lower frequencies. You can choose between high pass mode as well as Tilt mode and adjust each accordingly with settings to the right. Detection Filter modes None – detection circuit is equally sensitive across all frequencies. High Pass – applies a high pass filter to the detection circuit so low frequencies do not trigger dynamics processing. You may adjust the cutoff frequency of the filter as well as the slope with controls on the right. Tilt – similar to the “THRUST” circuit found on API compressors, Tilt mode preserves low frequencies using a high frequency weighted filter curve. You may adjust the amount of slope in the filter curve by adjusting the Amount value. Solo - By selecting Solo you may hear the signal that the detection circuit is using to trigger the dynamics module. Mid/Side Support Stereo /Mid/side: This button allows you to switch between stereo processing or mid/side processing. When Stereo is selected, the Ozone module will perform basic stereo signal processing. When Mid/Side is selected, all mid-side features become available. Colors To make it easier to distinguish between Mid and Side modes, the Dynamics Interface has designated colors. Mid mode is presented as orange, and Side mode is presented as dark blue.
- 59. Mastering Modules 55 Example using Mid-Side Processing in Ozone's Multiband Dynamics When dealing with multiband compression on a stereo mix, it is sometimes difficult to apply processing to a specific instrument or vocal if they are too close in frequency. In these cases, Mid-Side processing reveals more refined control by allowing you to separate a specific frequency range into its Mid and Side components and apply compression separately to the Mid (center) channel, or the Sides of your mix. There are many uses for Mid-Side processing using compression. For example, this can help prevent other instruments from being affected by compression on the lead vocal, since the vocal is usually in the center of your mix and other instruments are typically found at the sides of your mix. To learn more about Ozone Mid-Side Processing controls, click here... Additional Settings Level Detection Below the Threshold Meter is a selection box which determines what levels the dynamics module's detection circuit looks at: Peak: When this option is enabled Ozone acts as a peak compressor/limiter/expander. This means the detection circuit looks at peak levels of the incoming signal. In general this is useful when you’re trying to even out sudden peaks in your music. RMS: When this option is enabled, Ozone looks at the average level of the incoming signal. RMS detection is useful when you're trying to increase the overall volume level without changing the character of the sound.
- 60. Ozone 5 Help Documentation 56 True Envelope: New to Ozone 5, True Envelope mode behaves much like RMS mode, but with some key advantages. Unlike RMS, True Envelope mode produces even levels across all frequencies. Additionally, True Envelope mode will not produce the aliasing or artifacts that RMS detection can cause. Knee: If you are not using Ozone 5 Advanced, you may select either hard or soft knee dynamics processing from a selection box in the top left of the Dynamic Curve Meter. In Ozone Advanced, a variable knee control is available for each dynamics stage in each band. Look-Ahead Time Control: The Look-ahead function allows for smoother gain changes with quicker attack rates. The longer the amount of look-ahead, the smoother the dynamics processing will be, however Ozone will introduce more latency into the signal path in your host program. You may adjust the amount of look-ahead time in the Dynamics Options Tab. Upward Compression and Expansion Ozone’s dynamics module now allows for ratios of less than 1:1 in all of the dynamics stages. At the gate and compressor stage a ratio of less than 1:1 performs upward compression. This raises the levels of anything that falls below the threshold. Upward compression can gently raise levels instead of pushing down peaks.
- 61. Mastering Modules 57 At the limiting stage a ratio of less than 1:1 performs upward expansion which can be seen below. This process actually raises the level of anything that reaches the threshold. Upward expansion can be used to add punch to dull mixes or emphasize the beat in rhythm-heavy music. Component Dynamics Plug-in If you are using Ozone 5 Advanced you will also have the ability to instantiate Ozone 5's Dynamics module as an individual component plug-in. Ozone 5 Advanced includes component plug-ins for all six of Ozone's modules complete with all the same features as the module within Ozone. Any module presets saved within Ozone will open within the component plug-ins' module preset system.
- 62. Ozone 5 Help Documentation 58 Stereo Imaging Ozone allows you to set widening and imaging for the mix using a multiband stereo imaging module. As with the other multiband modules in Ozone (Dynamics and Harmonic Exciter) the module is split up into four bands determined by the multiband crossover points displayed on the spectrum. Key Features • Provides up to four bands of widening for adding space to your mix • Apply multichannel delay controls to adjust the perceived location of the stereo field • Visualize the stereo image with Vectorscope and Correlation meters as well as new Width Spectrum View and Correlation Trace View to help you troubleshoot potential phase problems Ozone Advanced Exclusives: • Stereoize feature adds stereo width to mono or narrow recordings. When in Stereoize mode, the Width controls for bands 1-4 introduce a natural-sounding widening effect. Band Widening: These controls set the amount of stereo widening for each band. Higher amounts provide more widening: -1.0 (mono) to 1.0 (full widening) Meters: The Stereo Imaging module provides a view of the stereo imaging field through the Correlation meter and Vectorscope.
- 63. Mastering Modules 59 Mini-Spectrum Window The window at the top of the module defaults to a display of the signal spectrum. However, with selections on the left it may also display the Stereo Width Spectrum as well as the Correlation Trace. Stereo Width Spectrum: a mirrored spectrum display of the incoming signal’s stereo width by frequency superimposed on the multiband crossover display. Correlation Trace: a scrolling tracing of the incoming signal’s stereo correlation drawn in real-time. Positive (in phase) values are drawn in grey while negative (out of phase) values are drawn in red. Stereoizer: This Ozone 5 Advanced exclusive feature uses stereo synthesis to add natural-sounding stereo width to mono or narrow recordings. The Stereoizer’s stereo synthesis effect allows mono capability to be retained throughout the process. By adjusting the delay control in conjunction with the Width sliders you may control the character of the stereo effect. In addition, the Stereoize effect is totally mono-compatible—even if you add width to audio, it can still be played back in mono without producing unpleasant artifacts. Component Stereo Imaging Plug-in If you are using Ozone 5 Advanced you will also have the ability to instantiate Ozone 5's
- 64. Ozone 5 Help Documentation 60 Stereo Imaging module as an individual component plug-in. Ozone 5 Advanced includes component plug-ins for all six of Ozone's modules complete with all the same features as the module within Ozone. Any module presets saved within Ozone will open within the component plug-ins' module preset system.
- 65. Mastering Modules 61 Maximizer The Maximizer allows you to create an overall louder or fuller master by limiting the dynamic range and boosting the perceived overall level of the mix. Ozone’s acclaimed IRC (Intelligent Release Control) Loudness Maximizer lets you boost the level of your mixes without sacrificing dynamics and clarity. The Maximizer applies to the entire bandwidth of the mix and is not a multiband effect. Key Features • Intelligent limiting modes provide amazing results, greatly reducing pumping on transients and letting you get louder, fuller mixes without unwanted artifacts • Character control helps you fine tune the Maximizer’s response perfectly to your source material • Gain Reduction Trace provides valuable visual feedback of gain reduction • Interactive Threshold/Margin control allows you to adjust the amount of limiting in visual relation to the level of the incoming signal • Stereo Link feature allows you to limit the left and right channels independently Ozone Advanced Exclusives: • Transient Recovery feature allows you to preserve transients through limiting Limiting Modes IRC I: This mode provides intelligent digital loudness maximization of the signal. Unlike the analog modeled limiters (Soft or Brickwall), the Digital processor is designed for neutral or
- 66. Ozone 5 Help Documentation 62 transparent limiting. It does this by analyzing the source material and applying limiting in a psychoacoustically-pleasing manner, reacting quickly to transients (to prevent pumping) and reacting more slowly to steady bass tones (to prevent distortion). IRC II: Similar to Intelligent mode (above), but this mode is optimized to preserve transients even more, so they sound sharper and clearer in the output signal, even when aggressive limiting is taking place. IRC III: This is a new processing mode for Ozone 5. Intelligent III mode allows for the most aggressive limiting by using an advanced psychoacoustic model to intelligently determine the amount of limiting that can be done to the incoming signal before producing distortion that is detectable to the human ear. It is however, very CPU intensive and with high latency especially at higher sampling rates. You may find that at sampling rates greater than 48kHz you are unable to use Intelligent III mode in real-time. Hard: The hard limiter uses the Margin point as an absolute guide, and the final output level will not exceed this point. Soft: The soft limiting algorithm uses the Margin (or final output level) as a guide but not as a fixed limit for the output level. It provides a natural "soft" limiting effect at the expense of allowing the level to exceed the margin. Limiting Controls Threshold: Determines the point that the maximizer will begin limiting. Turning down the threshold limits more of the signal which in turn will create an overall louder mix. In other words, by turning down the Threshold you limit the dynamic range of the mix, and the maximizer automatically adds gain proportionally to maximize the output level. Margin: Determines how much to boost the output signal after limiting. If the Margin is set to 0 dB, the signal will be boosted all the way up to 0 dB. If the Margin is set to -0.3 dB, makeup gain will be applied until the output signal is at -0.3 dB. Note that in the Soft mode, the level may be allowed to cross the Margin setting, while in Intelligent or Hard modes the Margin serves as an absolute "stop" point. Intersample Detection: Intersample Detection enables “True Peak” limiting by examining not just the levels of each digital sample, but the levels of the analog signal that will eventually be produced by D/A conversion. This is sometimes necessary, since an analog signal's peak level can exceed its corresponding digital signal's peak level by more than 3 dB! This option will increase CPU usage slightly, but if your mixes are running very hot you may want to enable it to ensure that absolutely no distortion is introduced when your audio is finally run through a D/A converter. Note: Different True Peak meters have different oversampling algorithms and may produce slightly different level readings. Ozone 5 strictly limits true peaks using its own TP measurement. For compliance with other possible True Peak meters it is recommended to leave 0.1 dB of headroom Release: When the Maximizer is set to Soft or Hard mode, this is the release time for the limiting. In general, more extreme limiting will benefit from longer release times. Character: The IRC modes provide intelligent release control (the release time is automatically varied depending on the audio material). When using the Intelligent modes the release slider is replaced by a Character slider. This control allows you to modify the behavior or "character" of the limiter, by controlling how fast and aggressive it is. Note: The Character values will not necessarily behave the same between various IRC
- 67. Mastering Modules 63 modes. Each mode may require additional tweaking of the Character slider to achieve optimum results. Character Style (IRC3 only): When the Maximizer is set to IRC3 mode you may choose between a number of Character "styles" which will help you manage the limiter’s final sound by constraining its release behavior. To achieve the best results, start by adjusting the Character slider with the style set to Balanced, then cycle through the various styles to see which best suits your mix. The following styles may be set: Pumping - This is the least aggressive style setting for IRC3 and does not constrain the limiter's release behavior. It can tend toward a slower release behavior and may result in pumping. This is the “legacy” setting and is the behavior of Ozone 5.01 and earlier. Balanced - This setting constrains the release behavior of limiter in a generally transparent way and should be suitable for most material. At a Character setting above 5, it will be identical to “Pumping” and at a setting less than 0.5, it will be identical to “Clipping”. Crisp - This setting aggressively constrains the limiter's release behavior and will favor distortion over any pumping. At a character setting less than 1, it will be identical to “Clipping.” This setting may add more “body” to a mix at the risk of occasionally perceivable distortion. Clipping - This is the most aggressive style setting of IRC3 and may be used if you wish to slightly colorize your mix with distortion or achieve the highest degree of loudness with the greatest risk of clipping. Visuals The Threshold Control is a meter that allows you to adjust the Threshold and Margin of the maximizer in visual relation to the levels of the incoming and outgoing signal. The Threshold Control can display gain reduction as it is taking place with level meters. To enable the gain reduction meters, right- (or control-) click on the threshold control’s meter window and select Maximizer Options. From the Maximizer options page select Gain Reduction under the Threshold meter drop-down menu. Two meters display the levels of the incoming signal and as gain reduction begins to take place, a gain reduction meter appears in red between the two level bars. The Threshold Control meter also displays the amount of gain reduction in real-time with a dB readout at the bottom.
- 68. Ozone 5 Help Documentation 64 The Threshold Control can also display a histogram, a history of level over time. To enable the histogram, right- (or control-) click on the threshold control’s meter window and select Maximizer Options. From the Maximizer options page select Histogram under the Threshold Meter drop-down menu. This allows you visualize the overall "level content" of the audio by providing a running display of the history of levels in the audio. Learn more about gain reduction meters and histograms here. Mini-Spectrum Window The window at the top of the module features a display of the signal spectrum, however, with selections on the left it may also display the Gain Reduction Trace meter as well as the Dither Shape Display. Gain Reduction Trace- also found in the Dynamics module, the Gain Reduction Trace is a scrolling meter that displays the incoming signal’s waveform with a superimposed tracing that illustrates the amount of gain reduction taking place in real-time. The Gain Reduction Trace can help you to set attack and release controls appropriately and monitor the envelope of gain reduction. Note: You can adjust the scale on the left by hovering over it and using your mouse wheel. Dither Shape Display- when selected and dither is turned on, this window illustrates the noise shape and amount of the dither being applied. Note: You can adjust the scale on the left by hovering and using your mouse wheel. Stereo Link: The Ozone limiter defaults to 100% stereo linking which imposes one limiter across the stereo image. When selected, Stereo Link allows the left and right channels to be limited independently (0%). At values between 0-100, a gain envelope generated by a ratio of the individual channel and the entire stereo image triggers two independent channel limiters. Values less than 50 favor the independent channels’ gain and values higher than 50 favor the stereo image’s gain. Transient Recovery: This feature allows you to fine tune the shaping of transients before limiting takes place helping to preserve sharper sounds like drums while still optimizing loudness. The higher the amount of transient recovery set the more pronounced the transients will be after the limiting process.
- 69. Mastering Modules 65 Dithering The active or bypassed state of the maximizer applies only to the Maximizer processor. Dither is independent of the Maximizer. When the Dither type is set to "None", there is no dither or word length reduction applied. To turn dither and word length reduction on, click the "None" button to select MBIT+, Type 1 or Type 2 as the dither type. Component Maximizer Plug-in If you are using Ozone 5 Advanced you will also have the ability to instantiate Ozone 5's Maximizer module as an individual component plug-in. Ozone 5 Advanced includes component plug-ins for all six of Ozone's modules complete with all the same features as the module within Ozone. Any module presets saved within Ozone will open within the component plug-ins' module preset system.
- 70. Ozone 5 Help Documentation 66 Dithering Prepare studio-quality audio for CD and other formats with Ozone's essential dithering tools. Ozone allows you to effectively convert and dither to 24, 20, 16, 12 or 8 bits. Key Features • Includes iZotope MBIT+ Dither for exceptionally transparent conversion to different bit depths • Unique set of bit scopes and DC level meters provides a complete view of the digital bitstream and conversion process Note: Dither is independent of the Maximizer To turn dithering on and off, change the Dither type. By default, the dither is off (Type "None"), meaning that your program material is left in the original format. To reduce the bit depth of the material, change the Type from None to MBIT+, Type 1 or Type 2. When the Type is MBIT+, Type 1 or Type 2, dithering is applied and your audio will be reduced in bit depth to the number of bits selected in the Bit Depth control. The following options are available when reducing the bit depth of the audio. Type None: No dither or bit reduction is applied. MBIT+: This is a proprietary iZotope word length reduction technology that reduces quantization distortion with minimal perceived noise. While this might sound like a paradox, MBIT+ is a very smooth, quiet and almost "analog sounding" technology. Type 1: Dither is applied using a "rectangular" distribution function. While this provides a dither noise source with a low amplitude, the dither noise can become modulated by the audio signal and vary in level, which is undesirable in many situations. Also, the non-linear quantization distortion is not completely suppressed in some situations with this low dither amplitude. Type 2: Dither is applied using a "triangular" distribution function. This dither is larger in amplitude and completely suppresses the non-linear quantization distortion. Shape