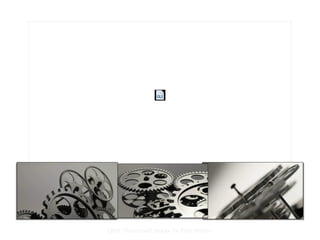
Zoom Up Gears
(Advanced)
To reproduce the thumbnail images on this slide, do the following:
On theHometab, in theSlidesgroup, clickLayout, and then clickBlank.
On theDesigntab, in theThemesgroup, clickColors, and then selectHardcover.
On theInserttab, in theMediagroup, clickVideo, and then clickVideo from File.
In the left pane of theInsert Videodialog box, click the drive or library that contains the video. In the right pane of the dialog box, click the first video that you want and then clickInsert.
On theHometab, in theClipboardgroup, clickCopy, then selectCopy.
Also on theHometab, in theClipboardgroup, click the arrow belowPaste, and selectPaste Special. In thePaste Specialdialog box, selectPaste, and then underAs,selectPicture (JPEG).
Select the new image, On theHometab, in theDrawinggroup, clickArrange, point toAlign, and then do the following:
ClickAlign Left.
ClickAlign Bottom.
On theInserttab, in theMediagroup, clickVideo, and then clickVideo from File.
In the left pane of theInsert Videodialog box, click the drive or library that contains the video. In the right pane of the dialog box, click the second video that you want and then clickInsert.
On theHometab, in theClipboardgroup, clickCopy, then selectCopy.
Also on theHometab, in theClipboardgroup, click the arrow belowPaste, and selectPaste Special. In thePaste Specialdialog box, selectPaste, and then underAs,selectPicture (JPEG).
Select the new image, On theHometab, in theDrawinggroup, clickArrange, point toAlign, and then do the following:
ClickAlign Center.
ClickAlign Bottom.
On theInserttab, in theMediagroup, clickVideo, and then clickVideo from File.
In the left pane of theInsert Videodialog box, click the drive or library that contains the video. In the right pane of the dialog box, click the third video that you want and then clickInsert.
On theHometab, in theClipboardgroup, clickCopy, then selectCopy.
Also on theHometab, in theClipboardgroup, click the arrow belowPaste, and selectPaste Special. In thePaste Specialdialog box, selectPaste, and then underAs,selectPicture (JPEG).
Select the new image, On theHometab, in theDrawinggroup, clickArrange, point toAlign, and then do the following:
ClickAlign Right.
ClickAlign Bottom.
Press and hold CTRL and select all 3 images.
UnderPicture Tools, on theFormattab in theSizegroup, set theHeightto1.68”and theWidthto2.98”.
Select just the left image. Also underPicture Tools, on theFormattab in theSizegroup, click the arrow at the bottom right launching theFormat Picturedialog box.
In theFormat Picturedialog box, select3-D Rotationin the left pane, under3-D Rotationon the right pane do the following:
Click the arrow next toPresets, underPerspective, selectPerspective Right.
UnderRotation, set theXbox to330 degrees.
Also in theFormat Picturedialog box, selectPositionin the left pane, underPosition on slidein the right pane set theHorizontalto0.54”and theVerticalto5.08”.
Also in theFormat Picturedialog box, selectLine Colorin the left pane, underLine Colorin the right pane selectSolid line, then click the arrow to the right ofColorand underTheme ColorsselectBlack, Text 1(first row, second option from left).
Also in theFormat Picturedialog box, selectLine Stylein the left pane, underLine Stylein the right pane, set theWidthto0.75 pt.
Also in theFormat Picturedialog box, selectShadowin the left pane, underShadowin the right pane, then click the arrow to the right ofPresetsand underOuterselectOffset Diagonal Bottom Left(first row, third option from left).
Select center image. UnderPicture Tools, on theFormattab in theSizegroup, click the arrow at the bottom right launching theFormat Picturedialog box.
In theFormat Picturedialog box, selectPositionin the left pane, underPosition on slidein the right pane set theHorizontalto3.51”and theVerticalto5.12”.
Also in theFormat Picturedialog box, selectLine Colorin the left pane, underLine Colorin the right pane selectSolid line, then click the arrow to the right ofColorand underTheme ColorsselectBlack, Text 1(first row, second option from left).
Also in theFormat Picturedialog box, selectLine Stylein the left pane, underLine Stylein the right pane, set theWidthto0.75 pt.
Also in theFormat Picturedialog box, selectShadowin the left pane, underShadowin the right pane, then click the arrow to the right ofPresetsand underOuterselectOffset Bottom(first row, second option from left).
Select third image. Also underPicture Tools, on theFormattab in theSizegroup, click the arrow at the bottom right launching theFormat Picturedialog box.
In theFormat Picturedialog box, select3-D Rotationin the left pane, under3-D Rotationon the right pane do the following:
Click the arrow next toPresets, underPerspective, selectPerspective Left.
In theXbox, enter30 degrees.
Also in theFormat Picturedialog box, selectPositionin the left pane, underPosition on slidein the right pane set theHorizontalto6.33”and theVerticalto5.08”.
Also in theFormat Picturedialog box, selectLine Colorin the left pane, underLine Colorin the right pane selectSolid line, then click the arrow to the right ofColorand underTheme ColorsselectBlack, Text 1(first row, second option from left).
Also in theFormat Picturedialog box, selectLine Stylein the left pane, underLine Stylein the right pane, set theWidthbox to0.75 pt.
Also in theFormat Picturedialog box, selectShadowin the left pane, underShadowin the right pane, then click the arrow to the right ofPresetsand underOuterselectOffset Diagonal Bottom Right(first row, first option from left).
Close theFormat Picturedialog box.
To reproduce the animation effects on this slide, do the following:
Press and hold CTRL and select all three videos. UnderVideo Toolson theFormattab, in theSizegroup, click the arrow at the bottom right launching theFormat Videodialog box.
In theFormat Videodialog box, selectSizein the left pane, underSize and rotatein the right pane set theHeightto4.63”and theWidthto8.2”.
Also in theFormat Videodialog box, selectPositionin the left pane, underPosition on slidein the right pane set theHorizontalto0.9”and theVerticalto0.66”.
Also in theFormat Videodialog box, selectBorder Colorin the left pane, underBorder Colorin the right pane selectSolid line, then click the arrow to the right ofColorand underTheme ColorsselectBlack, Text 1(first row, second option from left).
Also in theFormat Videodialog box, selectBorder Stylein the left pane, underBorder Stylein the right pane set the Width to0.75 pt.
Close theFormat Videodialog box.
Select the video that matches the left image.
On theAnimationstab, in theAnimationgroup, underEntrance, selectZoom.
Also on theAnimationstab, in theTiminggroup, click the arrow to the right ofStartand selectWith Previous.
Select the same video. On theAnimationstab, in theAnimationgroup, selectPlay.
Also on theAnimationstab, in theTiminggroup, click the arrow to the right ofStartand selectAfter Previous.
Select the same video. On theAnimationstab, in theAdvancedAnimationgroup, clickTrigger, point toOn Click Of, selectPicture 2.
Select the video that matches the center image.
On theAnimationstab, in theAnimationgroup, underEntrance, selectZoom.
Also on theAnimationstab, in theTiminggroup, click the arrow to the right ofStartand selectWith Previous.
Select the same video. On theAnimationstab, in theAnimationgroup, selectPlay.
Also on theAnimationstab, in theTiminggroup, click the arrow to the right ofStartand selectAfter Previous.
Select the same video. On theAnimationstab, in theAdvancedAnimationgroup, clickTrigger, point toOn Click Of, selectPicture 4.
Select the video that matches the right image.
On theAnimationstab, in theAnimationgroup, underEntrance, selectZoom.
Also on theAnimationstab, in theTiminggroup, click the arrow to the right ofStartand selectWith Previous.
Select the same video. On theAnimationstab, in theAnimationgroup, selectPlay.
Also on theAnimationstab, in theTiminggroup, click the arrow to the right ofStartand selectAfter Previous.
Select the same video. On theAnimationstab, in theAdvancedAnimationgroup, clickTrigger, point toOn Click Of, selectPicture 5.
On theAnimationstab, in theAdvancedAnimationgroup, clickAnimation Pane.
Select the video that matches the left image.
On theAnimationstab, in theAdvancedAnimationgroup, clickAdd Animation, underExit, selectFade.
Also on theAnimationstab, in theTiminggroup, click the arrow to the right ofStartand selectWith Previous.
In theAnimation Pane, select theExit Fadeanimation at the top of the list, using theDown Arrownext toRe-Orderat the bottom of theAnimation Pane, move theExit Fadeanimation into theTrigger: Picture 4 Group, but above thePlayanimation in the group.
Select the same video.
On theAnimationstab, in theAdvancedAnimationgroup, clickAdd Animation, underExit, selectFade.
Also on theAnimationstab, in theTiminggroup, click the arrow to the right ofStartand selectWith Previous.
In theAnimation Pane, select theExit Fadeanimation at the top of the list, using theDown Arrownext toRe-Orderat the bottom of theAnimation Pane, move theExit Fadeanimation into theTrigger: Picture 5 Group, but above thePlayanimation in the group.
Select the video that matches the center image.
On theAnimationstab, in theAdvancedAnimationgroup, clickAdd Animation, underExit, selectFade.
Also on theAnimationstab, in theTiminggroup, click the arrow to the right ofStartand selectWith Previous.
In theAnimation Pane, select theExit Fadeanimation at the top of the list, using theDown Arrownext toRe-Orderat the bottom of theAnimation Pane, move theExit Fadeanimation into theTrigger: Picture 2 Group, but above thePlayanimation in the group.
Select the same video.
On theAnimationstab, in theAdvancedAnimationgroup, clickAdd Animation, underExit, selectFade.
Also on theAnimationstab, in theTiminggroup, click the arrow to the right ofStartand selectWith Previous.
In theAnimation Pane, select theExit Fadeanimation at the top of the list, using theDown Arrownext toRe-Orderat the bottom of theAnimation Pane, move theExit Fadeanimation into theTrigger: Picture 5 Group, but above thePlayanimation in the group.
Select the video that matches the right image.
On theAnimationstab, in theAdvancedAnimationgroup, clickAdd Animation, underExit, selectFade.
Also on theAnimationstab, in theTiminggroup, click the arrow to the right ofStartand selectWith Previous.
In theAnimation Pane, select theExit Fadeanimation at the top of the list, using theDown Arrownext toRe-Orderat the bottom of theAnimation Pane, move theExit Fadeanimation into theTrigger: Picture 2 Group, but above thePlayanimation in the group.
Select the same video.
On theAnimationstab, in theAdvancedAnimationgroup, clickAdd Animation, underExit, selectFade.
Also on theAnimationstab, in theTiminggroup, click the arrow to the right ofStartand selectWith Previous.
In theAnimation Pane, select theExit Fadeanimation at the top of the list, using theDown Arrownext toRe-Orderat the bottom of theAnimation Pane, move theExit Fadeanimation into theTrigger: Picture 4 Group, but above thePlayanimation in the group.
Press and hold CTRL and select all 3 video.
On theAnimationstab, in theAdvancedAnimationgroup, clickAdd Animation, underExit, selectFade.
Also on theAnimationstab, in theTiminggroup, click the arrow to the right ofStartand selectWith Previous.
To reproduce the text effects on this slide, do the following:
On theInserttab, in theTextgroup, clickText Box, and then on the slide drag to draw your text box.
With the text box selected, type the text, ”Click Thumbnail Image To Play Movie.”
Select the text. On theHometab, in theFontgroup, do the following:
SelectCalibri (Headings)in the font list.
Click theBoldicon.
In theFont Sizebox, enter14 pt.
Also on theHometab, in theParagraphgroup, select theCenter Texticon.
Select the text box. UnderDrawing Tools, on theFormattab,WordArt Stylesgroup, in thePresets, underApplies to Selected Text, selectFill, Dark Red, Text 1, Inner Shadow(second row, third option from left).
Also under theDrawing Tools, on theFormattab, in theSizegroup, click the arrow at the bottom right corner opening theFormat Shapedialog box.
In theFormat Shapedialog box, selectPositionin the left pane, underPositionin the right pane do the following:
In theHorizontalbox, enter2.74”fromTop Left Corner.
In theVerticalbox, enter7.03”fromTop Left Corner.
Close theFormat Shapedialog box.
To reproduce the background effects on this slide, do the following:
Under theDesigntab, in theBackgroundgroup, click the arrow at the bottom right corner launching theFormat Backgrounddialog box.
In theFormat Backgrounddialog box, selectFillin the left pane, underFillin the right pane selectGradient fill, click the arrow to the right ofTypeand selectLinear.
UnderGradient stops, clickAdd gradient stoporRemove gradient stopuntil four stops appear on the slider. Customize the gradient stops as follows:
Select the first stop on the slider, and then do the following:
In thePositionbox, enter0%.
Click the button next toColor, and then underTheme ColorsselectBrown, Accent 4(first row, fifth option from the left).
Select the last stop on the list, and then do the following:
In thePositionbox, enter25%.
Click the button next toColor, and then underTheme ColorsselectBrown, Accent 4, Lighter 40%(first row, fifth option from the left).
Select the first stop on the slider, and then do the following:
In thePositionbox, enter75%.
Click the button next toColor, and then underTheme ColorsselectOlive Green, Accent 6, Lighter 40%(fourth row, tenth option from the left).
Select the last stop on the list, and then do the following:
In thePositionbox, enter100%.
Click the button next toColor, and then underTheme ColorsselectOlive Green, Accent 6, Darker 50%(sixth row, tenth option from the left).
CloseFormat Backgrounddialog box.
1