
Recommended
More Related Content
What's hot
Similar to How To Sew: Jewelry Organizer
Similar to How To Sew: Jewelry Organizer (20)
More from CandCSewing
Recently uploaded
Recently uploaded (20)
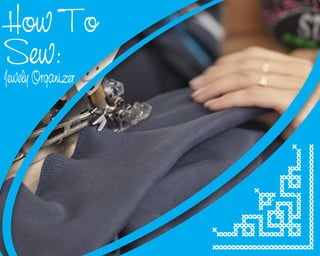
How To Sew: Jewelry Organizer
- 2. Recommended Machine: JK - SHIRLEY Shopping List: Got jewelry? Keep your adornments orderly and in clear view with this simple to-sew hanging coordinator. What about making one for sewing accessories, as well? A young lady can never be overly organized! ¾ yard fabric ¾ yard lining fabric (backing, lining) ¾ substantial weight interfacing ½ yard medium gage clear vinyl ¼ yard polyester fleece or low-loft batting 1/3 yard 1" wide sheer ribbon 2 pkgs. Additional wide twofold overlay bias tape 1 pkg. double fold bias tape OR 3/8" ribbon that matches extra wide bias 1 pkg. Wash-away basting tape String to coordinate bias tape Tubular plastic holder Fabric Preparation CUT: Fabric: One 17" x 22½" piece (Front) Vinyl: Four 4" x 17" pieces (Pockets) Interfacing: One 17" x 22½" piece Backing fabric: One 17" x 22½" piece
- 3. 1. Place extra wide double fold bias tape on one long edge of every vinyl piece, with more extensive side of tape underneath. Line near edge of inward crease, utilizing a long machine line, getting the more extensive overlay underneath. TIP: When sewing vinyl utilize a long stitch length setting. Since the needle makes a little gap in the vinyl, the more distant away the gaps of the join are, the more grounded the crease will be. 2. Place extra wide double fold bias tape on other long edge of three of the vinyl pieces. Line as in Step 1. 3. Pin wrong side of front to interfacing. 4. Place vinyl pockets on right half of fabric/interfacing unit separated as Shown to the right. Instructions:
- 4. TIP: Avoid utilizing pins when working with vinyl. Utilize paper clips or different clasp that won't penetrate the vinyl and leave a lasting gap. 5. Machine-baste vinyl pockets along the sides and bottom edges. TIP: What is machine basting? It implies sewing long and free stitches, which are utilized to hold fabric set up for a bit. For this situation, it holds the vinyl set up while the accessory pockets are shaped and before the external edge is done with bias tape. 6. Cut three 22½" pieces twofold overlay inclination OR 3/8" lace. On the off chance that utilizing double-fold bias rather than ribbon, trim it with the goal that it gauges 3/8" wide and has an overlap on each long edge. 7. Apply basting tape to wrong side of each bias/lace piece.
- 5. 8. Remove backing from basting tape and place bias/ribbon pieces onto coordinator front over vinyl as displayed: 9. Stitch near each long edge of each bias/strip piece. 10. Baste wrong side of backing on interfacing side of unit. 11. Attach additional wide twofold overlap predisposition to side and base edges of coordinator, mitering at base corners. 12. Make pattern for holder cover: • Place holder on paper and follow around shape. Draw a straight, even line crosswise over top at base of holder snare. • Add 3/8" crease remittance to finish everything/side edges; include ¾" crease stipend to base straight edge. • Using this pattern, cut two of fabric, two of downy and two of coating.
- 6. 13. Machine-baste fleece to wrong side of every fabric piece. 14. Right sides together, pin lining to hanger cover front. Stitch across top on each unit. Stitch across straight, bottom edge on one of the units. Turn each unit to the right side. 15. Right sides together and matching side raw edges, pin the hanger cover units together. Stitch along each side, leaving the bottom edge free. 16. Pin the right side of the hanger cover front to the right side of the organizer, matching raw edges, and keeping the lining of the hanger cover free. Stitch. 17. Finger press the seam away from the organizer. Turn under and pin the seam allowance of the hanger cover lining. Stitch the opening closed. 18. Insert the hanger into the cover. 19. Tie wide ribbon into a bow around hanger. Trim ends as desired.