2. • d blade into blade mount
Assembly
The peeler can be broken down into five different
sub-systems as demonstrated by the five different
colours on the page. These sub-systems each contain
their own assembly procedures which are shown by
the arrows presented with each process. Below is the
order in which it would be recommendable to
assemble the sub-systems but they actually do not
interfere with each other during assembly so most
orders could be achieved. When all the sub-systems
are combined there are 22 assembly steps.
Push in nylon bushes for
a press fit
Frame sub-assembly
Peeling arm sub-
assembly
Shaft sub-assembly
Slicing blade sub-
assembly
Base sub-assembly
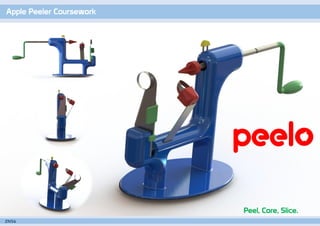
Analysis of provided peeler
ZN56
Basic facts
Name: Apple peeler and corer
Function: “Peels, cores and slices apples in one
easy motion”
Cost (including delivery): £7.95
Weight: 488g
Length (minimum): 300mm
Length (maximum): 400mm
Width: 100mm
Height: 125mm
Number of parts: 37
Base sub-assembly
The base acts as a steady support for the peeler which can be attached to a flat work surface
through the use of a large suction cup.
→ The metallic metal base will have been formed by deep drawing a blank which was cut from
sheet material. The holes will have been drilled afterwards either automatically or by a
worker using a jig.
→ The washers and bolts were most likely bought in by the company. However, originally the
washers will have been stamped from a sheet and the bolts will have been cold formed.
→ The lever arm will have been cut from a length of bar and then bent by a worker using a
bending jig or a machine using a bending jig. The circlip will have been stamped, just like the
washers.
→ The suction cup has been injection moulded as can been seen by the removal pin marks and
the injection mark on the underside. A simple two part mould would not have allowed all of
the features so a more complicated mould will have been used.
Screw base onto frame
using small bolts and
washers
Allign suction cup
grooves with
holes in base
Insert lever arm
through holes in
base and through
suction cup
Clip on circlip
Slicing blade sub-assembly
The slicing blade turns the apple into a spiral
shape and can be adjusted by hand using the
wingnut.
→ The wingnut will have been hot forged and
then tapped to form the thread.
→ The washer will have been stamped from a
sheet.
→ The blade shape will have been formed by
forging stainless steel and then a grinding
wheel used to produce the sharp edge.
→ The bolt will have been cold formed.
Screw bolt
through frame
Line up
slicing
blade
Attach
wingnut
and washer
Peeling arm sub-assembly
The peeling arm allows for the removal of the apple peel as the apple rotates.
→ The springs will have been made on large CNC machines which coil the wire and shape the ends.
→ The peeling arm itself has been die cast as shown by the separation line down its centre.
→ The peeling arm stop and the peeling blade mount have been stamped from sheet metal and then bent using jigs
to their required shapes.
→ The peeling blade has been stamped as a flat stainless steel blade and then sharpened using a grinding wheel.
Bend blade into
blade mount
Screw
mount on
arm
Screw on
adjustment
spring
Put peeling
arm stop
on frame
Slide on
peeling
arm spring
Hook large
spring to
frame
Slot peeling
arm onto
frame
Shaft sub-assembly
The shaft allows the movement of the handle to be converted into linear
and rotational movement of the apple.
→ The prongs will have been made by die casting rather than on a
continuously fed lathe due to the lack of turning marks.
→ The prong mount has been die cast then a screw thread was tapped.
→ The shaft itself has been turned on a lathe to produce to multiple
threads on it.
→ The crank handle has been die cast and then enamelled.
→ The handle is an injection moulded thermoplastic.
Press prongs into
mount for press fit
Screw mount
onto shaft
Slide through
bushes on
frame
Screw on
crank arm
Screw on
handle
Rivet shaft restraint
onto frame
Attach spring
to shaft
restraint
Frame sub-assembly
The frame provides a
sturdy mounting for
the other
components.
→ The frame has
been die cast.
→ The shaft restraint
has been forged.
1
3. h
Part #
Ease of
naming Essential?
Handling
score
Feeding
score
Fixing
score
1 4 H N 3 3 0
2 1 H N 7 5 0
3 1 H N 7 0 0
4 1 H N 3 3 3
5 2 E N 3 5 3
6 1 E N 3 2 5
7 1 E N 3 5 5
8 1 E N 3 1 3
9 1 E N 3 1 5
10 1 H Y 12 2 0
11 1 E Y 8 5 0
12 1 E Y 12 14 0
13 1 E Y 8 - 3
14 1 E N 8 0 0
15 3 E Y 6 - 0
16 1 E N 2 2 3
17 1 H N 5 1 0
18 1 H N 5 5 0
19 1 H Y 2 1 0
20 1 E N 4 3 0
21 1 E Y 1 4 0
22 1 E Y 4 10 0
23 1 E Y 7 4 0
24 1 H Y 6 - 0
25 1 E N 3 - 1
26 1 E Y 5 2 3
27 1 E Y 0 0 0
28 2 E N 3 0 0
29 1 E N 3 2 3
30 1 E Y 1 1 0
Total 37
Specification points which remain the same
Function
The function remains as “peels, cores and
slices apples with one easy motion”.
User
The user is still going to be kitchen users
who like novelty gadgets.
Specification
The task is to improve the manufacture,
assembly, ergonomics and appeal of the
peeler. Otherwise the function of the
peeler must remain the same. Therefore
some of the specification points for the
original peeler will remain the same and
some will be altered.
Naming the parts
Naming each of the parts not only aids descriptions of processes but also
acts as an indicator as to whether the part is primary or secondary. A
primary component will be easy to name by its function whilst it will be
difficult to do this for a secondary part.
1 Base washers 16 Prong mount
2 Lever-securing circlip 17 Suction cup lever cap
3 Peeling adjustment spring 18 Suction cup lever
4 Peeling adjustment bolt 19 Threaded shaft
5 Base bolts 20 Suction cup
6 Slicing blade wing-nut 21 Base
7 Slicing blade bolt 22 Peeling blade arm
8 Peeling blade wing-bolt 23 Slicing blade
9 Slicing blade washer 24 Shaft restraint
10 Shaft restraint spring 25 Shaft restraint rivet
11 Peeling arm stop 26 Crank arm
12 Peeling arm spring 27 Frame
13 Peeling blade 28 Shaft bushes
14 Peeling blade mount 29 Turning handle bolt
15 Apple mounting prongs 30 Turning handle
The table on the right gives each component scores in various categories
which were assessed by taking the peeler apart then putting it back
together. The peeling arm spring was the most troublesome component.
Analysis of provided peeler
ZN56
2
Size
It must work with apples with a diameter up
to 100mm as with the existing peeler.
Sustainability
As with all products the effect of the peeler
during production, transport, use and end of
life on the environment must be considered.
Altered specification points
Aesthetics
In the existing peeler it is evident that
not much thought was taken into the
aesthetics. However, one of the tasks is
to improve the “appeal” and so the
aesthetics must be more interesting and
enjoyable than the current ones.
Cost
Cost is a major driving factor in the
design of the existing peeler (finished
product can be bought and shipped
for £7.95!). However, this does not
necessarily need to be the case if a
more premium product is designed.
Manufacturing
Reduction in both the number of parts
and the complexity of assembly will be
vital.
Materials
Low cost materials were very
important in the peeler.
Attributes of provided peeler
Follows contours of apple
Securely holds apple
Converts rotational motion
into forwards and
rotational motion
Nylon bushes allow smooth movement
Slices and cores
using one
component
Grips shaft securely
Some specific areas requiring improvement
Slicing blade rotates out of position Springs get apple juice in them Suction cup is very temperamental
Peeling arm can
be held back
4. Styling inspirations
ZN56 3Image sources: http://food.ndtv.com http://www.demilked.com https://www.google.co.uk http://www.josephjoseph.com
The knife holder
is eye-catching
and makes the
user smile
Making the ladle look like a
dinosaur adds character to an
otherwise dull implement
Bright, simple colours and the large
features develop a sense of
playfulness for the robot
This sweetcorn stripper is
intriguing because it is novel
Bright patterns and optical illusions make
these cups visually interesting and fun
The tape dispenser
becomes fun with the
simple addition of
recognisable features
This reinvention of how cookies
should be eaten is playful and
childlike
This may peel carrots rather than apples but the
familiar shape in a new situation is amusing
This doorstop is
enjoyable because of
its inherent humour
These scoops have
simplistic geometry to aid
cleaning
Being able to
see what is
going on
through a
transparent
material
makes any
dirt visible
The order and efficiency
of this toothbrush holder
give it a sense of hygiene.
The use of single
or minimal
materials means
that there are no
joining points
where dirt can
gather
The primary colours distinguish
between different food types for
these chopping boards
This keyboard has a surface which
can be wiped clean without damage
Cleaning of these cups is
significantly aided by dishwasher
safe plastics
This product slices courgettes
but its simplicity can be drawn
on for inspiration
The industrial machine
seems robust
This apple peeler looks
flimsy and this should be
avoided
Although electrically
powered, the clean
aesthetics of this peeler
can be drawn upon
This huge peeler demonstrates
that the problem should not
be overcomplicated
This demonstrates that a
long shaft is not
necessarily required
5. Concept Design – Improvement of existing peeler
ZN56 4
A simple idea for reducing the
parts in the handle mechanism
from 3 down to 1. Reducing
assembly steps and assembly time
1-piece
injection
moulding
Thread
formed by
collapsible
core in
injection
mould
Rotating handle is not necessary as long as the handle has a low coefficient of friction
Elephant’s nose forms
the crank arm and
handle
“Adding
character” was
one of the
elements which
were identified
as being FUN.
Tensioned
metal wire
This part
would be built
into frame
Single contact
point with
shaft thread
Push here to
withdraw
from shaft
thread
Two contact
points with
shaft thread
Clip from
bag strap
Thread
works with a
straight
contact
Thread works with two points
of contact
This idea replaces the 3
part mechanism which
pushes against the shaft
with just one part. It was
inspired by the clip in the
photos on the left
This is a development of
the idea on the left and
uses two points of contact
rather than one. This
would lead to a more
reliable contact area.
Tension would
be applied
using a jig
Sprung strip of
metal
Attached to frame
here
Peeling blade assembly would be
very similar to original to
maintain functionality (rather
than as drawn)
This concept makes
assembling the peeler arm
much simpler. It also reduces
the number of components
required.
Would still need a
‘don’t peel’
mechanism
Apple
core
Could incorporate
the slicing blade
with the ear
Making the
elephant’s nose
from the apple core
adds a “playful”
dimension.
Would be part of the
frame
Plastic or metal
pins formed
with the frame
Holes line
up with
pins
This concept reduces
the parts in the slicing
blade assembly from 4
to 1.
Blade only needs
two positions, on
and off
Polymer with low coefficient
of friction to allow handle to
turn in hand
6. Concept design – Exploration of form
ZN56 5
Smaller
footprint on
work surface
Placing stationary
hand on here holds
it to the work
surface.
Have tested
that current
prongs
would hold
apple
vertically
Placing the peeler
vertically means that
the peel falls away
from the springs
which means that the
springs don’t need
cleaning. This is more
hygienic than the
current peeler. Added shelf
collects
peel
Could curve
shelf so that
peel cannot
fall off.
Holding hand
no longer gets
covered in peel
A wipe-clean shelf
means that the
peel and the sliced
apple will be
separated. This in
an improvement on
the concept before.
Twist and push this
half towards the
other half
Apple pushed
onto prongs
Base held with
the other hand
Hole allows prongs
to pass through
towards the end of
slicing
Would need some
sort of guiding
mechanism to
keep it centred
Ridged for better
rotational grip
This concept removes the need for the
large screw thread by having the user push
and turn the apple manually. Once the
slicing blade has “bitten” it should be fairly
easy to twist the apple into the blade.
Similar frame to
existing one
Rear shape mimics
Starck’s Juicy Salif
Frame sits inside
casing
Image sources: http://www.dezeen.com http://www.amazon.com
Hole for peeling arm
(other holes would be
required)
Functional parts all
attached to strong
frame
This concept centres around an
injection moulded casing which
would sit over the aesthetically
unpleasing frame and protect the
working parts from apple juice.
Flexible metal
peeling blade
Would pivot
on the frame
Might risk adding
parts rather than
reducing them
The idea here is that the blade is able to flex
around half of the apple so that it only takes
one rotation to peel it. However, this may
not work well for oddly shaped apples. Part of frame
Spring
Would be mounted
underneath apple
Peel falls away from
spring
Here the need for the peeler arm is
challenged. This simpler solution looks less
industrial than the existing peeler arm.
This slides
along here
This would form a
rail along the
bottom of the frame
Shaft only need to
be length of this
As the user turns the
handle they apply
pressure, pushing the
slider along the track and
forcing the apple into
blade. Inspired by
spiralizers as shown
below.
Could be difficult to
clean groove
without a special
tool
Nylon bush would
be inserted
7. Concept Design – Further ideas
ZN56 6
Injection moulded plastic cover
to protect spring from apple
juice
Is able to attach onto existing
peeler arm
Existing spring is
hard to clean
Hygiene is the focus of this concept, protecting the
springs from apple juice reduces the likelihood of
bacteria and mould formation.
Would attach to
frame here
Rubber padding
so as not to
damage work
surface
Limited by work
surfaces which have
cupboards below
Clamps onto
work surface
This is an alternative to the
existing suction cup. A quick-
action clamp might be more
appropriate however. The
suction cup is flawed as it only
works on smooth surfaces.
Suction cup
doesn’t work
here Would attach to
frame with snap
fittings
Ergonomic grip
for thumb
Grip on both
sides so works
for left and right
handed people
Palm rests here
to hold it to the
work surface
This alternative to the suction cup will
work on all flat surfaces. During peeling
the non-turning hand often naturally
grips the base anyway (shown on right),
so this makes it more comfortable and
reduces the part count.
Injection moulded
as one piece
Blade position would
still be fully adjustable
as before
Blade cover for
safety
This concept focusses
on safety by covering
the sharp blade except
when in use
Made from a rigid
polymer
This would be a
boss for the shaft
to screw into
One piece
injection
moulding
Stops apple
sliding onto
shaft
Reducing the prong assembly down to one part reduces the
part count by 3 and removes the assembly step of inserting
the prongs into the prong mount.
Still stops apple
rotating but with
less materialJust as easy to
pierce through the
core rather than
around it
Sharp corners are
not ideal in
injection moulding
Here an alternate method for securing the apple
is explored. However, further improvement is
required.
Sharp corners have
been replaced by
smoother
transitions
Changes in
thickness may cause
distortions when
cooling
Could make centre
hollow
Angle allows
apple to easily
push on, unlike
concept on left
This is a more feasible concept than the ones
on the left for securing the apple, but further
refinement is needed.
Easily injection
moulded using a
two part mould
Bottom section
would be hollow
with a boss for
the shaft
No changes of
thickness so no
sink marks
From left to right shows a progression of ideas
which reduce the number of parts and culminate
with this concept being the most practical.
8. Concept design – Combining and refining
ZN56 7
The Body
The main body of the peeler will
have internal clips which attach it to
the frame. The body acts as a
smooth surface which can easily be
wiped clean whilst adding to the fun
aesthetics through shape and colour.
Injection moulded
polymer
Two halves clip
together
Place non-turning
hand here
Peeling arm sticks
through
Hole for internal
shaft restraint
Rubber for grip
The Peeling Arm
The blade position is not
adjustable because if it is set in the
correct position originally then this
is not necessary. This reduces parts
and assembly steps.
Injection moulded
around blade
Slides into
slot on
frame
Bolt secures arm
to frame
Peeling blade mount
clips in
Mount slides onto
arm
Thin metal acts
as a spring
Clips into
blade
User grips
this to rotate
Injection
moulded
polymer
Part of the frame
The Slicing blade
The slicing blade can be rotated
out of the way by pushing it
back and rotating it. However, it
is securely held in position
when slicing because the apple
applies pressure to it.
Keeps the blade
straight during
slicing
Similar blade to
original
Shows how
the two fit
together
Cardboard model
used to find ideal
shape
Long enough to
allow it to be
pushed back and
rotated
The Shaft Restraint
The shaft restraint pushes
against the shaft and
allows it to move forwards.
The user can push it back
to retract the shaft.
Part of the
frame
Will be longer
as it’s
mounted low
down on the
frame
Cap slots on top
for user to push
comfortably
Will be mostly
enclosed within
the body
Unchanged Concepts
The crank and the device for
securing the apple will both
be single injection moulded
parts.
The Frame
The frame will be made from
cast aluminium. Its design
allows the various different
components to be attached as
simply as possible.
Shaft restraint
attaches here
Guides mean that the peeling
blade can be assembled in the
correct orientation
immediately
Threaded hole
for bolt
‘T’ cross section for
increasing the
second moment of
area and therefore
meaning it won’t
bend
Nylon bushes allow
smooth rotation
For slicing blade
No springs for apple
peel to get into
9. Development - Product
ZN56 8
Over-constrained Guiding pins
Standard M4 bolt
Flat guiding
pin
The original concept for
guiding in the peeling arm
was over-constrained. The
developed system allows
the arm to be inserted in
the correct orientation
every time, whilst allowing
for small errors in the
dimensions of the peeling
arm.
Much smaller to
allow flexibility
User grips here to
push back and
rotate
Long enough for the
blade to be pushed
back and rotated
Shape allows
rotation without
collision with
frame
Shape allows
blade to cut
unobstructed
Too thick for flexibility
Non-optimised
shape
Developing the slicing blade mount involved analysing how it would be used and how
it would interact with the frame. The developed result has a refined shape and snap
fittings which will function properly.
Allows for nylon
bushes
Wide so grips can
go around blade
Putting webs on
outside maximises
room for hand
Sharp corners not good
for casting and act as
stress concentrators
Rounded edges for
removal from
casting
Cuts into space for
hand
The frame was developed so that it
was more feasible to cast from
aluminium. Practical allowances
were also made such as widening
the holes to allow for nylon bushes.
Clips in to stop
any forwards or
backwards motion
Injection moulding will
be formed around the
blade
Rails are able to flex if
peeler arm is incorrectly
dimensioned
To stop peeling,
slide on guard
The peeling blade can now
be set to not peel, like the
original peeler, by sliding on
the cap. The blade mount is
slotted onto the arm in one
motion during assembly.
Longer to make it
easier to push in
Threaded to screw
onto shaft
Ribs
Stubby
Development of
the apple mount
centred on making
it more suited to
injection moulding.
Rubber cap
gives larger
surface to
push
Two contact
points for
reliability
The longer shaft restraint
allows its attachment to the
frame to be simple and also
makes it easier to fit due to
the longer leverage.
Hand breadth - USAF
Cadets (1942)
Hand thickness - USAF
Cadets (1968)
Anthropometric data
used for holding area
Gap allows
frame
through
Developing the body involved the use of
anthropometric data for hands (making
sure the 95th
percentile would fit). Also
how the body actually interacts with the
frame was considered. Further analysis of
the body is presented on the next page.
10. 1. Attach shaft restraint
By squeezing the sprung shaft restraint
with a pair of pliers it can easily be inserted
into its relevant holes. It can be put on
either way round to further simplify
assembly.
2. Attach peeling arm
Guide pins allow the CS70 spring steel arm
to be quickly located into position. Due to
the rear pin, the hole for the screw will
only line up if assembled in the correct
direction. A standard M4 bolt is used.
3. Push in nylon bushes
Just like in the original peeler the shaft
requires nylon bushes to operate smoothly.
These are pushed into position and secured
due to being an interference fit with the
frame.
4. Clip together body
The injection moulded body has clips which
allow the body to snap together around
the frame. The peeler arm and shaft
restraint have to be carefully slotted
through holes in the body.
5. Slot on shaft restraint cap
The injection moulded rubber cap makes it
more comfortable to push the shaft
restraint back. As it is pushed on it
stretches slightly and the tension in the
rubber holds it in place.
6. Clip slicing blade to mount
Due to the shaping of the slicing blade
mount it is only possible to attach the
blade in the correct way. This is done using
two snap fittings. One of which holds the
blade flush to the mount.
7. Slot slicing blade onto frame
The slicing blade is simply lined up with the
frame and pushed. The snap fitting passes
through the frame and out the other side
but is concealed by the body towards the
rear of the peeler.
8. Push peeling blade onto arm
Rails line up the mount and mean that it
can only be assembled in the correct
orientation. A plastic clip is recessed whilst
sliding then springs down to secure when it
reaches the correct position.
9. Screw handle onto shaft
The injection moulded handle has an
internal screw thread made using a
removable core in the mould. This is
screwed on by hand to the shaft. The screw
thread only matches one end.
10. Screw on the apple mount
The threaded shaft is slid through the nylon
bearings and then the apple mount is
screwed on. As with the original peeler the
apple mount is screwed on clockwise so
that it cannot come undone in operation.
11. Stick on rubber base
A sheet of rubber which has been laser cut
is then stuck onto the base. The rubber
comes with an adhesive backing so that
during assembly the protective sheet is
peeled off, then the rubber stuck on. Finished product
Development - Assembly
37
New Part Count: 17
Original Part Count:
Through the use of snap-fittings, simpler
mechanisms and the removal of unnecessary
parts, it has been possible to reduce the part
count by 54%! Therefore, not only will the
assembly time be reduced but so will the
number of manufacturing operations.
Therefore, reducing the time of production.
The original peeler was poorly concieved when it came to
the assembly operations. Parts were awkward to
assemble and sometimes entirely unessessary. This new
design takes just 11 very simple assembly steps. That’s a
reduction of 50%! This was achieved through the use of
snap fittings and clever designing of mechanisms.
22
ZN56 9
Original Assembly Steps:
New Assembly steps: 11
Orange: Guiding ribs
Green: Snap fittings
Joining the body
The body will be made from an injection moulded
polymer, therefore it is possible to include snap fittings
in the design. These are shown in green and
corresponding slots would exist on the other half. This
allows fast assembly, especially compared to using
screws. The body is quite thick so although the added
ribs do provide support, their main purpose is to secure
the frame within the body.
The Slicing blade
These two images show the reason why the snap fitting for
the slicing blade protrudes out of the frame. It can be pulled
back and rotated out of the way so that you can purely peel
the apple rather than slice and core it too. During operation
it is held in place by guiding arms and the pressure from the
apple.