Colorado School Garden Lesson Plan a6: Beyond Seed: Plant Propagation

Colorado School Garden Lesson Plan a6: Beyond Seed: Plant Propagation (1st Grade and Beyond) - Indoor Projects, Lesson Plans and Activities |=> Overview: This lesson discusses the parts of the plant and the various methods of propagation. This lesson can be done with great detail and explanation or modified to work with younger grade levels. ` For more information, Please see websites below: ` Organic Edible Schoolyards & Gardening with Children http://scribd.com/doc/239851214 ` Double your School Garden Food Production with Organic Tech http://scribd.com/doc/239851079 ` Free School Gardening Art Posters http://scribd.com/doc/239851159` ` Companion Planting Increases School Garden Food Production by 250 Percent http://scribd.com/doc/239851159 ` Healthy Foods Dramatically Improves Student Academic Success http://scribd.com/doc/239851348 ` City Chickens for your Organic School Garden http://scribd.com/doc/239850440 ` Simple Square Foot Gardening for Schools - Teacher Guide http://scribd.com/doc/239851110

Recommended
Recommended
More Related Content
More from School Vegetable Gardening - Victory Gardens
More from School Vegetable Gardening - Victory Gardens (20)
Recently uploaded
Recently uploaded (20)
Colorado School Garden Lesson Plan a6: Beyond Seed: Plant Propagation
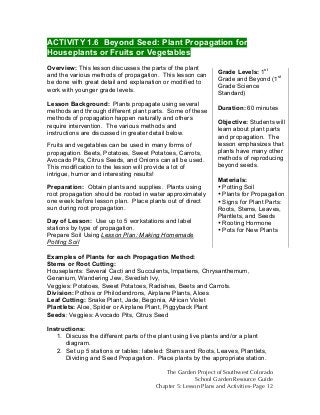
- 1. ACTIVITY 1.6 Beyond Seed: Plant Propagation for Houseplants or Fruits or Vegetables Overview: This lesson discusses the parts of the plant and the various methods of propagation. This lesson can be done with great detail and explanation or modified to work with younger grade levels. Lesson Background: Plants propagate using several methods and through different plant parts. Some of these methods of propagation happen naturally and others require intervention. The various methods and instructions are discussed in greater detail below. Fruits and vegetables can be used in many forms of propagation. Beets, Potatoes, Sweet Potatoes, Carrots, Avocado Pits, Citrus Seeds, and Onions can all be used. This modification to the lesson will provide a lot of intrigue, humor and interesting results! Preparation: Obtain plants and supplies. Plants using root propagation should be rooted in water approximately one week before lesson plan. Place plants out of direct sun during root propagation. Day of Lesson: Use up to 5 workstations and label stations by type of propagation. Prepare Soil Using Lesson Plan: Making Homemade Potting Soil Examples of Plants for each Propagation Method: Stems or Root Cutting: Houseplants: Several Cacti and Succulents, Impatiens, Chrysanthemum, Geranium, Wandering Jew, Swedish Ivy, Veggies: Potatoes, Sweet Potatoes, Radishes, Beets and Carrots. Division: Pothos or Philodendrons, Airplane Plants, Aloes Leaf Cutting: Snake Plant, Jade, Begonia, African Violet Plantlets: Aloe, Spider or Airplane Plant, Piggyback Plant Seeds: Veggies: Avocado Pits, Citrus Seed Instructions: Grade Levels: 1st Grade and Beyond (1st Grade Science Standard) Duration: 60 minutes Objective: Students will learn about plant parts and propagation. The lesson emphasizes that plants have many other methods of reproducing beyond seeds. Materials: • Potting Soil • Plants for Propagation • Signs for Plant Parts: Roots, Stems, Leaves, Plantlets, and Seeds • Rooting Hormone • Pots for New Plants 1. Discuss the different parts of the plant using live plants and/or a plant The Garden Project of Southwest Colorado School Garden Resource Guide Chapter 5: Lesson Plans and Activities- Page 12 diagram. 2. Set up 5 stations or tables: labeled: Stems and Roots, Leaves, Plantlets, Dividing and Seed Propagation. Place plants by the appropriate station.
- 2. 3. Move students through each station, explaining and modeling the different methods of plant propagation. Students can actively participate in any and all of the plant propagation techniques. Separation and division is certainly one of the easiest and quickest ways to propagate many plants. Simply remove the mother plant from its container and separate or divide it by pulling or cutting it apart. Each division should have some roots attached. Repot the new plant. Layering or Plantlets uses a mother plant and her babies and applies to plants with trailing stems or those like spider plants that produce baby plants. To propagate plants, prepare a small pot next to the mother plant and place a plantlet directly into prepared soil. The baby or plantlet will continue to use the mother plant for support until it is able to develop roots and new growth on its own. Once the roots have begun to develop or you see new growth on the plantlet, the baby is strong enough to be removed from its mother. Leaf Cuttings: Only a few plants can reproduce by leaf cuttings. Break off a whole leaf, including its stalk, and insert the stalk into the rooting medium as above. Cover the container with clear plastic. One or more new plantlets will soon sprout at the base of the leaf. They can be potted individually when they are well rooted. Stem Cuttings: Stem cuttings are the most popular method of plant propagation. The technique can be applied to all plants with noticeable stems. Select a healthy section of stem with at least three nodes (the bumps or rings where a leaf is or was attached) and cut it cleanly with a sharp knife just below the lowest node. Remove any flowers or flower buds as well as any leaves growing from the bottom node. A rooting hormone, available in the form of a powder, gel or liquid, can be applied to the cut section. The hormones (although not necessary) stimulate root growth. Over rooting or under rooting can cause a plant to be weak and may not survive transplant well. Leaves should not soak in water, only the stem. You can do this by removing all but the upper most leaves. Cuttings can be rooted in water, but a rooting mix such as soilless growing media, with vermiculite, sand or perlite works best. Fill a pot or other container with mix and moisten it lightly. Use a pencil to prepare a hole for the stem. Insert the cutting so that at least one or two nodes are covered with mix. Firm the mix then cover the container with a clear plastic bag to maintain high humidity. Put the cutting in bright light, but not full sun, and supply warm temperatures. When the plant is well rooted and growing on its own (this can take from two weeks to several months) remove the plastic and treat the cutting like an adult plant. Cuttings of succulents and cacti should be allowed to heal over before The Garden Project of Southwest Colorado School Garden Resource Guide Chapter 5: Lesson Plans and Activities- Page 13