1. If you are not confident on Depth Of Field it is recommended you have a quick read
of the following article.
http://www.ephotozine.com/article/Depth-of-field-explained
Exposure
In photography when we refer to a stop we are referring to exposure. If we increase
our exposure by one stop we are doubling the amount of light we allow to reach either
the sensor or film. Aperture, Shutter & ISO settings are all divided up into stops even
though the numbers used to measure each of them is different.
If we are in a dark room with one candle lit and we want to add one stop we would
add a second candle so we now have two candles lit, if again we wanted to add
another stop we would again double the amount of light so we would now have four
candles illuminating the room. Every time we want to add a stop of exposure (or in
this case candles) we are doubling the amount of candles we have lit, if we had 32
candles lit and we wanted to decrease the exposure by say two stops we would half
the amount of candles we have lit and then half this again so we would end up with 8
candles illuminating the room.
When using the camera we have three ways of adjusting exposure they are aperture,
shutter speed and ISO. If we were shooting a scene at ISO 100, aperture F22 and an
exposure time of 1 second and we then decide to add a stop of exposure we could
simply use a slower shutter speed by changing the exposure from one-second to two
seconds to allow more light into the camera. We could have also adjusted the aperture
or we could have changed the ISO.
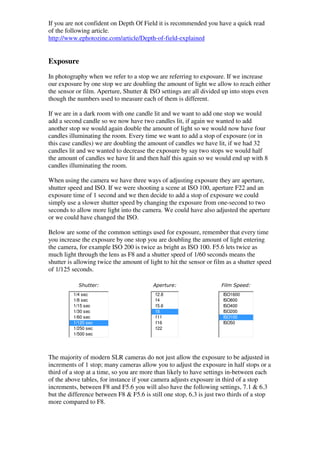
Below are some of the common settings used for exposure, remember that every time
you increase the exposure by one stop you are doubling the amount of light entering
the camera, for example ISO 200 is twice as bright as ISO 100. F5.6 lets twice as
much light through the lens as F8 and a shutter speed of 1/60 seconds means the
shutter is allowing twice the amount of light to hit the sensor or film as a shutter speed
of 1/125 seconds.
1/4 sec f2.8 ISO1600
1/8 sec f4 ISO800
1/15 sec f5.6 ISO400
1/30 sec f8 ISO200
1/60 sec f11 ISO100
1/125 sec f16 ISO50
1/250 sec f22
1/500 sec
The majority of modern SLR cameras do not just allow the exposure to be adjusted in
increments of 1 stop; many cameras allow you to adjust the exposure in half stops or a
third of a stop at a time, so you are more than likely to have settings in-between each
of the above tables, for instance if your camera adjusts exposure in third of a stop
increments, between F8 and F5.6 you will also have the following settings, 7.1 & 6.3
but the difference between F8 & F5.6 is still one stop, 6.3 is just two thirds of a stop
more compared to F8.
2. Using Filters
ND or Neutral Density Grad Filters
ND Grad filters are clear on the bottom and have a neutral grey colour on the top half.
The grey toned area of an ND grad filter reduces the amount of light reaching the film
or sensor. The purpose of an ND grad filter is to control the exposure contrast
between a bright sky and the usually darker foreground.
ND Grad filters come in a range of different strengths. Lee & Hitech filters come in
strengths of 0.3 = 1 stop, 0.6 = 2 stops, 0.9 = 3 stops and 1.2 = 4 stops.
Cokin tend to refer to the strength of their filters differently to Lee & Hitech, the
strength of Cokin’s filters are usually as follows: ND2 = 1 stop, ND4 = 2 stops and
ND 8 = 3 stops.
Close to sunrise or sunset there is often a large difference between the exposure of the
bright sky and the dark foreground. Our eyes can easily record the difference between
the bright and dark areas (often referred to as the dynamic range), but our camera
cannot record the exposure difference between the two. When photographing a sunset
with a bright sky and dark foreground without filters what is going to happen is that
the camera will either expose for the foreground and you will have a burnt, washed
out sky or the other thing that may happen is that your camera will expose for the
highlight in this case the sky so you have a correctly exposed sky but everything else
will record as a black silhouette.
By taking a meter reading we can measure the difference between the foreground and
the sky and place the relevant ND grad filter strength over the bright sky to balance
out the exposure. To take a meter set your camera to Manual Mode and point your
camera at a midtone in the foreground, now take a second reading of the sky and work
out the exposure difference in stops, if it is three stops difference we would use a
three stop filter over the sky and then set the exposure that we recorded for the
foreground.
3. Working in Manual mode & filters is my preferred method, but it is not essential.
Most modern cameras will be able to work out the exposure fairly accurately in
Aperture Priority Mode even when you have a filter in place, just remember to check
your histogram after each image and apply any exposure compensation should it be
required.
All workshop participants are entitled to a 20% discount on Hitech Filters. To receive
you discount simply mention you have are going or have been on one of my
photography workshops. A link to the Hitech filters site is below.
http://www.formatt.co.uk/stills-filters/filter-kits/graduated/grad-kit-4-nd0-3-nd0-6-
nd0-9-filter-graduated.aspx
Composition
If you want to learn more about composition it is recommended that you read the
following article on Composition
http://www.ephotozine.com/article/Beginners-guide-to-composition
Before You Take The Image
Remember to carefully study the scene before pressing the shutter button. Look for
any distracting elements in the foreground, especially rubbish or anything that could
be in front of the lens such as a strand of grass or even a raindrop on your lens or
filters. These can be very difficult to see through the viewfinder, but will inevitably
ruin the shot once you get home and notice it on your computer, so its important to
always check.
Getting Sharp Images
Always use a tripod if you can and always make sure it is secured well on the ground.
If your camera has a mirror lockup function then always use it.
Use either the self-timer or a remote/cable release
If there is a strong wind shield your camera and tripod with your body when taking a
picture.
4. Black & White Conversion
This is my preferred method for achieving B&W pictures in Adobe Photoshop (these
steps may be slightly different depending on what version of Photoshop you have).
Under the Image tab in Photoshop go to Image, Adjustments and then Channel Mixer,
click the Monochrome box in the bottom left hand corner, now play with the sliders
until you get the effect you want, the aim is to try and get the value of all three sliders
to roughly add up to 100, when you get a rough effect with good tones click ok.
Now go to the selective colour tab under image/adjustments and then selective colour.
Click the black colour from the colour drop down bar and then adjust the black
channel to increase the black tones, now change the black channel to White and
decrease the black slider to add to the white tones and once you get the effect you
want select ok.
Make sure the foreground colour is set to black and the background colour is set to
white and then under the Layer Menu select new adjustment layer and then gradient
map and then click ok. Now on the layers pallet change the opacity on the gradient
map to an amount that looks good and then flatten the layer and your B&W
conversion is complete.
Photoshop Actions
The digital Velvia and sharpening action we went through on the workshop can be
downloaded from Chris Sherperds website on the below page, it also states how to
install the actions.
http://www.shepherdpics.com/Blog/labels/Actions.html
To learn how to run actions in Photoshop Elements please visit the below page
http://www.hiddenelements.com/actions_whitepaper.htm
Below is a digital noise remover, please visit the below website to download the
action and for basic instructions on how to use it.
http://www.thelightsrightstudio.com/TLRDigitalNoiseReduction.htm
5. Adobe Photoshop Black & White Conversion
Above is the start image.
Load up the channel mixer in photoshop
6. Tick the Monochrome box and then adjust the three sliders until you get the tones you
are after, a good guide is to keep the total value of the sliders as close to 100 as
possible.
Now load up the selective colour box
7. Select the black from the colour drop down menu and then play around with the
bottom black slider to add contrast, now select the white colour and do the same again
before clicking ok.
Check that the black colour is set as the foreground colour and the background colour
is white, this can be seen where the red arrow is. Next click the layer menu, then new
adjustment layer and finally Gradient Map then click ok and ok again.
8. Now change the opacity on the slider bar to adjust the strength of the affect. Once this
is done flatten the layer and the image is complete.
Finished Image
9. Combining Images Using Layer Masks
There are times when its hard for our camera to expose for the entire scene without
burning out some of the highlights, luckily Photoshop has Layer Masks where we can
easily combine certain areas for different shots. The image on the right is correctly
exposed for the majority of the scene however the highlights from the setting sun has
burnt out some of the detail in the sky, in this case I shot a second image and
underexposed the original by two stops to keep the detail in the highlights.
I now need to combine the two images so I select the image with the burnt out
highlights by going to select then all, then edit and copy, I then select the darker
image and click paste.
10. Once combined I then select the Layer Mask Tool which is the square one with the
circle in the middle.
Once you have selected the Layer Mask go to the paint Brush tool in Photoshop and
start painting the burnt out areas using the default black colour, if you want to make
the effect less obvious reduce the opacity of the brush, the opacity slider is at the top
in Photoshop roughly under the window and help tabs. Its then a case of painting back
11. the detail from the image underneath, if you make a mistake switch to the white brush
and this will reverse any errors.
Once you have finished select the arrow underneath the cross of the layers palette and
then select flatten image.
12. Night Photography
Photography in the remote areas of our countryside & coastline usually only
appeals to photographers in the daylight hours, however for the discerning
photographer many of these areas can also work just as well at night.
Photographing images at night by adding torch or flash light to your chosen
subject using the technique known as “Painting With Light” is actually a
relatively simple process and does not require lots of expensive equipment to
achieve stunning results.
I love shooting at night as it allows me to visit locations I have been to countless
times and photograph the subject in a completely different and distinctive way. It also
allows me to get out taking pictures on the short winter days and the process involved
is actually surprisingly both relaxing and enjoyable.
Planning
As with all photography, planning and light is paramount to achieving successful
images and despite it being dark there are still some wonderful variety of lighting
conditions available at night. The weather along with light pollution will have a
dramatic effect on the success of images. For star trails clear nights are obviously
essential, but don’t ignore cloudy weather. Whilst with cloudy weather you are not
going to be able to record star trails in the image, moving clouds can make for some
13. stunning pictures particularly when they take on the colours of light pollution from
built-up areas.
Before we can begin taking pictures we need to find a suitable subject or location.
There is no use looking for suitable subjects in dark so make sure all location
searching is completed in the daylight hours. When I find a suitable subject I try to
pre visualise how the final result will look in the dark. I frame up suitable
compositions and carefully search the area for any potential hazards such as a river or
potholes as these can be difficult to see in the dark even with a torch.
I find subjects that include a strong outline against a night sky work particularly well.
Windmills, churches, trees, or rusty farm machinery all make for some fascinating
images. By adopting a low viewpoint in our images we can then use a powerful night
sky to add further drama to our pictures.
When in remote areas we basically have three main light sources that we can utilize to
illuminate our chosen subject moonlight, flashlight and torchlight. Moonlight is
probably the most powerful lighting source that we have at our disposal and it also
has a dramatic effect on how our images will appear. Both torchlight & flashlight are
great for lighting most subjects and offer a lot of control over what areas of the scene
you wish to illuminate. With torchlight it’s possible to illuminate just one particular
subject or a small area in a scene. A good quality flashgun like a torch will allow you
to illuminate a relatively small section of an image with the added bonus of being able
to control the power output. When fitted with coloured gels a flashgun can also add a
splash of colour to scenes.
Taking Pictures
Taking night pictures only requires the most basic of photography kit. The essential
items are a DSLR with a bulb facility, a lens, a good sturdy tripod, a cable release or
remote to lock open the cameras shutter and finally a light source to illuminate your
chosen subject.
I like to arrive at my chosen location whilst it’s still fairly light to enable me plenty of
time to easily compose and set the focus on my camera before its dark. When setting
up I always make sure my tripod is on secure ground before suspending my camera
bag from the hook on my tripod, this helps not only to steady the camera it also
ensures that it is not going to blow over should there be a sudden gust of wind.
With long exposures digital noise can be major problem so it’s essential to keep the
ISO as low as possible, usually around ISO 100 or 200 for most digital cameras. To
reduce noise you could simply utilize the Noise Reduction if your camera has such a
facility, I find this works very well however the downside is that the exposure time is
effectively doubled whilst the camera takes a dark frame to identify noise. Because
the noise reduction facility doubles exposure times I find it generally acceptable to
use for exposures of around five minutes, but for longer exposures I tend to turn the
noise reduction facility off and apply any required noise reduction whilst processing
the completed raw files.
Once you are ready to take the image, lock open the shutter using a cable release or
remote and take a note of the start time. Whilst the shutter is open the next job is to
14. begin illuminating our main subject using either a torch or flashgun. To do this I make
sure I stand to one side of the camera and avoid walking into the exposing frame with
a visible light source. The amount of light your subject requires will depend on a
number of things including the actual subject and the distance from your camera, for
subjects such as windmills I normally use a mixture of flash and torch light. When
painting by torchlight its important to use slow and even strokes without leaving the
torch shinning on a particular part of the image for too long. If the subject is more
than 20 meters from the camera then it will require considerably more light than you
think. Getting the correct exposure requires a little bit of trial and error so its
important to remember the length of the overall exposures and roughly the number of
flash bursts or the amount of time you illuminated the subject using the torch. Once
you feel you have given the subject long enough then release the shutter or cable
release lock and review the completed image on the LCD screen of your camera.
What You Need Or Recommended Gear
Bulb Mode
To achieve successful night images that allow a long enough exposure to capture
movement you will need to check your camera has the facility to lock open the shutter
using B or Bulb Mode.
Sturdy Tripod
As exposures can run from minutes to hours a good sturdy tripod & head is crucial.
For extra stability avoid raising the central column and if your camera has the facility
to suspend your camera bag from it make sure you use this to help aid with stability.
Light Source
A light source is vital to allow you to illuminate a subject, both a flashgun that can be
used off camera and a powerful torch will both come in handy. Remember to carry a
spare torch with you to find your way back to your car.
Battery Grip
Although not essential a battery grip will allow you to use more than one camera
battery in your camera at one time therefore meaning you can take longer exposures
before the camera’s battery power runs out.
Remote Release
A remote or cable release is essential to allow you to lock open your cameras shutter
button over a long period of time and allow you to walk round the side of your subject
to illuminate it with your chosen light source.
Top Tips
Composing Images In The Dark
To compose images in the dark simply change the ISO setting to your most sensitive
available before taking a few quick test exposures and recomposing your frame as
required. Remember once you have finished; change your settings back to normal.
15. Focusing In The Dark
To help aid with focusing in the dark shine a powerful torch on your chosen subject,
once your camera gets a focus lock switch your lens to manual focus so that it doesn’t
hunt when you press the shutter button.
North Star
Take a compass with you and work out the position of the North Star. As the Earth
rotates the North Star will appear to stay fixed and the rest of the stars will appear to
rotate around it.
Take Someone With You
Night photography can be quite spooky so having a friend or someone with you will
not only keep you company it will also make you feel safe.
Dress Warm
It can get very cold at night particularly when standing around waiting for long
exposures so warm clothing is essential.
Noise Reduction
If your camera has a noise reduction facility then turn it on for your final shot of the
evening. Once the main exposure is completed you can then pack away your camera
even though it’s still exposing for the dark frame. Once you arrive home from your
journey it’s exciting to view the completed image for the first time.
Know Before You Go
Check The Moon Cycle
The moon will have a dramatic effect on our images. A full moon will cut exposure
times and make the sky appear more of a blue colour, almost like its daytime,
however it will also reduce the number of visible stars. The moon cycle along with the
moonrise & set times can easily be found for most locations on the Internet.
Check the Weather
Keep an eye on the weather forecast, clear skies will work well for star trails, however
don’t ignore a cloudy or partly cloudy nights. The conditions to avoid are mist, fog or
rain as the water droplets can settle on the lens surface during long exposures and are
almost impossible to detect in the dark.
Take a spare Torch
I often work in remote locations so I always carry a spare torch with me to find my
way back to the car, particularly as my main rechargeable torch often runs out of
power. I find a spare wind up torch works well as you are then not reliant on battery
power.
Charge Batteries
Long exposures can quickly drain camera batteries so make sure they are fully
charged and that you have a spare.
16. Light Pollution
Whilst light pollution can mean its harder to see as many stars it can also add some
much needed colour to a sky. Light pollution will have the most dramatic effect on a
sky when there is a new moon or the moon is yet to rise.
Step By Step
Step 1: Choose Your Composition
Arrive at your location whilst it’s still fairly light to help you easily compose your
images. When setting up your camera make sure that your tripod is on secure ground
and that it’s not going to move during the long exposure
Step 2: Shoot Raw
By shooting your images in the raw format you will be able to apply slight changes to
your images at the processing stage. Small adjustments to white balance, exposure
and noise can all be applied when converting the raw files.
Step 3: Set Up Your Camera
Attach your cable release, set your camera to bulb mode and select your aperture.
Finally focus the lens on your subject, once this is completed remember to switch to
manual focusing so that the lens doesn’t start to hunt once its dark.
Step 4: Take A Test Shot
Once its dark lock open the cameras shutter using your remote release and begin
illuminating your subject by flash or torch light. Remember to take a note of the total
exposure time and roughly the amount of light applied to your subject.
Step 5: Review Your Test Shot
Review your test shot and work out what areas need more or less light, getting the
correct exposure involves a little bit of trial and error. Once you have decided on what
exposure changes to make simply re-take the shot and keep reviewing the images
until you get a result you are happy with.
Star Trails
Star trail images are always eye catching, but just like photographing images in the
day we need to find a good subject and a good composition. Whilst pictures of a night
sky alone will result in good star trails if there is no subject matter to the image then
they will rarely work well. For stunning images try locating the North Star in your
composition, as the earth rotates the other stars will appear to spin around it.
Clear skies are essential for photographing star trails so avoid nights when there is a
chance or thick cloud blowing in during the long exposure.
Exposures for star trails can range from several minutes to several hours, the overall
exposure length will depend on the amount of motion you wish to capture. One of the
major problems with digital cameras during long exposures is there are power hungry,
with this in mind I normally limit my exposures to less than an hour unless I am using
a battery grip with the facility to hold more than one battery at a time.
17. When photographing restored windmills I recommend taking time with the composition and
timing. Keep an eye on the sails. I always avoid having the tail fan and the main sails cutting
into each other. If possible I like to photograph the mills at a 45° angle to show both the tail
fan and the main sails in the same image, it adds depth.
I shoot all my landscape work in manual mode using the spot metering facility and graduated
neutral density filters. I take a reading from a mid-tone on the ground and a reading from the
sky. Then I work out the exposure difference in stops between the two values and choose the
appropriate filter for the difference before setting the exposure value for the foreground
reading on the camera.
To reduce the risk of flare when shooting at sunrise, try not to shoot directly into the sun. A
simple solution is to hide the sun either behind the mill or a nearby tree. You can even break
up some of the sun’s power by using the mill’s sails. If you are not shooting the classic
silhouetted sunrise or sunset image pay close attention to exposure in the highlights.
The main sails and cap of many windmills are painted white, which can cause havoc with
burnt out areas. For this reason I normally tend to err on the side of caution and underexpose
by half a stop, along with checking the histogram after each shot. It’s also worth concentrating
on the sky coming through the veins of the main sails before you press the shutter button. If
there’s a white cloud behind the main sails, it’s amazing how quickly the sails can get lost,
blending in with the clouds, and the impact of the picture can really suffer as a result.
Reeds can make for some fantastic foreground interest when illuminated by low light, whether
you use a slow shutter speed to blur the movement of the wind or a faster shutter speed to
capture them static. This technique doesn’t have to be restricted to reeds it can also be
applied to crops.
When photographing golden reeds or other crops in your scene wait until the warm light is
illuminating them to really bring out the warm colours. Side lighting and front lighting works
well for this, just keep an eye on not only your shadow, but also that from your tripod and
camera.
In the spring and early summer there will be plenty of birds nesting amongst thick reed beds,
such as the magnificent marsh harrier. So if you are planning on using reeds as foreground
interest, be extra careful. Never venture into the thick reed beds, because you could disturb
the wildlife of these fragile environments.
If you get up early and you are lucky you may even be blessed with some wonderful morning
mist. Mist can transform the dull and ordinary into the extraordinary, that row of houses or that
horrible building in the background can suddenly become lost in a sea of low mist hovering
over a river or the land. So how can you increase your chances of being blessed with a
wonderful misty morning?
The best advice is to pay close attention to the weather forecast, look for high pressure with
cold clear nights and either no wind or virtually no wind. Mist often appears over rivers, lakes
and damp ground so it’s always worth visiting such locations to increase your chances of
success.
If you are hoping for mist don’t be put off if you arrive at your location and it hasn’t put in an
appearance. It appears from nowhere and disappears quickly, even well after the sun has
risen. If you know of a particular mill that has a nearby vantage point overlooking it, head
there if mist is forecast – even in flat Norfolk, there are still vantage points; they don’t have to
be hills.
Throughout the UK, there are lots of windmills, some lying derelict, some in good order, but
don’t ignore the derelict mills as they make for fantastic shots. Many of the same mills on the
Norfolk and Suffolk Broads are shot over and over again, simply because they are easy to get
to. Don’t be afraid to explore. Check out an Ordnance Survey map to see if there are any mills
near you and take a walk to them, you may find a real gem that other photographers have not
yet visited.
18. KIT BAG
For the majority of my work I shoot using a Canon EOS 5D and 17-40mm lens with a set of
Lee ND Grad filters. Although I use the 17-40mm on the 5D, I find I very rarely shoot at
anything under 28mm. I also carry a Canon EOS 30D with a 100-400mm lens attached so I
can look for detail shots in the landscape.
I always use my Gitzo tripod along with a hotshoe spirit level, a cable release and an angle
finder. Angle finders are excellent accessories for the landscape photographer as they block
out a lot of stray light and really allow you to concentrate on the composition carefully; they
also reduce the need for you to bend down as far to look through the viewfinder.
One disadvantage to shooting early in the morning, especially in summer, is dew. I always
wear waterproof trousers and boots in order to avoid getting wet and uncomfortable.
A sun position compass (see bluepondimages.com) and map are always worth
keeping on you as if the weather is poor you can explore new locations and plan to
return at a later date.
New 2010 One Day Workshop Dates
Workshop One: Norfolk Broads, Sunday 7h February 2010
Price = £65.00
Workshop Two: Norfolk Coast, Sunday 14th February 2010
Price = £65.00
Workshop Three: Painting With Light, Norfolk, Saturday 6th February 2010
Price = £50.00
Workshop Four: Suffolk, Sunday 28th March 2010
Price = £65.00
Workshop Five: Norfolk Coast & Broads, Sunday 28th February 2010
Price = £65.00
Spring & Summer One Day Workshops
Spring & Summer One Day workshops are similar to our standard one day workshops
however due to the time of year they generally last slightly less time, this is usually
five to six hours.
Workshop Six, Sunset On The North Norfolk Coast 2010 Dates to be added shortly
Price = £65.00
Workshop Eight, Sunset On The Norfolk Coast 2010 Dates to be added shortly
Price = £65.00
19. One To One Tuition
Half Day One To One Workshops include either a sunrise or sunset shoot and are aimed at
those photographers who want to shoot in the best available light and learn at a fast and
productive pace. They also mean the day is generally not as long, especially when combined
with travel both before and after the workshops. A Half day one to one workshop shoot lasts
approximately 3 - 4 hours, sometimes longer depending on the lighting conditions. Half day
workshops also include full notes and unlimited email support both before and after the
workshop.
The price for a days standard one to one tuition is £125.00