How to Build a Palapa
•
0 likes•499 views

http://howtobuildapalapa.com/how-to-build-a-palapa-2/
Report
Share
Report
Share
Download to read offline
Recommended
Recommended
More than Just Lines on a Map: Best Practices for U.S Bike Routes
This session highlights best practices and lessons learned for U.S. Bike Route System designation, as well as how and why these routes should be integrated into bicycle planning at the local and regional level.
Presenters:
Presenter: Kevin Luecke Toole Design Group
Co-Presenter: Virginia Sullivan Adventure Cycling AssociationMore than Just Lines on a Map: Best Practices for U.S Bike Routes
More than Just Lines on a Map: Best Practices for U.S Bike RoutesProject for Public Spaces & National Center for Biking and Walking
More Related Content
Featured
More than Just Lines on a Map: Best Practices for U.S Bike Routes
This session highlights best practices and lessons learned for U.S. Bike Route System designation, as well as how and why these routes should be integrated into bicycle planning at the local and regional level.
Presenters:
Presenter: Kevin Luecke Toole Design Group
Co-Presenter: Virginia Sullivan Adventure Cycling AssociationMore than Just Lines on a Map: Best Practices for U.S Bike Routes
More than Just Lines on a Map: Best Practices for U.S Bike RoutesProject for Public Spaces & National Center for Biking and Walking
Featured (20)
How to Prepare For a Successful Job Search for 2024
How to Prepare For a Successful Job Search for 2024
Social Media Marketing Trends 2024 // The Global Indie Insights
Social Media Marketing Trends 2024 // The Global Indie Insights
Trends In Paid Search: Navigating The Digital Landscape In 2024
Trends In Paid Search: Navigating The Digital Landscape In 2024
5 Public speaking tips from TED - Visualized summary
5 Public speaking tips from TED - Visualized summary
Google's Just Not That Into You: Understanding Core Updates & Search Intent
Google's Just Not That Into You: Understanding Core Updates & Search Intent
The six step guide to practical project management
The six step guide to practical project management
Beginners Guide to TikTok for Search - Rachel Pearson - We are Tilt __ Bright...
Beginners Guide to TikTok for Search - Rachel Pearson - We are Tilt __ Bright...
Unlocking the Power of ChatGPT and AI in Testing - A Real-World Look, present...
Unlocking the Power of ChatGPT and AI in Testing - A Real-World Look, present...
More than Just Lines on a Map: Best Practices for U.S Bike Routes
More than Just Lines on a Map: Best Practices for U.S Bike Routes
Ride the Storm: Navigating Through Unstable Periods / Katerina Rudko (Belka G...
Ride the Storm: Navigating Through Unstable Periods / Katerina Rudko (Belka G...
Good Stuff Happens in 1:1 Meetings: Why you need them and how to do them well
Good Stuff Happens in 1:1 Meetings: Why you need them and how to do them well
How to Build a Palapa
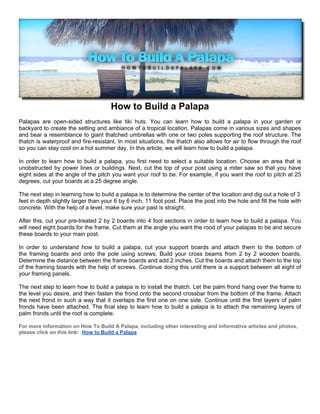
- 1. How to Build a Palapa Palapas are open-sided structures like tiki huts. You can learn how to build a palapa in your garden or backyard to create the setting and ambiance of a tropical location. Palapas come in various sizes and shapes and bear a resemblance to giant thatched umbrellas with one or two poles supporting the roof structure. The thatch is waterproof and fire-resistant. In most situations, the thatch also allows for air to flow through the roof so you can stay cool on a hot summer day. In this article, we will learn how to build a palapa. In order to learn how to build a palapa, you first need to select a suitable location. Choose an area that is unobstructed by power lines or buildings. Next, cut the top of your post using a miter saw so that you have eight sides at the angle of the pitch you want your roof to be. For example, if you want the roof to pitch at 25 degrees, cut your boards at a 25 degree angle. The next step in learning how to build a palapa is to determine the center of the location and dig out a hole of 3 feet in depth slightly larger than your 6 by 6 inch, 11 foot post. Place the post into the hole and fill the hole with concrete. With the help of a level, make sure your past is straight. After this, cut your pre-treated 2 by 2 boards into 4 foot sections in order to learn how to build a palapa. You will need eight boards for the frame. Cut them at the angle you want the rood of your palapas to be and secure these boards to your main post. In order to understand how to build a palapa, cut your support boards and attach them to the bottom of the framing boards and onto the pole using screws. Build your cross beams from 2 by 2 wooden boards. Determine the distance between the frame boards and add 2 inches. Cut the boards and attach them to the top of the framing boards with the help of screws. Continue doing this until there is a support between all eight of your framing panels. The next step to learn how to build a palapa is to install the thatch. Let the palm frond hang over the frame to the level you desire, and then fasten the frond onto the second crossbar from the bottom of the frame. Attach the next frond in such a way that it overlaps the first one on one side. Continue until the first layers of palm fronds have been attached. The final step to learn how to build a palapa is to attach the remaining layers of palm fronds until the roof is complete. For more information on How To Build A Palapa, including other interesting and informative articles and photos, please click on this link: How to Build a Palapa