1. Outdoor Shed Plans
Building a shed is a complex project, but it will definitely make your life easier and add value to your
property. In order to save money and to build the right shed for your needs, you could try to get the job
done by yourself. If you know the basic carpentry techniques, you can get the job done in just a few days
and save hundreds of dollars.
First of all you should start with the local building codes. Read them with great care, as they vary
extensively, as well as the legal requirements. If you live in a windy are or in a location exposed to heavy
snow, you have build sturdier foundation and frames. After getting yourself familiar with the building
codes, you should get the raw materials and the tools.
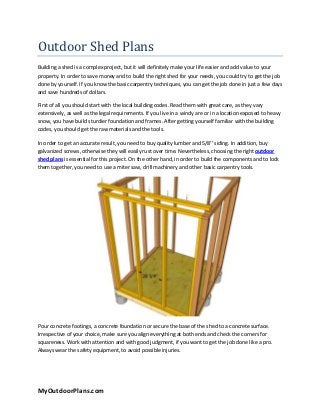
In order to get an accurate result, you need to buy quality lumber and 5/8’’ siding. In addition, buy
galvanized screws, otherwise they will easily rust over time. Nevertheless, choosing the right outdoor
shed plans is essential for this project. On the other hand, in order to build the components and to lock
them together, you need to use a miter saw, drill machinery and other basic carpentry tools.
Pour concrete footings, a concrete foundation or secure the base of the shed to a concrete surface.
Irrespective of your choice, make sure you align everything at both ends and check the corners for
squareness. Work with attention and with good judgment, if you want to get the job done like a pro.
Always wear the safety equipment, to avoid possible injuries.
MyOutdoorPlans.com
2. Build the frame of the shed from 2x6 lumber and lock the whole structure together with 3’’ stainless
steel screws. Drill pilot holes trough the rim joists, before inserting the screws, to prevent the wood
from splitting. Attach the ¾’’ plywood flooring and secure it to the joists with 2’’ nails, every 6’’.
Afterwards, build the frame of the walls, in the same manner described previously and place them on
the flooring. Use several braces to plumb the walls into place, before driving in the 3 ½’’ screws into the
joists. Use a spirit level to check if the walls are both plumb and the plates horizontal.
Once the frame is installed into place, we recommend you to build the trusses on the ground. Make sure
the gable roof will have a pitch of at least 30°, otherwise the water won’t be drained properly. Secure
the rafters together with ½’’ plywood gussets and 1 ¼’’ screws. Place the rafters into place and lock
them to the top plates with 3’’ wood screws (drive the screws at angle).
Next, attach the 5/8’’ siding to the frame and secure it into place with 1 ¼’’ screws, every 8’’ along the
studs. Use a good circular saw with a sharp blade to make the cuts, to prevent the edges from tearing. If
you want to get an exquisite appearance, you need to install interior walls (3/4’’ tongue and groove
plywood sheets). If you have used the right outdoor plans, you would get a professional result.
Last but not least, fit the roofing sheets into place and cover the whole surface with tar paper. In
addition, install the roofing shingles over the whole surface, starting with the bottom part of the roof.
Afterwards, fit the 1x4 trims into place, as to hide the edges and the joints. Fill the holes, sand the
wooden components along the wood grain and apply several coats of paint.
MyOutdoorPlans.com