vSphere Home Lab ReBuild part1 ESXi 5.1 Install
•Download as PPTX, PDF•
0 likes•2,846 views

I'm rebuilding my vsphere home lab from scratch. This is deck/video 1 - esxi 5.1 installation. See the whole video at my blog - http://wp.me/p2ngZY-4k

Recommended
Recommended
More Related Content
Recently uploaded
Recently uploaded (20)
Featured
Featured (20)
vSphere Home Lab ReBuild part1 ESXi 5.1 Install
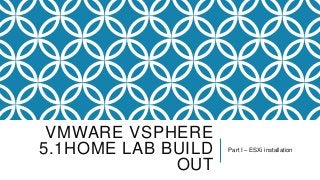
- 1. VMWARE VSPHERE 5.1HOME LAB BUILD Part I – ESXi installation OUT
- 2. OVERVIEW Differences between ESXi 4.x and 5.x installs ESXi Installation Options Best Practices for ESXi 5.1 Installation My Lab Hardware The Install Next Steps In my blog post @ http://wp.me/p2ngZY-4k is the video of the install.
- 3. INSTALLATION DIFFERENCES W/5.X Service Console is gone – instead we’ll be using vCLI and PowerCLI commands No boot disk required – local or shared No graphical installer New installs use GUID partition table which supports disks larger than 2TB
- 4. INSTALL OPTIONS ESXi can be installed using several methods: 1. Interactive – you sit at the server, boot the CD/DVD/USB/PXE installer, and press Enter a few times 2. Scripted – can use PXE to kick off a scripted, unattended installation 3. Auto Deploy – several options Stateless Provisioning – vCenter loads the ESXi image into host memory. Can use with host profiles but no ESXi state is stored on host disk. Stateful Provisioning – after initial provisioning by Auto Deploy, ESXi image and configuration is stored on host accessible disk. Subsequent boots load the local image and configuration. Stateless Caching – like Stateful except subsequent boots continue to use Auto Deploy except when Auto Deploy not available – then the host boots off local “cached” image and configuration.
- 5. BEST PRACTICES FOR ESXI 5.1 INSTALLATION There is a “Performance Best Practices for VMware vSphere 5.1” that I recommend reading. Pg. 17-37 are ESXi 5.1 specific. Also…. ESXi installation doc - “vSphere Installation and Setup – vSphere 5.1” “Recommendations for Enhanced ESXi Performance” pg. 31- 32 Ensure hardware is supported with the VMware Compatibility Guide Minimum of 2GB RAM – the installer will not proceed if less Place the management network and vm network on different physical NICs Even in a home lab if possible have at least 2 ports, preferably 4 (I’ll cover later)
- 6. MY LAB HARDWARE Switch 1 2Gb LAG Switch 2 My PC w/ Iomega HP MicroServer HP MicroServer Dedicated PC w/ iSCSI VMware AMD 2core/8GB AMD 2core/8GB VMware Workstation Workstation AMD 4core/8GB AMD 4core/8GB
- 7. INSTALL 1. Boot physical server to CD and run install Autoconfiguration Mode 2. Basic configuration to get “on net” Direct Console User Interface (DCUI) aka Direct Console ESXi Interface 3. Install client from new host 4. Mention next video – ESXi configuration
Editor's Notes
- This video covers installation of VMware ESXi 5.1 as part of my lab rebuild project.
- My Lab Hardware – quick review of that for contextThe Install – start the install itself
- It shouldn’t be any secret that the Service Console is gone. If you haven’t moved on yet this will be a bit of a surprise. No boot disk required – at allNo graphical installer – very basic infact
- I’ll be using Interactive to create the first as I do not have any infrastructure until I can get some VMs running. Once I have the pre-requisites running I’ll use Auto Deploy Stateless Provisioning with Host Profiles to install ESXi host #2.
- For a corporate type of environment, whether POC, lab or production there is actually a good bit of information to be aware of and I cannot underscore the need for planning and more planning prior to pushing the first button.
- Here’s the HW I have in my home lab. Nothing too fancy but definitely covers most basis. I use the physical HP servers as ESXi hosts and I can turn up virtual ESXi hosts on the pc dedicated to VMware Workstation. I do that for specific scenarios where I need more than 2 hosts. As I move forward with the installations and configurations in upcoming videos I’ll get into much detail.
- There’s actually a good amount of stuff to cover yet.