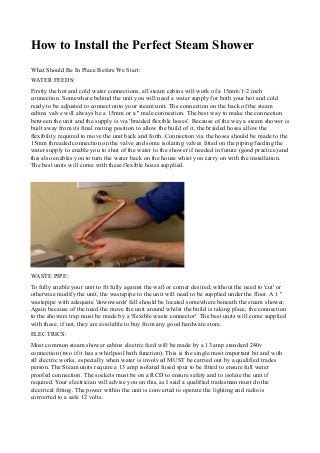
Firstly the hot and cold water connections, all steam cabins will work of a 15mm/1/2 inch
connection. Somewhere behind the unit you will need a water supply for both your hot and cold
ready to be adjusted to connect onto your steam unit.
1. How to Install the Perfect Steam Shower
What Should Be In Place Before We Start:
WATER FEEDS:
Firstly the hot and cold water connections, all steam cabins will work of a 15mm/1/2 inch
connection. Somewhere behind the unit you will need a water supply for both your hot and cold
ready to be adjusted to connect onto your steam unit. The connection on the back of the steam
cabins valve will always be a 15mm or a '' male connection. The best way to make the connection
between the unit and the supply is via 'braided flexible hoses'. Because of the way a steam shower is
built away from its final resting position to allow the build of it, the braided hoses allow the
flexibility required to move the unit back and forth. Connection via the hoses should be made to the
15mm threaded connection on the valve and some isolating valves fitted on the piping feeding the
water supply to enable you to shut of the water to the shower if needed in future (good practice) and
this also enables you to turn the water back on the house whist you carry on with the installation.
The best units will come with these flexible hoses supplied.
WASTE PIPE:
To fully enable your unit to fit fully against the wall or corner desired, without the need to 'cut' or
otherwise modify the unit, the wastepipe to the unit will need to be supplied under the floor. A 1 ''
wastepipe with adequate 'downwards' fall should be located somewhere beneath the steam shower.
Again because of the need the move the unit around whilst the build is taking place, the connection
to the showers trap must be made by a 'flexible waste connector'. The best units will come supplied
with these, if not, they are available to buy from any good hardware store.
ELECTRICS:
Most common steam shower cabins electric feed will be made by a 13 amp standard 240v
connection (two if it has a whirlpool bath function). This is the single most important bit and with
all electric works, especially when water is involved MUST be carried out by a qualified trades
person. The Steam units require a 13 amp isolated fused spur to be fitted to ensure full water
proofed connection. The sockets must be on a RCD to ensure safety and to isolate the unit if
required. Your electrician will advise you on this, as I said a qualified tradesman must do the
electrical fitting. The power within the unit is converted to operate the lighting and radio is
converted to a safe 12 volts.
2. Building The Unit:
RULES YOU MUST NEVER FORGET!
1. PTFE, which stands for Poly Tetra Fluoro Ethylene or as a plumber calls it Plumbers Tape For
Everything. Should be used on every 15mm/ '' connection.
2. Don't screw up and screws tight until the end. This allow the panels and glass to move and twist
into position as you go.
3. Check every component before you start
4. Do you need a PEV? Pressure Equalising Valve? Thisonly protects the life and functionality of
any shower valve but also helps ensure constant temperatures.
5. If it's possible to fill the tub or tray with water before you start to check of cracks of leaks, do so.
6. After the installation is complete, leave the unit 24 hours to let the any silicone to fully set before
use
BASE/TUB:
Ones everything is in place and you're ready to go, spanner in hand, the first obstacle you'll face is
the tray or tub base to the shower itself. First port of call is to fully connect and ensure the
watertight connection of the trays trap and waster pipe. Ensure all rubber gaskets and fittings are
tight and well fitted, it might be an idea to our some water into the trap or fill the tub to ensure
there's no drips at this stage as it's easier to access. Second, is to fully level the tray or tub via the
adjustable legs. Check, check and check again, having the tub fully level is essential to the rest of
the build to not only ensure its stands straight and upright, but also to ensures all connections are
made whilst the individual components are without any gaps and are 'sitting' as they should be.
WALL AND CONTROLL PANEL:
This is when you'll need two people. First look over every panel and the back of the control panel
and tighten up and connections to the valve, water jets and anything that you can see, as many are
only hand tight for transport purposes and will not initially be water tight. First thing you will need
to do is place the 'back panels' onto the tub and all but tighten up there connections to the base, don't
tighten these fully yet, leave them with the fixings to hold them in place but slack enough to allow
them have some maneuverability. Then place in the control panel, the best steam shower units will
have either a rubber or plastic strip running along the lengths of where the panels meet to ensure a
waterproof fitting, Otherwise it would be more than wise to run a small bead of silicon down the
lengths, it's better to use too much silicon than too little as any excess can simply be wiped off.
DOOR FRAME AND GLASS:
With your shower now looking something like a shower. The next thing to tackle is the framework
for the glass doors. The best way of doing this is to build this up separate from the shower itself and
lift it into position on its completion. The connection screws for the framework is notoriously tricky
to put together so first ensure you have enough space around you to fully manipulate and move the
framework around. Starting at the bottom up, first attach the two sides to the base piece, and then
the top framework. Then install any 'fixed glasses' and support/holding pieces into the framework.
Once this is done, lift the framework onto the shower tray or tub, again using silicone if necessary
tighten up the connection between the framework and panels. REMEMEBER nothing should yet be
screwed up tight to allow all pieces to fully fall into place throughout fitting.
3. ROOF:
The Roof is usual the home to all the main functions and features that come with a steam shower.
Carefully lifting the roof onto the shower, ensure all holes 'marry up' as they should. (it not as
important to silicone between the roof and panels that it sites on, as this should be at a level where
volumes of water shouldn't be getting to)
CONNECTIONS:
Now it's probably the best time to fix any shelves, riser rails and any other components that come
with the shower to the unit itself and to fully tighten up all the screws and fixings on the shower that
have been left, check before doing this that every panel and piece fully stand and fit as they should.
Also it's a good time now to connect the electrics to the supply and connect all the connections to
the fan, speakers or any other connections that need to be in place. It's also possible now to connect
the hot and cold water via the braided hoses. All connection should be straight forward and labeled
to match each other. The steam generator will most communally have three connections to it 1st the
water supply, which is most communally located in the middle and feeds from the shower valve or
directly from the cold water feed. 2nd the steam outlet, which is positioned the highest of the three
and feeds to the steam outlet on the unit and finally the 3rd which is the water drainage, this will in
most cases fit to the waste via a pipe that's attached to it on a spigot.
DOORS:
Hopefully if I haven't missed anything out the last thing you should be left with is the doors to the
unit. Before you fit theses it's a good idea, as with any shower enclosure, to run a small bead of
silicone along the lengths of the panels and tray/tub to ensure a waterproof fitting. This is not
always necessary but does greatly add the water integrity of the unit, Then depending on the quality
of the unit spend a couple of minutes looking for any gaps of weak points on the frame work where
any water may penetrate. Finally the doors, using the door cams provided simply fit these to the
frameworks 'runners' adjusting them to fit and slid straight via the adjustable cams.
THE FINAL CHECK:
First run though all the functions both electric and water, checking on top, behind and below for any
leaks, drips or any sign of anything out of place, BE THOUROGH!! After this is all OK which it
will be if you have followed this guide, it's time for the final check, put the valve onto the shower
head and spray away! Methodically spray the corners then up and down the connected lengths,
move to the next, along the bottoms and in turn spray everywhere, with one person spraying and
another behind the unit to check for complete water integrity before sliding the shower happily back
into its final resting place.
That's it, you're done. Relax.
4. Hopefully along with this guide and a little thinking from yourself your shower is now perfectly
installed and ready to use. A steam shower is a fantastic luxury item that is absolutely fantastic place
to relax and unwind, and when installed correctly is a lifelong, endurable feature for your bathroom.
Article written by Andrew Ellis from http://steamshowerstore.co.uk/products/steam-showers