SlideShare a Scribd company logo
1 of 41
Download to read offline
AUGUST 2014 (Revised)
A PRINCIPLED TECHNOLOGIES TEST REPORT
Commissioned by Dell Inc.
SIMPLIFYING SYSTEMS MANAGEMENT WITH DELL OPENMANAGE ON
13G DELL POWEREDGE SERVERS
A new generation of servers doesn’t just provide new hardware to increase
performance. New servers also deliver updated systems management features to help
you streamline management tasks and reduce management costs.
In the Principled Technologies test labs, we tested the systems management
enhancements in the new, 13th
generation of Dell servers along with the newest
versions of the Dell OpenManage suite, to see the time and steps that we could save by
using the newer technologies.
We found that the new 13G Dell PowerEdge servers with OpenManage enabled
easier deployment than the previous generation, using new Auto Configuration and
OpenManage Essentials (OME) one-to-many features. We also explored multiple
enhanced connectivity methods to the 13G integrated Dell Remote Access Controller
(iDRAC) 8. Finally, we tested scenarios using the new version of OpenManage suite with
13G, which we found provided features that make updating easier.
With all these new features, Dell OpenManage with Dell 13G servers can help
ease your datacenter’s management burden, no matter the size of your infrastructure.
A Principled Technologies test report 2Simplifying systems management with Dell OpenManage on
13G Dell PowerEdge servers
DELL OPENMANAGE SUITE AND DELL 13G
Dell OpenManage is a systems management suite designed to help IT
departments of all sizes manage their Dell PowerEdge server infrastructures. Without
automating management tasks, administrators must perform these tasks manually,
including node deployment, error correction, and updates. The Dell OpenManage suite
automates many processes, freeing up IT time for more strategic tasks. Using integrated
systems management can improve the overall function of your infrastructure by
allowing administrators to more quickly solve any problems that arise in the datacenter.
With the introduction of 13G Dell PowerEdge servers, Dell has added a number
of features to Dell OpenManage systems management to save administrator time and
increase management flexibility (see Figure 1).
New systems management features in the Dell OpenManage Suite and iDRAC8 for 13G servers
Faster
Deployment
“Zero-Touch” Auto Configuration
Deploy a baseline server configuration profile automatically as
soon as the server is connected to the network.
Open Manage Essentials (OME)
One-to-many deployment
Perform automated hardware configuration and Operating
System deployment to multiple servers through centralized
management.
Improved
Connectivity
iDRAC Direct (cable)
Connect directly to the iDRAC using a front side USB
connection, without the need for a dedicated management
network
iDRAC Direct (key)
Rapidly deploy custom server profiles using plug and play
technology.
Quick Sync (NFC)
Quickly inventory and modify server configurations using
smartphone and tablets.
Automated
Maintenance
Tech Support Report
Gather complete, advanced diagnostic information from a
single location.
OME Managing Configuration
Baseline
Manage your server configurations from a centralized location,
without having to take a single server offline for inventory.
Easier
updating
Zero Touch Repository Manager
and Self-updating firmware
system
Build self-maintaining repositories and configure servers to
automatically update to new versions of software on your own
schedule.
OME Agent-free driver update
Deploy firmware and driver updates from the OME console
without manage software on your servers.
Figure 1: New features in Dell OpenManage.
To learn more about our test components, see Appendix A. For a detailed look
at the system we used for testing, see Appendix B. For step-by-step details on how we
tested, see Appendix C.
A Principled Technologies test report 3Simplifying systems management with Dell OpenManage on
13G Dell PowerEdge servers
WHAT WE FOUND
We investigated the new features of the Dell OpenManage Suite and the Dell
13G line on a new Dell PowerEdge R730 server to see how they simplified management
tasks compared to doing them manually. These features fit into four categories:
 Deployment
 Connectivity
 Maintenance
 Updating
We found that the new features simplified all these tasks, saving administrator
time and steps, as shown in Figure 2 shows.
Scenario
Automation Manual Difference
Time (s) Steps Time (s) Steps Less time (s) % Less time Fewer steps
Zero-Touch Auto Configuration 0 0 859 213 859 100% 213
OME One-to-Many Auto
Deployment (100 servers -
extrapolated)
95 23 125,400 22,200 125,305 99.92% 22,177
One server 95 23 1,254 222 1,159 92% 199
iDRAC Direct (cable) 76 12 181 27 105 58% 15
iDRAC Direct (USB key) 28 4 859 213 831 97% 209
Quick Sync with OM Mobile App 156 36 508 43 352 69% 7
Quick Sync Read 39 12 248 18 209 84% 6
Quick Sync Write 117 24 260 25 143 55% 1
Tech Support Report 123 11 455 29 332 73% 18
OME Configuration
Management (100 servers -
extrapolated) 50 5 57,300 7,400 57,250 99.91% 7,395
One server 50 5 573 74 523 91% 69
Zero Touch Repository
Management and Auto-Update
Firmware
0 0 306 20 306 100% 20
Figure 2: Summary of our test results.
New features for deployment
“Zero-Touch” Auto Configuration
Configuring new servers can be a time-consuming task, especially when IT staff
has a number of servers to deploy, apply changes to, and get into production. Dell 13G
servers can use “Zero-Touch” Auto Configuration, which automates the server profile
application. With Auto Configuration, when a server is powered on and the iDRAC is
connected and configured for DHCP (a factory option), the iDRAC obtains configuration
profile information from the pre-configured DHCP server and automatically applies the
A Principled Technologies test report 4Simplifying systems management with Dell OpenManage on
13G Dell PowerEdge servers
correct hardware settings, which reduces deployment time and eliminates potential
user error.
In our hands-on tests, we used Auto Configuration to configure a Dell
PowerEdge R730 server using a Server Configuration Profile, and then applied the same
changes manually. As Figure 3 shows, using Dell Auto Configuration required no steps or
time for administrators to configure a server with an automatically deployed server
profile, while it took 213 steps and 14 minutes 19 seconds to do the same configuration
tasks manually. If your organization is deploying one hundred servers at a time, Auto
Configuration could save nearly three days of administrative time and eliminate 21,300
steps and potential human error. Administrators could use the time they save
configuring servers to maintain and innovate elsewhere.
Figure 3: It took 213 fewer
steps to configure a new
server using Dell OpenManage
with Zero-Touch auto-
configuration than doing it
manually.
Dell OpenManage Essentials one-to-many deployment
Speeding up deployment server-by-server would certainly increase datacenter
efficiency, but what if administrators could reduce the time it took to deploy
organization-approved configurations and operating systems to whole racks at a time?
With OpenManage Essentials one-to-many deployment, we were able to deploy
configuration profiles and operating systems to a Dell PowerEdge R730 server in just 95
seconds, using just 23 steps. Doing the same task on an older Dell server with a Lifecycle
Controller-guided deployment process was a much lengthier process.
Figure 4 compares the number of steps it took to configure basic hardware
information, including iDRAC IP, RAID, NIC, and more, and install and boot the Windows
Server 2012 R2 operating system.
A Principled Technologies test report 5Simplifying systems management with Dell OpenManage on
13G Dell PowerEdge servers
Figure 4: Configuring a single
server using Dell OME one-to-
many deployment took 199
fewer steps than the previous-
generation solution.
As Figure 5 shows, it took only 1 minute 35 seconds—92 percent less time to
deploy the configuration to a single server using Dell OME one-to-many deployment
compared to the previous-generation guided deployment.
Figure 5: Configuring a single
server using Dell OME one-to-
many deployment took 92
percent less time than the
previous-generation solution.
The real benefit of Dell OME one-to-many deployment (see Figure 6) becomes
clear when extrapolated to a large number of servers, which many infrastructures
require. For example, deploying a configuration profile and operating system to 100
servers would save up to 22,177 repetitive administrative steps, and nearly 35 hours of
administrative time, while guaranteeing consistency and eliminating human error from
the deployment process.
A Principled Technologies test report 6Simplifying systems management with Dell OpenManage on
13G Dell PowerEdge servers
Figure 6: Dell OpenManage
Essentials enables automatic
deployment of both server
hardware profiles and
operating systems to multiple
targets simultaneously.
New features for connectivity
Some administrators still prefer to manage their servers while directly
connected to their hardware. When something is wrong with a configuration or you
need to make a quick change with minimal disruption to service, it is important that you
can connect as quickly as possible. Dell OpenManage on Dell 13G servers provides
features that let you connect directly to integrated Dell Remote Access Controller
(iDRAC) and manage systems in a number of ways. With multiple paths to connect to
the embedded management system, including iDRAC Direct (cable), iDRAC Direct (key),
and Quick Sync (NFC), we found that administrators could save both steps and time to
connect.
iDRAC Direct (cable)
We found that iDRAC Direct could eliminate the need for cumbersome “crash
carts” and reduced the number of steps and time it took to make changes to a server
configuration compared to the legacy method using KVM and manual setup (see Figures
7 and 8). Using the legacy method required connecting KVM hardware to the server,
rebooting, and manually entering system setup at the boot screen. This procedure also
takes the system out of service, which affects customers. With iDRAC Direct, the
management network was immediately accessible; we simply had to plug in a USB cable
and open a browser to directly connect to the iDRAC, where we were able to make array
configuration changes.
A Principled Technologies test report 7Simplifying systems management with Dell OpenManage on
13G Dell PowerEdge servers
Figure 7: Making configuration
changes using iDRAC Direct
(cable) required 15 fewer
steps than using KVM and
manual setup.
Figure 8: Changing the server
configuration using iDRAC
Direct (cable) required 58
percent less time than
connecting using KVM and
manual setup.
iDRAC Direct (key)
When you need to repurpose a server, it can be time consuming to reconfigure
the server for optimal performance in its new role. Using iDRAC Direct (key), we were
able to redeploy a server with a new hardware profile, without a time-consuming,
manual process. We found that iDRAC Direct could detect a server profile stored on a
USB key, and deploy the profile to the server in just four steps requiring only 28 seconds
of an administrator’s time – that’s 209 fewer steps and 97 percent less time than
manually reconfiguring a server. (See Figures 9 and 10.)
A Principled Technologies test report 8Simplifying systems management with Dell OpenManage on
13G Dell PowerEdge servers
Figure 9: Connecting to iDRAC
at the box using iDRAC Direct
(key) required 209 fewer steps
than deploying a server profile
using KVM and manual setup.
Figure 10: Connecting to
iDRAC at the box using iDRAC
Direct (key) required 97
percent less time than
deploying a server profile
using KVM and manual setup.
To prevent subsequent configuration changes on your server, you can configure
the iDRAC to disable USB key deployment once the configuration is complete, and to
prevent unauthorized reconfiguration without factory credentials. These safeguards
prevent a new configuration from being written to a production server.
Quick Sync
As smartphones and tablets increasingly become tools of the trade for system
administrators, the ability to manage systems from these devices can be a real
advantage to admins who favor the portability of the smaller smart devices.
A Principled Technologies test report 9Simplifying systems management with Dell OpenManage on
13G Dell PowerEdge servers
The 13G Dell PowerEdge servers contain, as part of their front bezels, a Near
Field Communications (NFC) device. We installed the Dell OpenManage Mobile app on
an NFC-enabled Android™ tablet, and used that device to perform basic inventory,
health check, and system configuration tasks, which Figure 11 shows. Each time a
system is synchronized, the configuration remains cached for later use, so
administrators can quickly inventory an entire rack or row of servers, and then distill or
manipulate the data once they return to their desks.
Figure 11: Dell OpenManage
Mobile enables administrators
to use NFC-enabled devices to
manage the servers in their
datacenters.
We found that Quick Sync was able to reduce manual inventory and iDRAC
configuration times by a combined 69 percent (see Figure 12), saving seven steps per
server compared to manual methods for previous-generation servers. We found that
with Dell OpenManage and the 13G Dell PowerEdge R730, we were able to complete
faster inventory and hardware identification. QuickSync from our NFC-enabled tablet
provided easier navigation than using the on-system LCD panel and accompanying front
panel buttons.
A Principled Technologies test report 10Simplifying systems management with Dell OpenManage on
13G Dell PowerEdge servers
Figure 12: Completing
inventory and basic
configuration using Quick Sync
required 69 percent less time
than manually inventorying
the system and using the LCD
screen for basic iDRAC setup.
New features to improve maintenance
Dell OpenManage also introduces new maintenance and problem-solving
features for 13G server. The quicker your administrators can solve problems, the higher
the availability of your infrastructure so that business can keep moving.
Tech Support Report
Simplifying support calls is a great way to reduce administrative effort while
ensuring that problems are handle more efficiently to keep your workloads running. We
found that in 13G servers with iDRAC8, we could generate a complete Tech Support
Report (TSR) that included Operating System diagnostic information. The iDRAC 8
leverages the Dell iDRAC Service Module, a lightweight software component that installs
in a host operating system, to obtain diagnostic data from the OS. It is no longer
necessary to execute a separate data collection program within the operating system
when trying to troubleshoot issues – the single iDRAC-generated TSR already contains
that information.
We found that this simplified information gathering mechanism required 73
percent less time than a process where Dell Server E-support Tool or DSET is
downloaded and executed on the host operating system (see Figure 13). The 13G
version of the TSR simplifies support calls by reducing the variety of data that has to be
collected.
A Principled Technologies test report 11Simplifying systems management with Dell OpenManage on
13G Dell PowerEdge servers
Figure 13: iDRAC8 with Tech
Support Report reduced the
time it took to gather
diagnostic data by 73 percent.
OME Managing Configuration Baseline
A major advantage of using server profiles is the ability to consistently configure
servers for optimal performance in their intended role. Sometimes, in the course of
ongoing operations, changes are made to server configurations. These changes may
gradually introduce inconsistencies that degrade performance or affect IT standards.
Manually inventorying a server to validate its configuration means taking the server out
of operation, and deploying a configuration profile to servers that are already in use
may have unforeseen consequences. With Dell OpenManage Essentials (OME), an
administrator can create baseline configurations that contain all the settings a particular
group of servers should use, and then associate servers with those configurations, as
Figure 14 shows. OME can then perform regular, non-disruptive inventory on its
managed servers, and allow administrators to easily find servers that have configuration
drift and determine whether mitigation is necessary.
A Principled Technologies test report 12Simplifying systems management with Dell OpenManage on
13G Dell PowerEdge servers
Figure 14: Dell OME allows
administrators to assign
servers to configuration
templates to quickly monitor
compliance.
In our tests, we determined OME configuration baseline management reduced
administrative effort by 69 steps (see Figure 15), and required 91 percent less time than
manually inventorying a single server. Because multiple servers can be applied to a
given baseline, administrators can quickly determine which and how many servers
deviate from a preferred profile. For example, OME can determine baseline
configuration drift for 100 servers in the same number of steps and time required for a
single server. This results in 7,395 fewer steps, and 99.91 percent less time than
performing the same checks using manual methods for 100 servers. That’s a savings of
15 hours, 54 minutes, 10 seconds administrator time that could be spent doing high-
value work.
A Principled Technologies test report 13Simplifying systems management with Dell OpenManage on
13G Dell PowerEdge servers
Figure 15: Dell OME reduced
manual steps to manage
configuration baseline to a
Dell PowerEdge R730 server
by 69 steps.
New features to simplify updating
A major, time consuming responsibility administrators handle is ongoing
updates of both firmware and drivers for their supported systems. The Dell
OpenManage suite provides enhanced automation features specifically for dealing with
these tasks. This frees up administrators so they can execute higher-value efforts in the
datacenter.
Auto-Updating Firmware
To minimize impact to customers, pre-planned maintenance windows generally
occur at times of off-peak usage, typically during the late night and early morning hours.
This means administrators must either extend their working hours or shift their
schedules, creating the possibility of support issues due to resource availability during
higher activity periods.
13G Dell PowerEdge servers with iDRAC 8 have the ability to auto-update their
firmware, allowing administrators to define network-based repositories as the sources
of the updates and configure updates to occur during a specified period of time, without
direct interaction (see Figure 16). When coupled with the Zero-Touch Repository
Management features of Dell Repository Manager, the ability to perform updates
automatically during off hours means an administrator can pre-stage maintenance
activities during normal business hours. This allows administrators to tightly manage the
types of updates a server will execute and remain available during peak times to address
customer issues – all while reducing the server administration burden on the staff.
A Principled Technologies test report 14Simplifying systems management with Dell OpenManage on
13G Dell PowerEdge servers
Figure 16: Dell 13G iDRAC 8
gives administrators the
flexibility to schedule
automated updates to fit their
organization’s needs.
In our tests, using Auto-Updating with Zero-Touch Repository manager saved 20
repetitive steps and 5 minutes, 6 seconds per server (see Figure 17). In organizations
with multiple servers, this can be a substantial reduction in administrative effort.
Updating just 10 servers manually during an over-night maintenance window would
require a full hour of administrator time. Updating 100 servers would mean spanning
multiple maintenance windows, and operating for at least one business day with some
servers on one firmware revision, and some servers with another – a situation ripe for
inconsistencies that could affect performance.
A Principled Technologies test report 15Simplifying systems management with Dell OpenManage on
13G Dell PowerEdge servers
Figure 17: Updating firmware
using automatic updating
reduced administrative effort
by 5 minutes 6 seconds per
server compared to manual
methods.
Agent-free OME driver updates
Dell OpenManage Essentials (see Figure 18) now has the ability to do agent-free
inventory and firmware and driver updates on managed systems. By using this feature
of Dell OME, an administrator doesn’t have to worry about having agents or
management applications installed on the host OS, which means less software to
maintain.
Figure 18: OpenManage
Essentials can perform
centrally managed, agentless
driver and firmware updates
to managed systems.
A Principled Technologies test report 16Simplifying systems management with Dell OpenManage on
13G Dell PowerEdge servers
Zero-Touch Repository Management
Dell Repository Manager allows administrators to define custom repositories
containing drivers and firmware updates. Many organizations have a vigorous vetting
process to ensure that new firmware or drivers don’t introduce unforeseen changes into
their environment that can affect production servers.
With the latest versions of Dell Repository Manager, an administrator can create
repositories that automatically update their contents when updates are available. This
means the administrator always has the latest revisions available for testing, and can
release those updates based on their organization’s pre-planned maintenance cycle.
(See Figure 19.)
Figure 19: Dell Repository
Manager allows
administrators to establish
automatically updated
repositories.
CONCLUSION
Automated systems management and additional connectivity solutions can
reduce the number of administrators you need to run your datacenter or simply free up
administrators to innovate rather than tying them up with routine management tasks.
We found that the Dell OpenManage suite provides several new features for 13G Dell
PowerEdge server solutions to streamline management tasks in both time and steps.
Other new features let us easily connect to iDRAC right from the server. Updating
firmware with Dell OpenManage features was also easier—eliminating 213 steps for
updating a single server compared to updating manually.
The latest versions of the Dell OpenManage suite of system management tools
and the power of iDRAC 8 contained within Dell 13G servers gives administrators
A Principled Technologies test report 17Simplifying systems management with Dell OpenManage on
13G Dell PowerEdge servers
increased flexibility and powerful new options for managing their data centers that
translate to demonstrable savings in time and administrative effort. These automated
enhancements and new technologies enable administrators to manage increasingly
larger workloads while reducing the amount of hands-on work required for each system,
bringing real value to systems management and datacenter operations.
A Principled Technologies test report 18Simplifying systems management with Dell OpenManage on
13G Dell PowerEdge servers
APPENDIX A – ABOUT THE COMPONENTS
About the Dell PowerEdge R730
The 2U Dell PowerEdge R730 rack server is powered by two Intel Xeon Haswell processors and is designed for
functional flexibility in the datacenter. The PowerEdge R730 has 24 DIMM slots to support up to 1.5 TB of memory,
supports up to two optional internal GPU processing accelerators, and can support up to four optional NVMe Express
Flash PCIe SSDs to reduce storage bottlenecks.
With redundant power supply units, hot-swappable hardware, and Dual SD card for Failsafe Hypervisors, the
Dell PowerEdge R730 supports hardware high availability. The PowerEdge R730 comes standard with iDRAC7 with
Lifecycle Controller and Dell OpenManage, which all work to streamline management. For more information on Dell
Solutions, including the Dell PowerEdge R730, visit http://dell.to/enterprise.
A Principled Technologies test report 19Simplifying systems management with Dell OpenManage on
13G Dell PowerEdge servers
APPENDIX B – SYSTEM CONFIGURATION INFORMATION
Figure 20 provides detailed configuration information for the test system.
System Dell PowerEdge R730
Platform
Vendor and model number Dell PowerEdge R730
BIOS name and version 1.0.2
General
Number of processor packages 2
Number of cores per processor 12
Number of hardware threads per
core
2
CPU
Vendor Intel
Name Xeon
Model number E5-2690 v3
Socket type Socket 2011-3 / R3 / LGA2011-3
Core frequency (GHz) 2.6
Bus frequency 5 GT/s DMI
L1 cache 12 x 32 KB
L2 cache 12 x 256 KB
L3 cache 30 MB
Memory module(s)
Total RAM in system (GB) 16
Vendor and model number
Hynix Semiconductor
HMA41GR7MFR8N-TF
Type DDR4
Speed (MHz) 2,133
Speed running in the system (MHz) 2,133
Size (GB) 8
Number of RAM module(s) 2
Chip organization Dual-sided
Rank Dual
Operating system
Name Microsoft Windows Server 2012 R2, Datacenter x64 Edition
Build number Version 6.3 (Build 9600) (x64)
File system NTSF
Language English
RAID controller
Vendor and model number Dell PERC H730P Mini
Firmware version 25.2.1.0037
Driver version 6.602.07.00
Cache size (MB) 2,048
A Principled Technologies test report 20Simplifying systems management with Dell OpenManage on
13G Dell PowerEdge servers
System Dell PowerEdge R730
Hard drives
Vendor and model number Seagate ST300MM0006
Number of drives 5
Size (GB) 278.88
RPM 10,000
Type SAS
Power supplies
Total number 2
Vendor and model number Dell 0G6W6KX02
Wattage of each (W) 750
Cooling fans
Total number 6
Ethernet adapters
Vendor and model number Intel 2P X520/2P I350 rNDC
Figure 20: System configuration information for the test system.
A Principled Technologies test report 21Simplifying systems management with Dell OpenManage on
13G Dell PowerEdge servers
APPENDIX C – HOW WE TESTED
New features for deployment
Deploying a server with configured profile
Zero-Touch Auto Configuration
This task required no repetitive steps.
Deploying a Manual Configuration
1. Open a Web browser from within the management network and navigate to the iDRAC IP address
(192.168.1.101).
2. Log in with the iDRAC’s username and password (Username: root; Password: calvin).
3. Look at the Virtual Console Preview to see if the server is powered on. If there is no image, power on the server
using the task under Quick Launch Tasks.
4. Select Alerts from the vertical navigation bar.
5. Select the SNMP and Email Settings tab from the horizontal navigation bar.
6. Check the State radio box for Alert Destination1 and type the destination IP address (192.168.1.50).
7. Verify that the Community String field is set to public.
8. Click Apply.
9. Change SNMP Trap Format to SNMP v2.
10. Click Apply.
11. Check the first State radio box for Destination Email Address and type the destination email address for Email
Alert 1 (adminpager@principledtechnologies.com).
12. Click Apply.
13. In the SMTP (Email) Server IP Address or FQDN / DNS Name field, type the fully qualified domain name for the
email server (mailer.principledtechnologies.com).
14. Click Apply.
15. Select the Alerts tab from the horizontal navigation bar.
16. Change Alerts to Enabled.
17. Click Apply.
18. Under Email, check the Amperage, Auto Sys Reset, and Battery Event critical alerts. Uncheck any non-critical
alerts in this category.
19. Check the topmost radio box for SNMP Trap to check all radio boxes.
20. Check the topmost radio box for IPMI Alert to check all radio boxes.
21. Check the topmost radio box for Remote System Log to check all radio boxes.
22. Check the topmost radio box for WS Eventing to check all radio boxes.
23. Check the topmost radio box for OS Log to check all radio boxes.
24. Click the right arrow to navigate to the next page.
25. Under Email, check the Processor, Proc Absent, and Fan Event critical alerts. Uncheck any non-critical alerts in
this category.
26. Check the topmost radio box for SNMP Trap to check all radio boxes.
27. Check the topmost radio box for IPMI Alert to check all radio boxes.
28. Check the topmost radio box for Remote System Log to check all radio boxes.
29. Check the topmost radio box for WS Eventing to check all radio boxes.
30. Check the topmost radio box for OS Log to check all radio boxes.
31. Click the right arrow to navigate to the next page.
32. Under Email, check the Hardware Config and Memory critical alerts. Uncheck any non-critical alerts in this
category.
33. Check the topmost radio box for SNMP Trap to check all radio boxes.
A Principled Technologies test report 22Simplifying systems management with Dell OpenManage on
13G Dell PowerEdge servers
34. Check the topmost radio box for Remote System Log to check all radio boxes.
35. Check the topmost radio box for WS Eventing to check all radio boxes.
36. Check the topmost radio box for OS Log to check all radio boxes.
37. Click the right arrow to navigate to the next page.
38. Under Email, check the OS Event, PCI Device, and Physical Disk critical alerts. Uncheck any non-critical alerts in
this category.
39. Check the topmost radio box for SNMP Trap to check all radio boxes.
40. Check the topmost radio box for IPMI Alert to check all radio boxes.
41. Check the topmost radio box for Remote System Log to check all radio boxes.
42. Check the topmost radio box for WS Eventing to check all radio boxes.
43. Check the topmost radio box for OS Log to check all radio boxes.
44. Click the right arrow to navigate to the next page.
45. Under Email, check the BIOS POST, Power Supply, PSU Absent, and Power Usage critical alerts. Uncheck any non-
critical alerts in this category.
46. Check the topmost radio box for SNMP Trap to check all radio boxes.
47. Check the topmost radio box for IPMI Alert to check all radio boxes.
48. Check the topmost radio box for Remote System Log to check all radio boxes.
49. Check the topmost radio box for WS Eventing to check all radio boxes.
50. Check the topmost radio box for OS Log to check all radio boxes.
51. Click the right arrow to navigate to the next page.
52. Under Email, check the critical alerts for Redundancy, IDSDM Media, and IDSDM Absent. Uncheck any non-
critical alerts in this category.
53. Check the topmost radio box for SNMP Trap to check all radio boxes.
54. Check the topmost radio box for IPMI Alert to check all radio boxes.
55. Check the topmost radio box for Remote System Log to check all radio boxes.
56. Check the topmost radio box for WS Eventing to check all radio boxes.
57. Check the topmost radio box for OS Log to check all radio boxes.
58. Click the right arrow to navigate to the next page.
59. Under Email, check the IDSDM Redundancy, Security Event, and Sys Event Log critical alerts. Uncheck any non-
critical alerts in this category.
60. Check the topmost radio box for SNMP Trap to check all radio boxes.
61. Check the topmost radio box for IPMI Alert to check all radio boxes.
62. Check the topmost radio box for Remote System Log to check all radio boxes.
63. Check the topmost radio box for WS Eventing to check all radio boxes.
64. Check the topmost radio box for OS Log to check all radio boxes.
65. Click the right arrow to navigate to the next page.
66. Under Email, check the Software Config, Temperature, and Temperature Statistics critical alerts. Uncheck any
non-critical alerts in this category.
67. Check the topmost radio box for SNMP Trap to check all radio boxes.
68. Check the topmost radio box for IPMI Alert to check all radio boxes.
69. Check the topmost radio box for Remote System Log to check all radio boxes.
70. Check the topmost radio box for WS Eventing to check all radio boxes.
71. Check the topmost radio box for OS Log to check all radio boxes.
72. Click the right arrow to navigate to the next page.
73. Under Email, check the vFlash Event and Voltage critical alerts. Uncheck any non-critical alerts in this category.
74. Check the topmost radio box for SNMP Trap to check all radio boxes.
75. Check the topmost radio box for IPMI Alert to check all radio boxes.
76. Check the topmost radio box for Remote System Log to check all radio boxes.
A Principled Technologies test report 23Simplifying systems management with Dell OpenManage on
13G Dell PowerEdge servers
77. Check the topmost radio box for WS Eventing to check all radio boxes.
78. Check the topmost radio box for OS Log to check all radio boxes.
79. Click the right arrow to navigate to the next page.
80. Under Email, check the Battery Event, Storage Contr, and Storage Enclosr critical alerts. Uncheck any non-critical
alerts in this category.
81. Check the topmost radio box for SNMP Trap to check all radio boxes.
82. Check the topmost radio box for Remote System Log to check all radio boxes.
83. Check the topmost radio box for WS Eventing to check all radio boxes.
84. Check the topmost radio box for OS Log to check all radio boxes.
85. Click the right arrow to navigate to the next page.
86. Under Email, check the Fan Event, Physical Disk, and Power Supply critical alerts. Uncheck any non-critical alerts
in this category.
87. Check the topmost radio box for SNMP Trap to check all radio boxes.
88. Check the topmost radio box for Remote System Log to check all radio boxes.
89. Check the topmost radio box for WS Eventing to check all radio boxes.
90. Check the topmost radio box for OS Log to check all radio boxes.
91. Click the right arrow to navigate to the next page.
92. Under Email, check the Temperature and Virtual Disk critical alerts. Uncheck any non-critical alerts in this
category.
93. Check the topmost radio box for SNMP Trap to check all radio boxes.
94. Check the topmost radio box for Remote System Log to check all radio boxes.
95. Check the topmost radio box for WS Eventing to check all radio boxes.
96. Check the topmost radio box for OS Log to check all radio boxes.
97. Click the right arrow to navigate to the next page.
98. Under Email, uncheck any non-critical alerts in this category.
99. Check the topmost radio box for SNMP Trap to check all radio boxes.
100. Check the topmost radio box for Remote System Log to check all radio boxes.
101. Check the topmost radio box for WS Eventing to check all radio boxes.
102. Check the topmost radio box for OS Log to check all radio boxes.
103. Click the right arrow to navigate to the next page.
104. Under Email, check the Licensing critical alert. Uncheck any non-critical alerts in this category.
105. Check the topmost radio box for SNMP Trap to check all radio boxes.
106. Check the topmost radio box for IPMI Alert to check all radio boxes.
107. Check the topmost radio box for Remote System Log to check all radio boxes.
108. Check the topmost radio box for WS Eventing to check all radio boxes.
109. Check the topmost radio box for OS Log to check all radio boxes.
110. Click the right arrow to navigate to the next page.
111. Under Email, uncheck any non-critical alerts in this category.
112. Check the topmost radio box for SNMP Trap to check all radio boxes.
113. Check the topmost radio box for Remote System Log to check all radio boxes.
114. Check the topmost radio box for WS Eventing to check all radio boxes.
115. Check the topmost radio box for OS Log to check all radio boxes.
116. Click Apply.
117. Click Virtual Console in the vertical navigation bar.
118. Click Launch Virtual Console.
119. A Java app will launch. Click Continue when the security warning appears.
120. Click Run when the Java warning appears.
121. Click Run when the second security warning appears. The remote console viewer will launch.
A Principled Technologies test report 24Simplifying systems management with Dell OpenManage on
13G Dell PowerEdge servers
122. Assuming no boot devices are installed, strike F2 to enter System Setup and launch the System Setup menu.
123. At the System Setup Main Menu, select System BIOS.
124. Select Processor Settings.
125. Verify QPI Speed is set to Maximum data rate.
126. Verify that Virtualization Technology is Enabled.
127. Verify that Adjacent Cache Line Prefetch is Enabled.
128. Verify that Hardware Prefetcher is Enabled.
129. Verify that DCU Streamer Prefetcher is Enabled.
130. Verify that DCU IP Prefetcher is Enabled.
131. Verify that Execute Disable is Enabled.
132. Scroll down to verify that Number of Cores per Processor is set to 10. (Default: All)
133. Click the Back button.
134. Select SATA Settings.
135. Verify that Embedded SATA is set to AHCI Mode.
136. Click the Back button.
137. Select Boot Settings.
138. Verify that Boot Sequence Retry is Enabled.
139. Click the Back button.
140. Select Integrated Devices.
141. Verify that Embedded Video Controller is Enabled.
142. Scroll down to verify that OS Watchdog Timer is Disabled.
143. Click the Back button.
144. Select Serial Communication.
145. Verify that Serial Communication is Auto.
146. Verify that Serial Port Address is configured as follows: Serial Device1=COM1, Serial Device2=COM2. (Default:
Serial Device1=COM2, Serial Device2=COM1)
147. Verify that External Serial Connector is set to Serial Device 1.
148. Verify that Failsafe Baud Rate is set to 115200.
149. Verify that Remote Terminal Type is set to ANSI. (Default: VT100/VT220)
150. Click the Back button.
151. Select System Profile Settings.
152. Verify that System Profile is set to Custom. (Default: Performance)
153. Verify that CPU Power Management is set to OS DBPM. (Default: Maximum Performance)
154. Verify that Turbo Boost is Enabled.
155. Verify that C1E is Enabled. (Default: Disabled)
156. Verify that Memory Frequency is set to Maximum Performance.
157. Verify that C States is Enabled. (Default: Disabled)
158. Verify that Memory Patrol Scrub is Disabled. (Default: Standard)
159. Scroll down to verify that Collaborative CPU Performance Control is Disabled.
160. Verify that Energy Efficient Policy is set to Balanced Performance. (Default: Performance)
161. Click the Back button.
162. Select System Security.
163. Verify that NMI Button is Disabled.
164. Click the Back button.
165. Scroll down to select Miscellaneous Settings.
166. Verify that F1/F2 Prompt on Error is Disabled. (Default: Enabled)
167. Verify that Load Legacy Video Option ROM is Enabled. (Default: Disabled)
168. Click the Back button.
A Principled Technologies test report 25Simplifying systems management with Dell OpenManage on
13G Dell PowerEdge servers
169. Click the Finish button.
170. A warning dialog will appear. Click the Yes button.
171. A second dialog will appear alerting the user that the settings were saved successfully. Click the OK button.
172. At the System Setup Main Menu, select Device Settings.
173. Select Integrated RAID Controller 1.
174. Click Configuration Management.
175. Click Create Virtual Disk.
176. Set RAID Level to RAID5.
177. Select Select Physical Disks.
178. Select Check All to select all unconfigured disks.
179. Scroll down to click Apply Changes.
180. Click OK.
181. Scroll down, and change Default Initialization to Fast.
182. Select Create Virtual Disk.
183. Check Confirm, and click Yes.
184. Click OK.
185. Click the Back button.
186. Click the Back button again.
187. Click Finish.
188. At the Device Settings menu, select the Integrated NIC 1 Port 1.
189. Click NIC Configuration.
190. Verify that Legacy Boot Protocol is set to None. (Default: PXE)
191. Click Back.
192. Click Finish.
193. Click Yes, and click OK.
194. At the Device Settings menu, select the Integrated NIC 1 Port 2.
195. Click NIC Configuration.
196. Verify that legacy boot protocol is set to None.
197. Click the Back button.
198. Click the Finish button.
199. Click the Finish button again.
200. At the System Setup Main Menu, select iDRAC Settings.
201. Select Network.
202. Scroll down to the IPMI Settings category and set Enable IPMI Over LAN to Enabled. (Default: Disabled)
203. Click the Back button.
204. Select Alerts.
205. Verify that Enable Platform Event Filter Alerts is Enabled.
206. Verify that Enable Alert Destination 1 is Enabled.
207. Verify that Alert Destination 1 is set to 192.168.1.50.
208. Click the Back button.
209. Click the Finish button.
210. A warning dialog will appear alerting the user Settings have changed, and prompting the user Do you want to
save the changes? Click the Yes button.
211. A second dialog will appear alerting the user that the settings were saved successfully. Click the OK button.
212. At the System Setup Main Menu, click the Finish button to apply all changes and reboot.
213. A warning dialog will appear confirming the exit command and prompting the user Are you sure you want to
exit and reboot? Click the Yes button to reboot.
A Principled Technologies test report 26Simplifying systems management with Dell OpenManage on
13G Dell PowerEdge servers
One-to-many deployment
Manual: Lifecycle Controller guided deployment
1. Open a Web browser from within the management network and navigate to the iDRAC IP address
(192.168.1.101).
2. Log in with the iDRAC s username and password (Username: root ; Password: calvin).
3. Look at the Virtual Console Preview to see if the server is powered on. If there is no image, under Quick Launch
Tasks, power the server on.
4. From the vertical navigation bar, select Alerts.
5. Select the SNMP and Email Settings tab from the horizontal navigation bar.
6. Check the State radio box for Alert Destination1 and type the destination IP address (192.168.1.50).
7. Verify that the Community String field is set to public.
8. Click Apply.
9. Change SNMP Trap Format to SNMP v2.
10. Click Apply.
11. Check the first State radio box for Destination Email Address and type the destination email address for Email
Alert 1 (adminpager@principledtechnologies.com).
12. Click Apply.
13. In the SMTP (Email) Server IP Address or FQDN / DNS Name field, type the fully qualified domain name for the
email server (mailer.principledtechnologies.com).
14. Click Apply.
15. Select the Alerts tab from the horizontal navigation bar.
16. Change Alerts to Enabled.
17. Click Apply.
18. Under Email, check the Amperage, Auto Sys Reset, and Battery Event critical alerts. Uncheck any non-critical
alerts in this category.
19. Check the topmost radio box for SNMP Trap to check all radio boxes.
20. Check the topmost radio box for IPMI Alert to check all radio boxes.
21. Check the topmost radio box for Remote System Log to check all radio boxes.
22. Check the topmost radio box for WS Eventing to check all radio boxes.
23. Check the topmost radio box for OS Log to check all radio boxes.
24. Click the right arrow to navigate to the next page.
25. Under Email, check the Processor, Proc Absent, and Fan Event critical alerts. Uncheck any non-critical alerts in
this category.
26. Check the topmost radio box for SNMP Trap to check all radio boxes.
27. Check the topmost radio box for IPMI Alert to check all radio boxes.
28. Check the topmost radio box for Remote System Log to check all radio boxes.
29. Check the topmost radio box for WS Eventing to check all radio boxes.
30. Check the topmost radio box for OS Log to check all radio boxes.
31. Click the right arrow to navigate to the next page.
32. Under Email, check the Hardware Config and Memory critical alerts. Uncheck any non-critical alerts in this
category.
33. Check the topmost radio box for SNMP Trap to check all radio boxes.
34. Check the topmost radio box for Remote System Log to check all radio boxes.
35. Check the topmost radio box for WS Eventing to check all radio boxes.
36. Check the topmost radio box for OS Log to check all radio boxes.
37. Click the right arrow to navigate to the next page.
A Principled Technologies test report 27Simplifying systems management with Dell OpenManage on
13G Dell PowerEdge servers
38. Under Email, check the OS Event, PCI Device, and Physical Disk critical alerts. Uncheck any non-critical alerts in
this category.
39. Check the topmost radio box for SNMP Trap to check all radio boxes.
40. Check the topmost radio box for IPMI Alert to check all radio boxes.
41. Check the topmost radio box for Remote System Log to check all radio boxes.
42. Check the topmost radio box for WS Eventing to check all radio boxes.
43. Check the topmost radio box for OS Log to check all radio boxes.
44. Click the right arrow to navigate to the next page.
45. Under Email, check the BIOS POST, Power Supply, PSU Absent, and Power Usage critical alerts. Uncheck any non-
critical alerts in this category.
46. Check the topmost radio box for SNMP Trap to check all radio boxes.
47. Check the topmost radio box for IPMI Alert to check all radio boxes.
48. Check the topmost radio box for Remote System Log to check all radio boxes.
49. Check the topmost radio box for WS Eventing to check all radio boxes.
50. Check the topmost radio box for OS Log to check all radio boxes.
51. Click the right arrow to navigate to the next page.
52. Under Email, check the Redundancy, IDSDM Media, and IDSDM Absent critical alerts. Uncheck any non-critical
alerts in this category.
53. Check the topmost radio box for SNMP Trap to check all radio boxes.
54. Check the topmost radio box for IPMI Alert to check all radio boxes.
55. Check the topmost radio box for Remote System Log to check all radio boxes.
56. Check the topmost radio box for WS Eventing to check all radio boxes.
57. Check the topmost radio box for OS Log to check all radio boxes.
58. Click the right arrow to navigate to the next page.
59. Under Email, check the IDSDM Redundancy, Security Event, and Sys Event Log critical alerts. Uncheck any non-
critical alerts in this category.
60. Check the topmost radio box for SNMP Trap to check all radio boxes.
61. Check the topmost radio box for IPMI Alert to check all radio boxes.
62. Check the topmost radio box for Remote System Log to check all radio boxes.
63. Check the topmost radio box for WS Eventing to check all radio boxes.
64. Check the topmost radio box for OS Log to check all radio boxes.
65. Click the right arrow to navigate to the next page.
66. Under Email, check the Software Config, Temperature, and Temperature Statistics critical alerts. Uncheck any
non-critical alerts in this category.
67. Check the topmost radio box for SNMP Trap to check all radio boxes.
68. Check the topmost radio box for IPMI Alert to check all radio boxes.
69. Check the topmost radio box for Remote System Log to check all radio boxes.
70. Check the topmost radio box for WS Eventing to check all radio boxes.
71. Check the topmost radio box for OS Log to check all radio boxes.
72. Click the right arrow to navigate to the next page.
73. Under Email, check the vFlash Event and Voltage critical alerts. Uncheck any non-critical alerts in this category.
74. Check the topmost radio box for SNMP Trap to check all radio boxes.
75. Check the topmost radio box for IPMI Alert to check all radio boxes.
76. Check the topmost radio box for Remote System Log to check all radio boxes.
77. Check the topmost radio box for WS Eventing to check all radio boxes.
78. Check the topmost radio box for OS Log to check all radio boxes.
79. Click the right arrow to navigate to the next page.
A Principled Technologies test report 28Simplifying systems management with Dell OpenManage on
13G Dell PowerEdge servers
80. Under Email, check the Battery Event, Storage Contr, and Storage Enclosr critical alerts. Uncheck any non-critical
alerts in this category.
81. Check the topmost radio box for SNMP Trap to check all radio boxes.
82. Check the topmost radio box for Remote System Log to check all radio boxes.
83. Check the topmost radio box for WS Eventing to check all radio boxes.
84. Check the topmost radio box for OS Log to check all radio boxes.
85. Click the right arrow to navigate to the next page.
86. Under Email, check the Fan Event, Physical Disk, and Power Supply critical alerts. Uncheck any non-critical alerts
in this category.
87. Check the topmost radio box for SNMP Trap to check all radio boxes.
88. Check the topmost radio box for Remote System Log to check all radio boxes.
89. Check the topmost radio box for WS Eventing to check all radio boxes.
90. Check the topmost radio box for OS Log to check all radio boxes.
91. Click the right arrow to navigate to the next page.
92. Under Email, check the Temperature and Virtual Disk critical alerts. Uncheck any non-critical alerts in this
category.
93. Check the topmost radio box for SNMP Trap to check all radio boxes.
94. Check the topmost radio box for Remote System Log to check all radio boxes.
95. Check the topmost radio box for WS Eventing to check all radio boxes.
96. Check the topmost radio box for OS Log to check all radio boxes.
97. Click the right arrow to navigate to the next page.
98. Under Email, uncheck any non-critical alerts in this category.
99. Check the topmost radio box for SNMP Trap to check all radio boxes.
100. Check the topmost radio box for Remote System Log to check all radio boxes.
101. Check the topmost radio box for WS Eventing to check all radio boxes.
102. Check the topmost radio box for OS Log to check all radio boxes.
103. Click the right arrow to navigate to the next page.
104. Under Email, check the Licensing critical alert. Uncheck any non-critical alerts in this category.
105. Check the topmost radio box for SNMP Trap to check all radio boxes.
106. Check the topmost radio box for IPMI Alert to check all radio boxes.
107. Check the topmost radio box for Remote System Log to check all radio boxes.
108. Check the topmost radio box for WS Eventing to check all radio boxes.
109. Check the topmost radio box for OS Log to check all radio boxes.
110. Click the right arrow to navigate to the next page.
111. Under Email, uncheck any non-critical alerts in this category.
112. Check the topmost radio box for SNMP Trap to check all radio boxes.
113. Check the topmost radio box for Remote System Log to check all radio boxes.
114. Check the topmost radio box for WS Eventing to check all radio boxes.
115. Check the topmost radio box for OS Log to check all radio boxes.
116. Click Apply.
117. Click Virtual Console in the vertical navigation bar.
118. Click Launch Virtual Console.
119. A Java app will launch. Click Continue when the security warning appears.
120. Click Run when the Java warning appears.
121. Click Run when the second security warning appears and the remote console viewer will launch.
122. Assuming no boot devices are installed, strike F2 to enter System Setup and launch the System Setup menu.
123. At the System Setup Main Menu, select System BIOS.
124. Select Processor Settings.
A Principled Technologies test report 29Simplifying systems management with Dell OpenManage on
13G Dell PowerEdge servers
125. Verify QPI Speed is set to Maximum data rate.
126. Verify that Virtualization Technology is Enabled.
127. Verify that Adjacent Cache Line Prefetch is Enabled.
128. Verify that Hardware Prefetcher is Enabled.
129. Verify that DCU Streamer Prefetcher is Enabled.
130. Verify that DCU IP Prefetcher is Enabled.
131. Verify that Execute Disable is Enabled.
132. Scroll down to verify that Number of Cores per Processor is 10 (Default: All).
133. Click the Back button.
134. Select SATA Settings.
135. Verify that Embedded SATA is AHCI Mode.
136. Click the Back button.
137. Select Boot Settings.
138. Verify that Boot Sequence Retry is Enabled.
139. Click the Back button.
140. Select Integrated Devices.
141. Verify that Embedded Video Controller is Enabled.
142. Scroll down to verify that OS Watchdog Timer is Disabled.
143. Click the Back button.
144. Select Serial Communication.
145. Verify that Serial Communication is Auto.
146. Verify that Serial Port Address is Serial Device1=COM1,Serial Device2=COM2 (Default: Serial
Device1=COM2,Serial Device2=COM1 ).
147. Verify that External Serial Connector is Serial Device 1.
148. Verify that Failsafe Baud Rate is 115200.
149. Verify that Remote Terminal Type is ANSI (Default: VT100/VT220).
150. Click the Back button.
151. Select System Profile Settings.
152. Verify that System Profile is Custom (Default: Performance ).
153. Verify that CPU Power Management is OS DBPM (Default: Maximum Performance ).
154. Verify that Turbo Boost is Enabled.
155. Verify that C1E is Enabled (Default: Disabled ).
156. Verify that Memory Frequency is Maximum Performance.
157. Verify that C States is Enabled (Default: Disabled ).
158. Verify that Memory Patrol Scrub is Disabled (Default: Standard ).
159. Scroll down to verify that Collaborative CPU Performance Control is Disabled.
160. Verify that Energy Efficient Policy is Balanced Performance (Default: Performance).
161. Click the Back button.
162. Select System Security.
163. Verify that NMI Button is Disabled.
164. Click the Back button.
165. Scroll down to select Miscellaneous Settings.
166. Verify that F1/F2 Prompt on Error is Disabled (Default: Enabled).
167. Verify that Load Legacy Video Option ROM is Enabled (Default: Disabled).
168. Click the Back button.
169. Click the Finish button.
170. A warning dialog will appear. Click the Yes button.
171. A second dialog will appear alerting the user that the settings were saved successfully. Click the OK button.
A Principled Technologies test report 30Simplifying systems management with Dell OpenManage on
13G Dell PowerEdge servers
172. At the System Setup Main Menu, select Device Settings.
173. Select Integrated RAID Controller 1.
174. Click Configuration Management.
175. Click Create Virtual Disk.
176. Select RAID Level change to RAID5.
177. Select Select Physical Disks.
178. Select Check All to select all unconfigured disks.
179. Scroll down to click Apply Changes.
180. Click OK.
181. Scroll down, and change Default Initialization to Fast.
182. Select Create Virtual Disk.
183. Check Confirm, and click Yes.
184. Click Ok.
185. Click the Back button.
186. Click the Back button again.
187. Click Finish.
188. At the Device Settings menu, select the Integrated NIC 1 Port 1.
189. Click NIC Configuration.
190. Verify that Legacy Boot Protocol is set to None (Default: PXE).
191. Click Back.
192. Click Finish.
193. Click Yes, and click OK.
194. At the Device Settings menu, select the Integrated NIC 1 Port 2.
195. Click NIC Configuration.
196. Verify that legacy boot protocol is set to None.
197. Click the Back button.
198. Click the Finish button.
199. Click the Finish button again.
200. At the System Setup Main Menu, select iDRAC Settings.
201. Select Network.
202. Scroll down to the IPMI Settings category and set Enable IPMI Over LAN to Enabled (Default: Disabled).
203. Click the Back button.
204. Select Alerts.
205. Verify that Enable Platform Event Filter Alerts is Enabled.
206. Verify that Enable Alert Destination 1 is Enabled.
207. Verify that Alert Destination 1 is 192.168.1.50.
208. Click the Back button.
209. Click the Finish button.
210. A warning dialog will appear alerting the user that Settings have changed. Do you want to save the changes?
Click the Yes button.
211. A second dialog will appear alerting the user that the settings were saved successfully. Click the OK button.
212. At the System Setup Main Menu, click the Finish button to apply all changes and reboot.
213. A warning dialog will appear confirming the exit command and prompting the user Are you sure you want to
exit and reboot? Click the Yes button to reboot.
214. Press F10 to enter Lifecycle Controller.
215. Click OS Deployment.
216. Click Deploy OS.
217. Select Go Directly to OS Deployment, and click Next.
A Principled Technologies test report 31Simplifying systems management with Dell OpenManage on
13G Dell PowerEdge servers
218. Select Microsoft Windows 2012 R2, and click Next.
219. Select Manual Install, and click Next.
220. Click Next to accept the default BIOS mode.
221. Insert the installation media, and click Next.
222. Click Finish to reboot the server and begin installation.
OME Auto Deployment
This procedure assumes a CSV list of Service Tags and a baseline profile have already been created.
1. Open a Web browser and log in to OME.
2. Select Deployment.
3. Click Setup Auto Deployment.
4. Check the box for Deploy Template.
5. Check the box for Boot to Network ISO.
6. Click Next.
7. Expand Server Templates, and select the template to deploy.
8. Click Next.
9. Enter the ISO Filename you want to deploy. We used windows2012r2.iso
10. Enter the IP address of the OME server. We used 192.168.1.50
11. Enter the share name of the deployment share. We entered ServerConfig
12. Enter the Share Username you configured for your deployment File Share. We used testadministrator
13. Enter the share password you configured for your deployment file sure user. We used Password1
14. Click Next.
15. Click Import.
16. Browse to the location of the CSV file containing hardware Service Tags, and click Open.
17. Click Ok. The servers from the CSV will be imported.
18. Click Next.
19. Click Next to accept defaults for template deployment.
20. Click Next to accept default iDRAC credentials.
21. Review the summary, and click Finish.
22. Click Yes to proceed.
23. Click Yes to confirm job creation.
New features for connectivity
iDRAC Direct (cable)
Manual: Crash cart
1. Plug the crash cart power strip into a power outlet.
2. Remove the front bezel.
3. Connect a keyboard to the server front panel.
4. Connect a mouse to the server front panel.
5. Connect a monitor to the server front panel.
6. Reboot Server.
7. Press F2 to enter system setup.
8. Click Device Settings.
9. Click Integrated Raid Controller 1: Dell PERC <PERC H730P Mini> Configuration Utility.
10. Click Configuration Management.
11. Click Create Virtual Disk.
12. Select RAID1.
A Principled Technologies test report 32Simplifying systems management with Dell OpenManage on
13G Dell PowerEdge servers
13. Click Select Physical Disks.
14. Check the boxes besides the disks to add them to the array.
15. Click Apply Changes.
16. Click OK.
17. Scroll down to Default Initialization. Select Fast.
18. Click Create Virtual Disk.
19. Check the box to Confirm.
20. Click Yes.
21. Click OK.
22. Click Back.
23. Click Back again.
24. Click Finish.
25. Click Finish again to exit Device Settings.
26. Click Finish to exit System Setup.
27. Click Yes to confirm exit and boot the server.
Automatic: USB A-A male-male cable
1. Remove the front bezel.
2. Connect a laptop to the server using a USB A/A cable. The USB cable must be connected to the server’s USB
management port, indicated on the front panel with a wrench icon.
3. Open a Web browser on the management laptop.
4. Connect to iDRAC at 169.254.0.3, and accept any certificate or security warnings.
5. Log in with your username and password.
6. Click Storage→Virtual Disks.
7. Click Create.
8. For Layout, select RAID-1.
9. Under Internal Disks, check the boxes to select the disks to add to the array.
10. Click Create Virtual Disk.
11. Click OK. Alternatively, you can view the job status by clicking Job Queue.
12. Log off of iDRAC.
iDRAC Direct (USB key)
Manual configuration
We used the time and steps from the Zero-Touch manual configuration.
Automatic: iDRAC Direct USB Key
1. Remove the bezel.
2. Connect a monitor to the server front panel, or observe the system through a remote console.
3. Insert a USB device with the necessary configuration profile.
4. Wait for the server to restart, as indicated by the monitor returning no signal.
Quick Sync (NFC)
Manual Read Procedure
1. Plug a monitor into an outlet.
2. Remove the front bezel.
3. Connect the monitor to the server.
4. Connect a keyboard to the server.
5. Connect a mouse to the server.
6. Power on the server.
A Principled Technologies test report 33Simplifying systems management with Dell OpenManage on
13G Dell PowerEdge servers
7. Press F10 to enter Lifecycle Controller.
8. Select Firmware Update.
9. Select View Current Versions.
10. Verify that the BIOS, Lifecycle Controller, PERC H730P Mini, and System CPLD are all up to date (0.3.23;
2.00.00.00; 25.2.1.0037; 0.5.1).
11. Return to the main menu.
12. Select Settings.
13. Select Network Settings.
14. Check the IP Address, Default Gateway, and DNS Address.
15. Return to the main menu.
16. Exit Lifecycle Controller.
17. Remove the keyboard, monitor, and mouse.
18. Reinstall the front bezel.
Automatic Read Procedure (NFC + tablet)
1. Unlock the tablet.
2. Open the OpenManage application on the NFC-capable tablet.
3. Press the NFC button on front bezel.
4. Hold the tablet’s NFC to the iDRAC Quick Sync and wait for tablet to refresh.
5. Touch Firmware Details.
6. Verify that the BIOS, Lifecycle Controller, PERC H730P Mini, and System CPLD are all up to date (0.3.23;
2.00.00.00; 25.2.1.0037; 0.5.1). Return to the main menu.
7. Touch the back arrow to go back to the main menu.
8. Touch Network Details.
9. Touch IPv4.
10. Check the IP Address, Default Gateway and DNS Address.
11. Touch the back arrow twice to return to the main menu.
12. Close the application.
Manual Write Procedure
1. Remove the front bezel.
2. Press the check button beside the R730 LCD screen.
3. Press the right arrow button to select Setup.
4. Press the check button to enter Setup.
5. Press the check button to select iDRAC.
6. Press the right arrow button to select Static.
7. Press the check button to enter a Static IP address.
8. Set the IP address for the iDRAC. We used 172.16.10.120. Use the arrow keys to select an IP address digit.
Press the checkbox to edit the digit. Press the arrow keys to modify the value of the digit. Press the check button
to accept the value. Repeat for each digit.
9. Press the right arrow key to move the cursor to the far right.
10. Press the check button.
11. Set the Subnet Mask. We used 255.255.0.0. Use the arrow keys to select an IP address digit. Press the
checkbox to edit the digit. Press the arrow keys to modify the value of the digit. Press the check button to accept
the value. Repeat for each digit.
12. Press the right arrow key to move the cursor to the far right.
13. Press the check button.
A Principled Technologies test report 34Simplifying systems management with Dell OpenManage on
13G Dell PowerEdge servers
14. Set the IP address for the Gateway. We used 172.16.10.1. Use the arrow keys to select an IP address digit.
Press the checkbox to edit the digit. Press the arrow keys to modify the value of the digit. Press the check button
to accept the value. Repeat for each digit.
15. Press the right arrow key to move the cursor to the far right.
16. Press the check button.
17. Press the check button to select Yes and setup DNS.
18. Set the IP address for the DNS. We used 172.16.0.10. Use the arrow keys to select an IP address digit. Press
the checkbox to edit the digit. Press the arrow keys to modify the value of the digit. Press the check button to
accept the value. Repeat for each digit.
19. Press the right arrow key to move the cursor to the far right.
20. Press the check button.
21. Set the IP address for the secondary DNS. We used 172.16.0.11. Use the arrow keys to select an IP address
digit. Press the checkbox to edit the digit. Press the arrow keys to modify the value of the digit. Press the check
button to accept the value. Repeat for each digit.
22. Press the right arrow key to move the cursor to the far right.
23. Press the check button.
24. Press the check button to save the configuration to the iDRAC.
25. Replace the front bezel.
Automatic Write Procedure (NFC + tablet)
1. Unlock the tablet.
2. Open the OpenManage application on the NFC-capable tablet.
3. Press the NFC button on the front bezel.
4. Place the tablet against the NFC area of the front bezel. The configuration will be imported.
5. Tap the gear icon at the top right of the page.
6. Tap iDRAC Configuration via Quick Sync (NFC bezel).
7. Tap IPv4 Settings.
8. Tap the checkbox for Enable DHCP to clear it.
9. Tap the top field for the IP address.
10. Using the tablet keyboard, enter the IP address. We used 172.16.10.120.
11. Tap the middle field for the Gateway address.
12. Using the tablet keyboard, enter the IP address. We used 172.16.10.1.
13. Tap the third field for the Subnet Mask.
14. Using the tablet keyboard, enter the IP address. We used 255.255.0.0.
15. Tap the checkbox for Use DHCP for DNS to clear it.
16. Tap the fifth field for the primary DNS address.
17. Using the tablet keyboard, enter the IP address. We used 172.16.10.10.
18. Tap the sixth field for the secondary DNS address.
19. Using the tablet keyboard, enter the IP address. We used 172.16.10.11.
20. Tap Save.
21. Enter the username and password of the iDRAC you are going to update. We used the username root and the
password calvin.
22. Press Sync Now.
23. Press the NFC button on the front bezel.
24. Touch the tablet to the NFC bezel to perform a Quick Sync.
25. Close the OpenManage app.
A Principled Technologies test report 35Simplifying systems management with Dell OpenManage on
13G Dell PowerEdge servers
New features to improve maintenance
Tech Support Report
Manual (12G TSR + DSET)
1. Log in to iDRAC with your username and password.
2. Under Server in the vertical navigation menu, select Troubleshooting.
3. Select Tech Support Report in the horizontal navigation bar.
4. Fill out the required network information. For our tests, we used CIFS:
a. IP Address: 192.168.1.20
b. Share name: profiles
c. Domain Name: <blank>
d. Username: Administrator
e. Password: Password1
5. Click Export.
6. Click Server in the vertical navigation menu.
7. Click Job Queue in the horizontal navigation bar.
8. Refresh the page until the job status reports Completed.
9. Click Virtual Console in the vertical navigation menu.
10. Click Launch Virtual Console.
11. Click Continue.
12. Click Run.
13. Click Run again.
14. Click Macros, and click Ctrl-Alt-Delete.
15. Log in to Windows with your username and password.
16. Open a Web browser and navigate to dell.com/dset
17. Download DSET for Windows.
18. Run the downloaded application.
19. Click Next.
20. Accept the license agreement.
21. Leave Create a One-Time Local System DSET Report as default, and click Next.
22. Enter the network file share location (192.168.1.20profiles).
23. Check Enable Report Filtering and Automatically Upload the Report to Dell.
24. Click Next.
25. Leave Hardware Information, Storage Information, and Software Information checked by default.
26. Check Gather Advanced Log Files Information.
27. Click Next.
28. Click Start.
29. A command window will appear and update the report generation and upload status. The window will
automatically close. Click Finish.
30. Sign out of the Windows server.
Automatic (13G TSR)
1. Log into iDRAC with your username and password.
2. Under Server in the vertical navigation menu, select Troubleshooting.
3. Select Tech Support Report in the horizontal navigation bar.
4. Select Advanced Export Options.
5. Check RAID Controller Log and OS and Application Data, and ensure Enable Report Filtering is checked.
6. Under Export Location, change the radio button to Network.
7. Fill out the required network information. For our tests, we used CIFS:
A Principled Technologies test report 36Simplifying systems management with Dell OpenManage on
13G Dell PowerEdge servers
a. IP Address: 192.168.1.20
b. Share name: profiles
c. Domain Name: <blank>
d. Username: Administrator
e. Password: Password1
8. Check I agree to allow Technical Support to use this data.
9. Click Export.
10. View the status of the export by clicking the job queue button.
11. Refresh the page until the job status reports Completed.
OME Compliance Baseline Management
Manual (12G Configuration Settings) Compliance Check
We used a spreadsheet to keep track of all configuration items for the manual scenario. For every verification
step in this methodology, if the setting is correct, mark C for compliant; if the setting is missing, mark M for missing; if
the setting is different than the configuration baseline, mark D for different, and write the current setting in the non-
compliant value cell in the compliance spreadsheet.
1. Connect a monitor.
2. Connect a keyboard.
3. Connect a mouse.
4. Power on the server.
5. Strike F2 to enter System Setup when prompted.
6. At the System Setup Main Menu, select System BIOS.
7. Select Processor Settings.
8. Verify QPI Speed is set to Maximum Data Rate.
9. Verify that Virtualization Technology is Enabled.
10. Verify that Adjacent Cache Line Prefetch is Enabled.
11. Verify that Hardware Prefetcher is Enabled.
12. Verify that DCU Streamer Prefetcher is Enabled.
13. Verify that DCU IP Prefetcher is Enabled.
14. Verify that Execute Disable is Enabled.
15. Verify that Number of Cores per Processor is All.
16. Click the Back button.
17. Select SATA Settings.
18. Verify that Embedded SATA is AHCI Mode.
19. Click the Back button.
20. Select Boot Settings.
21. Verify that Boot Sequence Retry is Enabled.
22. Click the Back button.
23. Select Integrated Devices.
24. Verify that OS Watchdog Timer is Disabled.
25. Verify that Embedded Video Controller is Enabled.
26. Click the Back button.
27. Select Serial Communication.
28. Verify that Serial Communication is On with Console Redirection.
29. Verify that Serial Port Address is configured as follows: Serial Device1=COM1, Serial Device2=COM2.
30. Verify that External Serial Connector is set to Serial Device 1.
31. Verify that Failsafe Baud Rate is set to 115200.
A Principled Technologies test report 37Simplifying systems management with Dell OpenManage on
13G Dell PowerEdge servers
32. Verify that Remote Terminal Type is set to ANSI.
33. Click the Back button.
34. Select System Profile Settings.
35. Verify that System Profile is set to Custom.
36. Verify that CPU Power Management is set to OS DBPM.
37. Verify that Memory Frequency is set to Maximum Performance.
38. Verify that Turbo Boost is Enabled.
39. Verify that C1E is Enabled.
40. Verify that C States is Enabled.
41. Verify that Memory Patrol Scrub is Disabled.
42. Verify that Collaborative CPU Performance Control is Disabled.
43. Click the Back button.
44. Select System Security.
45. Verify that NMI Button is Disabled.
46. Click the Back button.
47. Select Miscellaneous Settings.
48. Verify that F1/F2 Prompt on Error is Disabled.
49. Click the Back button.
50. Click the Finish button.
51. At the System Setup Main Menu, select Device Settings.
52. Select the Integrated NIC 1 Port 1.
53. Click NIC Configuration.
54. Verify that Legacy Boot Protocol is set to None.
55. Click Back.
56. Click Finish.
57. At the Device Settings menu, select the Integrated NIC 1 Port 2.
58. Click NIC Configuration.
59. Verify that legacy boot protocol is set to None.
60. Click the Back button.
61. Click the Finish button.
62. Click the Finish button again.
63. At the System Setup Main Menu, select iDRAC Settings.
64. Select Network.
65. Scroll down to the IPMI Settings category, and verify that Enable IPMI Over LAN is Enabled.
66. Click the Back button.
67. Select Alerts.
68. Verify that Enable Platform Event Filter Alerts is Enabled.
69. Verify that Enable Alert Destination 1 is Enabled
70. Verify that Alert Destination 1 is 192.168.1.50.
71. Click the Back button.
72. Click the Finish button.
73. At the System Setup Main Menu, click the Finish button.
74. A warning dialog will appear confirming the exit command and prompting the user Are you sure you want to
exit? Click the Yes button to reboot.
OME Baseline Configuration Compliance Check
1. Open a Web browser and connect to OME.
2. Select Manage→Configuration.
3. Click the red section of the pie chart indicated as non-compliant.
A Principled Technologies test report 38Simplifying systems management with Dell OpenManage on
13G Dell PowerEdge servers
4. Double-click an entry in the pop-out table.
5. Note the missing and different settings. These are sortable and can be exported to HTML.
New features to simplify updating
OME Agentless Driver Updates
OS Driver Updates using OMSA
Installing OMSA (one time task)
1. Log into remote server.
2. Browse to the location of the OMSA installation file.
3. Double-click setup.exe.
4. When prompted, click Run.
5. Correct any conditions that create an error, and click Install Server Administrator.
6. Click Next.
7. Select I accept the terms in the license agreement and click Next.
8. Click Typical and select Next.
9. Click Install.
10. Click Finish.
Performing Updates with OMSA
1. On the OME server, log in to OME.
2. Click Manage→System Update.
3. Click Select a Catalog Source in the left hand menu.
4. Select Use repository manager file.
5. Click Browse and select the catalog.xml file you want to use for the baseline.
6. Click Open to select the catalog.xml file.
7. Click Import Now. The compliance report will regenerate.
8. Click the red section of the chart indicating Non-Compliant Systems.
9. Check the box beside a non-compliant system. Note the preferred Delivery Method is In-Band Agent.
10. Under Select Updates to Apply, check the topmost box to select all updates.
11. Click Apply Selected Updates.
12. Select Run Now under Set the Task Schedule.
13. Check the box for Skip Signature and Hash Check.
14. Enter the server credentials for the task. We used testadministrator and Password1.
15. Click Finish.
OS Driver Updates without OMSA
Performing Inventory (one time task creation)
1. On the OME server, log in to OME.
2. Click Manage→Remote Tasks.
3. Under Common Tasks, click Create F/W and Driver Inventory Task.
4. Check the box for 64-bit system.
5. Click Next.
6. Select the radio button for Select server(s) for this task to target.
7. Expand Servers and select the server you want to inventory.
8. Click Next.
9. Under Set Schedule, select Periodic.
A Principled Technologies test report 39Simplifying systems management with Dell OpenManage on
13G Dell PowerEdge servers
10. Select how frequently you want to conduct the inventory.
11. Enter the credentials to use on the remote target. We used testadministrator and Password1.
12. Click Finish.
Performing Updates without OMSA
1. On the OME server, log into OME.
2. Click Manage→System Update.
3. Click Select a Catalog Source in the left hand menu.
4. Select Use repository manager file.
5. Click Browse and select the catalog.xml file you want to use for the baseline.
6. Click Open to select the catalog.xml file.
7. Click Import Now. The compliance report will regenerate.
8. Click the red section of the chart indicating Non-Compliant Systems.
9. Check the box beside a non-compliant system. Note the preferred Delivery Method is In-Band Agent.
10. Under Select Updates to Apply, check the topmost box to select all updates.
11. Click Apply Selected Updates.
12. Select Run Now under Set the Task Schedule.
13. Check the box for Skip Signature and Hash Check.
14. Enter the server credentials for the task. We used testadministrator and Password1.
15. Click Finish.
Repository Manager and Automatic Updates.
Manual firmware updates – iDRAC
1. On a management workstation, open a Web browser and login to the iDRAC.
2. Click iDRAC Settings→Update and Rollback.
3. Click Browse to locate the BIOS update file.
4. Select the file, and click Open.
5. Click upload to transmit the file from the management workstation to the iDRAC.
6. Click Browse to locate the iDRAC update file (ESM_Firmware).
7. Select the file, and click Open.
8. Click upload to transmit the file from the management workstation to the iDRAC.
9. Click Browse to locate the Lifecycle Controller update file.
10. Select the file, and click Open.
11. Click upload to transmit the file from the management workstation to the iDRAC.
12. Click Browse to locate the NIC update file.
13. Select the file, and click Open.
14. Click upload to transmit the file from the management workstation to the iDRAC.
15. Click Browse to locate the RAID controller update file.
16. Select the file, and click Open.
17. Click upload to transmit the file from the management workstation to the iDRAC.
18. Click the checkbox beside content at the top of the Update Details section to select all uploaded components.
19. Click Install and Reboot.
20. Click OK to confirm job submission.
Automatic Updates (setup only – not counted as repetitive administrative task)
(Note: 72 seconds – not included in timed runs.)
A Principled Technologies test report 40Simplifying systems management with Dell OpenManage on
13G Dell PowerEdge servers
1. Log into iDRAC with your username and password.
2. Select iDRAC Settings→Update and Rollback.
3. Click the Automatic Update tab.
4. Check the box for Enable Automatic Updates.
5. For Server Reboot, select Schedule Updates and Reboot Server.
6. For File Location, select Network.
7. For Protocol, select CIFS.
8. Enter the IP address of the repository host. We used 192.168.1.20.
9. Enter the share name that houses the repository. We used repoman.
10. Enter the username with access to the repository share. We used administrator.
11. Enter the password of the user with access to the share. We used Password1.
12. Enter the start time for the maintenance window. We used 00:00.
13. Select Monthly and use the pull-down menus to select the first Sunday of every one month.
14. Click Schedule Update.
15. Click OK to confirm that the Auto Update setup is complete.
A Principled Technologies test report 41Simplifying systems management with Dell OpenManage on
13G Dell PowerEdge servers
ABOUT PRINCIPLED TECHNOLOGIES
Principled Technologies, Inc.
1007 Slater Road, Suite 300
Durham, NC, 27703
www.principledtechnologies.com
We provide industry-leading technology assessment and fact-based
marketing services. We bring to every assignment extensive experience
with and expertise in all aspects of technology testing and analysis, from
researching new technologies, to developing new methodologies, to
testing with existing and new tools.
When the assessment is complete, we know how to present the results to
a broad range of target audiences. We provide our clients with the
materials they need, from market-focused data to use in their own
collateral to custom sales aids, such as test reports, performance
assessments, and white papers. Every document reflects the results of
our trusted independent analysis.
We provide customized services that focus on our clients’ individual
requirements. Whether the technology involves hardware, software, Web
sites, or services, we offer the experience, expertise, and tools to help our
clients assess how it will fare against its competition, its performance, its
market readiness, and its quality and reliability.
Our founders, Mark L. Van Name and Bill Catchings, have worked
together in technology assessment for over 20 years. As journalists, they
published over a thousand articles on a wide array of technology subjects.
They created and led the Ziff-Davis Benchmark Operation, which
developed such industry-standard benchmarks as Ziff Davis Media’s
Winstone and WebBench. They founded and led eTesting Labs, and after
the acquisition of that company by Lionbridge Technologies were the
head and CTO of VeriTest.
Principled Technologies is a registered trademark of Principled Technologies, Inc.
All other product names are the trademarks of their respective owners.
Disclaimer of Warranties; Limitation of Liability:
PRINCIPLED TECHNOLOGIES, INC. HAS MADE REASONABLE EFFORTS TO ENSURE THE ACCURACY AND VALIDITY OF ITS TESTING, HOWEVER,
PRINCIPLED TECHNOLOGIES, INC. SPECIFICALLY DISCLAIMS ANY WARRANTY, EXPRESSED OR IMPLIED, RELATING TO THE TEST RESULTS AND
ANALYSIS, THEIR ACCURACY, COMPLETENESS OR QUALITY, INCLUDING ANY IMPLIED WARRANTY OF FITNESS FOR ANY PARTICULAR PURPOSE.
ALL PERSONS OR ENTITIES RELYING ON THE RESULTS OF ANY TESTING DO SO AT THEIR OWN RISK, AND AGREE THAT PRINCIPLED
TECHNOLOGIES, INC., ITS EMPLOYEES AND ITS SUBCONTRACTORS SHALL HAVE NO LIABILITY WHATSOEVER FROM ANY CLAIM OF LOSS OR
DAMAGE ON ACCOUNT OF ANY ALLEGED ERROR OR DEFECT IN ANY TESTING PROCEDURE OR RESULT.
IN NO EVENT SHALL PRINCIPLED TECHNOLOGIES, INC. BE LIABLE FOR INDIRECT, SPECIAL, INCIDENTAL, OR CONSEQUENTIAL DAMAGES IN
CONNECTION WITH ITS TESTING, EVEN IF ADVISED OF THE POSSIBILITY OF SUCH DAMAGES. IN NO EVENT SHALL PRINCIPLED TECHNOLOGIES,
INC.’S LIABILITY, INCLUDING FOR DIRECT DAMAGES, EXCEED THE AMOUNTS PAID IN CONNECTION WITH PRINCIPLED TECHNOLOGIES, INC.’S
TESTING. CUSTOMER’S SOLE AND EXCLUSIVE REMEDIES ARE AS SET FORTH HEREIN.

More Related Content

What's hot

Citrix XenApp 6.5 Performance - How To Ensure a Great End User Experience Bef...
Citrix XenApp 6.5 Performance - How To Ensure a Great End User Experience Bef...Citrix XenApp 6.5 Performance - How To Ensure a Great End User Experience Bef...
Citrix XenApp 6.5 Performance - How To Ensure a Great End User Experience Bef...eG Innovations
 
VMworld 2015: Advanced SQL Server on vSphere
VMworld 2015: Advanced SQL Server on vSphereVMworld 2015: Advanced SQL Server on vSphere
VMworld 2015: Advanced SQL Server on vSphereVMworld
 
Net1674 final emea
Net1674 final emeaNet1674 final emea
Net1674 final emeaVMworld
 
VMworld Europe 204: Technical Deep Dive on EVO: RAIL, the new VMware Hyper-Co...
VMworld Europe 204: Technical Deep Dive on EVO: RAIL, the new VMware Hyper-Co...VMworld Europe 204: Technical Deep Dive on EVO: RAIL, the new VMware Hyper-Co...
VMworld Europe 204: Technical Deep Dive on EVO: RAIL, the new VMware Hyper-Co...VMworld
 
XPDS16: High-Performance Virtualization for HPC Cloud on Xen - Jun Nakajima &...
XPDS16: High-Performance Virtualization for HPC Cloud on Xen - Jun Nakajima &...XPDS16: High-Performance Virtualization for HPC Cloud on Xen - Jun Nakajima &...
XPDS16: High-Performance Virtualization for HPC Cloud on Xen - Jun Nakajima &...The Linux Foundation
 
Co je nového v XenDesktop 7.6 a XenApp 7.6
Co je nového v XenDesktop 7.6 a XenApp 7.6 Co je nového v XenDesktop 7.6 a XenApp 7.6
Co je nového v XenDesktop 7.6 a XenApp 7.6 MarketingArrowECS_CZ
 
VMworld 2016: Virtualize Active Directory, the Right Way!
VMworld 2016: Virtualize Active Directory, the Right Way! VMworld 2016: Virtualize Active Directory, the Right Way!
VMworld 2016: Virtualize Active Directory, the Right Way! VMworld
 
Migrating from XenApp 4.5 and 5 to XenApp 6.5
Migrating from XenApp 4.5 and 5 to XenApp 6.5Migrating from XenApp 4.5 and 5 to XenApp 6.5
Migrating from XenApp 4.5 and 5 to XenApp 6.5David McGeough
 
VMworld 2015: Monitoring and Managing Applications with vRealize Operations 6...
VMworld 2015: Monitoring and Managing Applications with vRealize Operations 6...VMworld 2015: Monitoring and Managing Applications with vRealize Operations 6...
VMworld 2015: Monitoring and Managing Applications with vRealize Operations 6...VMworld
 
Citrix xen desktop by Naeem ali saifi from Ricoh
Citrix xen desktop by Naeem ali saifi from RicohCitrix xen desktop by Naeem ali saifi from Ricoh
Citrix xen desktop by Naeem ali saifi from Ricohctxnaeem
 
Designing your XenApp 7.5 Environment
Designing your XenApp 7.5 EnvironmentDesigning your XenApp 7.5 Environment
Designing your XenApp 7.5 EnvironmentDavid McGeough
 
Citrix Day 2014: XenApp / XenDesktop 7.6
Citrix Day 2014: XenApp / XenDesktop 7.6Citrix Day 2014: XenApp / XenDesktop 7.6
Citrix Day 2014: XenApp / XenDesktop 7.6Digicomp Academy AG
 
VMworld 2015: vCloud Air 2015 – Getting Started with Hybrid Cloud
VMworld 2015: vCloud Air 2015 – Getting Started with Hybrid CloudVMworld 2015: vCloud Air 2015 – Getting Started with Hybrid Cloud
VMworld 2015: vCloud Air 2015 – Getting Started with Hybrid CloudVMworld
 
Citrix Desktop Master Class - XenApp/XD Feature Pack 2
Citrix Desktop Master Class - XenApp/XD Feature Pack 2Citrix Desktop Master Class - XenApp/XD Feature Pack 2
Citrix Desktop Master Class - XenApp/XD Feature Pack 2Lee Bushen
 
VMworld Europe 2014: A DevOps Story - Unlocking the Power of Docker with the ...
VMworld Europe 2014: A DevOps Story - Unlocking the Power of Docker with the ...VMworld Europe 2014: A DevOps Story - Unlocking the Power of Docker with the ...
VMworld Europe 2014: A DevOps Story - Unlocking the Power of Docker with the ...VMworld
 
Presentation basic administration for citrix xen app 6
Presentation   basic administration for citrix xen app 6Presentation   basic administration for citrix xen app 6
Presentation basic administration for citrix xen app 6xKinAnx
 
Oda as an enterprise solution at walgreens oow 2012 v7
Oda as an enterprise solution at walgreens oow 2012 v7Oda as an enterprise solution at walgreens oow 2012 v7
Oda as an enterprise solution at walgreens oow 2012 v7Fuad Arshad
 
Lenovo Rack and Tower Server Portfolio
Lenovo Rack and Tower Server PortfolioLenovo Rack and Tower Server Portfolio
Lenovo Rack and Tower Server PortfolioLenovo Data Center
 
Windows 2008 R2 Overview
Windows 2008 R2 OverviewWindows 2008 R2 Overview
Windows 2008 R2 OverviewAmit Gatenyo
 
VMworld Europe 2014: Customer Panel - Going Beyond Server Virtualization
VMworld Europe 2014: Customer Panel - Going Beyond Server VirtualizationVMworld Europe 2014: Customer Panel - Going Beyond Server Virtualization
VMworld Europe 2014: Customer Panel - Going Beyond Server VirtualizationVMworld
 

What's hot (20)

Citrix XenApp 6.5 Performance - How To Ensure a Great End User Experience Bef...
Citrix XenApp 6.5 Performance - How To Ensure a Great End User Experience Bef...Citrix XenApp 6.5 Performance - How To Ensure a Great End User Experience Bef...
Citrix XenApp 6.5 Performance - How To Ensure a Great End User Experience Bef...
 
VMworld 2015: Advanced SQL Server on vSphere
VMworld 2015: Advanced SQL Server on vSphereVMworld 2015: Advanced SQL Server on vSphere
VMworld 2015: Advanced SQL Server on vSphere
 
Net1674 final emea
Net1674 final emeaNet1674 final emea
Net1674 final emea
 
VMworld Europe 204: Technical Deep Dive on EVO: RAIL, the new VMware Hyper-Co...
VMworld Europe 204: Technical Deep Dive on EVO: RAIL, the new VMware Hyper-Co...VMworld Europe 204: Technical Deep Dive on EVO: RAIL, the new VMware Hyper-Co...
VMworld Europe 204: Technical Deep Dive on EVO: RAIL, the new VMware Hyper-Co...
 
XPDS16: High-Performance Virtualization for HPC Cloud on Xen - Jun Nakajima &...
XPDS16: High-Performance Virtualization for HPC Cloud on Xen - Jun Nakajima &...XPDS16: High-Performance Virtualization for HPC Cloud on Xen - Jun Nakajima &...
XPDS16: High-Performance Virtualization for HPC Cloud on Xen - Jun Nakajima &...
 
Co je nového v XenDesktop 7.6 a XenApp 7.6
Co je nového v XenDesktop 7.6 a XenApp 7.6 Co je nového v XenDesktop 7.6 a XenApp 7.6
Co je nového v XenDesktop 7.6 a XenApp 7.6
 
VMworld 2016: Virtualize Active Directory, the Right Way!
VMworld 2016: Virtualize Active Directory, the Right Way! VMworld 2016: Virtualize Active Directory, the Right Way!
VMworld 2016: Virtualize Active Directory, the Right Way!
 
Migrating from XenApp 4.5 and 5 to XenApp 6.5
Migrating from XenApp 4.5 and 5 to XenApp 6.5Migrating from XenApp 4.5 and 5 to XenApp 6.5
Migrating from XenApp 4.5 and 5 to XenApp 6.5
 
VMworld 2015: Monitoring and Managing Applications with vRealize Operations 6...
VMworld 2015: Monitoring and Managing Applications with vRealize Operations 6...VMworld 2015: Monitoring and Managing Applications with vRealize Operations 6...
VMworld 2015: Monitoring and Managing Applications with vRealize Operations 6...
 
Citrix xen desktop by Naeem ali saifi from Ricoh
Citrix xen desktop by Naeem ali saifi from RicohCitrix xen desktop by Naeem ali saifi from Ricoh
Citrix xen desktop by Naeem ali saifi from Ricoh
 
Designing your XenApp 7.5 Environment
Designing your XenApp 7.5 EnvironmentDesigning your XenApp 7.5 Environment
Designing your XenApp 7.5 Environment
 
Citrix Day 2014: XenApp / XenDesktop 7.6
Citrix Day 2014: XenApp / XenDesktop 7.6Citrix Day 2014: XenApp / XenDesktop 7.6
Citrix Day 2014: XenApp / XenDesktop 7.6
 
VMworld 2015: vCloud Air 2015 – Getting Started with Hybrid Cloud
VMworld 2015: vCloud Air 2015 – Getting Started with Hybrid CloudVMworld 2015: vCloud Air 2015 – Getting Started with Hybrid Cloud
VMworld 2015: vCloud Air 2015 – Getting Started with Hybrid Cloud
 
Citrix Desktop Master Class - XenApp/XD Feature Pack 2
Citrix Desktop Master Class - XenApp/XD Feature Pack 2Citrix Desktop Master Class - XenApp/XD Feature Pack 2
Citrix Desktop Master Class - XenApp/XD Feature Pack 2
 
VMworld Europe 2014: A DevOps Story - Unlocking the Power of Docker with the ...
VMworld Europe 2014: A DevOps Story - Unlocking the Power of Docker with the ...VMworld Europe 2014: A DevOps Story - Unlocking the Power of Docker with the ...
VMworld Europe 2014: A DevOps Story - Unlocking the Power of Docker with the ...
 
Presentation basic administration for citrix xen app 6
Presentation   basic administration for citrix xen app 6Presentation   basic administration for citrix xen app 6
Presentation basic administration for citrix xen app 6
 
Oda as an enterprise solution at walgreens oow 2012 v7
Oda as an enterprise solution at walgreens oow 2012 v7Oda as an enterprise solution at walgreens oow 2012 v7
Oda as an enterprise solution at walgreens oow 2012 v7
 
Lenovo Rack and Tower Server Portfolio
Lenovo Rack and Tower Server PortfolioLenovo Rack and Tower Server Portfolio
Lenovo Rack and Tower Server Portfolio
 
Windows 2008 R2 Overview
Windows 2008 R2 OverviewWindows 2008 R2 Overview
Windows 2008 R2 Overview
 
VMworld Europe 2014: Customer Panel - Going Beyond Server Virtualization
VMworld Europe 2014: Customer Panel - Going Beyond Server VirtualizationVMworld Europe 2014: Customer Panel - Going Beyond Server Virtualization
VMworld Europe 2014: Customer Panel - Going Beyond Server Virtualization
 

Similar to Simplifying systems management with Dell OpenManage on 13G Dell PowerEdge servers

Systems management savings with Dell OpenManage on 13G Dell PowerEdge servers
Systems management savings with Dell OpenManage on 13G Dell PowerEdge servers Systems management savings with Dell OpenManage on 13G Dell PowerEdge servers
Systems management savings with Dell OpenManage on 13G Dell PowerEdge servers Principled Technologies
 
Simplify administrator tasks and improve security and health monitoring with ...
Simplify administrator tasks and improve security and health monitoring with ...Simplify administrator tasks and improve security and health monitoring with ...
Simplify administrator tasks and improve security and health monitoring with ...Principled Technologies
 
The evolution of Dell EMC PowerEdge server systems management - Infographic
The evolution of Dell EMC PowerEdge server systems management - InfographicThe evolution of Dell EMC PowerEdge server systems management - Infographic
The evolution of Dell EMC PowerEdge server systems management - InfographicPrincipled Technologies
 
Reducing deployment time with Dell Chassis Management Controller
Reducing deployment time with Dell Chassis Management ControllerReducing deployment time with Dell Chassis Management Controller
Reducing deployment time with Dell Chassis Management ControllerPrincipled Technologies
 
Microsoft System Center virtual environment comparison: Dell PowerEdge server...
Microsoft System Center virtual environment comparison: Dell PowerEdge server...Microsoft System Center virtual environment comparison: Dell PowerEdge server...
Microsoft System Center virtual environment comparison: Dell PowerEdge server...Principled Technologies
 
Efficient and versatile hardware management with Dell PowerEdge VRTX
Efficient and versatile hardware management with Dell PowerEdge VRTXEfficient and versatile hardware management with Dell PowerEdge VRTX
Efficient and versatile hardware management with Dell PowerEdge VRTXPrincipled Technologies
 
Reduce hands-on deployment times to near zero* with iDRAC9 automation
Reduce hands-on deployment times to near zero* with iDRAC9 automationReduce hands-on deployment times to near zero* with iDRAC9 automation
Reduce hands-on deployment times to near zero* with iDRAC9 automationPrincipled Technologies
 
Faster, easier deployment of Dell PowerEdge servers helps it and your business
Faster, easier deployment of Dell PowerEdge servers  helps it and your businessFaster, easier deployment of Dell PowerEdge servers  helps it and your business
Faster, easier deployment of Dell PowerEdge servers helps it and your businessPrincipled Technologies
 
Remote notebook management: Dell unique vPro extensions and Dell Client Integ...
Remote notebook management: Dell unique vPro extensions and Dell Client Integ...Remote notebook management: Dell unique vPro extensions and Dell Client Integ...
Remote notebook management: Dell unique vPro extensions and Dell Client Integ...Principled Technologies
 
Dell OpenManage Essentials: Improve efficiency with fewer tools, more benefits
Dell OpenManage Essentials: Improve efficiency with fewer tools, more benefits Dell OpenManage Essentials: Improve efficiency with fewer tools, more benefits
Dell OpenManage Essentials: Improve efficiency with fewer tools, more benefits Principled Technologies
 
Dell PowerEdge VRTX and M-series compute nodes configuration study
Dell PowerEdge VRTX and M-series compute nodes configuration studyDell PowerEdge VRTX and M-series compute nodes configuration study
Dell PowerEdge VRTX and M-series compute nodes configuration studyPrincipled Technologies
 
Streamline more than server registration
Streamline more than server registrationStreamline more than server registration
Streamline more than server registrationPrincipled Technologies
 
Faster and easier server installation with Dell ProDeploy Factory Configurati...
Faster and easier server installation with Dell ProDeploy Factory Configurati...Faster and easier server installation with Dell ProDeploy Factory Configurati...
Faster and easier server installation with Dell ProDeploy Factory Configurati...Principled Technologies
 
Rein in power consumption faster and more easily
Rein in power consumption faster and more easilyRein in power consumption faster and more easily
Rein in power consumption faster and more easilyPrincipled Technologies
 
Dell OME advanced features deliver faster power monitoring capabilities plus ...
Dell OME advanced features deliver faster power monitoring capabilities plus ...Dell OME advanced features deliver faster power monitoring capabilities plus ...
Dell OME advanced features deliver faster power monitoring capabilities plus ...Principled Technologies
 
Automate high-touch server lifecycle management tasks
Automate high-touch server lifecycle management tasksAutomate high-touch server lifecycle management tasks
Automate high-touch server lifecycle management tasksPrincipled Technologies
 
A Dell PowerEdge MX environment using OpenManage Enterprise and OpenManage En...
A Dell PowerEdge MX environment using OpenManage Enterprise and OpenManage En...A Dell PowerEdge MX environment using OpenManage Enterprise and OpenManage En...
A Dell PowerEdge MX environment using OpenManage Enterprise and OpenManage En...Principled Technologies
 
Dell EMC PowerEdge MX streamlined routine tasks including deployment, firmwar...
Dell EMC PowerEdge MX streamlined routine tasks including deployment, firmwar...Dell EMC PowerEdge MX streamlined routine tasks including deployment, firmwar...
Dell EMC PowerEdge MX streamlined routine tasks including deployment, firmwar...Principled Technologies
 
More efficient service deployment with Dell Active System Manager
More efficient service deployment with Dell Active System ManagerMore efficient service deployment with Dell Active System Manager
More efficient service deployment with Dell Active System ManagerPrincipled Technologies
 
Manage infrastructure and deploy services with ease using Dell Active System ...
Manage infrastructure and deploy services with ease using Dell Active System ...Manage infrastructure and deploy services with ease using Dell Active System ...
Manage infrastructure and deploy services with ease using Dell Active System ...Principled Technologies
 

Similar to Simplifying systems management with Dell OpenManage on 13G Dell PowerEdge servers (20)

Systems management savings with Dell OpenManage on 13G Dell PowerEdge servers
Systems management savings with Dell OpenManage on 13G Dell PowerEdge servers Systems management savings with Dell OpenManage on 13G Dell PowerEdge servers
Systems management savings with Dell OpenManage on 13G Dell PowerEdge servers
 
Simplify administrator tasks and improve security and health monitoring with ...
Simplify administrator tasks and improve security and health monitoring with ...Simplify administrator tasks and improve security and health monitoring with ...
Simplify administrator tasks and improve security and health monitoring with ...
 
The evolution of Dell EMC PowerEdge server systems management - Infographic
The evolution of Dell EMC PowerEdge server systems management - InfographicThe evolution of Dell EMC PowerEdge server systems management - Infographic
The evolution of Dell EMC PowerEdge server systems management - Infographic
 
Reducing deployment time with Dell Chassis Management Controller
Reducing deployment time with Dell Chassis Management ControllerReducing deployment time with Dell Chassis Management Controller
Reducing deployment time with Dell Chassis Management Controller
 
Microsoft System Center virtual environment comparison: Dell PowerEdge server...
Microsoft System Center virtual environment comparison: Dell PowerEdge server...Microsoft System Center virtual environment comparison: Dell PowerEdge server...
Microsoft System Center virtual environment comparison: Dell PowerEdge server...
 
Efficient and versatile hardware management with Dell PowerEdge VRTX
Efficient and versatile hardware management with Dell PowerEdge VRTXEfficient and versatile hardware management with Dell PowerEdge VRTX
Efficient and versatile hardware management with Dell PowerEdge VRTX
 
Reduce hands-on deployment times to near zero* with iDRAC9 automation
Reduce hands-on deployment times to near zero* with iDRAC9 automationReduce hands-on deployment times to near zero* with iDRAC9 automation
Reduce hands-on deployment times to near zero* with iDRAC9 automation
 
Faster, easier deployment of Dell PowerEdge servers helps it and your business
Faster, easier deployment of Dell PowerEdge servers  helps it and your businessFaster, easier deployment of Dell PowerEdge servers  helps it and your business
Faster, easier deployment of Dell PowerEdge servers helps it and your business
 
Remote notebook management: Dell unique vPro extensions and Dell Client Integ...
Remote notebook management: Dell unique vPro extensions and Dell Client Integ...Remote notebook management: Dell unique vPro extensions and Dell Client Integ...
Remote notebook management: Dell unique vPro extensions and Dell Client Integ...
 
Dell OpenManage Essentials: Improve efficiency with fewer tools, more benefits
Dell OpenManage Essentials: Improve efficiency with fewer tools, more benefits Dell OpenManage Essentials: Improve efficiency with fewer tools, more benefits
Dell OpenManage Essentials: Improve efficiency with fewer tools, more benefits
 
Dell PowerEdge VRTX and M-series compute nodes configuration study
Dell PowerEdge VRTX and M-series compute nodes configuration studyDell PowerEdge VRTX and M-series compute nodes configuration study
Dell PowerEdge VRTX and M-series compute nodes configuration study
 
Streamline more than server registration
Streamline more than server registrationStreamline more than server registration
Streamline more than server registration
 
Faster and easier server installation with Dell ProDeploy Factory Configurati...
Faster and easier server installation with Dell ProDeploy Factory Configurati...Faster and easier server installation with Dell ProDeploy Factory Configurati...
Faster and easier server installation with Dell ProDeploy Factory Configurati...
 
Rein in power consumption faster and more easily
Rein in power consumption faster and more easilyRein in power consumption faster and more easily
Rein in power consumption faster and more easily
 
Dell OME advanced features deliver faster power monitoring capabilities plus ...
Dell OME advanced features deliver faster power monitoring capabilities plus ...Dell OME advanced features deliver faster power monitoring capabilities plus ...
Dell OME advanced features deliver faster power monitoring capabilities plus ...
 
Automate high-touch server lifecycle management tasks
Automate high-touch server lifecycle management tasksAutomate high-touch server lifecycle management tasks
Automate high-touch server lifecycle management tasks
 
A Dell PowerEdge MX environment using OpenManage Enterprise and OpenManage En...
A Dell PowerEdge MX environment using OpenManage Enterprise and OpenManage En...A Dell PowerEdge MX environment using OpenManage Enterprise and OpenManage En...
A Dell PowerEdge MX environment using OpenManage Enterprise and OpenManage En...
 
Dell EMC PowerEdge MX streamlined routine tasks including deployment, firmwar...
Dell EMC PowerEdge MX streamlined routine tasks including deployment, firmwar...Dell EMC PowerEdge MX streamlined routine tasks including deployment, firmwar...
Dell EMC PowerEdge MX streamlined routine tasks including deployment, firmwar...
 
More efficient service deployment with Dell Active System Manager
More efficient service deployment with Dell Active System ManagerMore efficient service deployment with Dell Active System Manager
More efficient service deployment with Dell Active System Manager
 
Manage infrastructure and deploy services with ease using Dell Active System ...
Manage infrastructure and deploy services with ease using Dell Active System ...Manage infrastructure and deploy services with ease using Dell Active System ...
Manage infrastructure and deploy services with ease using Dell Active System ...
 

More from Principled Technologies

Dell APEX Cloud Platform for Red Hat OpenShift: An easily deployable and powe...
Dell APEX Cloud Platform for Red Hat OpenShift: An easily deployable and powe...Dell APEX Cloud Platform for Red Hat OpenShift: An easily deployable and powe...
Dell APEX Cloud Platform for Red Hat OpenShift: An easily deployable and powe...Principled Technologies
 
Upgrade your cloud infrastructure with Dell PowerEdge R760 servers and VMware...
Upgrade your cloud infrastructure with Dell PowerEdge R760 servers and VMware...Upgrade your cloud infrastructure with Dell PowerEdge R760 servers and VMware...
Upgrade your cloud infrastructure with Dell PowerEdge R760 servers and VMware...Principled Technologies
 
Realize 2.1X the performance with 20% less power with AMD EPYC processor-back...
Realize 2.1X the performance with 20% less power with AMD EPYC processor-back...Realize 2.1X the performance with 20% less power with AMD EPYC processor-back...
Realize 2.1X the performance with 20% less power with AMD EPYC processor-back...Principled Technologies
 
Improve performance and gain room to grow by easily migrating to a modern Ope...
Improve performance and gain room to grow by easily migrating to a modern Ope...Improve performance and gain room to grow by easily migrating to a modern Ope...
Improve performance and gain room to grow by easily migrating to a modern Ope...Principled Technologies
 
Boost PC performance: How more available memory can improve productivity
Boost PC performance: How more available memory can improve productivityBoost PC performance: How more available memory can improve productivity
Boost PC performance: How more available memory can improve productivityPrincipled Technologies
 
Deploy with confidence: VMware Cloud Foundation 5.1 on next gen Dell PowerEdg...
Deploy with confidence: VMware Cloud Foundation 5.1 on next gen Dell PowerEdg...Deploy with confidence: VMware Cloud Foundation 5.1 on next gen Dell PowerEdg...
Deploy with confidence: VMware Cloud Foundation 5.1 on next gen Dell PowerEdg...Principled Technologies
 
Upgrade your cloud infrastructure with Dell PowerEdge R760 servers and VMware...
Upgrade your cloud infrastructure with Dell PowerEdge R760 servers and VMware...Upgrade your cloud infrastructure with Dell PowerEdge R760 servers and VMware...
Upgrade your cloud infrastructure with Dell PowerEdge R760 servers and VMware...Principled Technologies
 
A comparison of security features in Dell, HP, and Lenovo PC systems
A comparison of security features in Dell, HP, and Lenovo PC systemsA comparison of security features in Dell, HP, and Lenovo PC systems
A comparison of security features in Dell, HP, and Lenovo PC systemsPrincipled Technologies
 
Increase security, sustainability, and efficiency with robust Dell server man...
Increase security, sustainability, and efficiency with robust Dell server man...Increase security, sustainability, and efficiency with robust Dell server man...
Increase security, sustainability, and efficiency with robust Dell server man...Principled Technologies
 
Scale up your storage with higher-performing Dell APEX Block Storage for AWS ...
Scale up your storage with higher-performing Dell APEX Block Storage for AWS ...Scale up your storage with higher-performing Dell APEX Block Storage for AWS ...
Scale up your storage with higher-performing Dell APEX Block Storage for AWS ...Principled Technologies
 
Scale up your storage with higher-performing Dell APEX Block Storage for AWS
Scale up your storage with higher-performing Dell APEX Block Storage for AWSScale up your storage with higher-performing Dell APEX Block Storage for AWS
Scale up your storage with higher-performing Dell APEX Block Storage for AWSPrincipled Technologies
 
Get in and stay in the productivity zone with the HP Z2 G9 Tower Workstation
Get in and stay in the productivity zone with the HP Z2 G9 Tower WorkstationGet in and stay in the productivity zone with the HP Z2 G9 Tower Workstation
Get in and stay in the productivity zone with the HP Z2 G9 Tower WorkstationPrincipled Technologies
 
Open up new possibilities with higher transactional database performance from...
Open up new possibilities with higher transactional database performance from...Open up new possibilities with higher transactional database performance from...
Open up new possibilities with higher transactional database performance from...Principled Technologies
 
Improving database performance and value with an easy migration to Azure Data...
Improving database performance and value with an easy migration to Azure Data...Improving database performance and value with an easy migration to Azure Data...
Improving database performance and value with an easy migration to Azure Data...Principled Technologies
 
Realize better value and performance migrating from Azure Database for Postgr...
Realize better value and performance migrating from Azure Database for Postgr...Realize better value and performance migrating from Azure Database for Postgr...
Realize better value and performance migrating from Azure Database for Postgr...Principled Technologies
 
Set up students and teachers to excel now and in the future with Intel proces...
Set up students and teachers to excel now and in the future with Intel proces...Set up students and teachers to excel now and in the future with Intel proces...
Set up students and teachers to excel now and in the future with Intel proces...Principled Technologies
 
Finding the path to AI success with the Dell AI portfolio - Summary
Finding the path to AI success with the Dell AI portfolio - SummaryFinding the path to AI success with the Dell AI portfolio - Summary
Finding the path to AI success with the Dell AI portfolio - SummaryPrincipled Technologies
 

More from Principled Technologies (20)

Dell APEX Cloud Platform for Red Hat OpenShift: An easily deployable and powe...
Dell APEX Cloud Platform for Red Hat OpenShift: An easily deployable and powe...Dell APEX Cloud Platform for Red Hat OpenShift: An easily deployable and powe...
Dell APEX Cloud Platform for Red Hat OpenShift: An easily deployable and powe...
 
Upgrade your cloud infrastructure with Dell PowerEdge R760 servers and VMware...
Upgrade your cloud infrastructure with Dell PowerEdge R760 servers and VMware...Upgrade your cloud infrastructure with Dell PowerEdge R760 servers and VMware...
Upgrade your cloud infrastructure with Dell PowerEdge R760 servers and VMware...
 
Upgrade your cloud infrastructure with Dell PowerEdge R760 servers and VMware...
Upgrade your cloud infrastructure with Dell PowerEdge R760 servers and VMware...Upgrade your cloud infrastructure with Dell PowerEdge R760 servers and VMware...
Upgrade your cloud infrastructure with Dell PowerEdge R760 servers and VMware...
 
Realize 2.1X the performance with 20% less power with AMD EPYC processor-back...
Realize 2.1X the performance with 20% less power with AMD EPYC processor-back...Realize 2.1X the performance with 20% less power with AMD EPYC processor-back...
Realize 2.1X the performance with 20% less power with AMD EPYC processor-back...
 
Improve performance and gain room to grow by easily migrating to a modern Ope...
Improve performance and gain room to grow by easily migrating to a modern Ope...Improve performance and gain room to grow by easily migrating to a modern Ope...
Improve performance and gain room to grow by easily migrating to a modern Ope...
 
Boost PC performance: How more available memory can improve productivity
Boost PC performance: How more available memory can improve productivityBoost PC performance: How more available memory can improve productivity
Boost PC performance: How more available memory can improve productivity
 
Deploy with confidence: VMware Cloud Foundation 5.1 on next gen Dell PowerEdg...
Deploy with confidence: VMware Cloud Foundation 5.1 on next gen Dell PowerEdg...Deploy with confidence: VMware Cloud Foundation 5.1 on next gen Dell PowerEdg...
Deploy with confidence: VMware Cloud Foundation 5.1 on next gen Dell PowerEdg...
 
Upgrade your cloud infrastructure with Dell PowerEdge R760 servers and VMware...
Upgrade your cloud infrastructure with Dell PowerEdge R760 servers and VMware...Upgrade your cloud infrastructure with Dell PowerEdge R760 servers and VMware...
Upgrade your cloud infrastructure with Dell PowerEdge R760 servers and VMware...
 
A comparison of security features in Dell, HP, and Lenovo PC systems
A comparison of security features in Dell, HP, and Lenovo PC systemsA comparison of security features in Dell, HP, and Lenovo PC systems
A comparison of security features in Dell, HP, and Lenovo PC systems
 
Increase security, sustainability, and efficiency with robust Dell server man...
Increase security, sustainability, and efficiency with robust Dell server man...Increase security, sustainability, and efficiency with robust Dell server man...
Increase security, sustainability, and efficiency with robust Dell server man...
 
Increase security, sustainability, and efficiency with robust Dell server man...
Increase security, sustainability, and efficiency with robust Dell server man...Increase security, sustainability, and efficiency with robust Dell server man...
Increase security, sustainability, and efficiency with robust Dell server man...
 
Scale up your storage with higher-performing Dell APEX Block Storage for AWS ...
Scale up your storage with higher-performing Dell APEX Block Storage for AWS ...Scale up your storage with higher-performing Dell APEX Block Storage for AWS ...
Scale up your storage with higher-performing Dell APEX Block Storage for AWS ...
 
Scale up your storage with higher-performing Dell APEX Block Storage for AWS
Scale up your storage with higher-performing Dell APEX Block Storage for AWSScale up your storage with higher-performing Dell APEX Block Storage for AWS
Scale up your storage with higher-performing Dell APEX Block Storage for AWS
 
Get in and stay in the productivity zone with the HP Z2 G9 Tower Workstation
Get in and stay in the productivity zone with the HP Z2 G9 Tower WorkstationGet in and stay in the productivity zone with the HP Z2 G9 Tower Workstation
Get in and stay in the productivity zone with the HP Z2 G9 Tower Workstation
 
Open up new possibilities with higher transactional database performance from...
Open up new possibilities with higher transactional database performance from...Open up new possibilities with higher transactional database performance from...
Open up new possibilities with higher transactional database performance from...
 
Improving database performance and value with an easy migration to Azure Data...
Improving database performance and value with an easy migration to Azure Data...Improving database performance and value with an easy migration to Azure Data...
Improving database performance and value with an easy migration to Azure Data...
 
Realize better value and performance migrating from Azure Database for Postgr...
Realize better value and performance migrating from Azure Database for Postgr...Realize better value and performance migrating from Azure Database for Postgr...
Realize better value and performance migrating from Azure Database for Postgr...
 
Realize better value and performance migrating from Azure Database for Postgr...
Realize better value and performance migrating from Azure Database for Postgr...Realize better value and performance migrating from Azure Database for Postgr...
Realize better value and performance migrating from Azure Database for Postgr...
 
Set up students and teachers to excel now and in the future with Intel proces...
Set up students and teachers to excel now and in the future with Intel proces...Set up students and teachers to excel now and in the future with Intel proces...
Set up students and teachers to excel now and in the future with Intel proces...
 
Finding the path to AI success with the Dell AI portfolio - Summary
Finding the path to AI success with the Dell AI portfolio - SummaryFinding the path to AI success with the Dell AI portfolio - Summary
Finding the path to AI success with the Dell AI portfolio - Summary
 

Recently uploaded

Apidays New York 2024 - The Good, the Bad and the Governed by David O'Neill, ...
Apidays New York 2024 - The Good, the Bad and the Governed by David O'Neill, ...Apidays New York 2024 - The Good, the Bad and the Governed by David O'Neill, ...
Apidays New York 2024 - The Good, the Bad and the Governed by David O'Neill, ...apidays
 
Powerful Google developer tools for immediate impact! (2023-24 C)
Powerful Google developer tools for immediate impact! (2023-24 C)Powerful Google developer tools for immediate impact! (2023-24 C)
Powerful Google developer tools for immediate impact! (2023-24 C)wesley chun
 
FWD Group - Insurer Innovation Award 2024
FWD Group - Insurer Innovation Award 2024FWD Group - Insurer Innovation Award 2024
FWD Group - Insurer Innovation Award 2024The Digital Insurer
 
Apidays Singapore 2024 - Modernizing Securities Finance by Madhu Subbu
Apidays Singapore 2024 - Modernizing Securities Finance by Madhu SubbuApidays Singapore 2024 - Modernizing Securities Finance by Madhu Subbu
Apidays Singapore 2024 - Modernizing Securities Finance by Madhu Subbuapidays
 
EMPOWERMENT TECHNOLOGY GRADE 11 QUARTER 2 REVIEWER
EMPOWERMENT TECHNOLOGY GRADE 11 QUARTER 2 REVIEWEREMPOWERMENT TECHNOLOGY GRADE 11 QUARTER 2 REVIEWER
EMPOWERMENT TECHNOLOGY GRADE 11 QUARTER 2 REVIEWERMadyBayot
 
A Year of the Servo Reboot: Where Are We Now?
A Year of the Servo Reboot: Where Are We Now?A Year of the Servo Reboot: Where Are We Now?
A Year of the Servo Reboot: Where Are We Now?Igalia
 
How to Troubleshoot Apps for the Modern Connected Worker
How to Troubleshoot Apps for the Modern Connected WorkerHow to Troubleshoot Apps for the Modern Connected Worker
How to Troubleshoot Apps for the Modern Connected WorkerThousandEyes
 
Boost Fertility New Invention Ups Success Rates.pdf
Boost Fertility New Invention Ups Success Rates.pdfBoost Fertility New Invention Ups Success Rates.pdf
Boost Fertility New Invention Ups Success Rates.pdfsudhanshuwaghmare1
 
Real Time Object Detection Using Open CV
Real Time Object Detection Using Open CVReal Time Object Detection Using Open CV
Real Time Object Detection Using Open CVKhem
 
presentation ICT roal in 21st century education
presentation ICT roal in 21st century educationpresentation ICT roal in 21st century education
presentation ICT roal in 21st century educationjfdjdjcjdnsjd
 
AXA XL - Insurer Innovation Award Americas 2024
AXA XL - Insurer Innovation Award Americas 2024AXA XL - Insurer Innovation Award Americas 2024
AXA XL - Insurer Innovation Award Americas 2024The Digital Insurer
 
Navi Mumbai Call Girls 🥰 8617370543 Service Offer VIP Hot Model
Navi Mumbai Call Girls 🥰 8617370543 Service Offer VIP Hot ModelNavi Mumbai Call Girls 🥰 8617370543 Service Offer VIP Hot Model
Navi Mumbai Call Girls 🥰 8617370543 Service Offer VIP Hot ModelDeepika Singh
 
MS Copilot expands with MS Graph connectors
MS Copilot expands with MS Graph connectorsMS Copilot expands with MS Graph connectors
MS Copilot expands with MS Graph connectorsNanddeep Nachan
 
Manulife - Insurer Transformation Award 2024
Manulife - Insurer Transformation Award 2024Manulife - Insurer Transformation Award 2024
Manulife - Insurer Transformation Award 2024The Digital Insurer
 
Strategies for Landing an Oracle DBA Job as a Fresher
Strategies for Landing an Oracle DBA Job as a FresherStrategies for Landing an Oracle DBA Job as a Fresher
Strategies for Landing an Oracle DBA Job as a FresherRemote DBA Services
 
ICT role in 21st century education and its challenges
ICT role in 21st century education and its challengesICT role in 21st century education and its challenges
ICT role in 21st century education and its challengesrafiqahmad00786416
 
Apidays New York 2024 - Accelerating FinTech Innovation by Vasa Krishnan, Fin...
Apidays New York 2024 - Accelerating FinTech Innovation by Vasa Krishnan, Fin...Apidays New York 2024 - Accelerating FinTech Innovation by Vasa Krishnan, Fin...
Apidays New York 2024 - Accelerating FinTech Innovation by Vasa Krishnan, Fin...apidays
 
Mastering MySQL Database Architecture: Deep Dive into MySQL Shell and MySQL R...
Mastering MySQL Database Architecture: Deep Dive into MySQL Shell and MySQL R...Mastering MySQL Database Architecture: Deep Dive into MySQL Shell and MySQL R...
Mastering MySQL Database Architecture: Deep Dive into MySQL Shell and MySQL R...Miguel Araújo
 
ProductAnonymous-April2024-WinProductDiscovery-MelissaKlemke
ProductAnonymous-April2024-WinProductDiscovery-MelissaKlemkeProductAnonymous-April2024-WinProductDiscovery-MelissaKlemke
ProductAnonymous-April2024-WinProductDiscovery-MelissaKlemkeProduct Anonymous
 
Artificial Intelligence Chap.5 : Uncertainty
Artificial Intelligence Chap.5 : UncertaintyArtificial Intelligence Chap.5 : Uncertainty
Artificial Intelligence Chap.5 : UncertaintyKhushali Kathiriya
 

Recently uploaded (20)

Apidays New York 2024 - The Good, the Bad and the Governed by David O'Neill, ...
Apidays New York 2024 - The Good, the Bad and the Governed by David O'Neill, ...Apidays New York 2024 - The Good, the Bad and the Governed by David O'Neill, ...
Apidays New York 2024 - The Good, the Bad and the Governed by David O'Neill, ...
 
Powerful Google developer tools for immediate impact! (2023-24 C)
Powerful Google developer tools for immediate impact! (2023-24 C)Powerful Google developer tools for immediate impact! (2023-24 C)
Powerful Google developer tools for immediate impact! (2023-24 C)
 
FWD Group - Insurer Innovation Award 2024
FWD Group - Insurer Innovation Award 2024FWD Group - Insurer Innovation Award 2024
FWD Group - Insurer Innovation Award 2024
 
Apidays Singapore 2024 - Modernizing Securities Finance by Madhu Subbu
Apidays Singapore 2024 - Modernizing Securities Finance by Madhu SubbuApidays Singapore 2024 - Modernizing Securities Finance by Madhu Subbu
Apidays Singapore 2024 - Modernizing Securities Finance by Madhu Subbu
 
EMPOWERMENT TECHNOLOGY GRADE 11 QUARTER 2 REVIEWER
EMPOWERMENT TECHNOLOGY GRADE 11 QUARTER 2 REVIEWEREMPOWERMENT TECHNOLOGY GRADE 11 QUARTER 2 REVIEWER
EMPOWERMENT TECHNOLOGY GRADE 11 QUARTER 2 REVIEWER
 
A Year of the Servo Reboot: Where Are We Now?
A Year of the Servo Reboot: Where Are We Now?A Year of the Servo Reboot: Where Are We Now?
A Year of the Servo Reboot: Where Are We Now?
 
How to Troubleshoot Apps for the Modern Connected Worker
How to Troubleshoot Apps for the Modern Connected WorkerHow to Troubleshoot Apps for the Modern Connected Worker
How to Troubleshoot Apps for the Modern Connected Worker
 
Boost Fertility New Invention Ups Success Rates.pdf
Boost Fertility New Invention Ups Success Rates.pdfBoost Fertility New Invention Ups Success Rates.pdf
Boost Fertility New Invention Ups Success Rates.pdf
 
Real Time Object Detection Using Open CV
Real Time Object Detection Using Open CVReal Time Object Detection Using Open CV
Real Time Object Detection Using Open CV
 
presentation ICT roal in 21st century education
presentation ICT roal in 21st century educationpresentation ICT roal in 21st century education
presentation ICT roal in 21st century education
 
AXA XL - Insurer Innovation Award Americas 2024
AXA XL - Insurer Innovation Award Americas 2024AXA XL - Insurer Innovation Award Americas 2024
AXA XL - Insurer Innovation Award Americas 2024
 
Navi Mumbai Call Girls 🥰 8617370543 Service Offer VIP Hot Model
Navi Mumbai Call Girls 🥰 8617370543 Service Offer VIP Hot ModelNavi Mumbai Call Girls 🥰 8617370543 Service Offer VIP Hot Model
Navi Mumbai Call Girls 🥰 8617370543 Service Offer VIP Hot Model
 
MS Copilot expands with MS Graph connectors
MS Copilot expands with MS Graph connectorsMS Copilot expands with MS Graph connectors
MS Copilot expands with MS Graph connectors
 
Manulife - Insurer Transformation Award 2024
Manulife - Insurer Transformation Award 2024Manulife - Insurer Transformation Award 2024
Manulife - Insurer Transformation Award 2024
 
Strategies for Landing an Oracle DBA Job as a Fresher
Strategies for Landing an Oracle DBA Job as a FresherStrategies for Landing an Oracle DBA Job as a Fresher
Strategies for Landing an Oracle DBA Job as a Fresher
 
ICT role in 21st century education and its challenges
ICT role in 21st century education and its challengesICT role in 21st century education and its challenges
ICT role in 21st century education and its challenges
 
Apidays New York 2024 - Accelerating FinTech Innovation by Vasa Krishnan, Fin...
Apidays New York 2024 - Accelerating FinTech Innovation by Vasa Krishnan, Fin...Apidays New York 2024 - Accelerating FinTech Innovation by Vasa Krishnan, Fin...
Apidays New York 2024 - Accelerating FinTech Innovation by Vasa Krishnan, Fin...
 
Mastering MySQL Database Architecture: Deep Dive into MySQL Shell and MySQL R...
Mastering MySQL Database Architecture: Deep Dive into MySQL Shell and MySQL R...Mastering MySQL Database Architecture: Deep Dive into MySQL Shell and MySQL R...
Mastering MySQL Database Architecture: Deep Dive into MySQL Shell and MySQL R...
 
ProductAnonymous-April2024-WinProductDiscovery-MelissaKlemke
ProductAnonymous-April2024-WinProductDiscovery-MelissaKlemkeProductAnonymous-April2024-WinProductDiscovery-MelissaKlemke
ProductAnonymous-April2024-WinProductDiscovery-MelissaKlemke
 
Artificial Intelligence Chap.5 : Uncertainty
Artificial Intelligence Chap.5 : UncertaintyArtificial Intelligence Chap.5 : Uncertainty
Artificial Intelligence Chap.5 : Uncertainty
 

Simplifying systems management with Dell OpenManage on 13G Dell PowerEdge servers

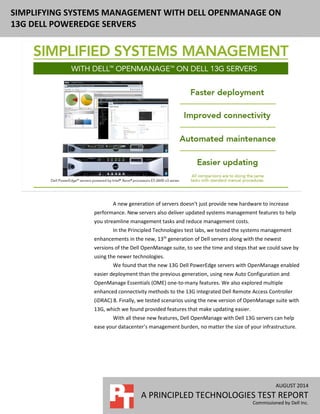
  • 1. AUGUST 2014 (Revised) A PRINCIPLED TECHNOLOGIES TEST REPORT Commissioned by Dell Inc. SIMPLIFYING SYSTEMS MANAGEMENT WITH DELL OPENMANAGE ON 13G DELL POWEREDGE SERVERS A new generation of servers doesn’t just provide new hardware to increase performance. New servers also deliver updated systems management features to help you streamline management tasks and reduce management costs. In the Principled Technologies test labs, we tested the systems management enhancements in the new, 13th generation of Dell servers along with the newest versions of the Dell OpenManage suite, to see the time and steps that we could save by using the newer technologies. We found that the new 13G Dell PowerEdge servers with OpenManage enabled easier deployment than the previous generation, using new Auto Configuration and OpenManage Essentials (OME) one-to-many features. We also explored multiple enhanced connectivity methods to the 13G integrated Dell Remote Access Controller (iDRAC) 8. Finally, we tested scenarios using the new version of OpenManage suite with 13G, which we found provided features that make updating easier. With all these new features, Dell OpenManage with Dell 13G servers can help ease your datacenter’s management burden, no matter the size of your infrastructure.
  • 2. A Principled Technologies test report 2Simplifying systems management with Dell OpenManage on 13G Dell PowerEdge servers DELL OPENMANAGE SUITE AND DELL 13G Dell OpenManage is a systems management suite designed to help IT departments of all sizes manage their Dell PowerEdge server infrastructures. Without automating management tasks, administrators must perform these tasks manually, including node deployment, error correction, and updates. The Dell OpenManage suite automates many processes, freeing up IT time for more strategic tasks. Using integrated systems management can improve the overall function of your infrastructure by allowing administrators to more quickly solve any problems that arise in the datacenter. With the introduction of 13G Dell PowerEdge servers, Dell has added a number of features to Dell OpenManage systems management to save administrator time and increase management flexibility (see Figure 1). New systems management features in the Dell OpenManage Suite and iDRAC8 for 13G servers Faster Deployment “Zero-Touch” Auto Configuration Deploy a baseline server configuration profile automatically as soon as the server is connected to the network. Open Manage Essentials (OME) One-to-many deployment Perform automated hardware configuration and Operating System deployment to multiple servers through centralized management. Improved Connectivity iDRAC Direct (cable) Connect directly to the iDRAC using a front side USB connection, without the need for a dedicated management network iDRAC Direct (key) Rapidly deploy custom server profiles using plug and play technology. Quick Sync (NFC) Quickly inventory and modify server configurations using smartphone and tablets. Automated Maintenance Tech Support Report Gather complete, advanced diagnostic information from a single location. OME Managing Configuration Baseline Manage your server configurations from a centralized location, without having to take a single server offline for inventory. Easier updating Zero Touch Repository Manager and Self-updating firmware system Build self-maintaining repositories and configure servers to automatically update to new versions of software on your own schedule. OME Agent-free driver update Deploy firmware and driver updates from the OME console without manage software on your servers. Figure 1: New features in Dell OpenManage. To learn more about our test components, see Appendix A. For a detailed look at the system we used for testing, see Appendix B. For step-by-step details on how we tested, see Appendix C.
  • 3. A Principled Technologies test report 3Simplifying systems management with Dell OpenManage on 13G Dell PowerEdge servers WHAT WE FOUND We investigated the new features of the Dell OpenManage Suite and the Dell 13G line on a new Dell PowerEdge R730 server to see how they simplified management tasks compared to doing them manually. These features fit into four categories:  Deployment  Connectivity  Maintenance  Updating We found that the new features simplified all these tasks, saving administrator time and steps, as shown in Figure 2 shows. Scenario Automation Manual Difference Time (s) Steps Time (s) Steps Less time (s) % Less time Fewer steps Zero-Touch Auto Configuration 0 0 859 213 859 100% 213 OME One-to-Many Auto Deployment (100 servers - extrapolated) 95 23 125,400 22,200 125,305 99.92% 22,177 One server 95 23 1,254 222 1,159 92% 199 iDRAC Direct (cable) 76 12 181 27 105 58% 15 iDRAC Direct (USB key) 28 4 859 213 831 97% 209 Quick Sync with OM Mobile App 156 36 508 43 352 69% 7 Quick Sync Read 39 12 248 18 209 84% 6 Quick Sync Write 117 24 260 25 143 55% 1 Tech Support Report 123 11 455 29 332 73% 18 OME Configuration Management (100 servers - extrapolated) 50 5 57,300 7,400 57,250 99.91% 7,395 One server 50 5 573 74 523 91% 69 Zero Touch Repository Management and Auto-Update Firmware 0 0 306 20 306 100% 20 Figure 2: Summary of our test results. New features for deployment “Zero-Touch” Auto Configuration Configuring new servers can be a time-consuming task, especially when IT staff has a number of servers to deploy, apply changes to, and get into production. Dell 13G servers can use “Zero-Touch” Auto Configuration, which automates the server profile application. With Auto Configuration, when a server is powered on and the iDRAC is connected and configured for DHCP (a factory option), the iDRAC obtains configuration profile information from the pre-configured DHCP server and automatically applies the
  • 4. A Principled Technologies test report 4Simplifying systems management with Dell OpenManage on 13G Dell PowerEdge servers correct hardware settings, which reduces deployment time and eliminates potential user error. In our hands-on tests, we used Auto Configuration to configure a Dell PowerEdge R730 server using a Server Configuration Profile, and then applied the same changes manually. As Figure 3 shows, using Dell Auto Configuration required no steps or time for administrators to configure a server with an automatically deployed server profile, while it took 213 steps and 14 minutes 19 seconds to do the same configuration tasks manually. If your organization is deploying one hundred servers at a time, Auto Configuration could save nearly three days of administrative time and eliminate 21,300 steps and potential human error. Administrators could use the time they save configuring servers to maintain and innovate elsewhere. Figure 3: It took 213 fewer steps to configure a new server using Dell OpenManage with Zero-Touch auto- configuration than doing it manually. Dell OpenManage Essentials one-to-many deployment Speeding up deployment server-by-server would certainly increase datacenter efficiency, but what if administrators could reduce the time it took to deploy organization-approved configurations and operating systems to whole racks at a time? With OpenManage Essentials one-to-many deployment, we were able to deploy configuration profiles and operating systems to a Dell PowerEdge R730 server in just 95 seconds, using just 23 steps. Doing the same task on an older Dell server with a Lifecycle Controller-guided deployment process was a much lengthier process. Figure 4 compares the number of steps it took to configure basic hardware information, including iDRAC IP, RAID, NIC, and more, and install and boot the Windows Server 2012 R2 operating system.
  • 5. A Principled Technologies test report 5Simplifying systems management with Dell OpenManage on 13G Dell PowerEdge servers Figure 4: Configuring a single server using Dell OME one-to- many deployment took 199 fewer steps than the previous- generation solution. As Figure 5 shows, it took only 1 minute 35 seconds—92 percent less time to deploy the configuration to a single server using Dell OME one-to-many deployment compared to the previous-generation guided deployment. Figure 5: Configuring a single server using Dell OME one-to- many deployment took 92 percent less time than the previous-generation solution. The real benefit of Dell OME one-to-many deployment (see Figure 6) becomes clear when extrapolated to a large number of servers, which many infrastructures require. For example, deploying a configuration profile and operating system to 100 servers would save up to 22,177 repetitive administrative steps, and nearly 35 hours of administrative time, while guaranteeing consistency and eliminating human error from the deployment process.
  • 6. A Principled Technologies test report 6Simplifying systems management with Dell OpenManage on 13G Dell PowerEdge servers Figure 6: Dell OpenManage Essentials enables automatic deployment of both server hardware profiles and operating systems to multiple targets simultaneously. New features for connectivity Some administrators still prefer to manage their servers while directly connected to their hardware. When something is wrong with a configuration or you need to make a quick change with minimal disruption to service, it is important that you can connect as quickly as possible. Dell OpenManage on Dell 13G servers provides features that let you connect directly to integrated Dell Remote Access Controller (iDRAC) and manage systems in a number of ways. With multiple paths to connect to the embedded management system, including iDRAC Direct (cable), iDRAC Direct (key), and Quick Sync (NFC), we found that administrators could save both steps and time to connect. iDRAC Direct (cable) We found that iDRAC Direct could eliminate the need for cumbersome “crash carts” and reduced the number of steps and time it took to make changes to a server configuration compared to the legacy method using KVM and manual setup (see Figures 7 and 8). Using the legacy method required connecting KVM hardware to the server, rebooting, and manually entering system setup at the boot screen. This procedure also takes the system out of service, which affects customers. With iDRAC Direct, the management network was immediately accessible; we simply had to plug in a USB cable and open a browser to directly connect to the iDRAC, where we were able to make array configuration changes.
  • 7. A Principled Technologies test report 7Simplifying systems management with Dell OpenManage on 13G Dell PowerEdge servers Figure 7: Making configuration changes using iDRAC Direct (cable) required 15 fewer steps than using KVM and manual setup. Figure 8: Changing the server configuration using iDRAC Direct (cable) required 58 percent less time than connecting using KVM and manual setup. iDRAC Direct (key) When you need to repurpose a server, it can be time consuming to reconfigure the server for optimal performance in its new role. Using iDRAC Direct (key), we were able to redeploy a server with a new hardware profile, without a time-consuming, manual process. We found that iDRAC Direct could detect a server profile stored on a USB key, and deploy the profile to the server in just four steps requiring only 28 seconds of an administrator’s time – that’s 209 fewer steps and 97 percent less time than manually reconfiguring a server. (See Figures 9 and 10.)
  • 8. A Principled Technologies test report 8Simplifying systems management with Dell OpenManage on 13G Dell PowerEdge servers Figure 9: Connecting to iDRAC at the box using iDRAC Direct (key) required 209 fewer steps than deploying a server profile using KVM and manual setup. Figure 10: Connecting to iDRAC at the box using iDRAC Direct (key) required 97 percent less time than deploying a server profile using KVM and manual setup. To prevent subsequent configuration changes on your server, you can configure the iDRAC to disable USB key deployment once the configuration is complete, and to prevent unauthorized reconfiguration without factory credentials. These safeguards prevent a new configuration from being written to a production server. Quick Sync As smartphones and tablets increasingly become tools of the trade for system administrators, the ability to manage systems from these devices can be a real advantage to admins who favor the portability of the smaller smart devices.
  • 9. A Principled Technologies test report 9Simplifying systems management with Dell OpenManage on 13G Dell PowerEdge servers The 13G Dell PowerEdge servers contain, as part of their front bezels, a Near Field Communications (NFC) device. We installed the Dell OpenManage Mobile app on an NFC-enabled Android™ tablet, and used that device to perform basic inventory, health check, and system configuration tasks, which Figure 11 shows. Each time a system is synchronized, the configuration remains cached for later use, so administrators can quickly inventory an entire rack or row of servers, and then distill or manipulate the data once they return to their desks. Figure 11: Dell OpenManage Mobile enables administrators to use NFC-enabled devices to manage the servers in their datacenters. We found that Quick Sync was able to reduce manual inventory and iDRAC configuration times by a combined 69 percent (see Figure 12), saving seven steps per server compared to manual methods for previous-generation servers. We found that with Dell OpenManage and the 13G Dell PowerEdge R730, we were able to complete faster inventory and hardware identification. QuickSync from our NFC-enabled tablet provided easier navigation than using the on-system LCD panel and accompanying front panel buttons.
  • 10. A Principled Technologies test report 10Simplifying systems management with Dell OpenManage on 13G Dell PowerEdge servers Figure 12: Completing inventory and basic configuration using Quick Sync required 69 percent less time than manually inventorying the system and using the LCD screen for basic iDRAC setup. New features to improve maintenance Dell OpenManage also introduces new maintenance and problem-solving features for 13G server. The quicker your administrators can solve problems, the higher the availability of your infrastructure so that business can keep moving. Tech Support Report Simplifying support calls is a great way to reduce administrative effort while ensuring that problems are handle more efficiently to keep your workloads running. We found that in 13G servers with iDRAC8, we could generate a complete Tech Support Report (TSR) that included Operating System diagnostic information. The iDRAC 8 leverages the Dell iDRAC Service Module, a lightweight software component that installs in a host operating system, to obtain diagnostic data from the OS. It is no longer necessary to execute a separate data collection program within the operating system when trying to troubleshoot issues – the single iDRAC-generated TSR already contains that information. We found that this simplified information gathering mechanism required 73 percent less time than a process where Dell Server E-support Tool or DSET is downloaded and executed on the host operating system (see Figure 13). The 13G version of the TSR simplifies support calls by reducing the variety of data that has to be collected.
  • 11. A Principled Technologies test report 11Simplifying systems management with Dell OpenManage on 13G Dell PowerEdge servers Figure 13: iDRAC8 with Tech Support Report reduced the time it took to gather diagnostic data by 73 percent. OME Managing Configuration Baseline A major advantage of using server profiles is the ability to consistently configure servers for optimal performance in their intended role. Sometimes, in the course of ongoing operations, changes are made to server configurations. These changes may gradually introduce inconsistencies that degrade performance or affect IT standards. Manually inventorying a server to validate its configuration means taking the server out of operation, and deploying a configuration profile to servers that are already in use may have unforeseen consequences. With Dell OpenManage Essentials (OME), an administrator can create baseline configurations that contain all the settings a particular group of servers should use, and then associate servers with those configurations, as Figure 14 shows. OME can then perform regular, non-disruptive inventory on its managed servers, and allow administrators to easily find servers that have configuration drift and determine whether mitigation is necessary.
  • 12. A Principled Technologies test report 12Simplifying systems management with Dell OpenManage on 13G Dell PowerEdge servers Figure 14: Dell OME allows administrators to assign servers to configuration templates to quickly monitor compliance. In our tests, we determined OME configuration baseline management reduced administrative effort by 69 steps (see Figure 15), and required 91 percent less time than manually inventorying a single server. Because multiple servers can be applied to a given baseline, administrators can quickly determine which and how many servers deviate from a preferred profile. For example, OME can determine baseline configuration drift for 100 servers in the same number of steps and time required for a single server. This results in 7,395 fewer steps, and 99.91 percent less time than performing the same checks using manual methods for 100 servers. That’s a savings of 15 hours, 54 minutes, 10 seconds administrator time that could be spent doing high- value work.
  • 13. A Principled Technologies test report 13Simplifying systems management with Dell OpenManage on 13G Dell PowerEdge servers Figure 15: Dell OME reduced manual steps to manage configuration baseline to a Dell PowerEdge R730 server by 69 steps. New features to simplify updating A major, time consuming responsibility administrators handle is ongoing updates of both firmware and drivers for their supported systems. The Dell OpenManage suite provides enhanced automation features specifically for dealing with these tasks. This frees up administrators so they can execute higher-value efforts in the datacenter. Auto-Updating Firmware To minimize impact to customers, pre-planned maintenance windows generally occur at times of off-peak usage, typically during the late night and early morning hours. This means administrators must either extend their working hours or shift their schedules, creating the possibility of support issues due to resource availability during higher activity periods. 13G Dell PowerEdge servers with iDRAC 8 have the ability to auto-update their firmware, allowing administrators to define network-based repositories as the sources of the updates and configure updates to occur during a specified period of time, without direct interaction (see Figure 16). When coupled with the Zero-Touch Repository Management features of Dell Repository Manager, the ability to perform updates automatically during off hours means an administrator can pre-stage maintenance activities during normal business hours. This allows administrators to tightly manage the types of updates a server will execute and remain available during peak times to address customer issues – all while reducing the server administration burden on the staff.
  • 14. A Principled Technologies test report 14Simplifying systems management with Dell OpenManage on 13G Dell PowerEdge servers Figure 16: Dell 13G iDRAC 8 gives administrators the flexibility to schedule automated updates to fit their organization’s needs. In our tests, using Auto-Updating with Zero-Touch Repository manager saved 20 repetitive steps and 5 minutes, 6 seconds per server (see Figure 17). In organizations with multiple servers, this can be a substantial reduction in administrative effort. Updating just 10 servers manually during an over-night maintenance window would require a full hour of administrator time. Updating 100 servers would mean spanning multiple maintenance windows, and operating for at least one business day with some servers on one firmware revision, and some servers with another – a situation ripe for inconsistencies that could affect performance.
  • 15. A Principled Technologies test report 15Simplifying systems management with Dell OpenManage on 13G Dell PowerEdge servers Figure 17: Updating firmware using automatic updating reduced administrative effort by 5 minutes 6 seconds per server compared to manual methods. Agent-free OME driver updates Dell OpenManage Essentials (see Figure 18) now has the ability to do agent-free inventory and firmware and driver updates on managed systems. By using this feature of Dell OME, an administrator doesn’t have to worry about having agents or management applications installed on the host OS, which means less software to maintain. Figure 18: OpenManage Essentials can perform centrally managed, agentless driver and firmware updates to managed systems.
  • 16. A Principled Technologies test report 16Simplifying systems management with Dell OpenManage on 13G Dell PowerEdge servers Zero-Touch Repository Management Dell Repository Manager allows administrators to define custom repositories containing drivers and firmware updates. Many organizations have a vigorous vetting process to ensure that new firmware or drivers don’t introduce unforeseen changes into their environment that can affect production servers. With the latest versions of Dell Repository Manager, an administrator can create repositories that automatically update their contents when updates are available. This means the administrator always has the latest revisions available for testing, and can release those updates based on their organization’s pre-planned maintenance cycle. (See Figure 19.) Figure 19: Dell Repository Manager allows administrators to establish automatically updated repositories. CONCLUSION Automated systems management and additional connectivity solutions can reduce the number of administrators you need to run your datacenter or simply free up administrators to innovate rather than tying them up with routine management tasks. We found that the Dell OpenManage suite provides several new features for 13G Dell PowerEdge server solutions to streamline management tasks in both time and steps. Other new features let us easily connect to iDRAC right from the server. Updating firmware with Dell OpenManage features was also easier—eliminating 213 steps for updating a single server compared to updating manually. The latest versions of the Dell OpenManage suite of system management tools and the power of iDRAC 8 contained within Dell 13G servers gives administrators
  • 17. A Principled Technologies test report 17Simplifying systems management with Dell OpenManage on 13G Dell PowerEdge servers increased flexibility and powerful new options for managing their data centers that translate to demonstrable savings in time and administrative effort. These automated enhancements and new technologies enable administrators to manage increasingly larger workloads while reducing the amount of hands-on work required for each system, bringing real value to systems management and datacenter operations.
  • 18. A Principled Technologies test report 18Simplifying systems management with Dell OpenManage on 13G Dell PowerEdge servers APPENDIX A – ABOUT THE COMPONENTS About the Dell PowerEdge R730 The 2U Dell PowerEdge R730 rack server is powered by two Intel Xeon Haswell processors and is designed for functional flexibility in the datacenter. The PowerEdge R730 has 24 DIMM slots to support up to 1.5 TB of memory, supports up to two optional internal GPU processing accelerators, and can support up to four optional NVMe Express Flash PCIe SSDs to reduce storage bottlenecks. With redundant power supply units, hot-swappable hardware, and Dual SD card for Failsafe Hypervisors, the Dell PowerEdge R730 supports hardware high availability. The PowerEdge R730 comes standard with iDRAC7 with Lifecycle Controller and Dell OpenManage, which all work to streamline management. For more information on Dell Solutions, including the Dell PowerEdge R730, visit http://dell.to/enterprise.
  • 19. A Principled Technologies test report 19Simplifying systems management with Dell OpenManage on 13G Dell PowerEdge servers APPENDIX B – SYSTEM CONFIGURATION INFORMATION Figure 20 provides detailed configuration information for the test system. System Dell PowerEdge R730 Platform Vendor and model number Dell PowerEdge R730 BIOS name and version 1.0.2 General Number of processor packages 2 Number of cores per processor 12 Number of hardware threads per core 2 CPU Vendor Intel Name Xeon Model number E5-2690 v3 Socket type Socket 2011-3 / R3 / LGA2011-3 Core frequency (GHz) 2.6 Bus frequency 5 GT/s DMI L1 cache 12 x 32 KB L2 cache 12 x 256 KB L3 cache 30 MB Memory module(s) Total RAM in system (GB) 16 Vendor and model number Hynix Semiconductor HMA41GR7MFR8N-TF Type DDR4 Speed (MHz) 2,133 Speed running in the system (MHz) 2,133 Size (GB) 8 Number of RAM module(s) 2 Chip organization Dual-sided Rank Dual Operating system Name Microsoft Windows Server 2012 R2, Datacenter x64 Edition Build number Version 6.3 (Build 9600) (x64) File system NTSF Language English RAID controller Vendor and model number Dell PERC H730P Mini Firmware version 25.2.1.0037 Driver version 6.602.07.00 Cache size (MB) 2,048
  • 20. A Principled Technologies test report 20Simplifying systems management with Dell OpenManage on 13G Dell PowerEdge servers System Dell PowerEdge R730 Hard drives Vendor and model number Seagate ST300MM0006 Number of drives 5 Size (GB) 278.88 RPM 10,000 Type SAS Power supplies Total number 2 Vendor and model number Dell 0G6W6KX02 Wattage of each (W) 750 Cooling fans Total number 6 Ethernet adapters Vendor and model number Intel 2P X520/2P I350 rNDC Figure 20: System configuration information for the test system.
  • 21. A Principled Technologies test report 21Simplifying systems management with Dell OpenManage on 13G Dell PowerEdge servers APPENDIX C – HOW WE TESTED New features for deployment Deploying a server with configured profile Zero-Touch Auto Configuration This task required no repetitive steps. Deploying a Manual Configuration 1. Open a Web browser from within the management network and navigate to the iDRAC IP address (192.168.1.101). 2. Log in with the iDRAC’s username and password (Username: root; Password: calvin). 3. Look at the Virtual Console Preview to see if the server is powered on. If there is no image, power on the server using the task under Quick Launch Tasks. 4. Select Alerts from the vertical navigation bar. 5. Select the SNMP and Email Settings tab from the horizontal navigation bar. 6. Check the State radio box for Alert Destination1 and type the destination IP address (192.168.1.50). 7. Verify that the Community String field is set to public. 8. Click Apply. 9. Change SNMP Trap Format to SNMP v2. 10. Click Apply. 11. Check the first State radio box for Destination Email Address and type the destination email address for Email Alert 1 (adminpager@principledtechnologies.com). 12. Click Apply. 13. In the SMTP (Email) Server IP Address or FQDN / DNS Name field, type the fully qualified domain name for the email server (mailer.principledtechnologies.com). 14. Click Apply. 15. Select the Alerts tab from the horizontal navigation bar. 16. Change Alerts to Enabled. 17. Click Apply. 18. Under Email, check the Amperage, Auto Sys Reset, and Battery Event critical alerts. Uncheck any non-critical alerts in this category. 19. Check the topmost radio box for SNMP Trap to check all radio boxes. 20. Check the topmost radio box for IPMI Alert to check all radio boxes. 21. Check the topmost radio box for Remote System Log to check all radio boxes. 22. Check the topmost radio box for WS Eventing to check all radio boxes. 23. Check the topmost radio box for OS Log to check all radio boxes. 24. Click the right arrow to navigate to the next page. 25. Under Email, check the Processor, Proc Absent, and Fan Event critical alerts. Uncheck any non-critical alerts in this category. 26. Check the topmost radio box for SNMP Trap to check all radio boxes. 27. Check the topmost radio box for IPMI Alert to check all radio boxes. 28. Check the topmost radio box for Remote System Log to check all radio boxes. 29. Check the topmost radio box for WS Eventing to check all radio boxes. 30. Check the topmost radio box for OS Log to check all radio boxes. 31. Click the right arrow to navigate to the next page. 32. Under Email, check the Hardware Config and Memory critical alerts. Uncheck any non-critical alerts in this category. 33. Check the topmost radio box for SNMP Trap to check all radio boxes.
  • 22. A Principled Technologies test report 22Simplifying systems management with Dell OpenManage on 13G Dell PowerEdge servers 34. Check the topmost radio box for Remote System Log to check all radio boxes. 35. Check the topmost radio box for WS Eventing to check all radio boxes. 36. Check the topmost radio box for OS Log to check all radio boxes. 37. Click the right arrow to navigate to the next page. 38. Under Email, check the OS Event, PCI Device, and Physical Disk critical alerts. Uncheck any non-critical alerts in this category. 39. Check the topmost radio box for SNMP Trap to check all radio boxes. 40. Check the topmost radio box for IPMI Alert to check all radio boxes. 41. Check the topmost radio box for Remote System Log to check all radio boxes. 42. Check the topmost radio box for WS Eventing to check all radio boxes. 43. Check the topmost radio box for OS Log to check all radio boxes. 44. Click the right arrow to navigate to the next page. 45. Under Email, check the BIOS POST, Power Supply, PSU Absent, and Power Usage critical alerts. Uncheck any non- critical alerts in this category. 46. Check the topmost radio box for SNMP Trap to check all radio boxes. 47. Check the topmost radio box for IPMI Alert to check all radio boxes. 48. Check the topmost radio box for Remote System Log to check all radio boxes. 49. Check the topmost radio box for WS Eventing to check all radio boxes. 50. Check the topmost radio box for OS Log to check all radio boxes. 51. Click the right arrow to navigate to the next page. 52. Under Email, check the critical alerts for Redundancy, IDSDM Media, and IDSDM Absent. Uncheck any non- critical alerts in this category. 53. Check the topmost radio box for SNMP Trap to check all radio boxes. 54. Check the topmost radio box for IPMI Alert to check all radio boxes. 55. Check the topmost radio box for Remote System Log to check all radio boxes. 56. Check the topmost radio box for WS Eventing to check all radio boxes. 57. Check the topmost radio box for OS Log to check all radio boxes. 58. Click the right arrow to navigate to the next page. 59. Under Email, check the IDSDM Redundancy, Security Event, and Sys Event Log critical alerts. Uncheck any non- critical alerts in this category. 60. Check the topmost radio box for SNMP Trap to check all radio boxes. 61. Check the topmost radio box for IPMI Alert to check all radio boxes. 62. Check the topmost radio box for Remote System Log to check all radio boxes. 63. Check the topmost radio box for WS Eventing to check all radio boxes. 64. Check the topmost radio box for OS Log to check all radio boxes. 65. Click the right arrow to navigate to the next page. 66. Under Email, check the Software Config, Temperature, and Temperature Statistics critical alerts. Uncheck any non-critical alerts in this category. 67. Check the topmost radio box for SNMP Trap to check all radio boxes. 68. Check the topmost radio box for IPMI Alert to check all radio boxes. 69. Check the topmost radio box for Remote System Log to check all radio boxes. 70. Check the topmost radio box for WS Eventing to check all radio boxes. 71. Check the topmost radio box for OS Log to check all radio boxes. 72. Click the right arrow to navigate to the next page. 73. Under Email, check the vFlash Event and Voltage critical alerts. Uncheck any non-critical alerts in this category. 74. Check the topmost radio box for SNMP Trap to check all radio boxes. 75. Check the topmost radio box for IPMI Alert to check all radio boxes. 76. Check the topmost radio box for Remote System Log to check all radio boxes.
  • 23. A Principled Technologies test report 23Simplifying systems management with Dell OpenManage on 13G Dell PowerEdge servers 77. Check the topmost radio box for WS Eventing to check all radio boxes. 78. Check the topmost radio box for OS Log to check all radio boxes. 79. Click the right arrow to navigate to the next page. 80. Under Email, check the Battery Event, Storage Contr, and Storage Enclosr critical alerts. Uncheck any non-critical alerts in this category. 81. Check the topmost radio box for SNMP Trap to check all radio boxes. 82. Check the topmost radio box for Remote System Log to check all radio boxes. 83. Check the topmost radio box for WS Eventing to check all radio boxes. 84. Check the topmost radio box for OS Log to check all radio boxes. 85. Click the right arrow to navigate to the next page. 86. Under Email, check the Fan Event, Physical Disk, and Power Supply critical alerts. Uncheck any non-critical alerts in this category. 87. Check the topmost radio box for SNMP Trap to check all radio boxes. 88. Check the topmost radio box for Remote System Log to check all radio boxes. 89. Check the topmost radio box for WS Eventing to check all radio boxes. 90. Check the topmost radio box for OS Log to check all radio boxes. 91. Click the right arrow to navigate to the next page. 92. Under Email, check the Temperature and Virtual Disk critical alerts. Uncheck any non-critical alerts in this category. 93. Check the topmost radio box for SNMP Trap to check all radio boxes. 94. Check the topmost radio box for Remote System Log to check all radio boxes. 95. Check the topmost radio box for WS Eventing to check all radio boxes. 96. Check the topmost radio box for OS Log to check all radio boxes. 97. Click the right arrow to navigate to the next page. 98. Under Email, uncheck any non-critical alerts in this category. 99. Check the topmost radio box for SNMP Trap to check all radio boxes. 100. Check the topmost radio box for Remote System Log to check all radio boxes. 101. Check the topmost radio box for WS Eventing to check all radio boxes. 102. Check the topmost radio box for OS Log to check all radio boxes. 103. Click the right arrow to navigate to the next page. 104. Under Email, check the Licensing critical alert. Uncheck any non-critical alerts in this category. 105. Check the topmost radio box for SNMP Trap to check all radio boxes. 106. Check the topmost radio box for IPMI Alert to check all radio boxes. 107. Check the topmost radio box for Remote System Log to check all radio boxes. 108. Check the topmost radio box for WS Eventing to check all radio boxes. 109. Check the topmost radio box for OS Log to check all radio boxes. 110. Click the right arrow to navigate to the next page. 111. Under Email, uncheck any non-critical alerts in this category. 112. Check the topmost radio box for SNMP Trap to check all radio boxes. 113. Check the topmost radio box for Remote System Log to check all radio boxes. 114. Check the topmost radio box for WS Eventing to check all radio boxes. 115. Check the topmost radio box for OS Log to check all radio boxes. 116. Click Apply. 117. Click Virtual Console in the vertical navigation bar. 118. Click Launch Virtual Console. 119. A Java app will launch. Click Continue when the security warning appears. 120. Click Run when the Java warning appears. 121. Click Run when the second security warning appears. The remote console viewer will launch.
  • 24. A Principled Technologies test report 24Simplifying systems management with Dell OpenManage on 13G Dell PowerEdge servers 122. Assuming no boot devices are installed, strike F2 to enter System Setup and launch the System Setup menu. 123. At the System Setup Main Menu, select System BIOS. 124. Select Processor Settings. 125. Verify QPI Speed is set to Maximum data rate. 126. Verify that Virtualization Technology is Enabled. 127. Verify that Adjacent Cache Line Prefetch is Enabled. 128. Verify that Hardware Prefetcher is Enabled. 129. Verify that DCU Streamer Prefetcher is Enabled. 130. Verify that DCU IP Prefetcher is Enabled. 131. Verify that Execute Disable is Enabled. 132. Scroll down to verify that Number of Cores per Processor is set to 10. (Default: All) 133. Click the Back button. 134. Select SATA Settings. 135. Verify that Embedded SATA is set to AHCI Mode. 136. Click the Back button. 137. Select Boot Settings. 138. Verify that Boot Sequence Retry is Enabled. 139. Click the Back button. 140. Select Integrated Devices. 141. Verify that Embedded Video Controller is Enabled. 142. Scroll down to verify that OS Watchdog Timer is Disabled. 143. Click the Back button. 144. Select Serial Communication. 145. Verify that Serial Communication is Auto. 146. Verify that Serial Port Address is configured as follows: Serial Device1=COM1, Serial Device2=COM2. (Default: Serial Device1=COM2, Serial Device2=COM1) 147. Verify that External Serial Connector is set to Serial Device 1. 148. Verify that Failsafe Baud Rate is set to 115200. 149. Verify that Remote Terminal Type is set to ANSI. (Default: VT100/VT220) 150. Click the Back button. 151. Select System Profile Settings. 152. Verify that System Profile is set to Custom. (Default: Performance) 153. Verify that CPU Power Management is set to OS DBPM. (Default: Maximum Performance) 154. Verify that Turbo Boost is Enabled. 155. Verify that C1E is Enabled. (Default: Disabled) 156. Verify that Memory Frequency is set to Maximum Performance. 157. Verify that C States is Enabled. (Default: Disabled) 158. Verify that Memory Patrol Scrub is Disabled. (Default: Standard) 159. Scroll down to verify that Collaborative CPU Performance Control is Disabled. 160. Verify that Energy Efficient Policy is set to Balanced Performance. (Default: Performance) 161. Click the Back button. 162. Select System Security. 163. Verify that NMI Button is Disabled. 164. Click the Back button. 165. Scroll down to select Miscellaneous Settings. 166. Verify that F1/F2 Prompt on Error is Disabled. (Default: Enabled) 167. Verify that Load Legacy Video Option ROM is Enabled. (Default: Disabled) 168. Click the Back button.
  • 25. A Principled Technologies test report 25Simplifying systems management with Dell OpenManage on 13G Dell PowerEdge servers 169. Click the Finish button. 170. A warning dialog will appear. Click the Yes button. 171. A second dialog will appear alerting the user that the settings were saved successfully. Click the OK button. 172. At the System Setup Main Menu, select Device Settings. 173. Select Integrated RAID Controller 1. 174. Click Configuration Management. 175. Click Create Virtual Disk. 176. Set RAID Level to RAID5. 177. Select Select Physical Disks. 178. Select Check All to select all unconfigured disks. 179. Scroll down to click Apply Changes. 180. Click OK. 181. Scroll down, and change Default Initialization to Fast. 182. Select Create Virtual Disk. 183. Check Confirm, and click Yes. 184. Click OK. 185. Click the Back button. 186. Click the Back button again. 187. Click Finish. 188. At the Device Settings menu, select the Integrated NIC 1 Port 1. 189. Click NIC Configuration. 190. Verify that Legacy Boot Protocol is set to None. (Default: PXE) 191. Click Back. 192. Click Finish. 193. Click Yes, and click OK. 194. At the Device Settings menu, select the Integrated NIC 1 Port 2. 195. Click NIC Configuration. 196. Verify that legacy boot protocol is set to None. 197. Click the Back button. 198. Click the Finish button. 199. Click the Finish button again. 200. At the System Setup Main Menu, select iDRAC Settings. 201. Select Network. 202. Scroll down to the IPMI Settings category and set Enable IPMI Over LAN to Enabled. (Default: Disabled) 203. Click the Back button. 204. Select Alerts. 205. Verify that Enable Platform Event Filter Alerts is Enabled. 206. Verify that Enable Alert Destination 1 is Enabled. 207. Verify that Alert Destination 1 is set to 192.168.1.50. 208. Click the Back button. 209. Click the Finish button. 210. A warning dialog will appear alerting the user Settings have changed, and prompting the user Do you want to save the changes? Click the Yes button. 211. A second dialog will appear alerting the user that the settings were saved successfully. Click the OK button. 212. At the System Setup Main Menu, click the Finish button to apply all changes and reboot. 213. A warning dialog will appear confirming the exit command and prompting the user Are you sure you want to exit and reboot? Click the Yes button to reboot.
  • 26. A Principled Technologies test report 26Simplifying systems management with Dell OpenManage on 13G Dell PowerEdge servers One-to-many deployment Manual: Lifecycle Controller guided deployment 1. Open a Web browser from within the management network and navigate to the iDRAC IP address (192.168.1.101). 2. Log in with the iDRAC s username and password (Username: root ; Password: calvin). 3. Look at the Virtual Console Preview to see if the server is powered on. If there is no image, under Quick Launch Tasks, power the server on. 4. From the vertical navigation bar, select Alerts. 5. Select the SNMP and Email Settings tab from the horizontal navigation bar. 6. Check the State radio box for Alert Destination1 and type the destination IP address (192.168.1.50). 7. Verify that the Community String field is set to public. 8. Click Apply. 9. Change SNMP Trap Format to SNMP v2. 10. Click Apply. 11. Check the first State radio box for Destination Email Address and type the destination email address for Email Alert 1 (adminpager@principledtechnologies.com). 12. Click Apply. 13. In the SMTP (Email) Server IP Address or FQDN / DNS Name field, type the fully qualified domain name for the email server (mailer.principledtechnologies.com). 14. Click Apply. 15. Select the Alerts tab from the horizontal navigation bar. 16. Change Alerts to Enabled. 17. Click Apply. 18. Under Email, check the Amperage, Auto Sys Reset, and Battery Event critical alerts. Uncheck any non-critical alerts in this category. 19. Check the topmost radio box for SNMP Trap to check all radio boxes. 20. Check the topmost radio box for IPMI Alert to check all radio boxes. 21. Check the topmost radio box for Remote System Log to check all radio boxes. 22. Check the topmost radio box for WS Eventing to check all radio boxes. 23. Check the topmost radio box for OS Log to check all radio boxes. 24. Click the right arrow to navigate to the next page. 25. Under Email, check the Processor, Proc Absent, and Fan Event critical alerts. Uncheck any non-critical alerts in this category. 26. Check the topmost radio box for SNMP Trap to check all radio boxes. 27. Check the topmost radio box for IPMI Alert to check all radio boxes. 28. Check the topmost radio box for Remote System Log to check all radio boxes. 29. Check the topmost radio box for WS Eventing to check all radio boxes. 30. Check the topmost radio box for OS Log to check all radio boxes. 31. Click the right arrow to navigate to the next page. 32. Under Email, check the Hardware Config and Memory critical alerts. Uncheck any non-critical alerts in this category. 33. Check the topmost radio box for SNMP Trap to check all radio boxes. 34. Check the topmost radio box for Remote System Log to check all radio boxes. 35. Check the topmost radio box for WS Eventing to check all radio boxes. 36. Check the topmost radio box for OS Log to check all radio boxes. 37. Click the right arrow to navigate to the next page.
  • 27. A Principled Technologies test report 27Simplifying systems management with Dell OpenManage on 13G Dell PowerEdge servers 38. Under Email, check the OS Event, PCI Device, and Physical Disk critical alerts. Uncheck any non-critical alerts in this category. 39. Check the topmost radio box for SNMP Trap to check all radio boxes. 40. Check the topmost radio box for IPMI Alert to check all radio boxes. 41. Check the topmost radio box for Remote System Log to check all radio boxes. 42. Check the topmost radio box for WS Eventing to check all radio boxes. 43. Check the topmost radio box for OS Log to check all radio boxes. 44. Click the right arrow to navigate to the next page. 45. Under Email, check the BIOS POST, Power Supply, PSU Absent, and Power Usage critical alerts. Uncheck any non- critical alerts in this category. 46. Check the topmost radio box for SNMP Trap to check all radio boxes. 47. Check the topmost radio box for IPMI Alert to check all radio boxes. 48. Check the topmost radio box for Remote System Log to check all radio boxes. 49. Check the topmost radio box for WS Eventing to check all radio boxes. 50. Check the topmost radio box for OS Log to check all radio boxes. 51. Click the right arrow to navigate to the next page. 52. Under Email, check the Redundancy, IDSDM Media, and IDSDM Absent critical alerts. Uncheck any non-critical alerts in this category. 53. Check the topmost radio box for SNMP Trap to check all radio boxes. 54. Check the topmost radio box for IPMI Alert to check all radio boxes. 55. Check the topmost radio box for Remote System Log to check all radio boxes. 56. Check the topmost radio box for WS Eventing to check all radio boxes. 57. Check the topmost radio box for OS Log to check all radio boxes. 58. Click the right arrow to navigate to the next page. 59. Under Email, check the IDSDM Redundancy, Security Event, and Sys Event Log critical alerts. Uncheck any non- critical alerts in this category. 60. Check the topmost radio box for SNMP Trap to check all radio boxes. 61. Check the topmost radio box for IPMI Alert to check all radio boxes. 62. Check the topmost radio box for Remote System Log to check all radio boxes. 63. Check the topmost radio box for WS Eventing to check all radio boxes. 64. Check the topmost radio box for OS Log to check all radio boxes. 65. Click the right arrow to navigate to the next page. 66. Under Email, check the Software Config, Temperature, and Temperature Statistics critical alerts. Uncheck any non-critical alerts in this category. 67. Check the topmost radio box for SNMP Trap to check all radio boxes. 68. Check the topmost radio box for IPMI Alert to check all radio boxes. 69. Check the topmost radio box for Remote System Log to check all radio boxes. 70. Check the topmost radio box for WS Eventing to check all radio boxes. 71. Check the topmost radio box for OS Log to check all radio boxes. 72. Click the right arrow to navigate to the next page. 73. Under Email, check the vFlash Event and Voltage critical alerts. Uncheck any non-critical alerts in this category. 74. Check the topmost radio box for SNMP Trap to check all radio boxes. 75. Check the topmost radio box for IPMI Alert to check all radio boxes. 76. Check the topmost radio box for Remote System Log to check all radio boxes. 77. Check the topmost radio box for WS Eventing to check all radio boxes. 78. Check the topmost radio box for OS Log to check all radio boxes. 79. Click the right arrow to navigate to the next page.
  • 28. A Principled Technologies test report 28Simplifying systems management with Dell OpenManage on 13G Dell PowerEdge servers 80. Under Email, check the Battery Event, Storage Contr, and Storage Enclosr critical alerts. Uncheck any non-critical alerts in this category. 81. Check the topmost radio box for SNMP Trap to check all radio boxes. 82. Check the topmost radio box for Remote System Log to check all radio boxes. 83. Check the topmost radio box for WS Eventing to check all radio boxes. 84. Check the topmost radio box for OS Log to check all radio boxes. 85. Click the right arrow to navigate to the next page. 86. Under Email, check the Fan Event, Physical Disk, and Power Supply critical alerts. Uncheck any non-critical alerts in this category. 87. Check the topmost radio box for SNMP Trap to check all radio boxes. 88. Check the topmost radio box for Remote System Log to check all radio boxes. 89. Check the topmost radio box for WS Eventing to check all radio boxes. 90. Check the topmost radio box for OS Log to check all radio boxes. 91. Click the right arrow to navigate to the next page. 92. Under Email, check the Temperature and Virtual Disk critical alerts. Uncheck any non-critical alerts in this category. 93. Check the topmost radio box for SNMP Trap to check all radio boxes. 94. Check the topmost radio box for Remote System Log to check all radio boxes. 95. Check the topmost radio box for WS Eventing to check all radio boxes. 96. Check the topmost radio box for OS Log to check all radio boxes. 97. Click the right arrow to navigate to the next page. 98. Under Email, uncheck any non-critical alerts in this category. 99. Check the topmost radio box for SNMP Trap to check all radio boxes. 100. Check the topmost radio box for Remote System Log to check all radio boxes. 101. Check the topmost radio box for WS Eventing to check all radio boxes. 102. Check the topmost radio box for OS Log to check all radio boxes. 103. Click the right arrow to navigate to the next page. 104. Under Email, check the Licensing critical alert. Uncheck any non-critical alerts in this category. 105. Check the topmost radio box for SNMP Trap to check all radio boxes. 106. Check the topmost radio box for IPMI Alert to check all radio boxes. 107. Check the topmost radio box for Remote System Log to check all radio boxes. 108. Check the topmost radio box for WS Eventing to check all radio boxes. 109. Check the topmost radio box for OS Log to check all radio boxes. 110. Click the right arrow to navigate to the next page. 111. Under Email, uncheck any non-critical alerts in this category. 112. Check the topmost radio box for SNMP Trap to check all radio boxes. 113. Check the topmost radio box for Remote System Log to check all radio boxes. 114. Check the topmost radio box for WS Eventing to check all radio boxes. 115. Check the topmost radio box for OS Log to check all radio boxes. 116. Click Apply. 117. Click Virtual Console in the vertical navigation bar. 118. Click Launch Virtual Console. 119. A Java app will launch. Click Continue when the security warning appears. 120. Click Run when the Java warning appears. 121. Click Run when the second security warning appears and the remote console viewer will launch. 122. Assuming no boot devices are installed, strike F2 to enter System Setup and launch the System Setup menu. 123. At the System Setup Main Menu, select System BIOS. 124. Select Processor Settings.
  • 29. A Principled Technologies test report 29Simplifying systems management with Dell OpenManage on 13G Dell PowerEdge servers 125. Verify QPI Speed is set to Maximum data rate. 126. Verify that Virtualization Technology is Enabled. 127. Verify that Adjacent Cache Line Prefetch is Enabled. 128. Verify that Hardware Prefetcher is Enabled. 129. Verify that DCU Streamer Prefetcher is Enabled. 130. Verify that DCU IP Prefetcher is Enabled. 131. Verify that Execute Disable is Enabled. 132. Scroll down to verify that Number of Cores per Processor is 10 (Default: All). 133. Click the Back button. 134. Select SATA Settings. 135. Verify that Embedded SATA is AHCI Mode. 136. Click the Back button. 137. Select Boot Settings. 138. Verify that Boot Sequence Retry is Enabled. 139. Click the Back button. 140. Select Integrated Devices. 141. Verify that Embedded Video Controller is Enabled. 142. Scroll down to verify that OS Watchdog Timer is Disabled. 143. Click the Back button. 144. Select Serial Communication. 145. Verify that Serial Communication is Auto. 146. Verify that Serial Port Address is Serial Device1=COM1,Serial Device2=COM2 (Default: Serial Device1=COM2,Serial Device2=COM1 ). 147. Verify that External Serial Connector is Serial Device 1. 148. Verify that Failsafe Baud Rate is 115200. 149. Verify that Remote Terminal Type is ANSI (Default: VT100/VT220). 150. Click the Back button. 151. Select System Profile Settings. 152. Verify that System Profile is Custom (Default: Performance ). 153. Verify that CPU Power Management is OS DBPM (Default: Maximum Performance ). 154. Verify that Turbo Boost is Enabled. 155. Verify that C1E is Enabled (Default: Disabled ). 156. Verify that Memory Frequency is Maximum Performance. 157. Verify that C States is Enabled (Default: Disabled ). 158. Verify that Memory Patrol Scrub is Disabled (Default: Standard ). 159. Scroll down to verify that Collaborative CPU Performance Control is Disabled. 160. Verify that Energy Efficient Policy is Balanced Performance (Default: Performance). 161. Click the Back button. 162. Select System Security. 163. Verify that NMI Button is Disabled. 164. Click the Back button. 165. Scroll down to select Miscellaneous Settings. 166. Verify that F1/F2 Prompt on Error is Disabled (Default: Enabled). 167. Verify that Load Legacy Video Option ROM is Enabled (Default: Disabled). 168. Click the Back button. 169. Click the Finish button. 170. A warning dialog will appear. Click the Yes button. 171. A second dialog will appear alerting the user that the settings were saved successfully. Click the OK button.
  • 30. A Principled Technologies test report 30Simplifying systems management with Dell OpenManage on 13G Dell PowerEdge servers 172. At the System Setup Main Menu, select Device Settings. 173. Select Integrated RAID Controller 1. 174. Click Configuration Management. 175. Click Create Virtual Disk. 176. Select RAID Level change to RAID5. 177. Select Select Physical Disks. 178. Select Check All to select all unconfigured disks. 179. Scroll down to click Apply Changes. 180. Click OK. 181. Scroll down, and change Default Initialization to Fast. 182. Select Create Virtual Disk. 183. Check Confirm, and click Yes. 184. Click Ok. 185. Click the Back button. 186. Click the Back button again. 187. Click Finish. 188. At the Device Settings menu, select the Integrated NIC 1 Port 1. 189. Click NIC Configuration. 190. Verify that Legacy Boot Protocol is set to None (Default: PXE). 191. Click Back. 192. Click Finish. 193. Click Yes, and click OK. 194. At the Device Settings menu, select the Integrated NIC 1 Port 2. 195. Click NIC Configuration. 196. Verify that legacy boot protocol is set to None. 197. Click the Back button. 198. Click the Finish button. 199. Click the Finish button again. 200. At the System Setup Main Menu, select iDRAC Settings. 201. Select Network. 202. Scroll down to the IPMI Settings category and set Enable IPMI Over LAN to Enabled (Default: Disabled). 203. Click the Back button. 204. Select Alerts. 205. Verify that Enable Platform Event Filter Alerts is Enabled. 206. Verify that Enable Alert Destination 1 is Enabled. 207. Verify that Alert Destination 1 is 192.168.1.50. 208. Click the Back button. 209. Click the Finish button. 210. A warning dialog will appear alerting the user that Settings have changed. Do you want to save the changes? Click the Yes button. 211. A second dialog will appear alerting the user that the settings were saved successfully. Click the OK button. 212. At the System Setup Main Menu, click the Finish button to apply all changes and reboot. 213. A warning dialog will appear confirming the exit command and prompting the user Are you sure you want to exit and reboot? Click the Yes button to reboot. 214. Press F10 to enter Lifecycle Controller. 215. Click OS Deployment. 216. Click Deploy OS. 217. Select Go Directly to OS Deployment, and click Next.
  • 31. A Principled Technologies test report 31Simplifying systems management with Dell OpenManage on 13G Dell PowerEdge servers 218. Select Microsoft Windows 2012 R2, and click Next. 219. Select Manual Install, and click Next. 220. Click Next to accept the default BIOS mode. 221. Insert the installation media, and click Next. 222. Click Finish to reboot the server and begin installation. OME Auto Deployment This procedure assumes a CSV list of Service Tags and a baseline profile have already been created. 1. Open a Web browser and log in to OME. 2. Select Deployment. 3. Click Setup Auto Deployment. 4. Check the box for Deploy Template. 5. Check the box for Boot to Network ISO. 6. Click Next. 7. Expand Server Templates, and select the template to deploy. 8. Click Next. 9. Enter the ISO Filename you want to deploy. We used windows2012r2.iso 10. Enter the IP address of the OME server. We used 192.168.1.50 11. Enter the share name of the deployment share. We entered ServerConfig 12. Enter the Share Username you configured for your deployment File Share. We used testadministrator 13. Enter the share password you configured for your deployment file sure user. We used Password1 14. Click Next. 15. Click Import. 16. Browse to the location of the CSV file containing hardware Service Tags, and click Open. 17. Click Ok. The servers from the CSV will be imported. 18. Click Next. 19. Click Next to accept defaults for template deployment. 20. Click Next to accept default iDRAC credentials. 21. Review the summary, and click Finish. 22. Click Yes to proceed. 23. Click Yes to confirm job creation. New features for connectivity iDRAC Direct (cable) Manual: Crash cart 1. Plug the crash cart power strip into a power outlet. 2. Remove the front bezel. 3. Connect a keyboard to the server front panel. 4. Connect a mouse to the server front panel. 5. Connect a monitor to the server front panel. 6. Reboot Server. 7. Press F2 to enter system setup. 8. Click Device Settings. 9. Click Integrated Raid Controller 1: Dell PERC <PERC H730P Mini> Configuration Utility. 10. Click Configuration Management. 11. Click Create Virtual Disk. 12. Select RAID1.
  • 32. A Principled Technologies test report 32Simplifying systems management with Dell OpenManage on 13G Dell PowerEdge servers 13. Click Select Physical Disks. 14. Check the boxes besides the disks to add them to the array. 15. Click Apply Changes. 16. Click OK. 17. Scroll down to Default Initialization. Select Fast. 18. Click Create Virtual Disk. 19. Check the box to Confirm. 20. Click Yes. 21. Click OK. 22. Click Back. 23. Click Back again. 24. Click Finish. 25. Click Finish again to exit Device Settings. 26. Click Finish to exit System Setup. 27. Click Yes to confirm exit and boot the server. Automatic: USB A-A male-male cable 1. Remove the front bezel. 2. Connect a laptop to the server using a USB A/A cable. The USB cable must be connected to the server’s USB management port, indicated on the front panel with a wrench icon. 3. Open a Web browser on the management laptop. 4. Connect to iDRAC at 169.254.0.3, and accept any certificate or security warnings. 5. Log in with your username and password. 6. Click Storage→Virtual Disks. 7. Click Create. 8. For Layout, select RAID-1. 9. Under Internal Disks, check the boxes to select the disks to add to the array. 10. Click Create Virtual Disk. 11. Click OK. Alternatively, you can view the job status by clicking Job Queue. 12. Log off of iDRAC. iDRAC Direct (USB key) Manual configuration We used the time and steps from the Zero-Touch manual configuration. Automatic: iDRAC Direct USB Key 1. Remove the bezel. 2. Connect a monitor to the server front panel, or observe the system through a remote console. 3. Insert a USB device with the necessary configuration profile. 4. Wait for the server to restart, as indicated by the monitor returning no signal. Quick Sync (NFC) Manual Read Procedure 1. Plug a monitor into an outlet. 2. Remove the front bezel. 3. Connect the monitor to the server. 4. Connect a keyboard to the server. 5. Connect a mouse to the server. 6. Power on the server.
  • 33. A Principled Technologies test report 33Simplifying systems management with Dell OpenManage on 13G Dell PowerEdge servers 7. Press F10 to enter Lifecycle Controller. 8. Select Firmware Update. 9. Select View Current Versions. 10. Verify that the BIOS, Lifecycle Controller, PERC H730P Mini, and System CPLD are all up to date (0.3.23; 2.00.00.00; 25.2.1.0037; 0.5.1). 11. Return to the main menu. 12. Select Settings. 13. Select Network Settings. 14. Check the IP Address, Default Gateway, and DNS Address. 15. Return to the main menu. 16. Exit Lifecycle Controller. 17. Remove the keyboard, monitor, and mouse. 18. Reinstall the front bezel. Automatic Read Procedure (NFC + tablet) 1. Unlock the tablet. 2. Open the OpenManage application on the NFC-capable tablet. 3. Press the NFC button on front bezel. 4. Hold the tablet’s NFC to the iDRAC Quick Sync and wait for tablet to refresh. 5. Touch Firmware Details. 6. Verify that the BIOS, Lifecycle Controller, PERC H730P Mini, and System CPLD are all up to date (0.3.23; 2.00.00.00; 25.2.1.0037; 0.5.1). Return to the main menu. 7. Touch the back arrow to go back to the main menu. 8. Touch Network Details. 9. Touch IPv4. 10. Check the IP Address, Default Gateway and DNS Address. 11. Touch the back arrow twice to return to the main menu. 12. Close the application. Manual Write Procedure 1. Remove the front bezel. 2. Press the check button beside the R730 LCD screen. 3. Press the right arrow button to select Setup. 4. Press the check button to enter Setup. 5. Press the check button to select iDRAC. 6. Press the right arrow button to select Static. 7. Press the check button to enter a Static IP address. 8. Set the IP address for the iDRAC. We used 172.16.10.120. Use the arrow keys to select an IP address digit. Press the checkbox to edit the digit. Press the arrow keys to modify the value of the digit. Press the check button to accept the value. Repeat for each digit. 9. Press the right arrow key to move the cursor to the far right. 10. Press the check button. 11. Set the Subnet Mask. We used 255.255.0.0. Use the arrow keys to select an IP address digit. Press the checkbox to edit the digit. Press the arrow keys to modify the value of the digit. Press the check button to accept the value. Repeat for each digit. 12. Press the right arrow key to move the cursor to the far right. 13. Press the check button.
  • 34. A Principled Technologies test report 34Simplifying systems management with Dell OpenManage on 13G Dell PowerEdge servers 14. Set the IP address for the Gateway. We used 172.16.10.1. Use the arrow keys to select an IP address digit. Press the checkbox to edit the digit. Press the arrow keys to modify the value of the digit. Press the check button to accept the value. Repeat for each digit. 15. Press the right arrow key to move the cursor to the far right. 16. Press the check button. 17. Press the check button to select Yes and setup DNS. 18. Set the IP address for the DNS. We used 172.16.0.10. Use the arrow keys to select an IP address digit. Press the checkbox to edit the digit. Press the arrow keys to modify the value of the digit. Press the check button to accept the value. Repeat for each digit. 19. Press the right arrow key to move the cursor to the far right. 20. Press the check button. 21. Set the IP address for the secondary DNS. We used 172.16.0.11. Use the arrow keys to select an IP address digit. Press the checkbox to edit the digit. Press the arrow keys to modify the value of the digit. Press the check button to accept the value. Repeat for each digit. 22. Press the right arrow key to move the cursor to the far right. 23. Press the check button. 24. Press the check button to save the configuration to the iDRAC. 25. Replace the front bezel. Automatic Write Procedure (NFC + tablet) 1. Unlock the tablet. 2. Open the OpenManage application on the NFC-capable tablet. 3. Press the NFC button on the front bezel. 4. Place the tablet against the NFC area of the front bezel. The configuration will be imported. 5. Tap the gear icon at the top right of the page. 6. Tap iDRAC Configuration via Quick Sync (NFC bezel). 7. Tap IPv4 Settings. 8. Tap the checkbox for Enable DHCP to clear it. 9. Tap the top field for the IP address. 10. Using the tablet keyboard, enter the IP address. We used 172.16.10.120. 11. Tap the middle field for the Gateway address. 12. Using the tablet keyboard, enter the IP address. We used 172.16.10.1. 13. Tap the third field for the Subnet Mask. 14. Using the tablet keyboard, enter the IP address. We used 255.255.0.0. 15. Tap the checkbox for Use DHCP for DNS to clear it. 16. Tap the fifth field for the primary DNS address. 17. Using the tablet keyboard, enter the IP address. We used 172.16.10.10. 18. Tap the sixth field for the secondary DNS address. 19. Using the tablet keyboard, enter the IP address. We used 172.16.10.11. 20. Tap Save. 21. Enter the username and password of the iDRAC you are going to update. We used the username root and the password calvin. 22. Press Sync Now. 23. Press the NFC button on the front bezel. 24. Touch the tablet to the NFC bezel to perform a Quick Sync. 25. Close the OpenManage app.
  • 35. A Principled Technologies test report 35Simplifying systems management with Dell OpenManage on 13G Dell PowerEdge servers New features to improve maintenance Tech Support Report Manual (12G TSR + DSET) 1. Log in to iDRAC with your username and password. 2. Under Server in the vertical navigation menu, select Troubleshooting. 3. Select Tech Support Report in the horizontal navigation bar. 4. Fill out the required network information. For our tests, we used CIFS: a. IP Address: 192.168.1.20 b. Share name: profiles c. Domain Name: <blank> d. Username: Administrator e. Password: Password1 5. Click Export. 6. Click Server in the vertical navigation menu. 7. Click Job Queue in the horizontal navigation bar. 8. Refresh the page until the job status reports Completed. 9. Click Virtual Console in the vertical navigation menu. 10. Click Launch Virtual Console. 11. Click Continue. 12. Click Run. 13. Click Run again. 14. Click Macros, and click Ctrl-Alt-Delete. 15. Log in to Windows with your username and password. 16. Open a Web browser and navigate to dell.com/dset 17. Download DSET for Windows. 18. Run the downloaded application. 19. Click Next. 20. Accept the license agreement. 21. Leave Create a One-Time Local System DSET Report as default, and click Next. 22. Enter the network file share location (192.168.1.20profiles). 23. Check Enable Report Filtering and Automatically Upload the Report to Dell. 24. Click Next. 25. Leave Hardware Information, Storage Information, and Software Information checked by default. 26. Check Gather Advanced Log Files Information. 27. Click Next. 28. Click Start. 29. A command window will appear and update the report generation and upload status. The window will automatically close. Click Finish. 30. Sign out of the Windows server. Automatic (13G TSR) 1. Log into iDRAC with your username and password. 2. Under Server in the vertical navigation menu, select Troubleshooting. 3. Select Tech Support Report in the horizontal navigation bar. 4. Select Advanced Export Options. 5. Check RAID Controller Log and OS and Application Data, and ensure Enable Report Filtering is checked. 6. Under Export Location, change the radio button to Network. 7. Fill out the required network information. For our tests, we used CIFS:
  • 36. A Principled Technologies test report 36Simplifying systems management with Dell OpenManage on 13G Dell PowerEdge servers a. IP Address: 192.168.1.20 b. Share name: profiles c. Domain Name: <blank> d. Username: Administrator e. Password: Password1 8. Check I agree to allow Technical Support to use this data. 9. Click Export. 10. View the status of the export by clicking the job queue button. 11. Refresh the page until the job status reports Completed. OME Compliance Baseline Management Manual (12G Configuration Settings) Compliance Check We used a spreadsheet to keep track of all configuration items for the manual scenario. For every verification step in this methodology, if the setting is correct, mark C for compliant; if the setting is missing, mark M for missing; if the setting is different than the configuration baseline, mark D for different, and write the current setting in the non- compliant value cell in the compliance spreadsheet. 1. Connect a monitor. 2. Connect a keyboard. 3. Connect a mouse. 4. Power on the server. 5. Strike F2 to enter System Setup when prompted. 6. At the System Setup Main Menu, select System BIOS. 7. Select Processor Settings. 8. Verify QPI Speed is set to Maximum Data Rate. 9. Verify that Virtualization Technology is Enabled. 10. Verify that Adjacent Cache Line Prefetch is Enabled. 11. Verify that Hardware Prefetcher is Enabled. 12. Verify that DCU Streamer Prefetcher is Enabled. 13. Verify that DCU IP Prefetcher is Enabled. 14. Verify that Execute Disable is Enabled. 15. Verify that Number of Cores per Processor is All. 16. Click the Back button. 17. Select SATA Settings. 18. Verify that Embedded SATA is AHCI Mode. 19. Click the Back button. 20. Select Boot Settings. 21. Verify that Boot Sequence Retry is Enabled. 22. Click the Back button. 23. Select Integrated Devices. 24. Verify that OS Watchdog Timer is Disabled. 25. Verify that Embedded Video Controller is Enabled. 26. Click the Back button. 27. Select Serial Communication. 28. Verify that Serial Communication is On with Console Redirection. 29. Verify that Serial Port Address is configured as follows: Serial Device1=COM1, Serial Device2=COM2. 30. Verify that External Serial Connector is set to Serial Device 1. 31. Verify that Failsafe Baud Rate is set to 115200.
  • 37. A Principled Technologies test report 37Simplifying systems management with Dell OpenManage on 13G Dell PowerEdge servers 32. Verify that Remote Terminal Type is set to ANSI. 33. Click the Back button. 34. Select System Profile Settings. 35. Verify that System Profile is set to Custom. 36. Verify that CPU Power Management is set to OS DBPM. 37. Verify that Memory Frequency is set to Maximum Performance. 38. Verify that Turbo Boost is Enabled. 39. Verify that C1E is Enabled. 40. Verify that C States is Enabled. 41. Verify that Memory Patrol Scrub is Disabled. 42. Verify that Collaborative CPU Performance Control is Disabled. 43. Click the Back button. 44. Select System Security. 45. Verify that NMI Button is Disabled. 46. Click the Back button. 47. Select Miscellaneous Settings. 48. Verify that F1/F2 Prompt on Error is Disabled. 49. Click the Back button. 50. Click the Finish button. 51. At the System Setup Main Menu, select Device Settings. 52. Select the Integrated NIC 1 Port 1. 53. Click NIC Configuration. 54. Verify that Legacy Boot Protocol is set to None. 55. Click Back. 56. Click Finish. 57. At the Device Settings menu, select the Integrated NIC 1 Port 2. 58. Click NIC Configuration. 59. Verify that legacy boot protocol is set to None. 60. Click the Back button. 61. Click the Finish button. 62. Click the Finish button again. 63. At the System Setup Main Menu, select iDRAC Settings. 64. Select Network. 65. Scroll down to the IPMI Settings category, and verify that Enable IPMI Over LAN is Enabled. 66. Click the Back button. 67. Select Alerts. 68. Verify that Enable Platform Event Filter Alerts is Enabled. 69. Verify that Enable Alert Destination 1 is Enabled 70. Verify that Alert Destination 1 is 192.168.1.50. 71. Click the Back button. 72. Click the Finish button. 73. At the System Setup Main Menu, click the Finish button. 74. A warning dialog will appear confirming the exit command and prompting the user Are you sure you want to exit? Click the Yes button to reboot. OME Baseline Configuration Compliance Check 1. Open a Web browser and connect to OME. 2. Select Manage→Configuration. 3. Click the red section of the pie chart indicated as non-compliant.
  • 38. A Principled Technologies test report 38Simplifying systems management with Dell OpenManage on 13G Dell PowerEdge servers 4. Double-click an entry in the pop-out table. 5. Note the missing and different settings. These are sortable and can be exported to HTML. New features to simplify updating OME Agentless Driver Updates OS Driver Updates using OMSA Installing OMSA (one time task) 1. Log into remote server. 2. Browse to the location of the OMSA installation file. 3. Double-click setup.exe. 4. When prompted, click Run. 5. Correct any conditions that create an error, and click Install Server Administrator. 6. Click Next. 7. Select I accept the terms in the license agreement and click Next. 8. Click Typical and select Next. 9. Click Install. 10. Click Finish. Performing Updates with OMSA 1. On the OME server, log in to OME. 2. Click Manage→System Update. 3. Click Select a Catalog Source in the left hand menu. 4. Select Use repository manager file. 5. Click Browse and select the catalog.xml file you want to use for the baseline. 6. Click Open to select the catalog.xml file. 7. Click Import Now. The compliance report will regenerate. 8. Click the red section of the chart indicating Non-Compliant Systems. 9. Check the box beside a non-compliant system. Note the preferred Delivery Method is In-Band Agent. 10. Under Select Updates to Apply, check the topmost box to select all updates. 11. Click Apply Selected Updates. 12. Select Run Now under Set the Task Schedule. 13. Check the box for Skip Signature and Hash Check. 14. Enter the server credentials for the task. We used testadministrator and Password1. 15. Click Finish. OS Driver Updates without OMSA Performing Inventory (one time task creation) 1. On the OME server, log in to OME. 2. Click Manage→Remote Tasks. 3. Under Common Tasks, click Create F/W and Driver Inventory Task. 4. Check the box for 64-bit system. 5. Click Next. 6. Select the radio button for Select server(s) for this task to target. 7. Expand Servers and select the server you want to inventory. 8. Click Next. 9. Under Set Schedule, select Periodic.
  • 39. A Principled Technologies test report 39Simplifying systems management with Dell OpenManage on 13G Dell PowerEdge servers 10. Select how frequently you want to conduct the inventory. 11. Enter the credentials to use on the remote target. We used testadministrator and Password1. 12. Click Finish. Performing Updates without OMSA 1. On the OME server, log into OME. 2. Click Manage→System Update. 3. Click Select a Catalog Source in the left hand menu. 4. Select Use repository manager file. 5. Click Browse and select the catalog.xml file you want to use for the baseline. 6. Click Open to select the catalog.xml file. 7. Click Import Now. The compliance report will regenerate. 8. Click the red section of the chart indicating Non-Compliant Systems. 9. Check the box beside a non-compliant system. Note the preferred Delivery Method is In-Band Agent. 10. Under Select Updates to Apply, check the topmost box to select all updates. 11. Click Apply Selected Updates. 12. Select Run Now under Set the Task Schedule. 13. Check the box for Skip Signature and Hash Check. 14. Enter the server credentials for the task. We used testadministrator and Password1. 15. Click Finish. Repository Manager and Automatic Updates. Manual firmware updates – iDRAC 1. On a management workstation, open a Web browser and login to the iDRAC. 2. Click iDRAC Settings→Update and Rollback. 3. Click Browse to locate the BIOS update file. 4. Select the file, and click Open. 5. Click upload to transmit the file from the management workstation to the iDRAC. 6. Click Browse to locate the iDRAC update file (ESM_Firmware). 7. Select the file, and click Open. 8. Click upload to transmit the file from the management workstation to the iDRAC. 9. Click Browse to locate the Lifecycle Controller update file. 10. Select the file, and click Open. 11. Click upload to transmit the file from the management workstation to the iDRAC. 12. Click Browse to locate the NIC update file. 13. Select the file, and click Open. 14. Click upload to transmit the file from the management workstation to the iDRAC. 15. Click Browse to locate the RAID controller update file. 16. Select the file, and click Open. 17. Click upload to transmit the file from the management workstation to the iDRAC. 18. Click the checkbox beside content at the top of the Update Details section to select all uploaded components. 19. Click Install and Reboot. 20. Click OK to confirm job submission. Automatic Updates (setup only – not counted as repetitive administrative task) (Note: 72 seconds – not included in timed runs.)
  • 40. A Principled Technologies test report 40Simplifying systems management with Dell OpenManage on 13G Dell PowerEdge servers 1. Log into iDRAC with your username and password. 2. Select iDRAC Settings→Update and Rollback. 3. Click the Automatic Update tab. 4. Check the box for Enable Automatic Updates. 5. For Server Reboot, select Schedule Updates and Reboot Server. 6. For File Location, select Network. 7. For Protocol, select CIFS. 8. Enter the IP address of the repository host. We used 192.168.1.20. 9. Enter the share name that houses the repository. We used repoman. 10. Enter the username with access to the repository share. We used administrator. 11. Enter the password of the user with access to the share. We used Password1. 12. Enter the start time for the maintenance window. We used 00:00. 13. Select Monthly and use the pull-down menus to select the first Sunday of every one month. 14. Click Schedule Update. 15. Click OK to confirm that the Auto Update setup is complete.
  • 41. A Principled Technologies test report 41Simplifying systems management with Dell OpenManage on 13G Dell PowerEdge servers ABOUT PRINCIPLED TECHNOLOGIES Principled Technologies, Inc. 1007 Slater Road, Suite 300 Durham, NC, 27703 www.principledtechnologies.com We provide industry-leading technology assessment and fact-based marketing services. We bring to every assignment extensive experience with and expertise in all aspects of technology testing and analysis, from researching new technologies, to developing new methodologies, to testing with existing and new tools. When the assessment is complete, we know how to present the results to a broad range of target audiences. We provide our clients with the materials they need, from market-focused data to use in their own collateral to custom sales aids, such as test reports, performance assessments, and white papers. Every document reflects the results of our trusted independent analysis. We provide customized services that focus on our clients’ individual requirements. Whether the technology involves hardware, software, Web sites, or services, we offer the experience, expertise, and tools to help our clients assess how it will fare against its competition, its performance, its market readiness, and its quality and reliability. Our founders, Mark L. Van Name and Bill Catchings, have worked together in technology assessment for over 20 years. As journalists, they published over a thousand articles on a wide array of technology subjects. They created and led the Ziff-Davis Benchmark Operation, which developed such industry-standard benchmarks as Ziff Davis Media’s Winstone and WebBench. They founded and led eTesting Labs, and after the acquisition of that company by Lionbridge Technologies were the head and CTO of VeriTest. Principled Technologies is a registered trademark of Principled Technologies, Inc. All other product names are the trademarks of their respective owners. Disclaimer of Warranties; Limitation of Liability: PRINCIPLED TECHNOLOGIES, INC. HAS MADE REASONABLE EFFORTS TO ENSURE THE ACCURACY AND VALIDITY OF ITS TESTING, HOWEVER, PRINCIPLED TECHNOLOGIES, INC. SPECIFICALLY DISCLAIMS ANY WARRANTY, EXPRESSED OR IMPLIED, RELATING TO THE TEST RESULTS AND ANALYSIS, THEIR ACCURACY, COMPLETENESS OR QUALITY, INCLUDING ANY IMPLIED WARRANTY OF FITNESS FOR ANY PARTICULAR PURPOSE. ALL PERSONS OR ENTITIES RELYING ON THE RESULTS OF ANY TESTING DO SO AT THEIR OWN RISK, AND AGREE THAT PRINCIPLED TECHNOLOGIES, INC., ITS EMPLOYEES AND ITS SUBCONTRACTORS SHALL HAVE NO LIABILITY WHATSOEVER FROM ANY CLAIM OF LOSS OR DAMAGE ON ACCOUNT OF ANY ALLEGED ERROR OR DEFECT IN ANY TESTING PROCEDURE OR RESULT. IN NO EVENT SHALL PRINCIPLED TECHNOLOGIES, INC. BE LIABLE FOR INDIRECT, SPECIAL, INCIDENTAL, OR CONSEQUENTIAL DAMAGES IN CONNECTION WITH ITS TESTING, EVEN IF ADVISED OF THE POSSIBILITY OF SUCH DAMAGES. IN NO EVENT SHALL PRINCIPLED TECHNOLOGIES, INC.’S LIABILITY, INCLUDING FOR DIRECT DAMAGES, EXCEED THE AMOUNTS PAID IN CONNECTION WITH PRINCIPLED TECHNOLOGIES, INC.’S TESTING. CUSTOMER’S SOLE AND EXCLUSIVE REMEDIES ARE AS SET FORTH HEREIN.