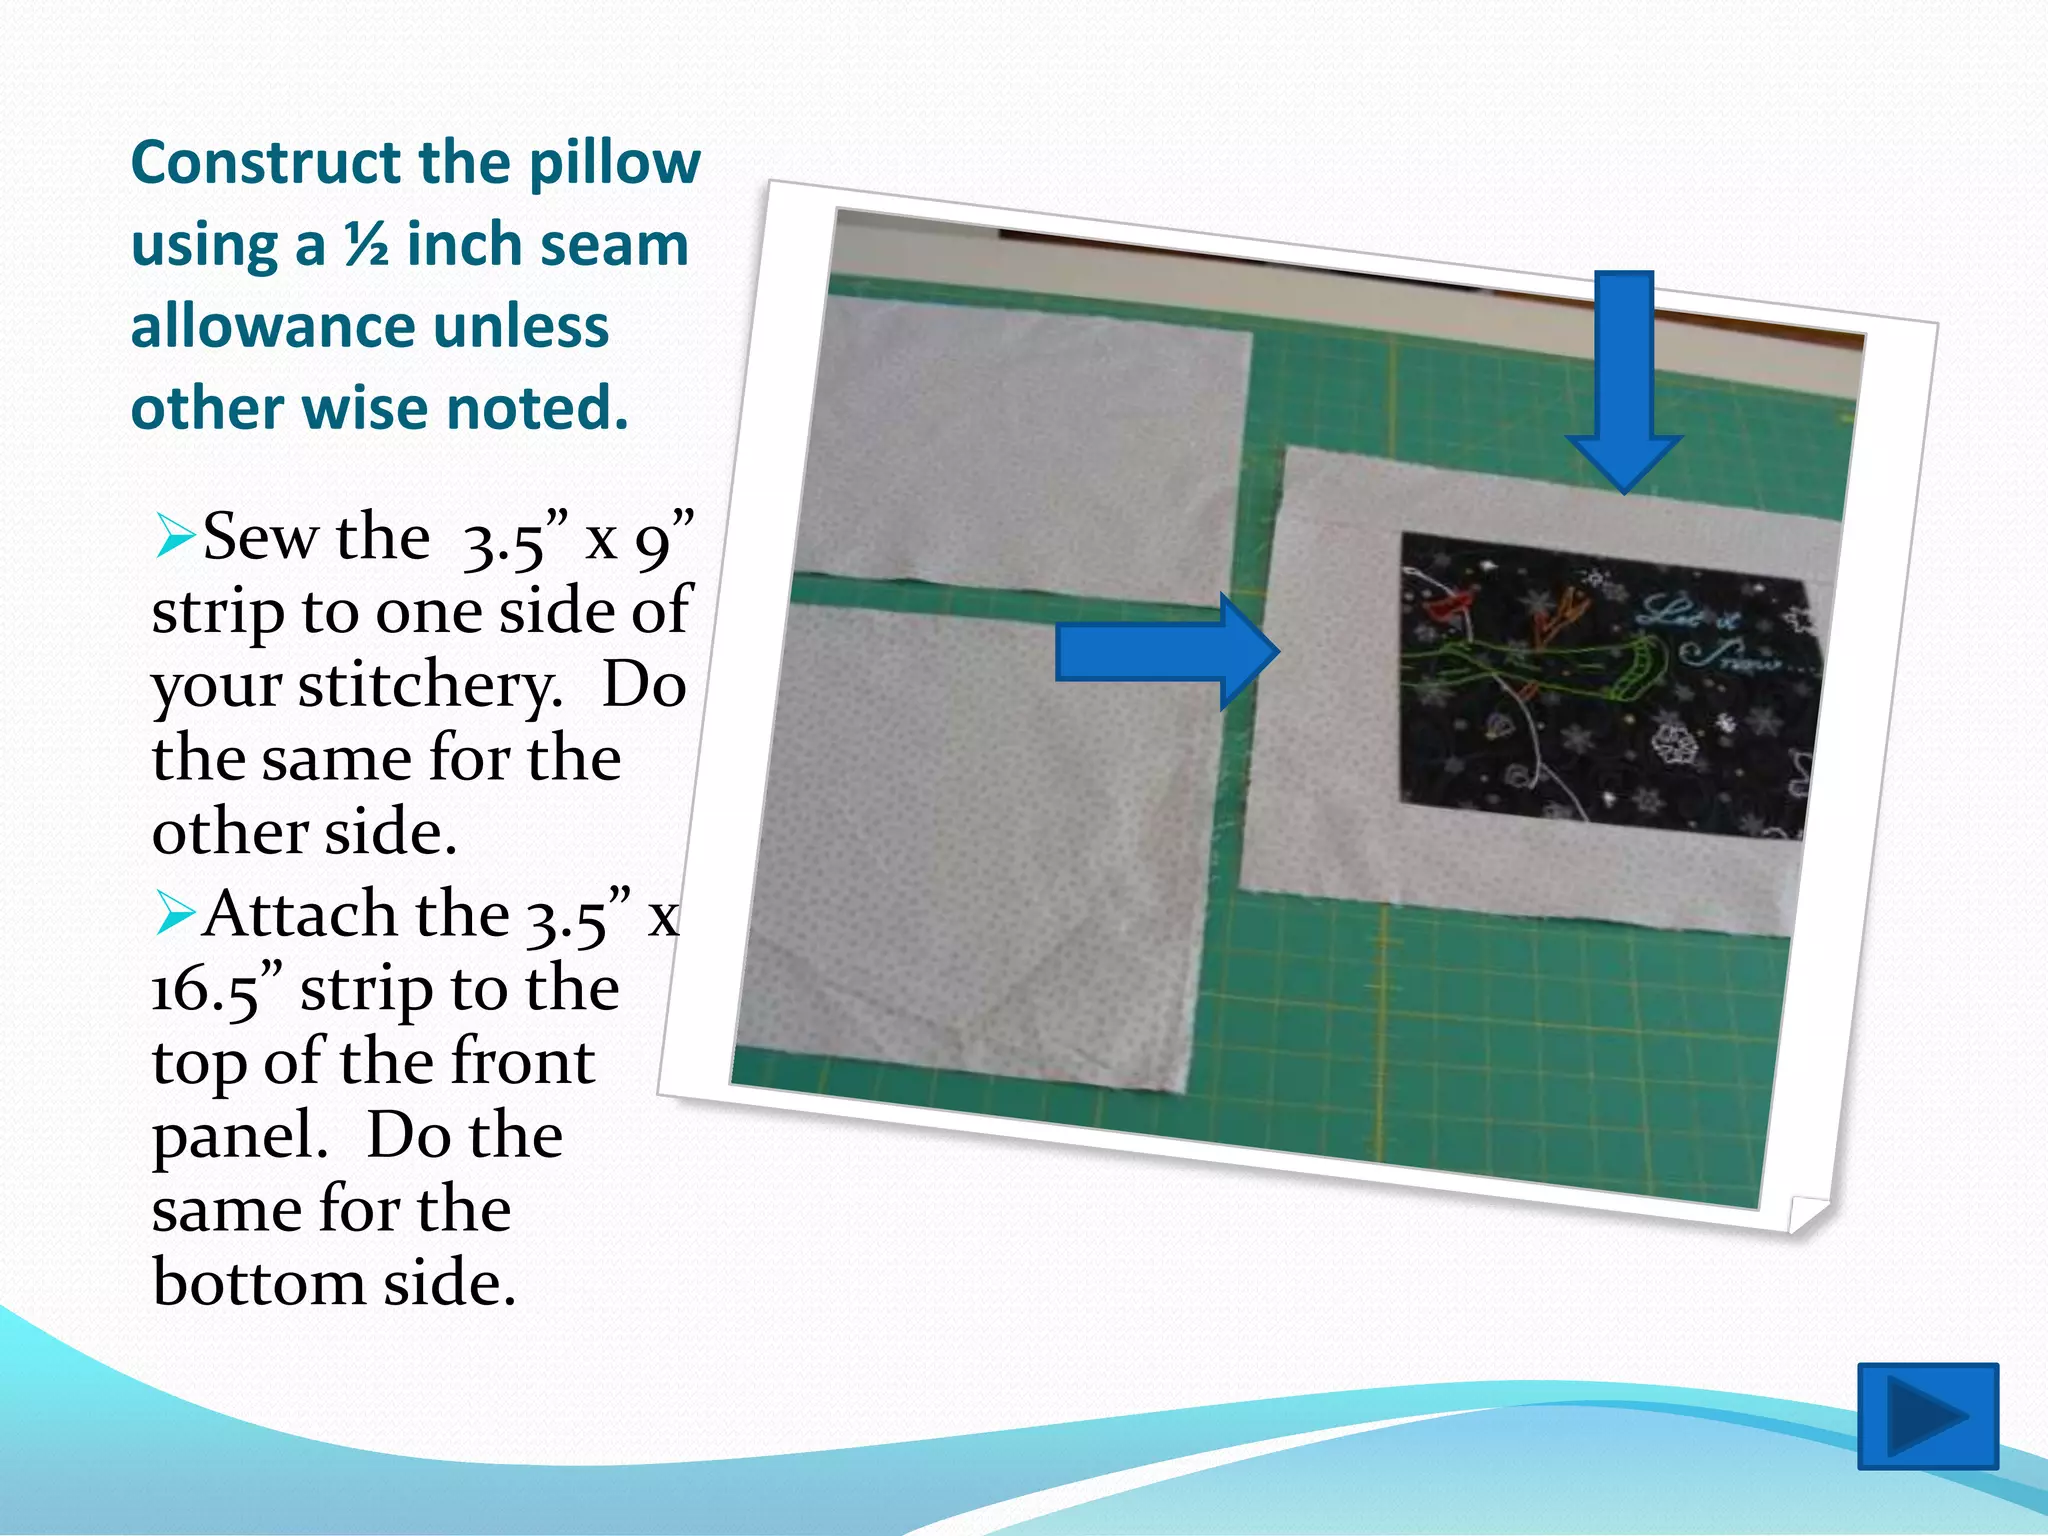
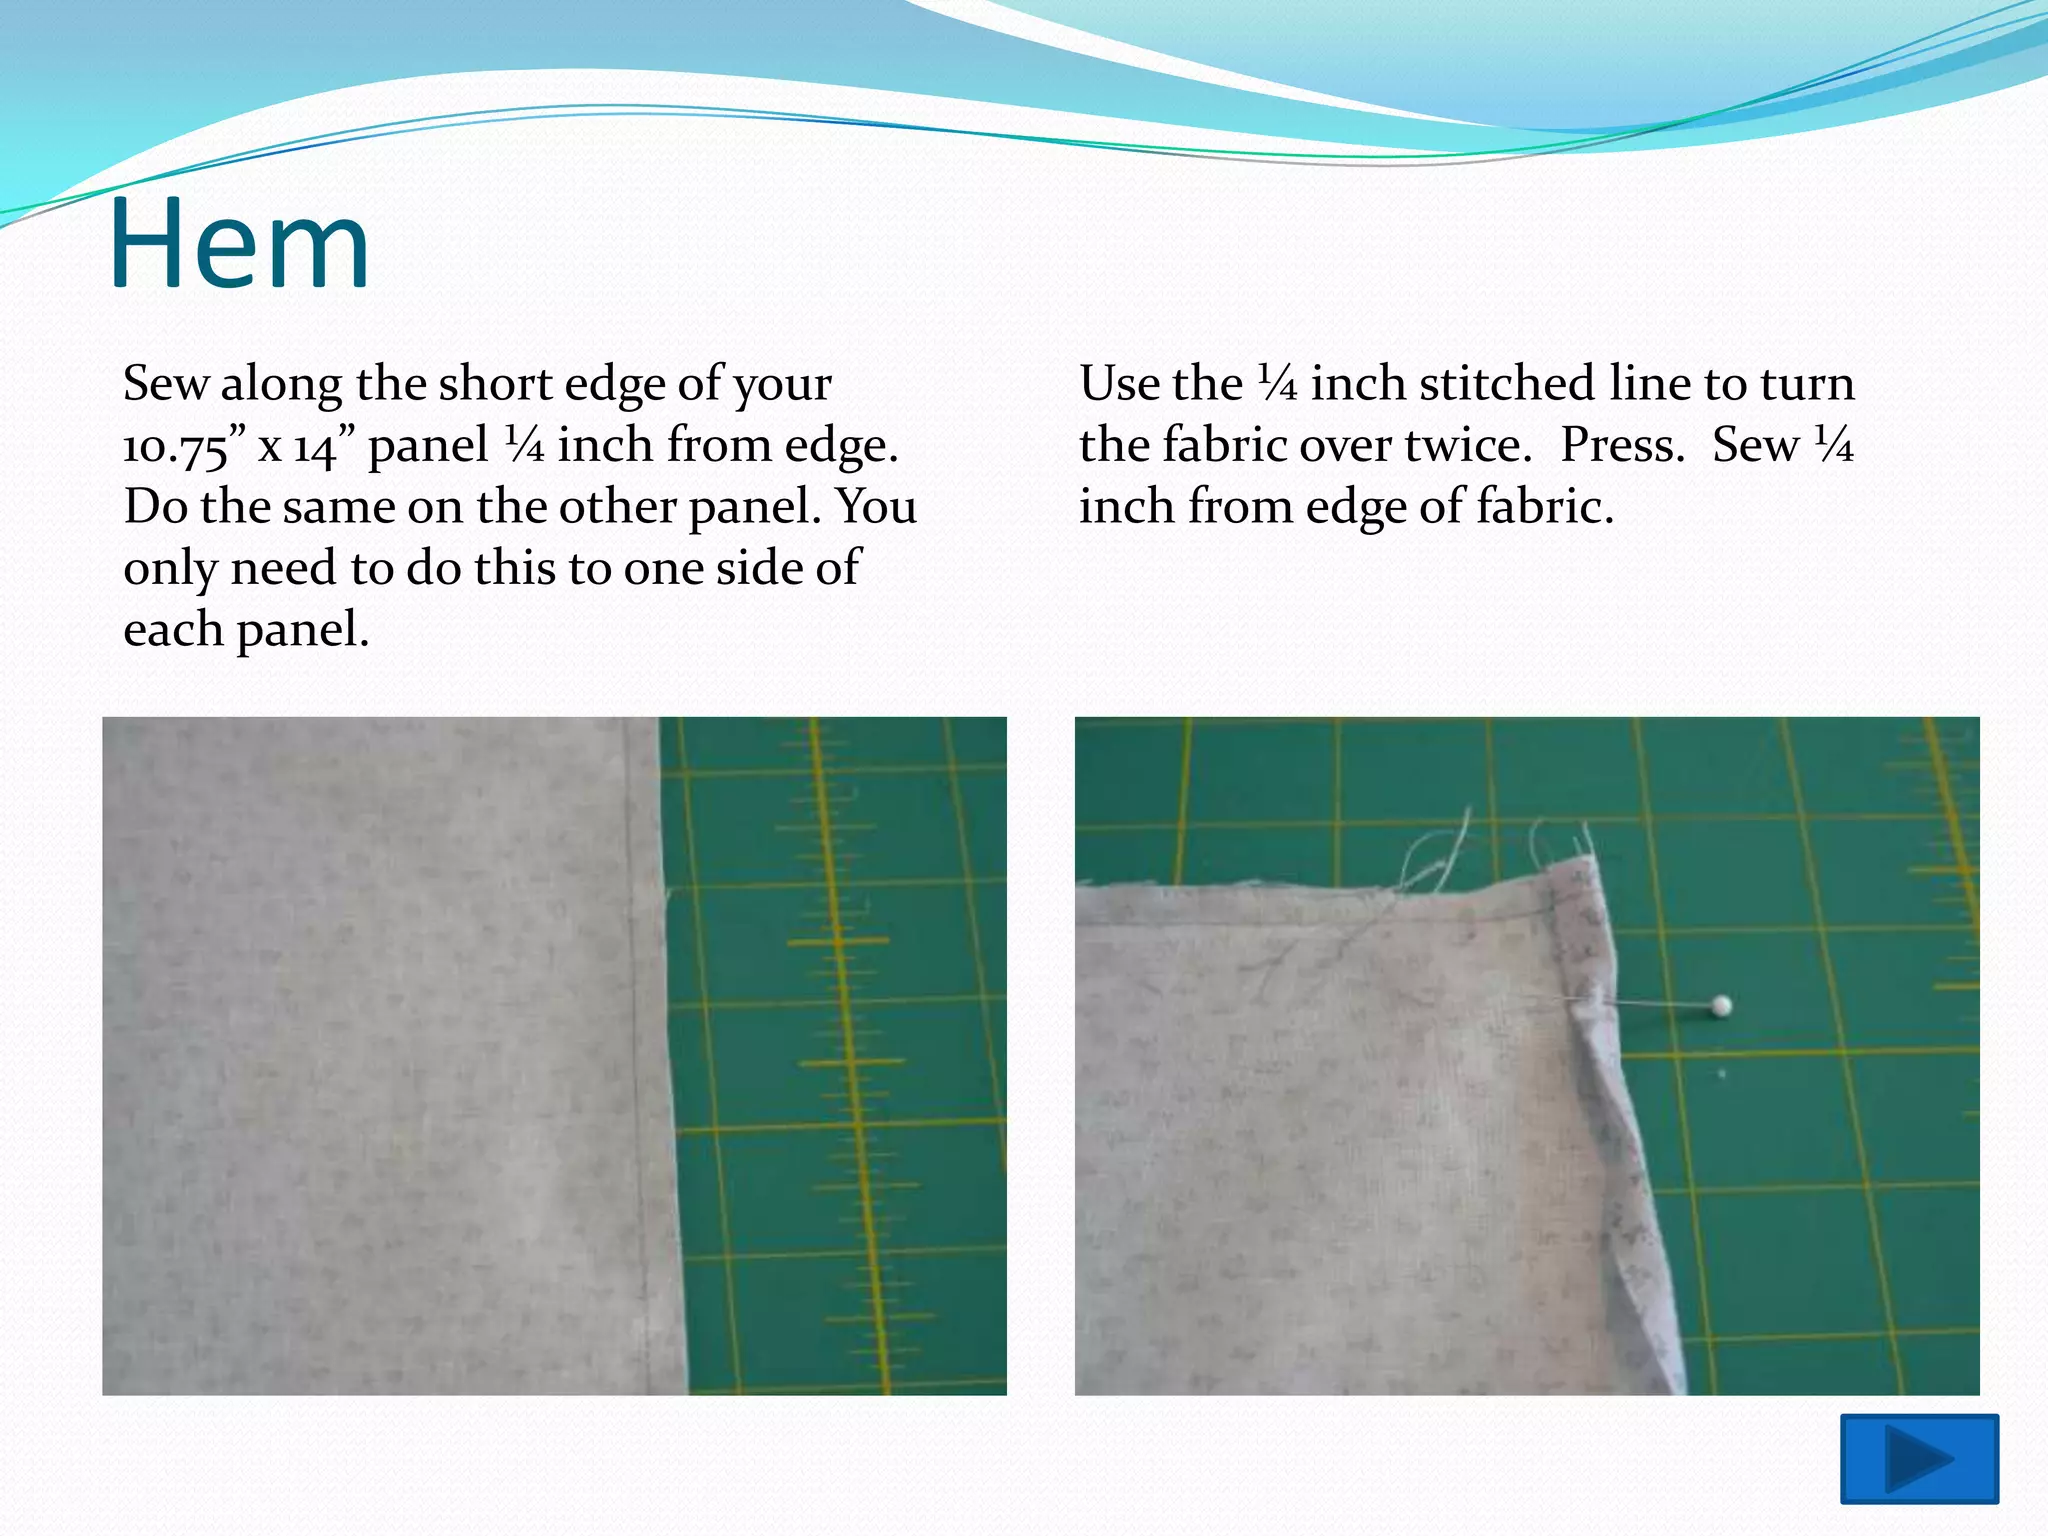
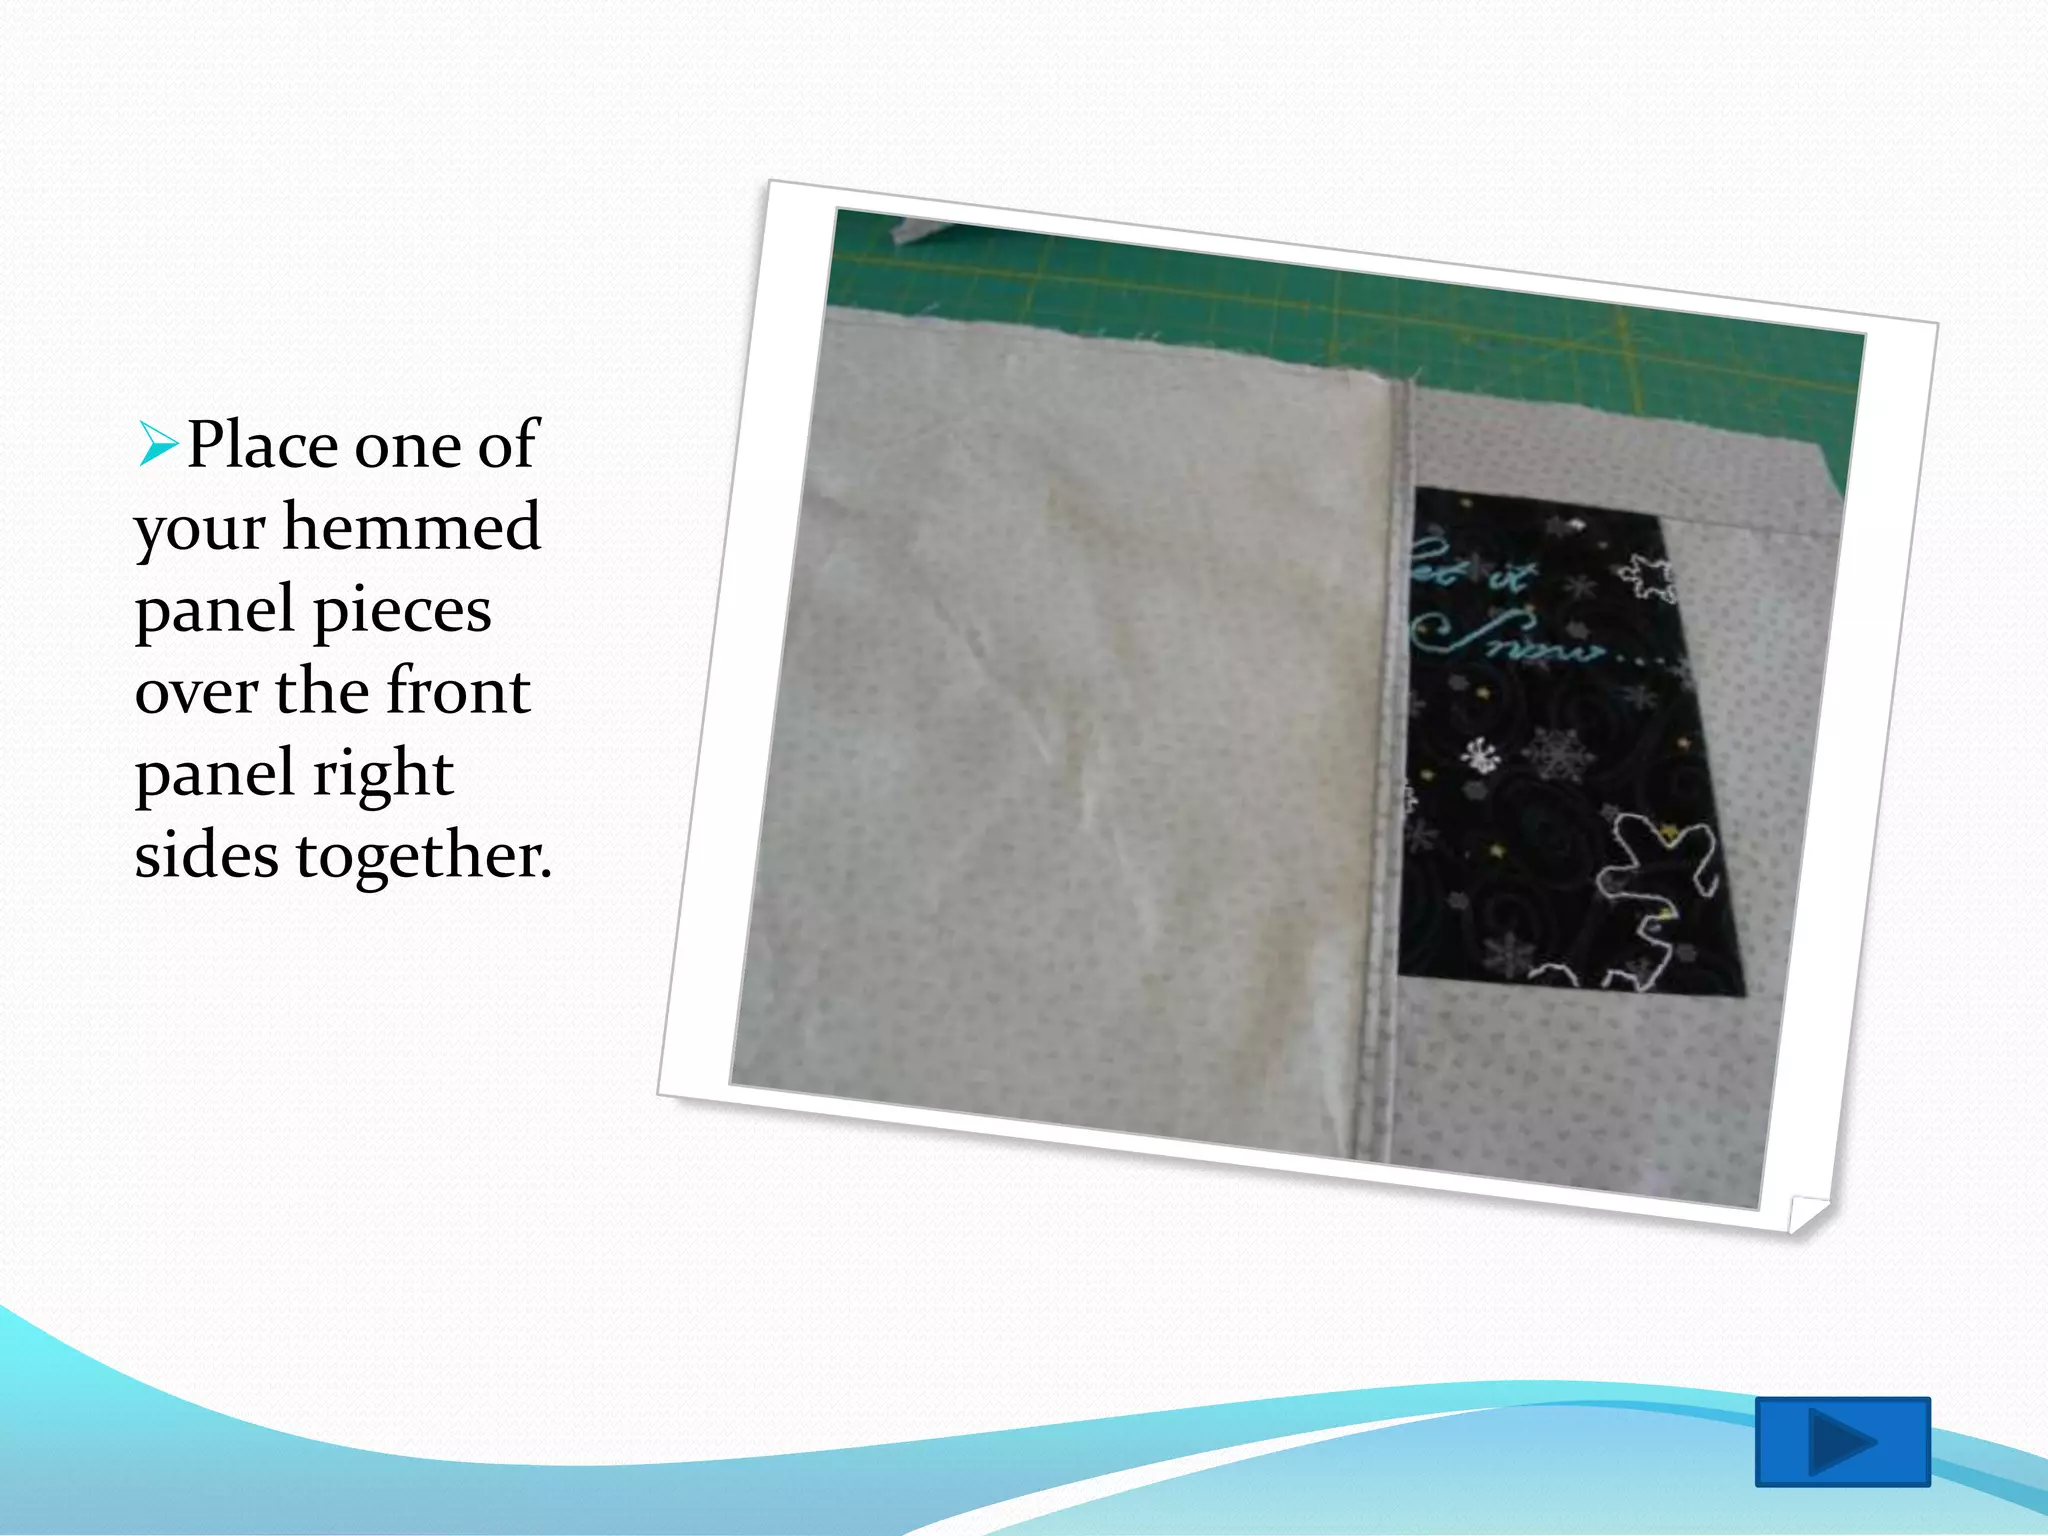
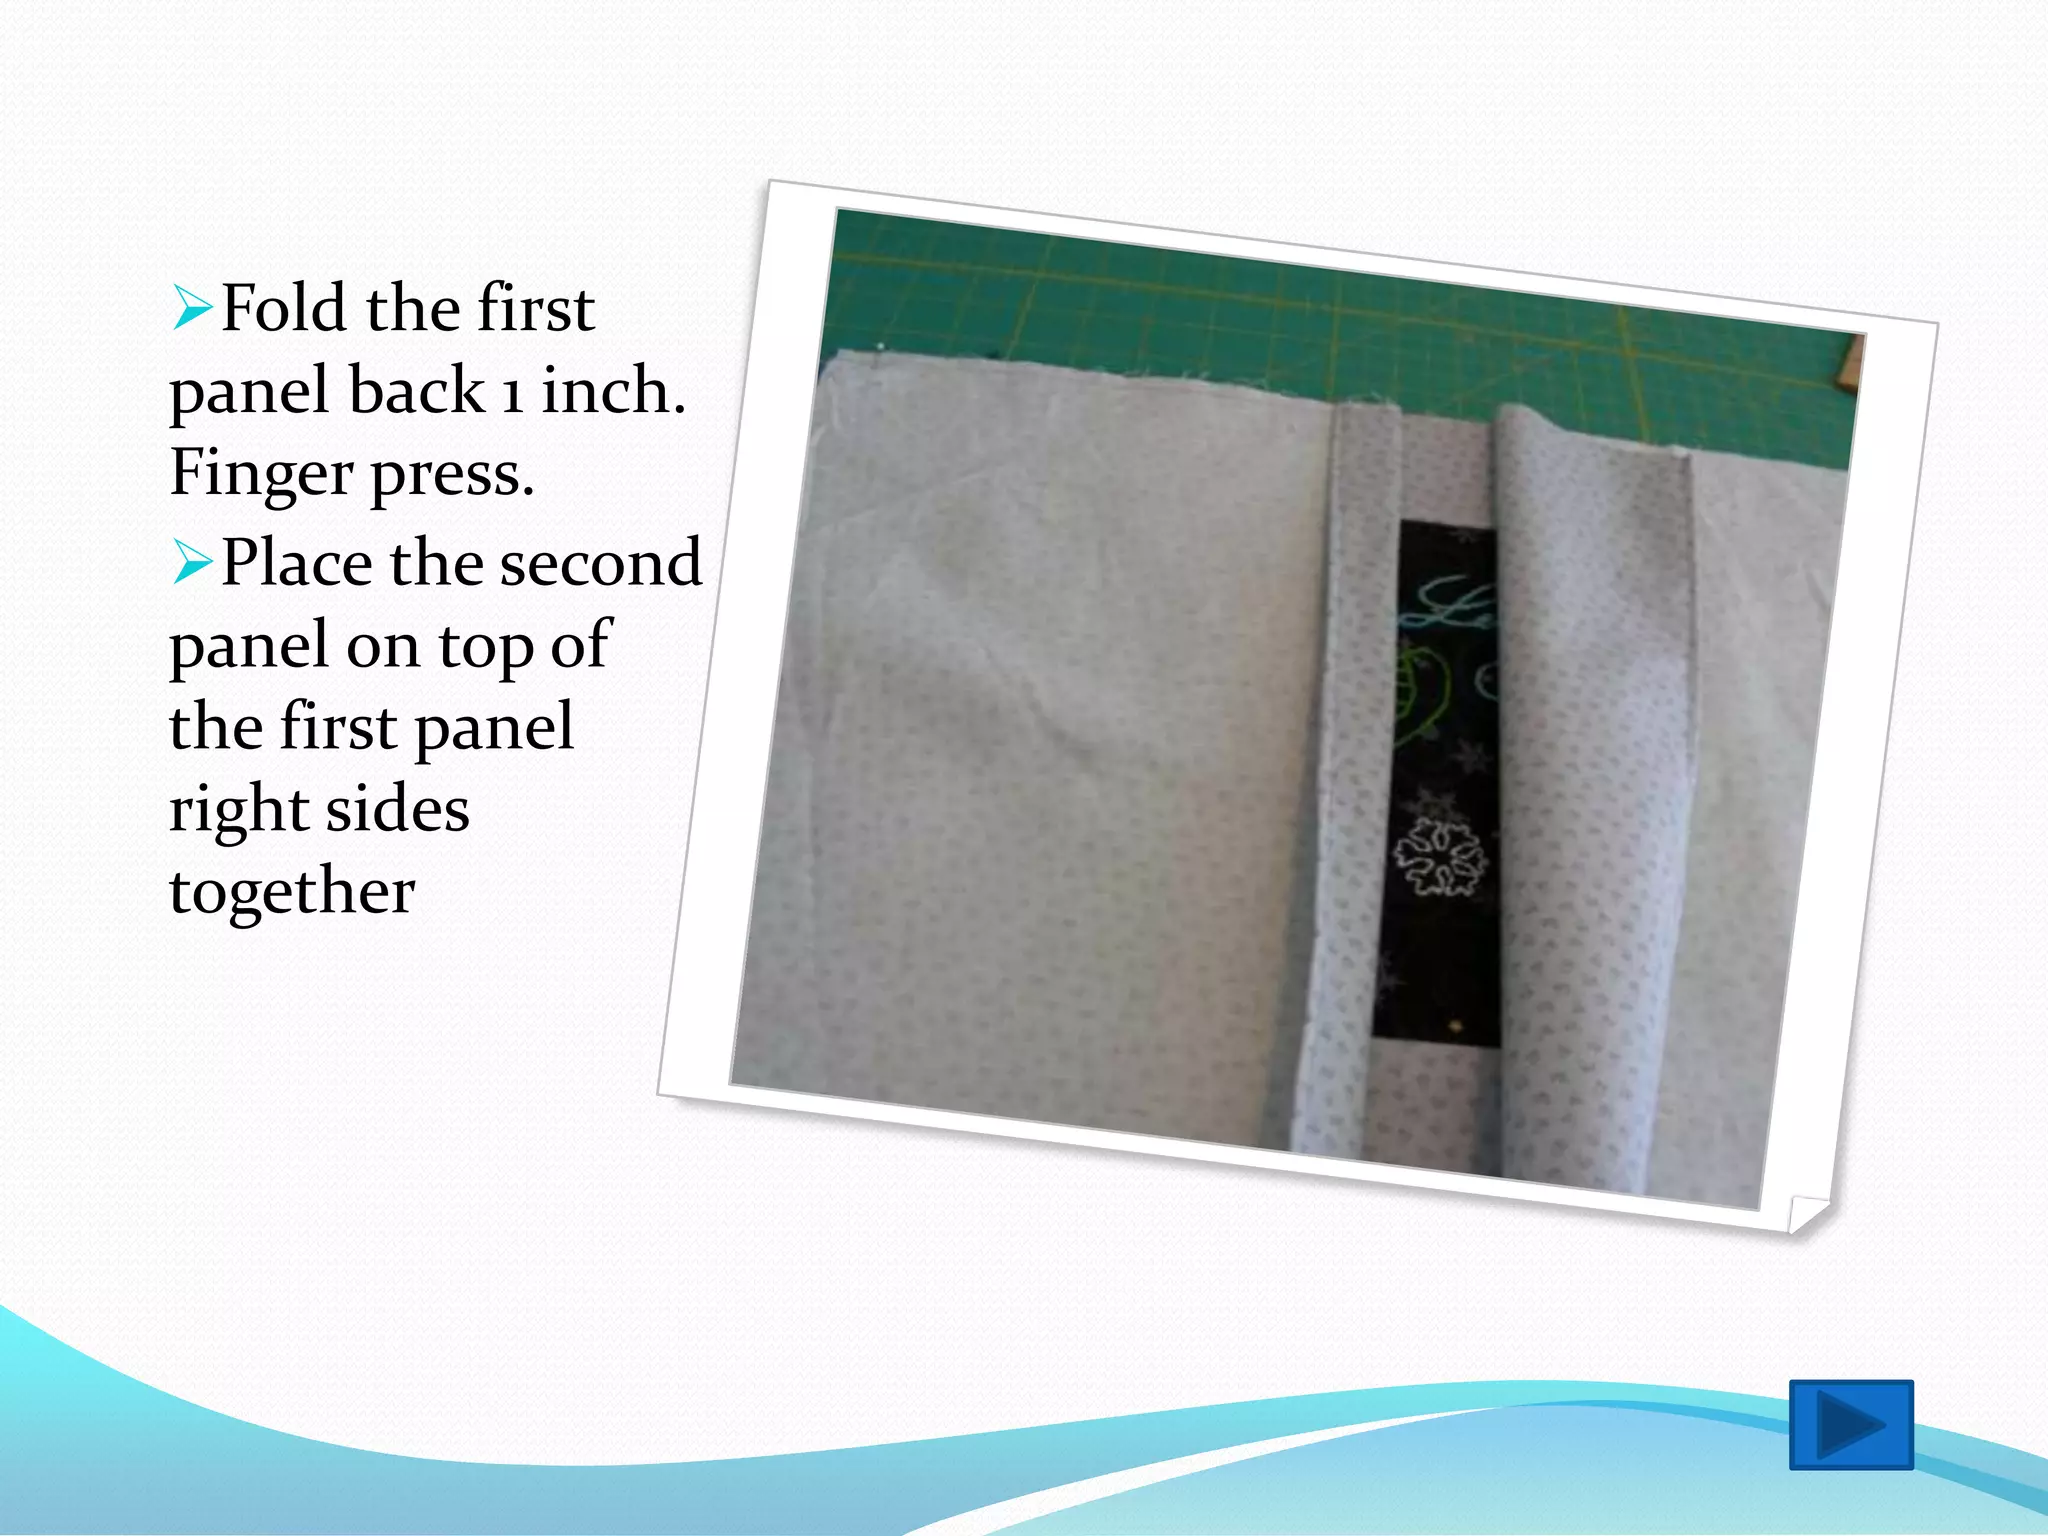
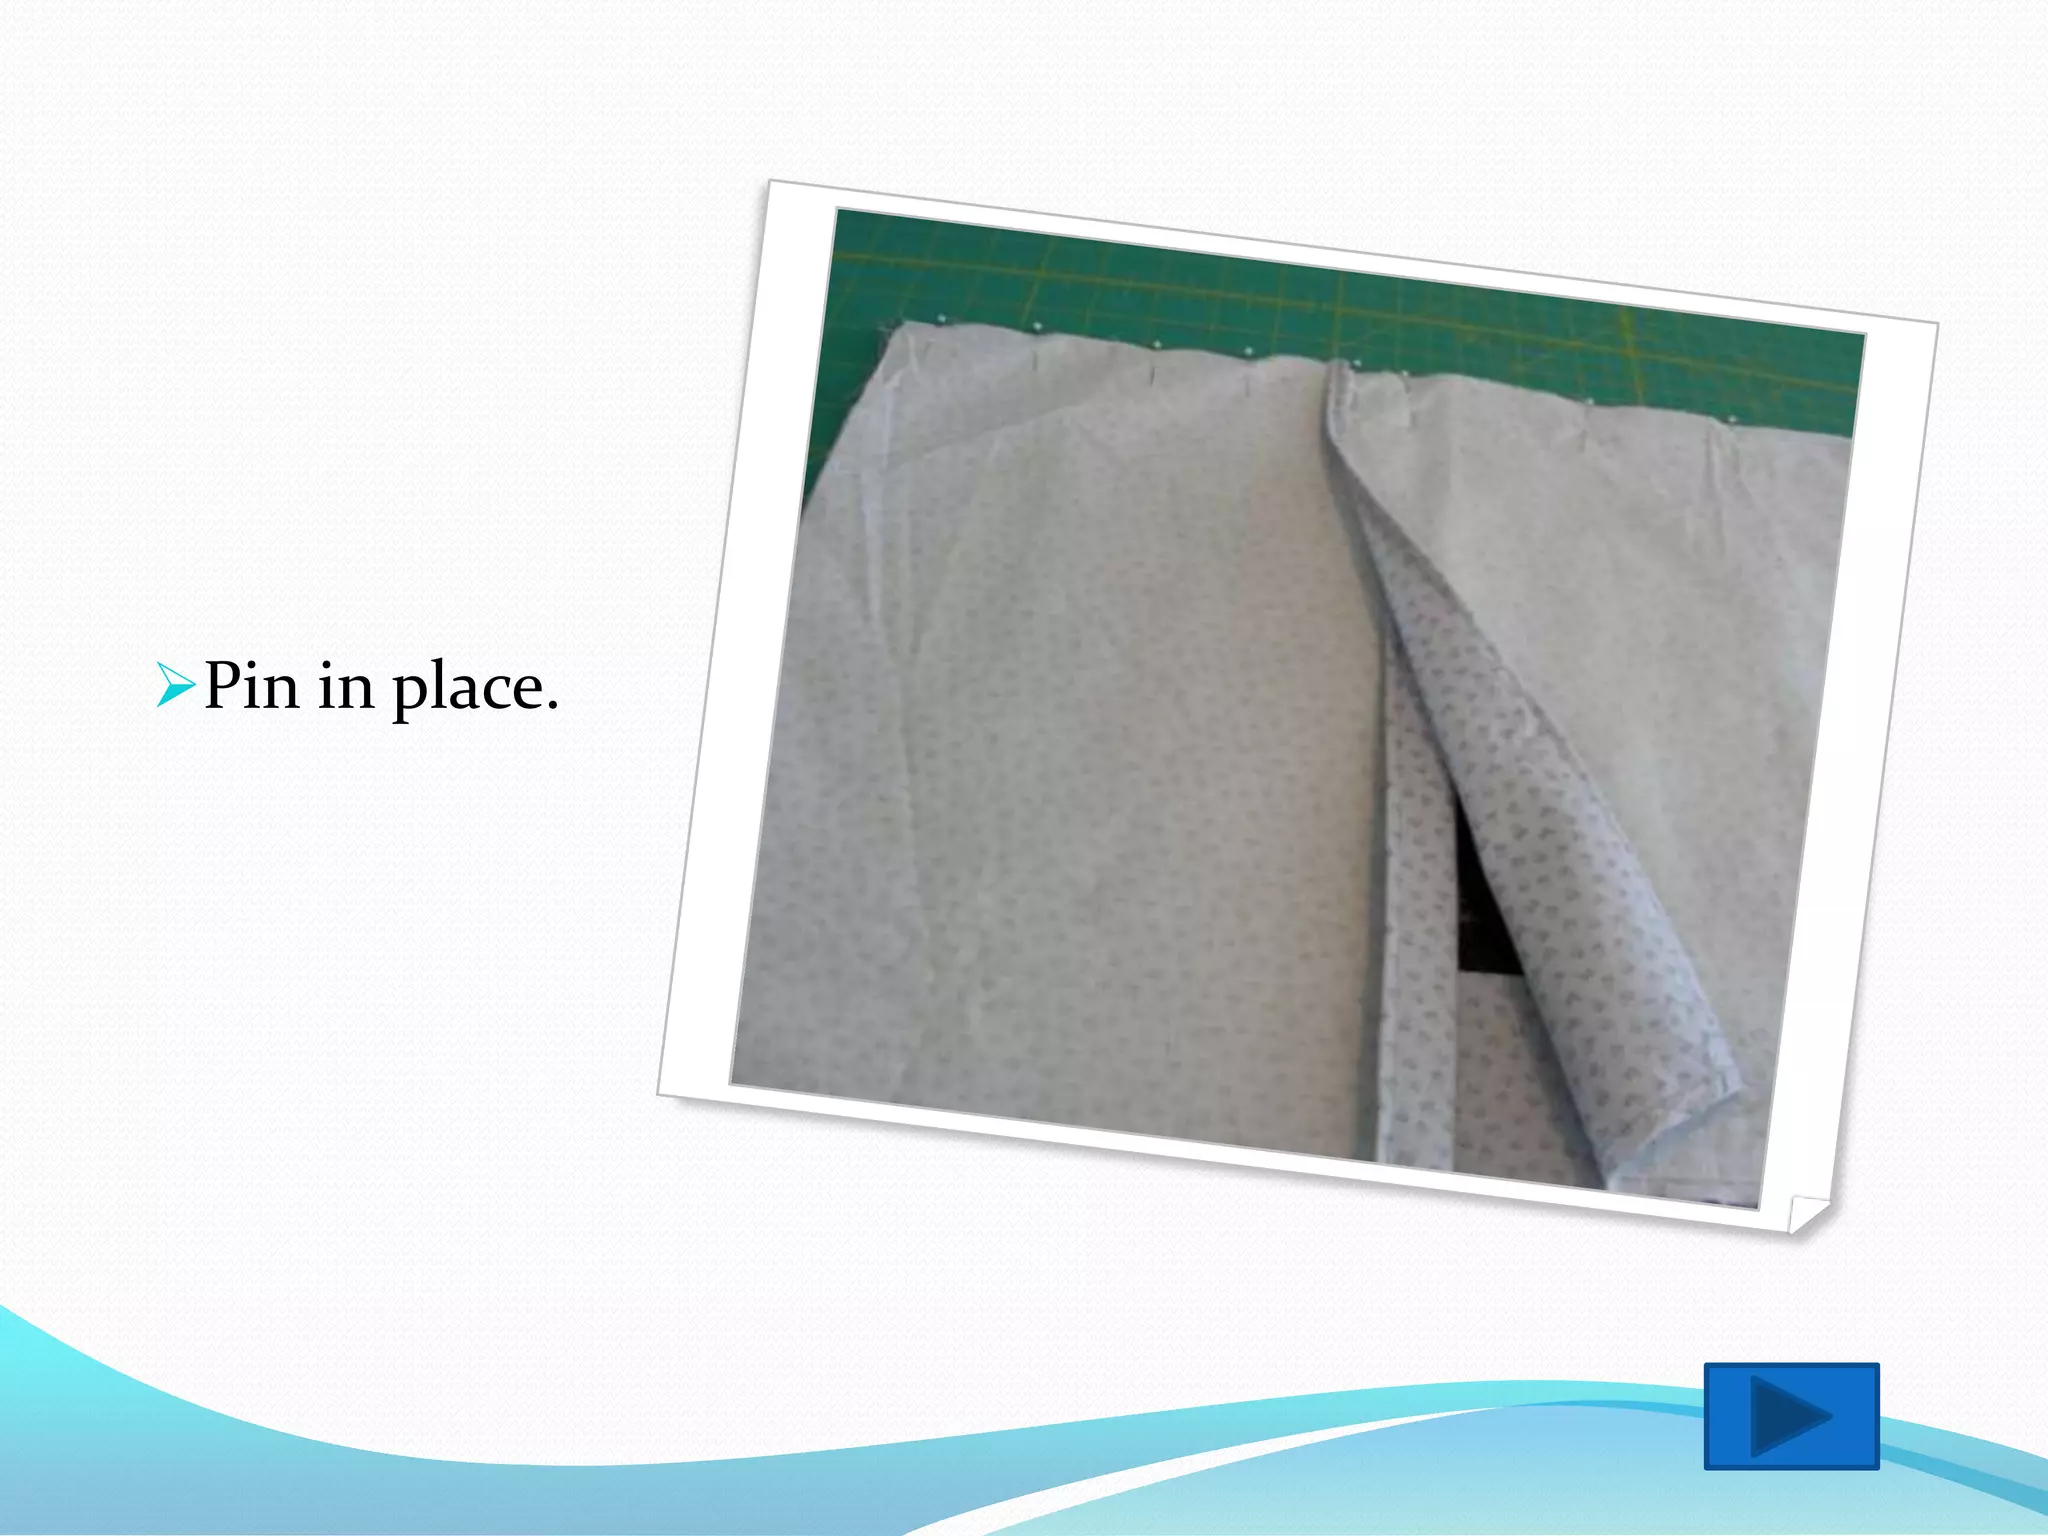
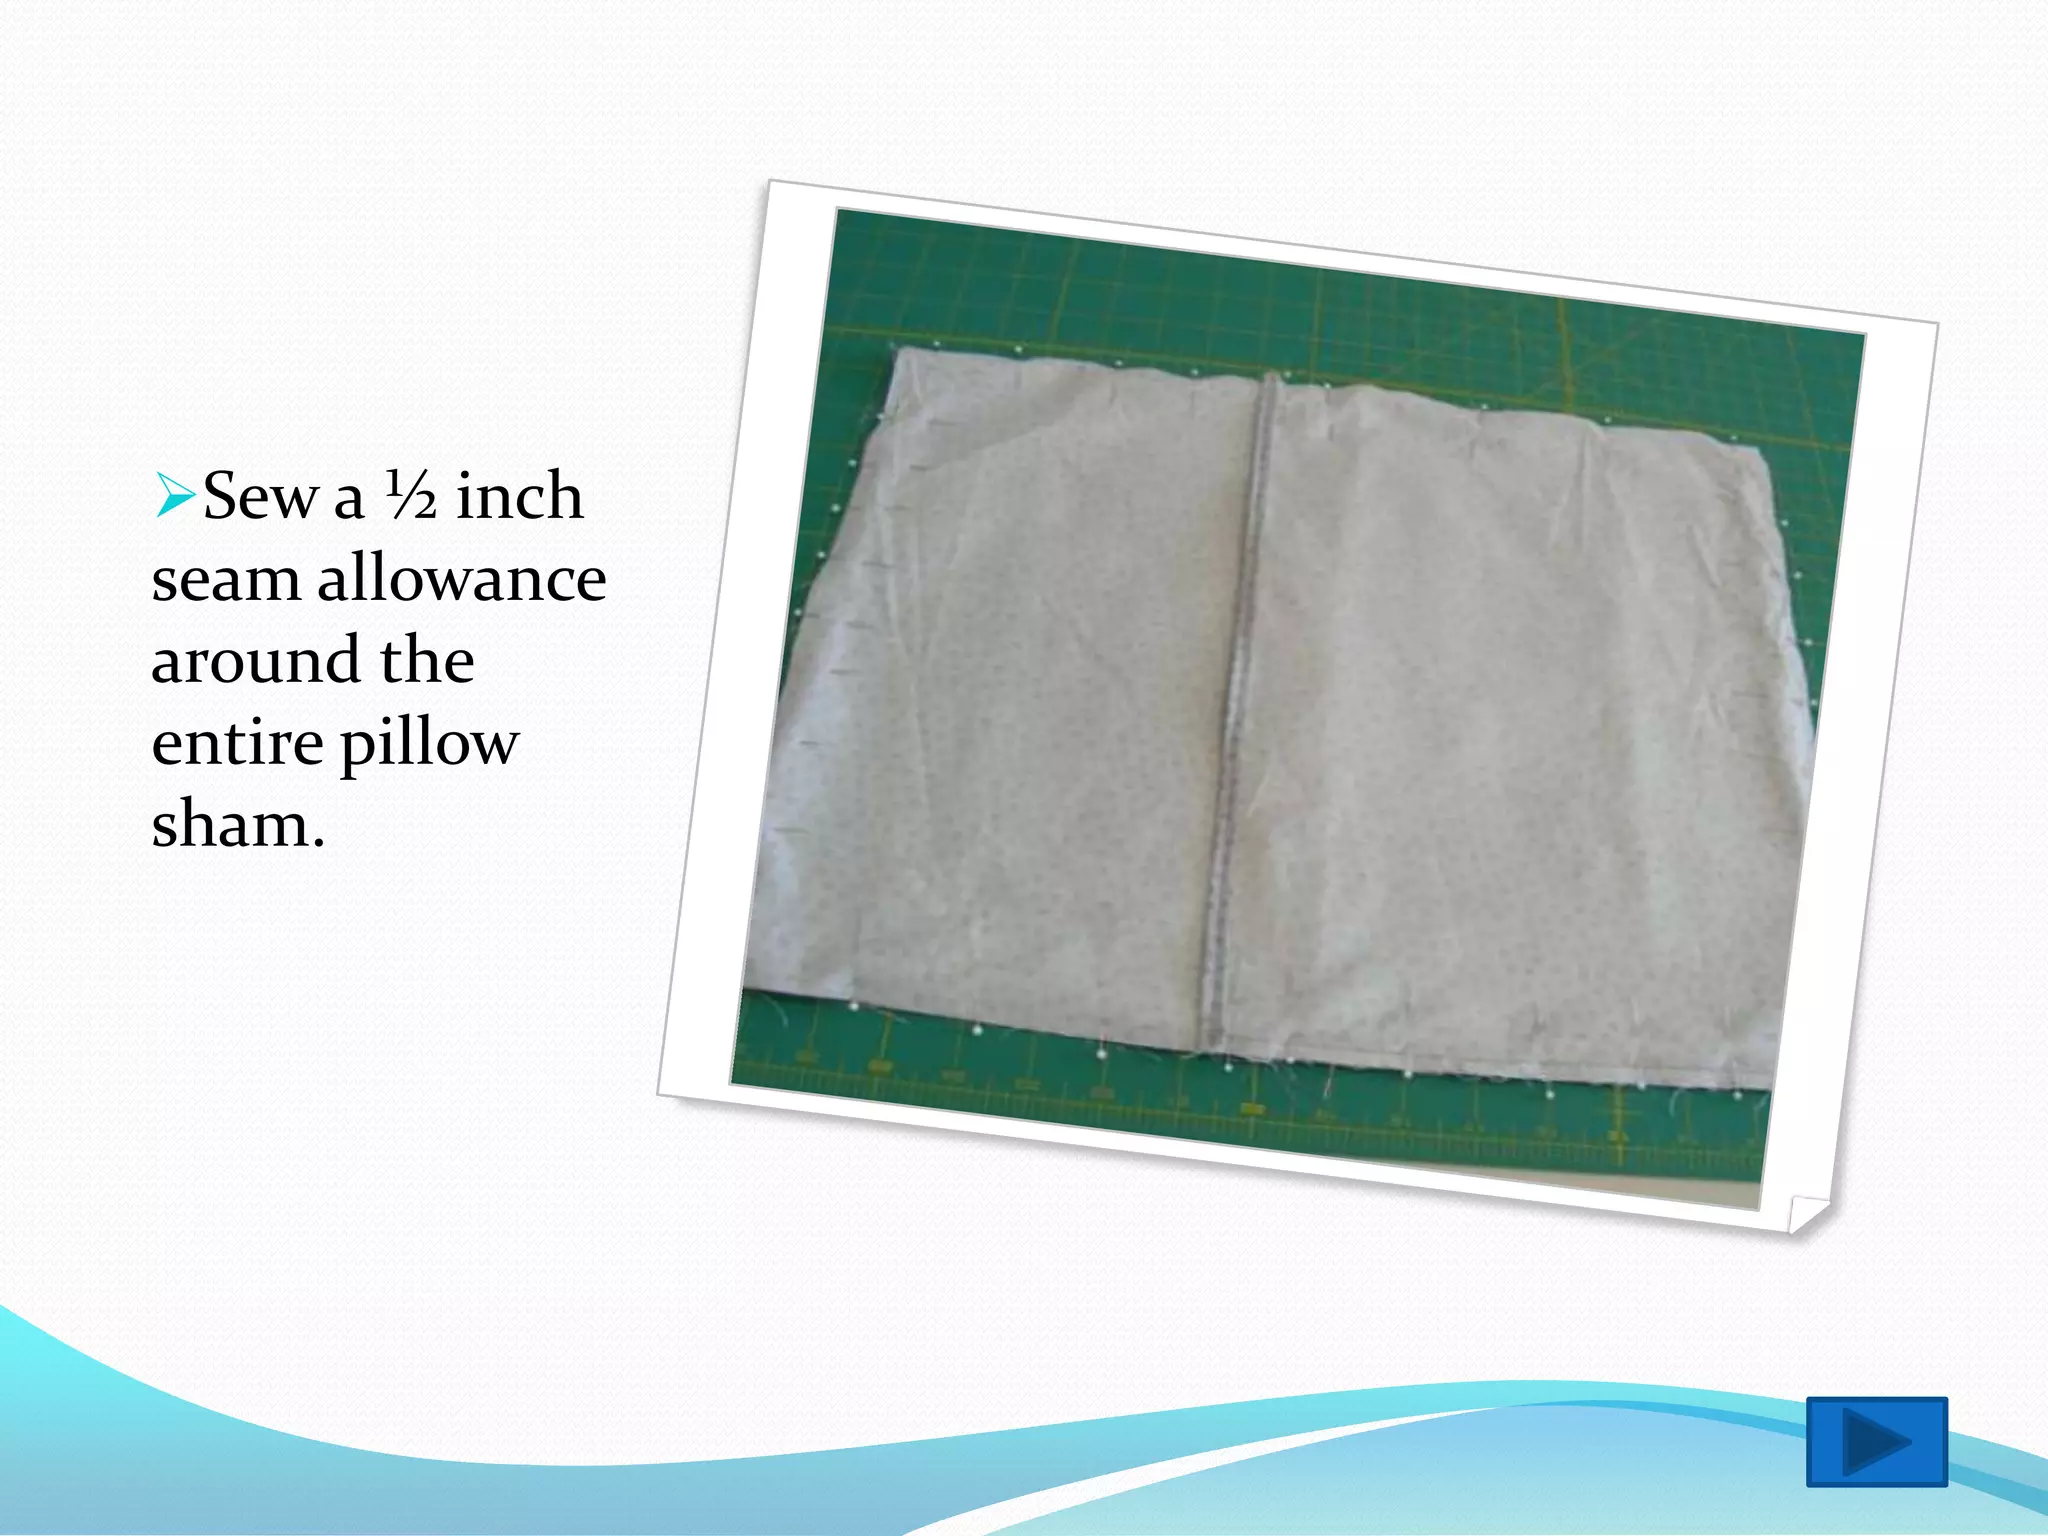
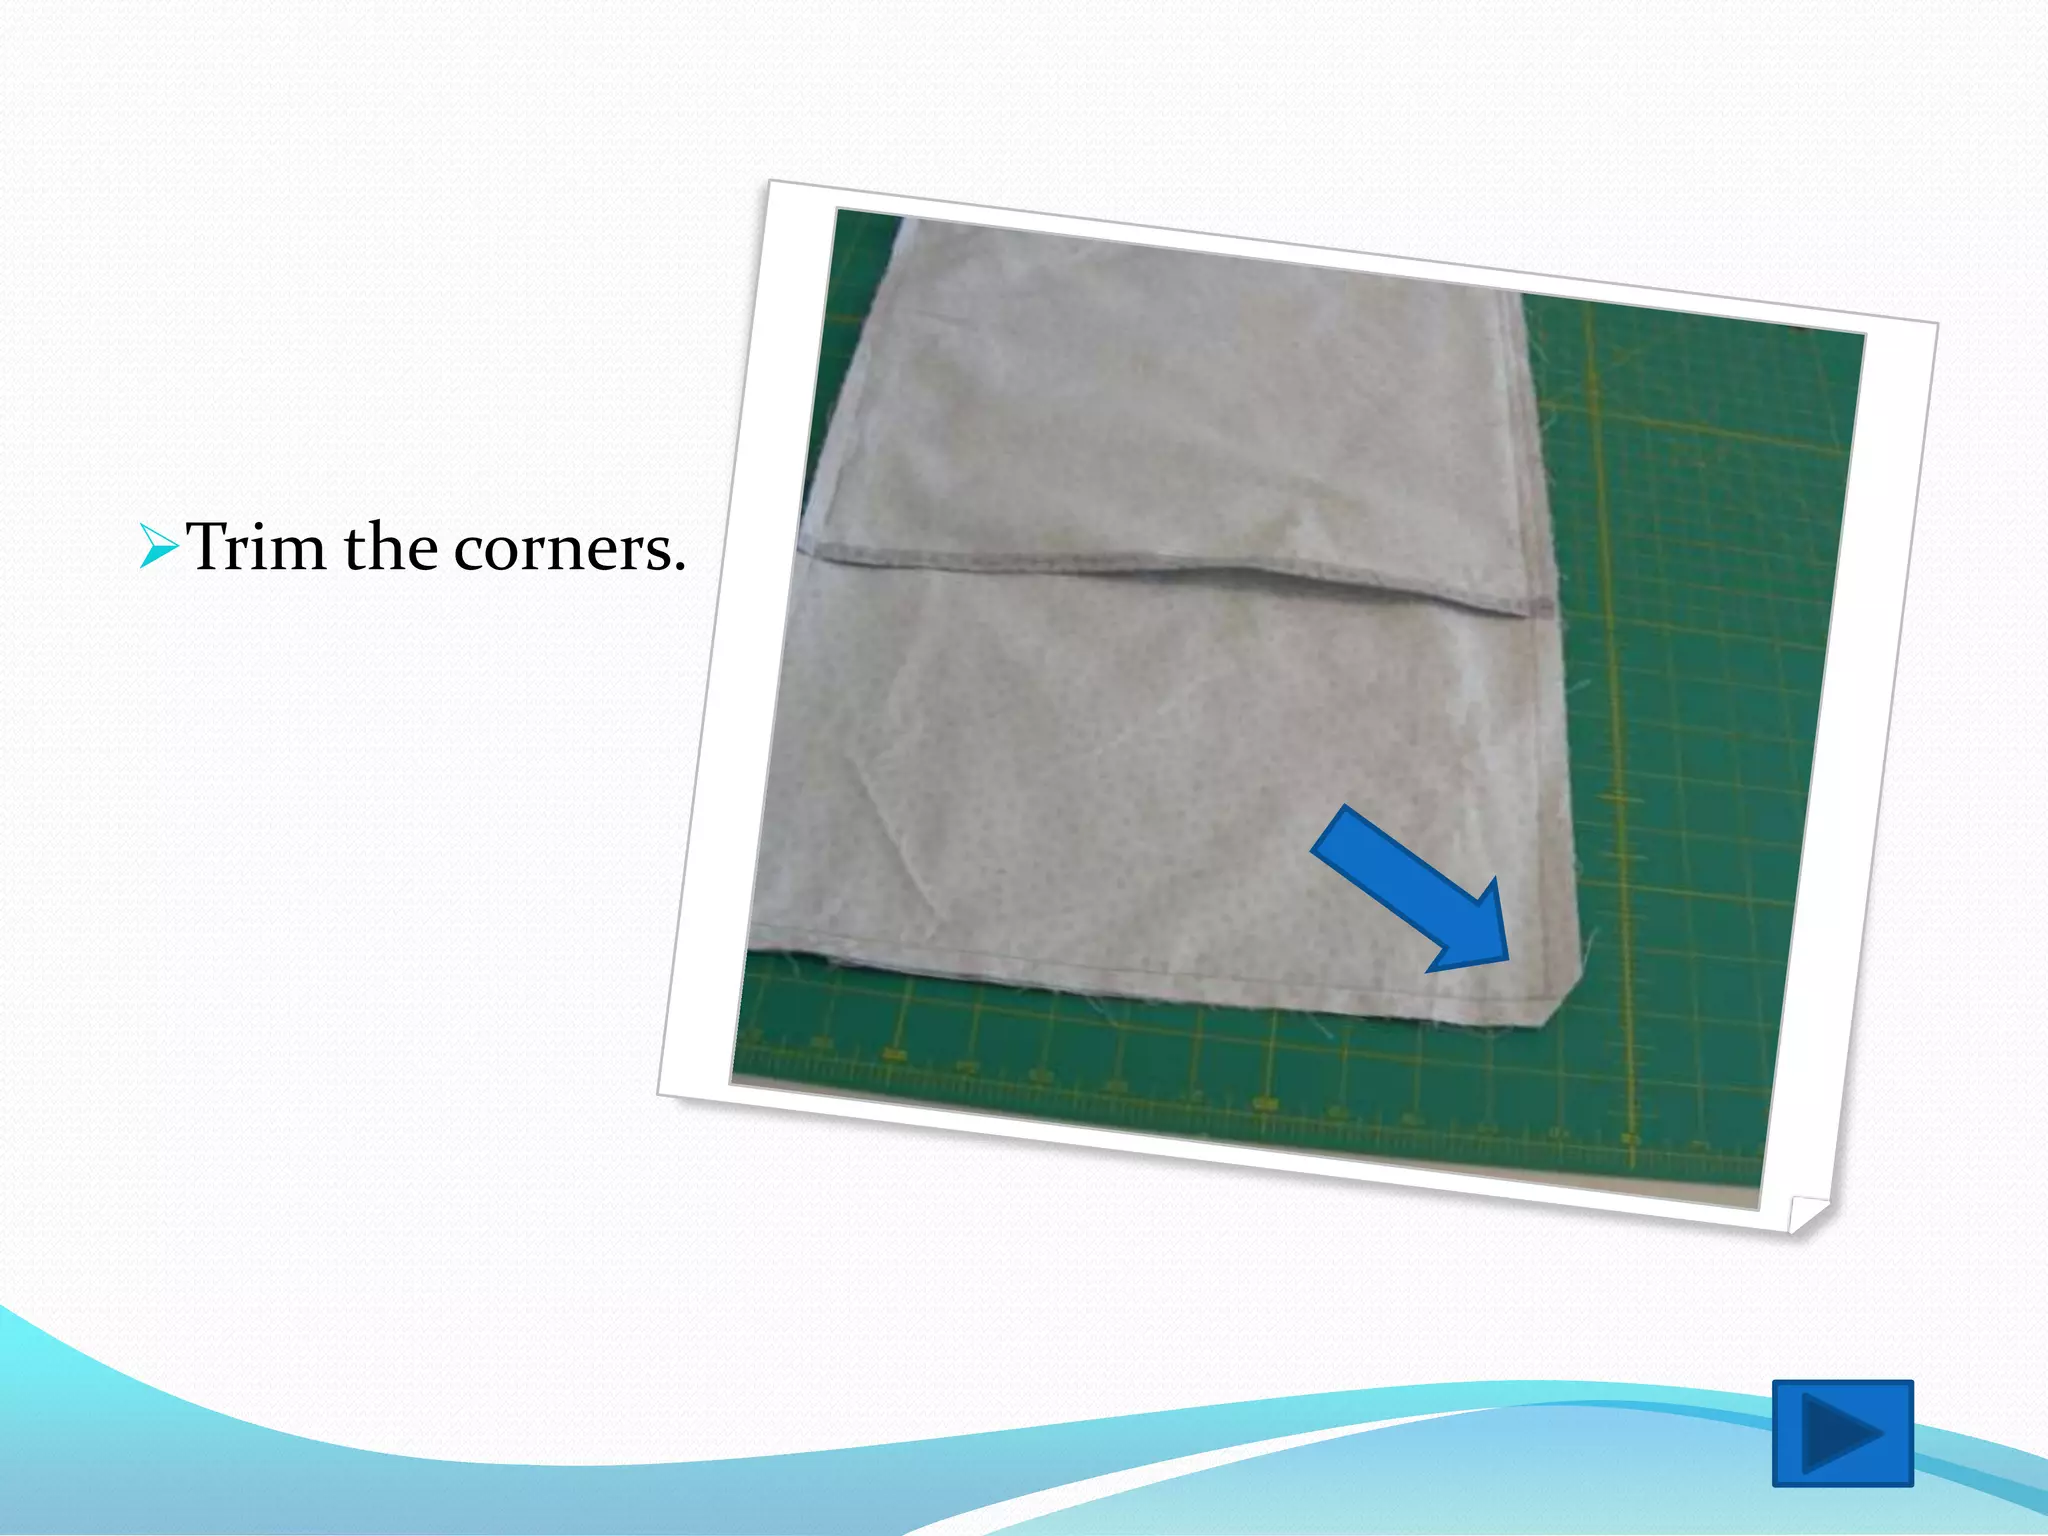
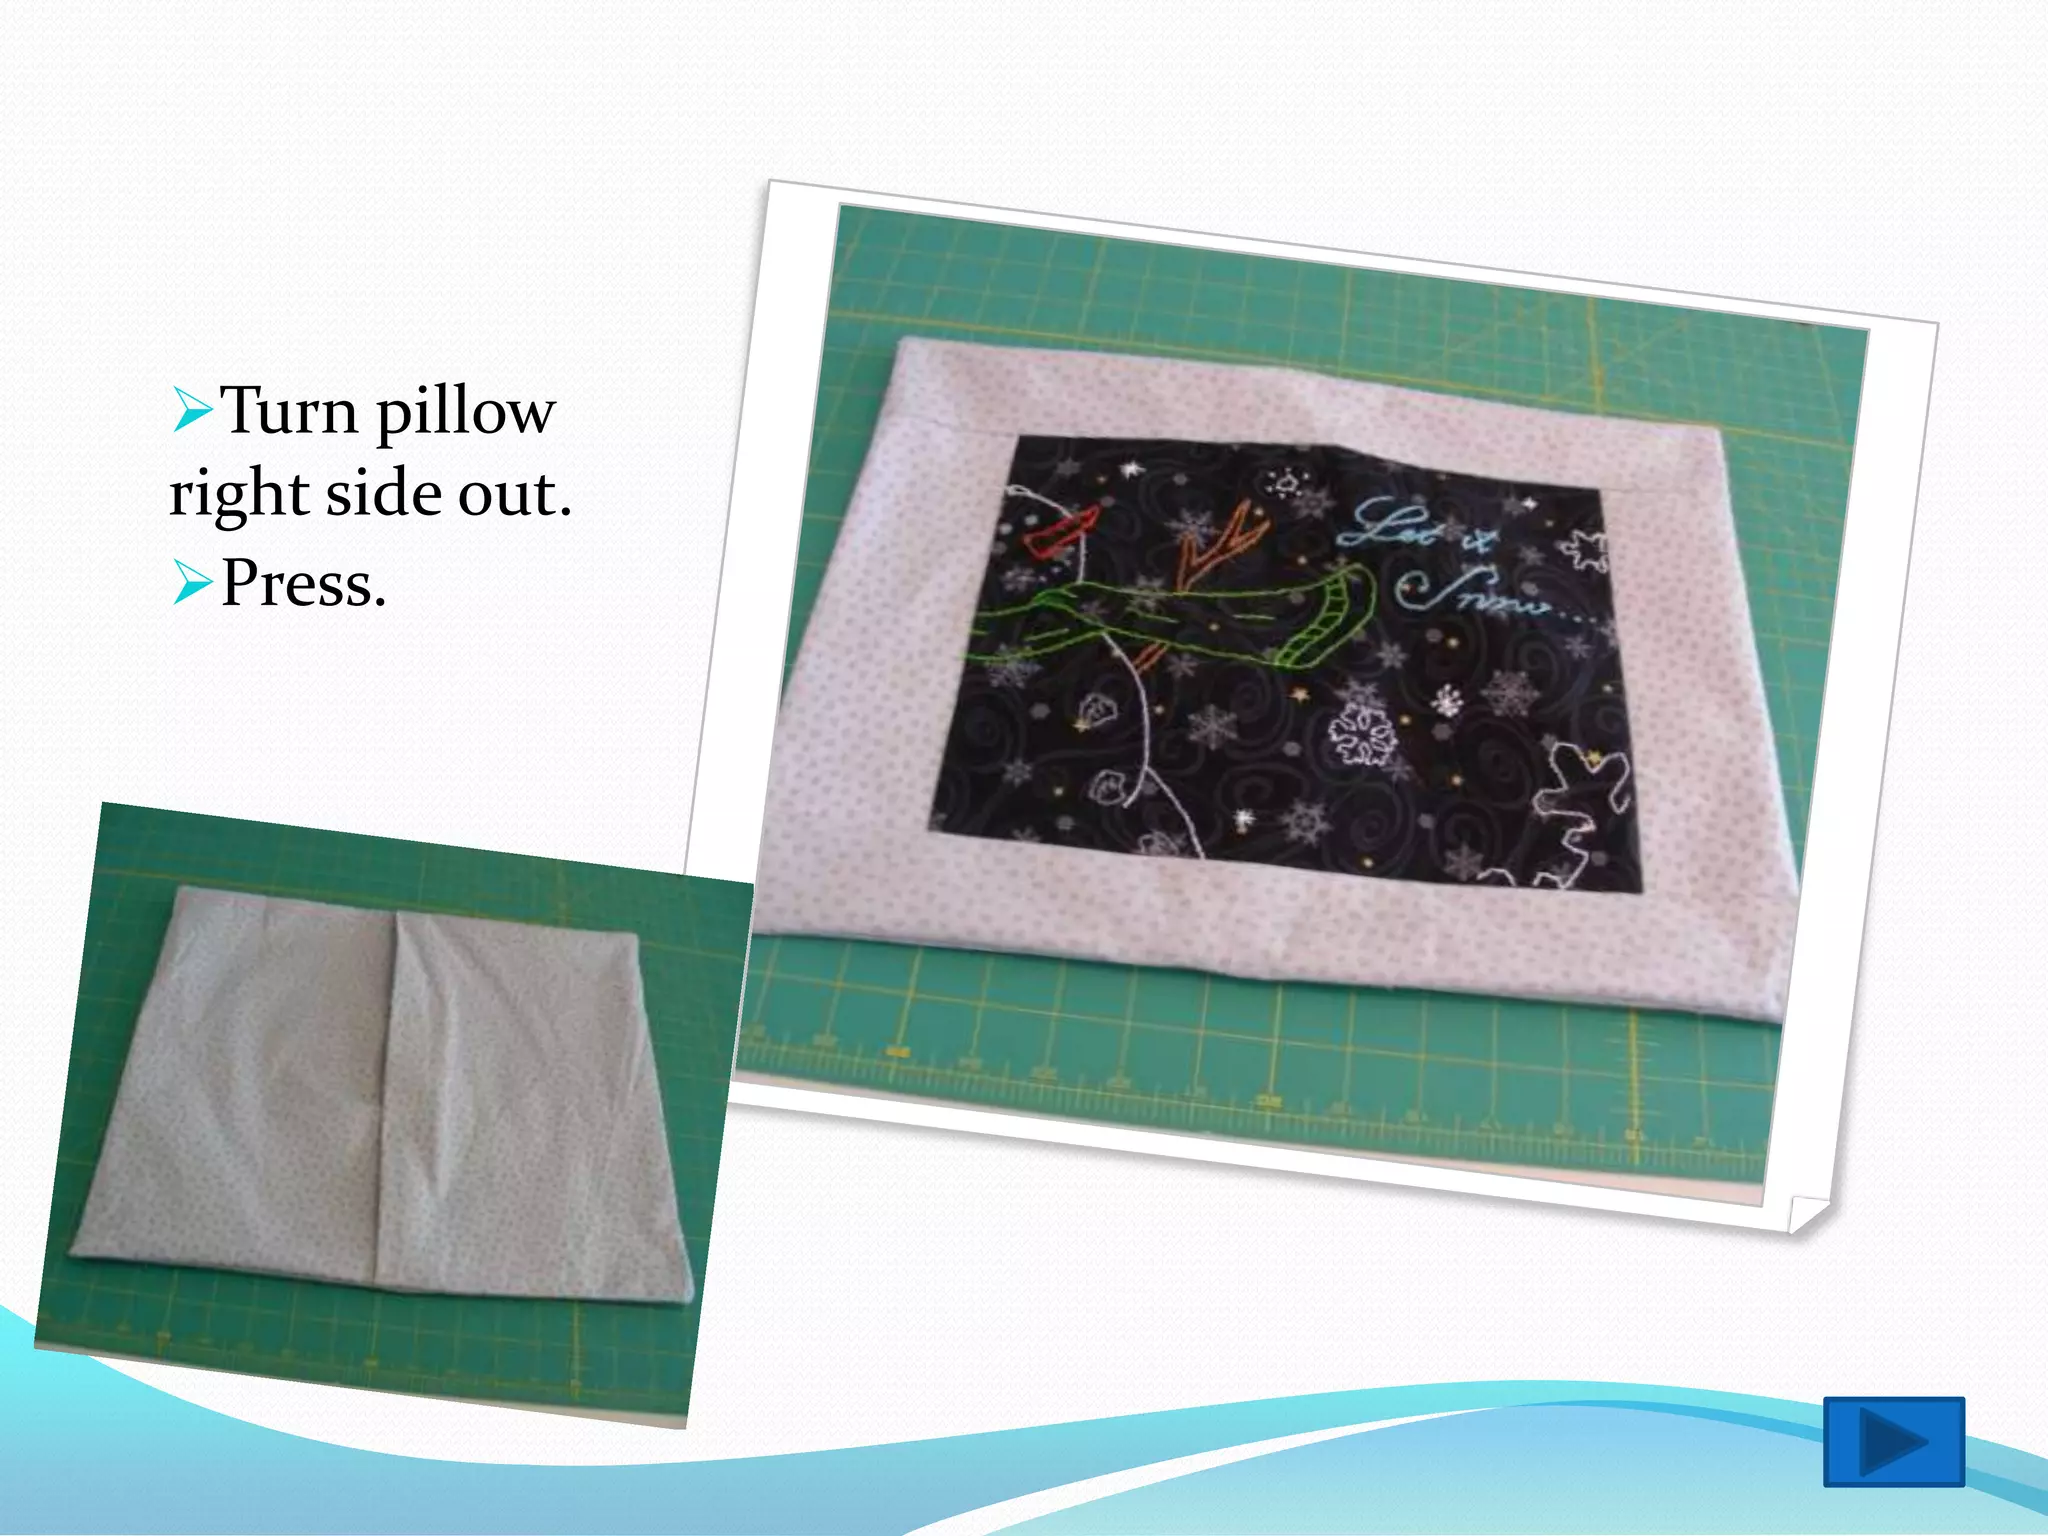
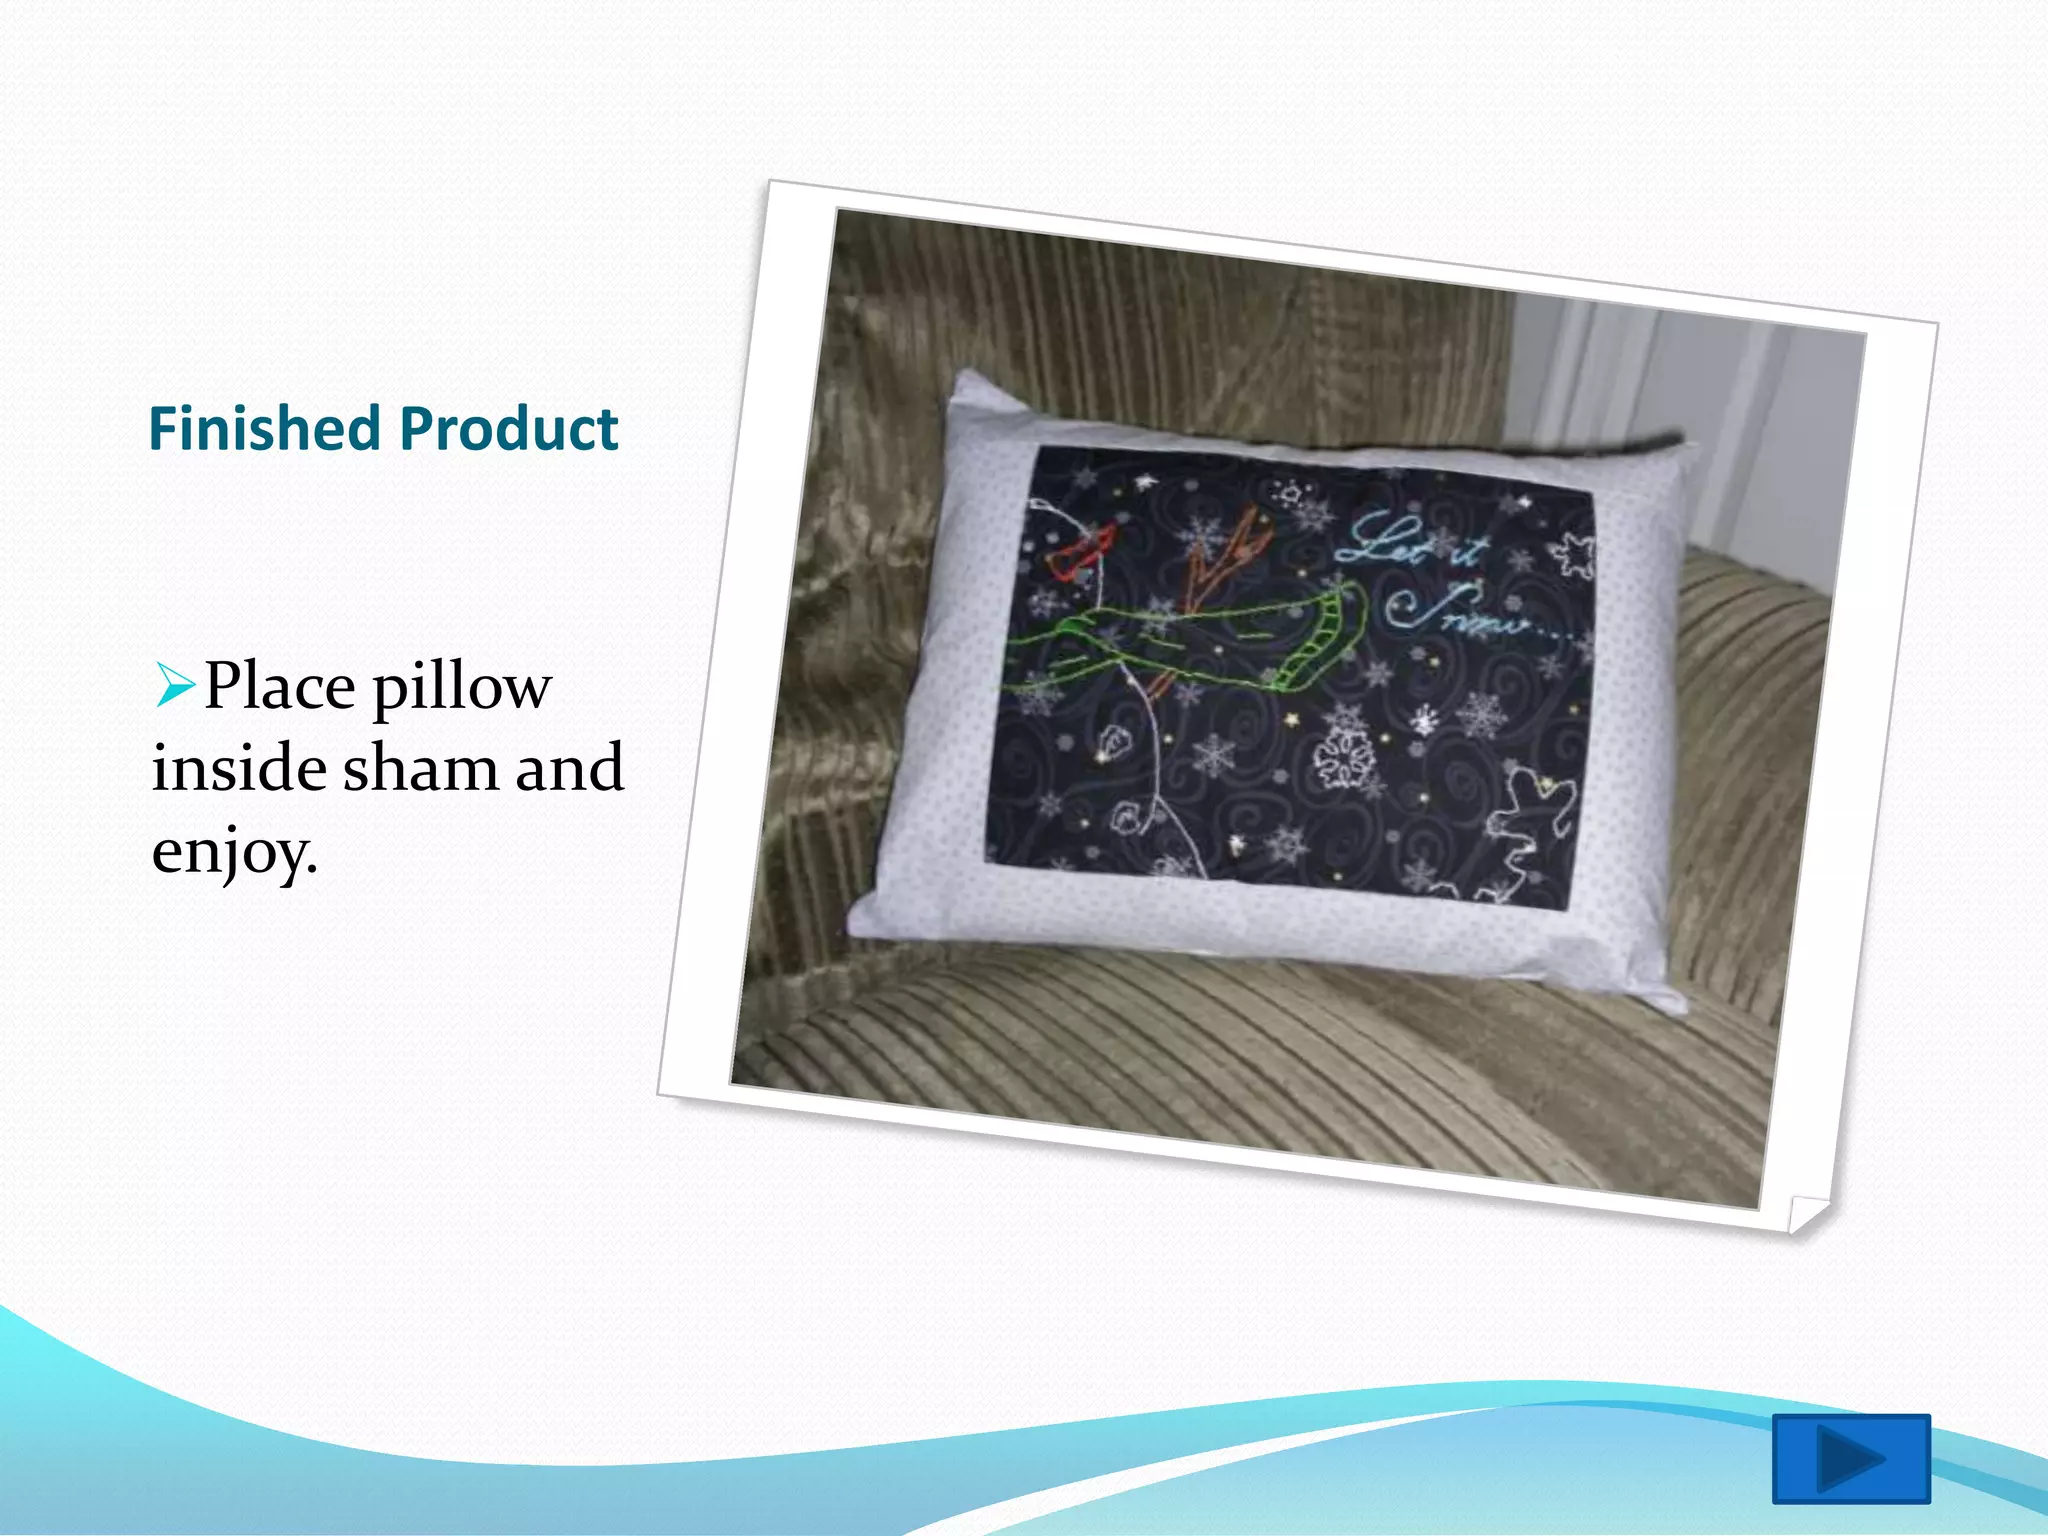
Learn how to make a pillow sham for your stitchery project.
                           Created by Azure Moon Design
                               Click here to view our blog.
Supplies
 1/2 yard of 100% cotton fabric.
 One 12”x16” pillow.

Cutting Instructions
 Trim your stitchery panel to measure 9”x 11.5”
 Cut the following from your fabric:
    Two strips that are 3.5” x 9”
    Two strips that are 3.5” x 16.5”
    Two panels that are 10.75” x 14”
Construct the pillow
using a ½ inch seam
allowance unless
other wise noted.
Sew the 3.5” x 9”
strip to one side of
your stitchery. Do
the same for the
other side.
Attach the 3.5” x
16.5” strip to the
top of the front
panel. Do the
same for the
bottom side.
Hem
Sew along the short edge of your       Use the ¼ inch stitched line to turn
10.75” x 14” panel ¼ inch from edge.   the fabric over twice. Press. Sew ¼
Do the same on the other panel. You    inch from edge of fabric.
only need to do this to one side of
each panel.
Place one of
your hemmed
panel pieces
over the front
panel right
sides together.
Fold the first
panel back 1 inch.
Finger press.
Place the second
panel on top of
the first panel
right sides
together
Pin in place.
Sew a ½ inch
seam allowance
around the
entire pillow
sham.
Trim the corners.
Turn pillow
right side out.
Press.
Finished Product


Place pillow
inside sham and
enjoy.
You can find our stitchery patterns, tutorials and other fun
      items at www.azuremoondesign.blogspot.com

                   ©Azure Moon Design
         If you would like to use this presentation
              please contact us for permission.

Pillow sham 101

  • 1.
    Learn how tomake a pillow sham for your stitchery project. Created by Azure Moon Design Click here to view our blog.
  • 2.
    Supplies  1/2 yardof 100% cotton fabric.  One 12”x16” pillow. Cutting Instructions  Trim your stitchery panel to measure 9”x 11.5”  Cut the following from your fabric:  Two strips that are 3.5” x 9”  Two strips that are 3.5” x 16.5”  Two panels that are 10.75” x 14”
  • 3.
    Construct the pillow usinga ½ inch seam allowance unless other wise noted. Sew the 3.5” x 9” strip to one side of your stitchery. Do the same for the other side. Attach the 3.5” x 16.5” strip to the top of the front panel. Do the same for the bottom side.
  • 4.
    Hem Sew along theshort edge of your Use the ¼ inch stitched line to turn 10.75” x 14” panel ¼ inch from edge. the fabric over twice. Press. Sew ¼ Do the same on the other panel. You inch from edge of fabric. only need to do this to one side of each panel.
  • 5.
    Place one of yourhemmed panel pieces over the front panel right sides together.
  • 6.
    Fold the first panelback 1 inch. Finger press. Place the second panel on top of the first panel right sides together
  • 7.
  • 8.
    Sew a ½inch seam allowance around the entire pillow sham.
  • 9.
  • 10.
  • 11.
  • 12.
    You can findour stitchery patterns, tutorials and other fun items at www.azuremoondesign.blogspot.com ©Azure Moon Design If you would like to use this presentation please contact us for permission.