How to add a breakfast nook with built in storage
•
0 likes•235 views

How to add a breakfast nook with built in storage

Recommended
More Related Content
More from HSS Hire
Recently uploaded
Recently uploaded (20)
How to add a breakfast nook with built in storage
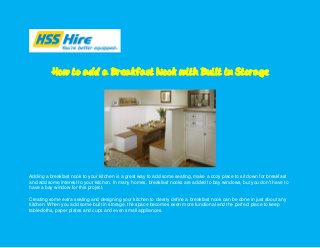
- 1. How to add a Breakfast Nook with Built in Storage Adding a breakfast nook to your kitchen is a great way to add some seating, make a cozy place to sit down for breakfast and add some interest to your kitchen. In many homes, breakfast nooks are added to bay windows, but you don’t have to have a bay window for this project. Creating some extra seating and designing your kitchen to clearly define a breakfast nook can be done in just about any kitchen. When you add some built in storage, the space becomes even more functional and the perfect place to keep tablecloths, paper plates and cups and even small appliances.
- 2. Outline the Area First, decide where you want to add the breakfast nook. Choose a place where there is plenty of room for seating, a table and any other furniture you want to add. It’s also a good idea to add a nook in a place where it won’t interfere with high- traffic areas or that you don’t need for cooking. When you have the space ready, take some measurements. Draw an aerial outline of the space on graph paper and then start sketching in things like furniture, lighting, accessories and of course, the bench for seating and storage. Think about where these things are in relation to windows and existing furniture that will stay where it is. The idea behind the sketch is to allow you to brainstorm ways to arrange things and make the most of the space before you start building. Build and Install Seating with Storage Now that you know where you want to add the storage bench, prepare the area. Remove existing furniture, rework wiring where needed and make sure the space is ready for seating. Choose a wall to build the bench against and decide how wide and tall you want it to be. Keep in mind that if you already have a table you want to use, the bench should be at a height that makes using the table comfortable. Now, use a saw to cut boards to length to create a frame of the bench, with the wall acting as the back edge. If possible, install the boards to wall studs and use brackets to make sure they are securely attached. When the frame is done you can add the boards for the sides and top of the bench. For the sides, you can use a decorative board, like bead board. Use an electric screwdriver to attach the sides and add vertical posts along the front of the bench to add support and to anchor the front boards. For the top, you will need to use a thicker, sturdier type of lumber. Instead of installing this directly onto the frame, use hinges to attach it only at the back, against the wall, so you can lift the seat to access the storage.
- 3. Now, add finishing touches like moulding or decorative elements, sand the bench and paint or stain it to match your kitchen. You can purchase cushions that fit the top of your bench or you can sew your own with a fabric that goes with the decor in your kitchen and the rest of your home. Add other Furniture With the storage bench installed, you can start adding other furniture to make the nook more functional. Start with a table and choose one that isn’t too big for the space. If this isn’t your primary dining area, you can use a smaller table that is meant to seat just a few people for breakfast or a cup of hot chocolate. Add a few chairs next to the table and then bring in other pieces. A hutch, small countertop or shelves look great in a breakfast nook with a little extra space. Bring in enough furniture to make the nook functional and comfortable without overcrowding it. The best nooks are simple and designed to be easy to use. Define the Space The built in seating and furniture will help you define the space naturally. But, you can also add a few things to help you do this. When you define the nook you are making it look like its own, separate space. Instead of letting it feel like it’s just part of the kitchen or that it is a cluttered space, it will look intentional. A well-define space is also more attractive and will make your kitchen look like it was done by a designer. Use a rug under the table to separate the nook from the rest of the kitchen and add warmth and comfort. If the nook has windows in it, consider adding a window treatment that is slightly different from the ones on the other windows. Installing a hanging light is also a great way to separate the nook from the rest of the room. Add a charming chandelier or sleek hanging light to illuminate the area and make it its own space.
- 4. For a bolder look, consider painting a wall in the nook a different colour to add contrast and interest, installing a chair rail or even adding crown moulding to complete the look. Accessorise to Match Now that the structure has been set up, it’s time to accessorise! Adding small things to the nook will make it feel homelier and connect it to the rest of your kitchen, adding to the flow of your home. Things like vases of flowers, candles, artwork, knick-knacks, collections, plates on the walls, baskets, table runners and centrepieces add to the personality and style of breakfast nooks. Some items, like artwork and hanging plates, may be more permanent decorations that you leave in the nook all year. Other things, like vases, tablecloths and centrepieces are things you can swap out throughout the year to change the look of the breakfast nook or to decorate it for seasons and holidays. Adding a breakfast nook is a do-it-yourself project you can take on to make your kitchen more functional and create a cozy, comfortable space for your family. For more DIY ideas and to see a range of our tools available for hire please visit: http://www.hss.com/