Bt big button phone user manual from Telephones Online www.telephonesonline.co.uk
•
1 like•2,307 views

Bt big button phone user manual from Telephones Online www.telephonesonline.co.uk

Recommended
Recommended
More Related Content
What's hot
What's hot (13)
Similar to Bt big button phone user manual from Telephones Online www.telephonesonline.co.uk
Similar to Bt big button phone user manual from Telephones Online www.telephonesonline.co.uk (20)
More from Telephones Online
More from Telephones Online (20)
Recently uploaded
Recently uploaded (20)
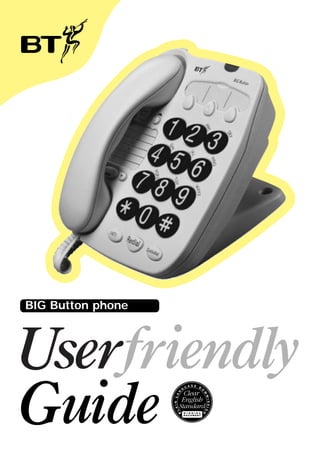
Bt big button phone user manual from Telephones Online www.telephonesonline.co.uk
- 2. Lift flap
- 3. At a glance Handset hook When the phone has been wall-mounted it keeps the handset in place. S (secrecy) button Held down, this button allows you to speak to someone in the same room without the person on the other end of the line hearing your conversation. Handset park When the BIG Button phone is wallmounted, you can hook the handset on this if you need to temporarily move away from the phone. Indicator light This will flash when the phone rings. R (recall) button Recall button for use with some BT Select Services and switchboards. One-touch memory buttons Enables you to quickly dial your most regularly used numbers or a stored number for emergencies. Memory label For making a note of names and numbers stored in the Quickdial memories. Store button Allows you to store phone numbers in the Quickdial and One-touch memories. Amplify button This button allows you to amplify your voice or the caller’s voice. Use the +/– buttons to increase/ decrease the level of amplification on your call. 2 1 2 3 4 5 6 7 8 9 0 1471 Redial Ringing volume, tone and amplification setting The switches on the phone base give you the option to change the ringing volume, ringing tone and incoming or outgoing amplification. Handset To use the inductive coupler, switch your hearing aid to the T setting. Quickdial 1471 button Allows you to check the phone number of the last person who called you. Quickdial button Enables you to dial up to 10 phone numbers stored in the memory. Redial button Redials the last number dialled.
- 5. Introduction Introduction Your BIG Button phone is designed for ease of use and made to the high standards set by BT We thank you for making the right choice and expect that your phone will give you many years of quality service. Contents This user guide is available in the following formats:– • Large Print. • Braille. • Tape recording. If required, please ring BT on Freefone 0800 800 150 (0800 243 123 for textphone users only). 2 Introduction Please read the instructions carefully before use, and keep this User Guide for future reference. At a glance 3 Installing your BIG Button phone 4 Using your BIG Button phone 8 Wall-mounting 14 Technical information 16 Index 18 Hints and tips boxes In this user guide, we’ve included helpful tips and useful notes. These are shown in yellow boxes. 3
- 6. Installing Installing your BIG Button phone The emergency services can be contacted in the UK by dialling 999. You may also dial 112, which is valid in any country that is a member of the European Community. You may not be able to make an emergency call in certain situations: • If the telephone line is disconnected. I M P O R TA N T Check that your BIG Button phone is complete. When you unpack you should find: BIG Button phone with telephone line cable attached and a plinth • If there is a fault on the line from your phone or on the network. If your BIG Button phone is connected to a PBX (switchboard), you may have to dial an access number before 999 to contact the emergency services. 4 Screws and wall plugs for wall mounting
- 7. It should be within two metres of a phone socket. Do not stand it on carpets or other similar surfaces that generate fibres as this may reduce the ringing sound and clog inside mechanisms. Wa r n i n g Installing Plan where you will put your BIG Button phone Your BIG Button phone is only designed to be operated in a normal domestic or office environment. It should not be used in bathrooms or near water. Plug your BIG Button phone into the wall socket Your BIG Button phone can be positioned in three alternative ways: Flat on a table surface. Raised position on a table surface. Wall-mounted. See ‘Wall-mounting’ on page 14. Do not cover or enclose the phone; allow a free flow of air to its surfaces. If you do not have a modern style socket, call BT on Freefone 0800 800 150 and ask for a BT engineer to come and fit the correct socket. This may be a chargeable service. 5
- 8. Ringer tone select Installing Ringer volume Switch found on base of phone. Switch found on base of phone. Set the volume of the ringer to Either High, Low or Off. This switch allows you to select the pitch required for the ringer. R1: For a low pitched tone. R2: For a medium pitched tone. R3: For a high pitched tone. 6
- 9. Time Break Recall and Earth Recall selection Switch found on base of phone. Switch found on base of phone. Choose between either incoming or outgoing settings. Incoming makes the caller’s voice louder. Outgoing makes your voice louder at the other end of the call. Your phone will already be set to TB. If you are a residential customer this will help you to use some Network Services such as Call Waiting, as long as you subscribe to this service. Using the Amplify button will increase the volume of all sounds that enter the microphone, so if you can, reduce any background noise whenever you use this feature. Installing Amplify selection Call BT on Freefone 0800 800 150 for details. Your BIG Button phone is now ready for use 7
- 10. Using Using your BIG Button phone To redial the last number dialled To make a call 2 Lift the handset and listen for a dialling tone. Dial the number you require. To end the call, replace the handset. To receive a call When the phone rings pick up the handset and speak. 8 1 Lift the handset. 2 1 Press the REDIAL button. The phone will automatically redial the last number dialled.
- 11. Lift up the handset. 2 Push label to the left. 3 Press the STORE button. 4 Press the ‘one-touch’ memory button under which you wish to store the number. Your BIG Button phone has three ‘one-touch’ memory buttons. These allow you to store three numbers that may be dialled at the touch of a button. These should be your most commonly used numbers. You can store a phone number under each of these buttons and dial the number by pressing just the one button; so there is no need to dial the digits every time. To store numbers in the memory, use the STORE button. This is located under the memory label which is underneath the handset. Push the plastic cover and label to the left to reveal the STORE button and instructions. 5 6 Using 1 To store phone numbers in the ‘one-touch’ memory Enter the number you wish to store. Press the STORE button again. The phone number is now stored. Please replace the handset. 9
- 12. Using Each memory location can store a maximum of 21 digits (numbers). To store phone numbers in the Quickdial memory You can write the name of the person with which you wish to associate the number on the label provided or perhaps insert a small photo. To dial a number stored in the ‘one-touch’ memory 1 2 Your BIG Button phone also has 10 ‘two-touch’ memory locations in the keypad, which are dialled by using the QUICKDIAL button. 1 Lift the handset. Lift the handset. 2 Press the STORE button. Press the ‘one-touch’ memory button under which the phone number is stored. 3 Press the QUICKDIAL button. Quickdial 4 The phone number is dialled automatically. Press the 0-9 keypad button under which you want to store the number. 0...9 10
- 13. Enter the number you want to store. 6 Press the STORE button. Quickdial memory label Use the memory label to keep a record of which 0-9 location code you have used for each number. The phone number is now stored. Please replace the handset. A large print version of this is included at the end of this user guide. See ‘Quickdial memory label’ on page 19. Repeat these steps for any other numbers you want to store, using a different 0-9 location for each one. Stored numbers can include Select Services using the D and # buttons, and switchboard services that are appropriate. Using 5 To dial a number stored in the Quickdial memory 1 Lift the handset. 2 Press the QUICKDIAL button. Quickdial 11
- 14. Using 3 Press the 0-9 location under which the number you require is stored. To change numbers stored in the memory 0...9 The phone number is dialled automatically. You may hear the telephone exchange say ‘Please hang up and try again’. This message does NOT necessarily mean your storing of numbers has failed. To change numbers stored in the memory, simply repeat the process of storing the original numbers but enter the new number. The number stored in that location is automatically replaced by the new number. Using the R button This button is used with some network services OR if your phone line is connected to a switchboard. To find out more about BT Select Services please call BT on Freefone 0800 800 150. 12
- 15. Press the Amplify button to turn amplification on. Amplify – and + allows you to select an appropriate setting between normal and maximum. Using To use your Amplify button To increase the amplification press the + button. To decrease, press the – button. To return to the normal setting, just press the amplify button again. The red LED will light up to show when amplify is switched on. There are a total of four settings. The standard setting is for the amplify to be off. The setting last used on Amplify will restore each time you turn amplify on. 13
- 16. Wall-mounting Wall-mounting Your BIG Button phone can be wall-mounted using the screws and wall plugs provided. 1 Use the plinth of the BIG Button phone as your wall-mounting template to pencil on the wall a guide for the drill holes. Before you wall-mount your BIG Button phone, check that: • the wall can support the weight of the phone; • the position you choose leaves sufficient space so that the phone is clear of any obstruction on the wall, such as a shelf or cupboard. 14 Drill two holes (diameter 8mm) for the screws vertically apart. Insert the wall plugs provided (if required). WALL PLUG WALL 2 3 SCREW 102 mm Drive the screws into the wall, leaving about 5mm free on which to hang the phone. Press the phone line cable into the groove on the base of the phone, so that the phone lies flat against the wall.
- 17. Rotate the handset hook 180°, so that you can hang up the handset when the phone is wallmounted. 5 Hang the holes on the back of the phone over the screwheads and gently pull the phone downward to make sure it is securely in place. 6 Feed the phone line through the bottom of the wall mounted plinth to allow the cable to rest flat against the wall. Wall-mounting 4 15
- 18. Technical information Technical information Connection information Your BIG Button phone may be connected to public networks in the United Kingdom. It may also be connected to switching systems that use tone (MF) signalling, with timed break or earth recall. If in doubt, your switch supplier or maintainer should be able to offer help. Advice on connection to BT switching systems can be obtained by dialling BT Freefone 0800 800 152. Generally your BIG Button phone can be connected to any switchboard where a simple modern telephone can be used to make and receive calls. 16 How many phones can you have? All items of telephone equipment have a Ringer Equivalence Number (REN), which is used to calculate the number of items that may be connected to any one telephone line. Your BIG Button phone has a REN of 1.5. A total REN of 4 is allowed from a single telephone line. If the total REN of 4 is exceeded, the telephones may not ring. With different telephone types there is no guarantee of ringing, even when the REN is less than 4. Typically 2 or 3 phones can be working simultaneously on the one telephone line.
- 19. Date of purchase: Place of purchase: Serial number: (on base of the telephone) Purchase price: (for warranty purposes, proof of purchase is required, so please keep your receipt) Guarantee BT guarantees the product for one year provided that: The goods have not been tampered with or repaired by anyone other than BT, its staff or agents. If a fault does occur in this product, and you bought the unit yourself, provided that you return it to the place of purchase and produce your receipt, it will either be repaired or replaced free of charge. The terms and conditions of this guarantee do not affect your statutory rights. Technical information For your records Outside guarantee (after 1 year from date of purchase). We recommend that you call BT on Freefone 0800 800 150, or visit your nearest BT shop, and you will be informed of our recommended repair agents. The goods have only been used for their intended purpose, and have not been subjected to misuse, or been wilfully or accidentally damaged. 17
- 20. Index Index Amplify 7,13 Dialling, one-touch 10 Dialling, Quickdial 11 Earth Recall 7 Emergency numbers 4 Guarantee 17 Labels,Quickdial 11,19 Make a call 8 Memory, Quickdial 10 Memory,changing 12 Memory,one-touch 9 Quickdial 10,11 R button 12 Receive a call 8 Redial 8 REN 16 Ringer tone 6 Storing numbers 9,10 Switchboards 16 Telephone socket 5 Timed Break Recall 7 Volume, ringer 6 Volume, increasing 6,7 Wall mounting 14 18
- 21. 19 Quickdial
- 22. 20 Quickdial
- 23. Offices in Europe, North America, Japan and Asia Pacific. The Telecommunications services described in this publication are subject to availability and may be modified from time to time. Services and equipment are provided subject to British Telecommunications plc’s respective standard conditions of contract. Nothing in this publication forms any part of any contract. Touchtone™ is a registered trade mark of British Telecommunications plc in the UK. BT BIG Button is a trade mark of British Telecommunications plc. © British Telecommunications plc 1998. Registered Office: 81 Newgate Street, London EC1A 7AJ. Registered in England No. 1800000. Printed in Malaysia. BIG Button phone Issue No.1 (11/98) 3.2. Designed by The Art Design Partnership Limited. CE compliant to 89/336/EEC (EMC Directive) 73/23/EEC (Low Voltage Directive) APPROVED for connection to telecommunication systems specified in the instructions for use subject to the conditions set out in them