
Recommended
More Related Content
Similar to Connect Java to MS Access Database Using JDBC
Similar to Connect Java to MS Access Database Using JDBC (20)
Recently uploaded
Recently uploaded (20)
Connect Java to MS Access Database Using JDBC
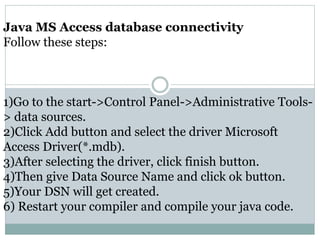
- 1. Java MS Access database connectivity Follow these steps: 1)Go to the start->Control Panel->Administrative Tools- > data sources. 2)Click Add button and select the driver Microsoft Access Driver(*.mdb). 3)After selecting the driver, click finish button. 4)Then give Data Source Name and click ok button. 5)Your DSN will get created. 6) Restart your compiler and compile your java code.
- 2. DBC Steps to be followed while writing JDBC program: Loading Driver Establishing Connection Executing Statements Getting Results Closing Database Connection
- 3. Loading Driver Loading Database driver is very first step towards making JDBC connectivity with the database. It is necessary to load the JDBC drivers before attempting to connect to the database. The JDBC drivers automatically register themselves with the JDBC system when loaded. Here is the code for loading the JDBC driver: Class.forName(driver).newInstance();
- 4. Establishing Connection In the above step we have loaded the database driver to be used. Now its time to make the connection with the database server. In the Establishing Connection step we will logon to the database with user name and password. Following code we have used to make the connection with the database: con = DriverManager.getConnection(url+db, user, p ass);
- 5. Executing Statements In the previous step we established the connection with the database, now its time to execute query against database. You can run any type of query against database to perform database operations. In this example we will select all the rows from employee table. Here is the code that actually execute the statements against database: ResultSet rs = st.executeQuery( "SELECT * FROM Hi" );
- 6. Getting Results In this step we receives the result of execute statement. In this case we will fetch the employees records from the recordset object and show on the console. Here is the code: while (rs.next()) { String Name = res.getInt( " name " ); System.out.println( Name ); }
- 7. Closing Database Connection Finally it is necessary to disconnect from the database and release resources being used. If you don’t close the connection then in the production environment your application will fail due to hanging database connections. Here is the code for disconnecting the application from database: con.close();
- 17. Ms Access
- 18. import java.sql.*; class Search{ public static void main(String[] args){ try{ Class.forName("sun.jdbc.odbc.JdbcOdbcDriver"); Connection con = DriverManager.getConnection("jdbc:odbc:Data"); Statement st=con.createStatement(); ResultSet rs=st.executeQuery("select * from Hi");
- 19. while(rs.next()){ System.out.println(rs.getString("ID")+" "+rs.getString("Name")); } } catch(Exception e){ System.out.println(e); } } }
- 22. Insert import java.sql.*; class JavaApplication1{ public static void main(String[] args){ try{ Class.forName("sun.jdbc.odbc.JdbcOdbcDriver"); Connection con = DriverManager.getConnection("jdbc:odbc:Data"); Statement st=con.createStatement(); int ID=5; String Name ="Meena";
- 23. int i=st.executeUpdate("insert into Hi(ID,Name) values('"+ ID +"','"+ Name +"')"); System.out.println("Row is added"); ResultSet rs=st.executeQuery("select * from Hi"); while(rs.next()){ System.out.println(rs.getString("ID")+" "+rs.getString("Name")); } } catch(Exception e){ System.out.println(e); } } }
- 26. Update import java.sql.*; class Update{ public static void main(String[] args){ try{ Class.forName("sun.jdbc.odbc.JdbcOdbcDriver"); Connection con = DriverManager.getConnection("jdbc:odbc:Data"); Statement st=con.createStatement();
- 27. int i=st.executeUpdate("update Hi set name='Reena' where ID = 3"); System.out.println("Row is updated"); ResultSet rs=st.executeQuery("select * from Hi"); while(rs.next()){ System.out.println(rs.getString("ID")+" "+rs.getString("Name")); } } catch(Exception e){ System.out.println(e); } } }
- 30. Delete import java.sql.*; class Delete{ public static void main(String[] args){ try{ Class.forName("sun.jdbc.odbc.JdbcOdbcDriver"); Connection con = DriverManager.getConnection("jdbc:odbc:Data"); Statement st=con.createStatement(); int i=st.executeUpdate("delete from Hi where id=3"); System.out.println("Row is deleted");
- 31. ResultSet rs=st.executeQuery("select * from Hi"); while(rs.next()){ System.out.println(rs.getString("ID")+" "+rs.getString("Name")); } } catch(Exception e){ System.out.println(e); } } }
- 34. Difference between Statement & PreparedStatement There are four steps for the execution of query : • Query is parsed, •Query is compile, •Query is optimized and •Query is executed. In case of statement interface these four steps are performed ,each time when query is submitted for execution. But in case of prepared statement first three steps are performed only once, when the query in initially submitted. Only the last step is performed each time query is submitted(in subsequence submissions), i.e if same query is submitted to be execute with different values multiple times then prepared statement interface provides better perfromance as compared to statement interface.*
- 35. •Comparing with the execution control of Statement – 1) executeXXX() method is invoked on the SQL statement executeUpdate(), executeQuery() 2) The Statement object submits SQL Statement to DB 3) The DB compiles the given SQL statement 4) An execution plan is prepared by DB to execute the statement 5) Execution plan is then executed. If SQL contains SELECT, the results are cached in buffer– Results are sent to the Statement object 6) Finally, response is sent to java application executeUpdate() methods
- 37. Normal statement execution –Compilation includes syntax check, name validation etc.–After validation, query optimizer prepares execution plan •Returns best execution plan •SQL statement goes thru above every time it is executed •If same query is executed multiple times, – Then execution plan can be saved and reuse it– This stored execution plan is known as pre-compiled statement • The PreparedStatement interface is designed for it –Hence, their execution is much faster compared to statement
- 39. when using PreparedStatement –Must be associated with one connection –It represents the execution plan, need to pass parameters –On connection close, it implicitly gets closed –Execution of query is processed as follows The connection object submits the SQL statement todatabase Database compiles the given statement •Execution plan is prepared by the database •Database returns the execution plan with unique id–Connection object– The setXXX() methods are used to set the parameters of SQL– executeXXX () method is invoked to execute the SQL –Database executes the execution plan with supplied parameters–Finall the result is sent to the java application
- 40. Advantages –Improves the application performance compared to Statement() –Inserts or updates SQL99 data types •CLOB, BLOB –Provides a programming approach to set the values •Disadvantages –Can represent only one SQL statement at a time –Can not execute more than one SQL statement in a single PreparedStatement •Situations when it is useful to use –A single query is executed multiple times –When a query consists of numerous parameters and complex types
- 41. Preapre Statement Example import java.sql.*; public class Prepare { static private final String driver = "sun.jdbc.odbc.JdbcOdbcDriver"; static private final String connection = "jdbc:odbc:emp"; public static void main(String args[]) { Connection con = null; PreparedStatement pst = null; ResultSet rs = null;
- 42. try { Class.forName(driver); con = DriverManager.getConnection(connection); con.setAutoCommit(false); String sql = "insert into Employees (ID,FirstName,LastName) values(?,?,?)"; pst = con.prepareStatement(sql); pst.setInt(1,4); pst.setString(2, "DDD"); pst.setString(3, "JOSHI");
- 43. pst.executeUpdate(); pst.close(); sql = "select * from Employees"; pst = con.prepareStatement(sql); rs = pst.executeQuery(); while (rs.next()) { System.out.print(rs.getString(1) + "t"); System.out.print(rs.getString(2) + "t"); System.out.println(rs.getString(3)); }
- 44. rs.close(); pst.close(); con.close(); } catch (Exception e) { } } }
- 46. Preapre Statement Update Example import java.sql.*; public class UpdatePre { static private final String driver = "sun.jdbc.odbc.JdbcOdbcDriver"; static private final String connection = "jdbc:odbc:emp"; public static void main(String args[]) { Connection con = null; PreparedStatement pst = null; ResultSet rs = null;
- 47. try { Class.forName(driver); con = DriverManager.getConnection(connection); con.setAutoCommit(false); String sql = "update Employees set LastName = ? where id =?"; pst = con.prepareStatement(sql); pst.setString(1,"DAVE"); pst.setInt(2, 2); pst.executeUpdate(); pst.close(); // System.out.println("updated"); sql = "select * from Employees";
- 48. pst = con.prepareStatement(sql); rs = pst.executeQuery(); while (rs.next()) { System.out.print(rs.getString(1) + "t"); System.out.print(rs.getString(2) + "t"); System.out.println(rs.getString(3)); } rs.close(); pst.close(); con.close(); } catch (Exception e) { } } }
- 50. JDBC with MySQL To connect java application to MySQL database we must have at least one database created in MySQL. And to create database in MySQL, it should be installed on your system. So first of all install MySQL database in your system. After installing it open MySQL console.
- 52. Create database with syntax create database databasename; and press enter. You can see message like Query OK, 1 row affected (0.03 sec) Now our database is created in MySQL. Second step is to create table in our database.
- 53. For creating table in particular database type Use databasename; and press enter and you can see message like database changed. Now for creating table type create table tablename (field1 type of field1, field2 type of field2, field3 type of field3); Now press enter again you can see the message like Query OK, 0 row affected (0.01 sec).
- 54. EX: Create database java; Use java; Create table data (id int,name char(20),city char(20),age int); Now the next step is to insert data into our table.
- 55. For inserting data simply type insert into table name (field1,field2,field3) values (value1,value2,value3); EX: insert into data (id,name,city,age) values (1,“ROMA",”AHM",30); So by that’s way you can insert as many data as you want in your table. Now for viewing our data from table just type select * from tablename; EX: select * from data;
- 57. String which we are writing in Class.forName("com.mysql.jdbc.Driver"); to load the driver. String which we are writing in Connection con = DriverManager.getConnection("jdbc:mysql://localhost:3 306/java","root",”Root") to create connection with particular database. Here the string jdbc:mysql://localhost:3306 is for connecting MySQL to JDBC in our local system and the name /java is our database name and 1st "root" is username of MySQL and 2nd “Root" is password of MySQL.
- 58. Here no need of Data Source Name as in access but one jar file named mysql-connector-java-5.1.6- bin.jar must be loded in your java IDE. For adding jar file simply right click on your project and select Set configuration Customize library and you can see window like this. Select option add JAR/Folder.
- 61. JDBC import java.sql.*; public class MySqlDemo1 { public static void main(String[] args) { try { Class.forName("com.mysql.jdbc.Driver"); System.out.println("Driver is loaded"); Connection c = DriverManager.getConnection("jdbc:mysql://localhost:3306/java", "root","Root"); System.out.println("Connection created");
- 62. Statement s = c.createStatement(); ResultSet rs = s.executeQuery("select * from data"); System.out.println("IDtNametCitytAge"); while(rs.next()) // Retrieve data from ResultSet { System.out.println(rs.getString(1)+"t"+rs.getString(2)+"t"+rs.getString(3)+"t"+r s.getString(4)); } } catch(Exception e) { System.out.println("Exception : " +e); } }}
- 68. Stored procedure in MySql Now we all know that for CallableStatement first of all we must have stored procedure in our database. Now how can we create stored procedure in MySQL. For that follow the steps given below. We already create a database in MySQL now for creating stored procedure for that particular database Use java; (use databasename;) Example stored procedure for addition of two numbers.
- 69. DELIMITER $$ CREATE PROCEDURE `addproc`( IN a INT, IN b INT, OUT c INT) BEGIN SET c = a + b; END$$
- 71. You can get message like Query OK, 0 rows affected (0.00 sec) It means your stored procedure is created successfully. Here we create stored procedure for add two int number. The stored procedure has 2 IN parameter and 1 OUT parameter so total 3 parameters
- 72. JDBC program for Callable mport java.sql.*; public class Mysql_CallableDemo { public static void main(String[] args) { try { Class.forName("com.mysql.jdbc.Driver"); System.out.println("Driver is loaded"); Connection c = DriverManager.getConnection("jdbc:mysql://localhost:3306/ java","root","Root"); System.out.println("Connection created");
- 73. String q = "call addproc(?,?,?)"; CallableStatement cs = c.prepareCall(q); cs.setInt(1, 10); cs.setInt(2, 20); cs.registerOutParameter(3, Types.INTEGER); cs.execute(); int add = cs.getInt(3); System.out.println("addition = "+add); } catch(Exception e) { System.out.println("Exception : " +e); } } }
- 75. Using finally() import java.sql.*; public class Mydemo { public static void main(String[] args) throws SQLException { Connection c = null; try { Class.forName("com.mysql.jdbc.Driver"); System.out.println("Driver is loaded"); c = DriverManager.getConnection("jdbc:mysql://localhost:3306/java","root"," Root"); System.out.println("Connection created"); Statement s = c.createStatement();
- 76. ResultSet rs = s.executeQuery("select * from data"); System.out.println("IDtNametCitytAge"); while(rs.next()) // Retrieve data from ResultSet { System.out.println(rs.getString(1)+"t"+rs.getString(2)+"t"+r s.getString(3)+"t"+rs.getString(4)); } } catch(Exception e) { System.out.println("Exception : " +e); } finally { c.close(); } }}