
Recommended
More Related Content
Recently uploaded
Recently uploaded (20)
Featured
Featured (20)
Understanding aspect ratio: Reclaiming your screen real estate
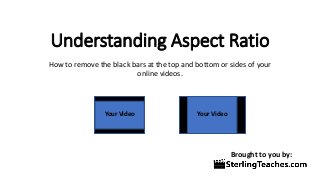
- 1. Understanding Aspect Ratio How to remove the black bars at the top and bottom or sides of your online videos. Your VideoYour Video Brought to you by:
- 2. Aspect Ratio • The aspect ratio of an image describes the proportional relationship between its width and its height. It is commonly expressed as two numbers separated by a colon, as in 4:3 or 16:9 https://en.wikipedia.org/wiki/Aspect_ratio_(image) Brought to you by:
- 3. Aspect Ratio Your VideoYour Video Width Height Width Height For more information visit
- 4. Aspect Ratio Your VideoYour Video 16 9 4 3 Learn more at
- 5. Letter Boxing or Black Columns Your VideoYour Video More training at
- 6. How to Prevent Letter Boxing or Black Columns • Plan Ahead • Design your media to be the same resolution as your desired output • If using Power Point make sure that your slides are set up to your desired Aspect ratio before designing your slides. (This can be changed on the design tab/slide size) • Using graphic programs, like photoshop, you can set the design to an HD video format size • Make sure that your output Ratio is the same as your media • Render 4:3 videos to SD Format • Render 16:9 videos to HD or a Widescreen Format Brought to you by:
- 7. For More Information on Aspect Ratios • Visit: https://en.wikipedia.org/wiki/Display_resolution Thank someone at
- 8. Keep it simple with:
Editor's Notes
- You have probably watched a movie where there are black bars on top and on bottom of the movie, or you have watched a video online with black columns around the video. This blank or black space has to do with the video’s aspect ratio and how it is being shown. Something that really bothers me is when I watch a training webinar and the trainers use PowerPoint or some other slide program to present information and the text on the slide is cramped in the middle of the screen with 2 big columns of space doing nothing but taking up valuable space or screen real estate. That valuable space could be better utilized. In order to fix that wasted space, we need to understand what is causing it and how we can prevent it from happening. It all has to do with the video or slide’s aspect ratio.
- This is the definition of Aspect Ratio on Wikipedia.
- Essentially the aspect ratio is the width’s relationship to it’s height. But unfortunately all videos or slides do not share the same aspect ratio.
- Here are 2 common Aspect Ratios used in Video and in Slide presentations, like PowerPoint. High Definition or HD video and widescreen video use the 16:9 aspect ratio and Standard Definition Video or SD uses a 4:3 ratio. There are many more common ratios at the end of this presentation I will show more common ratios and screen resolutions, but for simplicity’s sake let’s just focus on these two.
- When your video or slides are rendered into or uploaded to a “player” that is designed for the aspect ratio other than what it is black appears to fill the space. Resulting in black bars above and below your video when watching on your TV at home. Or 2 columns of black on either side of your video shared on your webcast or uploaded to YouTube. Essentially the picture is “shrunk” to fit the screen. I will not talk about Movies and aspect ratio much as that is a much bigger topic, but in online training video or webinars where a 4:3 image size is fit into a 16:9 video player wouldn’t it make more sense to use the entire screen? This will allow you to have a larger font, place bigger images of products, display clearer graphs and possibly yield better results. The best way to keep from having this wasted black is to prevent it.
- The best time to prevent the wasted black space from happening is at the beginning planning stages of your training or presentation. I recommend starting your presentations with a resolution of 16:9, that is the same ratio as High Definition video and is the “regular ratio” of online video platforms like YouTube and vimeo, and many online webinar platforms. If you are designing in a graphic editing program set the template to and “HD” template used in film or video. If multiple people are working on the same project make sure that everyone knows what aspect ratio you will be using and that they know how to make the changes in their graphics program or slide software. In older versions of Microsoft office the default screen ratio was 4:3 in more modern versions of the software the default is 16:9. Both allow you to change the ratio, but it is a great deal easier if everything is planned for from the beginning instead of having to go back and fix the image/video ratios. When editing video make sure that you render the video in the same type of format that you want your output to be. I create video for both 16:9 and 4:3 aspect ratios. I render video online in a 16:9 widescreen or HD format. I also operate an antiquated TV system that only works with 4:3 which forces me to also render videos in a 4:3 Standard Definition format. If it were not necessary for me to work with a legacy system, I would always render in a 16:9 aspect ratio.
- I hope that this presentation has helped you better understand screen aspect ratio and how to better utilize the screen’s real estate when making videos or online presentations including webinars. For more information about aspect ratios you can visit the Wikipedia article.
- Or you can keep it simple with SterlingTeaches.com. Visit the website for more tutorials, teaching tips and more.