SlideShare a Scribd company logo
1 of 12
Download to read offline
THE MUSIC PRODUCTION OF A ROCKABILLY COMPOSITION
WITH ADDITION OF THE BIG BAND BRASS SOUND
Logožar R.1
, Lajtman M.2
( robert.logozar@vz.t-com.hr, marko.lajtman@ck.t-com.hr )
1
Polytehcnic of Varaždin, J. Križanića 33, HR-42000 Varaždin, Croatia
2
Lajtman j.t.d., Glavna 2a, HR-40321 Mala Subotica, Croatia
Abstract. This paper describes the music production of a
rockabilly composition with addition of big band brass
sound, and is based on the bachelor thesis of the second
author. In the preproduction phase the music genre and
style were defined, and the full arrangement was pre-
pared. The standard music production stages, recording,
mixing and postproduction, were all done by using the
Digital Audio Workstation concept. The recording, in-
cluding a dozen of the brass sections’ lines, is done by
the one instrument at a time method. Furthermore, all the
lines of a particular brass section were performed by
only one player. The richness of the sound could proba-
bly be better if more players were involved and if the
whole sections were recorded at once, but in that case
the afterward time alignment of the individual tracks
would be impossible. By taking our approach and by
extensive time editing of the brass tracks, an excellent
rhythmical accuracy and punchy sound is achieved. The
produced song presents a good blending of the rockabilly
rhythmical basis, the big band brass sound, and the orig-
inal ethno-rock style of the band that performed it. The
song is about to appear on their new album.
Key words: music production, rockabilly, big band
brass sound, sound recording, editing, mixing, postpro-
duction, recording of brass instruments one at a time.
Sažetak. Ovaj članak opisuje glazbenu produkciju rock-
abilly skladbe uz dodatak zvuka puhača velikog jazz-
orkestra, i temelji se na završnom radu dodiplomskog
stručnog studija drugog autora. U fazi predprodukcije
definiran je glazbeni žanr i stil, te pripremljen potpuni
aranžman. Faze standardne glazbene produkcije, snima-
nje, miješanje i završna obradba, obavljene su uporabom
koncepta digitalne audio radne stanice. Snimanje, uklju-
čujući i tuce dionica puhačkih sekcija, obavljeno je me-
todom instrument po instrument. Nadalje, sve dionice
pojedine puhačke sekcije odsvirao je samo jedan puhač.
Bogatstvo zvuka je vjerojatno moglo biti bolje da je bilo
uključeno više svirača i da se snimala cijela sekcija od-
jednom, no u tom bi slučaju naknadno vremensko pode-
šavanje pojedinih dionica bilo nemoguće. Uz naš pristup,
te uz uporabu sveobuhvatnog vremenskog editiranja,
ostvarena je izvrsna ritmička točnost i zgusnut zvuk.
Producirana pjesma predstavlja dobar spoj rockabilly
ritmičke osnove, zvuka puhača velikog orkestra te izvor-
nog stila izvođačkog sastava, i bit će objavljena na nji-
hovom novom albumu.
Ključne riječi: glazbena produkcija, rockabilly zvuk
puhača velikog orkestra, snimanje zvuka, miješanje zvu-
ka, završna obrada, snimanje puhača jedan po jedan.
1. INTRODUCTION
The standard music production generally deals with the
recording, editing, mixing and mastering of music. To-
day it is quite common that the instrumental and vocal
arrangements, as well as other creative, very often itera-
tive, phases, like selection of instruments and definition
of their particular and global sound, are also intermixed
with the recording and mixing process. This is especially
so for the production of the contemporary bands without
many members, or the songwriter-performer-producer
teams who want to have the control of the whole produc-
tion process. On the other hand, when dealing with more
complex compositions, with many people and larger
orchestras involved, sticking to the standard music pro-
duction concept is more efficient. Here one expects that
the composition is well defined, that the arrangement is
correct and musically functional, and finally, that musi-
cians are prepared to play their parts. Only then we can
expect that the standard music production chain will do
the rest of the job.
In this article we present a production of a musical
piece in which the big band brass sound supports an up-
tempo rockabilly composition. The original idea came
from the Croatian ethno-rock band Kom3dija (named
after the Croatian word for comedy), who wanted to
record a song with added brass sound. In their Megji-
murje region such a sound is very popular and played in
the folk groups called bandisti.1
The idea was ambitious
and brave. Their small budget was supported only by a
big enthusiasm and friendship with the local Čakovec
Big Band –– an amateur jazz orchestra composed of ta-
lented and educated musicians, many of whom were
graduates from music schools.
The idea turned out to be even braver when Kom3dija
members decided to do all the recording in the same
studio in which they have had recorded their standard-
lineup ethno-rock songs. It is a well equipped, but cer-
tainly not big, two-room recording facility, called
Jazbina, owned by the second author of the paper
(Figure 1a and 1b). It has a 5.8 4.7 2.1m control
room ( 27.3m ,
57.2m ), and an acoustically treated 4.3 5.5 2.1m
recording room 23.7m ,
49.7m !. Because of the small height of the
recording room, a special attention was paid to providing
the highest possible absorption of its ceiling.
1
Megjimurje region term for the band members and the band.
Figure 1a. Jazbina recording studio control room. Figure 1b. Jazbina recording room.
Furthermore, to reduce the number of wind instrument
players to the minimum, it was decided that a few best
members of the big band would do all the recording on
the “one instrument at a time” basis. The procedure
common in rock and pop production was now extended
to the jazz wind instrument sections.
After all this corner-cutting decisions, a few questions
arose. Would the big band brass sound come out rich and
groovy? Would it blend into the rock sound and the gen-
eral ethno-rock concept of the band? Would the final
recording suffer because of implementing instruments
which are not in the standard lineup and do not partici-
pate in, either rehearsals, or in the formation of the song
and its sound?
In the further text we address all these questions and
explain how they were answered in the course of the
preproduction, and the standard music production phases:
recording and editing, mixing, and postproduction.
2. PREPRODUCTION
The preproduction phase includes dealing with all the
necessary things that need to be done before the actual
recording sessions start. In this work we cannot overem-
phasize the importance of this phase, and, as suggested in
the introduction, for the projects of this kind we advocate
the standard production procedure.
Before getting into details, a few general things will be
stressed. The song’s common data are presented in Table
1. Among other things, the authors and performers are
mentioned here.
Regarding the music production, it was the task of the
second author of this article to do all the practical work,
starting from the full technical logistics required by the
studio facility, through organization and synchronization
of the sessions, up to the recording, mixing and postpro-
duction. Above all that, the Kom3dija band assigned him
the duty of music producer, a person who would be re-
sponsible for the final sound and the recording as a
whole. Their trust was based on the cooperation in pre-
vious successful projects. They expected that their artis-
tic visions would be fully realized, and if not, the pro-
ducer was to blame! The first author provided some
modest counseling during the mixdown process, and
contributed mostly to the academic aspects of the project
by mentoring the bachelor thesis [1], and by preparing
this paper.
2.1 The importance of arrangement
Thanks to the fact that all the participants of the project
were aware of the need for a fully professional approach
to the involvement of the wind instruments, the first im-
portant steps in this endeavor were accomplished suc-
cessfully. In this matter, improvisation of any kind would
probably be disastrous. Having this in mind, the band
first recorded five demo songs to decide which would be
the best for adding the brass sound to it. The songs were
inspected by the Čakovec Big Band leader and conduc-
tor, who was also an experienced jazz arranger (Table 1).
He discussed his opinion with the producer, and with the
Kom3dija band members. Finally, a rockabilly song,
which was quite off the band’s standard ethno genre, was
chosen.
Table 1. The Psycho Billy song essentials.
Song Title: Psycho Billy (In Croatian: Sajkobili)
Duration & Tempo: 3min 30s at 220bpm
Genre: Rockabilly + the big band brass sound
Words and Music: Igor Baksa
Arrangement: Mario Jagec
Performed by: Ethno-Rock Band Kom3dija:
• Igor Baksa – vocal, el. guitars,
• Miloš Rok – clarinet,
• Neven Kolarić – el. bass,
• Marinko Marcijuš: drums,
& Čakovec Big Band members:
• Igor Hrustek – trumpets;
• Filip Horvat – trombones;
• Mario Jagec – saxophones.
Recorded, edited-
and mixed by:
Marko Lajtman in Jazbina Recording
Studio, Lajtman j.t.d. Mala Subotica,
Croatia, 2009 – 2010.
Produced by: Marko Lajtman
Editions: To be published on Kom3dija album
Prvi svjetski mir (The First World
Peace), for Dallas records, Zagreb.
Web availability: On selected specialized and other sites –
after publishing at the end of 2011.
The arranger made the complete orchestration for the
song, that is, not just for the wind instruments, but also
for the electric bass, electric guitars, and the drums. By
having the arrangement fully accomplished, we avoided
the mistake that is often made by inexperienced musi-
cians and producers who start the recording prior the
composition is finished. So be warned: the big band
sound starts with a properly written music score! This
is, of course, valid for inclusion of any kind of orches-
tras, ensembles, or instrument sections containing several
instruments, in any kind of music production. Especially
so when they appear in music projects as guests. Moreo-
ver, in our case the orchestration had to assure a nice and
distinctive amalgamate of different musical styles.
The arranger prepared the score, printed the instrumen-
tal excerpts, and delivered them to the musicians for
practicing. A few rehearsals were conducted by the big
band leader before the recording took place. Also, during
the recording sessions, he assisted the musicians in find-
ing the right groove and getting the best from their per-
formance. Just before the recording started, it was de-
cided to bring the tempo up from 210 bpm to 220 bpm.
This crucial decision helped in achieving the right up
tempo feel of the song. The performers had to adapt to
the change on the spot. This required slightly higher
technical skills and more concentration, but was wel-
comed by everyone because the groove was improved,
and the song finally sat in place.
2.2 The composition’s musical foundations
As was already mentioned above, our song is a mix of a
rockabilly theme with addition of the big band brass
sound. Since the rockabilly is based on the plucked string
instruments, primarily guitars, E major tonality came as a
good choice --- at least for the rock part of the band. On
the other hand, this is not so common tonality for the
most of the wind instruments, requiring some adaptation
in playing. However, as we shall soon show, a bit strange
tonality for the brasses could be creatively used.
The main arrangement parts are composed in the
scheme of questions and answers. In the main brass
theme that starts in the intro, the trumpets play in the four
voice harmonies, doubled by the trombones one octave
lower. The saxophones answer in a five-voice harmo-
nized theme. During the vocal parts, in their first pas-
sage, the saxophones start their short fills. They are
backed up by the trumpets and trombones in the second
passage (see also 2.4).
In order to avoid masking of the vocal by the brass
lines, the effect of shallow tones were used in the saxo-
phone parts overlapping with the vocalist. The shallow
tones appear when the most of holes on the sax are open,
which we refer to as the hollow positions. They have less
of the basic tone and lower aliquots, and sound thinner
than the other neighboring tones. On all saxophones, the
shallow notes are A4 – C#52
. On Eb alto sax these note
2
With middle C = C4, according to the scientific (American)
pitch notation. According to the Central European notation,
middle C = C1 = C’ (= Ger. Eingestrichenes C ). To convert
from the scientific to this notation, number 3 must be subtracted
for the octaves with scientific number n ≥ 4. Below C1 there
come: C kleines, C großes, C kontra, etc.
values correspond to the concert pitch tones one major
sixth lower: C4 – E4. On the baritone sax everything
sounds one octave lower than on the alto, so the shallow
tones are: C3 – E3. On the tenor Bb sax the notes A4 –
C#5 give the tones one octave and one major second
lower, i.e. the concert pitch tones: G3 – B33
.
Good players know how to compensate for the shallow
sounding notes, thus making them less obvious. On the
other hand, here it can be used to a good effect. Since the
song was in E-major, the highest notes played by the alto
saxophones could be chosen to be the shallow ones. E.g.
in the tonic E-maj chord, the shallow tone E4 appears. In
the subdominant A-maj chord the shallow tones are C#4
and E4, and in the dominant B-maj chord it is D#4. In the
seventh and ninth chords more shallow tones can appear.
If choosing the highest chord tones to be the shallow
ones during the vocal lines, the saxes will naturally
sound a bit thinner in their lower and mid frequency
range. This provides a natural dip in the frequency range
important for the vocal presence. On the other hand,
when there is no vocal, the fullest saxophone notes F5 –
B5 can be played, which on alto sax correspond to the
concert pitch tones G#4 – D5. In this way the saxophone
arrangement helps in providing of the natural equaliza-
tion with an important musical function.
Because there is no analogy to the shallow tones on the
trumpets and trombones, they were not played on top of
the vocal and solo lines. The exceptions were ends of the
refrains, where they have the fp4
effect followed by a
crescendo.
The hollow positions are also used during the guitar
and clarinet solo parts. At first the saxophones play in
unison, then in duet, and only at the end of the phrase in
the full chords, to avoid interference with the soloist. The
trumpets and trombones play only the short accents. At
the end of the solo, all the wind instrument lines intert-
wine with each other to increase the suspense. This is
evident mostly at the end of the last clarinet solo, where
the short sax accentuations exchange with the trumpets
and trombones. This play is furthermore emphasized by
panning the two groups of the wind instruments on the
opposite sides (see also 4). The end of the song comes in
the half tempo, with the wind instruments playing the
harmonized boogie-woogie theme and the cadenza in full
ff (fortissimo, compare also 2.4).
2.3 Instruments
The full instrument list is presented in Table 2. The mus-
ical basis of the rockabilly composition is played by the
rock rhythm section. The drums were played in the rock
style. Instead of the upright bass, often found in rockabil-
ly, the electric bass was used to conform to the Kom3dija
standard lineup. The electric guitar had the important
function of playing a continuous boogie-woogie riff in
the classic rock & roll style. It also doubled as a solo
instrument close to the end of the song.
3
B3 in Anglo-American notation = H kleines in the Central-
European notation.
4
fp = forte-piano, dynamical specifications of playing forte and
then immediately piano. The fp is often followed by a crescen-
do, possibly on the same tone.
The commonly known division of the wind instruments
is into the two groups:
• Brass instruments – trumpets and trombones;
• Woodwind instruments, in our case, and normally in
the jazz big bands – saxophones and clarinets.
The clarinet is a classic big band woodwind instrument.
The saxophone has the same sound producing principle
by using the reed as an oscillating element, but is made
of brass. Being a kind of a hybrid, it is often omitted
from the classical woodwinds (inspect e.g. [2]). In the
more precise Hornbostel–Sachs classification based on
the sound creation and sound formation physical prin-
ciples, saxophones are the single reed instruments with
conical bore [3]. Without going into the details of the
nomenclature and genealogy, throughout the text we
shall use the standard colloquial terms which are also
adopted in the American jazz and pop terminology:
• Brass sound, brass section, or simply brass, to cover
all the brassy wind instruments in jazz and other pop
bands – trumpets, trombones and saxophones;
• Since the classical woodwinds instruments (clarinets,
flutes, oboes, bassoons) rarely play in larger sections
in the pop and jazz bands, but mostly appear solo or in
duets, we usually speak of them separately.
Another peculiarity regarding the appearance of clari-
net in our project deserves a short elaboration. As can be
seen from the Table 2, it is a standard instrument in our
ethno-rock band, highly contributing to the band’s first
epithet – ethno. The ethno role of the clarinet is to bring
the melodic folk tunes with its smooth, noble, and
slightly wistful tone, thus making a contrast and counter-
balance to the harsher rock sound provided by the guitar-
based part of the band. It turns out that, in this song, the
clarinet will have two roles: to appear as a big band
household instrument, and to present a link to the stan-
dard band repertoire and its ethno roots.
Table 2. Instrumental sections and instruments.
S e c t i o n I n s t r u m e n t / Voice
Rhythm Section Drums
El. bass
Hollow body el. guitar, for:
– the guitar boogie riffs
– the guitar solo
Brass Instruments Trumpets × 4 lines
Trombones × 4 lines
Woodwinds
(wood and brass
reed-based wind
instruments)
Clarinet × 1 line
Alt Saxophones × 2 lines
Tenor Saxophones × 2 lines
Baritone Saxophone × 1 line
Vocals Lead male vocal
2.4 The song development
The song starts with a classic 12-bar boogie-woogie
rhythmical riff played on electric guitar, which establish-
es the rockabilly sound. The brasses come in with a few
chord stabs at the end of the 12-bar intro and, together
with a jazzy, swinging, drum break, lead us into the
second 12-bar passage. Here, on the top of the boogie-
woogie riff, a classic big band swing theme appears with
the full brass sound.
After the brass theme resolves with a typical downward
glissando and the drums stop on the last two beats, the
preparation for the vocal part is made. When the vocal
starts, only the guitar riff––accompanied by the bass and
drums––continues its rhythmical pattern. This lasts for
the whole first 12-bar A chorus. There are no brasses
here, so more space is left for the vocal to establish itself
and to bring out the melody with the introductory text
lines. The brasses join in the second repetition of the A
chorus, filling in between the vocal parts. They rise in
complexity and power, building up the tension in the
third A chorus. At the end of it, the classic 4-bar blues
cadence is melodically emphasized and repeated twice
into the total of 8 bars –– resulting in a part that has the
strength and role of a B chorus. Thus the 12 + 4 scheme
turned into an 8-bar part that can be viewed as a short-
ened A chorus, and an 8 bar B chorus. The latter delivers
the strongest lyrics line, and repeats it twice5
. The B
chorus brings the climax, the resolution of which con-
cludes the first part of the song.
The song continues with a light variation of the brass
swing theme from the intro, and is followed by (only)
two A choruses. They bring new, witty and humorous,
verses that grab the listener’s attention. In the second A
chorus the brasses come in and lead us to a classic boo-
gie-woogie bridge. Here, the first 4 bars on the tonic
degree are doubled for the total of 8 bars. The rhythm
section stops, except for the high-hat cymbal. The in-
struments hit the tutti chords, while the vocal brings the
higher tension melody with stronger lyrics. At the begin-
ning of the bridge the chords accentuate the first beats of
every two bars, then first beats of every bar, then every
two beats within a bar, and finally the acceleration and
suspense resolve by moving and continuing the boogie-
woogie chord progression to the subdominant degree.
The ending of the 12-bar scheme again turns into the
climax of the B chorus, which closes the second third of
the song.
After having heard the B chorus twice, the song dy-
namics and brass arrangement go down to mezzo piano,
and introduces the clarinet solo. This change of dynamics
contributes to the development and dramatic context of
the song. The clarinet leads its cheerful Dixieland melo-
dy in mezzo-forte, while the brasses grow in arrangement
and dynamics. After the clarinet solo, the vocal repeats
one (shortened) A chorus which immediately ends in the
B chorus. This is followed by two solos, each lasting for
the full 12-bar boogie-woogie phrase. The first is a rock-
abilly-style solo on electric guitar, and the second is a
stronger clarinet solo, which now has to fight through the
more prominent brasses. In the last passage of the 12-bar
scheme the vocal concludes the song by repeating just
the B chorus text5
during the A chorus part. The last four
bars are not repeated as before, but are “stalled” by
switching to the half tempo, making this last, fourth B
chorus, special and more dramatic. The last two bars are
a classic boogie-woogie cadenza, being also a standard in
Dixie, blues, swing and jazz in general (already men-
tioned in 2.2). It brings the song to an end, which is fur-
thermore affirmed by a short glissando stab, starting from
the tonic E6 chord and going downward in intonation and
dynamics.
5
The literal translation of the Croatian line is: “He is my friend,
his name is Psycho Billy”.
3. RECORDING AND EDITING
The recording microphones are listed in Table 3. A Tas-
cam DM-3200 digital mixing console served for collect-
ing the microphone signals into its high quality micro-
phone preamplifiers, and for the 44.1kHz/24-bit AD con-
version. The computer connection was provided through
the IF-FW/DM mkII 32-channel firewire interface. The
recording was done in Steinberg Nuendo® 3.2 host pro-
gram on the PC platform, maintaining the same 24 bit
dynamic resolution and 44.1kHz sampling frequency.
The instrument tracks were laid down one by one,
starting with drums. As was already mentioned in the
introduction, the same recording principle was used also
for the wind instruments. But let’s start with a short sur-
vey of the recording stage according to its chronology.
3.1 The drum kit recording
Both, the rockabilly drums and the big band jazz drums
should sound naturally on recordings. So, our goal was to
maintain the impression of the natural sounding drums,
played by a real drummer, but closer to the rock produc-
tion. The usual alterations of the drum sound from its
direct acoustic appearance––due to the use of close mik-
ing, EQs and dynamic processors––are considered as
expected by a modern listener. The drums will still be
perceived as “acoustic and natural”, just more “phono-
genic”. The processing is applied to make the sound a bit
punchier and more up front, and thus more adapted to the
recording and reproduction medium.
The Sonor Force 2003 drum kit with metal snare drum
was used. The drummer, well acquainted with the song,
was governed by the host program metronome at
220 bpm. In the end he halved the tempo as needed. If
there had been more subtle tempo changes, we should
have them preprogrammed, e.g. by using a tempo track.
Bass drum. The bass drum was recorded with Sure Beta
52a microphone, placed inside the small opening
(Φ ≈ 15cm) in the back membrane. The microphone was
pushed inside the drum body up to the half of its length,
and directed toward the beater hitting zone. Prerecording
equalization was done by inserting the Behringer Tube
Ultra-Q T1951 equalizer into the signal path, and choos-
ing a peaking curve for +4dB boost at 60Hz, to emphas-
ize the “thump” part of the bass drum sound.
Snare drum. The industry standard Sure SM57 was put
on the snare. It is a classic choice for both PA and studio
applications. The microphone was placed at the drum
edge, 6 cm above and in parallel to the drum skin, close
to the rim (Figure 2). A prerecording equalization was
Figure 2. The snare drum recording. Shure SM57 is
placed close to the edge, in parallel to the drumhead, and 6cm
above it. The picture is taken with gratitude from [4].
Table 3. Recording microphones.
Micro-
phone
Trans-
ductor
Polar
Char.
Freq.
Range
Usage
Shure
SM57
Dynamic Cardioid
40 –
15000 Hz
Snare dr.,
el. guitars,
clarinet
Shure
Beta 52A
Dynamic
Super-
Cardioid
20 –
10000 Hz
Bass
drum
Sennheiser
e604
Dynamic Cardioid
40 –
18000 Hz
Tom-tom
Shure
Beta 58A
Dynamic
Super-
Cardioid
50 –
16000 Hz
Clarinet
Rode NT5×2
(matched)
Condenser Cardioid
20 –
20000 Hz
Trumpets,
trombones,
saxes,
overheads
sE2200a
Condenser Cardioid
20 –
20000 Hz
Vocal
done on the second channel of the tube Ultra-Q, set to
+4dB HF shelving boost starting at 3kHz, to enhance the
snare component and add freshness to the sound.
Tom-toms. There were two tom-toms in the drum kit,
the mid and the floor tom, of which only the former was
used. It was miked with the Sennheiser e604, slightly to
the inside of the rear rim, at the angle of 450
to the drum-
head axis. The distance from the drum skin was carefully
adjusted by listening to the sound and trying to benefit
from the microphone proximity effect. No prerecording
processing of any kind was done.
Overhead recording. The popular overhead microphone
technique is used for collecting the global sound of the
drum kit with its cymbals. A pair of well placed micro-
phones, possibly matched, will provide a natural stereo
sound image of the drums that is close to how we hear
them in a given acoustic space. We applied the recog-
nized recorderman overhead technique. It is quite simple
and yields excellent results with only 2 or 3 micropho-
nes. A detailed description for the recorderman drum
setup may be found in [5]. The technique ensures that:
• The snare and the bass drums are well centered in the
stereo image, because the distances from each of them
to both of the microphones are equal (resulting in the
equal loudness and equal phase relationship).
• If the close microphones are used for the snare and
bass drum, the interference of their signals with those
of the overheads results in no audible problems.
• The captured sound will be close to how the drummer
hears it.
One of the important advantages of the recorderman
technique is the relatively close position of the overhead
microphones comparing to other overhead techniques.
This makes it very good for the low ceiling spaces as was
ours. There is not much interference from the early ref-
lections and reverberations from the nearby surfaces that
are usually introduced when further apart overheads are
used. Although our ceilings were made highly absorbent,
we still used the above technique for its tight, punchy,
and yet natural, sound, that fits our composition’s genre.
In our case, a matched pair of Rode NT5 microphones
was used for the overheads, bringing the total number of
the drum microphones to five.
3.2 The electric bass recording
One of the specifics of the rockabilly sound is energetic
staccato playing on the upright bass. As was already
discussed in 2.3, here we had a band with a standard rock
rhythm section, so that the bass line had to be played on
the electric bass. The bassist was supposed to resemble
the rockabilly mood by playing the cut-off, or “stopped”,
notes. He followed the bass line as notated in the ar-
rangement score, and was governed by the rhythm of the
recorded drum tracks. The Yamaha RBX 260 electric
bass was recorded directly into the Tascam digital con-
sole. The equalization was made on the electric bass
alone, by adjusting its pickups and onboard passive equa-
lizing filters.
3.3 The electric guitars recording
To get the authentic rockabilly sound, the band leader
and guitarist borrowed Washburn J9, a hollow body
electric guitar. It appeared on the two el. guitar lines: the
rhythmical boogie-woogie riffs, and the solo part.
The following two electric guitar amplifiers were used:
i. Marshal Valvestate 8040 combo, with a tube pream-
plifier on the so called “boost channel” and a transisto-
rized amplifier –– for the rhythmical riffs with just a
hint of distortion.
ii. Laney combo full tube amplifier –– for a bit more dis-
torted sound on the rockabilly guitar solo.
Figure 3. The placement of the microphone SM57 in front
of the Marshall Valvestate 8040 combo amplifier.
The amplifiers’ speakers were miked with Sure SM57, as
illustrated on Figure 3. As usual, the electric guitar sound
was carefully prepared on the amplifiers to be as close to
what we need as possible. Additionally, the tube equaliz-
er was inserted in the signal path to give more warmth
and to provide in detail prerecording corrections that
were not feasible on the amplifiers.
3.4 The wind instruments recording
As was already discussed in the introduction, just one
performer presented the whole wind instrument section,
and recorded all the necessary tracks one by one.
Trumpets and trombones. These classic brass instru-
ments were recorded with a small diaphragm Rode NT5
condenser microphone. The signal was fed directly into
the Tascam DM-3200. The trumpets are the loudest in-
struments in the big band, quite possibly the loudest
instruments at all, capable of producing sound pressures
of up to 155dBSPL at the horn output. This fact had to be
taken into consideration, because even the sturdiest mi-
crophones cannot accept the sound levels this high. The
NT5 has dynamic range of 143dBSPL at 1kHz test signal.
To accommodate for the trumpet high sound pressures
and ensure that no distortion will happen, the microphone
was placed at the distance of 80 cm apart from the trum-
pet horn, 20cm below the horn axis (Figure 4a).
Figure 4 a and b. Recording of trumpets (a), and sa-
xophones (b). The picture is gratefully taken from [4].
The four lines of trumpets and four of trombones were
recorded directly into the host program without any pre-
processing.
Saxophones. For all our saxophones the NT5 micro-
phone was used. It’s high quality small diaphragm
proved to be a good choice for the wind instruments in
general. The microphone position was slightly off axis to
the right, pointing to the spot in the middle of the instru-
ment body, approximately 50 – 75 cm apart (Figure 4b).
Fine adjustments were done for every of the three saxo-
phone types, by carefully listening to their sound.
In total 5 saxophone lines were recorded: 2 alto, 2 te-
nor, and 1 baritone, as outlined in Table 2.
Clarinet. The typical microphone position for the clari-
net recording is shown in Figure 5. The microphone is
placed on the side (to the right on the picture), pointing
to the lower part of the instrument, but not to the bore.
The intention was to get the sound evenly from both, the
wooden body, and the tube opening.
Figure 5. Clarinet recording. The microphone diaphragm axis
is further off the instrument axis (on the picture to the right [4]).
Although there was only one clarinet line in our ar-
rangement, we recorded it separately for:
i. The parts were it was playing together with the brass
instruments –– with one Rode NT5, as shown on
Figure 5.
ii. The clarinet solos in the last third of the song
two Shure Beta SM58 microphones placed in the NOS
stereo technique [6]. NOS is similar to the
technique (with distance d = 17cm,
= 1100
) but with greater distance between the micr
phones and narrower angle (Figure
technique to capture more integral clarinet sound.
Figure 6. NOS stereo recording technique
angle was ±40.50
from the line of symmetry
The practical choice of the angle is 900
(the
3.5 Vocal recording
The recording of the lead vocal was straightforward. The
signal coming from the sE Electronics 2200a large diap
ragm condenser microphone was fed directly into the
DM-3200 preamplifiers. The singer’s
fined the overall sound of Kom3dija band
the important task of shaping the vocal
such a way to artistically unite the band’s
rock genre with the rockabilly style on one hand
jazz style arrangement on the other.
3.6 Editing
One of the key benefits of the one-by
ments recording was evident in this
Thanks to the capabilities of modern
software, the full and precise time editing
complished. Rhythmical errors on any of the
(lines) within the wind instrument section
corrected. This, of course, would not be possible if the
whole sections were recorded.
The editing procedure is very time consuming, but is
also straightforward. The nuances and the final effects of
the moving of audio parts or audio samples depend
the host program. However, high precision and great
musicality are required in the process.
feel what the ideal rhythmical phrase
“groove” is, and adjust the off-time parts accordingly.
The final results were very good.
smooth-running and swingy, and the achieved rhythmical
accuracy was very satisfactory.
4. MIXING
The audio material was mixed in the same host pro
it was recorded in –– Nuendo 3.2. It was done
using any external equipment, according to the well
known concept In the Box (ITB). It designates that all the
tasks are done within a DAW (Digital Audio Workst
her with the brass
one Rode NT5, as shown on the
in the last third of the song –– with
58 microphones placed in the NOS
NOS is similar to the ORTF
= 17cm, and angle α =
) but with greater distance between the micro-
Figure 6). We used the
gral clarinet sound.
. NOS stereo recording technique. The original NOS
etry, adding up to 810
.
the picture is from [6]).
vocal was straightforward. The
2200a large diaph-
ragm condenser microphone was fed directly into the
’s voice largely de-
band. Here, he had
vocal interpretation in
band’s basic ethno-
on one hand, and the
by-one wind instru-
was evident in this production stage.
capabilities of modern audio recording
editing could be ac-
hythmical errors on any of the instruments
wind instrument sections were carefully
This, of course, would not be possible if the
very time consuming, but is
nuances and the final effects of
parts or audio samples depend on
. However, high precision and great
d in the process. The editor must
mical phrase, and the correct
time parts accordingly.
. The groove was
and swingy, and the achieved rhythmical
material was mixed in the same host program
Nuendo 3.2. It was done without
ment, according to the well
It designates that all the
(Digital Audio Worksta-
tion), i.e. within the realm of software
or possibly the hardware installed in it.
only the former that took place.
Since the instruments were
right sound––as desired or at least very
sired––no sound alterations w
first, rough mix. A frequent mistake is to start
tion on individual instrument tracks
global sound image. This often
ductive or excessive use of fre
processors.
In the preparation of the rough mix, w
wind instrument sections by
tions between particular instrumental lines.
was routed to a stereo subgroup for easier
pulation. Afterwards, the similar
rock band rhythm section, and the solo tracks.
was the definition of the approximate instrument levels
and their positions within the stereo image (
Figure 7. Instrument positions with
After defining the rough mix, the song was carefully
analyzed. The defects noticed
were attributed to particular instrument sections and their
individual tracks. These had to be improved by applying
frequency and dynamics modif
In order to adequately deal with various aspects of
audio material processing, every
ticularly the recording, mixing and mastering engi
should be well acquainted with the frequency ranges
the instrument’s fundamental tones
monic or overtone contents. One excellent chart contai
ing both of these can be found in
Modifying of the dynamic range is similarly important,
requiring knowledge and skills in applying a
processing to each track. The mi
expert in hearing and analyzing of the audio material, in
diagnosing the problems and finding ways to solve them.
All these actions are especially important in the
plex productions like ours. Here the
definition, and acoustic coordination of
must be achieved during the recording
more so in the mixing process.
In both, the frequency and dynamic
can recognize the following two
software run on a computer,
stalled in it. In our case it was
only the former that took place.
Since the instruments were already recorded with the
at least very close to the de-
tions were done prior making the
A frequent mistake is to start equaliza-
ment tracks without hearing the
This often leads to the counterpro-
or excessive use of frequency filters and other
preparation of the rough mix, we started with the
by defining the volume rela-
tions between particular instrumental lines. Every section
to a stereo subgroup for easier further mani-
similar actions followed for the
rhythm section, and the solo tracks. The result
approximate instrument levels
in the stereo image (Figure 7).
within the stereo image.
After defining the rough mix, the song was carefully
noticed in the global sound image
were attributed to particular instrument sections and their
individual tracks. These had to be improved by applying
frequency and dynamics modifying tools.
In order to adequately deal with various aspects of the
, every professional, and par-
recording, mixing and mastering engineer,
should be well acquainted with the frequency ranges of
fundamental tones and its higher har-
contents. One excellent chart contain-
can be found in [7].
ic range is similarly important,
ledge and skills in applying a correct
The mixing engineer must be an
expert in hearing and analyzing of the audio material, in
diagnosing the problems and finding ways to solve them.
especially important in the com-
productions like ours. Here the good audibility, the
and acoustic coordination of all instruments,
recording phase, and even
, the frequency and dynamic interventions, we
two types of actions:
i.Corrective actions, needed because of the deficiencies
in the audio material itself, or because of the way the
audio signal will interfere with other signals it the mix;
ii.Improving actions, aimed to make the audio material
more appealing, where the definition of the appealing
is, of course, depending on the music genre and style.
Sometimes only the first step will suffice, and sometimes
we shall want to make that extra enhancement or produce
a special effect. Quite often the same (similar) results can
be obtained by taking different routes of action. Which
way will be chosen, highly depends on the technical and
artistic style, experience, and inspiration of the mixing
engineer and producer.
The next step in our production was to set a precise
mixdown. Although it contained dozens of separate
tracks, we had to organize it in a way that would be easi-
ly controllable, and that would not burden the creative
process of mixing. Our final mixdown was based on
defining the rhythm section and the drums first.
4.1 The drum mixing
The modern drum kit contains drum and cymbal ele-
ments that spread a broad frequency range –– from the
lowest frequencies of the bass drum ( ≈50Hz and lower),
to the highest cymbal overtones that exceed 16 kHz [7].
Knowing the features and the desired sound of each drum
element in a given music genre is essential.
Bass drum. On the bass drum the low and high frequen-
cy roll-off is used. The high pass filter (HPF) was set at
27 Hz and the low pass filter (LPF) at 12 kHz, both hav-
ing the slope of 18dB/oct. The low range around 60 Hz
(precisely at 56 Hz in our case) was slightly boosted to
get yet higher thump volume (check also 3.1). To em-
phasize the kick component of the sound, a high Q peak-
ing boost was applied at 4k Hz. This accentuation of the
hi-mid frequencies will help the bass drum to be audible
on the (small) speakers with inferior bass response. The
Waves transient designer TransX Wide served us to shape
the signal envelope (see Table 4). The initial attack was
slowed down to make the kick a bit softer.
Snare drum. The snare drum track was treated with the
paragraphic equalizer, which combines the functionality
of the parametric equalizer (adjustable peaking frequency
and Q-factor), with the abundance of bands and the ap-
pearance of the graphic equalizer (sliding gain potenti-
ometers). Because no physical damping was provided on
the snare drum, the resonance of its top skin had to be
removed by applying a high Q factor cut by 16.5 dB at
667Hz. After that the signal is passed through the satura-
tor to sound richer. The snare drum sounds great when
recorded on the analog tape, as do many other instru-
ments. If the signal is recorded with a high enough level,
but of course, not too high, the tape enters its soft satura-
tion. This is a nonlinear regime which, like every other
nonlinearity, generates distortion. Thanks to the marvel
of the analog tape medium, this nonlinear response gene-
rates nice harmonics. These days we can find affordable
plugins which, at least partially, bring back the warmth
of analog recordings to digital studios.
More equalization was done after the saturator. A little
boost is made in the lower end at 250Hz. To help the
snare get through the mix, its presence is emphasized a
bit by boosting the region around 3kHz. Also, some airy
highs were added by applying a shelving equalization at
10 kHz to compensate the loss of high frequencies after
the saturator.
The signal was send to the effect track for adding the
necessary spaciousness. A software simulation of the
Lexicon PCM 96 reverberation unit was used, with the
“Chamber” type of space. It is important to fine-tweak
the reverberation time and other parameters till the ob-
tained sound blends with other instruments and sits well
in the mix.
Tom-tom drum. The tom-tom drum was processed by
using the gate dynamic effect to eliminate the unwanted
low-level signals picked up from other instruments. The
threshold was set at −24.5 dBFS. The gate attack and
release times were adjusted to get as smooth, and as
unnoticeable dynamic response, as possible. Sometimes,
the background signals coming from other drum ele-
ments may contribute to the richness of the drum sound
and its wider stereo image. However, this is usually not
applicable when heavy equalization and post-processing
of the drum tracks is applied.
The usage of dynamic gates contribute to the enhanced
dynamics, and can, depending on the settings, influence
the attack and release times of the recorded sound. In that
sense, our choice of using gates is correspondent to the
classical way of producing the rock drum tom-toms.
An alternative to the signal gating in nowadays digital
production is the manual editing. The unwanted audio
signal can be easily silenced out. On analog, and even on
digital, tape recorders, this was possible only for longer
pauses between the useful signals. Now we can do that in
the host recording programs with a surgical precision,
regardless of how short the unwanted signals are.
The equalization applied to the tom-tom drum had to
reduce its low frequencies, and to stretch its “singing”
overtones. The overall guidance was to get a nice, natural
sounding tom-tom.
Overhead drum tracks. The two mono tracks from the
overhead microphones were routed to a stereo subgroup
for the joint processing of both channels. The equaliza-
tion started by applying HPF set on 500Hz, with the
purpose of filtering out the basic frequencies of the bass
and snare drum sounds caught by the overheads. The
overall drum sound on these two tracks was gently com-
pressed by applying the PSP Oldtimer plugin. It is a
simulation of the compressor with fixed temporal para-
meters (attack and release time), resembling the opto or
vintage style tube compressors. A slight make-up gain of
1.5 dB was applied to utilize the extra headroom intro-
duced by the compression.
4.2 The electric bass mixing
The paragraphic equalizer was chosen to eliminate the
bass boominess. A low Q (& ' 1) peaking curve cen-
tered at 250Hz was used to make the cut. The harmonic
generator was applied to enhance the bass presence in the
higher spectrum range, thus helping the bass to get
through the mix and to be audible even on the smaller
speakers.
4.3 The electric guitar mixing
In the rockabilly style the electric guitars are raw, fresh,
and slightly distorted, bringing back the sound of the
early days of rock music. The Kom3dija’s standard guitar
sound was not far from that, only a bit harder, since be-
ing influenced by the early punk era. Now the sound was
slightly refined and redefined to make it suitable for the
rockabilly song (confer also 3.3).
Riff electric guitar. The recorded sound was empha-
sized by adding the mid and high-mid frequencies. Slight
analog tape saturation is added to smoothen out the tran-
sients. The low roll-off was applied to filter out the fre-
quencies below 100 Hz. After that the sound was com-
pressed by Softtube FET compressor in its parallel mode.
Here the high compressing ratio of 10:1 was mixed with
the bypassing uncompressed signal. Short attack and
release times were set, and the look-ahead function was
turned on to suppress the fast transient peaks of the
plucked strings.
Solo electric guitar. To achieve a warm and yet promi-
nent sound of the solo electric guitar, we have applied the
analog tape saturation simulator again. Afterwards the
sound was brightened a bit by cutting the middle fre-
quencies. Normally the solo guitar needs not a lot in the
high audio spectrum. After all, the best guitar amplifier
speakers are of limited range, and start their roll-off at 5
– 6 kHz. However, slight corrections, like raising the
frequencies above 4 kHz, will help in making the sound
brighter and better defined in the mix.
4.4 The wind instrument mixing
The main specific of this work was the implementation
of the big band brass sound into the more or less standard
rock production. Another thing special was the recording
of more than a dozen of wind instrument lines one by
one. To achieve the coherence of the tracks on the local
and global level, we have always grouped the separate
tracks belonging to the same section into one section
subgroup. Thus we have provided a means for the further
common mixing treatment of the section as a whole.
Such an approach highly contributed to the natural sound
of the brasses in the final mix.
Trumpets. Following the recipe just stated, the separate
trumpet tracks were routed to a stereo subgroup, to ob-
tain a homogenous trumpet section. The parallel com-
pressing was used in the limiting regime (compressing
ratio higher than 20:1). The attack and release times were
set to long values, to ensure the more natural response.
Anyway, the wind instruments do not have a fast attack.
High frequencies at 8kHz were boosted by 5.5 dB to
emphasize the brassiness of the sound.
Trombones. The trombone tracks were compressed
individually with a limiter added on output. The individ-
ual tracks were then routed to a stereo subgroup. Here the
lower mid frequencies from 300 – 400 Hz were cut a
little bit, and the highs at 5kHz were raised significantly
(+9 dB). Another compressor, with small 2:1 ratio, was
put in the stereo signal path to control the sudden peaks.
Saxophones. On the first alto saxophone there was a
loud resonating region around G4 concert tone (392Hz),
which is the E5 note on Eb alto sax. It was satisfactory
Table 4. The plugins used in the mixing process.
Type Manufact. & Name Usage
EQ Waves
Q10 - Paragraphic
• Snare drum, overheads,
tom-toms;
• El. bass, solo el. guitar;
• Saxophones, clarinet;
• Vocal.
Waves API 550A • Saxophones, trombones.
Waves VEQ4 • Bass drum
Softtubes
Trident – A – Range
• Snare drum, Tom-tom,
• El. riff guitar;
• Trumpets.
Comp-
ressor-
Waves API 2500 • Wind instruments
• Postproduction.
Waves RComp • Saxees, trombones;
• Vocal.
Waves RVox • Trombones
Softube,
FET Compressor
• El. riff guitar;
• Trumpets;
• Vocal.
PSP Oldtimer • Overheads
Limiter Waves L3 Multimaxizer • Postproduction
Gate Steinberg Dynamics • Tom-tom drum
Deesser Waves RDeesser. • Vocal
Saturator Stillwell OligarcDrive • Snare drum
SoundToys
Decapitator
• El. solo guitar
Transient
Designer
Waves TransX Wide • Bass drum
Harmonic
generator
SPL Twin Tube • Saxophones
Waves RBass • El. Bass
Vitalizer SPL Vitalizer • Postproduction
Reverb Lexicon PCM Native • Snare drum;
• Wind instruments;
• Vocal.
decreased by applying a high-Q cut by 5 dB on the Wa-
ves Q10 (the value of 90 corresponds to Q > 10).
On the second alto sax track the resonance occurred
around B4 tone (494 Hz, note G#5 on the alto sax)6
,
which was suppressed in the same way as above. To
avoid accumulation of the basic tones from the similar
instruments, the low frequency range around 100Hz was
decreased by 2dB. The mid range was boosted at 800Hz
to get the mellower sound. Finally, to obtain more “airy”
sound, the frequencies above 5 kHz were raised slightly.
On the tenor and baritone saxes the low-mid frequen-
cies were cut, and the high-mid and high frequencies
were raised, with the details depending on the instrument
[1]. As before, the individual tracks were routed to aste-
reo subgroup for the common dynamic processing, which
helped to homogenize the saxophone section.
6
B4 = H1, G#5 = G#2, in the Central-European pitch notation.
The Common Brass Section. The three section subgro-
ups were routed to a common brass section stereo group.
Dynamic processing, now on the third level, was applied
again for better blending of the constituents. The total
brass dynamic processing can be summarized as follows:
• Micro-dynamic processing applied on the individual
instrument level (trombones);
• Intermediate-dynamic processing on the instrument-
section level (trumpets, trombones, saxophones);
• Macro-dynamic processing on the global level, for the
brass section as a whole (wind instruments less the
clarinet).
The above procedure follows the usual practice of apply-
ing several compressing units with more subtle compres-
sion in series, rather than just one unit with severe com-
pression settings.
After finalizing the dynamics, the reverberation was
added to the common brass section. To keep the brasses
close to the listener, a reverberation effect with a short,
1.0s, RT60 reverberation time, and emphasized early re-
flections, was chosen on Lexicon PCM Native.
Clarinet – solo parts. Two mono clarinet tracks were
routed to a stereo subgroup and equalized by cutting the
low range at 125 Hz and 500 Hz. In the reverb applied,
the early reflections were emphasized similarly as for the
common brass section. However, we selected a bigger
space (medium hall), with longer reverberations (1.7s),
on the same plugin as above, in order to give more power
and spaciousness to the solo instrument.
4.5 The vocal mixing
The Kom3dija lead vocalist is known of his medium
raspy voice and an energetic and resolute style of sing-
ing. It is equally well suited to various genres, from jazz
and rockabilly to punk. During the vocal processing, the
attention was paid to preserve the voice vibrancy and
dynamics.
The first processor in the signal path was Waves
RDeesser set at 5.5 kHz to compress the sibilants. After-
wards, we had to get rid of an unwanted sound compo-
nent at 246 Hz that somehow entered the recording and
was enhanced even further in the later stages of the
processing chain. A strong 7.5 dB cut was made on the
paragraphic equalizer with a high-Q peaking curve.
The vocal dynamics was governed by two compressors
in series. The first one was set to parallel compressing
mode, with a high ratio (10:1) compression in parallel to
the original sound (compare to 4.3). The second one was
set to a mild compression.
Finally, the mono vocal track was routed to a stereo
subgroup, with the true stereo Lexicon PCM Native re-
verberation plugin inserted in its insert points. The Large
Wide Chamber space was chosen. The mixture of the
input (dry) and the reverberation (wet) signals was to be
carefully set in the plugin itself. This is a less standard
way of applying reverberations than the usual sending of
signal to a common effect track via the send (auxiliary)
busses. Namely, in this way the effect cannot be added to
any other tracks. However, when the reverb is used for
only one stereo pair of signals, as in our case, this is an
alternative giving the same final result.
4.6 Overall mixing
After having the complex brass sections already mixed
and processed, the final, overall, mix reduced to the
complexity of an average rock production. The composi-
tion structure and arrangement, presented in 2.4, was to
be carefully followed, in order to obtain the desired mus-
ical result.
With a detailed automatization we have achieved that
the brass sound merges well with the rock band sound. It
should be perceived as big and powerful, but must never
overshadow the rest of the band. Also, where needed, it
had to be adequately subdued to give room for the lead-
ing lines, like in the beginning of the vocal parts and
during the first clarinet solo. The consistency of the rela-
tion between the rock and the big band brass sound had
to be carefully preserved throughout the song. The pre-
cise arrangement and dynamical playing of the brass
sections helped us immensely in achieving that task.
The lead vocal clearly defines the song and reveals the
Kom3dija musical style. The voice is upfront and brings
the melodic and textual content resolutely, grasping the
listeners’ attention from the beginning.
During the clarinet solo, the arrangement is quitter,
providing a nice relaxation before the grand finale.
In the climax parts during B choruses, in the bridge
part, and in the end of the song, the “tutti sound” had to
be achieved. However, in difference to the classic big
band sound, the electric guitars, the bass and the drums
should be also present, reminding us that this is a rock-
abilly song and that the rock band is still there.
All this demanding dynamics required precisely set au-
tomatization. It was programmed in several passages, and
in consultations with several participants of the project.
5. POSTPRODUCTION
It is a well known piece of advice that the mastering
phase of production should not be done in the same place
and by the same people as mixing. This final touch in the
complex music production chain should be delegated to
specialized postproduction and mastering studios. How-
ever, many of the mixing engineers practice to finalize
their recordings by providing an after-mix or first-stage
postproduction. Many people consider such postproduc-
tion as being a logical closure of the mixing process, and
often do it even if knowing that the postproduction and
mastering will be applied later again, possibly in specia-
lized facilities. By providing the first-stage post-
production, they, at least temporarily, finalize the audio
material and make it better sounding for the radio and
other presentations. It is a help to their clients who do not
need to go elsewhere to get a final product. Very often it
can be a single song, a pilot radio version that, might or
might not appear on a future album, etc.
Regardless if the further postproduction and mastering
will be done or not, it is a good practice to save the pure
mixdown prior any, or most, of the processing is applied.
We may be tempted to leave our “super compressor” in
the stereo master channel, but only if sure that it is really
needed, and that it does not spoil anything. But, in order
to be able to repeat the postproduction process later on,
either by ourselves or by others, the preprocessed record-
ing should be the starting point. A mastering engineer
might require the unaltered mixdown, knowing that her
(or his) high quality equipment would do a better job on
the material which is not spoiled by previous (inferior)
audio processors.
From the above discussion it is obvious that most of
the people engaged in audio mixing will find themselves
doing at least some stages of postproduction. This is
especially so in the small recording studios like ours,
where most of the audio engineering tasks must be per-
formed by a single person.
In the after-mix or first-stage postproduction of a ste-
reo recording, we usually assume that the following pro-
cedures are carried out:
• Equalization (also including frequency enhancement,
excitement, vitalizing, and similar frequency-response
shaping processes);
• Compression and limiting;
• Other processing, like sound colorization (by the use
of harmonizers and chorus effects), stereo image cor-
rections and expansions, etc.
These actions need not be performed in the above order.
Also, they can be performed more than once, or not ap-
plied at all. At this postproduction stage we usually deal
with only one song or one song at a time. The true al-
bum-mastering process must fine-tune the sound images
of several different songs, it must level out their mutual
loudness, arrange good transitions from one song to
another, and assure good overall sound of a music album.
A common rule is that the postproduction should deal
only with (subtle) corrections of the global sound image.
It is not about correcting the mixdown mistakes, like bad
sounding individual tracks or wrong level ratios between
them. Also, because we affect the whole recording, only
the highest quality audio processors should be used, be
they in digital or analog domain. The material should be
monitored only on the high quality monitoring systems,
and at last, being probably the most important of all, the
process should be managed by an experienced person.
In this project we have also provided the first-stage
postproduction, which will be depicted here. The final
mastering of the album, on which the song is to appear, is
planned to be done in a high quality, professional master-
ing suite. This should prove that we have listened to the
advice from the beginning of this section.
For our postproduction, we used Nuendo 3.2 host pro-
gram. A great help in the procedure is the abundance of
good quality mastering plugins available today. By kno-
wing our monitoring system (the active Alesis M1mk2)
and our control room acoustics well, and by having ga-
ined the experience from many previous postproduction
endeavors, we were ready to accomplish this last task.
Fine shaping of the frequency range. The first proces-
sor was the SPL Vitalizer, used instead of the standard
equalizers. We brightened the global sound in the high-
mid region by applying 2dB boost at 3kHz, and by turn-
ing on the “process” knob of this multifunctional plugin.
Compression. The next processor in the chain was the
Waves API 2500 plugin, the software simulation of the
renowned industry-standard hardware compressor [8]. It
was applied with a low compression rate of 1.5 : 1. The
attack time was set to 30ms in order to preserve the tran-
sients and the liveliness of the original sound image. The
threshold was set in a way to get just a slight dynamic
reduction –– not more than 1dB in dynamically moderate
parts, and up to 1.5 dB in the loudest parts of the song.
The knee of the dynamic response curve was set to soft.
The DSP implementation of the API 2500 special high-
pass filter THRUST®, included in the Waves plugin, was
set to its medium option: MED Thrust. The filter is
placed before the compressor’s RMS detector, which has
the all important role of the gain reduction by governing
the voltage control amplifiers (VCAs). It provides filter-
ing of the side-chain control signal in order to get a natu-
ral, frequency dependable, compression, with response
sketched in Figure 8. The ordinate gives the signal that is
fed to the RMS detector. With the MED Thrust the HPF
starts at the low end and goes up to 200Hz with the slope
(3.01dB/oct (10log10
2 dB/oct (10dB/dec.
Here, oct and dec are octave and decade frequency inter-
vals, between which the elementary equality holds:
1 oct log232 dec. Further on, in the range from 200Hz
up to about 3 kHz, the MED Thrust filter is flat, and up
from there the high frequencies are boosted with the
same slope HPF as in the bass region. In all, there are
three THRUST positions: NORM, flat (working like an
ordinary compressor), the mentioned MED Thrust, and
LOUD Thrust, with the constantly rising HPF curve with
the slope (3.01dB/oct [8].
To explain shortly, the inverse slope from that of
THRUST is the well known declining slope of the pink
noise energy density: 45 3.01dB/oct . This density
halves its value after each octave, keeping the total ener-
gy per octave constant. The underlying idea of this pa-
tented system is to decrease the compression in the low-
er, and increase it in the higher, frequency region, in
accordance to the behavior of the pink noise. This reduc-
es the excessive gain pumping effect,7
which is in many
music genres, including ours, completely unacceptable.
Thus the above mechanism enables louder and smoother
recordings which still sound very natural.
Figure 8. The Waves API 2500 MED Thrust frequen-
cy response. From the unit specifications in [8].
7
Compression is usually triggered by the lower frequency sig-
nals, which dominate in the standard audio material, just like in
the pink noise. The usual compression suppresses all the fre-
quencies equally, so that during compression phase the high
frequency signals (including noise) are suppressed for the same
amount as the low ones. When the high-level low-frequency
signal, e.g. caused by a strong kick drum or bass ceases, the
compression stops, and the overall gain raises or pumps up. The
high frequency signals or the higher frequency background
noise, being present in the global audio material most of the
time, burst out, and causes the “breath-like”, pumping, effect.
Limiting. The last processor in our postproduction chain
was the Waves L3 Multimaximizer, a multiband limiter
that controls dynamics in five adjacent frequency bands
[9]. The limiting threshold was set so that the maximal
attenuation did not exceed 2 dB on the loudest passages.
The limiters must have a fast response (attack) times to
react promptly to sudden signal peaks. In this plugin only
the release time was adjustable for each frequency band.
The smooth limiting was achieved by rising the release
time to maximum, while still maintaining that the attenu-
ation indicators “dance with the rhythm of the music”.
The output signal ceiling was set to a value just slightly
lower than 0.0 dBFS (-0.3 dBFS), to prevent possible
problems that (lower quality) DA converters might expe-
rience when reproducing their maximum signal levels.
Together with the previous compression, this mild li-
miting enabled sufficient dynamical control and the in-
crease of the output RMS level for several decibels,
while preserving the natural sound of the final recording.
Dithering. In the final step of our postproduction, when
reducing from the 24 bit resolution to 16 bit CD audio
format, the now common dithering process was applied.
It was engaged on our last plugin, the Waves L3.8
6. CONCLUSION
Thanks to the development of digital audio technology,
the high standards of professional audio production are
nowadays more and more achievable in the recording
studios that cost only a fraction of what was once re-
garded as the industry standard minimum. In this work
we have described a demanding music production that
should prove the above thesis, and also show how small
recording studios can be effectively used for the record-
ing of the “big sound” of jazz and similar orchestras.
To accomplish the desired fusion in which an ethno-
rock band performs a rockabilly song with the addition of
the big band brass sound, it was a must to start from a
full orchestration. The band and the music arranger coo-
perated in the definition of the composition, combining
the rockabilly specifics with the power and grandness of
the big band brass sound. And while the composer and
the arranger had to define the musical ideas, while the
musicians had to utter the sound of their instruments and
bring in the art of their performance, it was the task of
the music producer to amalgamate all this into a profes-
sionally sounding product. We have described the
process of the music production starting with the prepro-
duction phase, and followed by the recording, editing,
mixing and postproduction stages.
The big band wind instruments were recorded one by
one. This method, quite uncommon in the music produc-
tion of the jazz orchestras, was thoroughly and consis-
8
Dithering is essential in decreasing the effects of quantization
error during dynamic reduction, like when transferring from 24
bit to 16 bit resolution. At low level periodic signals it is mani-
fested in the appearance of artificial periodic patterns, which
are heard as added harmonic content, i.e. the digital harmonic
distortion. To prevent this, a low-level noise is summed to the
original signal to “disturb and spoil” the harmonic patterns. The
result is a less audible distortion, since the ear is less perceptive
to the low level noise than to the same level harmonic content.
tently carried out. During the recording, the attention was
paid to achieve the correct tonal and rhythmical perfor-
mance. A precise and comprehensive time editing of the
recorded tracks was performed to achieve greater accura-
cy. The separate brass tracks were summed into sections
(trumpets, trombones, saxophones) and processed within
stereo groups, in order to make them sound more homo-
genous and punchier. The sections were then summed
into a common stereo brass section, with a rich sound,
improved punctuality, and good swinging groove.
Besides this, during the whole song we had to make
sure that the “big brass sound” never overshadows the
rockabilly foundation of the song. The guitars had to stay
in the mix even in the loudest brass passages. On the top
of everything, a prominent and stylish vocal had to bring
the simple and catchy melody with funny lyrics loudly
and clearly, acting like a cohesion factor that united all
the composition elements into one.
The ultimate task of music production is to get a fre-
quency-wise and dynamically-wise correct recording,
which besides all this must also be musically appealing.
We hope that our final recording complies with this re-
quirement, and proves that our production methods could
be used as a model for similar musical projects.
7. REFERENCES
1. Lajtman M, Glazbena produkcija rockabilly skladbe
uz dodatak zvuka velikog jazz-orkestra, završni rad
br.68/2009, Veleučilište u Varaždinu, Hrvatska
[Music production of a rockabilly composition with
addition of the big band sound, bachelor thesis, Poly-
technic of Varaždin. Croatia].
2. http://www.en.wikipedia.org , articles Wind Instru-
ments, Brass Instruments, Woodwind Instruments,
Saxophone (last accessed on May 2011).
3. Erich M. von Horbostel , Curt Sachs. 1914. Systematik
der Musikinstrumente: Ein Versuch, Zeitschrift für
Ethnologie, vol. 46, 1914; translated as "Classification
of Musical Instruments," by Anthony Baines and
Klaus Wachsmann, Galpin Society Journal (1961),
14: 3-29.
4. David H, Robert R, Modern recording techniques,
Focal press, 2005.
5. http://www.hometracked.com, inquiry: Recorderman
overhead drum mic technique (last accessed on June
2011).
6. http://en.wikipedia.org, article: NOS Stereo Technique
(last accessed on June 2011).
7. http://www.independentrecording.net/irn/, Interactive
Frequency Chart (last accessed on June 2011).
8. http://www.apiaudio.com/2500.html, API 2500 stereo
compressor (last accessed on June 2011).
9. http://www.waves.com/Content.aspx?id=255, Waves
L3 Multimaximizer (last accessed on June 2011).
ACKNOWLEDGMENTS
The authors wish to thank all the participants of this
project: the Kom3dija members and their leader Igor
Baksa, the wind instrument players from the Čakovec
Big Band and their leader Mario Jagec.

More Related Content

Similar to 718278.r logozar mlajtman_themusprodofarockbllycomposwthaddofbigbndbrsssound

Paul Carr Listening Paper - Ecocritical Listening
Paul Carr Listening Paper - Ecocritical ListeningPaul Carr Listening Paper - Ecocritical Listening
Paul Carr Listening Paper - Ecocritical ListeningPaul Carr
 
Paul carr listening paper to be read at conference
Paul carr listening paper   to be read at conferencePaul carr listening paper   to be read at conference
Paul carr listening paper to be read at conferencePaul Carr
 
Musicasmath kenjames11-140810225714-phpapp02
Musicasmath kenjames11-140810225714-phpapp02Musicasmath kenjames11-140810225714-phpapp02
Musicasmath kenjames11-140810225714-phpapp02veli erdal
 
music_9_tg_draft_4.7.2014.pdf
music_9_tg_draft_4.7.2014.pdfmusic_9_tg_draft_4.7.2014.pdf
music_9_tg_draft_4.7.2014.pdfJeromeManalo6
 
Jazz Concert Review Essay
Jazz Concert Review EssayJazz Concert Review Essay
Jazz Concert Review EssaySasha Jones
 
Research on my music genre
Research on my music genre Research on my music genre
Research on my music genre Ahmed5757
 
Session 2 song arrangement and track
Session 2 song arrangement and trackSession 2 song arrangement and track
Session 2 song arrangement and trackPaul Carr
 
Research on music genre and video
Research on music genre and videoResearch on music genre and video
Research on music genre and videoAhmed5757
 
Research on my music genre
Research on my music genreResearch on my music genre
Research on my music genreAhmed5757
 
MUSIC_Qtr_1_to_4 FOR MUSIC 9- MATERIALS.pdf
MUSIC_Qtr_1_to_4 FOR MUSIC 9- MATERIALS.pdfMUSIC_Qtr_1_to_4 FOR MUSIC 9- MATERIALS.pdf
MUSIC_Qtr_1_to_4 FOR MUSIC 9- MATERIALS.pdfKatherineFajardoSant
 
LIBERAL ARTS, COMMUNICATION & SOCIAL SCIENCES DIVISIONMUSIC DEPA.docx
LIBERAL ARTS, COMMUNICATION & SOCIAL SCIENCES DIVISIONMUSIC DEPA.docxLIBERAL ARTS, COMMUNICATION & SOCIAL SCIENCES DIVISIONMUSIC DEPA.docx
LIBERAL ARTS, COMMUNICATION & SOCIAL SCIENCES DIVISIONMUSIC DEPA.docxSHIVA101531
 
Digital Composition
Digital CompositionDigital Composition
Digital CompositionJosh White
 

Similar to 718278.r logozar mlajtman_themusprodofarockbllycomposwthaddofbigbndbrsssound (20)

Paul Carr Listening Paper - Ecocritical Listening
Paul Carr Listening Paper - Ecocritical ListeningPaul Carr Listening Paper - Ecocritical Listening
Paul Carr Listening Paper - Ecocritical Listening
 
Paul carr listening paper to be read at conference
Paul carr listening paper   to be read at conferencePaul carr listening paper   to be read at conference
Paul carr listening paper to be read at conference
 
Music as Math
Music as MathMusic as Math
Music as Math
 
Musicasmath kenjames11-140810225714-phpapp02
Musicasmath kenjames11-140810225714-phpapp02Musicasmath kenjames11-140810225714-phpapp02
Musicasmath kenjames11-140810225714-phpapp02
 
Bflat final
Bflat finalBflat final
Bflat final
 
Reflection
ReflectionReflection
Reflection
 
Music
MusicMusic
Music
 
music_9_tg_draft_4.7.2014.pdf
music_9_tg_draft_4.7.2014.pdfmusic_9_tg_draft_4.7.2014.pdf
music_9_tg_draft_4.7.2014.pdf
 
02 whole
02 whole02 whole
02 whole
 
Jazz Concert Review Essay
Jazz Concert Review EssayJazz Concert Review Essay
Jazz Concert Review Essay
 
MUSIC 9 WEEK 1.pptx
MUSIC 9 WEEK 1.pptxMUSIC 9 WEEK 1.pptx
MUSIC 9 WEEK 1.pptx
 
Research on my music genre
Research on my music genre Research on my music genre
Research on my music genre
 
Session 2 song arrangement and track
Session 2 song arrangement and trackSession 2 song arrangement and track
Session 2 song arrangement and track
 
Research on music genre and video
Research on music genre and videoResearch on music genre and video
Research on music genre and video
 
Research on my music genre
Research on my music genreResearch on my music genre
Research on my music genre
 
Creating Ambient Music
Creating Ambient MusicCreating Ambient Music
Creating Ambient Music
 
MUSIC_Qtr_1_to_4 FOR MUSIC 9- MATERIALS.pdf
MUSIC_Qtr_1_to_4 FOR MUSIC 9- MATERIALS.pdfMUSIC_Qtr_1_to_4 FOR MUSIC 9- MATERIALS.pdf
MUSIC_Qtr_1_to_4 FOR MUSIC 9- MATERIALS.pdf
 
LIBERAL ARTS, COMMUNICATION & SOCIAL SCIENCES DIVISIONMUSIC DEPA.docx
LIBERAL ARTS, COMMUNICATION & SOCIAL SCIENCES DIVISIONMUSIC DEPA.docxLIBERAL ARTS, COMMUNICATION & SOCIAL SCIENCES DIVISIONMUSIC DEPA.docx
LIBERAL ARTS, COMMUNICATION & SOCIAL SCIENCES DIVISIONMUSIC DEPA.docx
 
Music and Learning
Music and LearningMusic and Learning
Music and Learning
 
Digital Composition
Digital CompositionDigital Composition
Digital Composition
 

Recently uploaded

Call Girls in Friends Colony 9711199171 Delhi Enjoy Call Girls With Our Escorts
Call Girls in Friends Colony 9711199171 Delhi Enjoy Call Girls With Our EscortsCall Girls in Friends Colony 9711199171 Delhi Enjoy Call Girls With Our Escorts
Call Girls in Friends Colony 9711199171 Delhi Enjoy Call Girls With Our Escortsindian call girls near you
 
VIP Amritsar Call Girl 7001035870 Enjoy Call Girls With Our Escorts
VIP Amritsar Call Girl 7001035870 Enjoy Call Girls With Our EscortsVIP Amritsar Call Girl 7001035870 Enjoy Call Girls With Our Escorts
VIP Amritsar Call Girl 7001035870 Enjoy Call Girls With Our Escortssonatiwari757
 
BDSM⚡Call Girls in Hari Nagar Delhi >༒8448380779 Escort Service
BDSM⚡Call Girls in Hari Nagar Delhi >༒8448380779 Escort ServiceBDSM⚡Call Girls in Hari Nagar Delhi >༒8448380779 Escort Service
BDSM⚡Call Girls in Hari Nagar Delhi >༒8448380779 Escort ServiceDelhi Call girls
 
Q3 FY24 Earnings Conference Call Presentation
Q3 FY24 Earnings Conference Call PresentationQ3 FY24 Earnings Conference Call Presentation
Q3 FY24 Earnings Conference Call PresentationSysco_Investors
 
Malad Escorts, (Pooja 09892124323), Malad Call Girls Service
Malad Escorts, (Pooja 09892124323), Malad Call Girls ServiceMalad Escorts, (Pooja 09892124323), Malad Call Girls Service
Malad Escorts, (Pooja 09892124323), Malad Call Girls ServicePooja Nehwal
 
B2 Interpret the brief.docxccccccccccccccc
B2 Interpret the brief.docxcccccccccccccccB2 Interpret the brief.docxccccccccccccccc
B2 Interpret the brief.docxcccccccccccccccMollyBrown86
 
CALL ON ➥8923113531 🔝Call Girls Fazullaganj Lucknow best sexual service
CALL ON ➥8923113531 🔝Call Girls Fazullaganj Lucknow best sexual serviceCALL ON ➥8923113531 🔝Call Girls Fazullaganj Lucknow best sexual service
CALL ON ➥8923113531 🔝Call Girls Fazullaganj Lucknow best sexual serviceanilsa9823
 
VIP 7001035870 Find & Meet Hyderabad Call Girls Miyapur high-profile Call Girl
VIP 7001035870 Find & Meet Hyderabad Call Girls Miyapur high-profile Call GirlVIP 7001035870 Find & Meet Hyderabad Call Girls Miyapur high-profile Call Girl
VIP 7001035870 Find & Meet Hyderabad Call Girls Miyapur high-profile Call Girladitipandeya
 
Nicola Mining Inc. Corporate Presentation May 2024
Nicola Mining Inc. Corporate Presentation May 2024Nicola Mining Inc. Corporate Presentation May 2024
Nicola Mining Inc. Corporate Presentation May 2024nicola_mining
 
Diligence Checklist for Early Stage Startups
Diligence Checklist for Early Stage StartupsDiligence Checklist for Early Stage Startups
Diligence Checklist for Early Stage StartupsTILDEN
 

Recently uploaded (20)

@9999965857 🫦 Sexy Desi Call Girls Karol Bagh 💓 High Profile Escorts Delhi 🫶
@9999965857 🫦 Sexy Desi Call Girls Karol Bagh 💓 High Profile Escorts Delhi 🫶@9999965857 🫦 Sexy Desi Call Girls Karol Bagh 💓 High Profile Escorts Delhi 🫶
@9999965857 🫦 Sexy Desi Call Girls Karol Bagh 💓 High Profile Escorts Delhi 🫶
 
Call Girls In Vasant Kunj 📱 9999965857 🤩 Delhi 🫦 HOT AND SEXY VVIP 🍎 SERVICE
Call Girls In Vasant Kunj 📱  9999965857  🤩 Delhi 🫦 HOT AND SEXY VVIP 🍎 SERVICECall Girls In Vasant Kunj 📱  9999965857  🤩 Delhi 🫦 HOT AND SEXY VVIP 🍎 SERVICE
Call Girls In Vasant Kunj 📱 9999965857 🤩 Delhi 🫦 HOT AND SEXY VVIP 🍎 SERVICE
 
Call Girls in Friends Colony 9711199171 Delhi Enjoy Call Girls With Our Escorts
Call Girls in Friends Colony 9711199171 Delhi Enjoy Call Girls With Our EscortsCall Girls in Friends Colony 9711199171 Delhi Enjoy Call Girls With Our Escorts
Call Girls in Friends Colony 9711199171 Delhi Enjoy Call Girls With Our Escorts
 
Call Girls Service Green Park @9999965857 Delhi 🫦 No Advance VVIP 🍎 SERVICE
Call Girls Service Green Park @9999965857 Delhi 🫦 No Advance  VVIP 🍎 SERVICECall Girls Service Green Park @9999965857 Delhi 🫦 No Advance  VVIP 🍎 SERVICE
Call Girls Service Green Park @9999965857 Delhi 🫦 No Advance VVIP 🍎 SERVICE
 
VIP Amritsar Call Girl 7001035870 Enjoy Call Girls With Our Escorts
VIP Amritsar Call Girl 7001035870 Enjoy Call Girls With Our EscortsVIP Amritsar Call Girl 7001035870 Enjoy Call Girls With Our Escorts
VIP Amritsar Call Girl 7001035870 Enjoy Call Girls With Our Escorts
 
Call Girls 🫤 Mukherjee Nagar ➡️ 9999965857 ➡️ Delhi 🫦 Russian Escorts FULL ...
Call Girls 🫤 Mukherjee Nagar ➡️ 9999965857  ➡️ Delhi 🫦  Russian Escorts FULL ...Call Girls 🫤 Mukherjee Nagar ➡️ 9999965857  ➡️ Delhi 🫦  Russian Escorts FULL ...
Call Girls 🫤 Mukherjee Nagar ➡️ 9999965857 ➡️ Delhi 🫦 Russian Escorts FULL ...
 
Russian Call Girls Rohini Sector 3 💓 Delhi 9999965857 @Sabina Modi VVIP MODEL...
Russian Call Girls Rohini Sector 3 💓 Delhi 9999965857 @Sabina Modi VVIP MODEL...Russian Call Girls Rohini Sector 3 💓 Delhi 9999965857 @Sabina Modi VVIP MODEL...
Russian Call Girls Rohini Sector 3 💓 Delhi 9999965857 @Sabina Modi VVIP MODEL...
 
Call Girls In South Delhi 📱 9999965857 🤩 Delhi 🫦 HOT AND SEXY VVIP 🍎 SERVICE
Call Girls In South Delhi 📱  9999965857  🤩 Delhi 🫦 HOT AND SEXY VVIP 🍎 SERVICECall Girls In South Delhi 📱  9999965857  🤩 Delhi 🫦 HOT AND SEXY VVIP 🍎 SERVICE
Call Girls In South Delhi 📱 9999965857 🤩 Delhi 🫦 HOT AND SEXY VVIP 🍎 SERVICE
 
Rohini Sector 17 Call Girls Delhi 9999965857 @Sabina Saikh No Advance
Rohini Sector 17 Call Girls Delhi 9999965857 @Sabina Saikh No AdvanceRohini Sector 17 Call Girls Delhi 9999965857 @Sabina Saikh No Advance
Rohini Sector 17 Call Girls Delhi 9999965857 @Sabina Saikh No Advance
 
BDSM⚡Call Girls in Hari Nagar Delhi >༒8448380779 Escort Service
BDSM⚡Call Girls in Hari Nagar Delhi >༒8448380779 Escort ServiceBDSM⚡Call Girls in Hari Nagar Delhi >༒8448380779 Escort Service
BDSM⚡Call Girls in Hari Nagar Delhi >༒8448380779 Escort Service
 
Q3 FY24 Earnings Conference Call Presentation
Q3 FY24 Earnings Conference Call PresentationQ3 FY24 Earnings Conference Call Presentation
Q3 FY24 Earnings Conference Call Presentation
 
Malad Escorts, (Pooja 09892124323), Malad Call Girls Service
Malad Escorts, (Pooja 09892124323), Malad Call Girls ServiceMalad Escorts, (Pooja 09892124323), Malad Call Girls Service
Malad Escorts, (Pooja 09892124323), Malad Call Girls Service
 
B2 Interpret the brief.docxccccccccccccccc
B2 Interpret the brief.docxcccccccccccccccB2 Interpret the brief.docxccccccccccccccc
B2 Interpret the brief.docxccccccccccccccc
 
CALL ON ➥8923113531 🔝Call Girls Fazullaganj Lucknow best sexual service
CALL ON ➥8923113531 🔝Call Girls Fazullaganj Lucknow best sexual serviceCALL ON ➥8923113531 🔝Call Girls Fazullaganj Lucknow best sexual service
CALL ON ➥8923113531 🔝Call Girls Fazullaganj Lucknow best sexual service
 
Russian Call Girls Rohini Sector 22 💓 Delhi 9999965857 @Sabina Modi VVIP MODE...
Russian Call Girls Rohini Sector 22 💓 Delhi 9999965857 @Sabina Modi VVIP MODE...Russian Call Girls Rohini Sector 22 💓 Delhi 9999965857 @Sabina Modi VVIP MODE...
Russian Call Girls Rohini Sector 22 💓 Delhi 9999965857 @Sabina Modi VVIP MODE...
 
Call Girls In Kalkaji 📱 9999965857 🤩 Delhi 🫦 HOT AND SEXY VVIP 🍎 SERVICE
Call Girls In Kalkaji 📱  9999965857  🤩 Delhi 🫦 HOT AND SEXY VVIP 🍎 SERVICECall Girls In Kalkaji 📱  9999965857  🤩 Delhi 🫦 HOT AND SEXY VVIP 🍎 SERVICE
Call Girls In Kalkaji 📱 9999965857 🤩 Delhi 🫦 HOT AND SEXY VVIP 🍎 SERVICE
 
VIP 7001035870 Find & Meet Hyderabad Call Girls Miyapur high-profile Call Girl
VIP 7001035870 Find & Meet Hyderabad Call Girls Miyapur high-profile Call GirlVIP 7001035870 Find & Meet Hyderabad Call Girls Miyapur high-profile Call Girl
VIP 7001035870 Find & Meet Hyderabad Call Girls Miyapur high-profile Call Girl
 
Nicola Mining Inc. Corporate Presentation May 2024
Nicola Mining Inc. Corporate Presentation May 2024Nicola Mining Inc. Corporate Presentation May 2024
Nicola Mining Inc. Corporate Presentation May 2024
 
Call Girls 🫤 Mahipalpur ➡️ 9999965857 ➡️ Delhi 🫦 Russian Escorts FULL ENJOY
Call Girls 🫤 Mahipalpur ➡️ 9999965857  ➡️ Delhi 🫦  Russian Escorts FULL ENJOYCall Girls 🫤 Mahipalpur ➡️ 9999965857  ➡️ Delhi 🫦  Russian Escorts FULL ENJOY
Call Girls 🫤 Mahipalpur ➡️ 9999965857 ➡️ Delhi 🫦 Russian Escorts FULL ENJOY
 
Diligence Checklist for Early Stage Startups
Diligence Checklist for Early Stage StartupsDiligence Checklist for Early Stage Startups
Diligence Checklist for Early Stage Startups
 

718278.r logozar mlajtman_themusprodofarockbllycomposwthaddofbigbndbrsssound

  • 1. THE MUSIC PRODUCTION OF A ROCKABILLY COMPOSITION WITH ADDITION OF THE BIG BAND BRASS SOUND Logožar R.1 , Lajtman M.2 ( robert.logozar@vz.t-com.hr, marko.lajtman@ck.t-com.hr ) 1 Polytehcnic of Varaždin, J. Križanića 33, HR-42000 Varaždin, Croatia 2 Lajtman j.t.d., Glavna 2a, HR-40321 Mala Subotica, Croatia Abstract. This paper describes the music production of a rockabilly composition with addition of big band brass sound, and is based on the bachelor thesis of the second author. In the preproduction phase the music genre and style were defined, and the full arrangement was pre- pared. The standard music production stages, recording, mixing and postproduction, were all done by using the Digital Audio Workstation concept. The recording, in- cluding a dozen of the brass sections’ lines, is done by the one instrument at a time method. Furthermore, all the lines of a particular brass section were performed by only one player. The richness of the sound could proba- bly be better if more players were involved and if the whole sections were recorded at once, but in that case the afterward time alignment of the individual tracks would be impossible. By taking our approach and by extensive time editing of the brass tracks, an excellent rhythmical accuracy and punchy sound is achieved. The produced song presents a good blending of the rockabilly rhythmical basis, the big band brass sound, and the orig- inal ethno-rock style of the band that performed it. The song is about to appear on their new album. Key words: music production, rockabilly, big band brass sound, sound recording, editing, mixing, postpro- duction, recording of brass instruments one at a time. Sažetak. Ovaj članak opisuje glazbenu produkciju rock- abilly skladbe uz dodatak zvuka puhača velikog jazz- orkestra, i temelji se na završnom radu dodiplomskog stručnog studija drugog autora. U fazi predprodukcije definiran je glazbeni žanr i stil, te pripremljen potpuni aranžman. Faze standardne glazbene produkcije, snima- nje, miješanje i završna obradba, obavljene su uporabom koncepta digitalne audio radne stanice. Snimanje, uklju- čujući i tuce dionica puhačkih sekcija, obavljeno je me- todom instrument po instrument. Nadalje, sve dionice pojedine puhačke sekcije odsvirao je samo jedan puhač. Bogatstvo zvuka je vjerojatno moglo biti bolje da je bilo uključeno više svirača i da se snimala cijela sekcija od- jednom, no u tom bi slučaju naknadno vremensko pode- šavanje pojedinih dionica bilo nemoguće. Uz naš pristup, te uz uporabu sveobuhvatnog vremenskog editiranja, ostvarena je izvrsna ritmička točnost i zgusnut zvuk. Producirana pjesma predstavlja dobar spoj rockabilly ritmičke osnove, zvuka puhača velikog orkestra te izvor- nog stila izvođačkog sastava, i bit će objavljena na nji- hovom novom albumu. Ključne riječi: glazbena produkcija, rockabilly zvuk puhača velikog orkestra, snimanje zvuka, miješanje zvu- ka, završna obrada, snimanje puhača jedan po jedan. 1. INTRODUCTION The standard music production generally deals with the recording, editing, mixing and mastering of music. To- day it is quite common that the instrumental and vocal arrangements, as well as other creative, very often itera- tive, phases, like selection of instruments and definition of their particular and global sound, are also intermixed with the recording and mixing process. This is especially so for the production of the contemporary bands without many members, or the songwriter-performer-producer teams who want to have the control of the whole produc- tion process. On the other hand, when dealing with more complex compositions, with many people and larger orchestras involved, sticking to the standard music pro- duction concept is more efficient. Here one expects that the composition is well defined, that the arrangement is correct and musically functional, and finally, that musi- cians are prepared to play their parts. Only then we can expect that the standard music production chain will do the rest of the job. In this article we present a production of a musical piece in which the big band brass sound supports an up- tempo rockabilly composition. The original idea came from the Croatian ethno-rock band Kom3dija (named after the Croatian word for comedy), who wanted to record a song with added brass sound. In their Megji- murje region such a sound is very popular and played in the folk groups called bandisti.1 The idea was ambitious and brave. Their small budget was supported only by a big enthusiasm and friendship with the local Čakovec Big Band –– an amateur jazz orchestra composed of ta- lented and educated musicians, many of whom were graduates from music schools. The idea turned out to be even braver when Kom3dija members decided to do all the recording in the same studio in which they have had recorded their standard- lineup ethno-rock songs. It is a well equipped, but cer- tainly not big, two-room recording facility, called Jazbina, owned by the second author of the paper (Figure 1a and 1b). It has a 5.8 4.7 2.1m control room ( 27.3m , 57.2m ), and an acoustically treated 4.3 5.5 2.1m recording room 23.7m , 49.7m !. Because of the small height of the recording room, a special attention was paid to providing the highest possible absorption of its ceiling. 1 Megjimurje region term for the band members and the band.
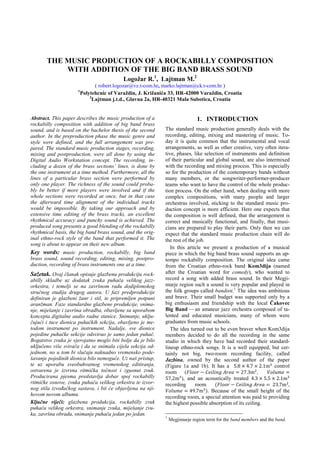
  • 2. Figure 1a. Jazbina recording studio control room. Figure 1b. Jazbina recording room. Furthermore, to reduce the number of wind instrument players to the minimum, it was decided that a few best members of the big band would do all the recording on the “one instrument at a time” basis. The procedure common in rock and pop production was now extended to the jazz wind instrument sections. After all this corner-cutting decisions, a few questions arose. Would the big band brass sound come out rich and groovy? Would it blend into the rock sound and the gen- eral ethno-rock concept of the band? Would the final recording suffer because of implementing instruments which are not in the standard lineup and do not partici- pate in, either rehearsals, or in the formation of the song and its sound? In the further text we address all these questions and explain how they were answered in the course of the preproduction, and the standard music production phases: recording and editing, mixing, and postproduction. 2. PREPRODUCTION The preproduction phase includes dealing with all the necessary things that need to be done before the actual recording sessions start. In this work we cannot overem- phasize the importance of this phase, and, as suggested in the introduction, for the projects of this kind we advocate the standard production procedure. Before getting into details, a few general things will be stressed. The song’s common data are presented in Table 1. Among other things, the authors and performers are mentioned here. Regarding the music production, it was the task of the second author of this article to do all the practical work, starting from the full technical logistics required by the studio facility, through organization and synchronization of the sessions, up to the recording, mixing and postpro- duction. Above all that, the Kom3dija band assigned him the duty of music producer, a person who would be re- sponsible for the final sound and the recording as a whole. Their trust was based on the cooperation in pre- vious successful projects. They expected that their artis- tic visions would be fully realized, and if not, the pro- ducer was to blame! The first author provided some modest counseling during the mixdown process, and contributed mostly to the academic aspects of the project by mentoring the bachelor thesis [1], and by preparing this paper. 2.1 The importance of arrangement Thanks to the fact that all the participants of the project were aware of the need for a fully professional approach to the involvement of the wind instruments, the first im- portant steps in this endeavor were accomplished suc- cessfully. In this matter, improvisation of any kind would probably be disastrous. Having this in mind, the band first recorded five demo songs to decide which would be the best for adding the brass sound to it. The songs were inspected by the Čakovec Big Band leader and conduc- tor, who was also an experienced jazz arranger (Table 1). He discussed his opinion with the producer, and with the Kom3dija band members. Finally, a rockabilly song, which was quite off the band’s standard ethno genre, was chosen. Table 1. The Psycho Billy song essentials. Song Title: Psycho Billy (In Croatian: Sajkobili) Duration & Tempo: 3min 30s at 220bpm Genre: Rockabilly + the big band brass sound Words and Music: Igor Baksa Arrangement: Mario Jagec Performed by: Ethno-Rock Band Kom3dija: • Igor Baksa – vocal, el. guitars, • Miloš Rok – clarinet, • Neven Kolarić – el. bass, • Marinko Marcijuš: drums, & Čakovec Big Band members: • Igor Hrustek – trumpets; • Filip Horvat – trombones; • Mario Jagec – saxophones. Recorded, edited- and mixed by: Marko Lajtman in Jazbina Recording Studio, Lajtman j.t.d. Mala Subotica, Croatia, 2009 – 2010. Produced by: Marko Lajtman Editions: To be published on Kom3dija album Prvi svjetski mir (The First World Peace), for Dallas records, Zagreb. Web availability: On selected specialized and other sites – after publishing at the end of 2011.
  • 3. The arranger made the complete orchestration for the song, that is, not just for the wind instruments, but also for the electric bass, electric guitars, and the drums. By having the arrangement fully accomplished, we avoided the mistake that is often made by inexperienced musi- cians and producers who start the recording prior the composition is finished. So be warned: the big band sound starts with a properly written music score! This is, of course, valid for inclusion of any kind of orches- tras, ensembles, or instrument sections containing several instruments, in any kind of music production. Especially so when they appear in music projects as guests. Moreo- ver, in our case the orchestration had to assure a nice and distinctive amalgamate of different musical styles. The arranger prepared the score, printed the instrumen- tal excerpts, and delivered them to the musicians for practicing. A few rehearsals were conducted by the big band leader before the recording took place. Also, during the recording sessions, he assisted the musicians in find- ing the right groove and getting the best from their per- formance. Just before the recording started, it was de- cided to bring the tempo up from 210 bpm to 220 bpm. This crucial decision helped in achieving the right up tempo feel of the song. The performers had to adapt to the change on the spot. This required slightly higher technical skills and more concentration, but was wel- comed by everyone because the groove was improved, and the song finally sat in place. 2.2 The composition’s musical foundations As was already mentioned above, our song is a mix of a rockabilly theme with addition of the big band brass sound. Since the rockabilly is based on the plucked string instruments, primarily guitars, E major tonality came as a good choice --- at least for the rock part of the band. On the other hand, this is not so common tonality for the most of the wind instruments, requiring some adaptation in playing. However, as we shall soon show, a bit strange tonality for the brasses could be creatively used. The main arrangement parts are composed in the scheme of questions and answers. In the main brass theme that starts in the intro, the trumpets play in the four voice harmonies, doubled by the trombones one octave lower. The saxophones answer in a five-voice harmo- nized theme. During the vocal parts, in their first pas- sage, the saxophones start their short fills. They are backed up by the trumpets and trombones in the second passage (see also 2.4). In order to avoid masking of the vocal by the brass lines, the effect of shallow tones were used in the saxo- phone parts overlapping with the vocalist. The shallow tones appear when the most of holes on the sax are open, which we refer to as the hollow positions. They have less of the basic tone and lower aliquots, and sound thinner than the other neighboring tones. On all saxophones, the shallow notes are A4 – C#52 . On Eb alto sax these note 2 With middle C = C4, according to the scientific (American) pitch notation. According to the Central European notation, middle C = C1 = C’ (= Ger. Eingestrichenes C ). To convert from the scientific to this notation, number 3 must be subtracted for the octaves with scientific number n ≥ 4. Below C1 there come: C kleines, C großes, C kontra, etc. values correspond to the concert pitch tones one major sixth lower: C4 – E4. On the baritone sax everything sounds one octave lower than on the alto, so the shallow tones are: C3 – E3. On the tenor Bb sax the notes A4 – C#5 give the tones one octave and one major second lower, i.e. the concert pitch tones: G3 – B33 . Good players know how to compensate for the shallow sounding notes, thus making them less obvious. On the other hand, here it can be used to a good effect. Since the song was in E-major, the highest notes played by the alto saxophones could be chosen to be the shallow ones. E.g. in the tonic E-maj chord, the shallow tone E4 appears. In the subdominant A-maj chord the shallow tones are C#4 and E4, and in the dominant B-maj chord it is D#4. In the seventh and ninth chords more shallow tones can appear. If choosing the highest chord tones to be the shallow ones during the vocal lines, the saxes will naturally sound a bit thinner in their lower and mid frequency range. This provides a natural dip in the frequency range important for the vocal presence. On the other hand, when there is no vocal, the fullest saxophone notes F5 – B5 can be played, which on alto sax correspond to the concert pitch tones G#4 – D5. In this way the saxophone arrangement helps in providing of the natural equaliza- tion with an important musical function. Because there is no analogy to the shallow tones on the trumpets and trombones, they were not played on top of the vocal and solo lines. The exceptions were ends of the refrains, where they have the fp4 effect followed by a crescendo. The hollow positions are also used during the guitar and clarinet solo parts. At first the saxophones play in unison, then in duet, and only at the end of the phrase in the full chords, to avoid interference with the soloist. The trumpets and trombones play only the short accents. At the end of the solo, all the wind instrument lines intert- wine with each other to increase the suspense. This is evident mostly at the end of the last clarinet solo, where the short sax accentuations exchange with the trumpets and trombones. This play is furthermore emphasized by panning the two groups of the wind instruments on the opposite sides (see also 4). The end of the song comes in the half tempo, with the wind instruments playing the harmonized boogie-woogie theme and the cadenza in full ff (fortissimo, compare also 2.4). 2.3 Instruments The full instrument list is presented in Table 2. The mus- ical basis of the rockabilly composition is played by the rock rhythm section. The drums were played in the rock style. Instead of the upright bass, often found in rockabil- ly, the electric bass was used to conform to the Kom3dija standard lineup. The electric guitar had the important function of playing a continuous boogie-woogie riff in the classic rock & roll style. It also doubled as a solo instrument close to the end of the song. 3 B3 in Anglo-American notation = H kleines in the Central- European notation. 4 fp = forte-piano, dynamical specifications of playing forte and then immediately piano. The fp is often followed by a crescen- do, possibly on the same tone.
  • 4. The commonly known division of the wind instruments is into the two groups: • Brass instruments – trumpets and trombones; • Woodwind instruments, in our case, and normally in the jazz big bands – saxophones and clarinets. The clarinet is a classic big band woodwind instrument. The saxophone has the same sound producing principle by using the reed as an oscillating element, but is made of brass. Being a kind of a hybrid, it is often omitted from the classical woodwinds (inspect e.g. [2]). In the more precise Hornbostel–Sachs classification based on the sound creation and sound formation physical prin- ciples, saxophones are the single reed instruments with conical bore [3]. Without going into the details of the nomenclature and genealogy, throughout the text we shall use the standard colloquial terms which are also adopted in the American jazz and pop terminology: • Brass sound, brass section, or simply brass, to cover all the brassy wind instruments in jazz and other pop bands – trumpets, trombones and saxophones; • Since the classical woodwinds instruments (clarinets, flutes, oboes, bassoons) rarely play in larger sections in the pop and jazz bands, but mostly appear solo or in duets, we usually speak of them separately. Another peculiarity regarding the appearance of clari- net in our project deserves a short elaboration. As can be seen from the Table 2, it is a standard instrument in our ethno-rock band, highly contributing to the band’s first epithet – ethno. The ethno role of the clarinet is to bring the melodic folk tunes with its smooth, noble, and slightly wistful tone, thus making a contrast and counter- balance to the harsher rock sound provided by the guitar- based part of the band. It turns out that, in this song, the clarinet will have two roles: to appear as a big band household instrument, and to present a link to the stan- dard band repertoire and its ethno roots. Table 2. Instrumental sections and instruments. S e c t i o n I n s t r u m e n t / Voice Rhythm Section Drums El. bass Hollow body el. guitar, for: – the guitar boogie riffs – the guitar solo Brass Instruments Trumpets × 4 lines Trombones × 4 lines Woodwinds (wood and brass reed-based wind instruments) Clarinet × 1 line Alt Saxophones × 2 lines Tenor Saxophones × 2 lines Baritone Saxophone × 1 line Vocals Lead male vocal 2.4 The song development The song starts with a classic 12-bar boogie-woogie rhythmical riff played on electric guitar, which establish- es the rockabilly sound. The brasses come in with a few chord stabs at the end of the 12-bar intro and, together with a jazzy, swinging, drum break, lead us into the second 12-bar passage. Here, on the top of the boogie- woogie riff, a classic big band swing theme appears with the full brass sound. After the brass theme resolves with a typical downward glissando and the drums stop on the last two beats, the preparation for the vocal part is made. When the vocal starts, only the guitar riff––accompanied by the bass and drums––continues its rhythmical pattern. This lasts for the whole first 12-bar A chorus. There are no brasses here, so more space is left for the vocal to establish itself and to bring out the melody with the introductory text lines. The brasses join in the second repetition of the A chorus, filling in between the vocal parts. They rise in complexity and power, building up the tension in the third A chorus. At the end of it, the classic 4-bar blues cadence is melodically emphasized and repeated twice into the total of 8 bars –– resulting in a part that has the strength and role of a B chorus. Thus the 12 + 4 scheme turned into an 8-bar part that can be viewed as a short- ened A chorus, and an 8 bar B chorus. The latter delivers the strongest lyrics line, and repeats it twice5 . The B chorus brings the climax, the resolution of which con- cludes the first part of the song. The song continues with a light variation of the brass swing theme from the intro, and is followed by (only) two A choruses. They bring new, witty and humorous, verses that grab the listener’s attention. In the second A chorus the brasses come in and lead us to a classic boo- gie-woogie bridge. Here, the first 4 bars on the tonic degree are doubled for the total of 8 bars. The rhythm section stops, except for the high-hat cymbal. The in- struments hit the tutti chords, while the vocal brings the higher tension melody with stronger lyrics. At the begin- ning of the bridge the chords accentuate the first beats of every two bars, then first beats of every bar, then every two beats within a bar, and finally the acceleration and suspense resolve by moving and continuing the boogie- woogie chord progression to the subdominant degree. The ending of the 12-bar scheme again turns into the climax of the B chorus, which closes the second third of the song. After having heard the B chorus twice, the song dy- namics and brass arrangement go down to mezzo piano, and introduces the clarinet solo. This change of dynamics contributes to the development and dramatic context of the song. The clarinet leads its cheerful Dixieland melo- dy in mezzo-forte, while the brasses grow in arrangement and dynamics. After the clarinet solo, the vocal repeats one (shortened) A chorus which immediately ends in the B chorus. This is followed by two solos, each lasting for the full 12-bar boogie-woogie phrase. The first is a rock- abilly-style solo on electric guitar, and the second is a stronger clarinet solo, which now has to fight through the more prominent brasses. In the last passage of the 12-bar scheme the vocal concludes the song by repeating just the B chorus text5 during the A chorus part. The last four bars are not repeated as before, but are “stalled” by switching to the half tempo, making this last, fourth B chorus, special and more dramatic. The last two bars are a classic boogie-woogie cadenza, being also a standard in Dixie, blues, swing and jazz in general (already men- tioned in 2.2). It brings the song to an end, which is fur- thermore affirmed by a short glissando stab, starting from the tonic E6 chord and going downward in intonation and dynamics. 5 The literal translation of the Croatian line is: “He is my friend, his name is Psycho Billy”.
  • 5. 3. RECORDING AND EDITING The recording microphones are listed in Table 3. A Tas- cam DM-3200 digital mixing console served for collect- ing the microphone signals into its high quality micro- phone preamplifiers, and for the 44.1kHz/24-bit AD con- version. The computer connection was provided through the IF-FW/DM mkII 32-channel firewire interface. The recording was done in Steinberg Nuendo® 3.2 host pro- gram on the PC platform, maintaining the same 24 bit dynamic resolution and 44.1kHz sampling frequency. The instrument tracks were laid down one by one, starting with drums. As was already mentioned in the introduction, the same recording principle was used also for the wind instruments. But let’s start with a short sur- vey of the recording stage according to its chronology. 3.1 The drum kit recording Both, the rockabilly drums and the big band jazz drums should sound naturally on recordings. So, our goal was to maintain the impression of the natural sounding drums, played by a real drummer, but closer to the rock produc- tion. The usual alterations of the drum sound from its direct acoustic appearance––due to the use of close mik- ing, EQs and dynamic processors––are considered as expected by a modern listener. The drums will still be perceived as “acoustic and natural”, just more “phono- genic”. The processing is applied to make the sound a bit punchier and more up front, and thus more adapted to the recording and reproduction medium. The Sonor Force 2003 drum kit with metal snare drum was used. The drummer, well acquainted with the song, was governed by the host program metronome at 220 bpm. In the end he halved the tempo as needed. If there had been more subtle tempo changes, we should have them preprogrammed, e.g. by using a tempo track. Bass drum. The bass drum was recorded with Sure Beta 52a microphone, placed inside the small opening (Φ ≈ 15cm) in the back membrane. The microphone was pushed inside the drum body up to the half of its length, and directed toward the beater hitting zone. Prerecording equalization was done by inserting the Behringer Tube Ultra-Q T1951 equalizer into the signal path, and choos- ing a peaking curve for +4dB boost at 60Hz, to emphas- ize the “thump” part of the bass drum sound. Snare drum. The industry standard Sure SM57 was put on the snare. It is a classic choice for both PA and studio applications. The microphone was placed at the drum edge, 6 cm above and in parallel to the drum skin, close to the rim (Figure 2). A prerecording equalization was Figure 2. The snare drum recording. Shure SM57 is placed close to the edge, in parallel to the drumhead, and 6cm above it. The picture is taken with gratitude from [4]. Table 3. Recording microphones. Micro- phone Trans- ductor Polar Char. Freq. Range Usage Shure SM57 Dynamic Cardioid 40 – 15000 Hz Snare dr., el. guitars, clarinet Shure Beta 52A Dynamic Super- Cardioid 20 – 10000 Hz Bass drum Sennheiser e604 Dynamic Cardioid 40 – 18000 Hz Tom-tom Shure Beta 58A Dynamic Super- Cardioid 50 – 16000 Hz Clarinet Rode NT5×2 (matched) Condenser Cardioid 20 – 20000 Hz Trumpets, trombones, saxes, overheads sE2200a Condenser Cardioid 20 – 20000 Hz Vocal done on the second channel of the tube Ultra-Q, set to +4dB HF shelving boost starting at 3kHz, to enhance the snare component and add freshness to the sound. Tom-toms. There were two tom-toms in the drum kit, the mid and the floor tom, of which only the former was used. It was miked with the Sennheiser e604, slightly to the inside of the rear rim, at the angle of 450 to the drum- head axis. The distance from the drum skin was carefully adjusted by listening to the sound and trying to benefit from the microphone proximity effect. No prerecording processing of any kind was done. Overhead recording. The popular overhead microphone technique is used for collecting the global sound of the drum kit with its cymbals. A pair of well placed micro- phones, possibly matched, will provide a natural stereo sound image of the drums that is close to how we hear them in a given acoustic space. We applied the recog- nized recorderman overhead technique. It is quite simple and yields excellent results with only 2 or 3 micropho- nes. A detailed description for the recorderman drum setup may be found in [5]. The technique ensures that: • The snare and the bass drums are well centered in the stereo image, because the distances from each of them to both of the microphones are equal (resulting in the equal loudness and equal phase relationship). • If the close microphones are used for the snare and bass drum, the interference of their signals with those of the overheads results in no audible problems. • The captured sound will be close to how the drummer hears it. One of the important advantages of the recorderman technique is the relatively close position of the overhead microphones comparing to other overhead techniques. This makes it very good for the low ceiling spaces as was ours. There is not much interference from the early ref- lections and reverberations from the nearby surfaces that
  • 6. are usually introduced when further apart overheads are used. Although our ceilings were made highly absorbent, we still used the above technique for its tight, punchy, and yet natural, sound, that fits our composition’s genre. In our case, a matched pair of Rode NT5 microphones was used for the overheads, bringing the total number of the drum microphones to five. 3.2 The electric bass recording One of the specifics of the rockabilly sound is energetic staccato playing on the upright bass. As was already discussed in 2.3, here we had a band with a standard rock rhythm section, so that the bass line had to be played on the electric bass. The bassist was supposed to resemble the rockabilly mood by playing the cut-off, or “stopped”, notes. He followed the bass line as notated in the ar- rangement score, and was governed by the rhythm of the recorded drum tracks. The Yamaha RBX 260 electric bass was recorded directly into the Tascam digital con- sole. The equalization was made on the electric bass alone, by adjusting its pickups and onboard passive equa- lizing filters. 3.3 The electric guitars recording To get the authentic rockabilly sound, the band leader and guitarist borrowed Washburn J9, a hollow body electric guitar. It appeared on the two el. guitar lines: the rhythmical boogie-woogie riffs, and the solo part. The following two electric guitar amplifiers were used: i. Marshal Valvestate 8040 combo, with a tube pream- plifier on the so called “boost channel” and a transisto- rized amplifier –– for the rhythmical riffs with just a hint of distortion. ii. Laney combo full tube amplifier –– for a bit more dis- torted sound on the rockabilly guitar solo. Figure 3. The placement of the microphone SM57 in front of the Marshall Valvestate 8040 combo amplifier. The amplifiers’ speakers were miked with Sure SM57, as illustrated on Figure 3. As usual, the electric guitar sound was carefully prepared on the amplifiers to be as close to what we need as possible. Additionally, the tube equaliz- er was inserted in the signal path to give more warmth and to provide in detail prerecording corrections that were not feasible on the amplifiers. 3.4 The wind instruments recording As was already discussed in the introduction, just one performer presented the whole wind instrument section, and recorded all the necessary tracks one by one. Trumpets and trombones. These classic brass instru- ments were recorded with a small diaphragm Rode NT5 condenser microphone. The signal was fed directly into the Tascam DM-3200. The trumpets are the loudest in- struments in the big band, quite possibly the loudest instruments at all, capable of producing sound pressures of up to 155dBSPL at the horn output. This fact had to be taken into consideration, because even the sturdiest mi- crophones cannot accept the sound levels this high. The NT5 has dynamic range of 143dBSPL at 1kHz test signal. To accommodate for the trumpet high sound pressures and ensure that no distortion will happen, the microphone was placed at the distance of 80 cm apart from the trum- pet horn, 20cm below the horn axis (Figure 4a). Figure 4 a and b. Recording of trumpets (a), and sa- xophones (b). The picture is gratefully taken from [4]. The four lines of trumpets and four of trombones were recorded directly into the host program without any pre- processing. Saxophones. For all our saxophones the NT5 micro- phone was used. It’s high quality small diaphragm proved to be a good choice for the wind instruments in general. The microphone position was slightly off axis to the right, pointing to the spot in the middle of the instru- ment body, approximately 50 – 75 cm apart (Figure 4b). Fine adjustments were done for every of the three saxo- phone types, by carefully listening to their sound. In total 5 saxophone lines were recorded: 2 alto, 2 te- nor, and 1 baritone, as outlined in Table 2. Clarinet. The typical microphone position for the clari- net recording is shown in Figure 5. The microphone is placed on the side (to the right on the picture), pointing to the lower part of the instrument, but not to the bore. The intention was to get the sound evenly from both, the wooden body, and the tube opening. Figure 5. Clarinet recording. The microphone diaphragm axis is further off the instrument axis (on the picture to the right [4]). Although there was only one clarinet line in our ar- rangement, we recorded it separately for:
  • 7. i. The parts were it was playing together with the brass instruments –– with one Rode NT5, as shown on Figure 5. ii. The clarinet solos in the last third of the song two Shure Beta SM58 microphones placed in the NOS stereo technique [6]. NOS is similar to the technique (with distance d = 17cm, = 1100 ) but with greater distance between the micr phones and narrower angle (Figure technique to capture more integral clarinet sound. Figure 6. NOS stereo recording technique angle was ±40.50 from the line of symmetry The practical choice of the angle is 900 (the 3.5 Vocal recording The recording of the lead vocal was straightforward. The signal coming from the sE Electronics 2200a large diap ragm condenser microphone was fed directly into the DM-3200 preamplifiers. The singer’s fined the overall sound of Kom3dija band the important task of shaping the vocal such a way to artistically unite the band’s rock genre with the rockabilly style on one hand jazz style arrangement on the other. 3.6 Editing One of the key benefits of the one-by ments recording was evident in this Thanks to the capabilities of modern software, the full and precise time editing complished. Rhythmical errors on any of the (lines) within the wind instrument section corrected. This, of course, would not be possible if the whole sections were recorded. The editing procedure is very time consuming, but is also straightforward. The nuances and the final effects of the moving of audio parts or audio samples depend the host program. However, high precision and great musicality are required in the process. feel what the ideal rhythmical phrase “groove” is, and adjust the off-time parts accordingly. The final results were very good. smooth-running and swingy, and the achieved rhythmical accuracy was very satisfactory. 4. MIXING The audio material was mixed in the same host pro it was recorded in –– Nuendo 3.2. It was done using any external equipment, according to the well known concept In the Box (ITB). It designates that all the tasks are done within a DAW (Digital Audio Workst her with the brass one Rode NT5, as shown on the in the last third of the song –– with 58 microphones placed in the NOS NOS is similar to the ORTF = 17cm, and angle α = ) but with greater distance between the micro- Figure 6). We used the gral clarinet sound. . NOS stereo recording technique. The original NOS etry, adding up to 810 . the picture is from [6]). vocal was straightforward. The 2200a large diaph- ragm condenser microphone was fed directly into the ’s voice largely de- band. Here, he had vocal interpretation in band’s basic ethno- on one hand, and the by-one wind instru- was evident in this production stage. capabilities of modern audio recording editing could be ac- hythmical errors on any of the instruments wind instrument sections were carefully This, of course, would not be possible if the very time consuming, but is nuances and the final effects of parts or audio samples depend on . However, high precision and great d in the process. The editor must mical phrase, and the correct time parts accordingly. . The groove was and swingy, and the achieved rhythmical material was mixed in the same host program Nuendo 3.2. It was done without ment, according to the well It designates that all the (Digital Audio Worksta- tion), i.e. within the realm of software or possibly the hardware installed in it. only the former that took place. Since the instruments were right sound––as desired or at least very sired––no sound alterations w first, rough mix. A frequent mistake is to start tion on individual instrument tracks global sound image. This often ductive or excessive use of fre processors. In the preparation of the rough mix, w wind instrument sections by tions between particular instrumental lines. was routed to a stereo subgroup for easier pulation. Afterwards, the similar rock band rhythm section, and the solo tracks. was the definition of the approximate instrument levels and their positions within the stereo image ( Figure 7. Instrument positions with After defining the rough mix, the song was carefully analyzed. The defects noticed were attributed to particular instrument sections and their individual tracks. These had to be improved by applying frequency and dynamics modif In order to adequately deal with various aspects of audio material processing, every ticularly the recording, mixing and mastering engi should be well acquainted with the frequency ranges the instrument’s fundamental tones monic or overtone contents. One excellent chart contai ing both of these can be found in Modifying of the dynamic range is similarly important, requiring knowledge and skills in applying a processing to each track. The mi expert in hearing and analyzing of the audio material, in diagnosing the problems and finding ways to solve them. All these actions are especially important in the plex productions like ours. Here the definition, and acoustic coordination of must be achieved during the recording more so in the mixing process. In both, the frequency and dynamic can recognize the following two software run on a computer, stalled in it. In our case it was only the former that took place. Since the instruments were already recorded with the at least very close to the de- tions were done prior making the A frequent mistake is to start equaliza- ment tracks without hearing the This often leads to the counterpro- or excessive use of frequency filters and other preparation of the rough mix, we started with the by defining the volume rela- tions between particular instrumental lines. Every section to a stereo subgroup for easier further mani- similar actions followed for the rhythm section, and the solo tracks. The result approximate instrument levels in the stereo image (Figure 7). within the stereo image. After defining the rough mix, the song was carefully noticed in the global sound image were attributed to particular instrument sections and their individual tracks. These had to be improved by applying frequency and dynamics modifying tools. In order to adequately deal with various aspects of the , every professional, and par- recording, mixing and mastering engineer, should be well acquainted with the frequency ranges of fundamental tones and its higher har- contents. One excellent chart contain- can be found in [7]. ic range is similarly important, ledge and skills in applying a correct The mixing engineer must be an expert in hearing and analyzing of the audio material, in diagnosing the problems and finding ways to solve them. especially important in the com- productions like ours. Here the good audibility, the and acoustic coordination of all instruments, recording phase, and even , the frequency and dynamic interventions, we two types of actions:
  • 8. i.Corrective actions, needed because of the deficiencies in the audio material itself, or because of the way the audio signal will interfere with other signals it the mix; ii.Improving actions, aimed to make the audio material more appealing, where the definition of the appealing is, of course, depending on the music genre and style. Sometimes only the first step will suffice, and sometimes we shall want to make that extra enhancement or produce a special effect. Quite often the same (similar) results can be obtained by taking different routes of action. Which way will be chosen, highly depends on the technical and artistic style, experience, and inspiration of the mixing engineer and producer. The next step in our production was to set a precise mixdown. Although it contained dozens of separate tracks, we had to organize it in a way that would be easi- ly controllable, and that would not burden the creative process of mixing. Our final mixdown was based on defining the rhythm section and the drums first. 4.1 The drum mixing The modern drum kit contains drum and cymbal ele- ments that spread a broad frequency range –– from the lowest frequencies of the bass drum ( ≈50Hz and lower), to the highest cymbal overtones that exceed 16 kHz [7]. Knowing the features and the desired sound of each drum element in a given music genre is essential. Bass drum. On the bass drum the low and high frequen- cy roll-off is used. The high pass filter (HPF) was set at 27 Hz and the low pass filter (LPF) at 12 kHz, both hav- ing the slope of 18dB/oct. The low range around 60 Hz (precisely at 56 Hz in our case) was slightly boosted to get yet higher thump volume (check also 3.1). To em- phasize the kick component of the sound, a high Q peak- ing boost was applied at 4k Hz. This accentuation of the hi-mid frequencies will help the bass drum to be audible on the (small) speakers with inferior bass response. The Waves transient designer TransX Wide served us to shape the signal envelope (see Table 4). The initial attack was slowed down to make the kick a bit softer. Snare drum. The snare drum track was treated with the paragraphic equalizer, which combines the functionality of the parametric equalizer (adjustable peaking frequency and Q-factor), with the abundance of bands and the ap- pearance of the graphic equalizer (sliding gain potenti- ometers). Because no physical damping was provided on the snare drum, the resonance of its top skin had to be removed by applying a high Q factor cut by 16.5 dB at 667Hz. After that the signal is passed through the satura- tor to sound richer. The snare drum sounds great when recorded on the analog tape, as do many other instru- ments. If the signal is recorded with a high enough level, but of course, not too high, the tape enters its soft satura- tion. This is a nonlinear regime which, like every other nonlinearity, generates distortion. Thanks to the marvel of the analog tape medium, this nonlinear response gene- rates nice harmonics. These days we can find affordable plugins which, at least partially, bring back the warmth of analog recordings to digital studios. More equalization was done after the saturator. A little boost is made in the lower end at 250Hz. To help the snare get through the mix, its presence is emphasized a bit by boosting the region around 3kHz. Also, some airy highs were added by applying a shelving equalization at 10 kHz to compensate the loss of high frequencies after the saturator. The signal was send to the effect track for adding the necessary spaciousness. A software simulation of the Lexicon PCM 96 reverberation unit was used, with the “Chamber” type of space. It is important to fine-tweak the reverberation time and other parameters till the ob- tained sound blends with other instruments and sits well in the mix. Tom-tom drum. The tom-tom drum was processed by using the gate dynamic effect to eliminate the unwanted low-level signals picked up from other instruments. The threshold was set at −24.5 dBFS. The gate attack and release times were adjusted to get as smooth, and as unnoticeable dynamic response, as possible. Sometimes, the background signals coming from other drum ele- ments may contribute to the richness of the drum sound and its wider stereo image. However, this is usually not applicable when heavy equalization and post-processing of the drum tracks is applied. The usage of dynamic gates contribute to the enhanced dynamics, and can, depending on the settings, influence the attack and release times of the recorded sound. In that sense, our choice of using gates is correspondent to the classical way of producing the rock drum tom-toms. An alternative to the signal gating in nowadays digital production is the manual editing. The unwanted audio signal can be easily silenced out. On analog, and even on digital, tape recorders, this was possible only for longer pauses between the useful signals. Now we can do that in the host recording programs with a surgical precision, regardless of how short the unwanted signals are. The equalization applied to the tom-tom drum had to reduce its low frequencies, and to stretch its “singing” overtones. The overall guidance was to get a nice, natural sounding tom-tom. Overhead drum tracks. The two mono tracks from the overhead microphones were routed to a stereo subgroup for the joint processing of both channels. The equaliza- tion started by applying HPF set on 500Hz, with the purpose of filtering out the basic frequencies of the bass and snare drum sounds caught by the overheads. The overall drum sound on these two tracks was gently com- pressed by applying the PSP Oldtimer plugin. It is a simulation of the compressor with fixed temporal para- meters (attack and release time), resembling the opto or vintage style tube compressors. A slight make-up gain of 1.5 dB was applied to utilize the extra headroom intro- duced by the compression. 4.2 The electric bass mixing The paragraphic equalizer was chosen to eliminate the bass boominess. A low Q (& ' 1) peaking curve cen- tered at 250Hz was used to make the cut. The harmonic generator was applied to enhance the bass presence in the higher spectrum range, thus helping the bass to get through the mix and to be audible even on the smaller speakers.
  • 9. 4.3 The electric guitar mixing In the rockabilly style the electric guitars are raw, fresh, and slightly distorted, bringing back the sound of the early days of rock music. The Kom3dija’s standard guitar sound was not far from that, only a bit harder, since be- ing influenced by the early punk era. Now the sound was slightly refined and redefined to make it suitable for the rockabilly song (confer also 3.3). Riff electric guitar. The recorded sound was empha- sized by adding the mid and high-mid frequencies. Slight analog tape saturation is added to smoothen out the tran- sients. The low roll-off was applied to filter out the fre- quencies below 100 Hz. After that the sound was com- pressed by Softtube FET compressor in its parallel mode. Here the high compressing ratio of 10:1 was mixed with the bypassing uncompressed signal. Short attack and release times were set, and the look-ahead function was turned on to suppress the fast transient peaks of the plucked strings. Solo electric guitar. To achieve a warm and yet promi- nent sound of the solo electric guitar, we have applied the analog tape saturation simulator again. Afterwards the sound was brightened a bit by cutting the middle fre- quencies. Normally the solo guitar needs not a lot in the high audio spectrum. After all, the best guitar amplifier speakers are of limited range, and start their roll-off at 5 – 6 kHz. However, slight corrections, like raising the frequencies above 4 kHz, will help in making the sound brighter and better defined in the mix. 4.4 The wind instrument mixing The main specific of this work was the implementation of the big band brass sound into the more or less standard rock production. Another thing special was the recording of more than a dozen of wind instrument lines one by one. To achieve the coherence of the tracks on the local and global level, we have always grouped the separate tracks belonging to the same section into one section subgroup. Thus we have provided a means for the further common mixing treatment of the section as a whole. Such an approach highly contributed to the natural sound of the brasses in the final mix. Trumpets. Following the recipe just stated, the separate trumpet tracks were routed to a stereo subgroup, to ob- tain a homogenous trumpet section. The parallel com- pressing was used in the limiting regime (compressing ratio higher than 20:1). The attack and release times were set to long values, to ensure the more natural response. Anyway, the wind instruments do not have a fast attack. High frequencies at 8kHz were boosted by 5.5 dB to emphasize the brassiness of the sound. Trombones. The trombone tracks were compressed individually with a limiter added on output. The individ- ual tracks were then routed to a stereo subgroup. Here the lower mid frequencies from 300 – 400 Hz were cut a little bit, and the highs at 5kHz were raised significantly (+9 dB). Another compressor, with small 2:1 ratio, was put in the stereo signal path to control the sudden peaks. Saxophones. On the first alto saxophone there was a loud resonating region around G4 concert tone (392Hz), which is the E5 note on Eb alto sax. It was satisfactory Table 4. The plugins used in the mixing process. Type Manufact. & Name Usage EQ Waves Q10 - Paragraphic • Snare drum, overheads, tom-toms; • El. bass, solo el. guitar; • Saxophones, clarinet; • Vocal. Waves API 550A • Saxophones, trombones. Waves VEQ4 • Bass drum Softtubes Trident – A – Range • Snare drum, Tom-tom, • El. riff guitar; • Trumpets. Comp- ressor- Waves API 2500 • Wind instruments • Postproduction. Waves RComp • Saxees, trombones; • Vocal. Waves RVox • Trombones Softube, FET Compressor • El. riff guitar; • Trumpets; • Vocal. PSP Oldtimer • Overheads Limiter Waves L3 Multimaxizer • Postproduction Gate Steinberg Dynamics • Tom-tom drum Deesser Waves RDeesser. • Vocal Saturator Stillwell OligarcDrive • Snare drum SoundToys Decapitator • El. solo guitar Transient Designer Waves TransX Wide • Bass drum Harmonic generator SPL Twin Tube • Saxophones Waves RBass • El. Bass Vitalizer SPL Vitalizer • Postproduction Reverb Lexicon PCM Native • Snare drum; • Wind instruments; • Vocal. decreased by applying a high-Q cut by 5 dB on the Wa- ves Q10 (the value of 90 corresponds to Q > 10). On the second alto sax track the resonance occurred around B4 tone (494 Hz, note G#5 on the alto sax)6 , which was suppressed in the same way as above. To avoid accumulation of the basic tones from the similar instruments, the low frequency range around 100Hz was decreased by 2dB. The mid range was boosted at 800Hz to get the mellower sound. Finally, to obtain more “airy” sound, the frequencies above 5 kHz were raised slightly. On the tenor and baritone saxes the low-mid frequen- cies were cut, and the high-mid and high frequencies were raised, with the details depending on the instrument [1]. As before, the individual tracks were routed to aste- reo subgroup for the common dynamic processing, which helped to homogenize the saxophone section. 6 B4 = H1, G#5 = G#2, in the Central-European pitch notation.
  • 10. The Common Brass Section. The three section subgro- ups were routed to a common brass section stereo group. Dynamic processing, now on the third level, was applied again for better blending of the constituents. The total brass dynamic processing can be summarized as follows: • Micro-dynamic processing applied on the individual instrument level (trombones); • Intermediate-dynamic processing on the instrument- section level (trumpets, trombones, saxophones); • Macro-dynamic processing on the global level, for the brass section as a whole (wind instruments less the clarinet). The above procedure follows the usual practice of apply- ing several compressing units with more subtle compres- sion in series, rather than just one unit with severe com- pression settings. After finalizing the dynamics, the reverberation was added to the common brass section. To keep the brasses close to the listener, a reverberation effect with a short, 1.0s, RT60 reverberation time, and emphasized early re- flections, was chosen on Lexicon PCM Native. Clarinet – solo parts. Two mono clarinet tracks were routed to a stereo subgroup and equalized by cutting the low range at 125 Hz and 500 Hz. In the reverb applied, the early reflections were emphasized similarly as for the common brass section. However, we selected a bigger space (medium hall), with longer reverberations (1.7s), on the same plugin as above, in order to give more power and spaciousness to the solo instrument. 4.5 The vocal mixing The Kom3dija lead vocalist is known of his medium raspy voice and an energetic and resolute style of sing- ing. It is equally well suited to various genres, from jazz and rockabilly to punk. During the vocal processing, the attention was paid to preserve the voice vibrancy and dynamics. The first processor in the signal path was Waves RDeesser set at 5.5 kHz to compress the sibilants. After- wards, we had to get rid of an unwanted sound compo- nent at 246 Hz that somehow entered the recording and was enhanced even further in the later stages of the processing chain. A strong 7.5 dB cut was made on the paragraphic equalizer with a high-Q peaking curve. The vocal dynamics was governed by two compressors in series. The first one was set to parallel compressing mode, with a high ratio (10:1) compression in parallel to the original sound (compare to 4.3). The second one was set to a mild compression. Finally, the mono vocal track was routed to a stereo subgroup, with the true stereo Lexicon PCM Native re- verberation plugin inserted in its insert points. The Large Wide Chamber space was chosen. The mixture of the input (dry) and the reverberation (wet) signals was to be carefully set in the plugin itself. This is a less standard way of applying reverberations than the usual sending of signal to a common effect track via the send (auxiliary) busses. Namely, in this way the effect cannot be added to any other tracks. However, when the reverb is used for only one stereo pair of signals, as in our case, this is an alternative giving the same final result. 4.6 Overall mixing After having the complex brass sections already mixed and processed, the final, overall, mix reduced to the complexity of an average rock production. The composi- tion structure and arrangement, presented in 2.4, was to be carefully followed, in order to obtain the desired mus- ical result. With a detailed automatization we have achieved that the brass sound merges well with the rock band sound. It should be perceived as big and powerful, but must never overshadow the rest of the band. Also, where needed, it had to be adequately subdued to give room for the lead- ing lines, like in the beginning of the vocal parts and during the first clarinet solo. The consistency of the rela- tion between the rock and the big band brass sound had to be carefully preserved throughout the song. The pre- cise arrangement and dynamical playing of the brass sections helped us immensely in achieving that task. The lead vocal clearly defines the song and reveals the Kom3dija musical style. The voice is upfront and brings the melodic and textual content resolutely, grasping the listeners’ attention from the beginning. During the clarinet solo, the arrangement is quitter, providing a nice relaxation before the grand finale. In the climax parts during B choruses, in the bridge part, and in the end of the song, the “tutti sound” had to be achieved. However, in difference to the classic big band sound, the electric guitars, the bass and the drums should be also present, reminding us that this is a rock- abilly song and that the rock band is still there. All this demanding dynamics required precisely set au- tomatization. It was programmed in several passages, and in consultations with several participants of the project. 5. POSTPRODUCTION It is a well known piece of advice that the mastering phase of production should not be done in the same place and by the same people as mixing. This final touch in the complex music production chain should be delegated to specialized postproduction and mastering studios. How- ever, many of the mixing engineers practice to finalize their recordings by providing an after-mix or first-stage postproduction. Many people consider such postproduc- tion as being a logical closure of the mixing process, and often do it even if knowing that the postproduction and mastering will be applied later again, possibly in specia- lized facilities. By providing the first-stage post- production, they, at least temporarily, finalize the audio material and make it better sounding for the radio and other presentations. It is a help to their clients who do not need to go elsewhere to get a final product. Very often it can be a single song, a pilot radio version that, might or might not appear on a future album, etc. Regardless if the further postproduction and mastering will be done or not, it is a good practice to save the pure mixdown prior any, or most, of the processing is applied. We may be tempted to leave our “super compressor” in the stereo master channel, but only if sure that it is really needed, and that it does not spoil anything. But, in order to be able to repeat the postproduction process later on, either by ourselves or by others, the preprocessed record-
  • 11. ing should be the starting point. A mastering engineer might require the unaltered mixdown, knowing that her (or his) high quality equipment would do a better job on the material which is not spoiled by previous (inferior) audio processors. From the above discussion it is obvious that most of the people engaged in audio mixing will find themselves doing at least some stages of postproduction. This is especially so in the small recording studios like ours, where most of the audio engineering tasks must be per- formed by a single person. In the after-mix or first-stage postproduction of a ste- reo recording, we usually assume that the following pro- cedures are carried out: • Equalization (also including frequency enhancement, excitement, vitalizing, and similar frequency-response shaping processes); • Compression and limiting; • Other processing, like sound colorization (by the use of harmonizers and chorus effects), stereo image cor- rections and expansions, etc. These actions need not be performed in the above order. Also, they can be performed more than once, or not ap- plied at all. At this postproduction stage we usually deal with only one song or one song at a time. The true al- bum-mastering process must fine-tune the sound images of several different songs, it must level out their mutual loudness, arrange good transitions from one song to another, and assure good overall sound of a music album. A common rule is that the postproduction should deal only with (subtle) corrections of the global sound image. It is not about correcting the mixdown mistakes, like bad sounding individual tracks or wrong level ratios between them. Also, because we affect the whole recording, only the highest quality audio processors should be used, be they in digital or analog domain. The material should be monitored only on the high quality monitoring systems, and at last, being probably the most important of all, the process should be managed by an experienced person. In this project we have also provided the first-stage postproduction, which will be depicted here. The final mastering of the album, on which the song is to appear, is planned to be done in a high quality, professional master- ing suite. This should prove that we have listened to the advice from the beginning of this section. For our postproduction, we used Nuendo 3.2 host pro- gram. A great help in the procedure is the abundance of good quality mastering plugins available today. By kno- wing our monitoring system (the active Alesis M1mk2) and our control room acoustics well, and by having ga- ined the experience from many previous postproduction endeavors, we were ready to accomplish this last task. Fine shaping of the frequency range. The first proces- sor was the SPL Vitalizer, used instead of the standard equalizers. We brightened the global sound in the high- mid region by applying 2dB boost at 3kHz, and by turn- ing on the “process” knob of this multifunctional plugin. Compression. The next processor in the chain was the Waves API 2500 plugin, the software simulation of the renowned industry-standard hardware compressor [8]. It was applied with a low compression rate of 1.5 : 1. The attack time was set to 30ms in order to preserve the tran- sients and the liveliness of the original sound image. The threshold was set in a way to get just a slight dynamic reduction –– not more than 1dB in dynamically moderate parts, and up to 1.5 dB in the loudest parts of the song. The knee of the dynamic response curve was set to soft. The DSP implementation of the API 2500 special high- pass filter THRUST®, included in the Waves plugin, was set to its medium option: MED Thrust. The filter is placed before the compressor’s RMS detector, which has the all important role of the gain reduction by governing the voltage control amplifiers (VCAs). It provides filter- ing of the side-chain control signal in order to get a natu- ral, frequency dependable, compression, with response sketched in Figure 8. The ordinate gives the signal that is fed to the RMS detector. With the MED Thrust the HPF starts at the low end and goes up to 200Hz with the slope (3.01dB/oct (10log10 2 dB/oct (10dB/dec. Here, oct and dec are octave and decade frequency inter- vals, between which the elementary equality holds: 1 oct log232 dec. Further on, in the range from 200Hz up to about 3 kHz, the MED Thrust filter is flat, and up from there the high frequencies are boosted with the same slope HPF as in the bass region. In all, there are three THRUST positions: NORM, flat (working like an ordinary compressor), the mentioned MED Thrust, and LOUD Thrust, with the constantly rising HPF curve with the slope (3.01dB/oct [8]. To explain shortly, the inverse slope from that of THRUST is the well known declining slope of the pink noise energy density: 45 3.01dB/oct . This density halves its value after each octave, keeping the total ener- gy per octave constant. The underlying idea of this pa- tented system is to decrease the compression in the low- er, and increase it in the higher, frequency region, in accordance to the behavior of the pink noise. This reduc- es the excessive gain pumping effect,7 which is in many music genres, including ours, completely unacceptable. Thus the above mechanism enables louder and smoother recordings which still sound very natural. Figure 8. The Waves API 2500 MED Thrust frequen- cy response. From the unit specifications in [8]. 7 Compression is usually triggered by the lower frequency sig- nals, which dominate in the standard audio material, just like in the pink noise. The usual compression suppresses all the fre- quencies equally, so that during compression phase the high frequency signals (including noise) are suppressed for the same amount as the low ones. When the high-level low-frequency signal, e.g. caused by a strong kick drum or bass ceases, the compression stops, and the overall gain raises or pumps up. The high frequency signals or the higher frequency background noise, being present in the global audio material most of the time, burst out, and causes the “breath-like”, pumping, effect.
  • 12. Limiting. The last processor in our postproduction chain was the Waves L3 Multimaximizer, a multiband limiter that controls dynamics in five adjacent frequency bands [9]. The limiting threshold was set so that the maximal attenuation did not exceed 2 dB on the loudest passages. The limiters must have a fast response (attack) times to react promptly to sudden signal peaks. In this plugin only the release time was adjustable for each frequency band. The smooth limiting was achieved by rising the release time to maximum, while still maintaining that the attenu- ation indicators “dance with the rhythm of the music”. The output signal ceiling was set to a value just slightly lower than 0.0 dBFS (-0.3 dBFS), to prevent possible problems that (lower quality) DA converters might expe- rience when reproducing their maximum signal levels. Together with the previous compression, this mild li- miting enabled sufficient dynamical control and the in- crease of the output RMS level for several decibels, while preserving the natural sound of the final recording. Dithering. In the final step of our postproduction, when reducing from the 24 bit resolution to 16 bit CD audio format, the now common dithering process was applied. It was engaged on our last plugin, the Waves L3.8 6. CONCLUSION Thanks to the development of digital audio technology, the high standards of professional audio production are nowadays more and more achievable in the recording studios that cost only a fraction of what was once re- garded as the industry standard minimum. In this work we have described a demanding music production that should prove the above thesis, and also show how small recording studios can be effectively used for the record- ing of the “big sound” of jazz and similar orchestras. To accomplish the desired fusion in which an ethno- rock band performs a rockabilly song with the addition of the big band brass sound, it was a must to start from a full orchestration. The band and the music arranger coo- perated in the definition of the composition, combining the rockabilly specifics with the power and grandness of the big band brass sound. And while the composer and the arranger had to define the musical ideas, while the musicians had to utter the sound of their instruments and bring in the art of their performance, it was the task of the music producer to amalgamate all this into a profes- sionally sounding product. We have described the process of the music production starting with the prepro- duction phase, and followed by the recording, editing, mixing and postproduction stages. The big band wind instruments were recorded one by one. This method, quite uncommon in the music produc- tion of the jazz orchestras, was thoroughly and consis- 8 Dithering is essential in decreasing the effects of quantization error during dynamic reduction, like when transferring from 24 bit to 16 bit resolution. At low level periodic signals it is mani- fested in the appearance of artificial periodic patterns, which are heard as added harmonic content, i.e. the digital harmonic distortion. To prevent this, a low-level noise is summed to the original signal to “disturb and spoil” the harmonic patterns. The result is a less audible distortion, since the ear is less perceptive to the low level noise than to the same level harmonic content. tently carried out. During the recording, the attention was paid to achieve the correct tonal and rhythmical perfor- mance. A precise and comprehensive time editing of the recorded tracks was performed to achieve greater accura- cy. The separate brass tracks were summed into sections (trumpets, trombones, saxophones) and processed within stereo groups, in order to make them sound more homo- genous and punchier. The sections were then summed into a common stereo brass section, with a rich sound, improved punctuality, and good swinging groove. Besides this, during the whole song we had to make sure that the “big brass sound” never overshadows the rockabilly foundation of the song. The guitars had to stay in the mix even in the loudest brass passages. On the top of everything, a prominent and stylish vocal had to bring the simple and catchy melody with funny lyrics loudly and clearly, acting like a cohesion factor that united all the composition elements into one. The ultimate task of music production is to get a fre- quency-wise and dynamically-wise correct recording, which besides all this must also be musically appealing. We hope that our final recording complies with this re- quirement, and proves that our production methods could be used as a model for similar musical projects. 7. REFERENCES 1. Lajtman M, Glazbena produkcija rockabilly skladbe uz dodatak zvuka velikog jazz-orkestra, završni rad br.68/2009, Veleučilište u Varaždinu, Hrvatska [Music production of a rockabilly composition with addition of the big band sound, bachelor thesis, Poly- technic of Varaždin. Croatia]. 2. http://www.en.wikipedia.org , articles Wind Instru- ments, Brass Instruments, Woodwind Instruments, Saxophone (last accessed on May 2011). 3. Erich M. von Horbostel , Curt Sachs. 1914. Systematik der Musikinstrumente: Ein Versuch, Zeitschrift für Ethnologie, vol. 46, 1914; translated as "Classification of Musical Instruments," by Anthony Baines and Klaus Wachsmann, Galpin Society Journal (1961), 14: 3-29. 4. David H, Robert R, Modern recording techniques, Focal press, 2005. 5. http://www.hometracked.com, inquiry: Recorderman overhead drum mic technique (last accessed on June 2011). 6. http://en.wikipedia.org, article: NOS Stereo Technique (last accessed on June 2011). 7. http://www.independentrecording.net/irn/, Interactive Frequency Chart (last accessed on June 2011). 8. http://www.apiaudio.com/2500.html, API 2500 stereo compressor (last accessed on June 2011). 9. http://www.waves.com/Content.aspx?id=255, Waves L3 Multimaximizer (last accessed on June 2011). ACKNOWLEDGMENTS The authors wish to thank all the participants of this project: the Kom3dija members and their leader Igor Baksa, the wind instrument players from the Čakovec Big Band and their leader Mario Jagec.