SlideShare a Scribd company logo
1 of 13
Download to read offline
instructables
This bench o ers a few extra seats at the dinner table
and comes with a lot of -invisible- storage space. Perfect
for arts & crafts supplies, board games or extra pillows
and blankets. The best thing is that you can make this
bench in a day (or two if you want to paint it). Just follow
this guide and you'll be sitting on your own bench in no
time!
Supplies:
Tools
- jigsaw or miter saw
- drill
- wood drill bit 2mm
- screwdriver
- pencil
- tape measure
- sanding paper
- masking tape (or other removable tape)
Hardware
- 32 wood screws 4x80mm
- 36 wood screws 3,5x40mm (minimum, recommend
buying extra)
- 48 wood screws 3,5x20mm (based on 6 screws per
hinge)
- 6 hinges (2 for each lid)
- 6 steel corner brackets 100x70x30mm (or similar)
Wood (see shopping list for dimensions and amount)
- wooden beams 44x44mm
- wooden carpentry panels, thickness 18mm
Optional supplies
- wood ller or putty
- paint or lacquer
- paintbrush
- paper or sheet to protect the oor while painting
- felt pads ( oor protection)
1. So. Much. Storage. Space.
1
Wooden Bench With Storage: Page 1
Wooden Bench With Storage
Start Your Next Project With Teds' Archive Of 16,000 Plans!
Step 1: Preparation
What makes this a quick project is that it requires only a
few di erent parts in only a few di erent shapes and
sizes. All component dimensions are based on standard
sizes for each part, resulting in very little left over
materials.
Note that standard sizes may di er from the stores here
in The Netherlands so be sure to check your local store in
order to get the most out of your material.
Most hardware stores around here have a service to saw
the wood you buy for free or for a very small fee. This
saves you a lot of time cutting all the pieces to size and
makes it a lot easier tting everything in your car ;)
If your store doesn't provide such a service just print out
the shopping list and cut all of the pieces to size before
we begin assembly in the next step. In case the wood
has any rough edges from cutting, use the sand paper to
smooth them before continueing.
1. front view of the frame
2. cross section of the frame
3. cross section of the bench with cushions
4. top view of the bench
1
2
3
4
Wooden Bench With Storage: Page 2
Step 2: Frame
1. overview of the steps in this build
First make sure you have the right components at hand
and make 2 sets of the following parts:
- 2 long beams 44x44x2244mm
- 4 short beams 44x44x312mm (the shortest ones)
- 8 wood screws 4x80mm
Line up the parts on the oor and ask a family member
or friend to hold the parts in place while you drill the
holes.
Get your drill and wood drill bit to drill the holes for the
screws so that they don't split the wood.
IMPORTANT: do NOT drill the holes exacty in the middle
of each beam, but o to the side a little bit. Otherwise
the screws connecting the second part of the frame will
cross the rst screws and might get stuck halfway into
the wood. Keeping the screws about 10mm apart will do
the trick. This means drilling the hole about 5mm o
center. If you want you can mark the places to drill with a
pencil to make sure you start drilling in the right spot.
Drill all 16 holes (8 for each set) and screw in the screws
xing the parts together to make 2 identical frames like
in the 3rd image.
Next get the remaining 8 wooden beams
(44x44x406mm) and line 4 of them up with the 2 frames.
The easiest way to do this is to place the frames upright
and put the short beams on the oor in between. Take 8
wood screws (4x80mm) and place them at each
connection.
Get your drill and drill the 8 holes for all connections and
screw in the screws xing the parts together. Make sure
you do NOT line up these screws with the ones that are
already there. Keep them about 10mm apart.
Once the rst 4 beams are rmly attached to both
frames creating a u-shape you can carefully ip the
frame over creating a n-shape. Place the last 4 short
beams on the oor at each of the intersections. Repeat
the previous action and drill 8 holes and screw in 8
screws in order to attach all parts creating a box-shaped
frame like in the last image.
If you like to be extra safe you can add some additional
brackets to the frame (see Step 4, image 4).
1
Wooden Bench With Storage: Page 3
1. make sure the 2 screws do NOT line up! keep about 10mm apart
1. make 2 of these frames
1. off center so the other screw doesn't cross its path 1. place the frames upright and align the short beams on the floor
1
1
1 1
Wooden Bench With Storage: Page 4
Step 3: Front and Side Panels
1. the u-shaped frame
1. the complete box frame
2. optional extra brackets can go here
1
1
2
Wooden Bench With Storage: Page 5
Before moving on to attaching the panels to the frame,
make sure the frame is as level as possible. Wooden
beams can be twisted slightly which means the box
frame you just assembled can be a little bit wobbly at
this stage. Do not worry, this will all work itself out in the
end!
Turn the frame over a few times and check which side is
the most level and steady on the oor. Line up the 2 side
panels (572x400x18mm) and front panel
(2280x400x18mm) and double check wether they t the
frame like in the last image. The front panel should
overlap the side panels and line up exactly.
In case you have skirting (or baseboards or plinths)
where you want to place the bench, this is the time to
measure them so we can cut a small piece out of the side
panels. This way the bench can be placed right up
against the wall leaving no gaps in between.
Measure the skirting and mark the dimensions on the
corner of each side panel. Before cutting check which
side of the panels look best and make sure to cut the
correct corner so that side will be visible once it is
screwed in place. Use a jigsaw or miter saw to cut the
marked piece of the side panels and sand o any rough
edges.
For each side panel you'll need at least 8 screws
(3,5x40mm) to secure the corners so they don't warp
outwards. Since the corners of the box frame already
have 2 large screws going through, it is best to place the
screws for the side panel o to the sides, like in the 3rd
image. If you have enough extra screws you can put in
one or more extra screws in between the corner screws.
Tip: use masking tape to temporarily secure the panel to
the frame while you drill the holes. This way you can use
both hands for drilling without the panel falling over.
Get your drill and drill holes through the panels into the
beams of the frame. Try to line up the holes with the
center of the beams in order to avoid splitting the
beams. Screw in the 8 (or more) screws to attach the side
panel to the frame.
When both side panels are xed take the large front
panel and line it up with the frame. Use masking tape to
temporarily secure the panel in place and mark the
places to drill the holes. You will need at least 2 screws
for each corner and 3 for each T-connection in between,
which makes 20 screws in total. Again, if you have extra
you can place more screws in between. Mark the places
to drill similar to the side panels: a little o to the side
from each connection to avoid the large screws.
Get your drill and drill holes through the panels into the
beams of the frame. Try to line up the holes with the
center of the beams in order to avoid splitting the
beams. Screw in the 20 (or more) screws to attach the
front panel to the frame.
1. make the cutout a few mm larger than your
skirting so it doesn't scrape against it
1
Wooden Bench With Storage: Page 6
Step 4: Top Panel
skirting so it doesn't scrape against it
1. use at least 8 screws for each side panel to ensure the corners don't
warp
1. the front and side panels should line up nicely
1
1
Wooden Bench With Storage: Page 7
The top panel is there to attach the hinges for the lids to
and to allow the lid to be opened up all the way and lean
against the wall instead of falling back down while
you're searching for crayons.
Since only the edge of the panel is resting on the frame
we will x the panel in place using the corner brackets.
They will go underneath the panel, attaching the panel
to the long frame beam. Lay out the 6 brackets on top of
the panel, in between the frame beams, spacing them
apart as evenly as possible. Get 12 of the remaining
scres (3,5x20mm) and put 2 next to each bracket.
To make sure the panel is ush with the lids, ask
someone to push down a little while you secure the
brackets. Hold the bracket in place underneath the panel
and pre-drill the holes in both the beam and the panel
through the holes in the bracket. Make sure you do not
drill to deep and go through the panel. There will
probably be 2 or 3 holes on each side of the bracket, but
you only need to drill 1 hole on each side. There won't be
much weight on the back of the bench and with 6
brackets the panel will not go anywhere.
Get the 2 screws and screw them in, xing the bracket in
place. Repeat this another 5 times and the top panel is
done!
1. evenly space out the brackets
1. you can use masking tape to secure the panel while attaching the
brackets, or have someone hold it down firmly
1. the corner backets go in between the frame beams underneath the
panel
2. extra structural support (should not be needed)
1
1
1
2
Wooden Bench With Storage: Page 8
Step 5: Painting (optional)
Step 6: Lid Panels
If you want to add some paint or other nish to your
bench, this is the time to do it. When the hinges are
attached painting the lids will be a lot more di cult.
You can choose to ll the screw 'holes' with ller or putty
to create a smooth nish. Note that sometimes these
areas can become more visible when painted because
they are smoother than the wood around it.
I chose to paint the outside of the bench a matte dark
grey and left the rest of the wood inside its natural
colour. To avoid leaving gaps in the paint visible on the
outside I also painted the edges of the panels as well as a
border on the underside of the lid panels. This way you
get a clean nish without having to be very careful with
the paintbrush.
Get your masking tape and mask all the bits you do not
want to paint. For the underside of the lids I taped a
rectangle about an inch from the edge to create a
straight line.
Prop up the bench with some sticks so you can paint the
edges on the bottom and to avoid the paint sticking to
the paper/sheet. You can place the lid panels on some
books and paint the top side. When it is dry turn it over
and paint the border on the bottom side.
Depending on the desired nish you can sand the
panels and add additional layers of paint. Make sure all
the parts are dry before assembing the lids.
Wooden Bench With Storage: Page 9
The lid panels will be attached to the top panel using 2
hinges for each lid. I chose black hinges to match the
bench and these hinges hapened to have 6 holes for
screws. If you use hinges with 4 screws you will need 12
screws less.
Put down the lid panels on top of the frame and make
sure they line up on all sides. I put pieces of 0,5mm
cardboard in between the lid panels to make sure they
would not scrape against each other once they were
xed.
Get your 6 hinges and 36 screws (3,5x20mm) and make
3 sets of 2 hinges and 12 screws. Lay out the hinges on
top of the lids, on the edge between the lid and the top
panel. Make sure the hinges are not in the same place as
the brackets holding up the top panel in order to avoid
crossing screws.
Hold the hinge in place and gently pre-drill the holes,
making sure not to go in too deep. If you use thinner
screws or are con dent the wood will not split, you can
also screw in the screws without pre-drilling the holes.
Repeat this another 5 times to secure the hinges to the
top and lid panels. Test the hinges by opening and
closing the lids to make sure everything works smoothly.
1. make sure the lids don't scrape against each other when fixed in place 1. 4 screws per hinge should work fine as well
1
1
Wooden Bench With Storage: Page 10
Step 7: Enjoy Your Bench!
1. make sure the hinges are not in the same place as the corner brackets
underneath
That is it, your bench is nished! Sit down, relax and
enjoy your hard work.
You can choose to add dividers between the
compartments if you dont want your stu to slide over
to the next compartment. I left the frame open and
haven't had any problems with it.
I had some cushions custom made to t the dimensions
of the lids and add a splash of colour. You can also make
these yourself of course.
I also put some felt pads underneath the frame to
prevent scratching the oor. This also makes it easier to
slide the bench in place and move it around if necessary.
I hope you enjoyed this build and I would love to see
your results! If you have any questions do not hesitate to
ask them in the comments.
Update: optional upgrades
As mentioned by Leon Ward you can choose to add a
back and bottom panel as well as some feet to raise it o
the oor and place the bench anywhere you like. My
advice would be to make the feet high enough to be
able to vacuum underneath the bench.
As mentioned by ChrisWX it is also possible to make the
front panel at an angle to give more room for your legs
and feet while sitting on the bench. You can do this in
combination with the box frame and just make the top
about 4 inches or 100mm deeper than the bottom.
1
Wooden Bench With Storage: Page 11
1. So. Much. Storage. Space.
1
Wooden Bench With Storage: Page 12
I notice that you have no bottom, or back, for this bench. This means that you are using the floor
of the room, and a wall, to contain the contents of the storage area. My thoughts would be to add
a bottom, and a back, make some small 50mm x 50mm feet and then the bench can be placed
anywhere. What say you???
Thanks for the suggestion, Leon! This is definitely an option. In my case we use the bench to
store closed boxes mostly, so it is no problem that it's open. Also we didn't want a gap underneath
so dirt doesn't go under. Makes vacuuming easier.
I would suggest either placing it on the floor directly or use higher feet that allow a vacuum
cleaner underneath. I might add this option to the instructable too.
This might be a dumb question, but all your measurements are in metric? Would it be possible to
get the cutting list, material and hardware in standard measurements? Thank you.
The measurements are indeed all in metric, in millimeters. For us here in Europe those are the
standard measurements ;)
The dimensions I used are a suggestion and are based on available materials in local stores
which means those will probably be different for you. The best thing to do is check your local
store and adjust the dimensions to fit the available materials in order to prevent waste.
Really nice! I think the bright cushions go so well with the dark paint :)
Thank you!
1. option: add back and bottom panels and feet
2. option: angled front panel
3. combination of both options: angled front and raised bench
1
2 3
Wooden Bench With Storage: Page 13
Special Time-Limited Subscriber's Offer

More Related Content

Similar to Wooden Bench With Storage.

소형베틀도면
소형베틀도면소형베틀도면
소형베틀도면Seongwon Kim
 
Easy small wood projects
Easy small wood projectsEasy small wood projects
Easy small wood projectsheatherbarnard5
 
4 classic roubo-style-workbench
4 classic roubo-style-workbench4 classic roubo-style-workbench
4 classic roubo-style-workbenchYadeaHerman
 
Mini Album Binding tutorial
Mini Album Binding tutorialMini Album Binding tutorial
Mini Album Binding tutorialhappyyellow
 
How To Make a Birdhouse
How To Make a BirdhouseHow To Make a Birdhouse
How To Make a BirdhouseUK-OakDoors
 
Wheelchair wheel dryer tutorial
Wheelchair wheel dryer tutorialWheelchair wheel dryer tutorial
Wheelchair wheel dryer tutorialTpicavet
 
Woods Presentation
Woods PresentationWoods Presentation
Woods Presentationjsartoris
 
How to make a cornhole board set
How to make a cornhole board setHow to make a cornhole board set
How to make a cornhole board setKrystle Cook
 
Make your own equipment (Archery)
Make your own equipment (Archery)Make your own equipment (Archery)
Make your own equipment (Archery)kelikados
 
Installing deck boards
Installing deck boardsInstalling deck boards
Installing deck boardsZulaiha Amaria
 
Woodworking projects
Woodworking projectsWoodworking projects
Woodworking projectsjazza patrick
 
Deck-Lounger-Plan
Deck-Lounger-PlanDeck-Lounger-Plan
Deck-Lounger-PlanDan Cary
 
Woodworking: The Essentila "all Purpose" workbench
Woodworking: The Essentila "all Purpose" workbenchWoodworking: The Essentila "all Purpose" workbench
Woodworking: The Essentila "all Purpose" workbenchYadeaHerman
 
Wood tube bamboo journal 6 - italian bamboo rodmakers association
Wood tube   bamboo journal 6 - italian bamboo rodmakers associationWood tube   bamboo journal 6 - italian bamboo rodmakers association
Wood tube bamboo journal 6 - italian bamboo rodmakers associationAnibal Ruben Reyes
 
Make a wooden toolbox
Make a wooden toolboxMake a wooden toolbox
Make a wooden toolboxHAYS NYC
 

Similar to Wooden Bench With Storage. (20)

Coffee table @1
Coffee table @1Coffee table @1
Coffee table @1
 
소형베틀도면
소형베틀도면소형베틀도면
소형베틀도면
 
Easy small wood projects
Easy small wood projectsEasy small wood projects
Easy small wood projects
 
4 classic roubo-style-workbench
4 classic roubo-style-workbench4 classic roubo-style-workbench
4 classic roubo-style-workbench
 
Mini Album Binding tutorial
Mini Album Binding tutorialMini Album Binding tutorial
Mini Album Binding tutorial
 
How To Make a Birdhouse
How To Make a BirdhouseHow To Make a Birdhouse
How To Make a Birdhouse
 
Wheelchair wheel dryer tutorial
Wheelchair wheel dryer tutorialWheelchair wheel dryer tutorial
Wheelchair wheel dryer tutorial
 
Woods Presentation
Woods PresentationWoods Presentation
Woods Presentation
 
Measuring device
Measuring deviceMeasuring device
Measuring device
 
How to make a cornhole board set
How to make a cornhole board setHow to make a cornhole board set
How to make a cornhole board set
 
Make your own equipment (Archery)
Make your own equipment (Archery)Make your own equipment (Archery)
Make your own equipment (Archery)
 
Wallpaper a ceiling
Wallpaper a ceilingWallpaper a ceiling
Wallpaper a ceiling
 
12BY8SHED.pdf
12BY8SHED.pdf12BY8SHED.pdf
12BY8SHED.pdf
 
Installing deck boards
Installing deck boardsInstalling deck boards
Installing deck boards
 
Woodworking projects
Woodworking projectsWoodworking projects
Woodworking projects
 
Deck-Lounger-Plan
Deck-Lounger-PlanDeck-Lounger-Plan
Deck-Lounger-Plan
 
Woodworking: The Essentila "all Purpose" workbench
Woodworking: The Essentila "all Purpose" workbenchWoodworking: The Essentila "all Purpose" workbench
Woodworking: The Essentila "all Purpose" workbench
 
Wood tube bamboo journal 6 - italian bamboo rodmakers association
Wood tube   bamboo journal 6 - italian bamboo rodmakers associationWood tube   bamboo journal 6 - italian bamboo rodmakers association
Wood tube bamboo journal 6 - italian bamboo rodmakers association
 
Exploding box instructions
Exploding box instructionsExploding box instructions
Exploding box instructions
 
Make a wooden toolbox
Make a wooden toolboxMake a wooden toolbox
Make a wooden toolbox
 

Recently uploaded

RAK Call Girls Service # 971559085003 # Call Girl Service In RAK
RAK Call Girls Service # 971559085003 # Call Girl Service In RAKRAK Call Girls Service # 971559085003 # Call Girl Service In RAK
RAK Call Girls Service # 971559085003 # Call Girl Service In RAKedwardsara83
 
Downtown Call Girls O5O91O128O Pakistani Call Girls in Downtown
Downtown Call Girls O5O91O128O Pakistani Call Girls in DowntownDowntown Call Girls O5O91O128O Pakistani Call Girls in Downtown
Downtown Call Girls O5O91O128O Pakistani Call Girls in Downtowndajasot375
 
FULL ENJOY - 9953040155 Call Girls in New Ashok Nagar | Delhi
FULL ENJOY - 9953040155 Call Girls in New Ashok Nagar | DelhiFULL ENJOY - 9953040155 Call Girls in New Ashok Nagar | Delhi
FULL ENJOY - 9953040155 Call Girls in New Ashok Nagar | DelhiMalviyaNagarCallGirl
 
FULL ENJOY - 9953040155 Call Girls in Gtb Nagar | Delhi
FULL ENJOY - 9953040155 Call Girls in Gtb Nagar | DelhiFULL ENJOY - 9953040155 Call Girls in Gtb Nagar | Delhi
FULL ENJOY - 9953040155 Call Girls in Gtb Nagar | DelhiMalviyaNagarCallGirl
 
Gomti Nagar & High Profile Call Girls in Lucknow (Adult Only) 8923113531 Esc...
Gomti Nagar & High Profile Call Girls in Lucknow  (Adult Only) 8923113531 Esc...Gomti Nagar & High Profile Call Girls in Lucknow  (Adult Only) 8923113531 Esc...
Gomti Nagar & High Profile Call Girls in Lucknow (Adult Only) 8923113531 Esc...gurkirankumar98700
 
The First Date by Daniel Johnson (Inspired By True Events)
The First Date by Daniel Johnson (Inspired By True Events)The First Date by Daniel Johnson (Inspired By True Events)
The First Date by Daniel Johnson (Inspired By True Events)thephillipta
 
Hazratganj / Call Girl in Lucknow - Phone 🫗 8923113531 ☛ Escorts Service at 6...
Hazratganj / Call Girl in Lucknow - Phone 🫗 8923113531 ☛ Escorts Service at 6...Hazratganj / Call Girl in Lucknow - Phone 🫗 8923113531 ☛ Escorts Service at 6...
Hazratganj / Call Girl in Lucknow - Phone 🫗 8923113531 ☛ Escorts Service at 6...akbard9823
 
exhuma plot and synopsis from the exhuma movie.pptx
exhuma plot and synopsis from the exhuma movie.pptxexhuma plot and synopsis from the exhuma movie.pptx
exhuma plot and synopsis from the exhuma movie.pptxKurikulumPenilaian
 
FULL ENJOY - 9953040155 Call Girls in Noida | Delhi
FULL ENJOY - 9953040155 Call Girls in Noida | DelhiFULL ENJOY - 9953040155 Call Girls in Noida | Delhi
FULL ENJOY - 9953040155 Call Girls in Noida | DelhiMalviyaNagarCallGirl
 
Lucknow 💋 Escorts Service Lucknow Phone No 8923113531 Elite Escort Service Av...
Lucknow 💋 Escorts Service Lucknow Phone No 8923113531 Elite Escort Service Av...Lucknow 💋 Escorts Service Lucknow Phone No 8923113531 Elite Escort Service Av...
Lucknow 💋 Escorts Service Lucknow Phone No 8923113531 Elite Escort Service Av...anilsa9823
 
Call Girl in Bur Dubai O5286O4116 Indian Call Girls in Bur Dubai By VIP Bur D...
Call Girl in Bur Dubai O5286O4116 Indian Call Girls in Bur Dubai By VIP Bur D...Call Girl in Bur Dubai O5286O4116 Indian Call Girls in Bur Dubai By VIP Bur D...
Call Girl in Bur Dubai O5286O4116 Indian Call Girls in Bur Dubai By VIP Bur D...dajasot375
 
FULL ENJOY - 9953040155 Call Girls in Moti Nagar | Delhi
FULL ENJOY - 9953040155 Call Girls in Moti Nagar | DelhiFULL ENJOY - 9953040155 Call Girls in Moti Nagar | Delhi
FULL ENJOY - 9953040155 Call Girls in Moti Nagar | DelhiMalviyaNagarCallGirl
 
Roadrunner Lodge, Motel/Residence, Tucumcari NM
Roadrunner Lodge, Motel/Residence, Tucumcari NMRoadrunner Lodge, Motel/Residence, Tucumcari NM
Roadrunner Lodge, Motel/Residence, Tucumcari NMroute66connected
 
SHIVNA SAHITYIKI APRIL JUNE 2024 Magazine
SHIVNA SAHITYIKI APRIL JUNE 2024 MagazineSHIVNA SAHITYIKI APRIL JUNE 2024 Magazine
SHIVNA SAHITYIKI APRIL JUNE 2024 MagazineShivna Prakashan
 
Lucknow 💋 Virgin Call Girls Lucknow | Book 8923113531 Extreme Naughty Call Gi...
Lucknow 💋 Virgin Call Girls Lucknow | Book 8923113531 Extreme Naughty Call Gi...Lucknow 💋 Virgin Call Girls Lucknow | Book 8923113531 Extreme Naughty Call Gi...
Lucknow 💋 Virgin Call Girls Lucknow | Book 8923113531 Extreme Naughty Call Gi...anilsa9823
 
FULL ENJOY - 9953040155 Call Girls in Uttam Nagar | Delhi
FULL ENJOY - 9953040155 Call Girls in Uttam Nagar | DelhiFULL ENJOY - 9953040155 Call Girls in Uttam Nagar | Delhi
FULL ENJOY - 9953040155 Call Girls in Uttam Nagar | DelhiMalviyaNagarCallGirl
 
Hazratganj ] (Call Girls) in Lucknow - 450+ Call Girl Cash Payment 🧄 89231135...
Hazratganj ] (Call Girls) in Lucknow - 450+ Call Girl Cash Payment 🧄 89231135...Hazratganj ] (Call Girls) in Lucknow - 450+ Call Girl Cash Payment 🧄 89231135...
Hazratganj ] (Call Girls) in Lucknow - 450+ Call Girl Cash Payment 🧄 89231135...akbard9823
 
Lucknow 💋 Cheap Call Girls In Lucknow Finest Escorts Service 8923113531 Avail...
Lucknow 💋 Cheap Call Girls In Lucknow Finest Escorts Service 8923113531 Avail...Lucknow 💋 Cheap Call Girls In Lucknow Finest Escorts Service 8923113531 Avail...
Lucknow 💋 Cheap Call Girls In Lucknow Finest Escorts Service 8923113531 Avail...anilsa9823
 
Deconstructing Gendered Language; Feminist World-Making 2024
Deconstructing Gendered Language; Feminist World-Making 2024Deconstructing Gendered Language; Feminist World-Making 2024
Deconstructing Gendered Language; Feminist World-Making 2024samlnance
 
FULL ENJOY - 9953040155 Call Girls in Old Rajendra Nagar | Delhi
FULL ENJOY - 9953040155 Call Girls in Old Rajendra Nagar | DelhiFULL ENJOY - 9953040155 Call Girls in Old Rajendra Nagar | Delhi
FULL ENJOY - 9953040155 Call Girls in Old Rajendra Nagar | DelhiMalviyaNagarCallGirl
 

Recently uploaded (20)

RAK Call Girls Service # 971559085003 # Call Girl Service In RAK
RAK Call Girls Service # 971559085003 # Call Girl Service In RAKRAK Call Girls Service # 971559085003 # Call Girl Service In RAK
RAK Call Girls Service # 971559085003 # Call Girl Service In RAK
 
Downtown Call Girls O5O91O128O Pakistani Call Girls in Downtown
Downtown Call Girls O5O91O128O Pakistani Call Girls in DowntownDowntown Call Girls O5O91O128O Pakistani Call Girls in Downtown
Downtown Call Girls O5O91O128O Pakistani Call Girls in Downtown
 
FULL ENJOY - 9953040155 Call Girls in New Ashok Nagar | Delhi
FULL ENJOY - 9953040155 Call Girls in New Ashok Nagar | DelhiFULL ENJOY - 9953040155 Call Girls in New Ashok Nagar | Delhi
FULL ENJOY - 9953040155 Call Girls in New Ashok Nagar | Delhi
 
FULL ENJOY - 9953040155 Call Girls in Gtb Nagar | Delhi
FULL ENJOY - 9953040155 Call Girls in Gtb Nagar | DelhiFULL ENJOY - 9953040155 Call Girls in Gtb Nagar | Delhi
FULL ENJOY - 9953040155 Call Girls in Gtb Nagar | Delhi
 
Gomti Nagar & High Profile Call Girls in Lucknow (Adult Only) 8923113531 Esc...
Gomti Nagar & High Profile Call Girls in Lucknow  (Adult Only) 8923113531 Esc...Gomti Nagar & High Profile Call Girls in Lucknow  (Adult Only) 8923113531 Esc...
Gomti Nagar & High Profile Call Girls in Lucknow (Adult Only) 8923113531 Esc...
 
The First Date by Daniel Johnson (Inspired By True Events)
The First Date by Daniel Johnson (Inspired By True Events)The First Date by Daniel Johnson (Inspired By True Events)
The First Date by Daniel Johnson (Inspired By True Events)
 
Hazratganj / Call Girl in Lucknow - Phone 🫗 8923113531 ☛ Escorts Service at 6...
Hazratganj / Call Girl in Lucknow - Phone 🫗 8923113531 ☛ Escorts Service at 6...Hazratganj / Call Girl in Lucknow - Phone 🫗 8923113531 ☛ Escorts Service at 6...
Hazratganj / Call Girl in Lucknow - Phone 🫗 8923113531 ☛ Escorts Service at 6...
 
exhuma plot and synopsis from the exhuma movie.pptx
exhuma plot and synopsis from the exhuma movie.pptxexhuma plot and synopsis from the exhuma movie.pptx
exhuma plot and synopsis from the exhuma movie.pptx
 
FULL ENJOY - 9953040155 Call Girls in Noida | Delhi
FULL ENJOY - 9953040155 Call Girls in Noida | DelhiFULL ENJOY - 9953040155 Call Girls in Noida | Delhi
FULL ENJOY - 9953040155 Call Girls in Noida | Delhi
 
Lucknow 💋 Escorts Service Lucknow Phone No 8923113531 Elite Escort Service Av...
Lucknow 💋 Escorts Service Lucknow Phone No 8923113531 Elite Escort Service Av...Lucknow 💋 Escorts Service Lucknow Phone No 8923113531 Elite Escort Service Av...
Lucknow 💋 Escorts Service Lucknow Phone No 8923113531 Elite Escort Service Av...
 
Call Girl in Bur Dubai O5286O4116 Indian Call Girls in Bur Dubai By VIP Bur D...
Call Girl in Bur Dubai O5286O4116 Indian Call Girls in Bur Dubai By VIP Bur D...Call Girl in Bur Dubai O5286O4116 Indian Call Girls in Bur Dubai By VIP Bur D...
Call Girl in Bur Dubai O5286O4116 Indian Call Girls in Bur Dubai By VIP Bur D...
 
FULL ENJOY - 9953040155 Call Girls in Moti Nagar | Delhi
FULL ENJOY - 9953040155 Call Girls in Moti Nagar | DelhiFULL ENJOY - 9953040155 Call Girls in Moti Nagar | Delhi
FULL ENJOY - 9953040155 Call Girls in Moti Nagar | Delhi
 
Roadrunner Lodge, Motel/Residence, Tucumcari NM
Roadrunner Lodge, Motel/Residence, Tucumcari NMRoadrunner Lodge, Motel/Residence, Tucumcari NM
Roadrunner Lodge, Motel/Residence, Tucumcari NM
 
SHIVNA SAHITYIKI APRIL JUNE 2024 Magazine
SHIVNA SAHITYIKI APRIL JUNE 2024 MagazineSHIVNA SAHITYIKI APRIL JUNE 2024 Magazine
SHIVNA SAHITYIKI APRIL JUNE 2024 Magazine
 
Lucknow 💋 Virgin Call Girls Lucknow | Book 8923113531 Extreme Naughty Call Gi...
Lucknow 💋 Virgin Call Girls Lucknow | Book 8923113531 Extreme Naughty Call Gi...Lucknow 💋 Virgin Call Girls Lucknow | Book 8923113531 Extreme Naughty Call Gi...
Lucknow 💋 Virgin Call Girls Lucknow | Book 8923113531 Extreme Naughty Call Gi...
 
FULL ENJOY - 9953040155 Call Girls in Uttam Nagar | Delhi
FULL ENJOY - 9953040155 Call Girls in Uttam Nagar | DelhiFULL ENJOY - 9953040155 Call Girls in Uttam Nagar | Delhi
FULL ENJOY - 9953040155 Call Girls in Uttam Nagar | Delhi
 
Hazratganj ] (Call Girls) in Lucknow - 450+ Call Girl Cash Payment 🧄 89231135...
Hazratganj ] (Call Girls) in Lucknow - 450+ Call Girl Cash Payment 🧄 89231135...Hazratganj ] (Call Girls) in Lucknow - 450+ Call Girl Cash Payment 🧄 89231135...
Hazratganj ] (Call Girls) in Lucknow - 450+ Call Girl Cash Payment 🧄 89231135...
 
Lucknow 💋 Cheap Call Girls In Lucknow Finest Escorts Service 8923113531 Avail...
Lucknow 💋 Cheap Call Girls In Lucknow Finest Escorts Service 8923113531 Avail...Lucknow 💋 Cheap Call Girls In Lucknow Finest Escorts Service 8923113531 Avail...
Lucknow 💋 Cheap Call Girls In Lucknow Finest Escorts Service 8923113531 Avail...
 
Deconstructing Gendered Language; Feminist World-Making 2024
Deconstructing Gendered Language; Feminist World-Making 2024Deconstructing Gendered Language; Feminist World-Making 2024
Deconstructing Gendered Language; Feminist World-Making 2024
 
FULL ENJOY - 9953040155 Call Girls in Old Rajendra Nagar | Delhi
FULL ENJOY - 9953040155 Call Girls in Old Rajendra Nagar | DelhiFULL ENJOY - 9953040155 Call Girls in Old Rajendra Nagar | Delhi
FULL ENJOY - 9953040155 Call Girls in Old Rajendra Nagar | Delhi
 

Wooden Bench With Storage.

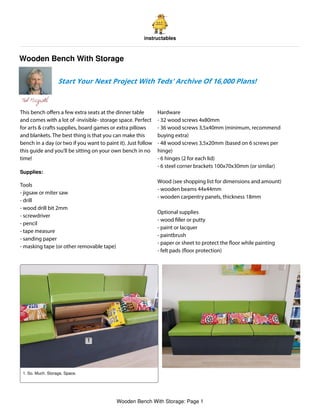
  • 1. instructables This bench o ers a few extra seats at the dinner table and comes with a lot of -invisible- storage space. Perfect for arts & crafts supplies, board games or extra pillows and blankets. The best thing is that you can make this bench in a day (or two if you want to paint it). Just follow this guide and you'll be sitting on your own bench in no time! Supplies: Tools - jigsaw or miter saw - drill - wood drill bit 2mm - screwdriver - pencil - tape measure - sanding paper - masking tape (or other removable tape) Hardware - 32 wood screws 4x80mm - 36 wood screws 3,5x40mm (minimum, recommend buying extra) - 48 wood screws 3,5x20mm (based on 6 screws per hinge) - 6 hinges (2 for each lid) - 6 steel corner brackets 100x70x30mm (or similar) Wood (see shopping list for dimensions and amount) - wooden beams 44x44mm - wooden carpentry panels, thickness 18mm Optional supplies - wood ller or putty - paint or lacquer - paintbrush - paper or sheet to protect the oor while painting - felt pads ( oor protection) 1. So. Much. Storage. Space. 1 Wooden Bench With Storage: Page 1 Wooden Bench With Storage Start Your Next Project With Teds' Archive Of 16,000 Plans!
  • 2. Step 1: Preparation What makes this a quick project is that it requires only a few di erent parts in only a few di erent shapes and sizes. All component dimensions are based on standard sizes for each part, resulting in very little left over materials. Note that standard sizes may di er from the stores here in The Netherlands so be sure to check your local store in order to get the most out of your material. Most hardware stores around here have a service to saw the wood you buy for free or for a very small fee. This saves you a lot of time cutting all the pieces to size and makes it a lot easier tting everything in your car ;) If your store doesn't provide such a service just print out the shopping list and cut all of the pieces to size before we begin assembly in the next step. In case the wood has any rough edges from cutting, use the sand paper to smooth them before continueing. 1. front view of the frame 2. cross section of the frame 3. cross section of the bench with cushions 4. top view of the bench 1 2 3 4 Wooden Bench With Storage: Page 2
  • 3. Step 2: Frame 1. overview of the steps in this build First make sure you have the right components at hand and make 2 sets of the following parts: - 2 long beams 44x44x2244mm - 4 short beams 44x44x312mm (the shortest ones) - 8 wood screws 4x80mm Line up the parts on the oor and ask a family member or friend to hold the parts in place while you drill the holes. Get your drill and wood drill bit to drill the holes for the screws so that they don't split the wood. IMPORTANT: do NOT drill the holes exacty in the middle of each beam, but o to the side a little bit. Otherwise the screws connecting the second part of the frame will cross the rst screws and might get stuck halfway into the wood. Keeping the screws about 10mm apart will do the trick. This means drilling the hole about 5mm o center. If you want you can mark the places to drill with a pencil to make sure you start drilling in the right spot. Drill all 16 holes (8 for each set) and screw in the screws xing the parts together to make 2 identical frames like in the 3rd image. Next get the remaining 8 wooden beams (44x44x406mm) and line 4 of them up with the 2 frames. The easiest way to do this is to place the frames upright and put the short beams on the oor in between. Take 8 wood screws (4x80mm) and place them at each connection. Get your drill and drill the 8 holes for all connections and screw in the screws xing the parts together. Make sure you do NOT line up these screws with the ones that are already there. Keep them about 10mm apart. Once the rst 4 beams are rmly attached to both frames creating a u-shape you can carefully ip the frame over creating a n-shape. Place the last 4 short beams on the oor at each of the intersections. Repeat the previous action and drill 8 holes and screw in 8 screws in order to attach all parts creating a box-shaped frame like in the last image. If you like to be extra safe you can add some additional brackets to the frame (see Step 4, image 4). 1 Wooden Bench With Storage: Page 3
  • 4. 1. make sure the 2 screws do NOT line up! keep about 10mm apart 1. make 2 of these frames 1. off center so the other screw doesn't cross its path 1. place the frames upright and align the short beams on the floor 1 1 1 1 Wooden Bench With Storage: Page 4
  • 5. Step 3: Front and Side Panels 1. the u-shaped frame 1. the complete box frame 2. optional extra brackets can go here 1 1 2 Wooden Bench With Storage: Page 5
  • 6. Before moving on to attaching the panels to the frame, make sure the frame is as level as possible. Wooden beams can be twisted slightly which means the box frame you just assembled can be a little bit wobbly at this stage. Do not worry, this will all work itself out in the end! Turn the frame over a few times and check which side is the most level and steady on the oor. Line up the 2 side panels (572x400x18mm) and front panel (2280x400x18mm) and double check wether they t the frame like in the last image. The front panel should overlap the side panels and line up exactly. In case you have skirting (or baseboards or plinths) where you want to place the bench, this is the time to measure them so we can cut a small piece out of the side panels. This way the bench can be placed right up against the wall leaving no gaps in between. Measure the skirting and mark the dimensions on the corner of each side panel. Before cutting check which side of the panels look best and make sure to cut the correct corner so that side will be visible once it is screwed in place. Use a jigsaw or miter saw to cut the marked piece of the side panels and sand o any rough edges. For each side panel you'll need at least 8 screws (3,5x40mm) to secure the corners so they don't warp outwards. Since the corners of the box frame already have 2 large screws going through, it is best to place the screws for the side panel o to the sides, like in the 3rd image. If you have enough extra screws you can put in one or more extra screws in between the corner screws. Tip: use masking tape to temporarily secure the panel to the frame while you drill the holes. This way you can use both hands for drilling without the panel falling over. Get your drill and drill holes through the panels into the beams of the frame. Try to line up the holes with the center of the beams in order to avoid splitting the beams. Screw in the 8 (or more) screws to attach the side panel to the frame. When both side panels are xed take the large front panel and line it up with the frame. Use masking tape to temporarily secure the panel in place and mark the places to drill the holes. You will need at least 2 screws for each corner and 3 for each T-connection in between, which makes 20 screws in total. Again, if you have extra you can place more screws in between. Mark the places to drill similar to the side panels: a little o to the side from each connection to avoid the large screws. Get your drill and drill holes through the panels into the beams of the frame. Try to line up the holes with the center of the beams in order to avoid splitting the beams. Screw in the 20 (or more) screws to attach the front panel to the frame. 1. make the cutout a few mm larger than your skirting so it doesn't scrape against it 1 Wooden Bench With Storage: Page 6
  • 7. Step 4: Top Panel skirting so it doesn't scrape against it 1. use at least 8 screws for each side panel to ensure the corners don't warp 1. the front and side panels should line up nicely 1 1 Wooden Bench With Storage: Page 7
  • 8. The top panel is there to attach the hinges for the lids to and to allow the lid to be opened up all the way and lean against the wall instead of falling back down while you're searching for crayons. Since only the edge of the panel is resting on the frame we will x the panel in place using the corner brackets. They will go underneath the panel, attaching the panel to the long frame beam. Lay out the 6 brackets on top of the panel, in between the frame beams, spacing them apart as evenly as possible. Get 12 of the remaining scres (3,5x20mm) and put 2 next to each bracket. To make sure the panel is ush with the lids, ask someone to push down a little while you secure the brackets. Hold the bracket in place underneath the panel and pre-drill the holes in both the beam and the panel through the holes in the bracket. Make sure you do not drill to deep and go through the panel. There will probably be 2 or 3 holes on each side of the bracket, but you only need to drill 1 hole on each side. There won't be much weight on the back of the bench and with 6 brackets the panel will not go anywhere. Get the 2 screws and screw them in, xing the bracket in place. Repeat this another 5 times and the top panel is done! 1. evenly space out the brackets 1. you can use masking tape to secure the panel while attaching the brackets, or have someone hold it down firmly 1. the corner backets go in between the frame beams underneath the panel 2. extra structural support (should not be needed) 1 1 1 2 Wooden Bench With Storage: Page 8
  • 9. Step 5: Painting (optional) Step 6: Lid Panels If you want to add some paint or other nish to your bench, this is the time to do it. When the hinges are attached painting the lids will be a lot more di cult. You can choose to ll the screw 'holes' with ller or putty to create a smooth nish. Note that sometimes these areas can become more visible when painted because they are smoother than the wood around it. I chose to paint the outside of the bench a matte dark grey and left the rest of the wood inside its natural colour. To avoid leaving gaps in the paint visible on the outside I also painted the edges of the panels as well as a border on the underside of the lid panels. This way you get a clean nish without having to be very careful with the paintbrush. Get your masking tape and mask all the bits you do not want to paint. For the underside of the lids I taped a rectangle about an inch from the edge to create a straight line. Prop up the bench with some sticks so you can paint the edges on the bottom and to avoid the paint sticking to the paper/sheet. You can place the lid panels on some books and paint the top side. When it is dry turn it over and paint the border on the bottom side. Depending on the desired nish you can sand the panels and add additional layers of paint. Make sure all the parts are dry before assembing the lids. Wooden Bench With Storage: Page 9
  • 10. The lid panels will be attached to the top panel using 2 hinges for each lid. I chose black hinges to match the bench and these hinges hapened to have 6 holes for screws. If you use hinges with 4 screws you will need 12 screws less. Put down the lid panels on top of the frame and make sure they line up on all sides. I put pieces of 0,5mm cardboard in between the lid panels to make sure they would not scrape against each other once they were xed. Get your 6 hinges and 36 screws (3,5x20mm) and make 3 sets of 2 hinges and 12 screws. Lay out the hinges on top of the lids, on the edge between the lid and the top panel. Make sure the hinges are not in the same place as the brackets holding up the top panel in order to avoid crossing screws. Hold the hinge in place and gently pre-drill the holes, making sure not to go in too deep. If you use thinner screws or are con dent the wood will not split, you can also screw in the screws without pre-drilling the holes. Repeat this another 5 times to secure the hinges to the top and lid panels. Test the hinges by opening and closing the lids to make sure everything works smoothly. 1. make sure the lids don't scrape against each other when fixed in place 1. 4 screws per hinge should work fine as well 1 1 Wooden Bench With Storage: Page 10
  • 11. Step 7: Enjoy Your Bench! 1. make sure the hinges are not in the same place as the corner brackets underneath That is it, your bench is nished! Sit down, relax and enjoy your hard work. You can choose to add dividers between the compartments if you dont want your stu to slide over to the next compartment. I left the frame open and haven't had any problems with it. I had some cushions custom made to t the dimensions of the lids and add a splash of colour. You can also make these yourself of course. I also put some felt pads underneath the frame to prevent scratching the oor. This also makes it easier to slide the bench in place and move it around if necessary. I hope you enjoyed this build and I would love to see your results! If you have any questions do not hesitate to ask them in the comments. Update: optional upgrades As mentioned by Leon Ward you can choose to add a back and bottom panel as well as some feet to raise it o the oor and place the bench anywhere you like. My advice would be to make the feet high enough to be able to vacuum underneath the bench. As mentioned by ChrisWX it is also possible to make the front panel at an angle to give more room for your legs and feet while sitting on the bench. You can do this in combination with the box frame and just make the top about 4 inches or 100mm deeper than the bottom. 1 Wooden Bench With Storage: Page 11
  • 12. 1. So. Much. Storage. Space. 1 Wooden Bench With Storage: Page 12
  • 13. I notice that you have no bottom, or back, for this bench. This means that you are using the floor of the room, and a wall, to contain the contents of the storage area. My thoughts would be to add a bottom, and a back, make some small 50mm x 50mm feet and then the bench can be placed anywhere. What say you??? Thanks for the suggestion, Leon! This is definitely an option. In my case we use the bench to store closed boxes mostly, so it is no problem that it's open. Also we didn't want a gap underneath so dirt doesn't go under. Makes vacuuming easier. I would suggest either placing it on the floor directly or use higher feet that allow a vacuum cleaner underneath. I might add this option to the instructable too. This might be a dumb question, but all your measurements are in metric? Would it be possible to get the cutting list, material and hardware in standard measurements? Thank you. The measurements are indeed all in metric, in millimeters. For us here in Europe those are the standard measurements ;) The dimensions I used are a suggestion and are based on available materials in local stores which means those will probably be different for you. The best thing to do is check your local store and adjust the dimensions to fit the available materials in order to prevent waste. Really nice! I think the bright cushions go so well with the dark paint :) Thank you! 1. option: add back and bottom panels and feet 2. option: angled front panel 3. combination of both options: angled front and raised bench 1 2 3 Wooden Bench With Storage: Page 13 Special Time-Limited Subscriber's Offer