Top Rated Kolkata Call Girls Dum Dum ⟟ 6297143586 ⟟ Call Me For Genuine Sex S...
Week 4 assignment
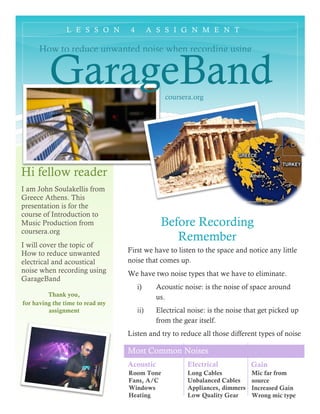
1. Most Common Noises
How to reduce unwanted noise when recording using
GarageBandcoursera.org
Before Recording
Remember
First we have to listen to the space and notice any little
noise that comes up.
We have two noise types that we have to eliminate.
i) Acoustic noise: is the noise of space around
us.
ii) Electrical noise: is the noise that get picked up
from the gear itself.
Listen and try to reduce all those different types of noise
Acoustic
Long Cables
Unbalanced Cables
Appliances, dimmers
Low Quality Gear
Gain
L E S S O N 4 A S S I G N M E N T
Hi fellow reader
I am John Soulakellis from
Greece Athens. This
presentation is for the
course of Introduction to
Music Production from
coursera.org
I will cover the topic of
How to reduce unwanted
electrical and acoustical
noise when recording using
GarageBand
Thank you,
for having the time to read my
assignment
Electrical
Room Tone
Fans, A/C
Windows
Heating
Mic far from
source
Increased Gain
Wrong mic type
2. 2
REMOVE UNWANTED NOISE USING GARAGEBAND WEEK 4 ASSIGNMENT
Open or create a Project
Open GarageBand Application and
choose what project you want to open.
In this example I will use the project
that I created for weeks’ 2 assignment
Create a project in a DAW using
GarageBand.
If you want to know how to create a new
project in Garage Band link is provided at
the last page of this assignment
Main Screen
)
After we open our project we can see the picture below. If we create a new one you
will not see sample tracks on left section, it will be empty.
3. 3
REMOVE UNWANTED NOISE USING GARAGEBAND WEEK 4 ASSIGNMENT
Choose Track
Select the track for adding effect
At the left side of main screen in
GarageBand select the sample track you
want to add an effect by clicking on it.
Select Preset Effect
At the top right corner select the Real
Instrument Tab and click Browse (for
adding effects from a preset list of ready
configured effect so you don’t have to
make a lot of adjustments) or click the Edit
Tab if you want manual selection.
In the effects menu we can see three
disabled effects for the current track Noise
Gate, Compressor, Visual EQ and two
enabled effects for Master output. The last
two will be added to all tracks in our
project and adds the desirable effect in
Master Output signal. We can change
them or edit them in the Master Track Tab
on the top right tab. The only thing to
mention is that changing the value of
master effects, affects only the current
track but we save time if we simply want to
use the same effect over and over.
Disabled effect switch is in grey color .
Enabled effect switch is in light blue.
4. 4
REMOVE UNWANTED NOISE USING GARAGEBAND WEEK 4 ASSIGNMENT
Adding Effect Track
If we hover the cursor over an empty cell
and click on it we can select an effect
from the list below.
By default GarageBand have a Noise Gate Effect in first
position that is non-interchangeable.
We just enable it and set the threshold level. In this
example I set it to -28dB. This value depends on the
signal itself. If we have a low gain level signal then we
might have to boost the signal gain also from the master
track.
In the above situation if we don’t boost the gain, then all
the signal won’t pass through the gate because what is
really this effect does is letting a signal from a desired gain
level and above to pass through it. (we can also say the
opposite, block a signal that is below this value). In other
words Noise Gate effect is letting a specific range of gain
level signal to pass through
To understand this better see the next example.
5. 5
REMOVE UNWANTED NOISE USING GARAGEBAND WEEK 4 ASSIGNMENT
Preview Result
After adding and editing the effect we can play the example and hear the result. I also
enabled Visual EQ for current track to see how much my signal is being blocked. As we
see below if I set the threshold to -5dB it almost blocks all of the signal and I can hear
only the loud stuff. This is natural because my signal flow makes a valley and isn’t flat.
If we set the level to -28dB we can see below that the trail of our valley signal passes
through and isn’t silenced as before.
Sometimes maybe we want to use the situation from 1st
picture if we are in a noisy
environment and we want to block the noise floor. Both examples exported in
SoundCloud links are provided at the last page.
6. 6
REMOVE UNWANTED NOISE USING GARAGEBAND WEEK 4 ASSIGNMENT
Sometimes is a bit of trial and error until
we find how much signal we want to block
until we are satisfied with the result. A
good way to is to measure the noise floor
before any action. We can download a dB
meter on our smartphone or have a device
to do that.
Sound Level Meter
We will be amazed on how many
dB noise passes through.
The above step wasn’t necessary to mention or write about it but if we don’t have
good listening abilities and we want to find the most free of noise position this is the
way.
7. Reduce Acoustic Noise
• Listen carefully the “silence” or “room tone” to identify noise.
• Move away from noisy sources like fans and windows (pillow or
blanket on windows stops noise)
• Create an isolated space for recording.
• Turn off noisy sources like A/C, fans, heating, TV and appliances.
What I learned from this weeks assignment was more technical terms, better
understanding of how effects works, noise types, how to avoid noises, a better way of
using a DAW, what to check before recording, what to change, how to set it up and
finally how to record it.
Thank you for your
time!
REMOVE UNWANTED NOISE USING GARAGEBAND WEEK 4 ASSIGNMENT
PICTURES CAPTURED USING OSX BUILT IN CAPTURING FUNCTION
LINKS
Sound Examples
https://soundcloud.com/john-soulakelliss/productionguitarchordsl04
https://soundcloud.com/john-soulakelliss/productionguitarchordsl04noise
Week 2 : How to Create a Project in GarageBand
http://www.slideshare.net/johnnys83/week2-assignment
Reduce Electrical Noise
• Use fewer pieces of gear.
• Use shorter cables
• Use balanced cables
• Turn off appliances and dimmers.
• Use High quality gear.
Avoid Unnecessary Gain: i) Use gain as little as possible.
ii) Try to move microphone closer to the source instead of increasing the
gain.
iii) Choose a directional microphone to isolate the source from a noisy
environment