Download free for 30 days
Sign in
Upload
Language (EN)
Support
Business
Mobile
Social Media
Marketing
Technology
Art & Photos
Career
Design
Education
Presentations & Public Speaking
Government & Nonprofit
Healthcare
Internet
Law
Leadership & Management
Automotive
Engineering
Software
Recruiting & HR
Retail
Sales
Services
Science
Small Business & Entrepreneurship
Food
Environment
Economy & Finance
Data & Analytics
Investor Relations
Sports
Spiritual
News & Politics
Travel
Self Improvement
Real Estate
Entertainment & Humor
Health & Medicine
Devices & Hardware
Lifestyle
Change Language
Language
English
Español
Português
Français
Deutsche
Cancel
Save
Submit search
EN
NI
Uploaded by
Naoki Iwami
PPTX, PDF
4,372 views
Webアプリのシナリオテスト自動化を運用に乗せるまでの10のステップ
Webアプリのシナリオテスト自動化を運用に乗せるまでのやり方やテクニックなどを紹介
Engineering
◦
Read more
5
Save
Share
Embed
Embed presentation
Download
Download to read offline
1
/ 65
2
/ 65
3
/ 65
4
/ 65
5
/ 65
6
/ 65
7
/ 65
8
/ 65
9
/ 65
10
/ 65
11
/ 65
12
/ 65
13
/ 65
14
/ 65
15
/ 65
16
/ 65
17
/ 65
18
/ 65
19
/ 65
20
/ 65
21
/ 65
22
/ 65
23
/ 65
24
/ 65
25
/ 65
26
/ 65
27
/ 65
28
/ 65
29
/ 65
30
/ 65
31
/ 65
32
/ 65
33
/ 65
34
/ 65
35
/ 65
36
/ 65
37
/ 65
38
/ 65
39
/ 65
40
/ 65
41
/ 65
42
/ 65
43
/ 65
44
/ 65
45
/ 65
46
/ 65
47
/ 65
48
/ 65
49
/ 65
50
/ 65
51
/ 65
52
/ 65
53
/ 65
54
/ 65
55
/ 65
56
/ 65
57
/ 65
58
/ 65
59
/ 65
60
/ 65
61
/ 65
62
/ 65
63
/ 65
64
/ 65
65
/ 65
More Related Content
PDF
【Camphor ×サイボウズ】selenium勉強会
by
Yuki Okada
PDF
Gradleどうでしょう
by
Takuma Watabiki
PDF
システム開発を前進させるためのGradle導入法
by
Takuma Watabiki
PDF
SeleniumIDEとSelenium WebDriver × Node.js Seleniumで業務効率化する15分
by
松田 千尋
PPTX
JJUG CCC 2011 Fall / Web test automation with Geb and Spock
by
Nobuhiro Sue
PDF
What makes Geb groovy?
by
Youtarou TAKAHASHI
PPT
第5回勉強会
by
Mugen Fujii
PDF
Gws 20141024 gradle_intro
by
Nobuhiro Sue
【Camphor ×サイボウズ】selenium勉強会
by
Yuki Okada
Gradleどうでしょう
by
Takuma Watabiki
システム開発を前進させるためのGradle導入法
by
Takuma Watabiki
SeleniumIDEとSelenium WebDriver × Node.js Seleniumで業務効率化する15分
by
松田 千尋
JJUG CCC 2011 Fall / Web test automation with Geb and Spock
by
Nobuhiro Sue
What makes Geb groovy?
by
Youtarou TAKAHASHI
第5回勉強会
by
Mugen Fujii
Gws 20141024 gradle_intro
by
Nobuhiro Sue
What's hot
ODP
今流行りのウェブアプリ開発環境Yeoman
by
tomo_masakura
PDF
脱・独自改造! GebでWebDriverをもっとシンプルに
by
Hiroko Tamagawa
PPT
テスト自動化ツール[Selenium]を検討してみて
by
裕史 川松
PPTX
Selenium webdriver使ってみようず
by
Oda Shinsuke
PPT
Jenkinsプラグイン開発
by
Takahisa Wada
PDF
View customize pluginを使いこなす
by
onozaty
PDF
Gradle布教活動
by
Nemoto Yusuke
PDF
JavaEE7徹底入門 プレゼンテーション層の開発 JSF
by
Masuji Katoda
PDF
テストゼロからイチに進むための戦略と戦術
by
Y Watanabe
PDF
Introduction to Spock
by
Takahiro Sugiura
PDF
JobStreamerではじめるJavaBatchのクラウド分散実行
by
Yoshitaka Kawashima
PDF
今すぐブラウザでES6を使おう
by
Hayashi Yuichi
PDF
Gradle handson
by
Nemoto Yusuke
PDF
GrailsでSpringをGroovyにしよう!
by
Tsuyoshi Yamamoto
PDF
20150131_jQueryのようにWebテストが書けるGeb Navigator APIの紹介
by
Yuki Fujisawa
PDF
Jjug 20140430 gradle_basic
by
Takuma Watabiki
PPTX
Jjug 20140430 gradle_advanced
by
Masatoshi Hayashi
PDF
【B-1】kintoneでお手軽コールセンター!
by
Sakae Saito
PDF
最近作ったもの
by
onozaty
PDF
Spring in-summer-gradle-hands on-withanswers
by
Takuma Watabiki
今流行りのウェブアプリ開発環境Yeoman
by
tomo_masakura
脱・独自改造! GebでWebDriverをもっとシンプルに
by
Hiroko Tamagawa
テスト自動化ツール[Selenium]を検討してみて
by
裕史 川松
Selenium webdriver使ってみようず
by
Oda Shinsuke
Jenkinsプラグイン開発
by
Takahisa Wada
View customize pluginを使いこなす
by
onozaty
Gradle布教活動
by
Nemoto Yusuke
JavaEE7徹底入門 プレゼンテーション層の開発 JSF
by
Masuji Katoda
テストゼロからイチに進むための戦略と戦術
by
Y Watanabe
Introduction to Spock
by
Takahiro Sugiura
JobStreamerではじめるJavaBatchのクラウド分散実行
by
Yoshitaka Kawashima
今すぐブラウザでES6を使おう
by
Hayashi Yuichi
Gradle handson
by
Nemoto Yusuke
GrailsでSpringをGroovyにしよう!
by
Tsuyoshi Yamamoto
20150131_jQueryのようにWebテストが書けるGeb Navigator APIの紹介
by
Yuki Fujisawa
Jjug 20140430 gradle_basic
by
Takuma Watabiki
Jjug 20140430 gradle_advanced
by
Masatoshi Hayashi
【B-1】kintoneでお手軽コールセンター!
by
Sakae Saito
最近作ったもの
by
onozaty
Spring in-summer-gradle-hands on-withanswers
by
Takuma Watabiki
Viewers also liked
PDF
JenkinsとjMeterで負荷テストの自動化
by
Satoshi Akama
PDF
Web ブラウザで DRM
by
Yusuke Goto
PPTX
amCharts勉強会
by
Naoki Iwami
PPTX
QAアーキテクチャの設計による 説明責任の高いテスト・品質保証
by
Yasuharu Nishi
PDF
Seleniumの薄っすい話 百八式 @ 第3回 日本Seleniumユーザーコミュニティ勉強会
by
Hiroshi Toda
PDF
Docker ホスティングサービス 'Arukas' での Mesos + Marathon の活用について(Mesos勉強会)
by
さくらインターネット株式会社
PDF
市場で勝ち続けるための品質とテストの技術②
by
Yahoo!デベロッパーネットワーク
PPT
ジェネリクスの基礎と クラス設計への応用
by
nagise
PDF
渋谷Java#2 昔のJavaを振り返る
by
Naoki Iwami
PDF
G*workshop 2011/11/22 Geb+Betamax
by
Nobuhiro Sue
PDF
The report of JavaOne2011 about groovy
by
Yasuharu Nakano
PDF
JJUG CCC 20150411 grails3 Spring-boot
by
Tsuyoshi Yamamoto
PDF
【短縮版】OSSのブラウザ自動テストツール「Selenium」を使った、開発・テストの効率化
by
Nozomi Ito
PDF
GDK48総選挙の裏側
by
Kiyotaka Oku
PDF
第3回日本seleniumユーザーコミュニティ勉強会
by
Nozomi Ito
PDF
20160914 te engineer
by
Kazuaki Matsuo
PDF
AWS Blackbelt 2015シリーズ Elastic Load Balancing
by
Amazon Web Services Japan
PDF
JGGUG合宿2011報告
by
Kazuchika Sekiya
PDF
スタイルシートの長い夢
by
shika kun
PDF
あなたとAndroid 今すぐダウンロード!? Android開発で変わる SIerのJava技術事情について
by
Shinichi Kozake
JenkinsとjMeterで負荷テストの自動化
by
Satoshi Akama
Web ブラウザで DRM
by
Yusuke Goto
amCharts勉強会
by
Naoki Iwami
QAアーキテクチャの設計による 説明責任の高いテスト・品質保証
by
Yasuharu Nishi
Seleniumの薄っすい話 百八式 @ 第3回 日本Seleniumユーザーコミュニティ勉強会
by
Hiroshi Toda
Docker ホスティングサービス 'Arukas' での Mesos + Marathon の活用について(Mesos勉強会)
by
さくらインターネット株式会社
市場で勝ち続けるための品質とテストの技術②
by
Yahoo!デベロッパーネットワーク
ジェネリクスの基礎と クラス設計への応用
by
nagise
渋谷Java#2 昔のJavaを振り返る
by
Naoki Iwami
G*workshop 2011/11/22 Geb+Betamax
by
Nobuhiro Sue
The report of JavaOne2011 about groovy
by
Yasuharu Nakano
JJUG CCC 20150411 grails3 Spring-boot
by
Tsuyoshi Yamamoto
【短縮版】OSSのブラウザ自動テストツール「Selenium」を使った、開発・テストの効率化
by
Nozomi Ito
GDK48総選挙の裏側
by
Kiyotaka Oku
第3回日本seleniumユーザーコミュニティ勉強会
by
Nozomi Ito
20160914 te engineer
by
Kazuaki Matsuo
AWS Blackbelt 2015シリーズ Elastic Load Balancing
by
Amazon Web Services Japan
JGGUG合宿2011報告
by
Kazuchika Sekiya
スタイルシートの長い夢
by
shika kun
あなたとAndroid 今すぐダウンロード!? Android開発で変わる SIerのJava技術事情について
by
Shinichi Kozake
Similar to Webアプリのシナリオテスト自動化を運用に乗せるまでの10のステップ
PDF
受託開発でテストファーストしたらXXXを早期発見できてハイアジリティになったはなし
by
terahide
PDF
第4回勉強会 単体テストのすすめ
by
hakoika-itwg
KEY
Behat+Symfony2ではじめるBDD超入門
by
晃 遠山
PPTX
【STAC2017】テスト自動化システム 成長記
by
友隆 浅黄
PDF
超簡単!!なTestLinkの使い方
by
Cake YOSHIDA
PDF
アジャイルテストを、壮絶に、考える。
by
Dai FUJIHARA
PDF
ブラウザのUIテストをしてみた話
by
Mitsushige Ishiguro
PDF
「Selenium実践入門」で学ぶテスト自動化の世界
by
Nozomi Ito
PPTX
TDC20111031_Groovy_Geb
by
Nobuhiro Sue
PDF
ゼロから始めたE2Eテスト
by
ushiboy
KEY
Androidリリース作業の効率化(2)
by
Kenichi Kambara
PDF
勉強会20140319 rspec_capybara
by
Shugo Numano
PPTX
Selenium
by
takeuchi-tk
PDF
Awsで実現するseleniumテスト高速術
by
finoue
PDF
20161218 selenium study4
by
Naoya Kojima
PDF
はこだてIKA 第4回勉強会 単体テスト
by
Seiji KOMATSU
PDF
継続的8章
by
shinjiyoshida
PDF
ぼくのかんがえた iOSテスト戦略
by
Naoki Umehara
PDF
ワンクリックデプロイ101 #ocdeploy
by
Ryutaro YOSHIBA
PDF
異業種でのテスト自動化の実際
by
Satsuki Urayama
受託開発でテストファーストしたらXXXを早期発見できてハイアジリティになったはなし
by
terahide
第4回勉強会 単体テストのすすめ
by
hakoika-itwg
Behat+Symfony2ではじめるBDD超入門
by
晃 遠山
【STAC2017】テスト自動化システム 成長記
by
友隆 浅黄
超簡単!!なTestLinkの使い方
by
Cake YOSHIDA
アジャイルテストを、壮絶に、考える。
by
Dai FUJIHARA
ブラウザのUIテストをしてみた話
by
Mitsushige Ishiguro
「Selenium実践入門」で学ぶテスト自動化の世界
by
Nozomi Ito
TDC20111031_Groovy_Geb
by
Nobuhiro Sue
ゼロから始めたE2Eテスト
by
ushiboy
Androidリリース作業の効率化(2)
by
Kenichi Kambara
勉強会20140319 rspec_capybara
by
Shugo Numano
Selenium
by
takeuchi-tk
Awsで実現するseleniumテスト高速術
by
finoue
20161218 selenium study4
by
Naoya Kojima
はこだてIKA 第4回勉強会 単体テスト
by
Seiji KOMATSU
継続的8章
by
shinjiyoshida
ぼくのかんがえた iOSテスト戦略
by
Naoki Umehara
ワンクリックデプロイ101 #ocdeploy
by
Ryutaro YOSHIBA
異業種でのテスト自動化の実際
by
Satsuki Urayama
Recently uploaded
PDF
krsk_aws_re-growth_aws_devops_agent_20251211
by
uedayuki
PDF
ソフトとハードの二刀流で実現する先進安全・自動運転のアルゴリズム開発【DENSO Tech Night 第二夜】 ー高精度な画像解析 / AI推論モデル ...
by
dots.
PDF
ソフトウェアエンジニアがクルマのコアを創る!? モビリティの価値を最大化するソフトウェア開発の最前線【DENSO Tech Night 第一夜】
by
dots.
PDF
2025/12/12 AutoDevNinjaピッチ資料 - 大人な男のAuto Dev環境
by
Masahiro Takechi
PDF
音楽アーティスト探索体験に特化した音楽ディスカバリーWebサービス「DigLoop」|Created byヨハク技研
by
yohakugiken
PPTX
君をむしばむこの力で_最終発表-1-Monthon2025最終発表用資料-.pptx
by
rintakano624
krsk_aws_re-growth_aws_devops_agent_20251211
by
uedayuki
ソフトとハードの二刀流で実現する先進安全・自動運転のアルゴリズム開発【DENSO Tech Night 第二夜】 ー高精度な画像解析 / AI推論モデル ...
by
dots.
ソフトウェアエンジニアがクルマのコアを創る!? モビリティの価値を最大化するソフトウェア開発の最前線【DENSO Tech Night 第一夜】
by
dots.
2025/12/12 AutoDevNinjaピッチ資料 - 大人な男のAuto Dev環境
by
Masahiro Takechi
音楽アーティスト探索体験に特化した音楽ディスカバリーWebサービス「DigLoop」|Created byヨハク技研
by
yohakugiken
君をむしばむこの力で_最終発表-1-Monthon2025最終発表用資料-.pptx
by
rintakano624
Webアプリのシナリオテスト自動化を運用に乗せるまでの10のステップ
1.
Webアプリのシナリオテスト自動化を 運用に乗せるまでの10のステップ at BIZREACH 2016.9.13
2.
まずは自己紹介。 岩見直樹 https://github.com/naoki-iwami マネージャ兼チーフエンジニア 主な言語:Java, Spring
framework, Groovy, … Limy Eclipse plugin, ermaster-b, jdynamo, … 最近はDockerが楽しい
3.
今日の話 シナリオテスト自動化を実現するまでに 苦労したことの話とか、テクニックなど
4.
今日のアジェンダ ・使うツールの紹介(Spock, Geb, Gradle) ・環境構築のやり方 ・とりあえずGebでテスト書いてみる ・運用に乗せるためのTIPS
x 10 ・まだやれていないこと、今後やりたいこと 質疑応答
5.
今日のゴール Webアプリをローカル環境で動かして、画面ベースのシナリ オテストを実行する。 実行結果はレポート出力され、画面キャプチャも付いてくる。 テストはコマンド一発で実行でき、かつ確実に 動作する
6.
画面テストあるある 作ったはいいが、○○さんのローカルでしか動かない 3回に1回くらいの割合でテストが失敗する 画面のちょっとしたレイアウト変更があるだけで テストが失敗する テストコードがDirtyすぎて誰も保守できない 1ケース作るのに2時間くらい掛かる
7.
使うツール Spock Geb Gradle Chrome
8.
今回導入したプロダクト https://br-campus.jp/
9.
アプリ構成 【言語】 Java8 +
Lombok 【フレームワーク】 Spring Boot 【テンプレート】 Thymeleaf 【フロント】 SCSS, ECMAScript 2015, Knockout.js 【ビルド】 Maven, node.js (gulp) 【IDE】 IntelliJ
10.
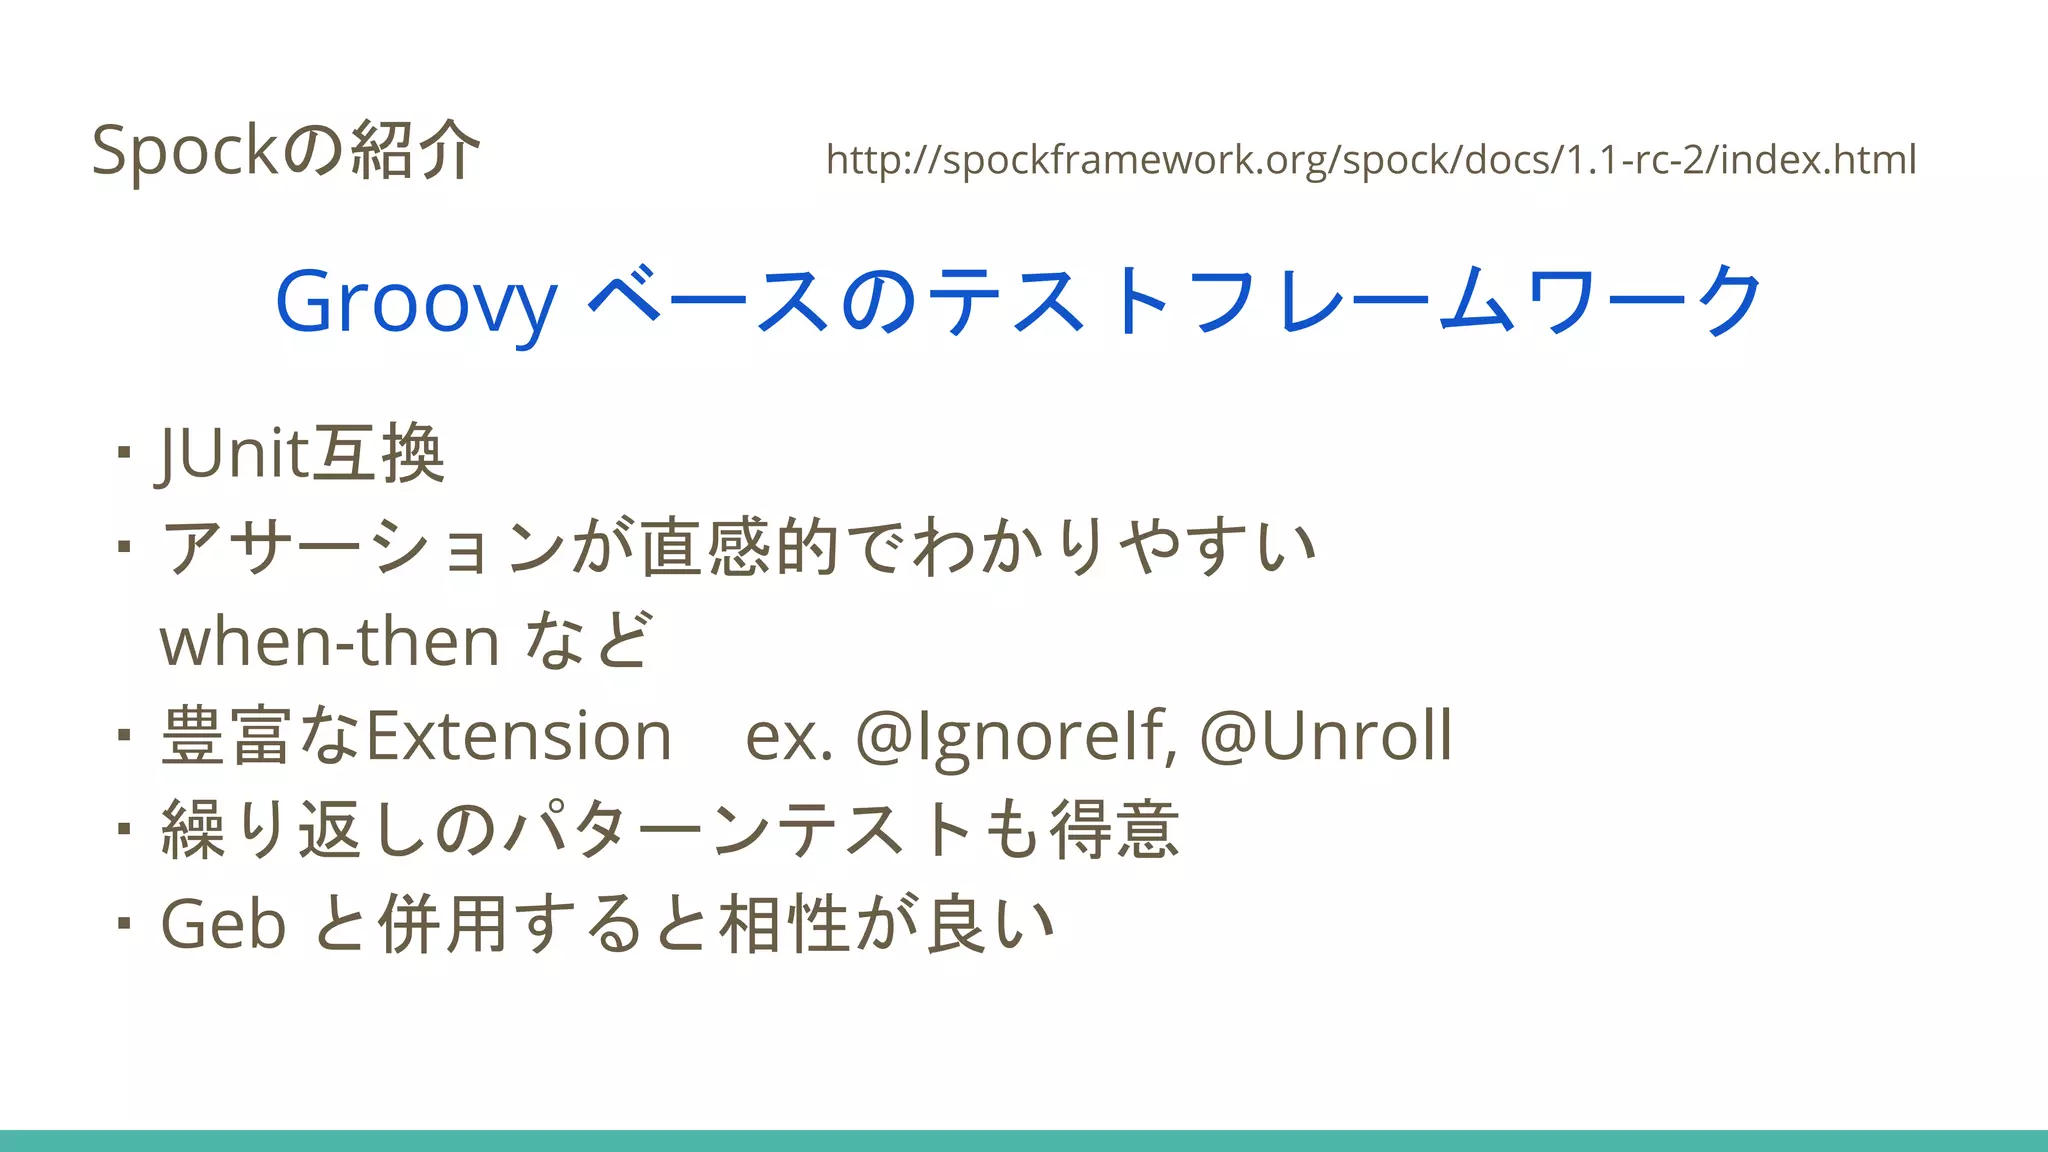
Spockの紹介 http://spockframework.org/spock/docs/1.1-rc-2/index.html Groovy ベースのテストフレームワーク ・JUnit互換 ・アサーションが直感的でわかりやすい when-then
など ・豊富なExtension ex. @IgnoreIf, @Unroll ・繰り返しのパターンテストも得意 ・Geb と併用すると相性が良い
11.
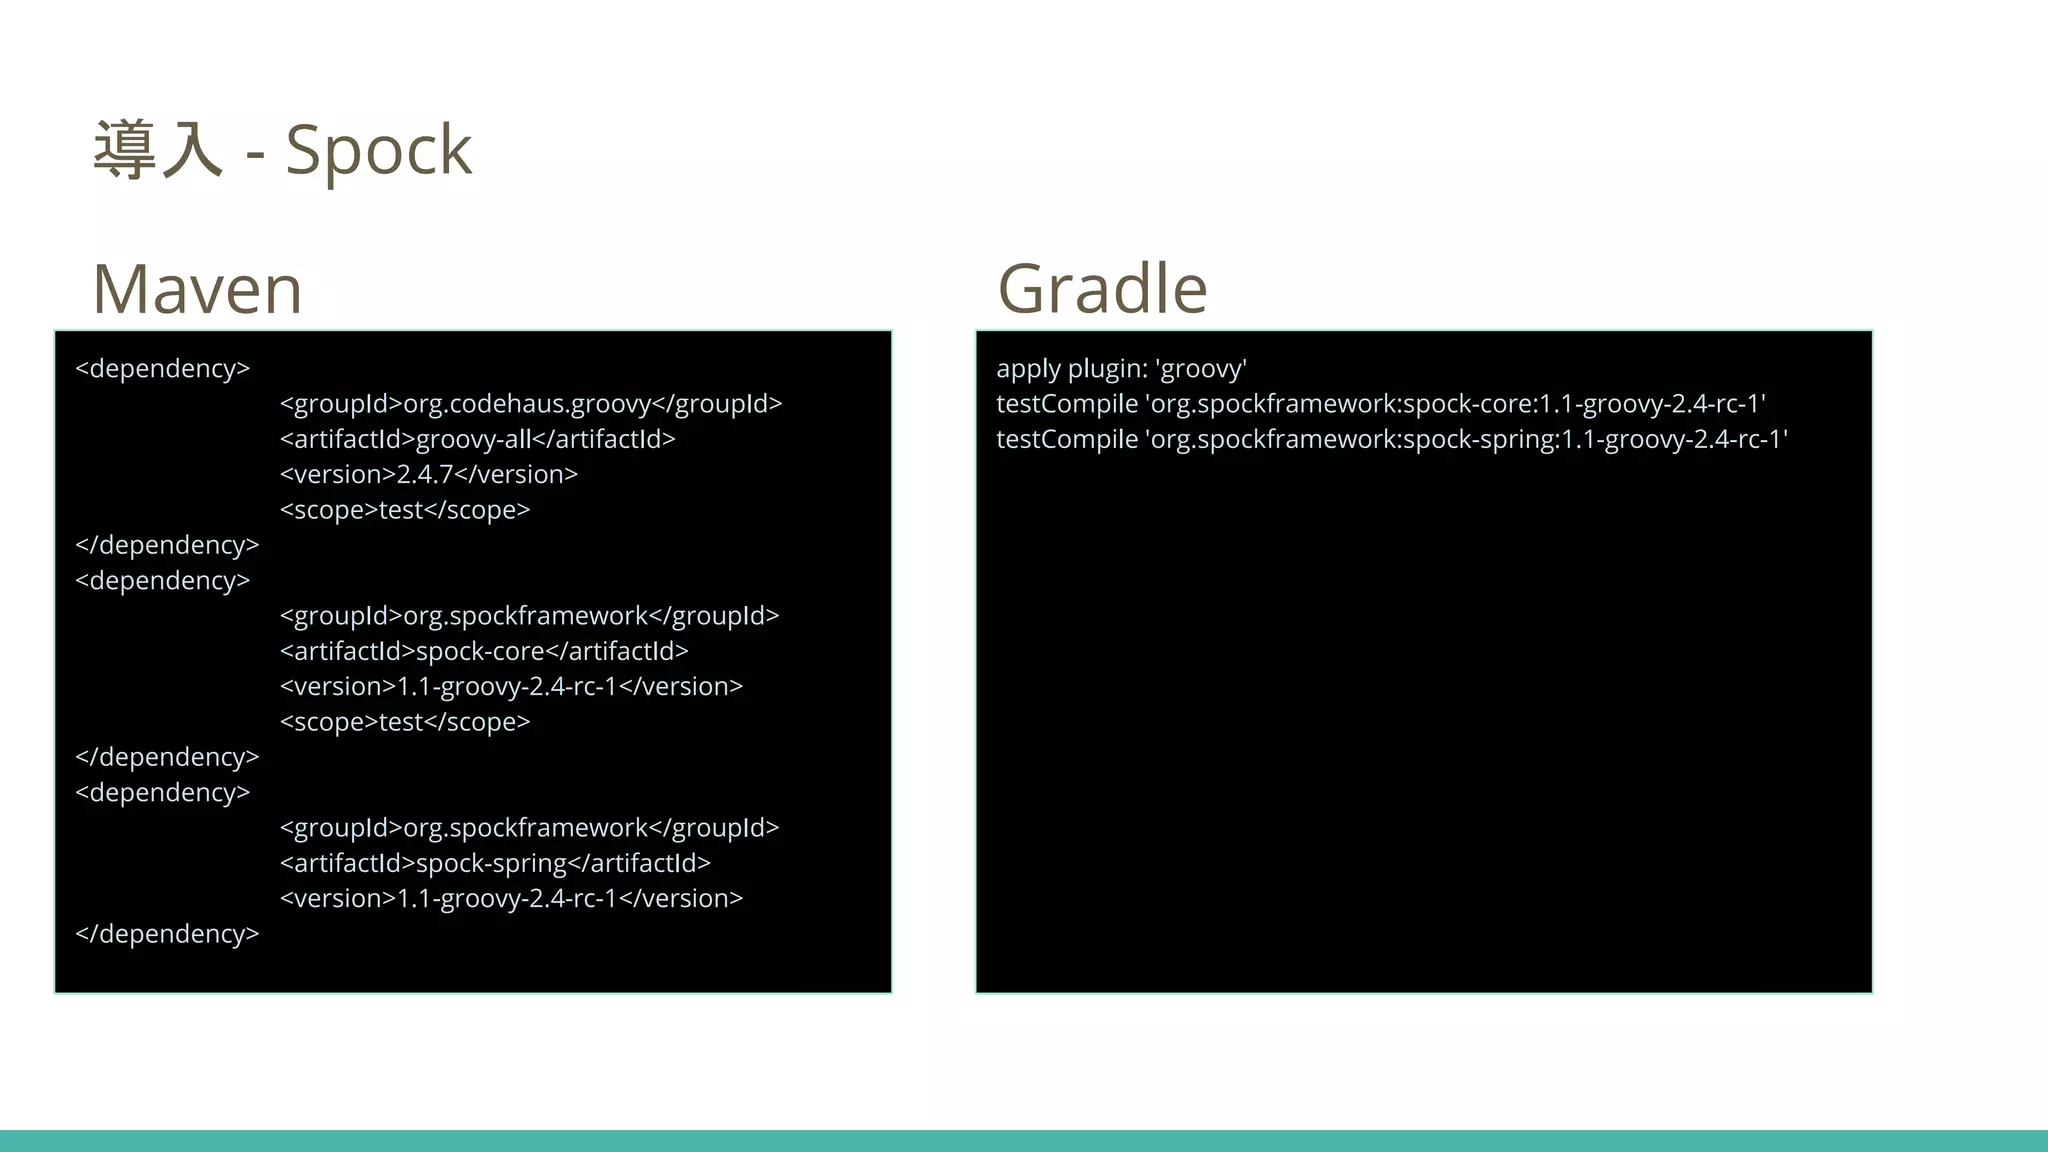
導入 - Spock Maven
Gradle <dependency> <groupId>org.codehaus.groovy</groupId> <artifactId>groovy-all</artifactId> <version>2.4.7</version> <scope>test</scope> </dependency> <dependency> <groupId>org.spockframework</groupId> <artifactId>spock-core</artifactId> <version>1.1-groovy-2.4-rc-1</version> <scope>test</scope> </dependency> <dependency> <groupId>org.spockframework</groupId> <artifactId>spock-spring</artifactId> <version>1.1-groovy-2.4-rc-1</version> </dependency> apply plugin: 'groovy' testCompile 'org.spockframework:spock-core:1.1-groovy-2.4-rc-1' testCompile 'org.spockframework:spock-spring:1.1-groovy-2.4-rc-1'
12.
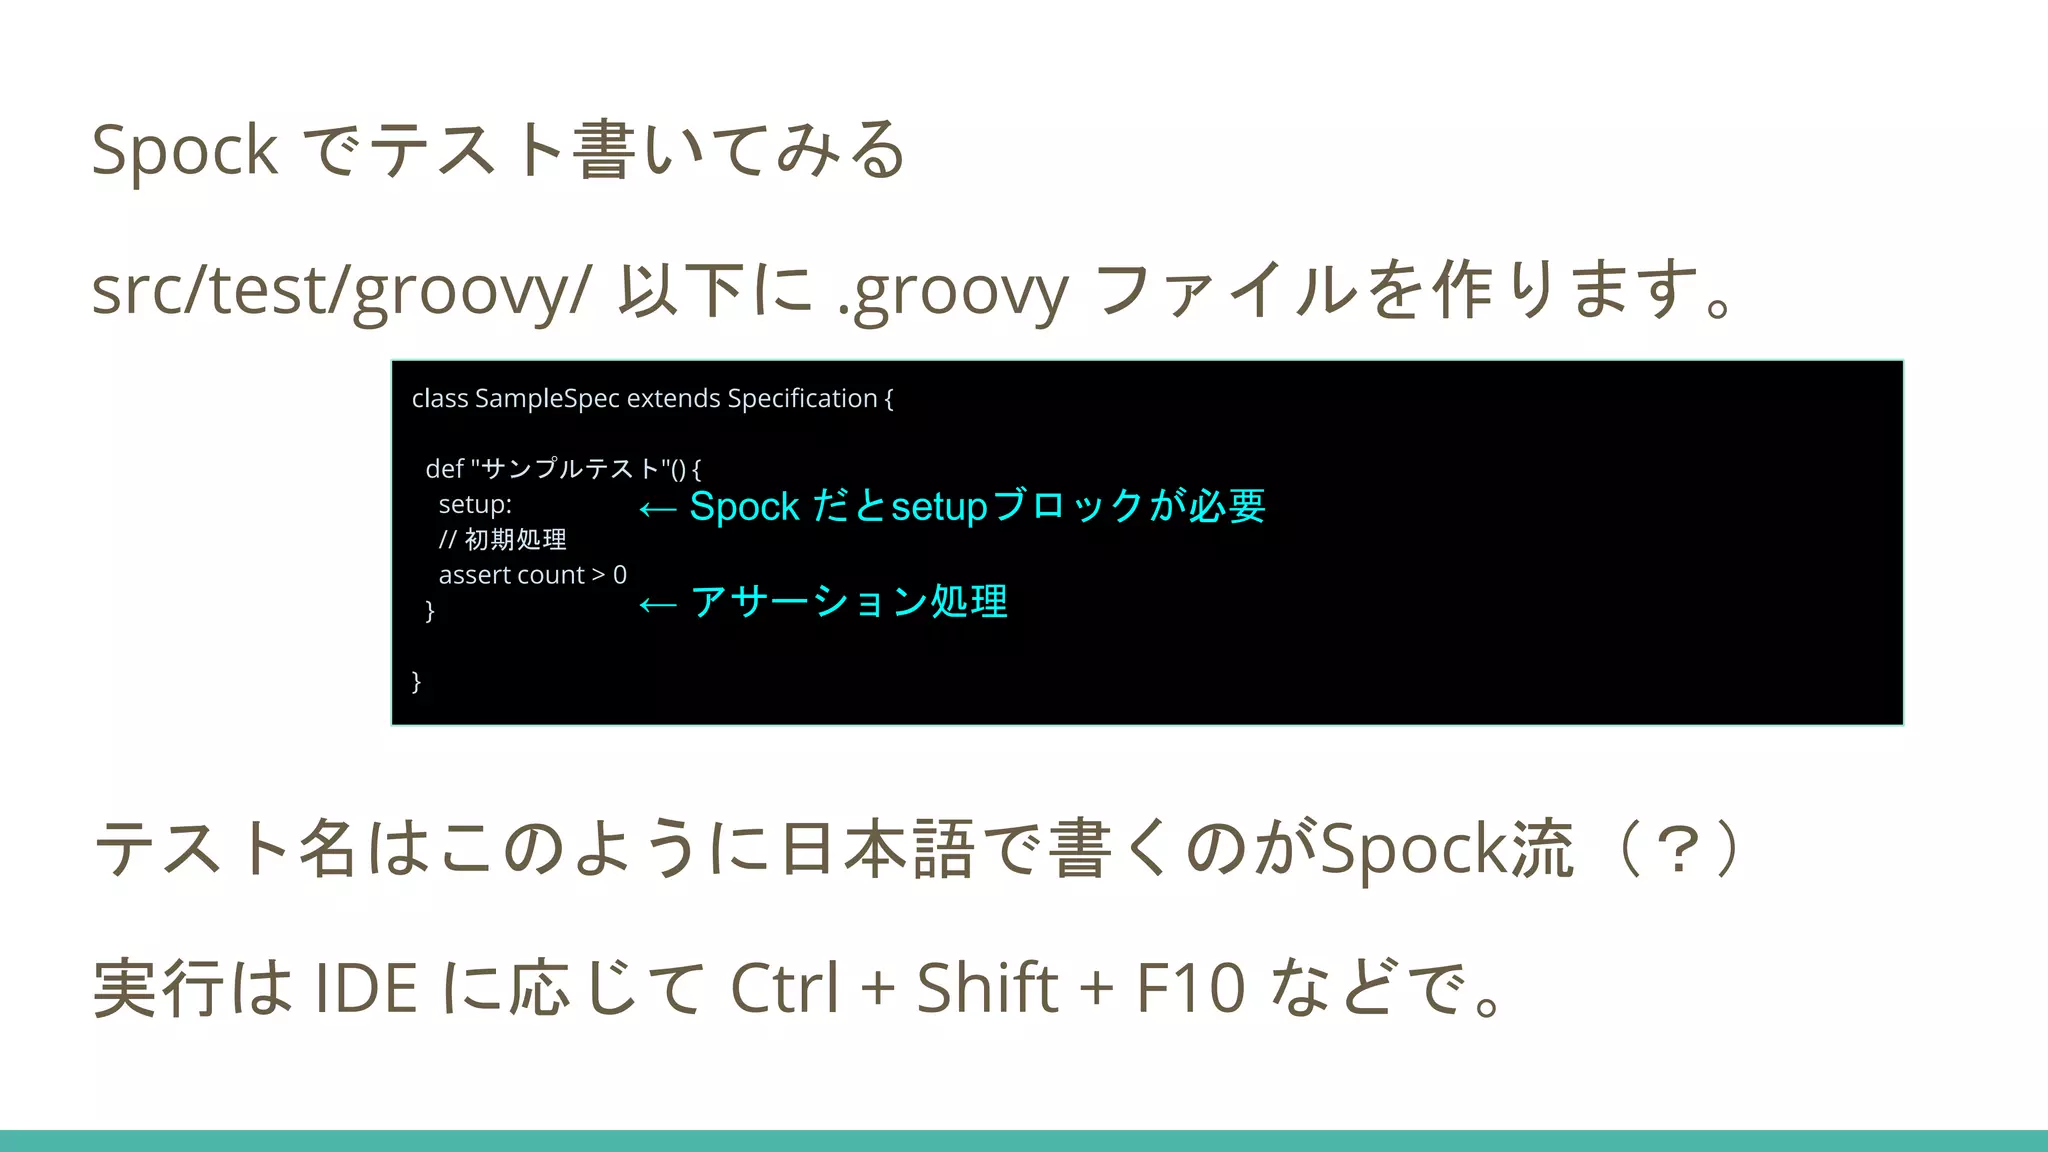
Spock でテスト書いてみる src/test/groovy/ 以下に
.groovy ファイルを作ります。 テスト名はこのように日本語で書くのがSpock流(?) 実行は IDE に応じて Ctrl + Shift + F10 などで。 class SampleSpec extends Specification { def "サンプルテスト"() { setup: // 初期処理 assert count > 0 } } ← Spock だとsetupブロックが必要 ← アサーション処理
13.
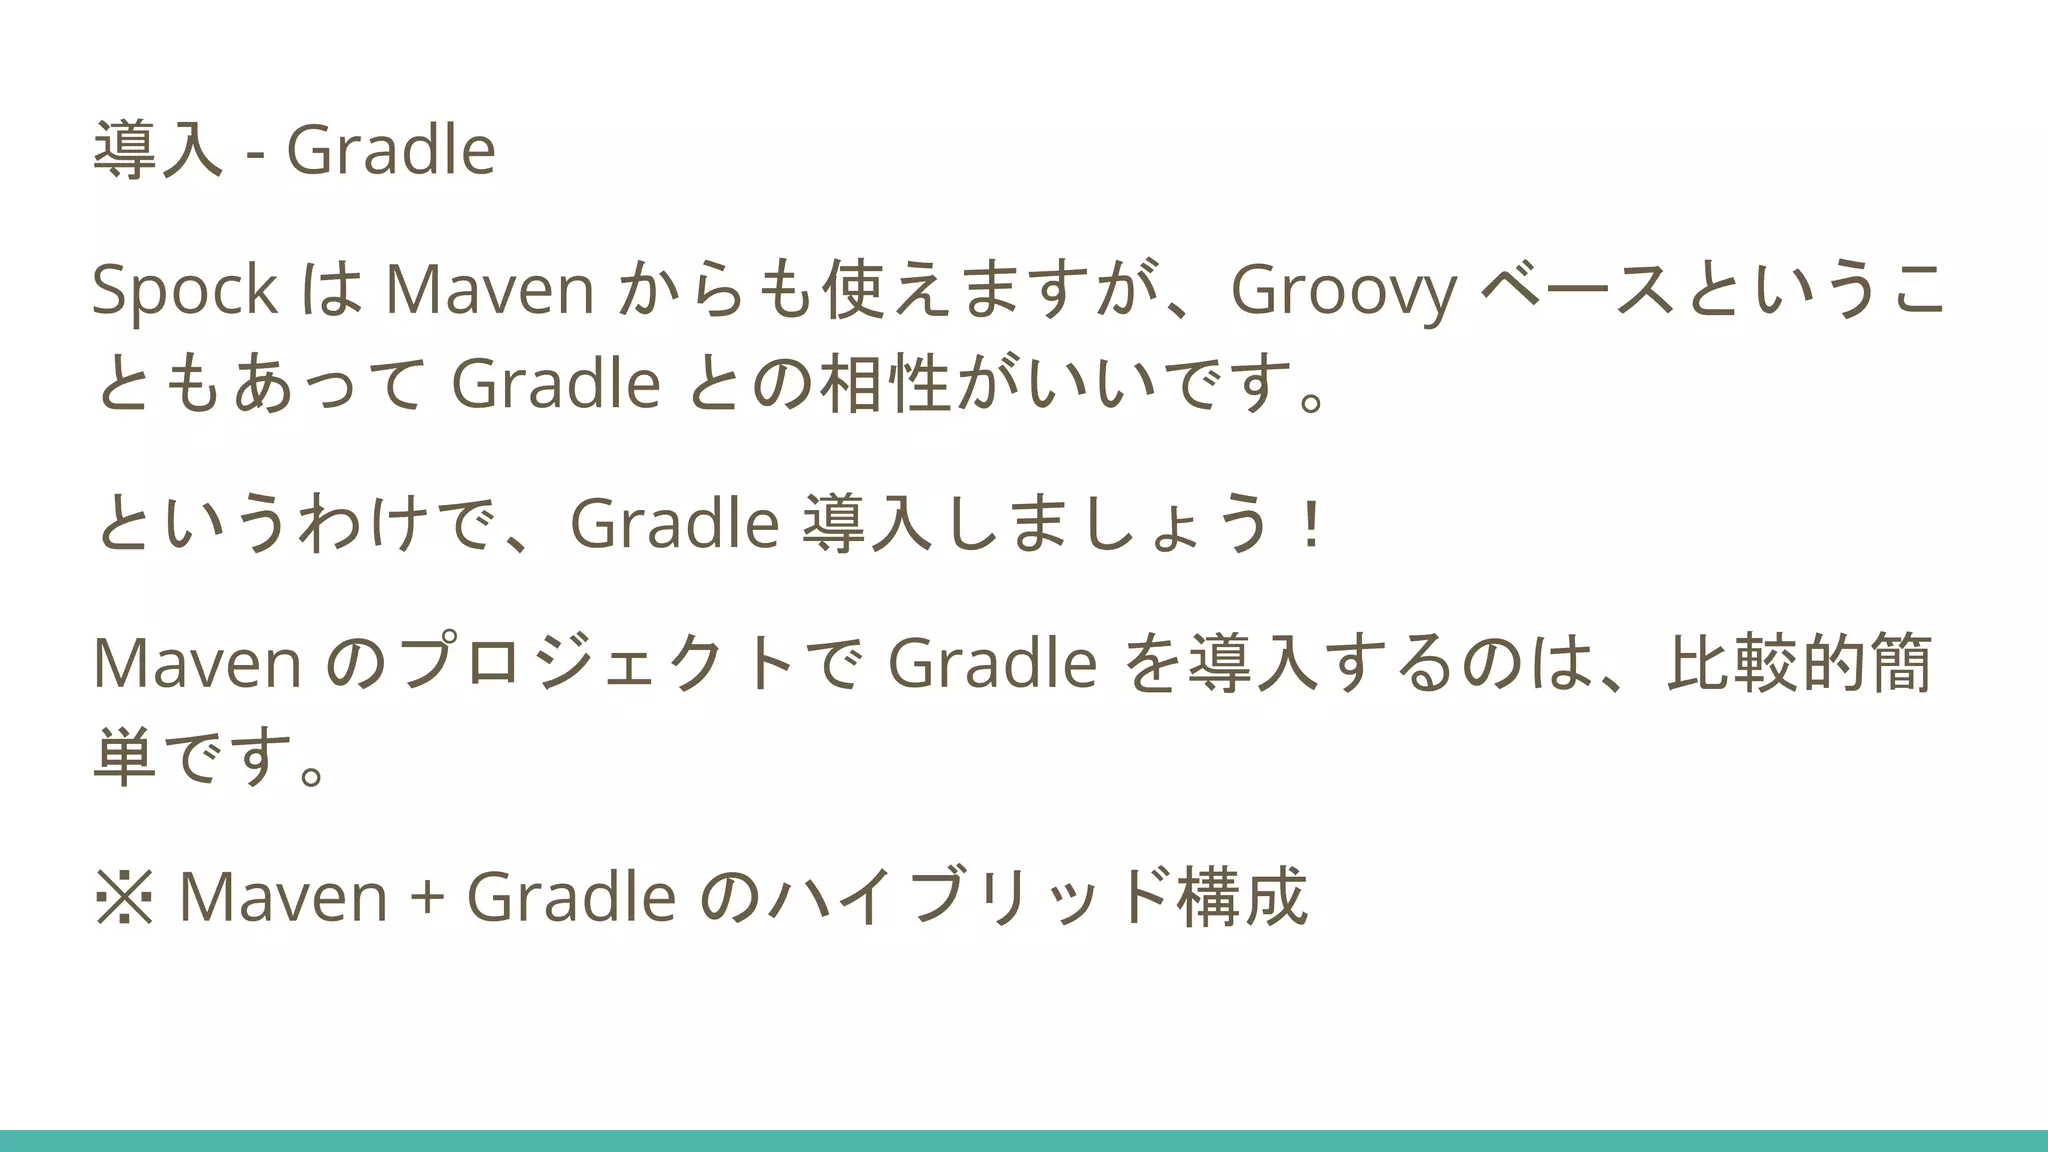
導入 - Gradle Spock
は Maven からも使えますが、Groovy ベースというこ ともあって Gradle との相性がいいです。 というわけで、Gradle 導入しましょう! Maven のプロジェクトで Gradle を導入するのは、比較的簡 単です。 ※ Maven + Gradle のハイブリッド構成
14.
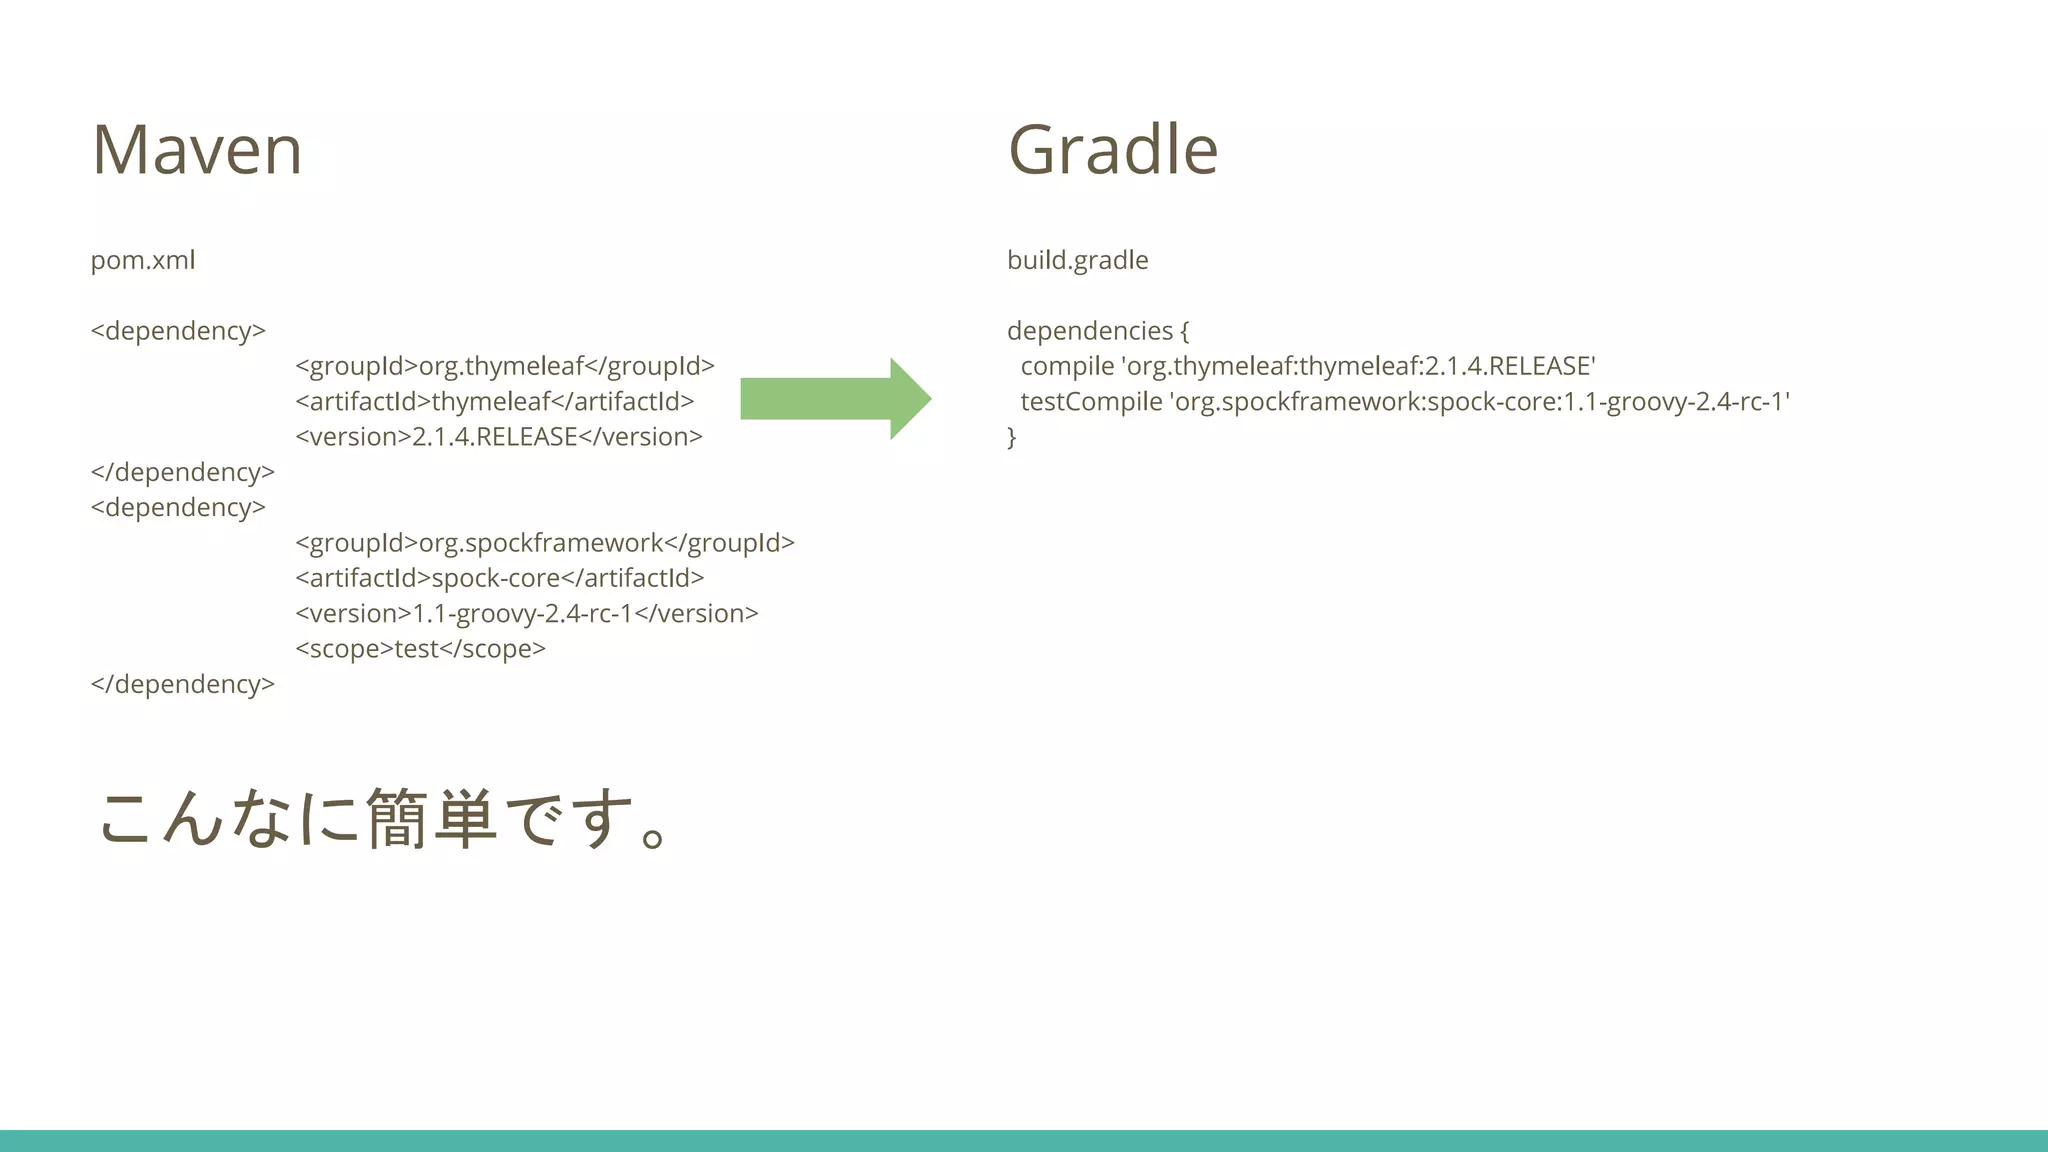
Maven pom.xml <dependency> <groupId>org.thymeleaf</groupId> <artifactId>thymeleaf</artifactId> <version>2.1.4.RELEASE</version> </dependency> <dependency> <groupId>org.spockframework</groupId> <artifactId>spock-core</artifactId> <version>1.1-groovy-2.4-rc-1</version> <scope>test</scope> </dependency> こんなに簡単です。 Gradle build.gradle dependencies { compile 'org.thymeleaf:thymeleaf:2.1.4.RELEASE' testCompile
'org.spockframework:spock-core:1.1-groovy-2.4-rc-1' }
15.
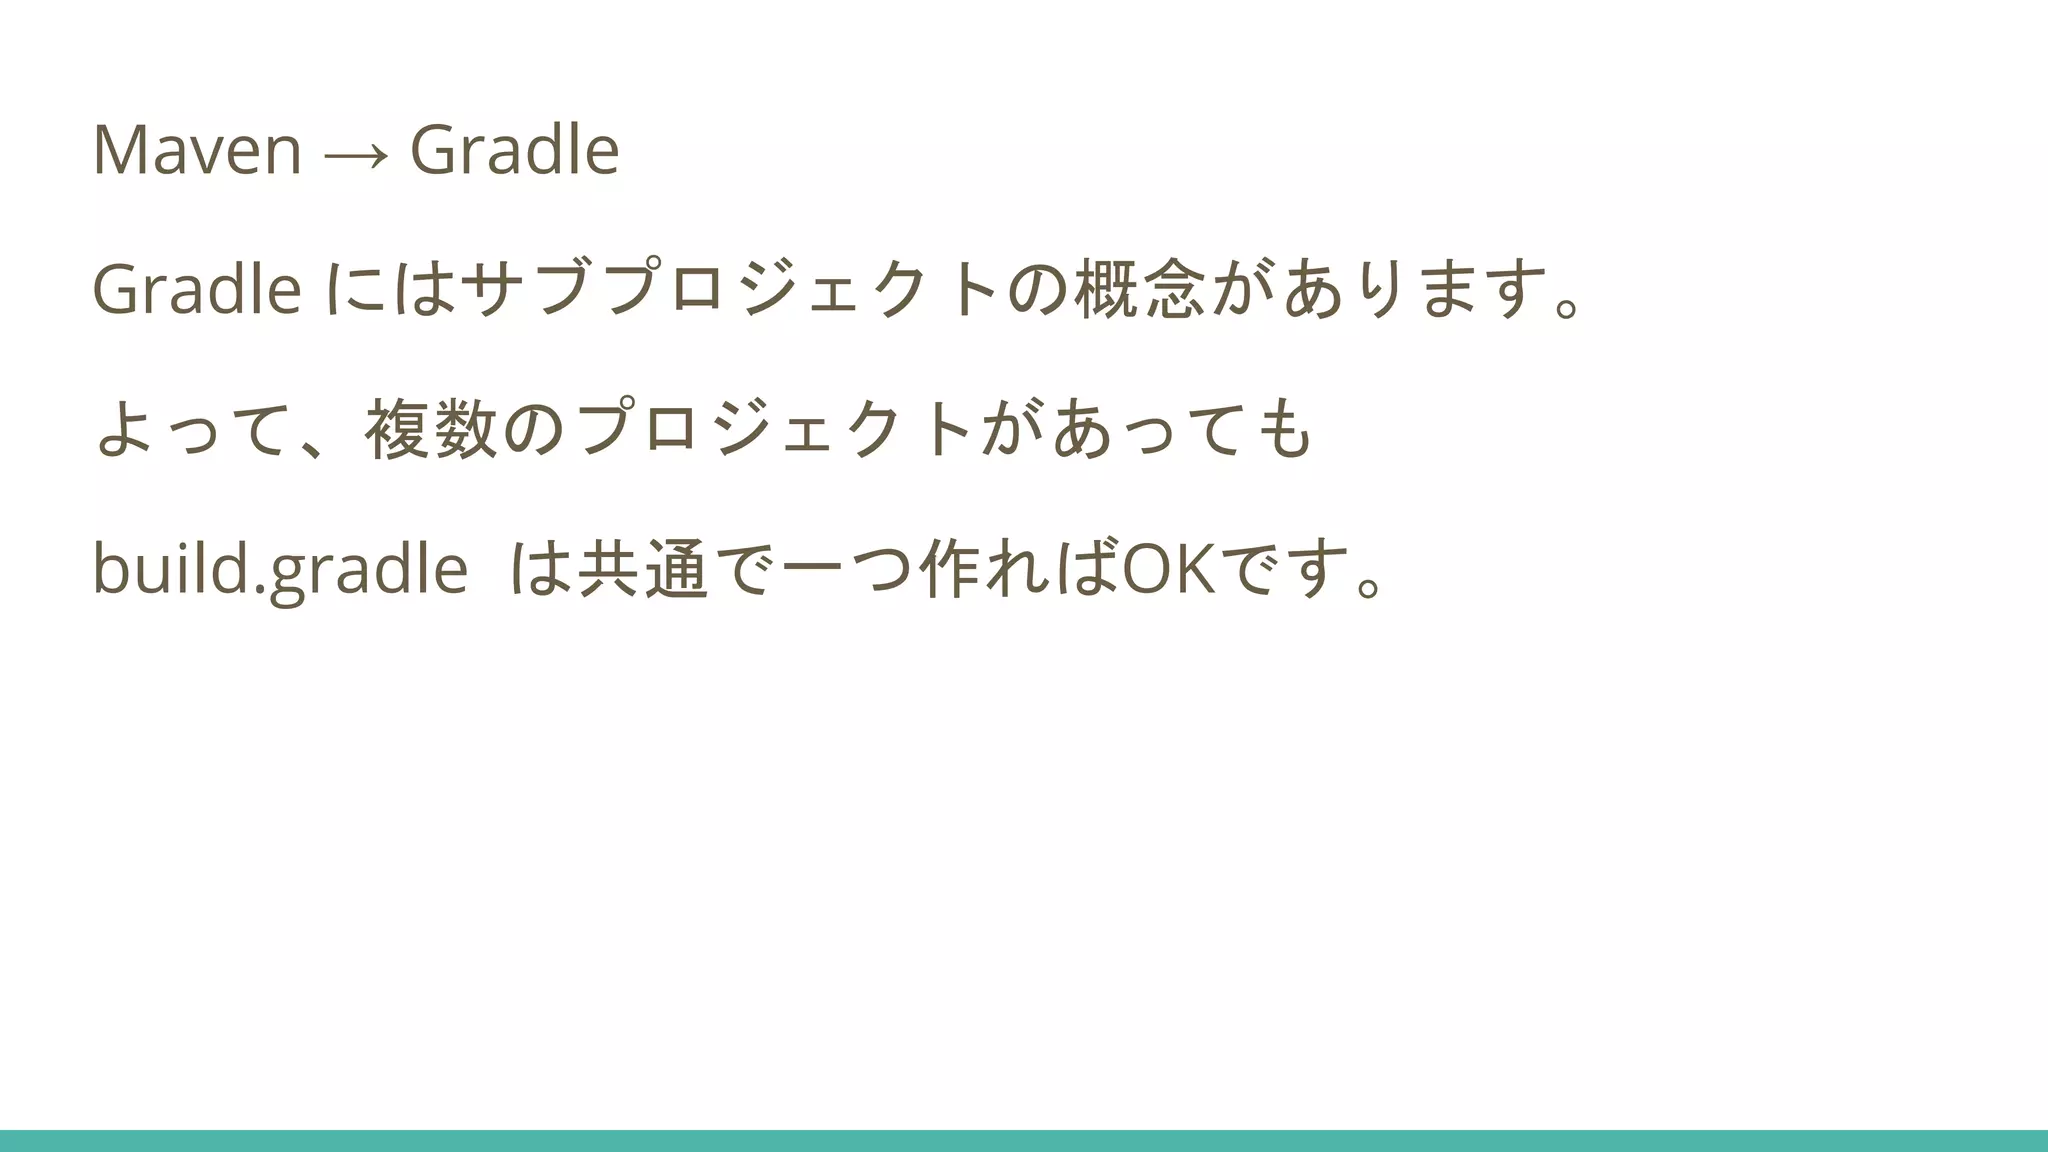
Maven → Gradle Gradle
にはサブプロジェクトの概念があります。 よって、複数のプロジェクトがあっても build.gradle は共通で一つ作ればOKです。
16.
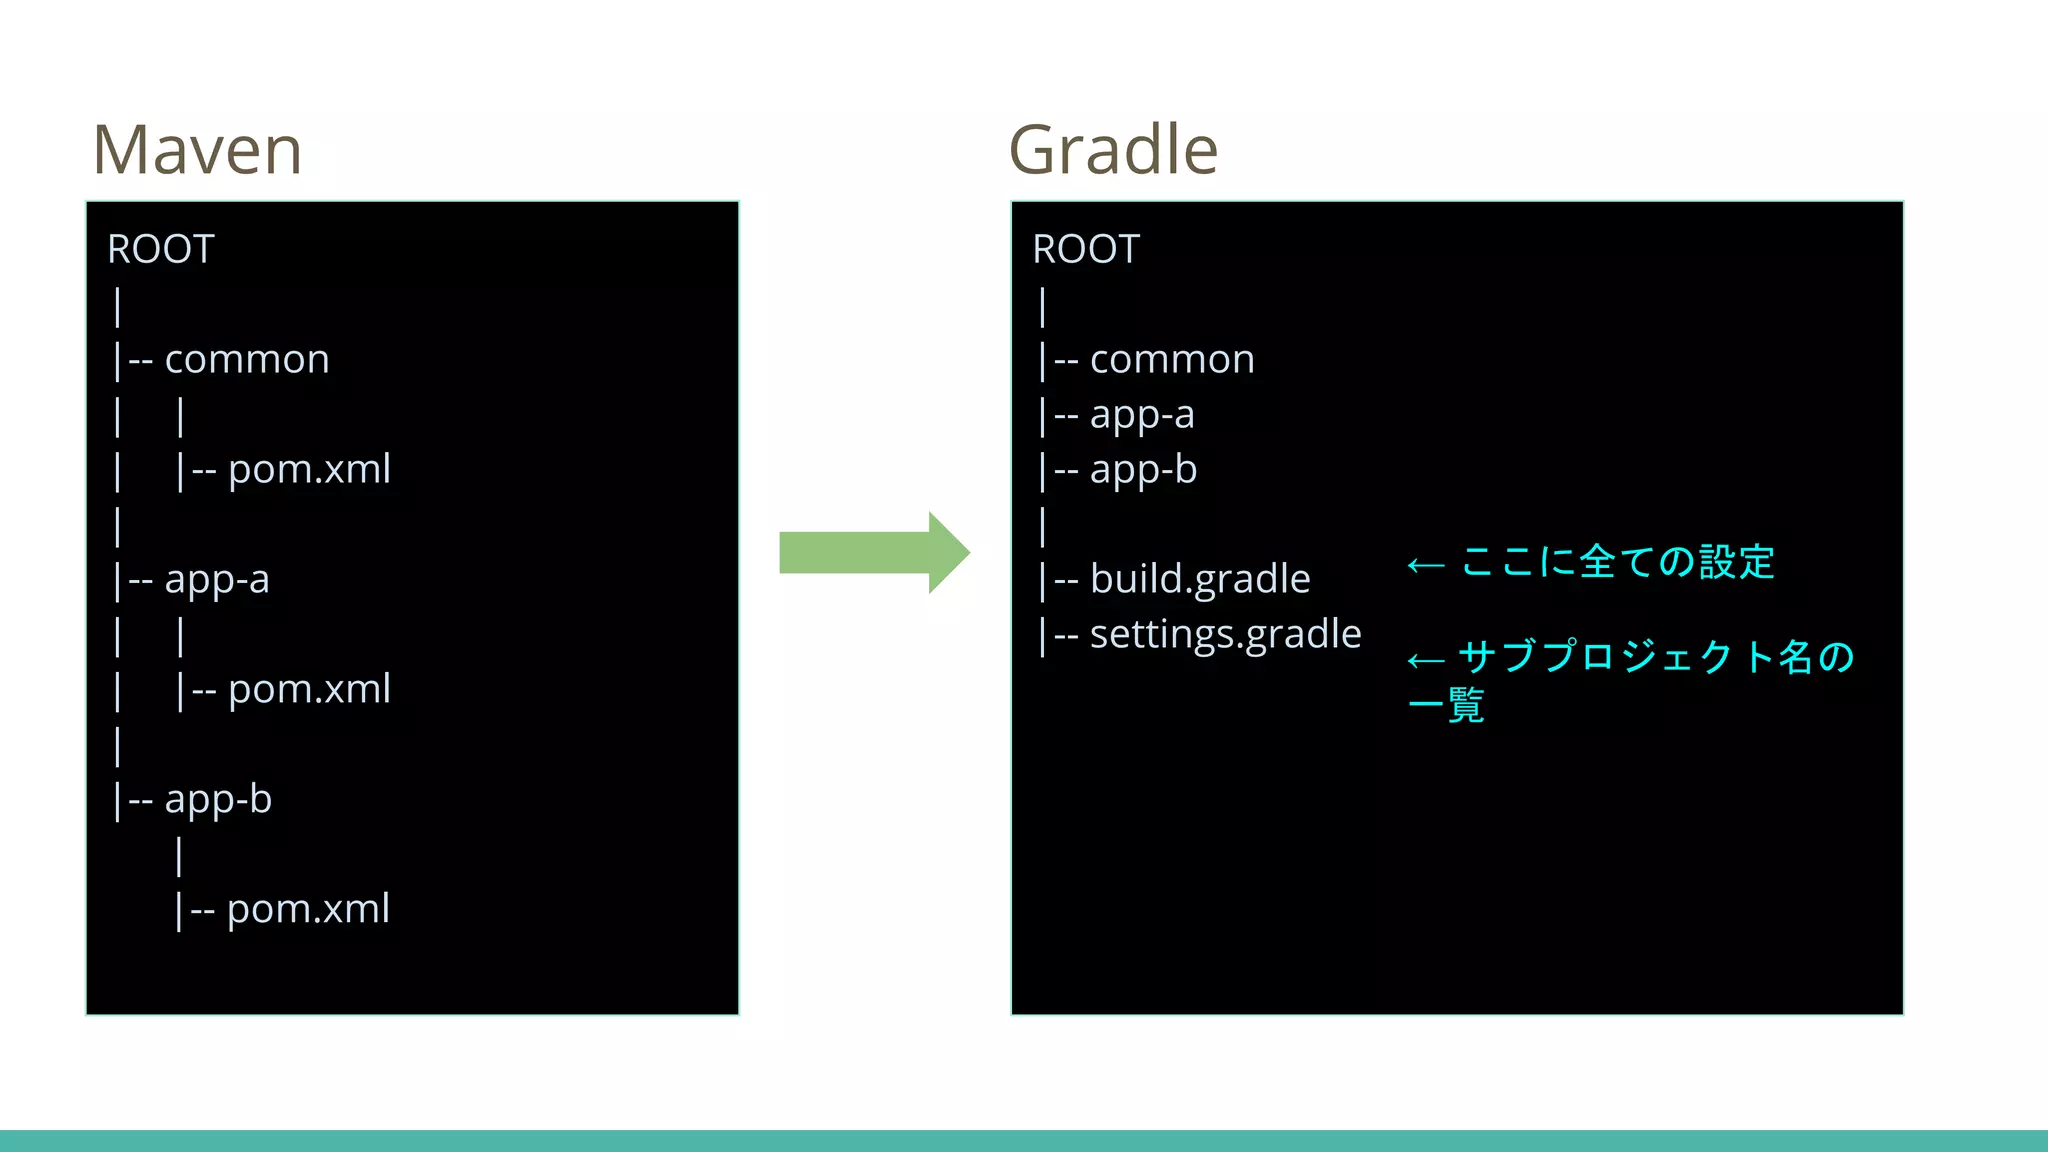
Maven Gradle ROOT | |-- common |
| | |-- pom.xml | |-- app-a | | | |-- pom.xml | |-- app-b | |-- pom.xml ROOT | |-- common |-- app-a |-- app-b | |-- build.gradle |-- settings.gradle ← ここに全ての設定 ← サブプロジェクト名の 一覧
17.
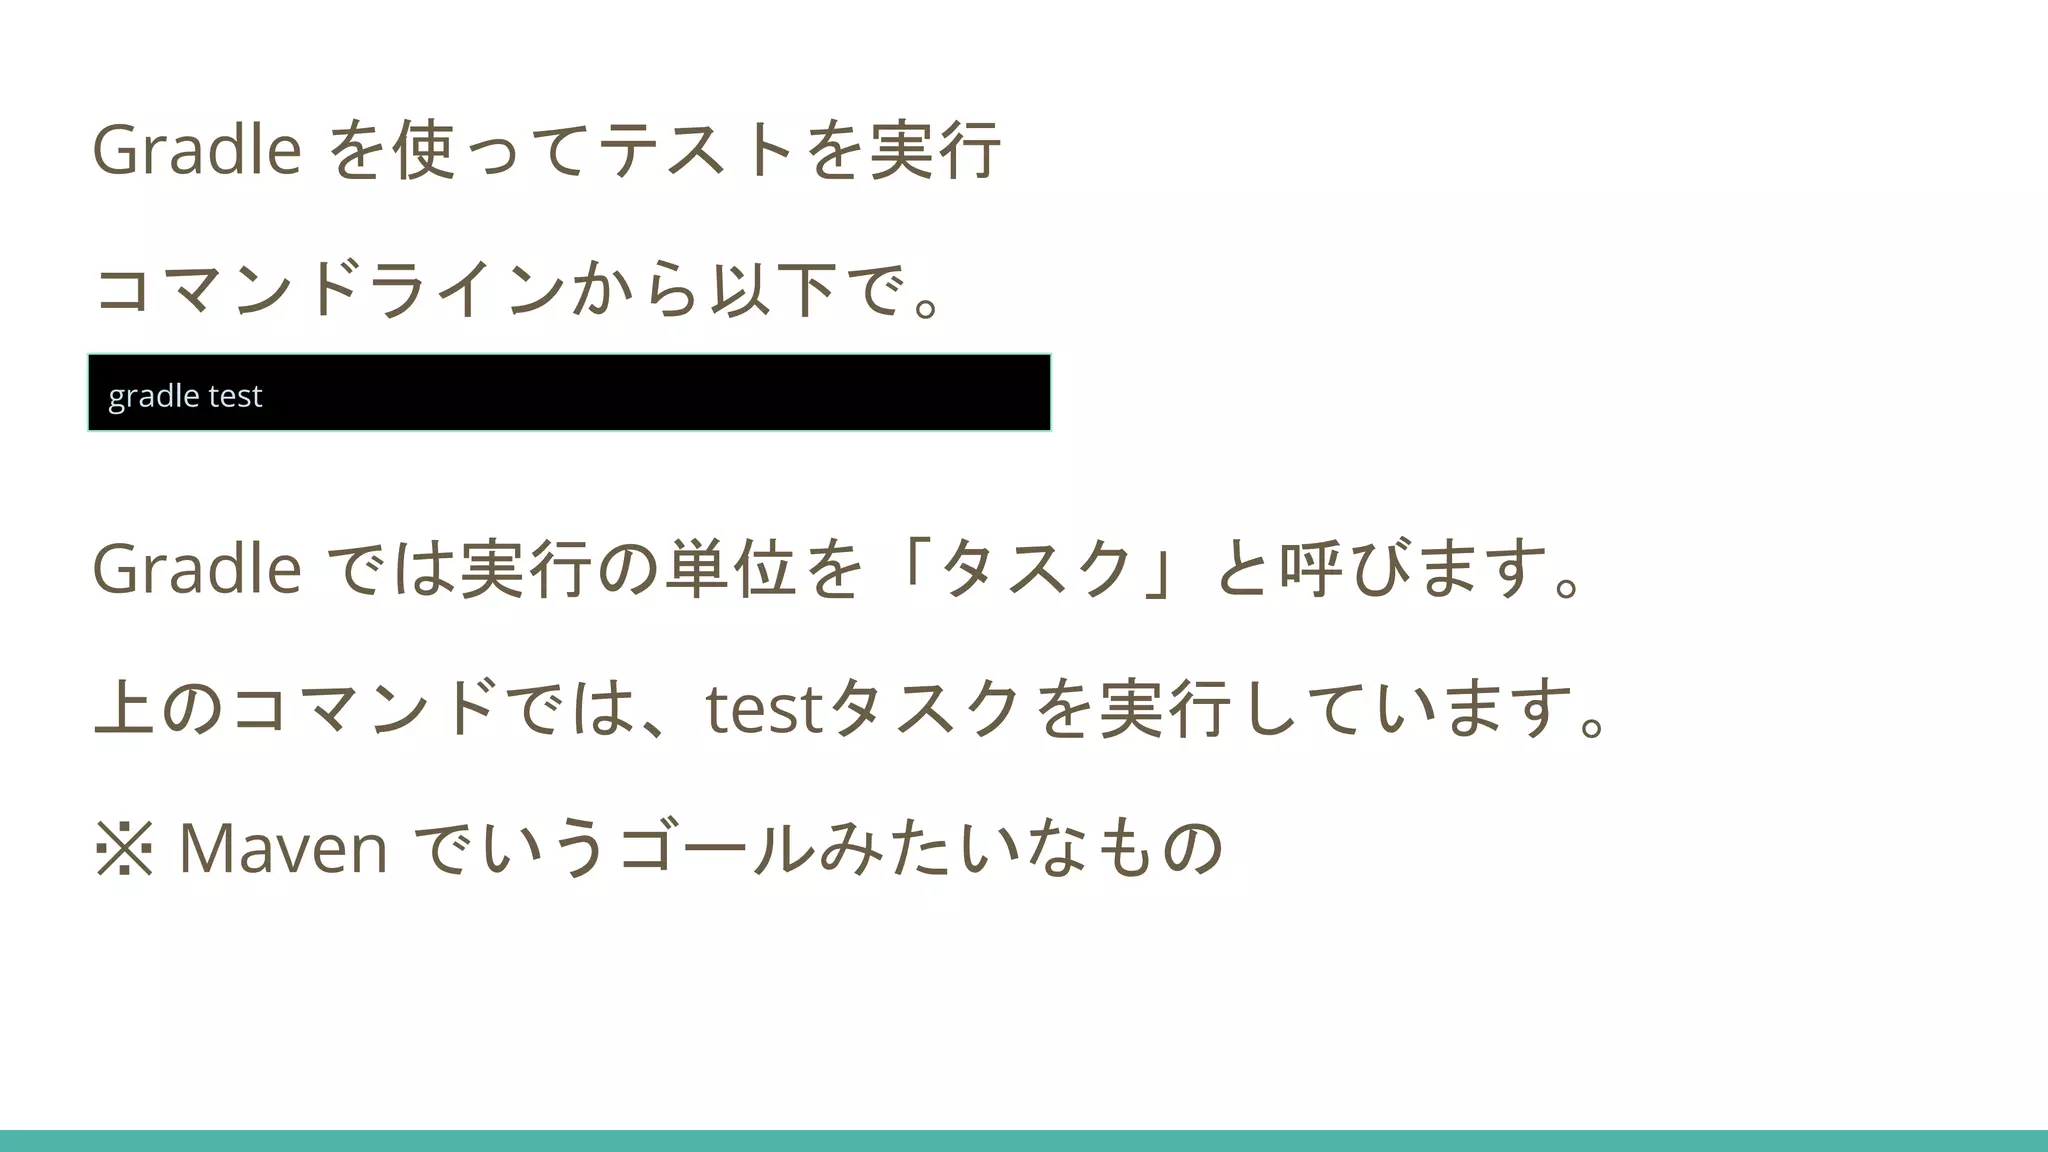
Gradle を使ってテストを実行 コマンドラインから以下で。 Gradle では実行の単位を「タスク」と呼びます。 上のコマンドでは、testタスクを実行しています。 ※
Maven でいうゴールみたいなもの gradle test
18.
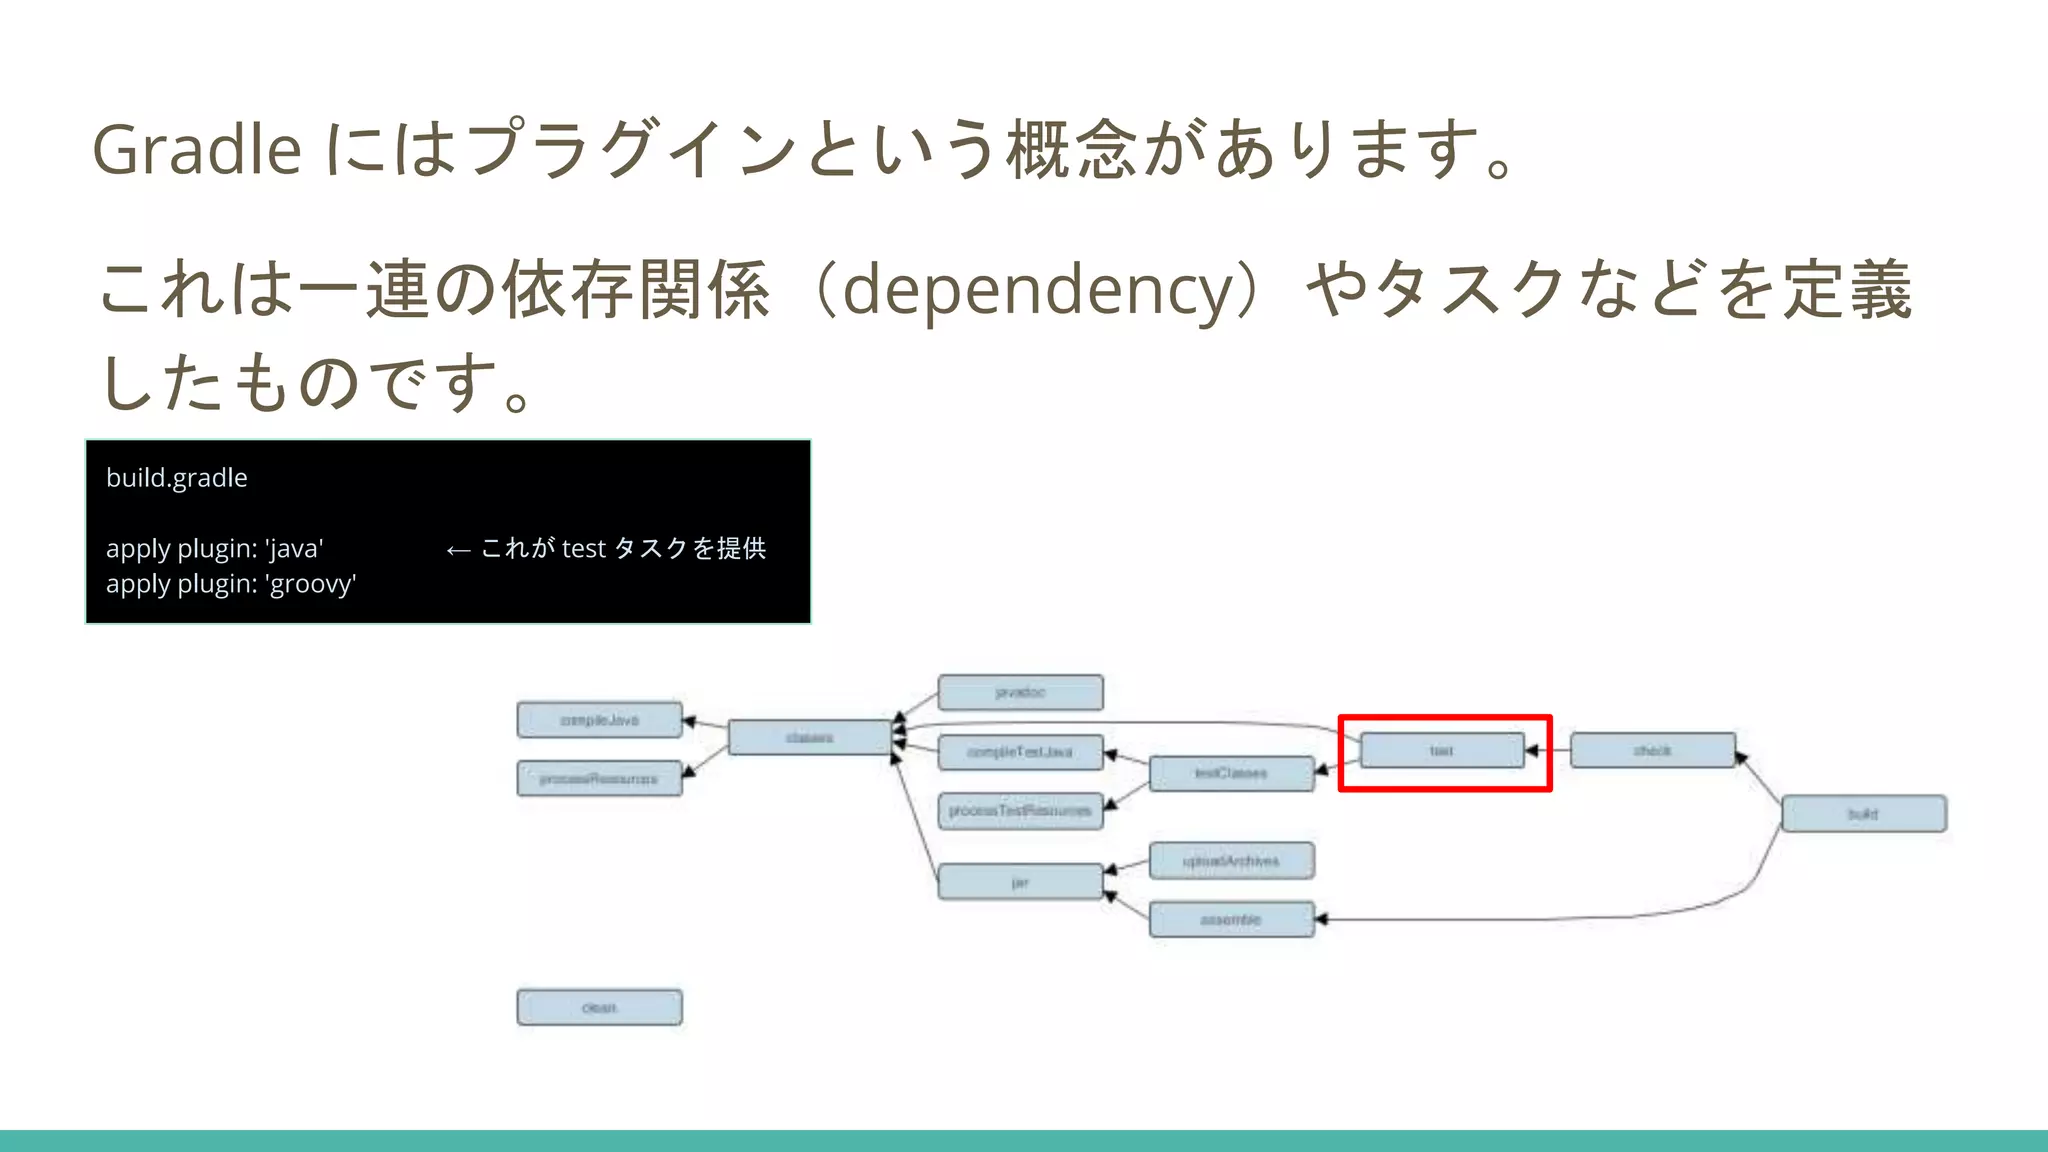
Gradle にはプラグインという概念があります。 これは一連の依存関係(dependency)やタスクなどを定義 したものです。 build.gradle apply plugin:
'java' ← これが test タスクを提供 apply plugin: 'groovy'
19.
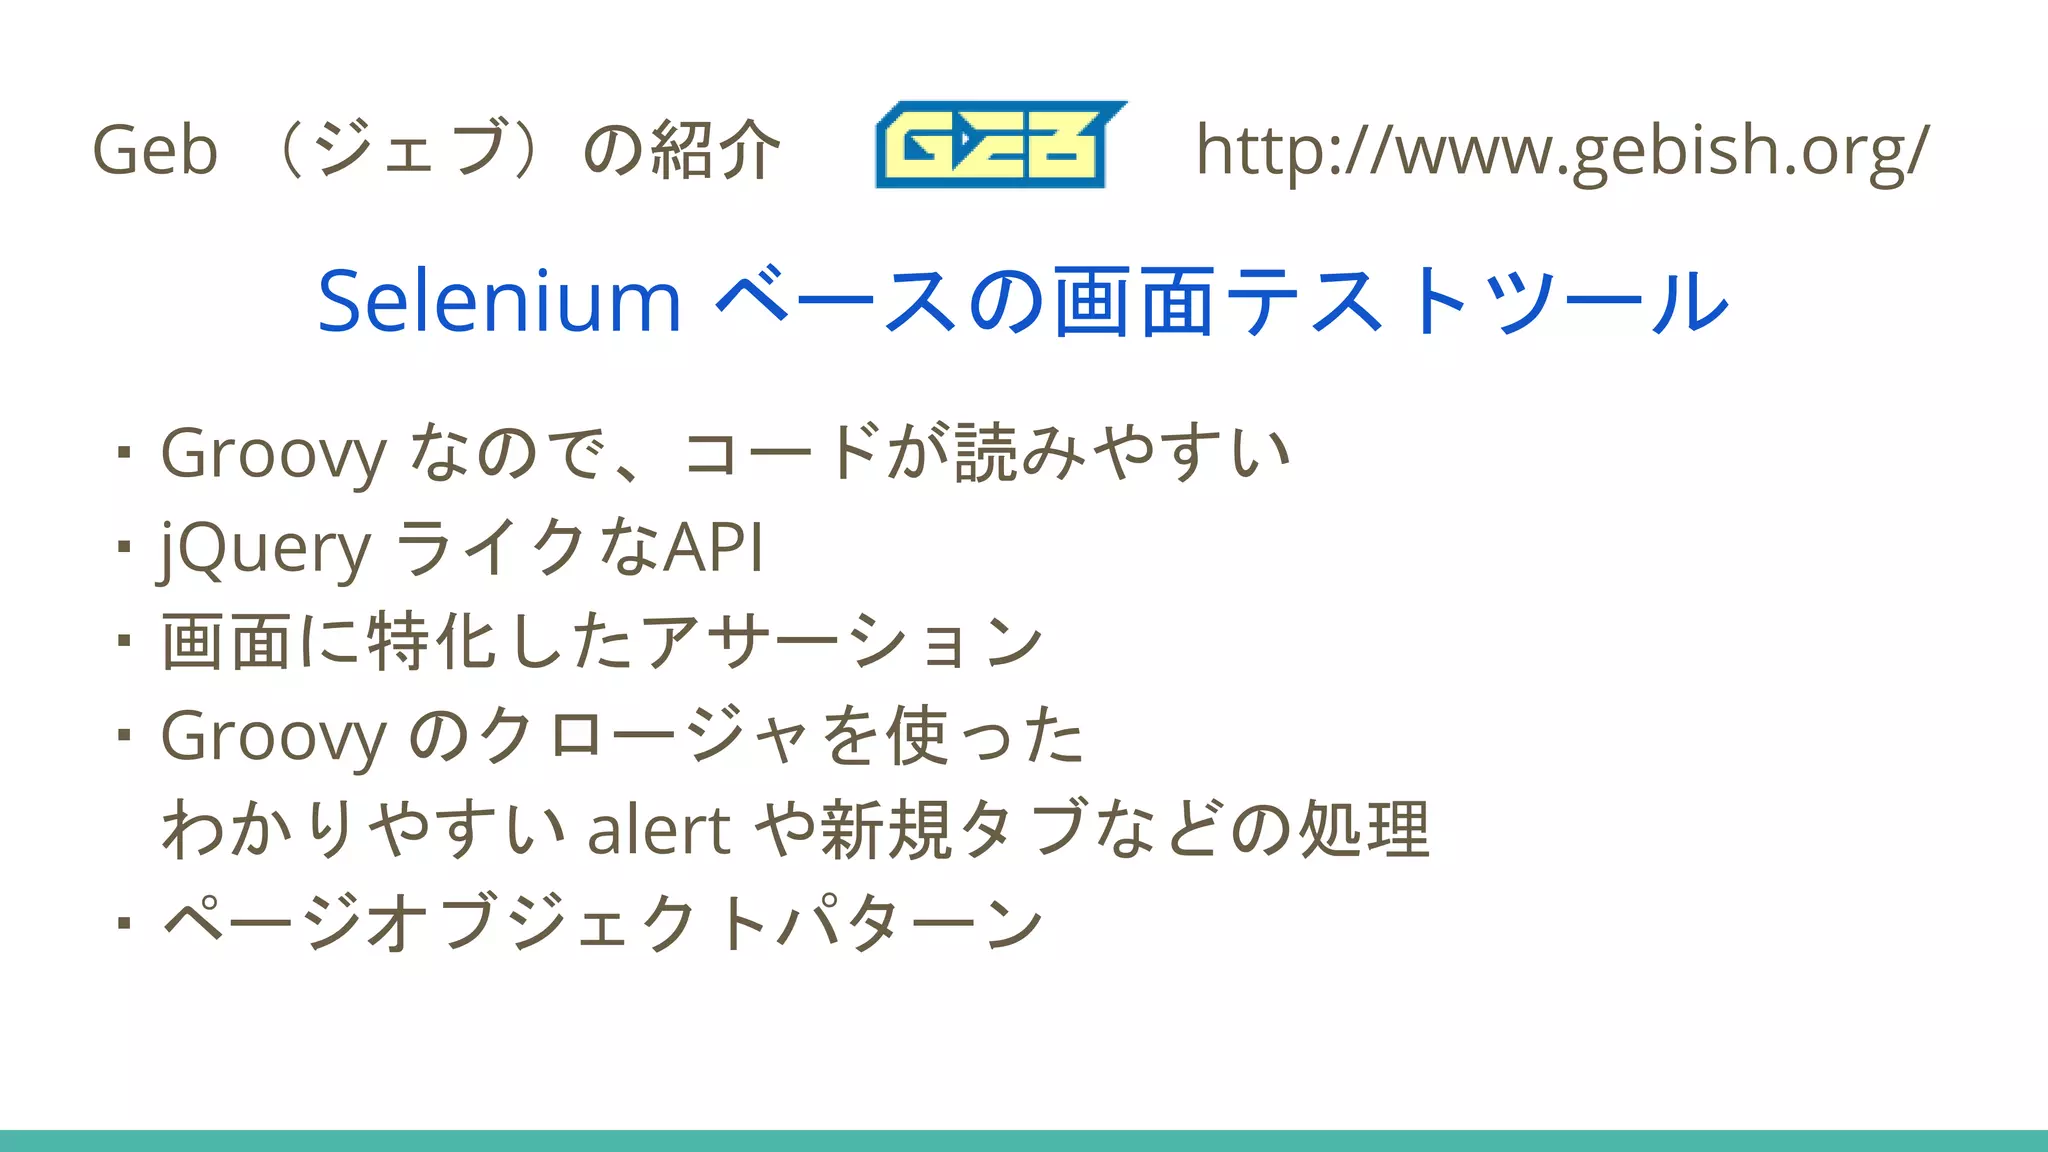
Geb (ジェブ)の紹介 http://www.gebish.org/ Selenium
ベースの画面テストツール ・Groovy なので、コードが読みやすい ・jQuery ライクなAPI ・画面に特化したアサーション ・Groovy のクロージャを使った わかりやすい alert や新規タブなどの処理 ・ページオブジェクトパターン
20.
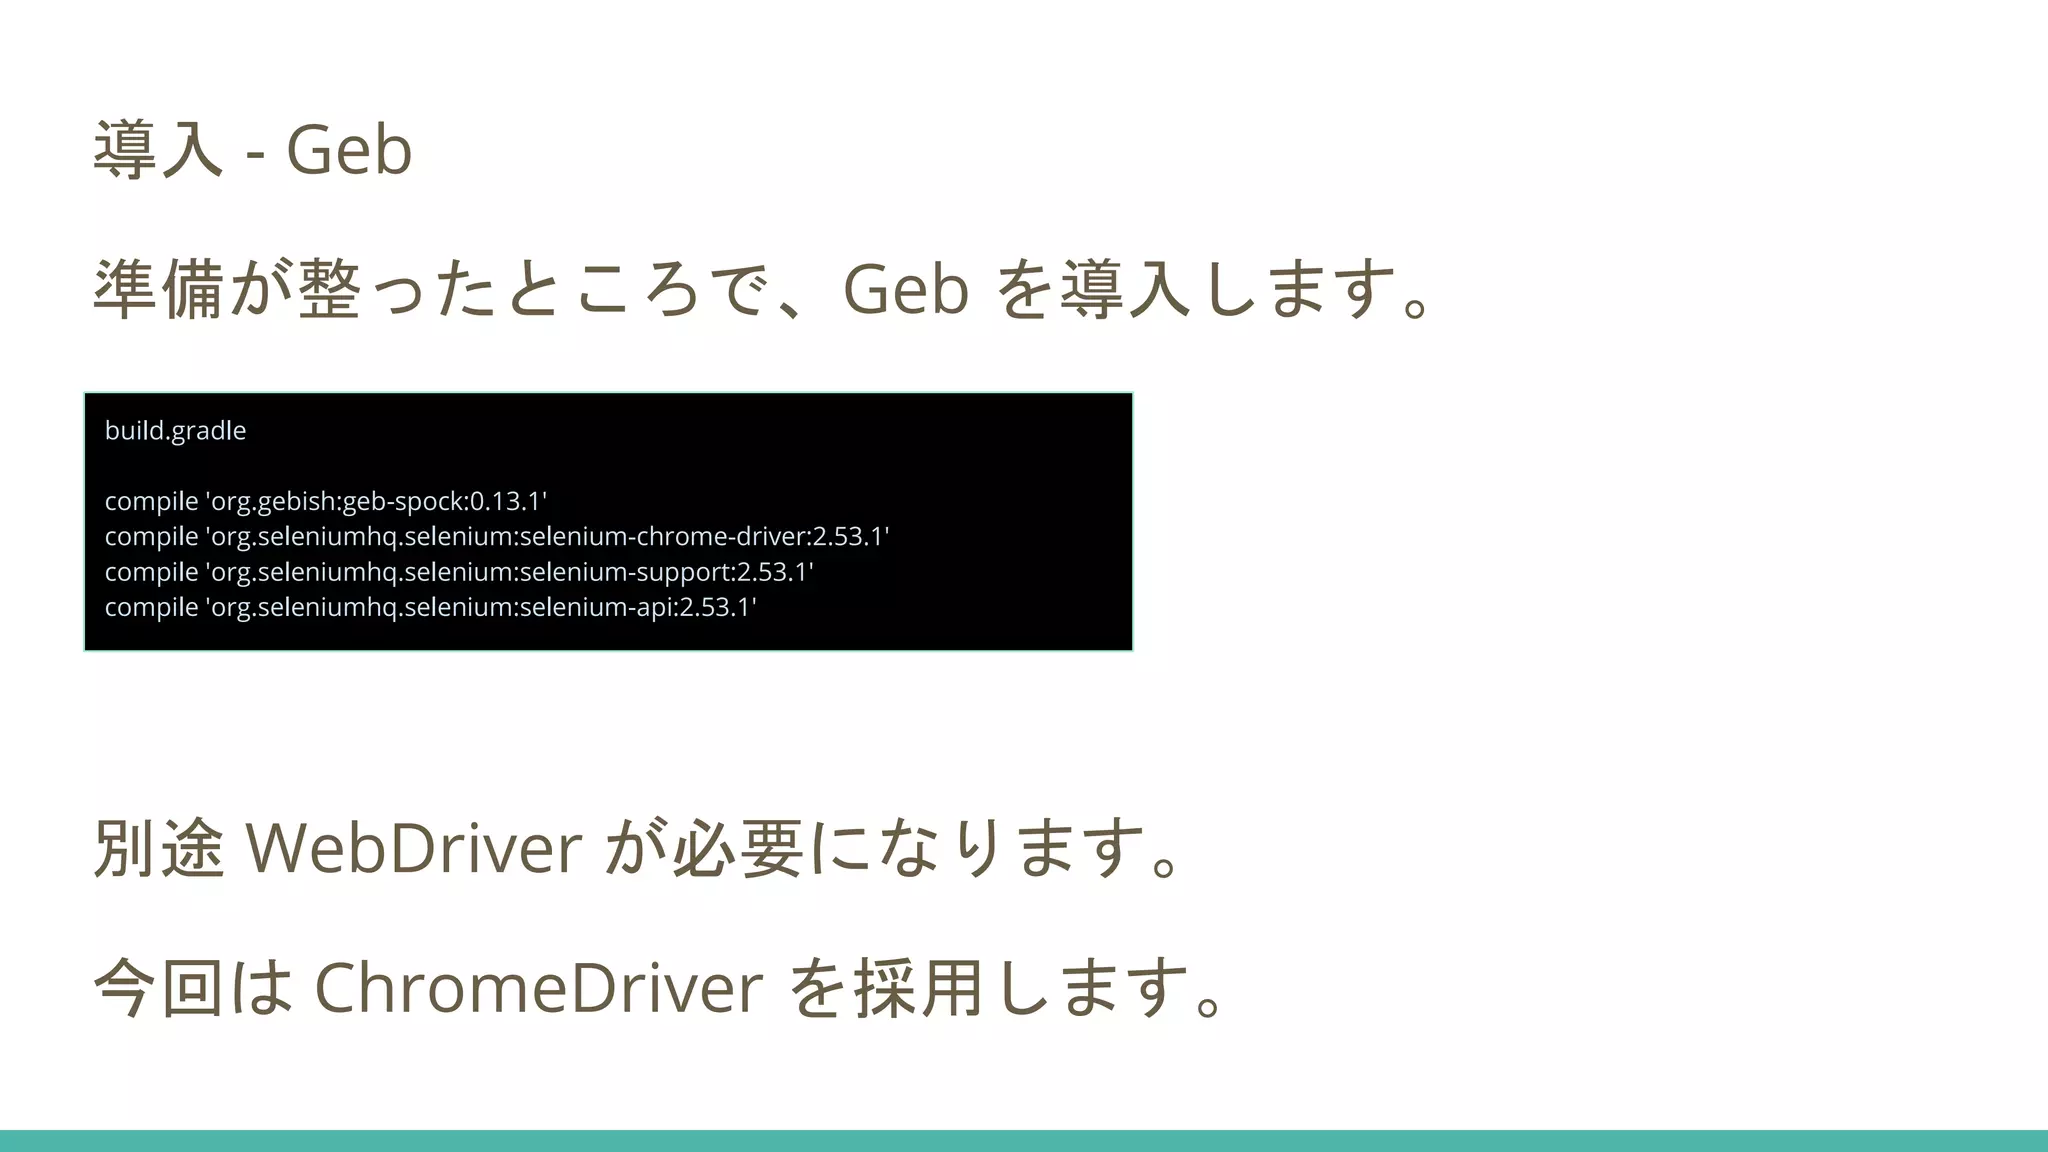
導入 - Geb 準備が整ったところで、Geb
を導入します。 別途 WebDriver が必要になります。 今回は ChromeDriver を採用します。 build.gradle compile 'org.gebish:geb-spock:0.13.1' compile 'org.seleniumhq.selenium:selenium-chrome-driver:2.53.1' compile 'org.seleniumhq.selenium:selenium-support:2.53.1' compile 'org.seleniumhq.selenium:selenium-api:2.53.1'
21.
ChromeDriver のダウンロード https://sites.google.com/a/chromium.org/chromedriver/downloads ここに Linux,
Mac, Windows それぞれのバイナリが用意され ているので、環境に応じたものをダウンロードしておきまし ょう。 ドライバのバイナリはそれほど大きいサイズではないので、 Git リポジトリに追加してしまいます。 git fetch したら誰でも使えるのが重要!
22.
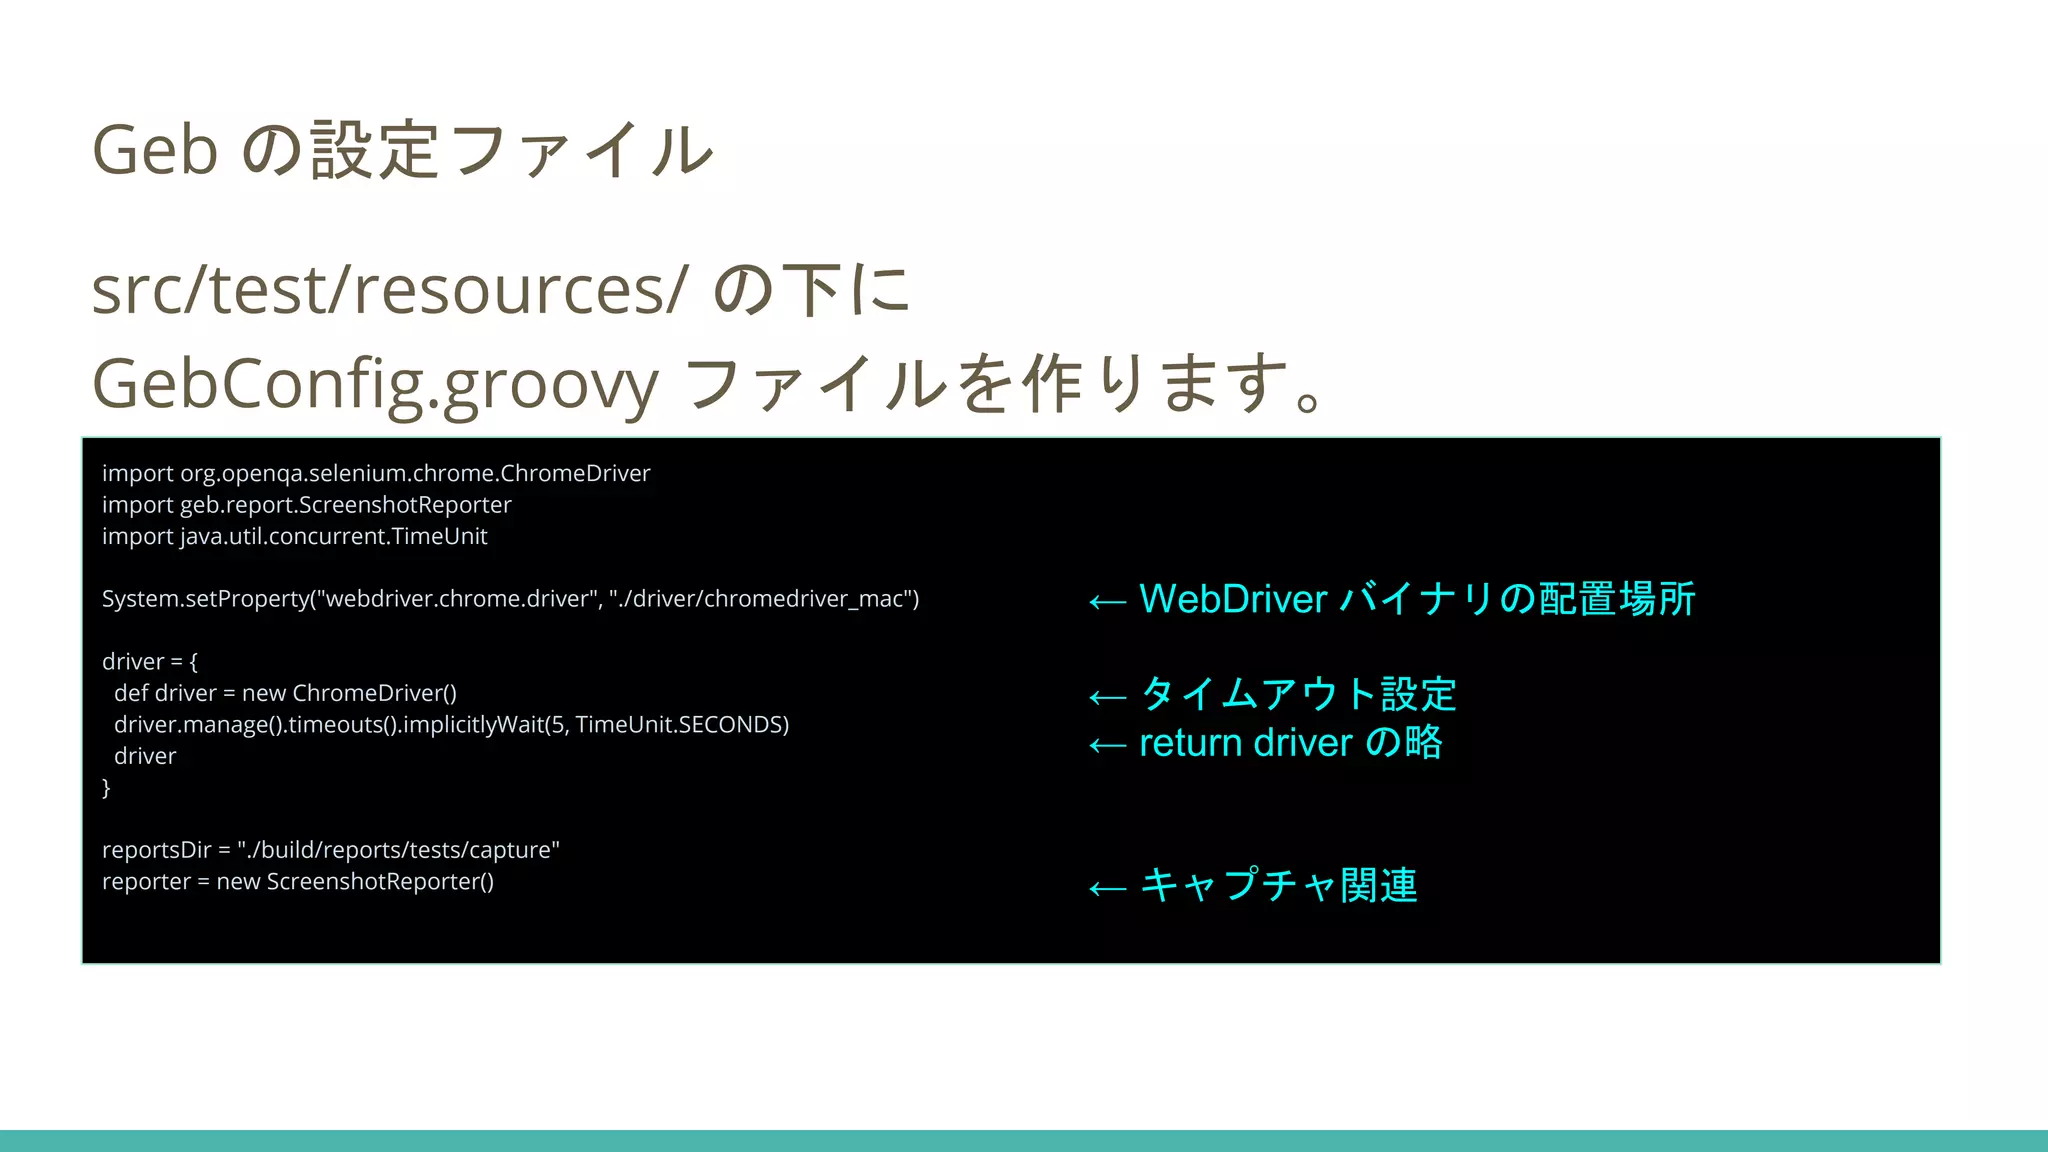
Geb の設定ファイル src/test/resources/ の下に GebConfig.groovy
ファイルを作ります。 import org.openqa.selenium.chrome.ChromeDriver import geb.report.ScreenshotReporter import java.util.concurrent.TimeUnit System.setProperty("webdriver.chrome.driver", "./driver/chromedriver_mac") driver = { def driver = new ChromeDriver() driver.manage().timeouts().implicitlyWait(5, TimeUnit.SECONDS) driver } reportsDir = "./build/reports/tests/capture" reporter = new ScreenshotReporter() ← WebDriver バイナリの配置場所 ← タイムアウト設定 ← return driver の略 ← キャプチャ関連
23.
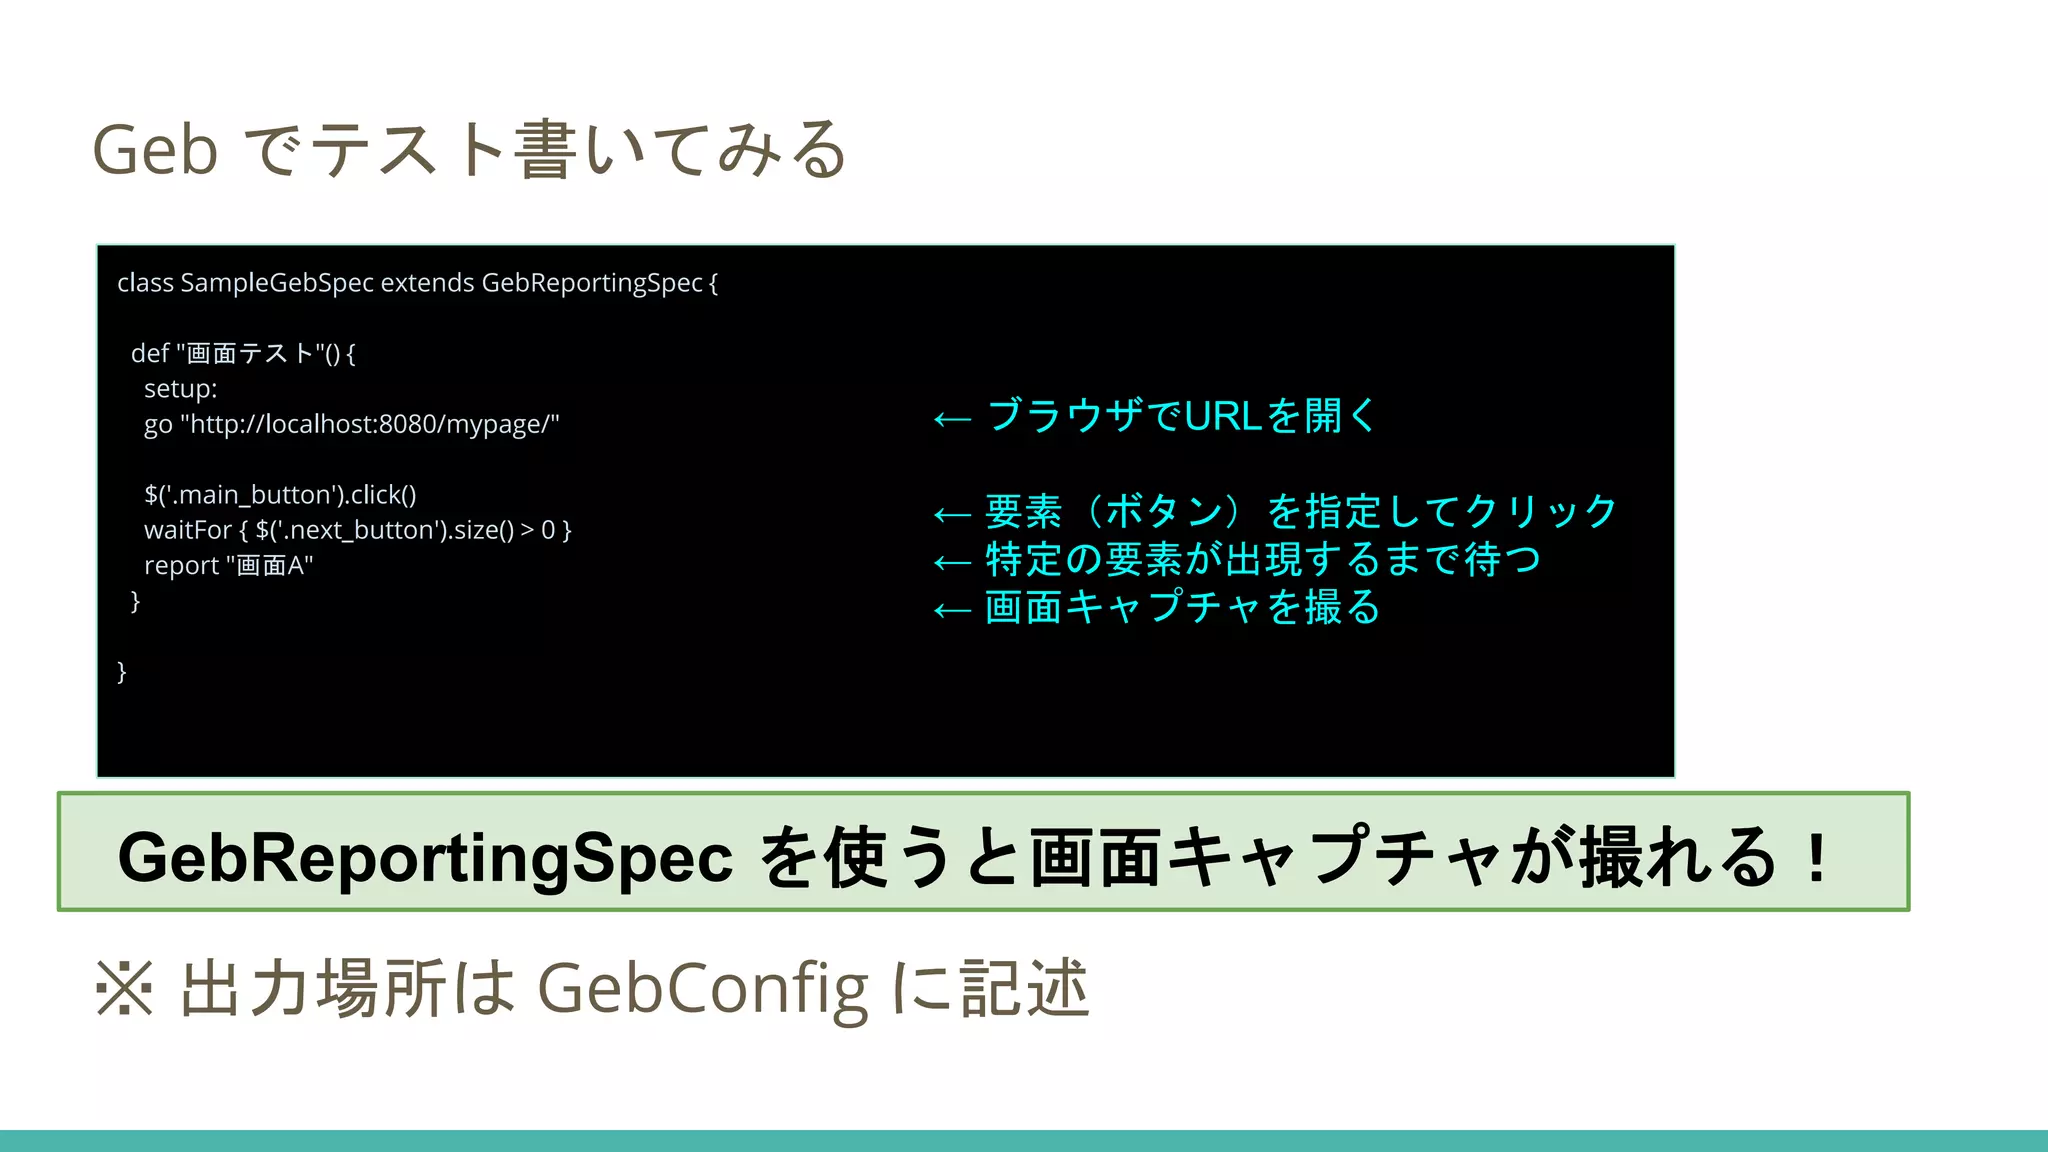
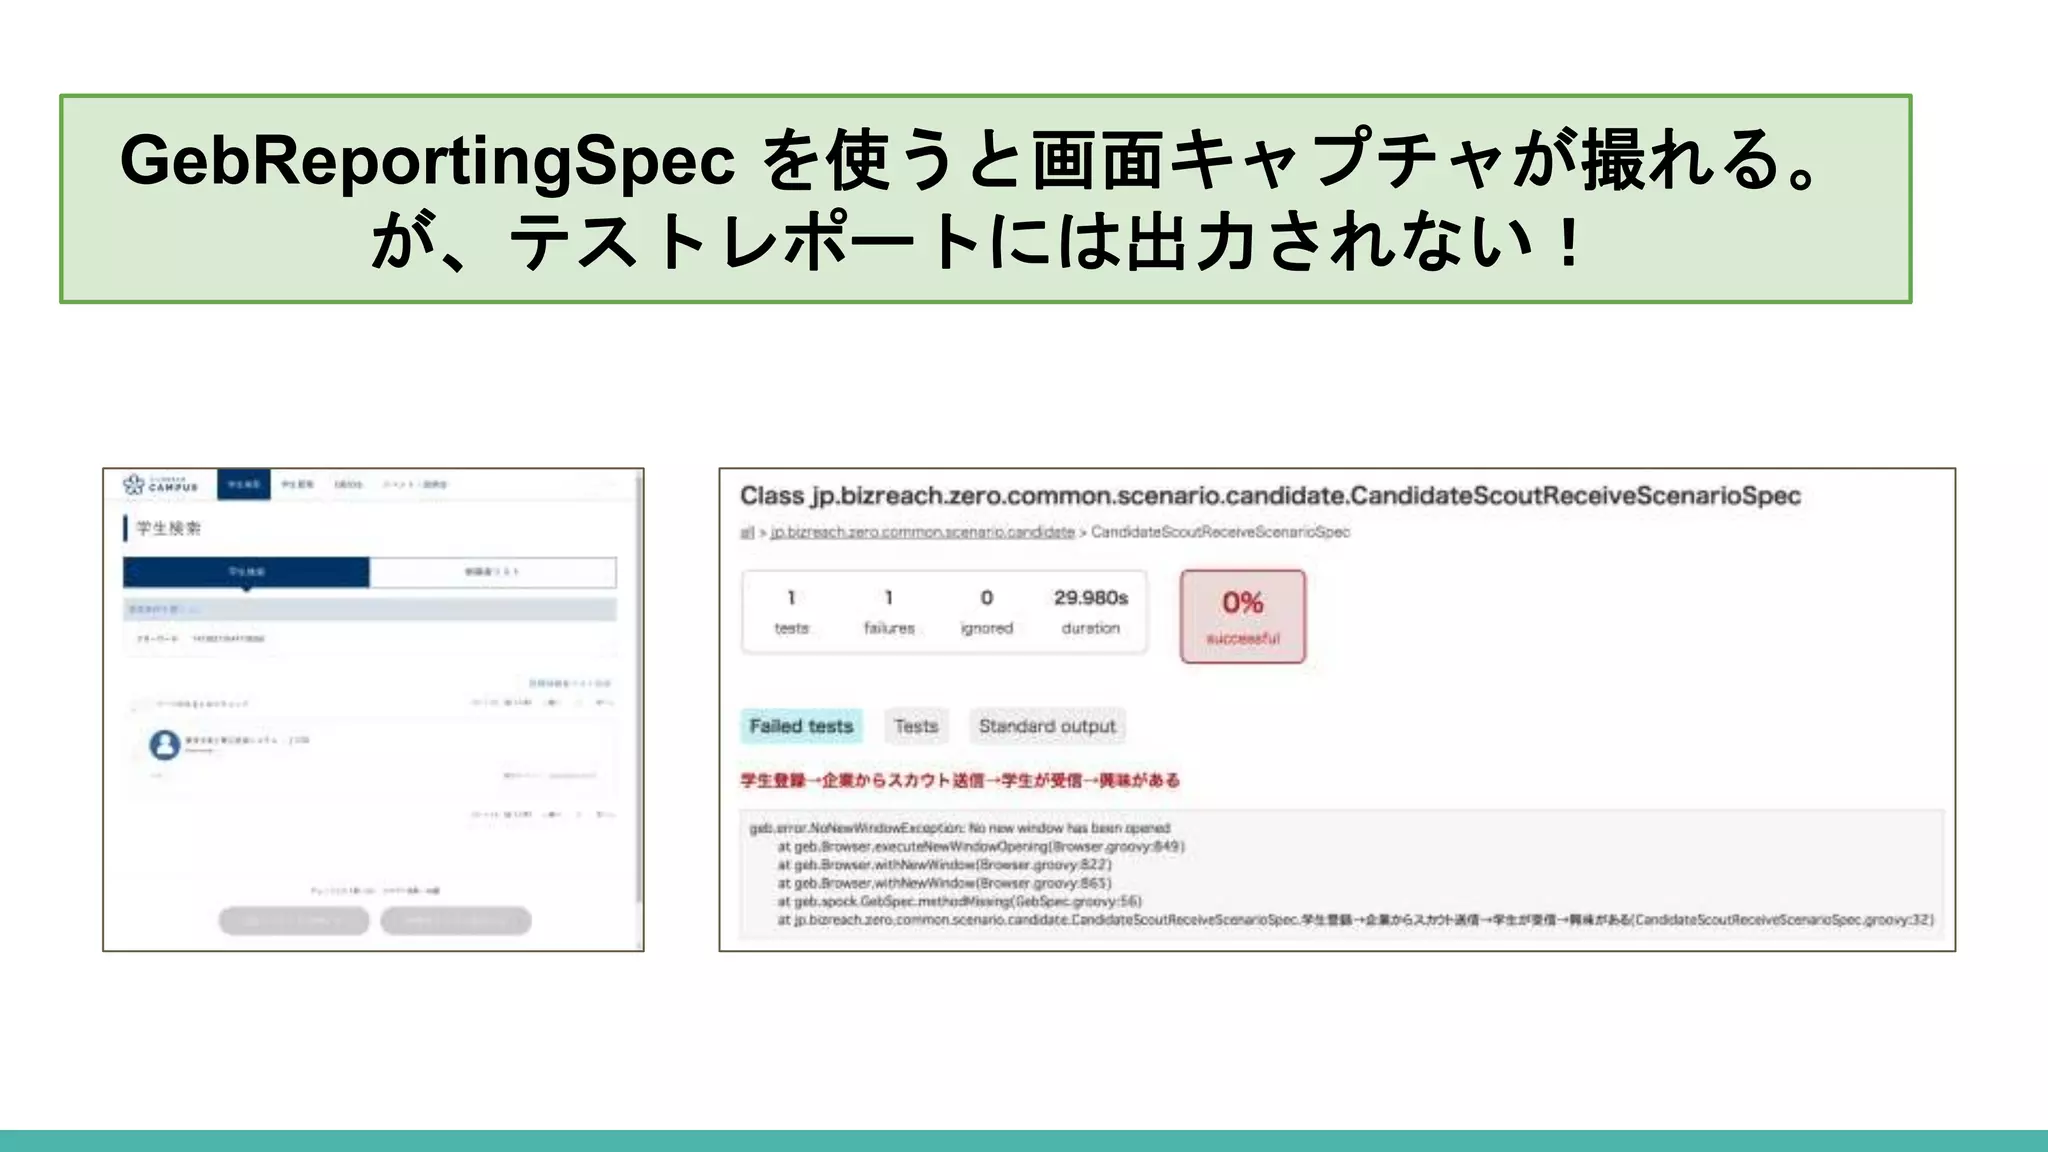
Geb でテスト書いてみる GebReportingSpec を使うと、画面キャプチャが撮れる。 ※
出力場所は GebConfig に記述 class SampleGebSpec extends GebReportingSpec { def "画面テスト"() { setup: go "http://localhost:8080/mypage/" $('.main_button').click() waitFor { $('.next_button').size() > 0 } report "画面A" } } ← ブラウザでURLを開く ← 要素(ボタン)を指定してクリック ← 特定の要素が出現するまで待つ ← 画面キャプチャを撮る GebReportingSpec を使うと画面キャプチャが撮れる!
24.
Gradle + Geb ここまで来れば、Gradle
+ Geb で画面テストをする準備が 整いました。 これで、Geb のテストが実行され build/reports/tests/ にテストレポートが出力されます。 gradle test
25.
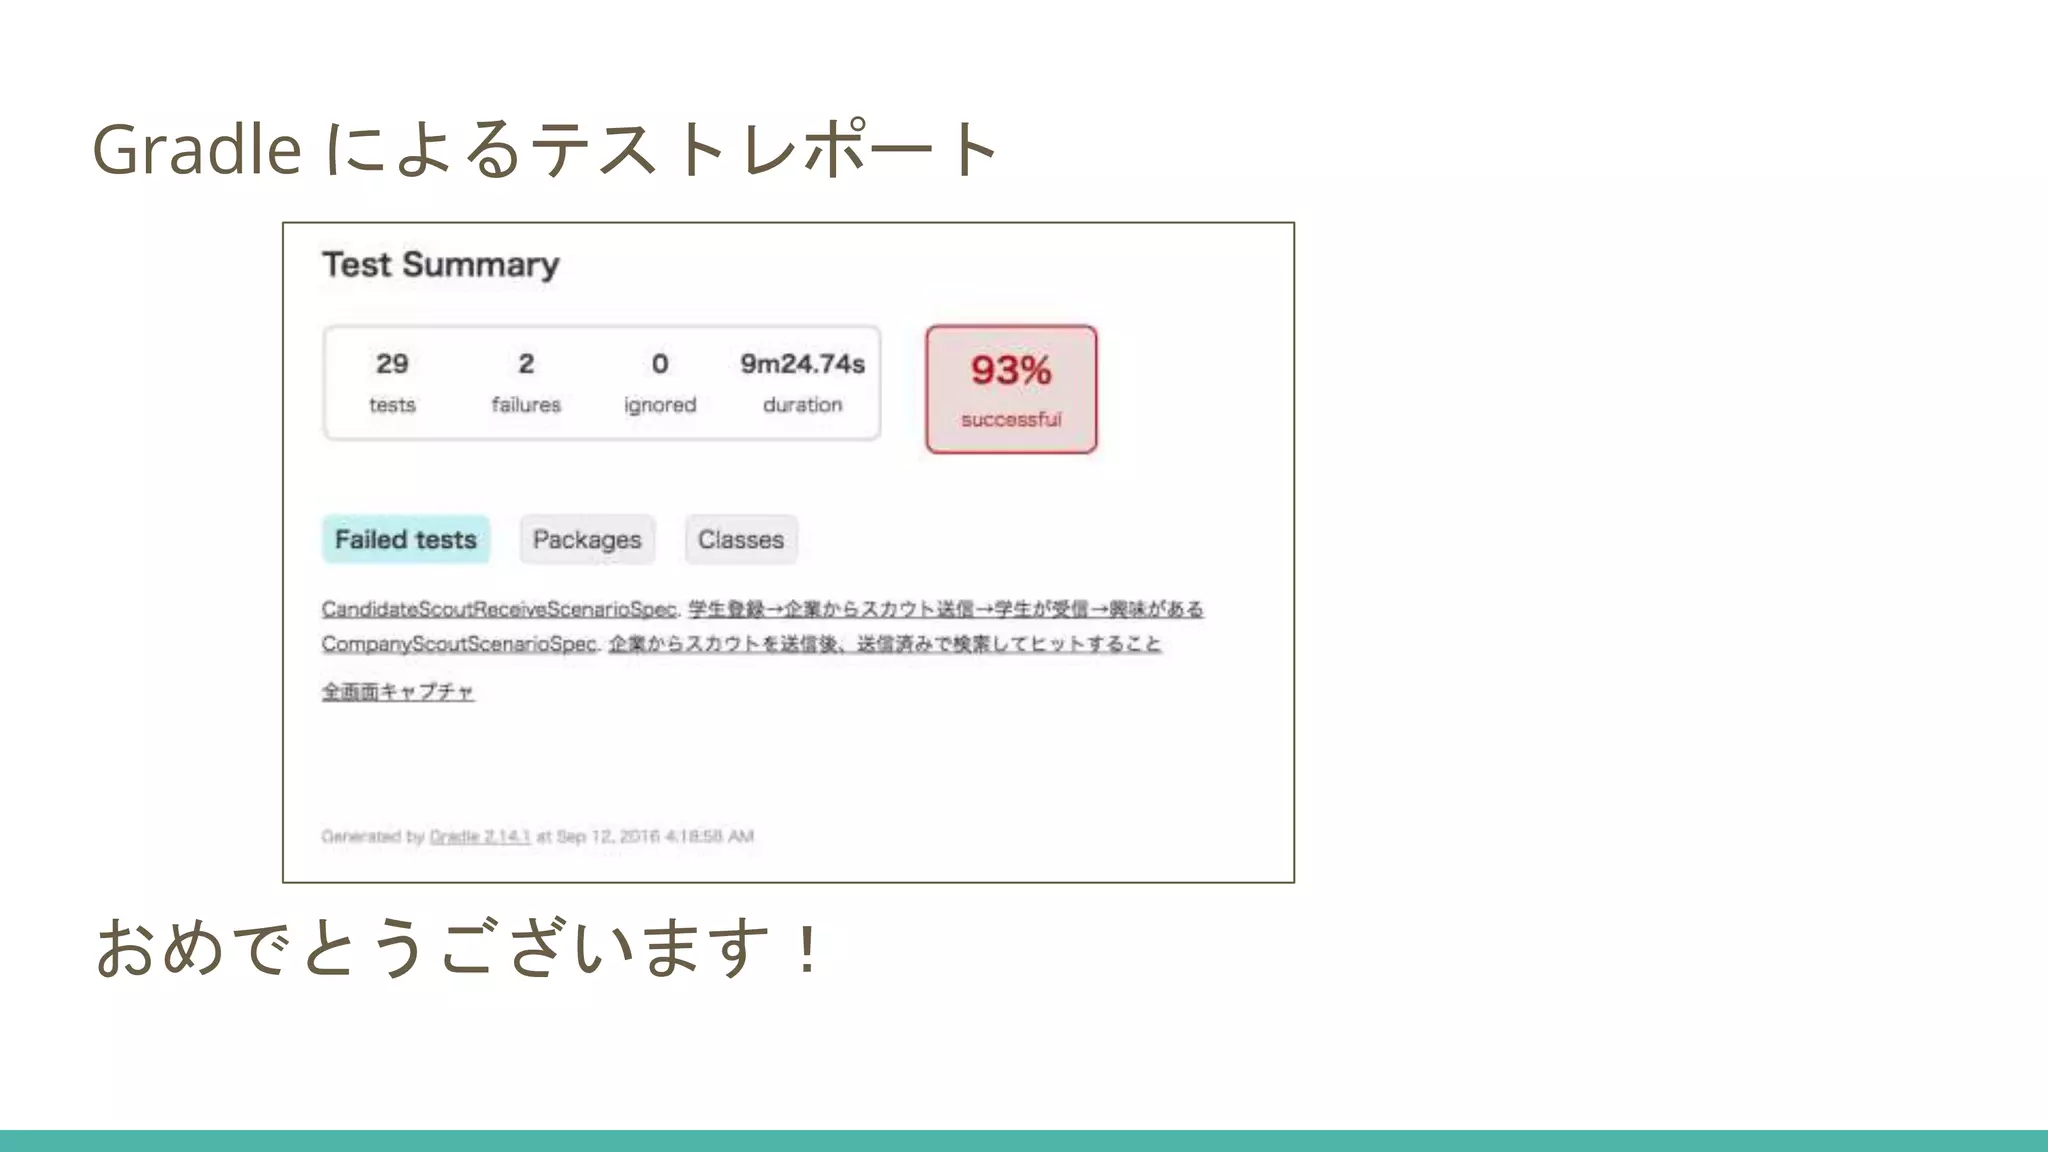
Gradle によるテストレポート おめでとうございます!
26.
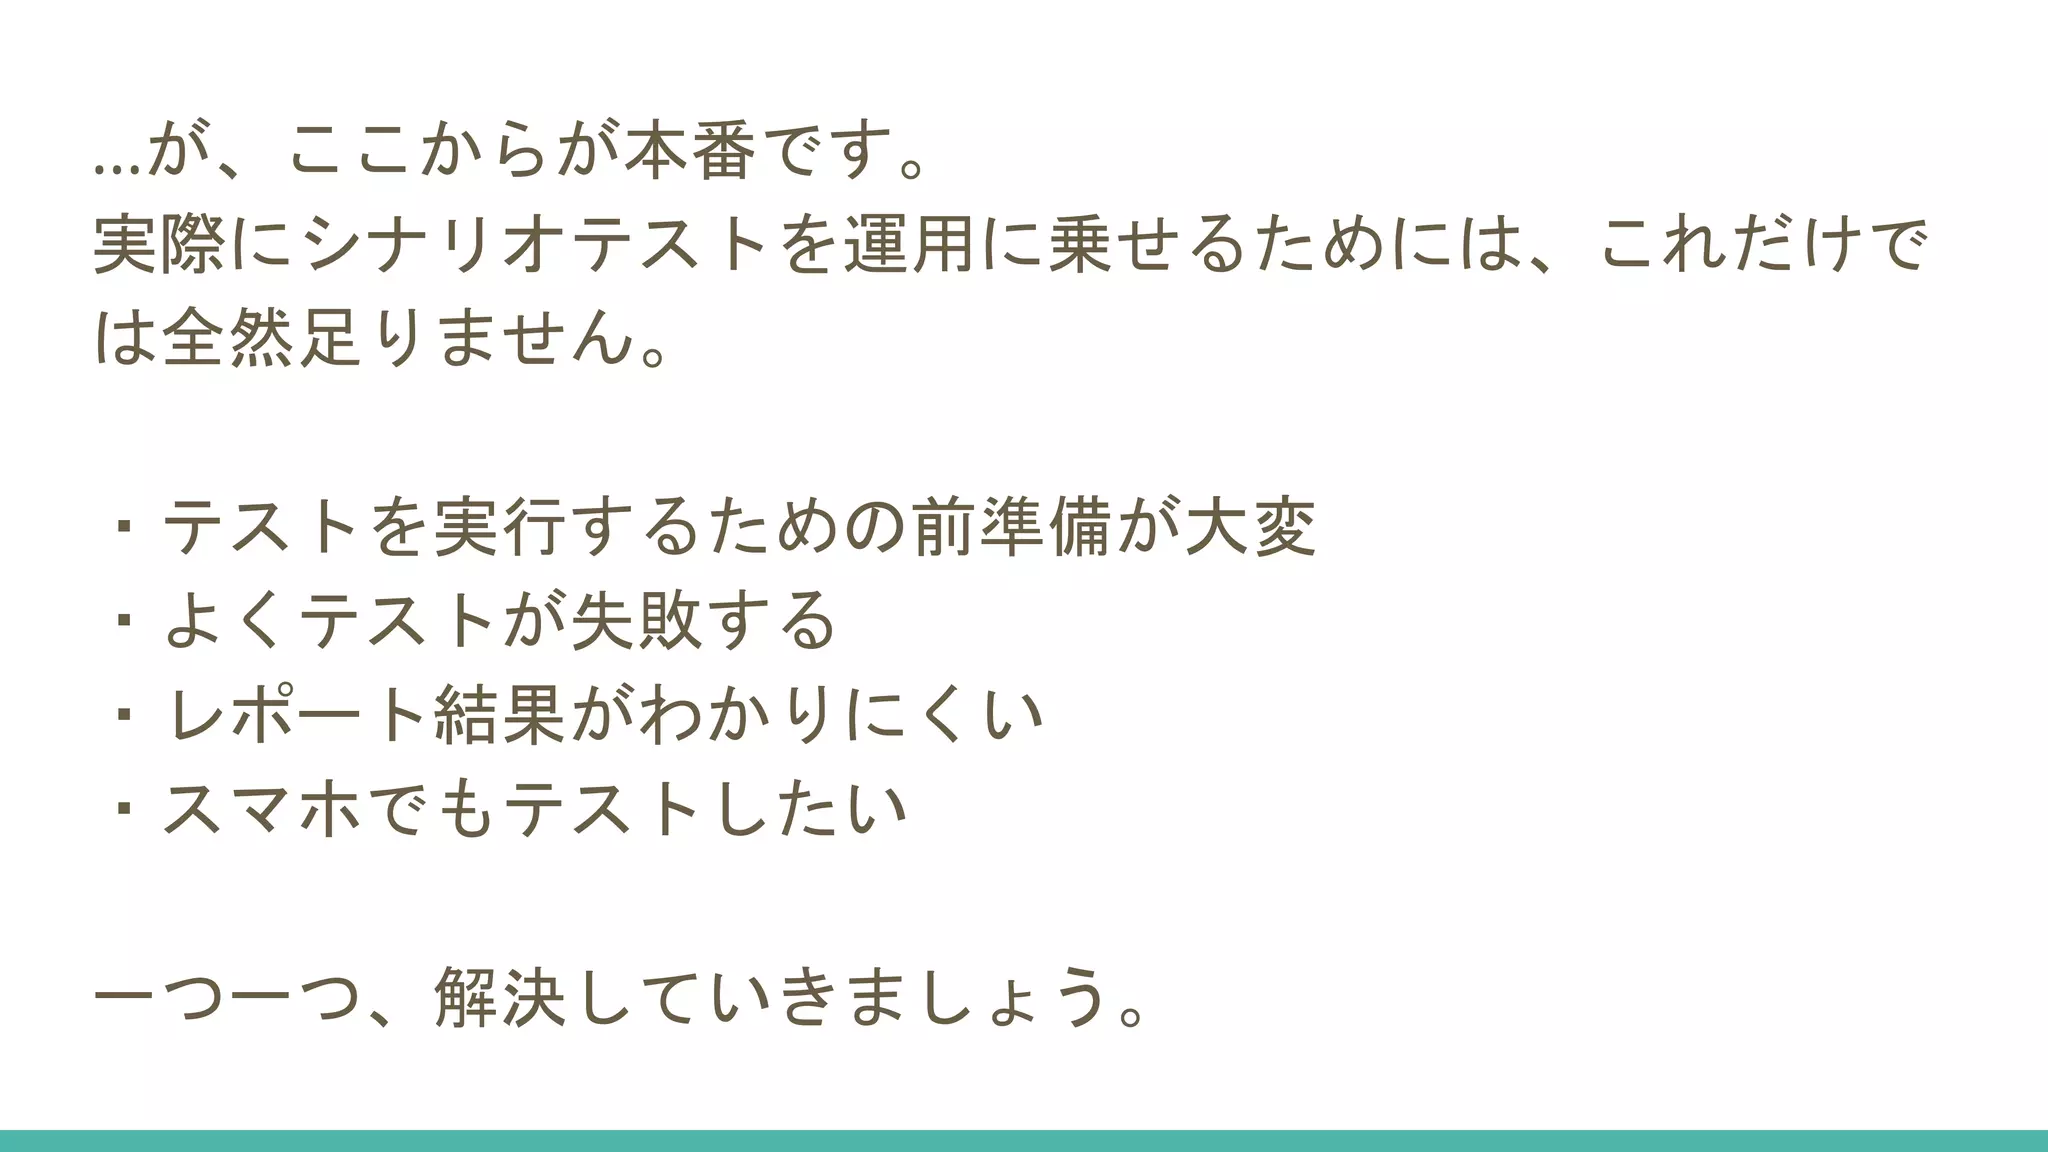
…が、ここからが本番です。 実際にシナリオテストを運用に乗せるためには、これだけで は全然足りません。 ・テストを実行するための前準備が大変 ・よくテストが失敗する ・レポート結果がわかりにくい ・スマホでもテストしたい 一つ一つ、解決していきましょう。
27.
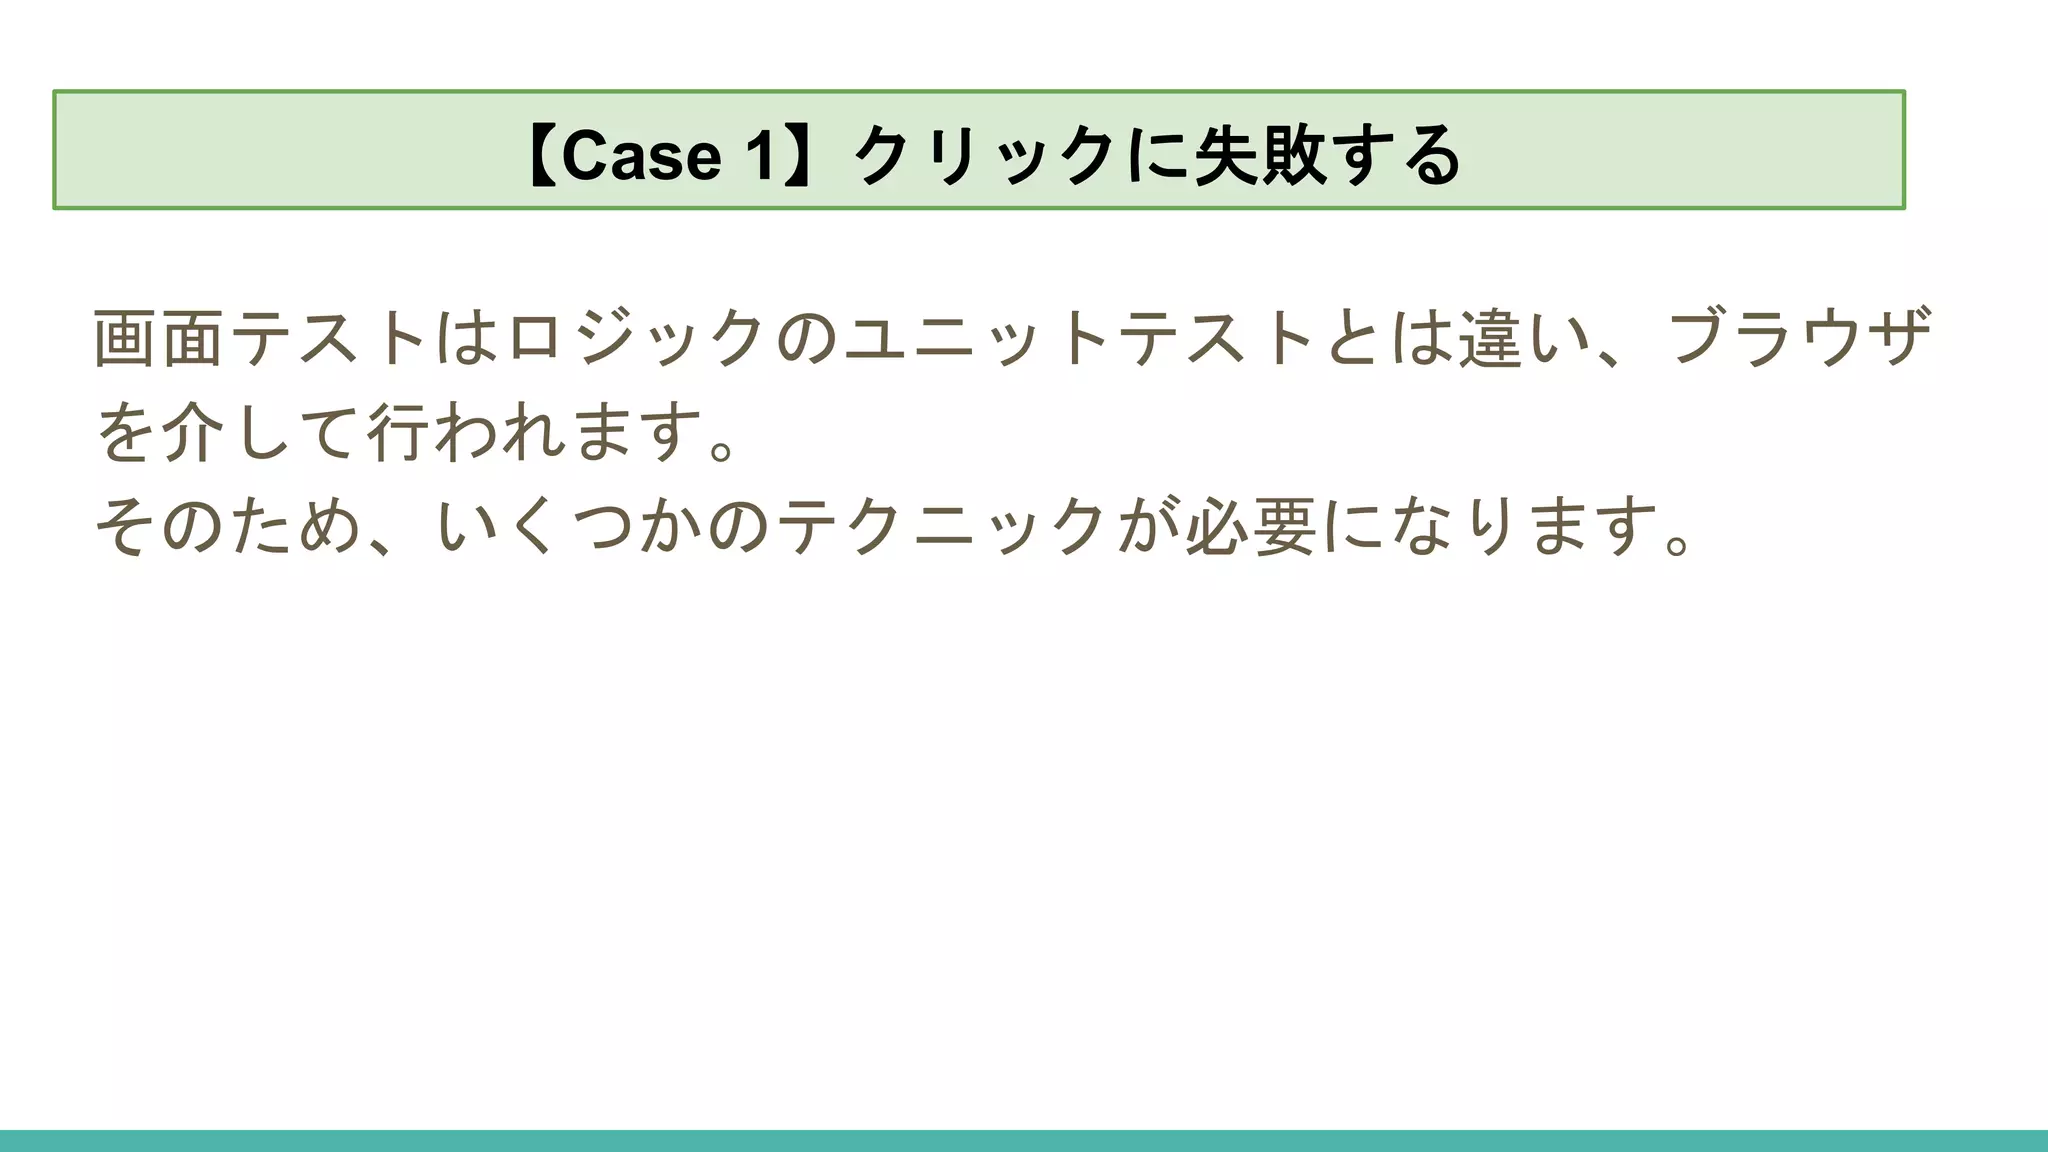
【Case 1】クリックに失敗する 画面テストはロジックのユニットテストとは違い、ブラウザ を介して行われます。 そのため、いくつかのテクニックが必要になります。 【Case 1】クリックに失敗する
28.
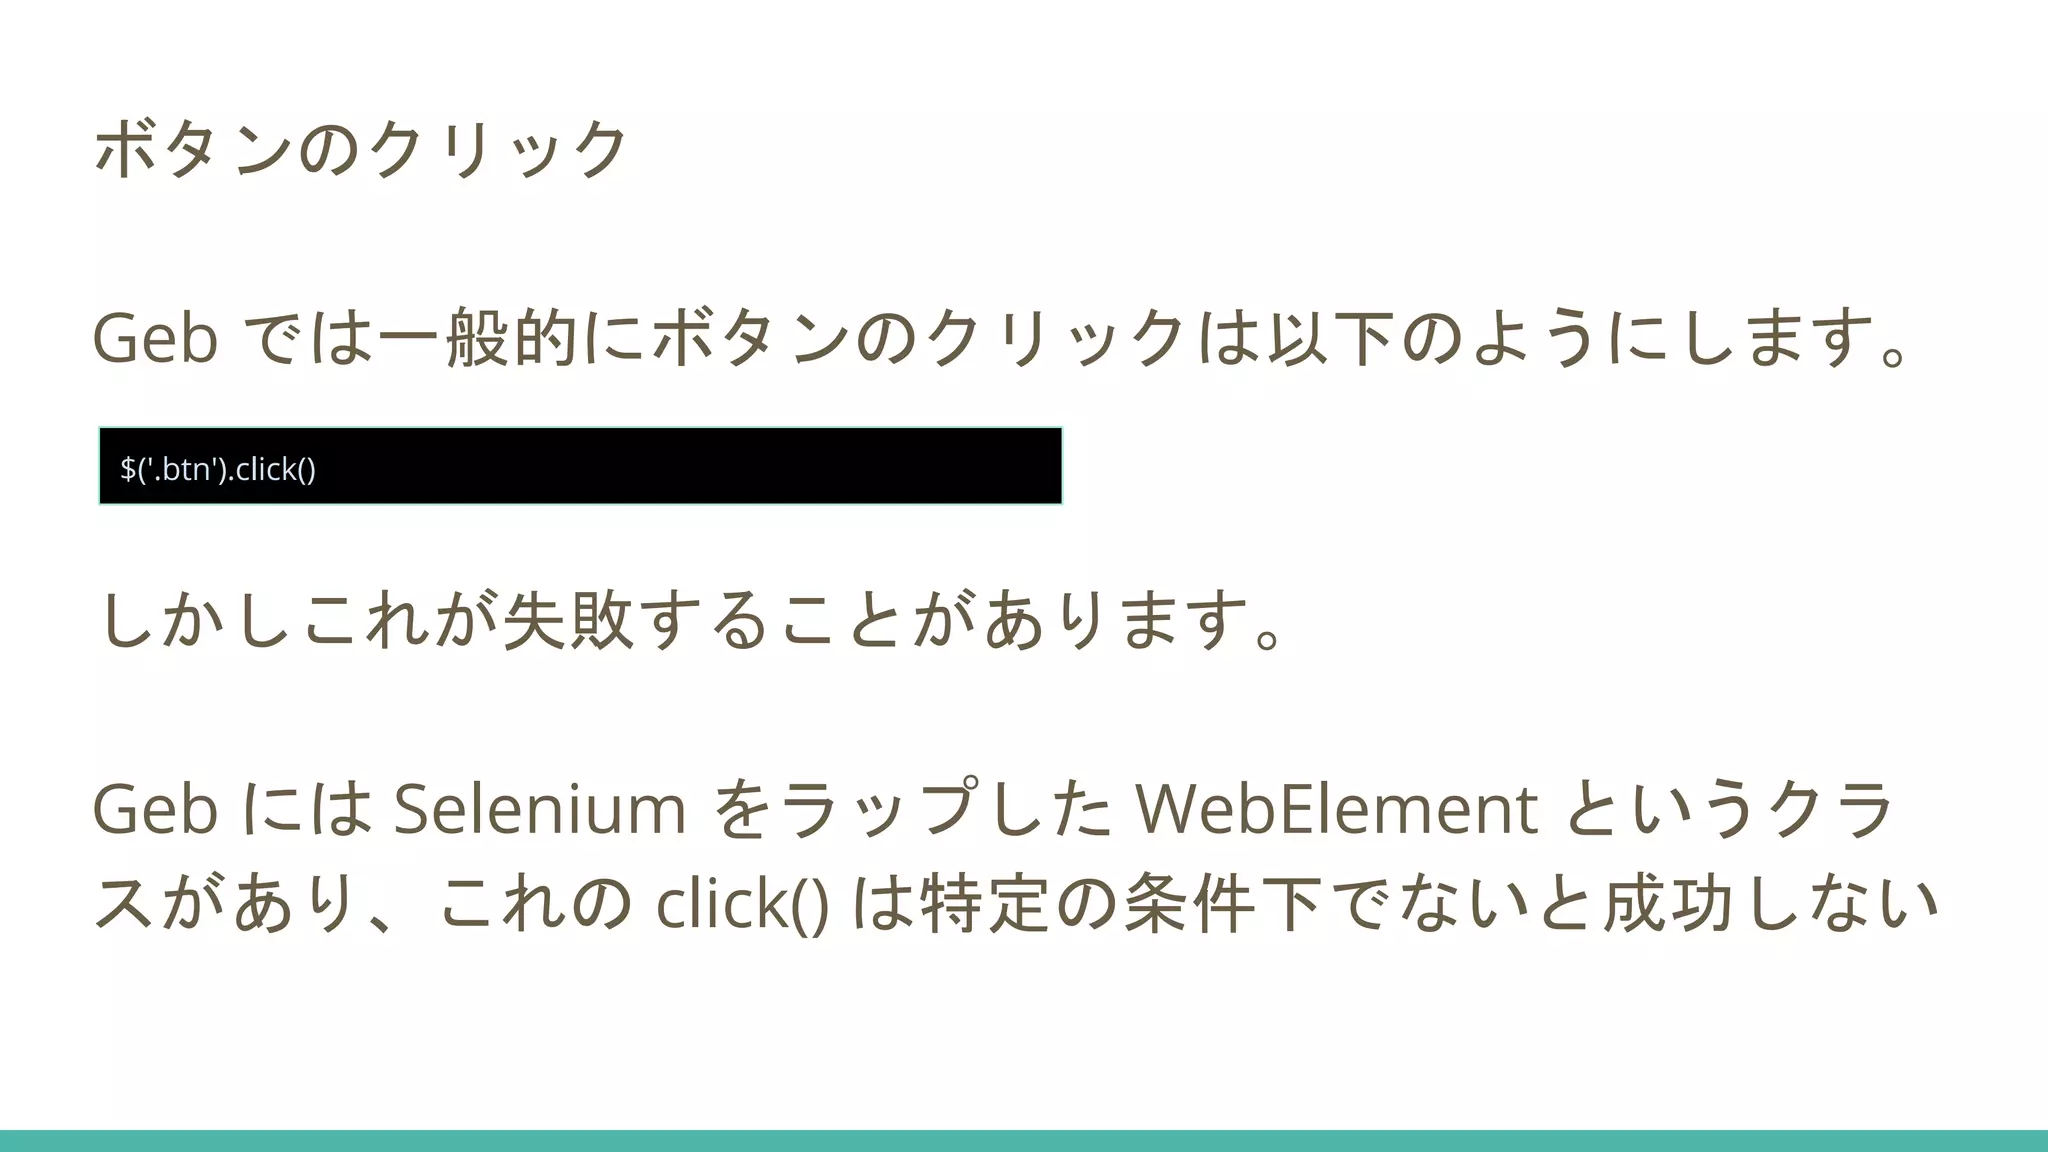
ボタンのクリック Geb では一般的にボタンのクリックは以下のようにします。 しかしこれが失敗することがあります。 Geb には
Selenium をラップした WebElement というクラ スがあり、これの click() は特定の条件下でないと成功しない $('.btn').click()
29.
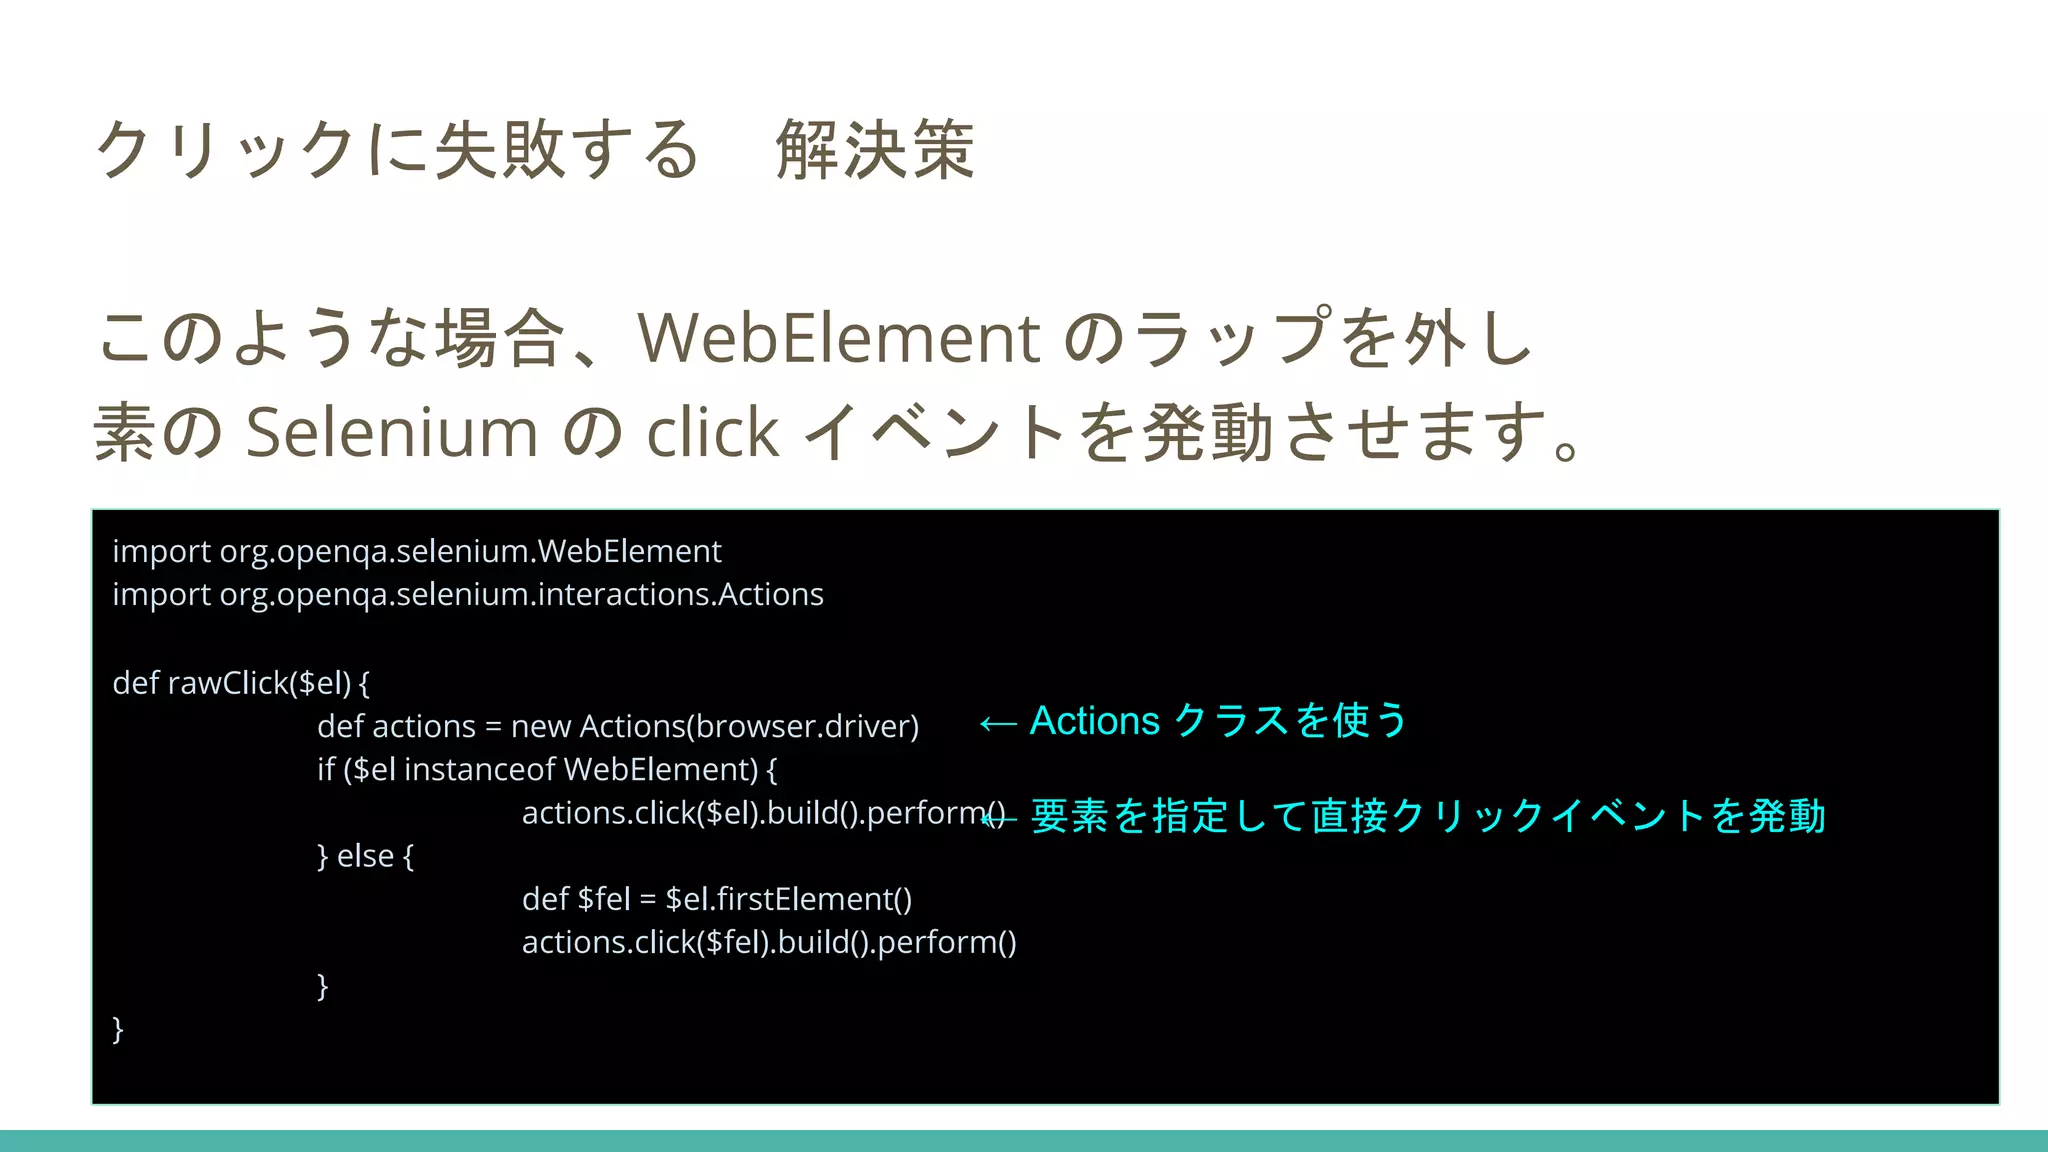
クリックに失敗する 解決策 このような場合、WebElement のラップを外し 素の
Selenium の click イベントを発動させます。 import org.openqa.selenium.WebElement import org.openqa.selenium.interactions.Actions def rawClick($el) { def actions = new Actions(browser.driver) if ($el instanceof WebElement) { actions.click($el).build().perform() } else { def $fel = $el.firstElement() actions.click($fel).build().perform() } } ← Actions クラスを使う ← 要素を指定して直接クリックイベントを発動
30.
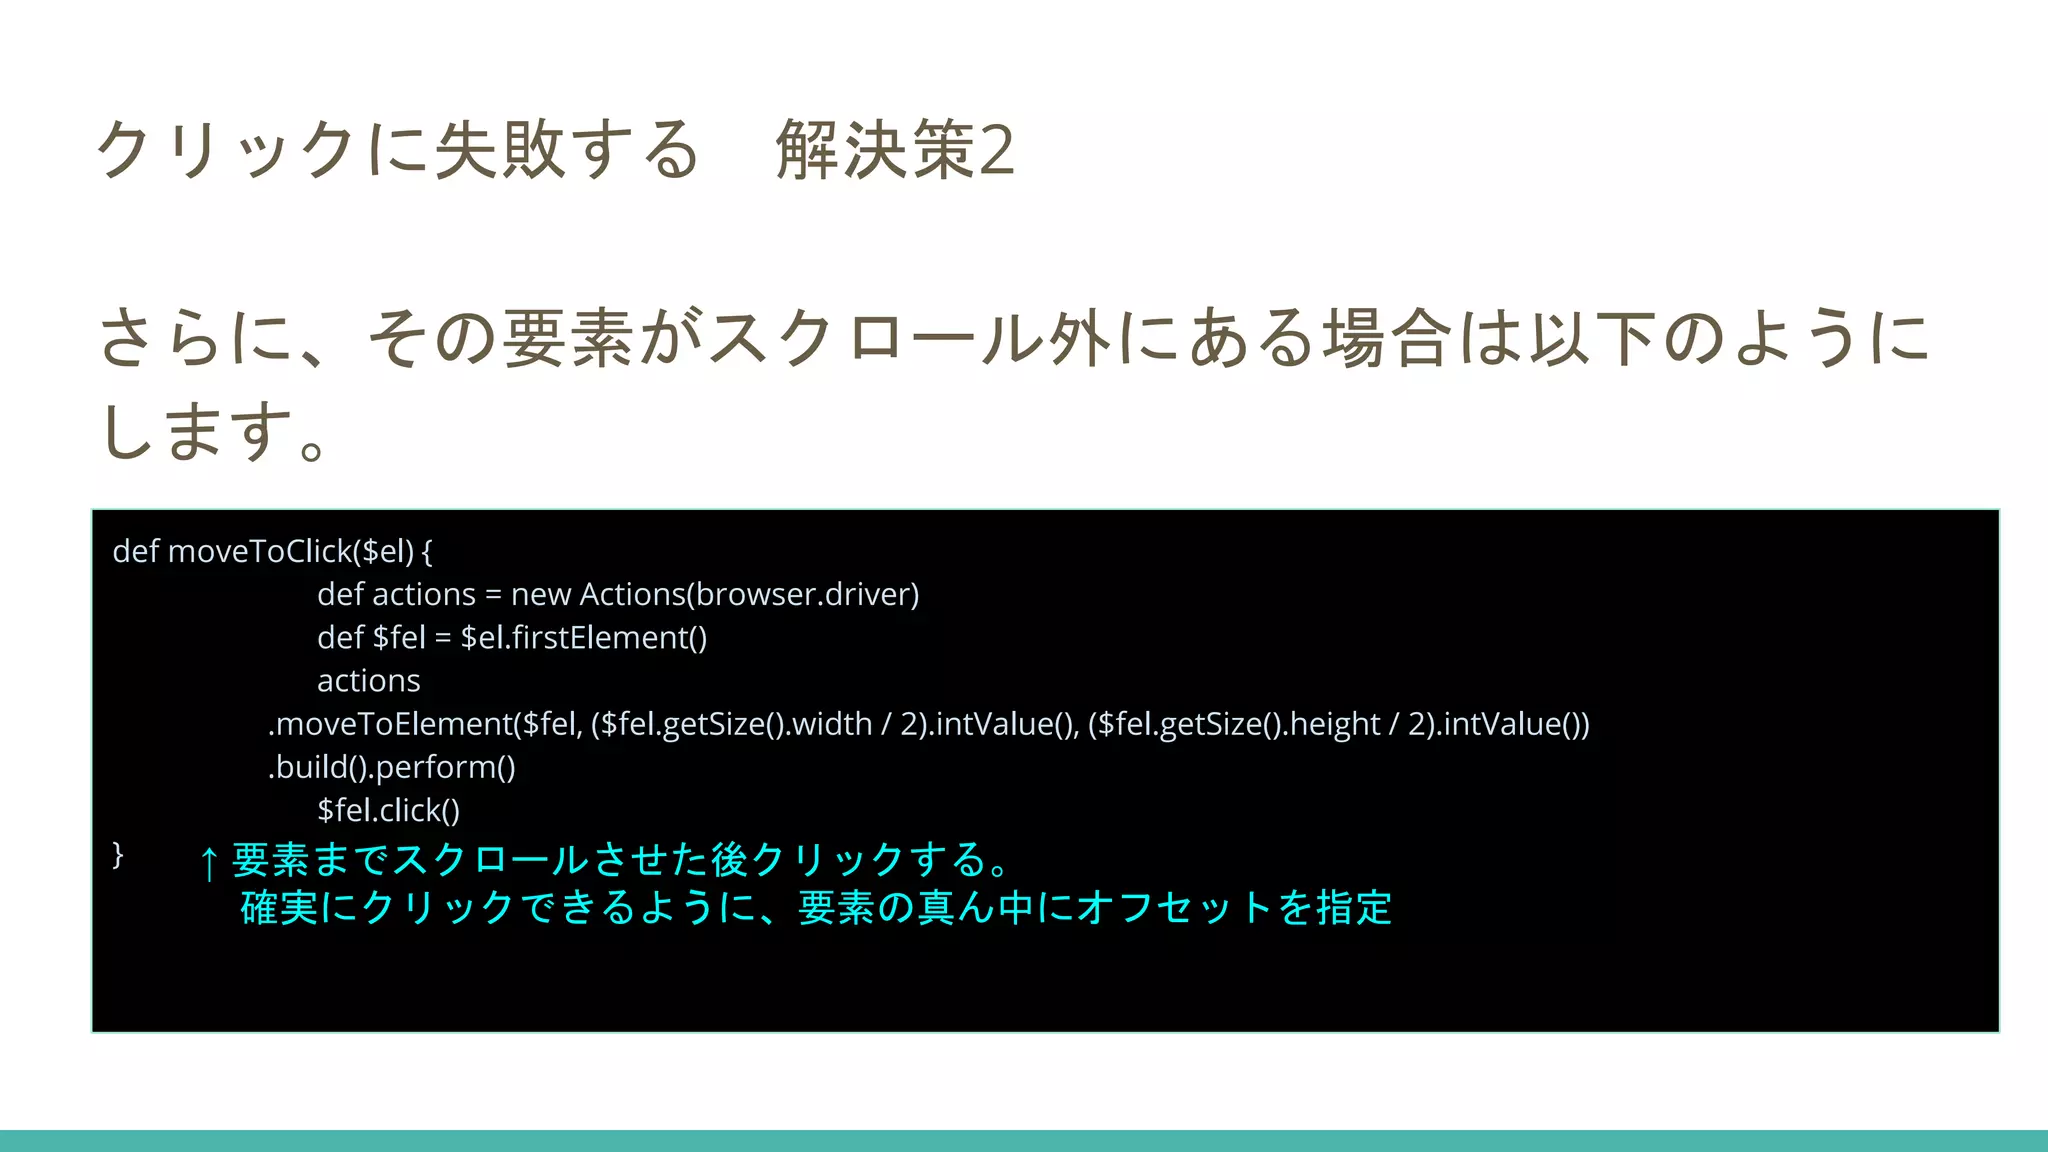
クリックに失敗する 解決策2 さらに、その要素がスクロール外にある場合は以下のように します。 def moveToClick($el)
{ def actions = new Actions(browser.driver) def $fel = $el.firstElement() actions .moveToElement($fel, ($fel.getSize().width / 2).intValue(), ($fel.getSize().height / 2).intValue()) .build().perform() $fel.click() } ↑ 要素までスクロールさせた後クリックする。 確実にクリックできるように、要素の真ん中にオフセットを指定
31.
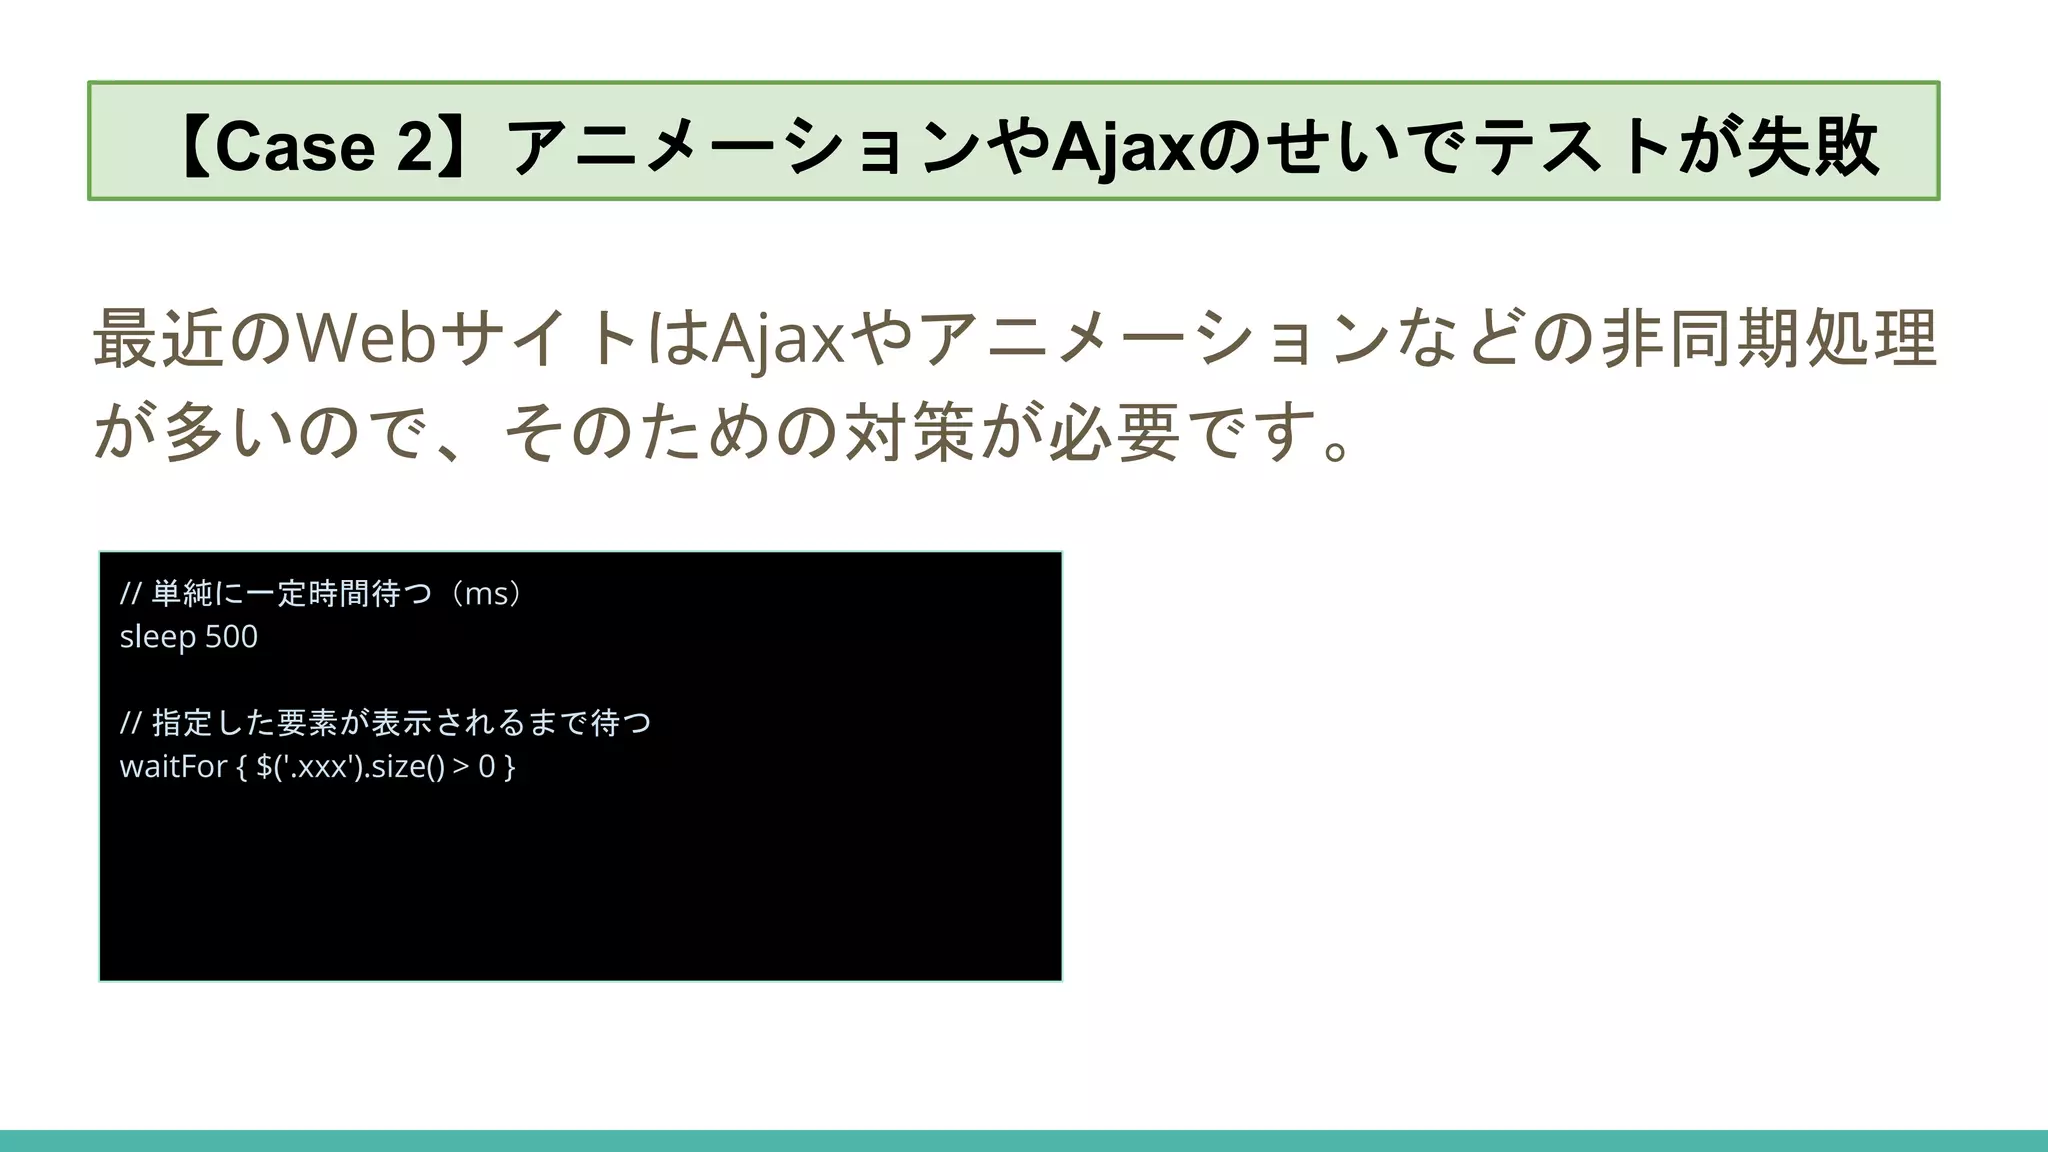
【Case 2】アニメーションやAjaxのせいでテストが失敗 最近のWebサイトはAjaxやアニメーションなどの非同期処理 が多いので、そのための対策が必要です。 // 単純に一定時間待つ(ms) sleep
500 // 指定した要素が表示されるまで待つ waitFor { $('.xxx').size() > 0 } 【Case 2】アニメーションやAjaxのせいでテストが失敗
32.
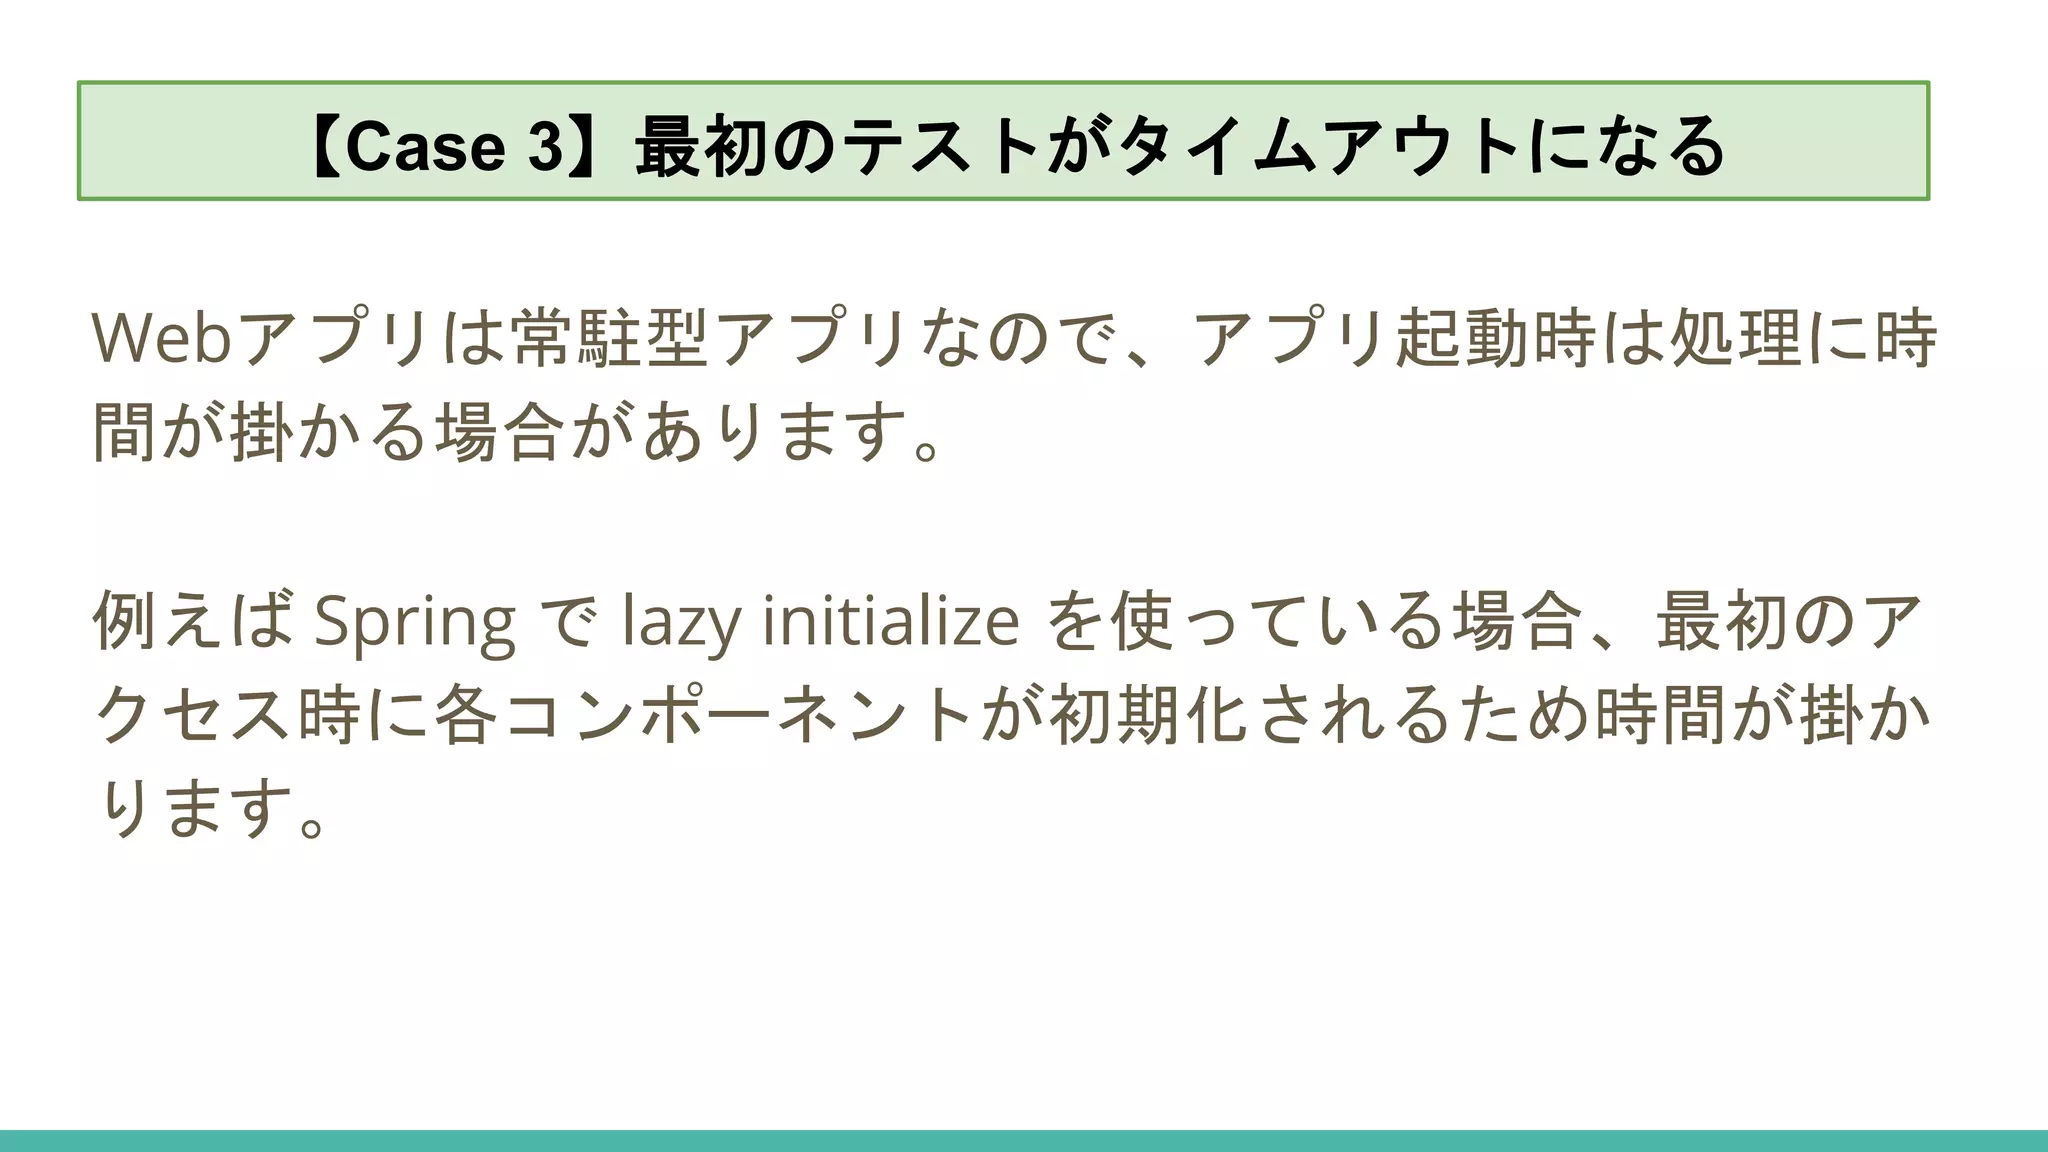
【Case 3】最初のテストがタイムアウトになる Webアプリは常駐型アプリなので、アプリ起動時は処理に時 間が掛かる場合があります。 例えば Spring
で lazy initialize を使っている場合、最初のア クセス時に各コンポーネントが初期化されるため時間が掛か ります。 【Case 3】最初のテストがタイムアウトになる
33.
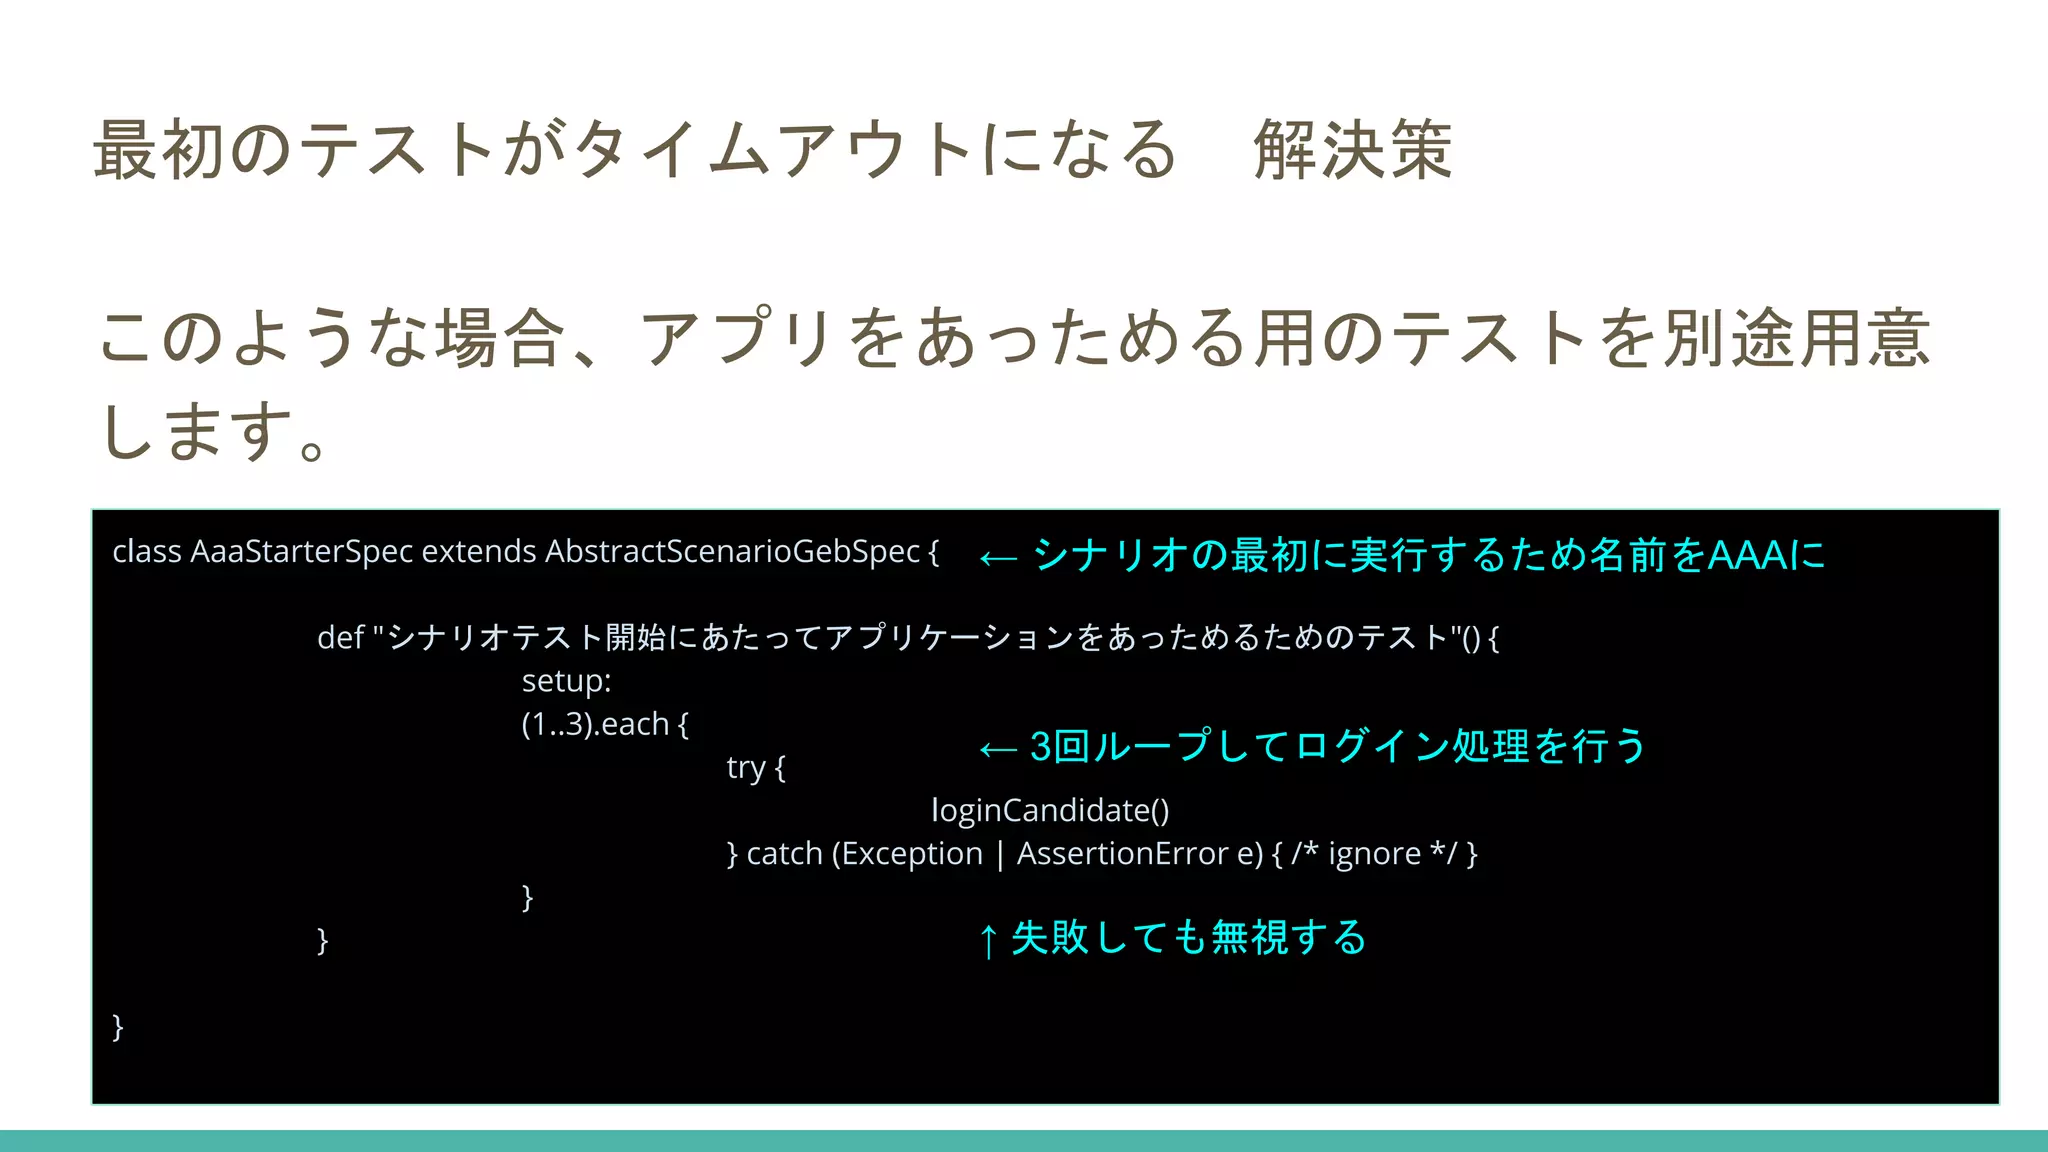
最初のテストがタイムアウトになる 解決策 このような場合、アプリをあっためる用のテストを別途用意 します。 class AaaStarterSpec
extends AbstractScenarioGebSpec { def "シナリオテスト開始にあたってアプリケーションをあっためるためのテスト"() { setup: (1..3).each { try { loginCandidate() } catch (Exception | AssertionError e) { /* ignore */ } } } } ← シナリオの最初に実行するため名前をAAAに ← 3回ループしてログイン処理を行う ↑ 失敗しても無視する
34.
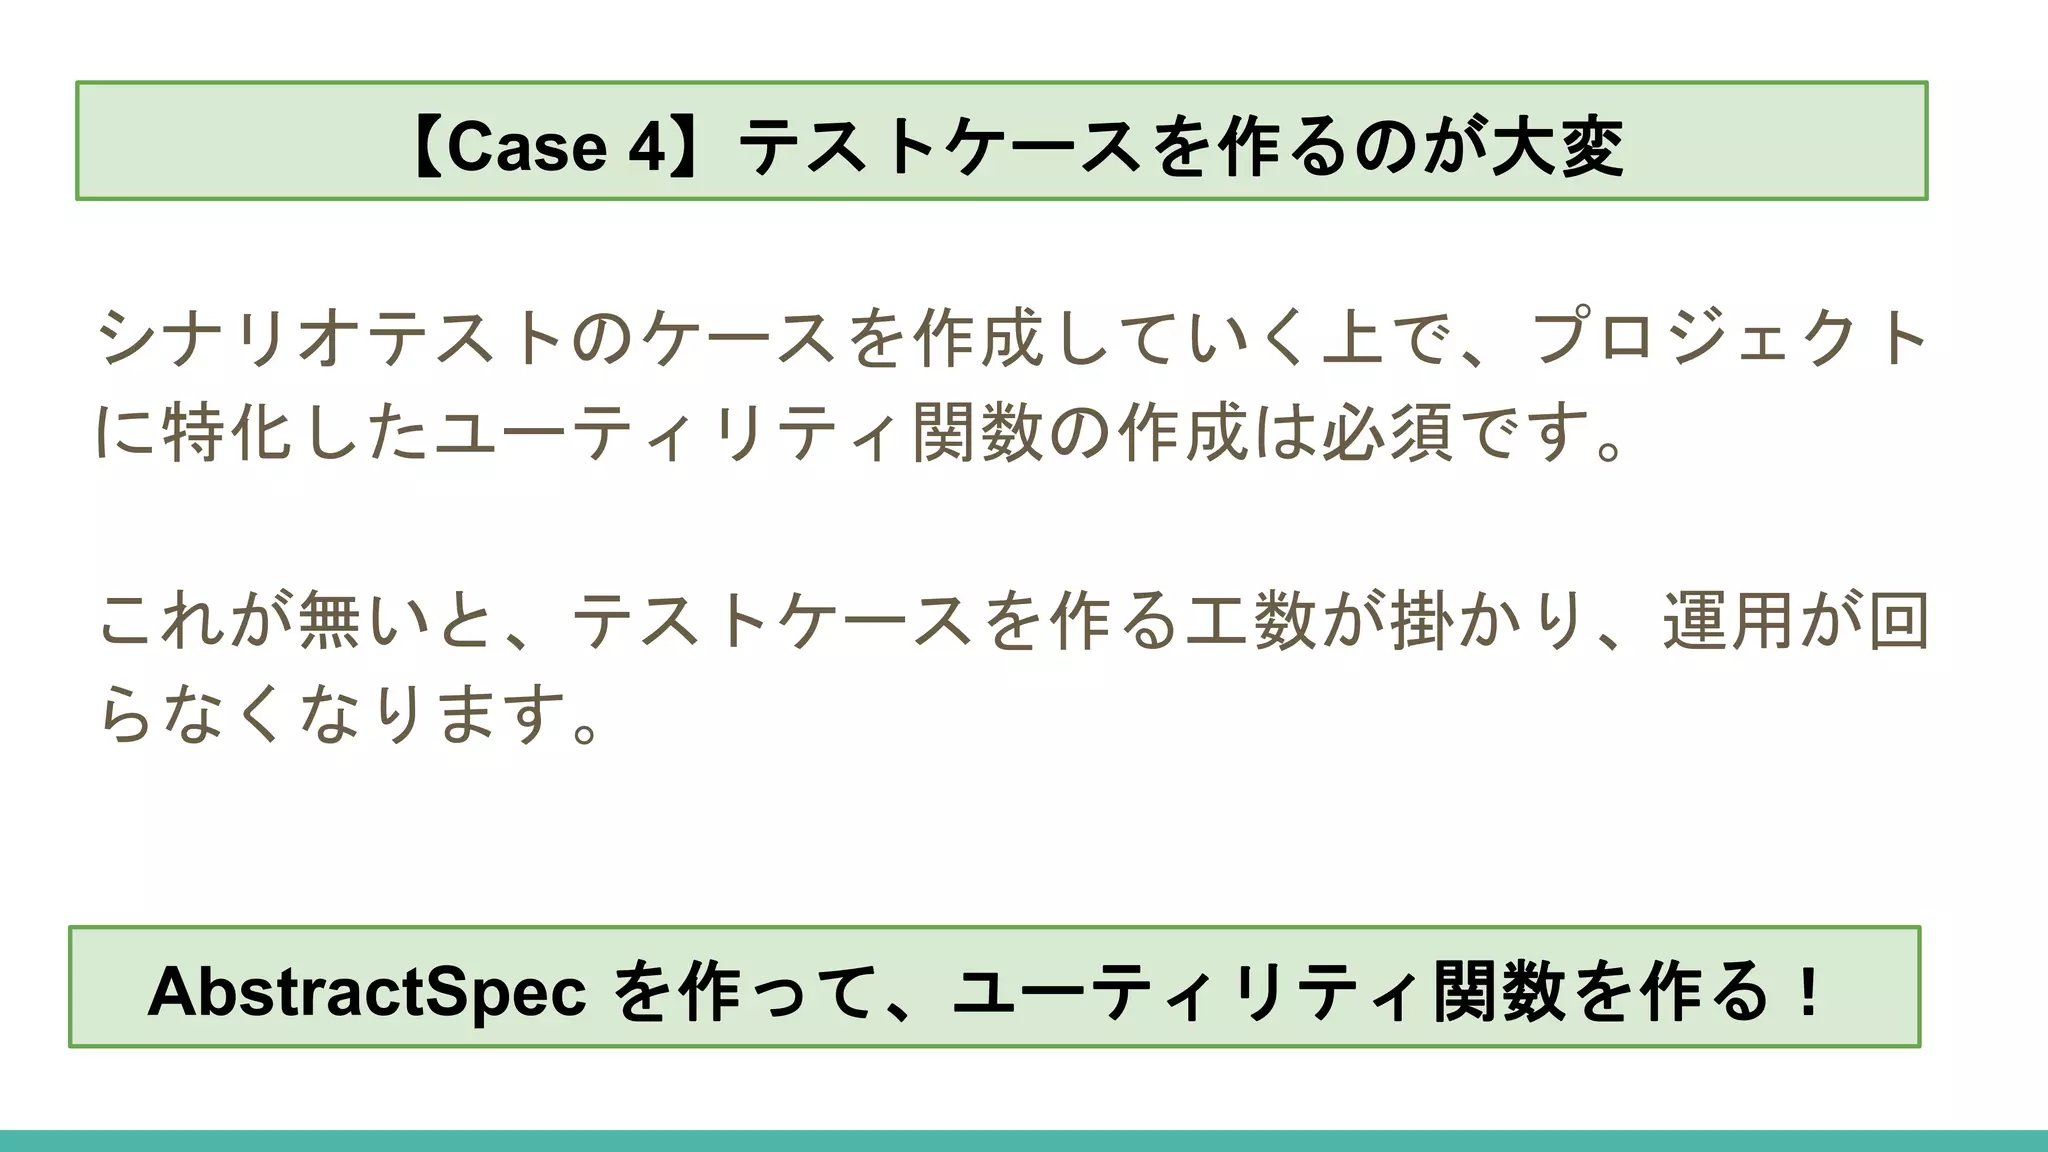
【Case 4】テストケースを作るのが大変 シナリオテストのケースを作成していく上で、プロジェクト に特化したユーティリティ関数の作成は必須です。 これが無いと、テストケースを作る工数が掛かり、運用が回 らなくなります。 【Case 4】テストケースを作るのが大変 AbstractSpec
を作って、ユーティリティ関数を作る!
35.
テストケースを作るのが大変 解決策 ・フォームへの入力補助 formInput( 'lastName': '山田', 'firstName':
'太郎' ) ・イベントハンドラ findClickableElement('reportObSubmit').click() ・共通的な画面処理(ユーザ登録など) registerUser() ・ランダム文字列生成 def email = createRandomEmail() ・ポップアップ関連 waitShowPopup($('#jsi-popup-apply')) ・正規表現で指定可能なURLのアサーション waitForUrl(~/events¥/[0-9]+/) ← これは必須。 name属性やID指定、JSライブラリ対応など ← イベントハンドラは JSライブラリに合わせた対応が望ましい ← 複数のシナリオで使う処理は共通化する ← DBのユニーク制約への対応 ← 使っているポップアップのライブラリに応じて ← これが無いとアサーションが難しい場合がある
36.
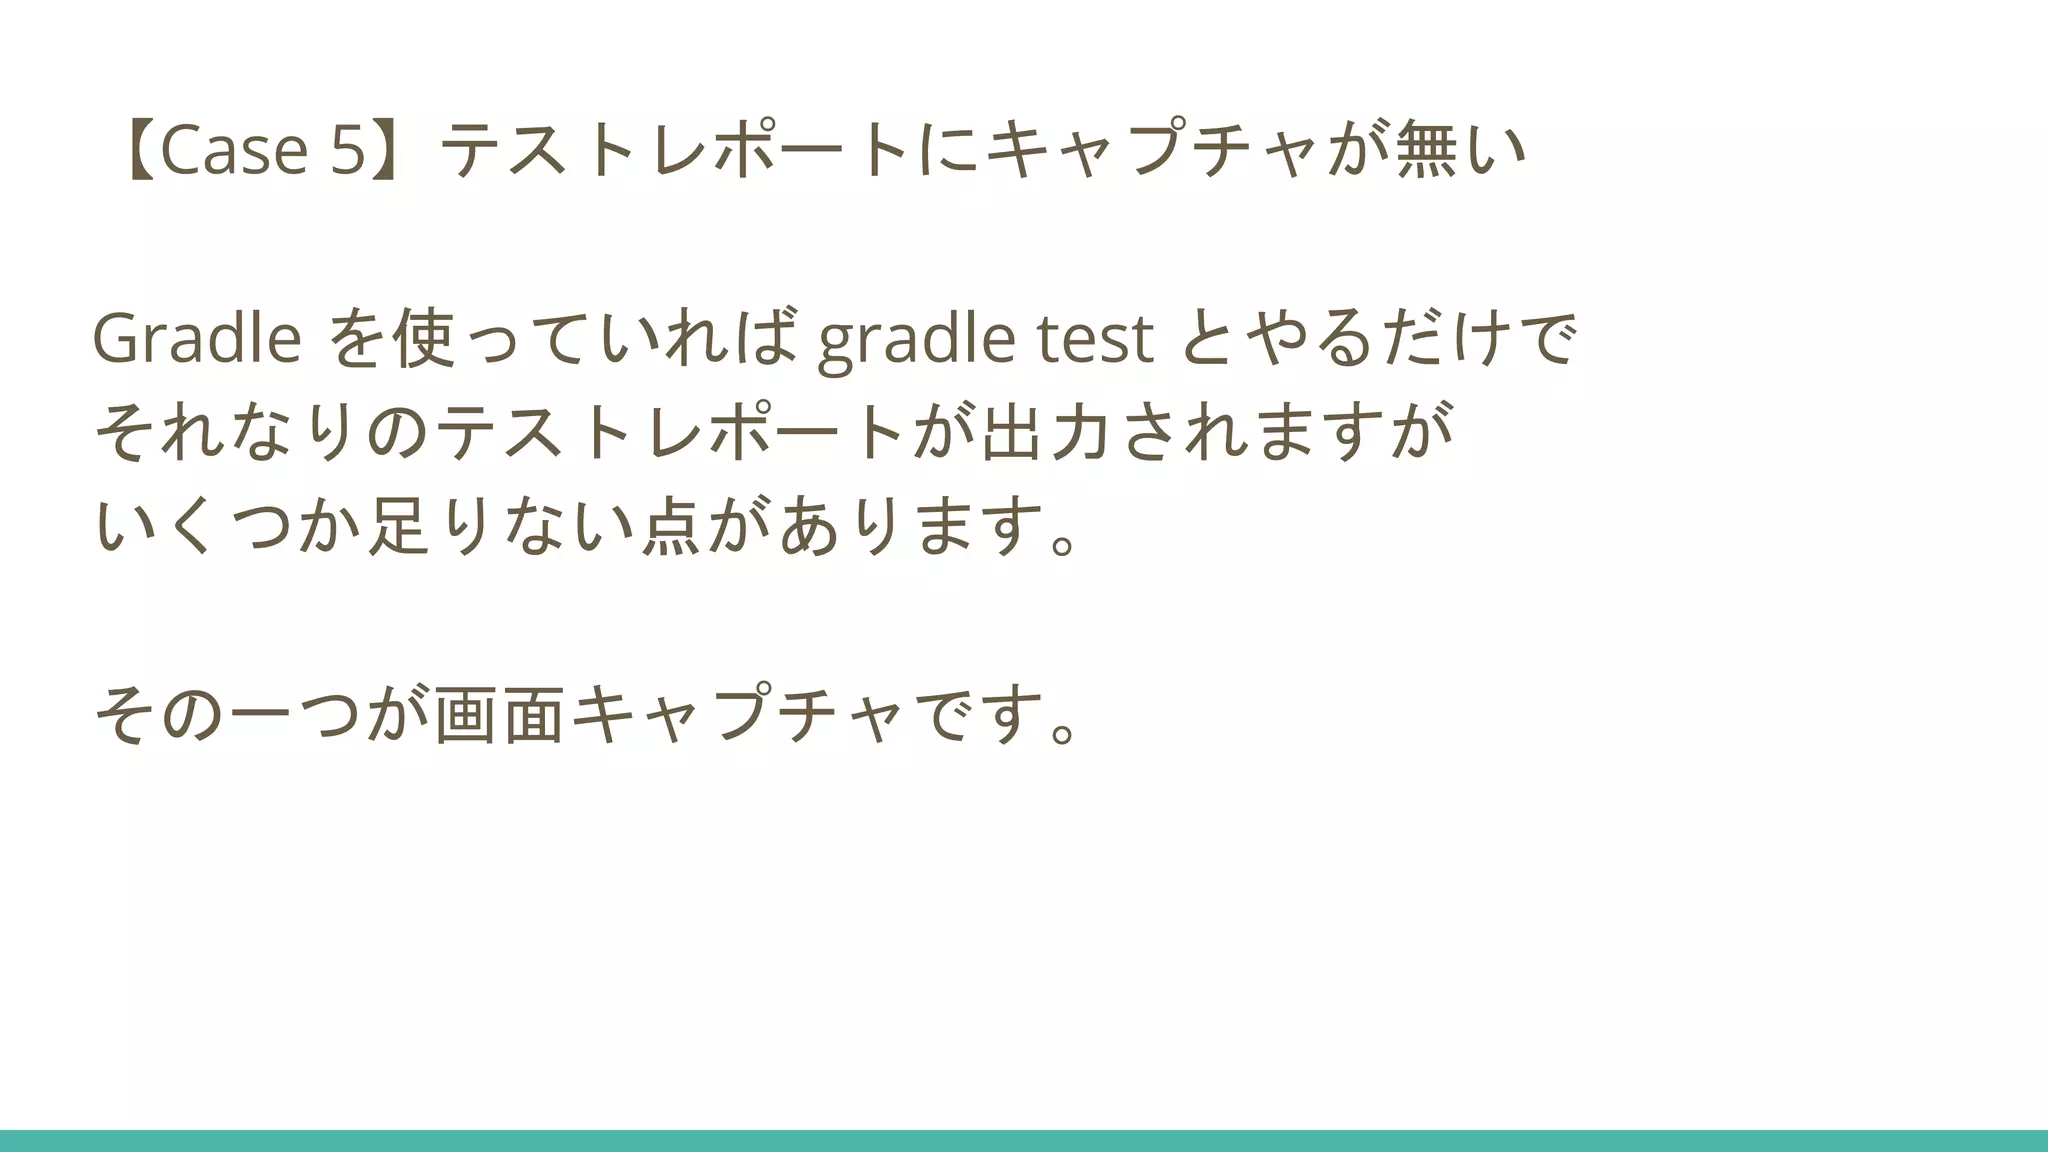
【Case 5】テストレポートにキャプチャが無い Gradle を使っていれば
gradle test とやるだけで それなりのテストレポートが出力されますが いくつか足りない点があります。 その一つが画面キャプチャです。
37.
GebReportingSpec を使うと画面キャプチャが撮れる。 が、テストレポートには出力されない!
38.
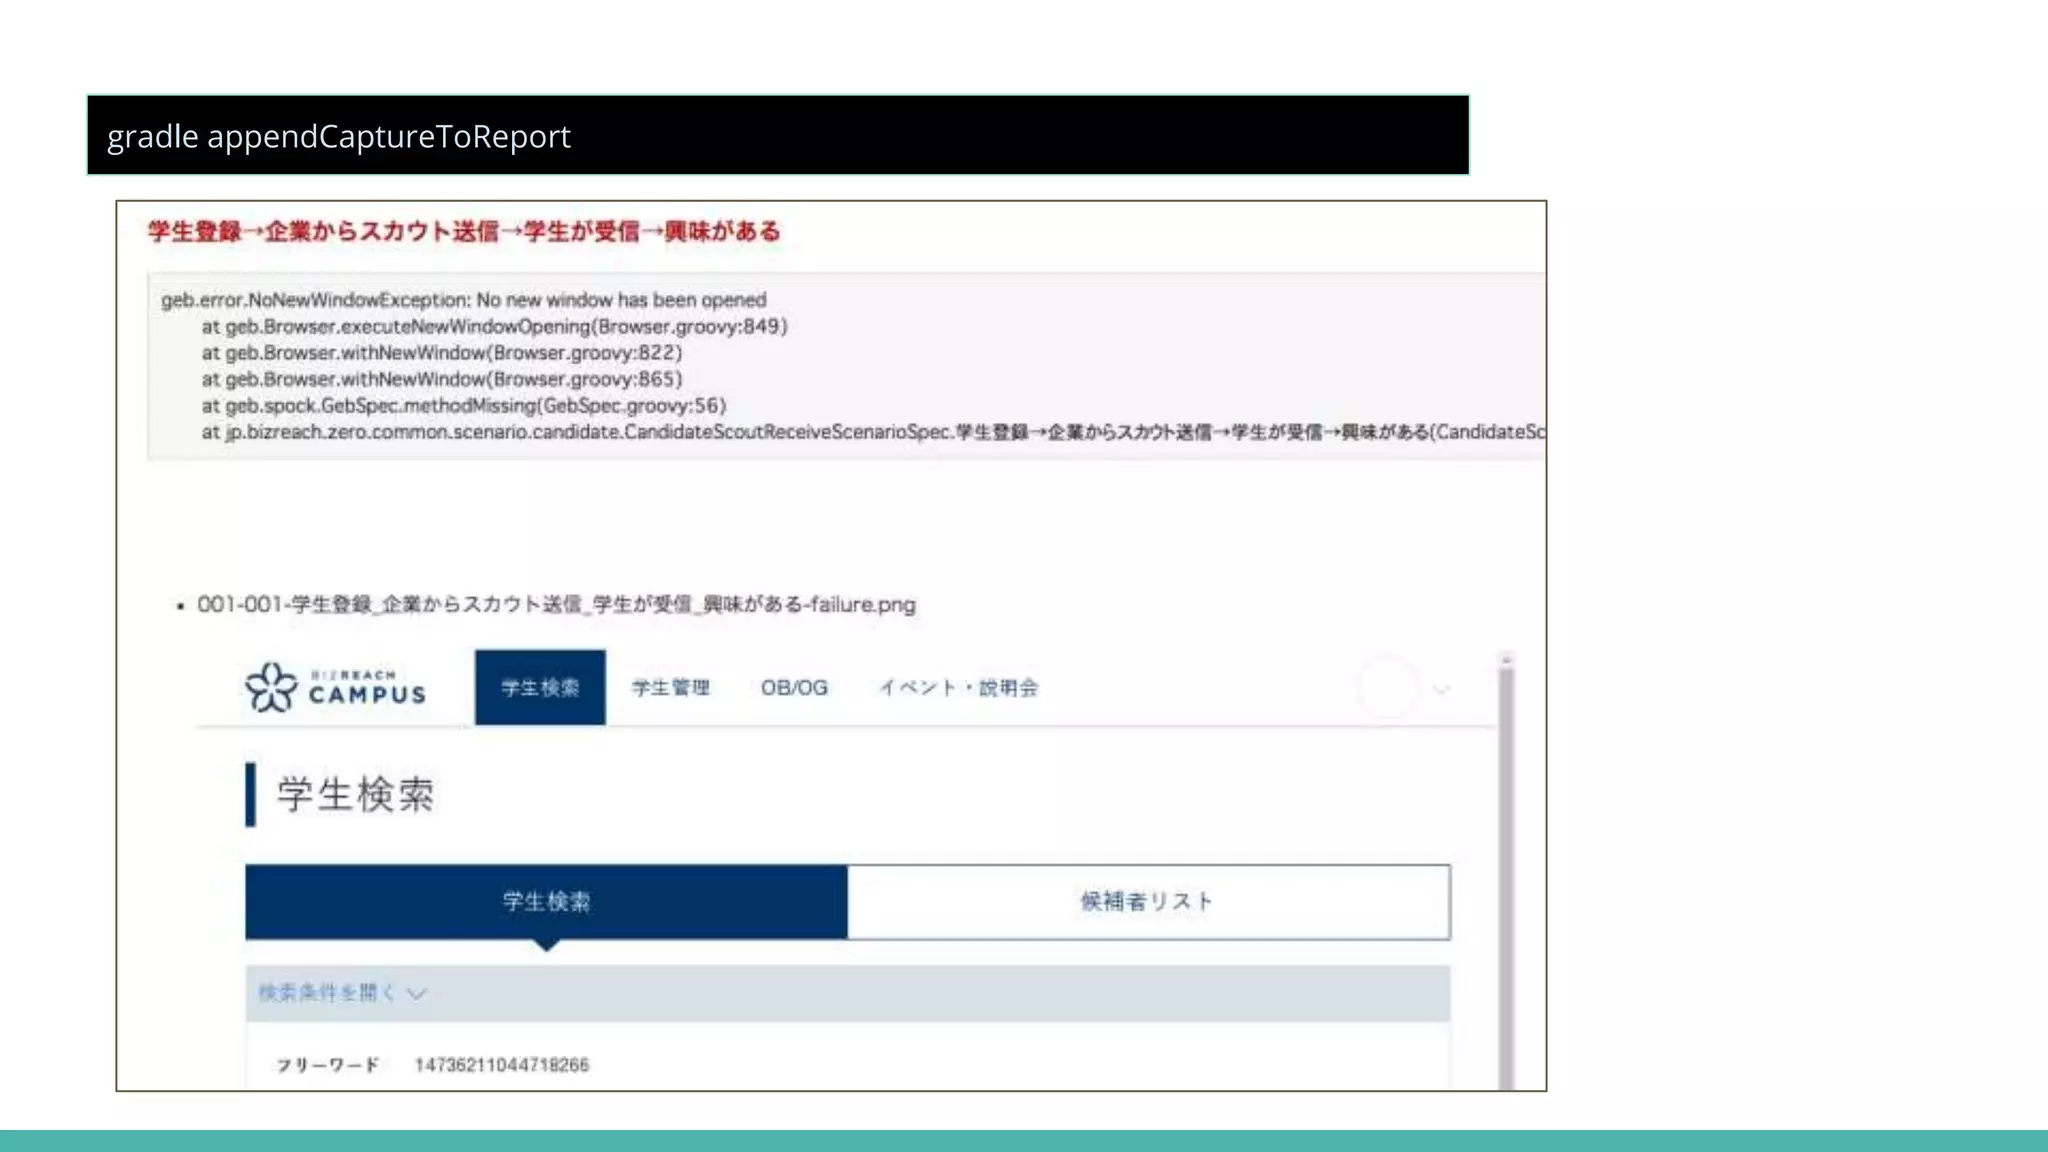
テストレポートにキャプチャが無い 解決策 やや強引ですが、Gradle スクリプト内でレポートHTMLにキ ャプチャ画像を貼り付けています。 task
appendCaptureToReport() << { def File basedir = project.projectDir def root = new File(basedir, 'build/reports/tests/capture') // キャプチャ画像ファイル一覧を取得 def buffs = [:] root.eachFileRecurse(FileType.FILES) { buffs[dir] << picName } … コードが長いので、全文は gist で https://gist.github.com/naoki-iwami/c5ceba0b02bee3b6bbcd1545c111ab98 }
39.
gradle appendCaptureToReport
40.
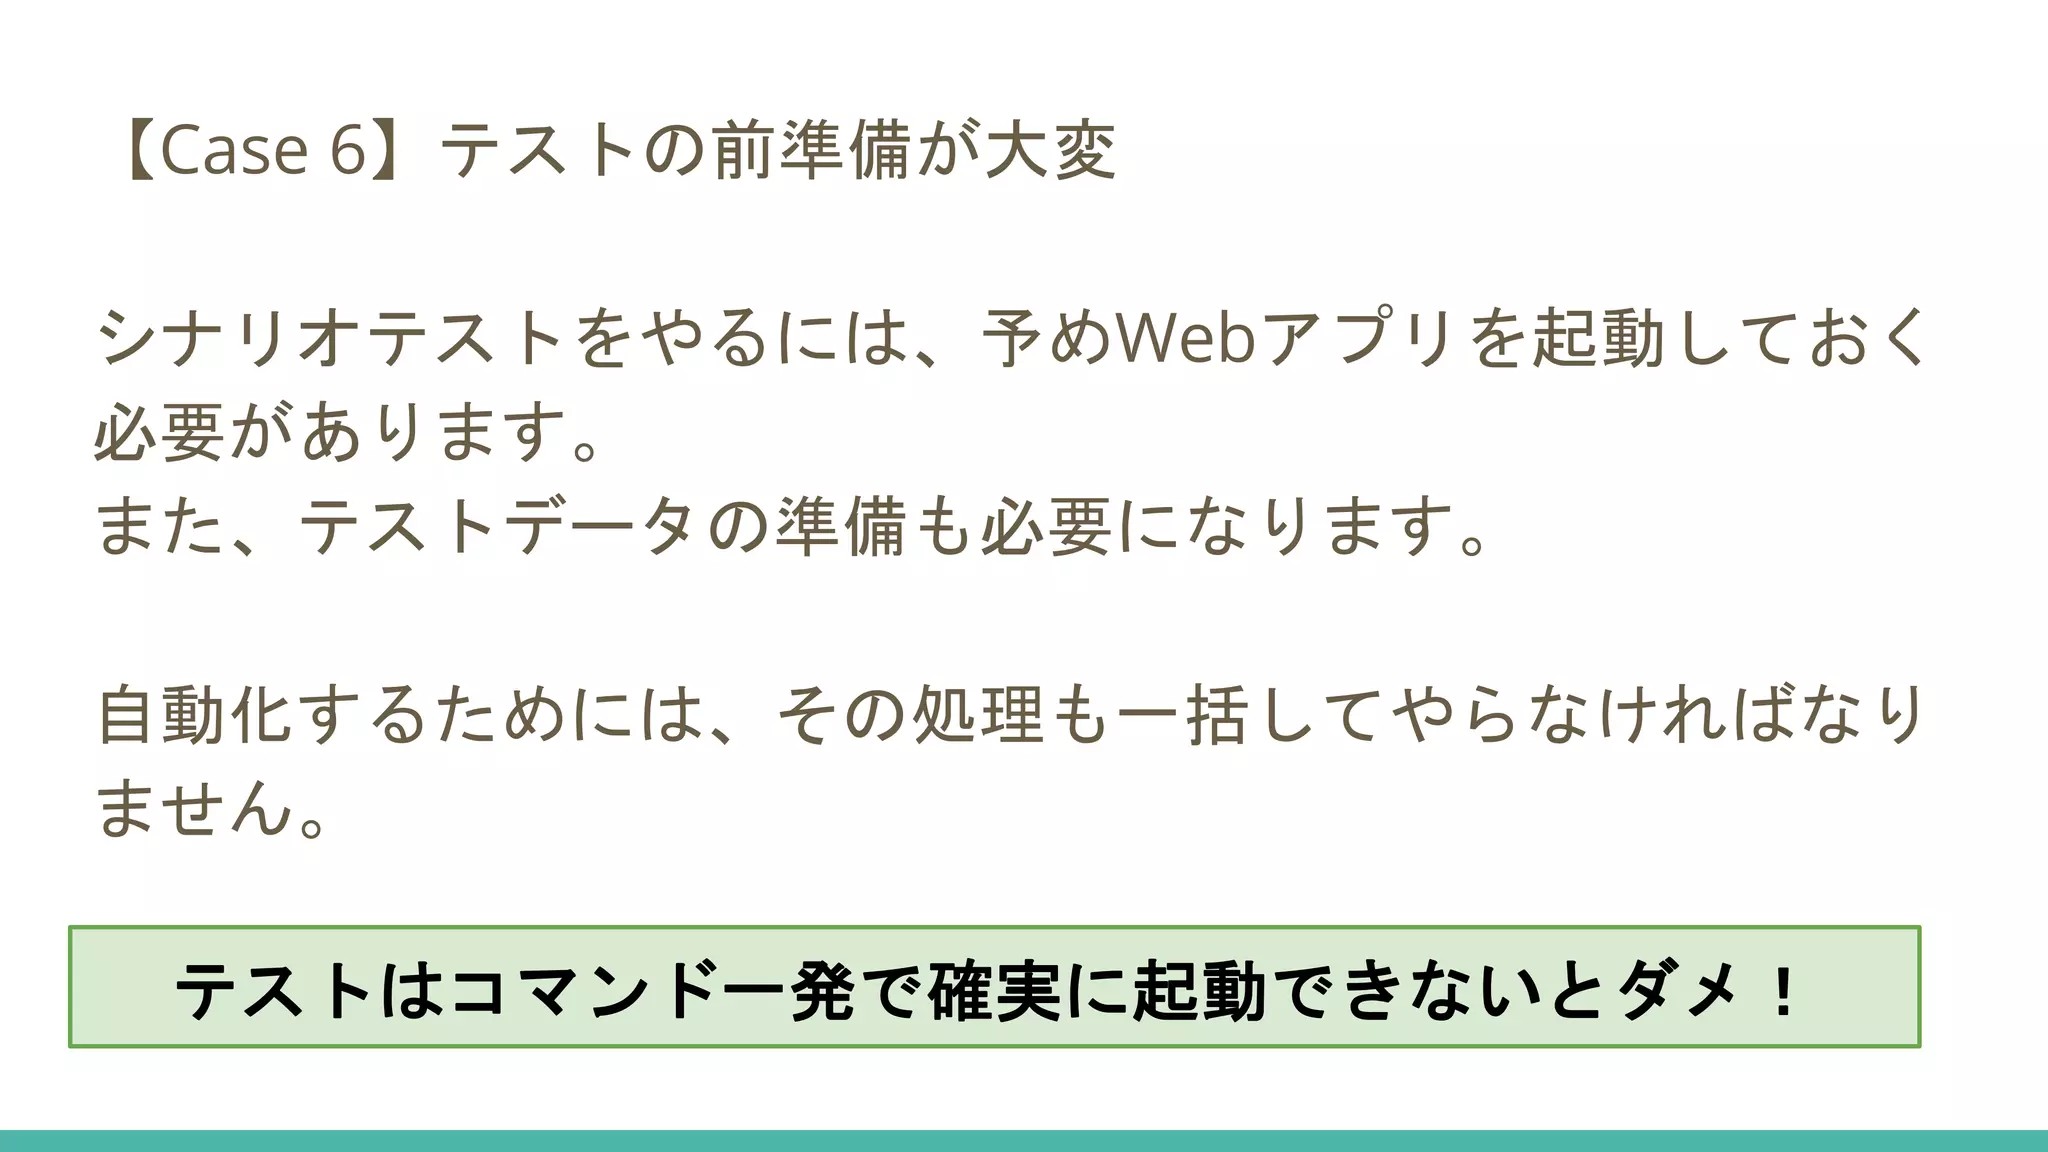
【Case 6】テストの前準備が大変 シナリオテストをやるには、予めWebアプリを起動しておく 必要があります。 また、テストデータの準備も必要になります。 自動化するためには、その処理も一括してやらなければなり ません。 テストはコマンド一発で確実に起動できないとダメ!
41.
テストデータについて シナリオテストをやる上で、テストデータをどうするかは重 要です。 ・テストに必要なデータを画面から全て作成する ・予めテストデータを用意しておく 今回は後者を採用します。
42.
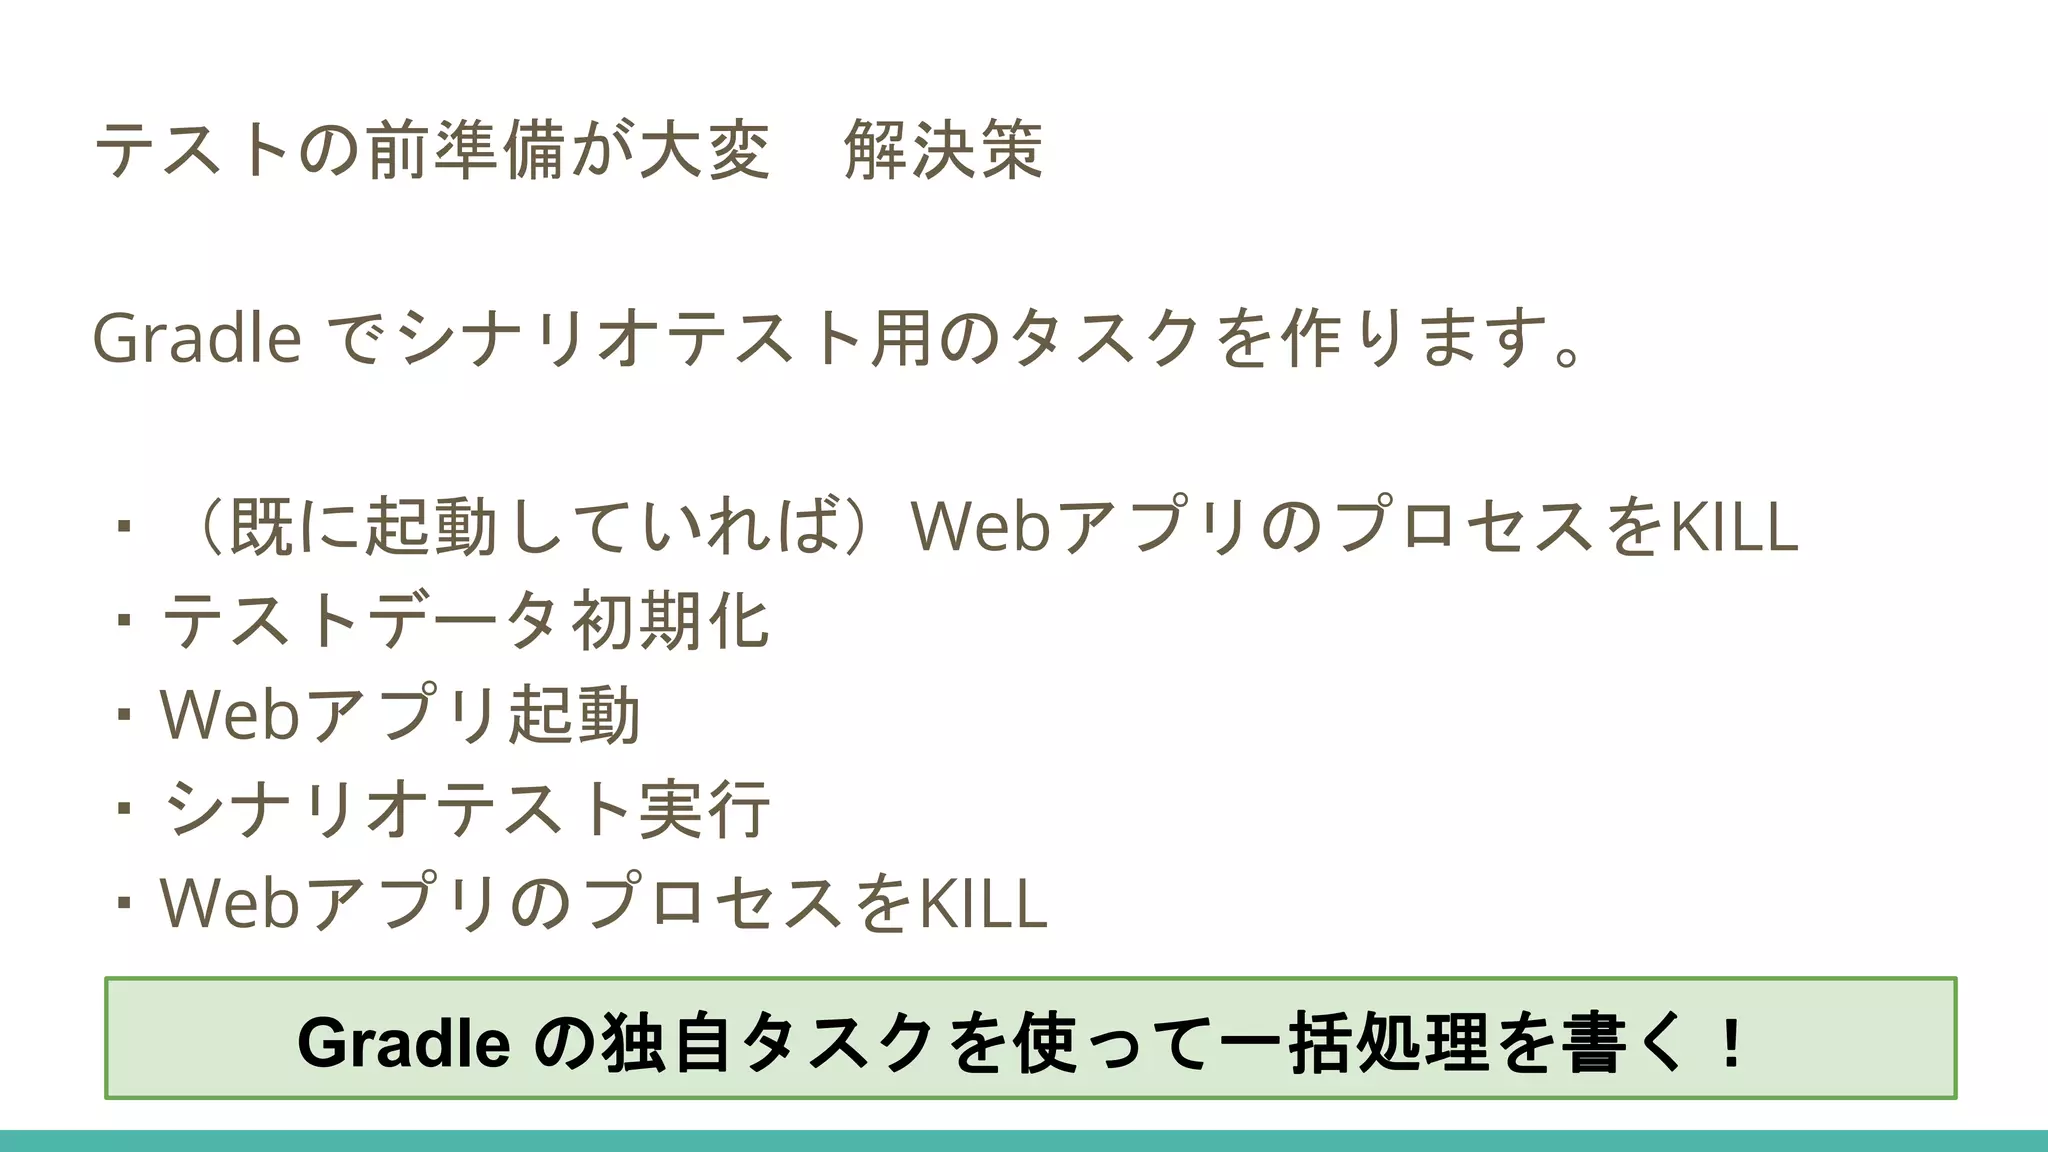
テストの前準備が大変 解決策 Gradle でシナリオテスト用のタスクを作ります。 ・(既に起動していれば)WebアプリのプロセスをKILL ・テストデータ初期化 ・Webアプリ起動 ・シナリオテスト実行 ・WebアプリのプロセスをKILL Gradle
の独自タスクを使って一括処理を書く!
43.
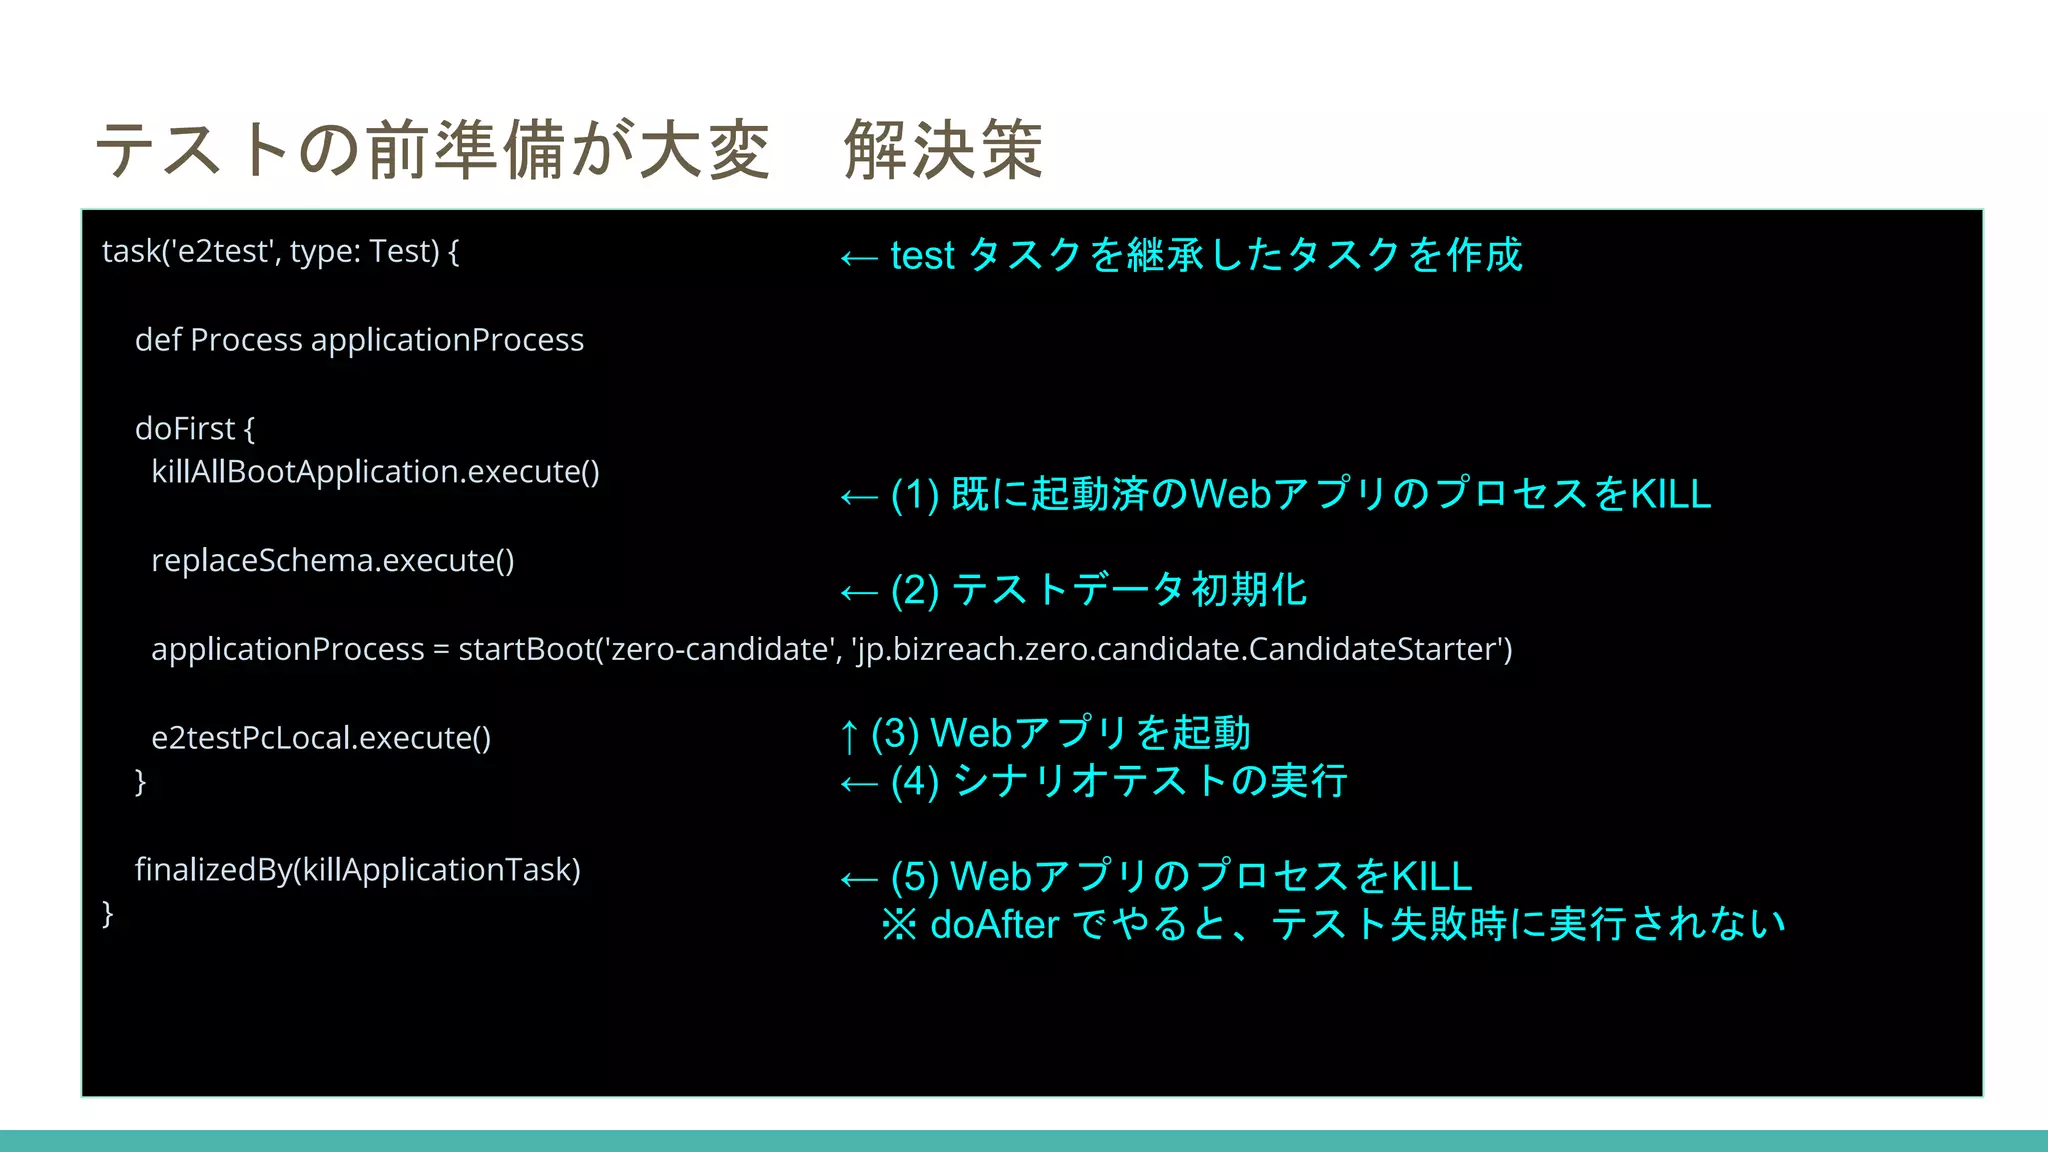
テストの前準備が大変 解決策 task('e2test', type:
Test) { def Process applicationProcess doFirst { killAllBootApplication.execute() replaceSchema.execute() applicationProcess = startBoot('zero-candidate', 'jp.bizreach.zero.candidate.CandidateStarter') e2testPcLocal.execute() } finalizedBy(killApplicationTask) } ← test タスクを継承したタスクを作成 ← (1) 既に起動済のWebアプリのプロセスをKILL ← (2) テストデータ初期化 ↑ (3) Webアプリを起動 ← (4) シナリオテストの実行 ← (5) WebアプリのプロセスをKILL ※ doAfter でやると、テスト失敗時に実行されない
44.
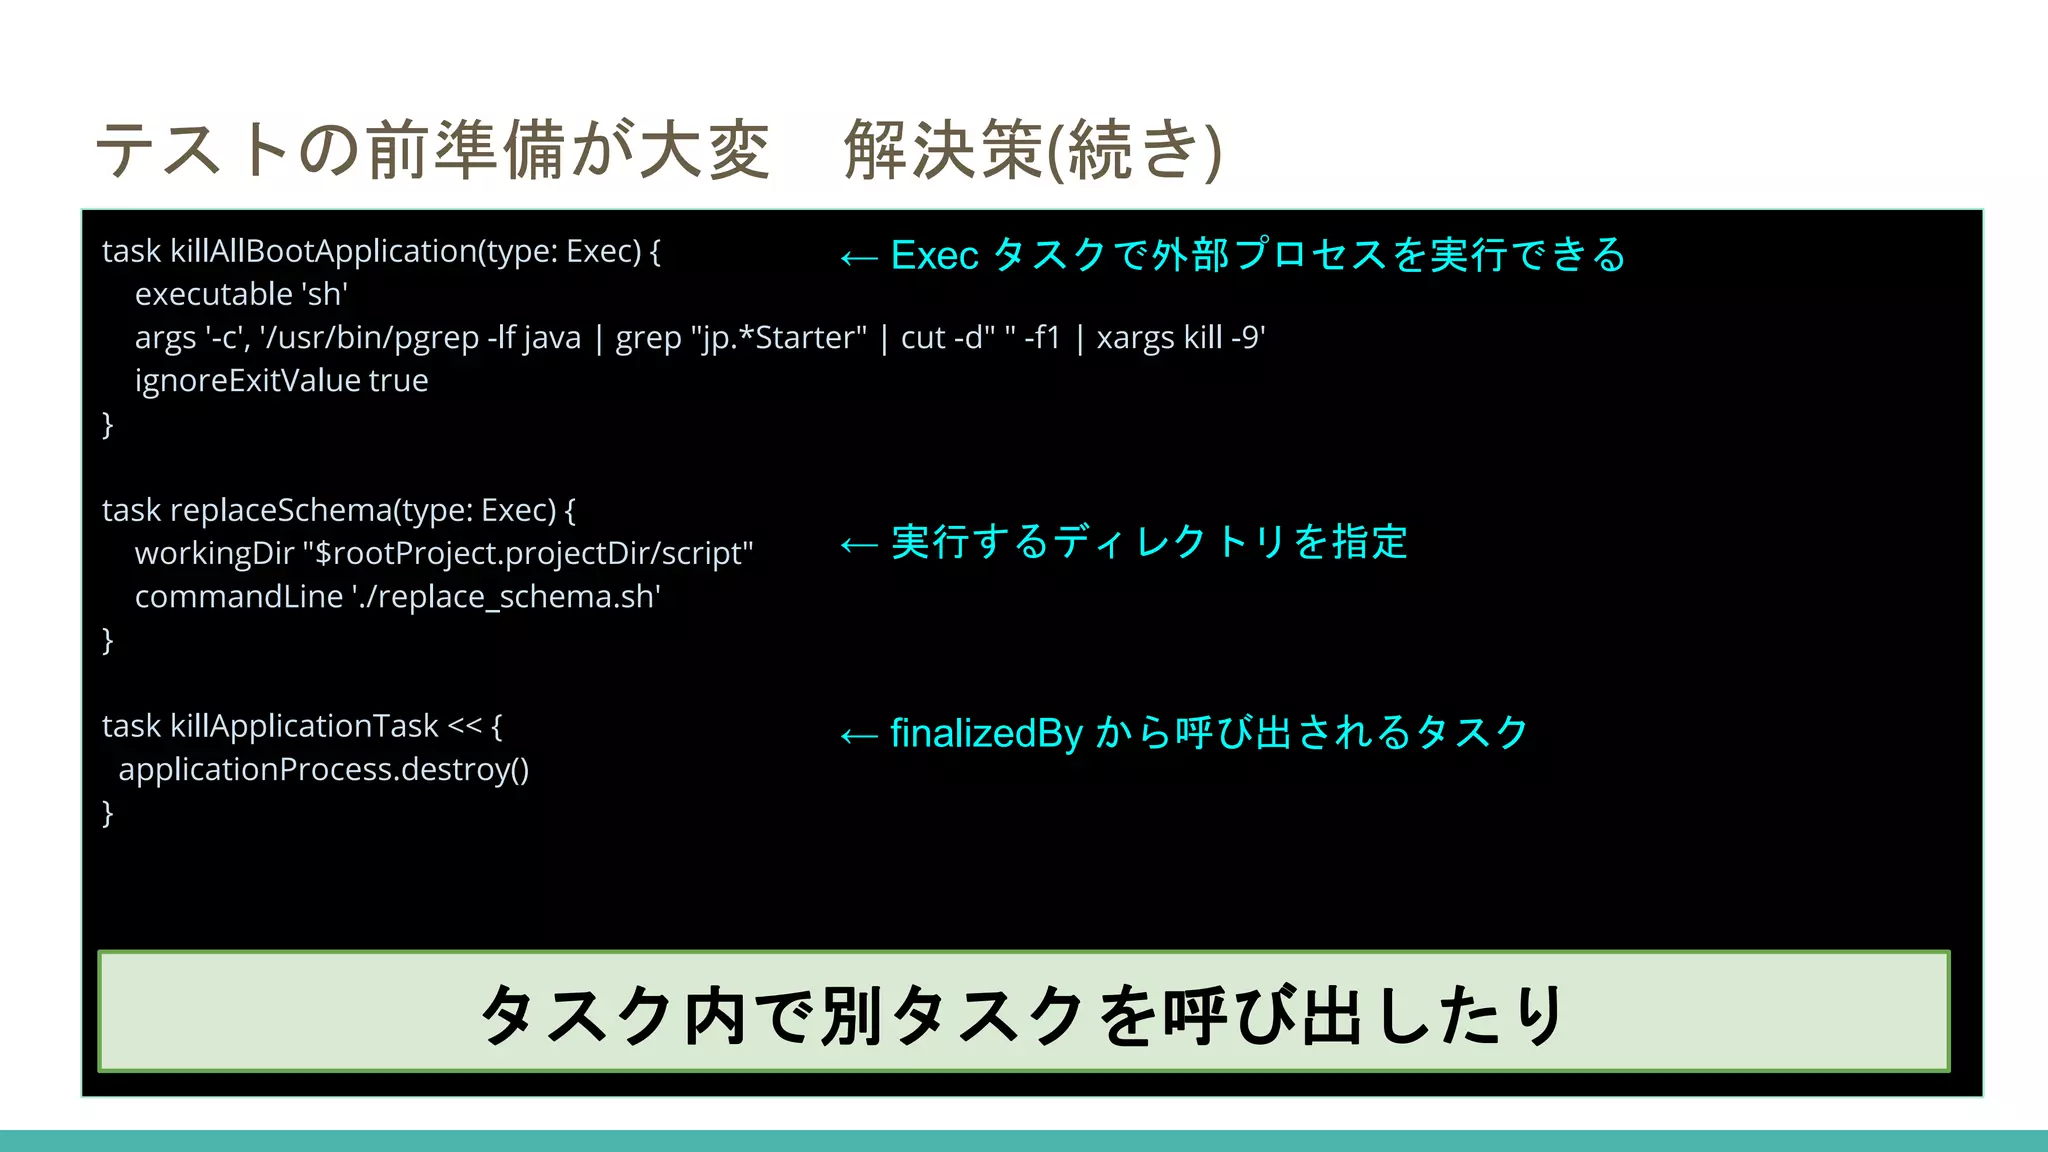
テストの前準備が大変 解決策(続き) task killAllBootApplication(type:
Exec) { executable 'sh' args '-c', '/usr/bin/pgrep -lf java | grep "jp.*Starter" | cut -d" " -f1 | xargs kill -9' ignoreExitValue true } task replaceSchema(type: Exec) { workingDir "$rootProject.projectDir/script" commandLine './replace_schema.sh' } task killApplicationTask << { applicationProcess.destroy() } ← Exec タスクで外部プロセスを実行できる ← 実行するディレクトリを指定 ← finalizedBy から呼び出されるタスク タスク内で別タスクを呼び出したり
45.
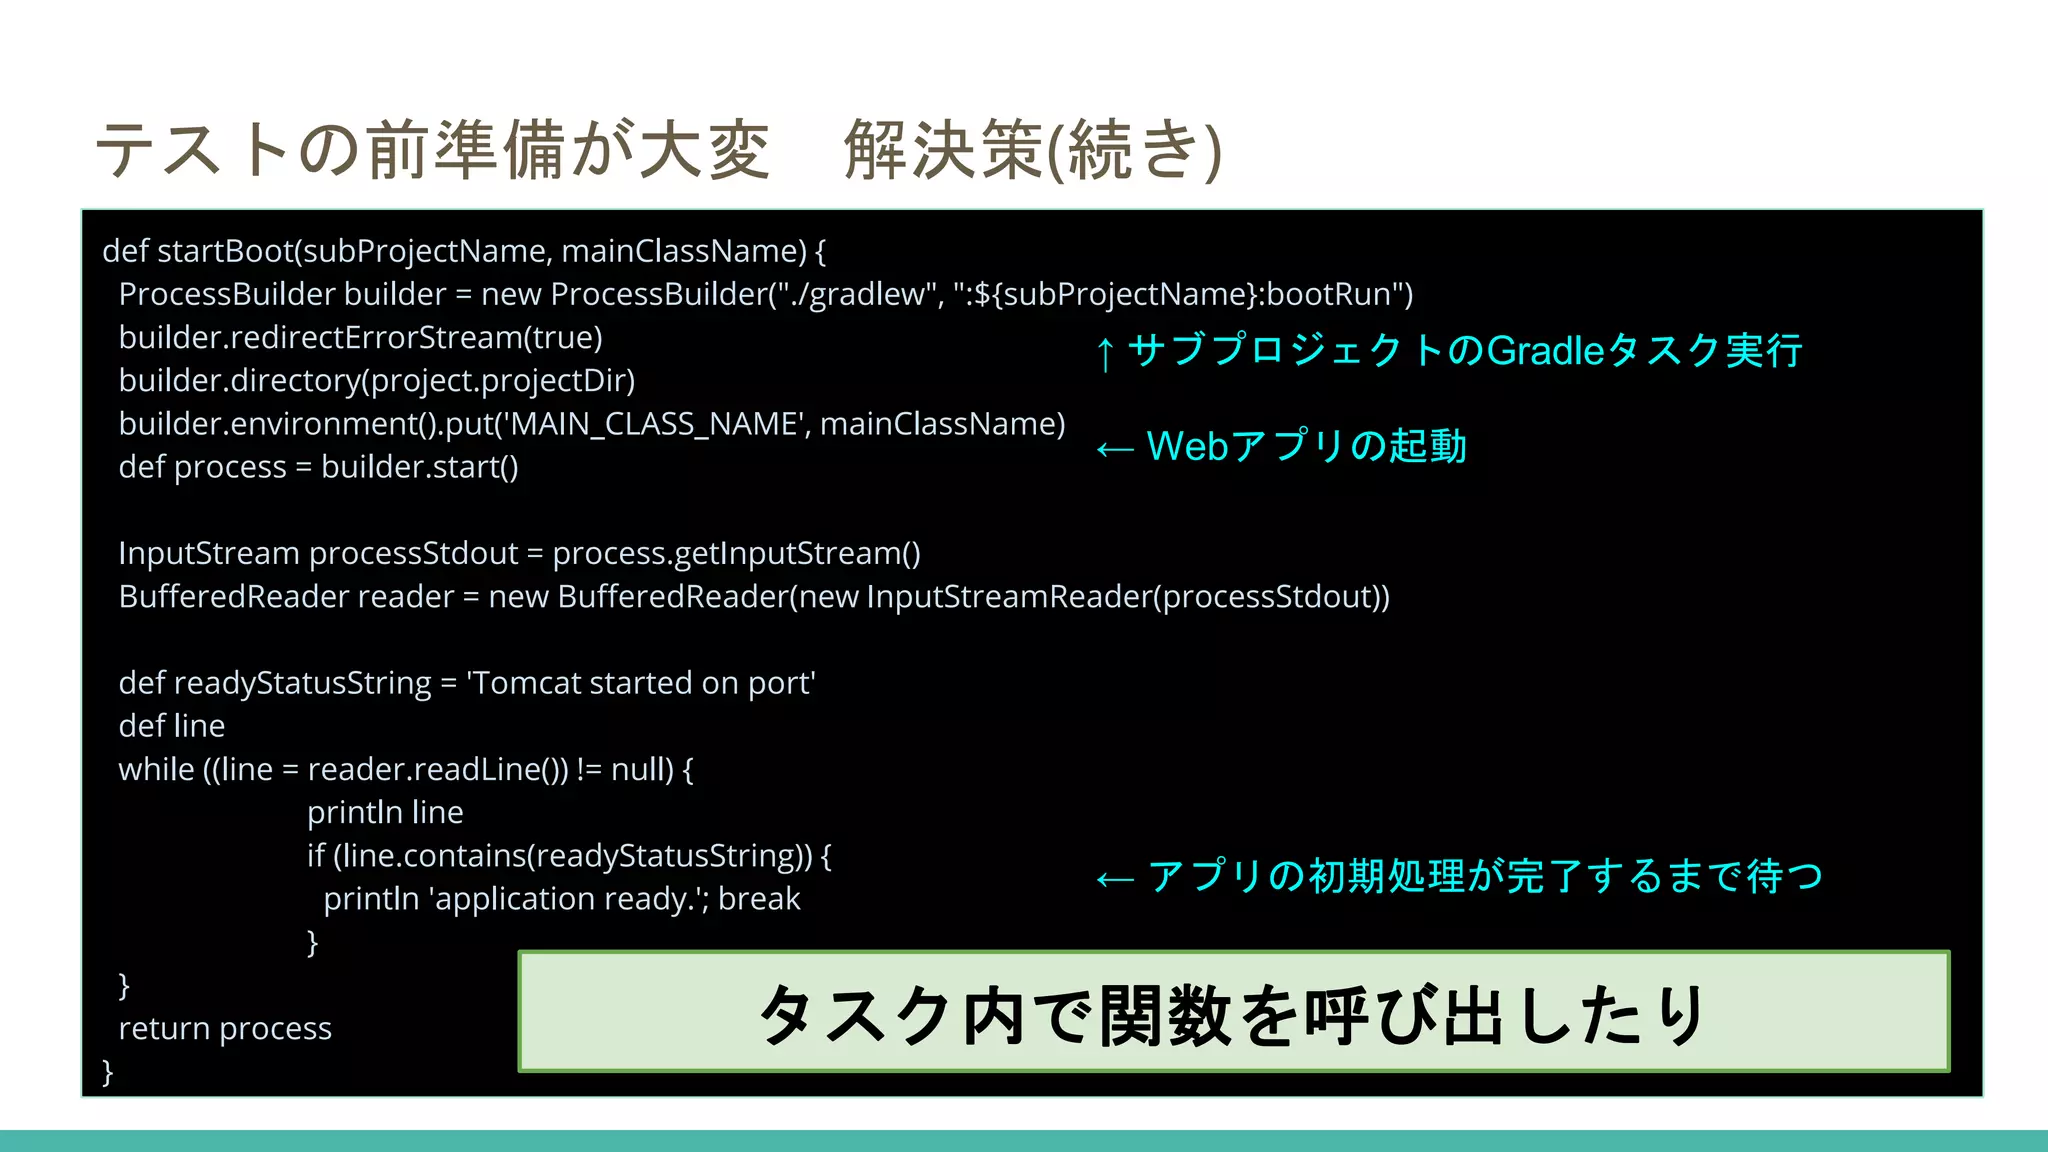
テストの前準備が大変 解決策(続き) def startBoot(subProjectName,
mainClassName) { ProcessBuilder builder = new ProcessBuilder("./gradlew", ":${subProjectName}:bootRun") builder.redirectErrorStream(true) builder.directory(project.projectDir) builder.environment().put('MAIN_CLASS_NAME', mainClassName) def process = builder.start() InputStream processStdout = process.getInputStream() BufferedReader reader = new BufferedReader(new InputStreamReader(processStdout)) def readyStatusString = 'Tomcat started on port' def line while ((line = reader.readLine()) != null) { println line if (line.contains(readyStatusString)) { println 'application ready.'; break } } return process } ↑ サブプロジェクトのGradleタスク実行 ← Webアプリの起動 ← アプリの初期処理が完了するまで待つ タスク内で関数を呼び出したり
46.
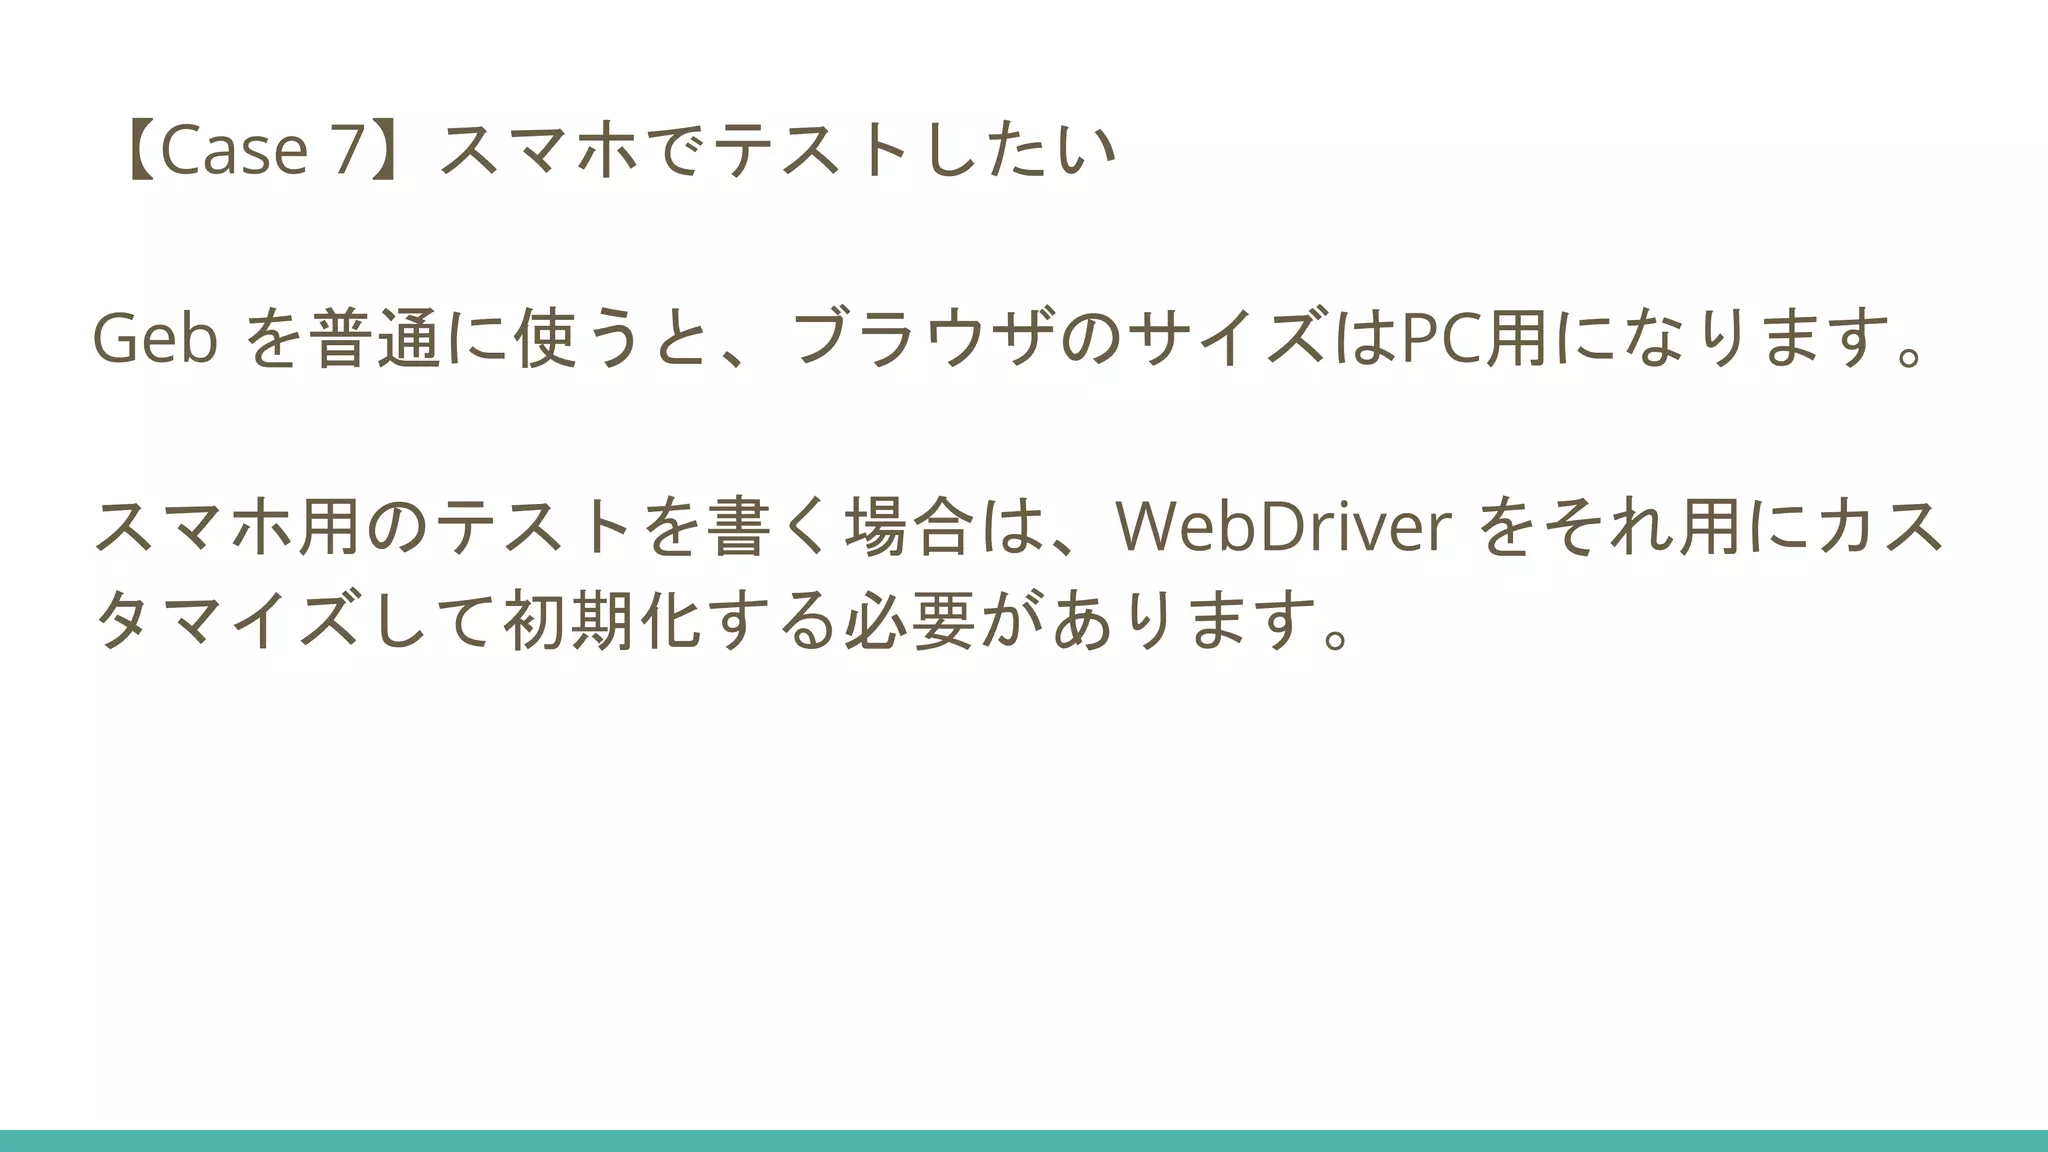
【Case 7】スマホでテストしたい Geb を普通に使うと、ブラウザのサイズはPC用になります。 スマホ用のテストを書く場合は、WebDriver
をそれ用にカス タマイズして初期化する必要があります。
47.
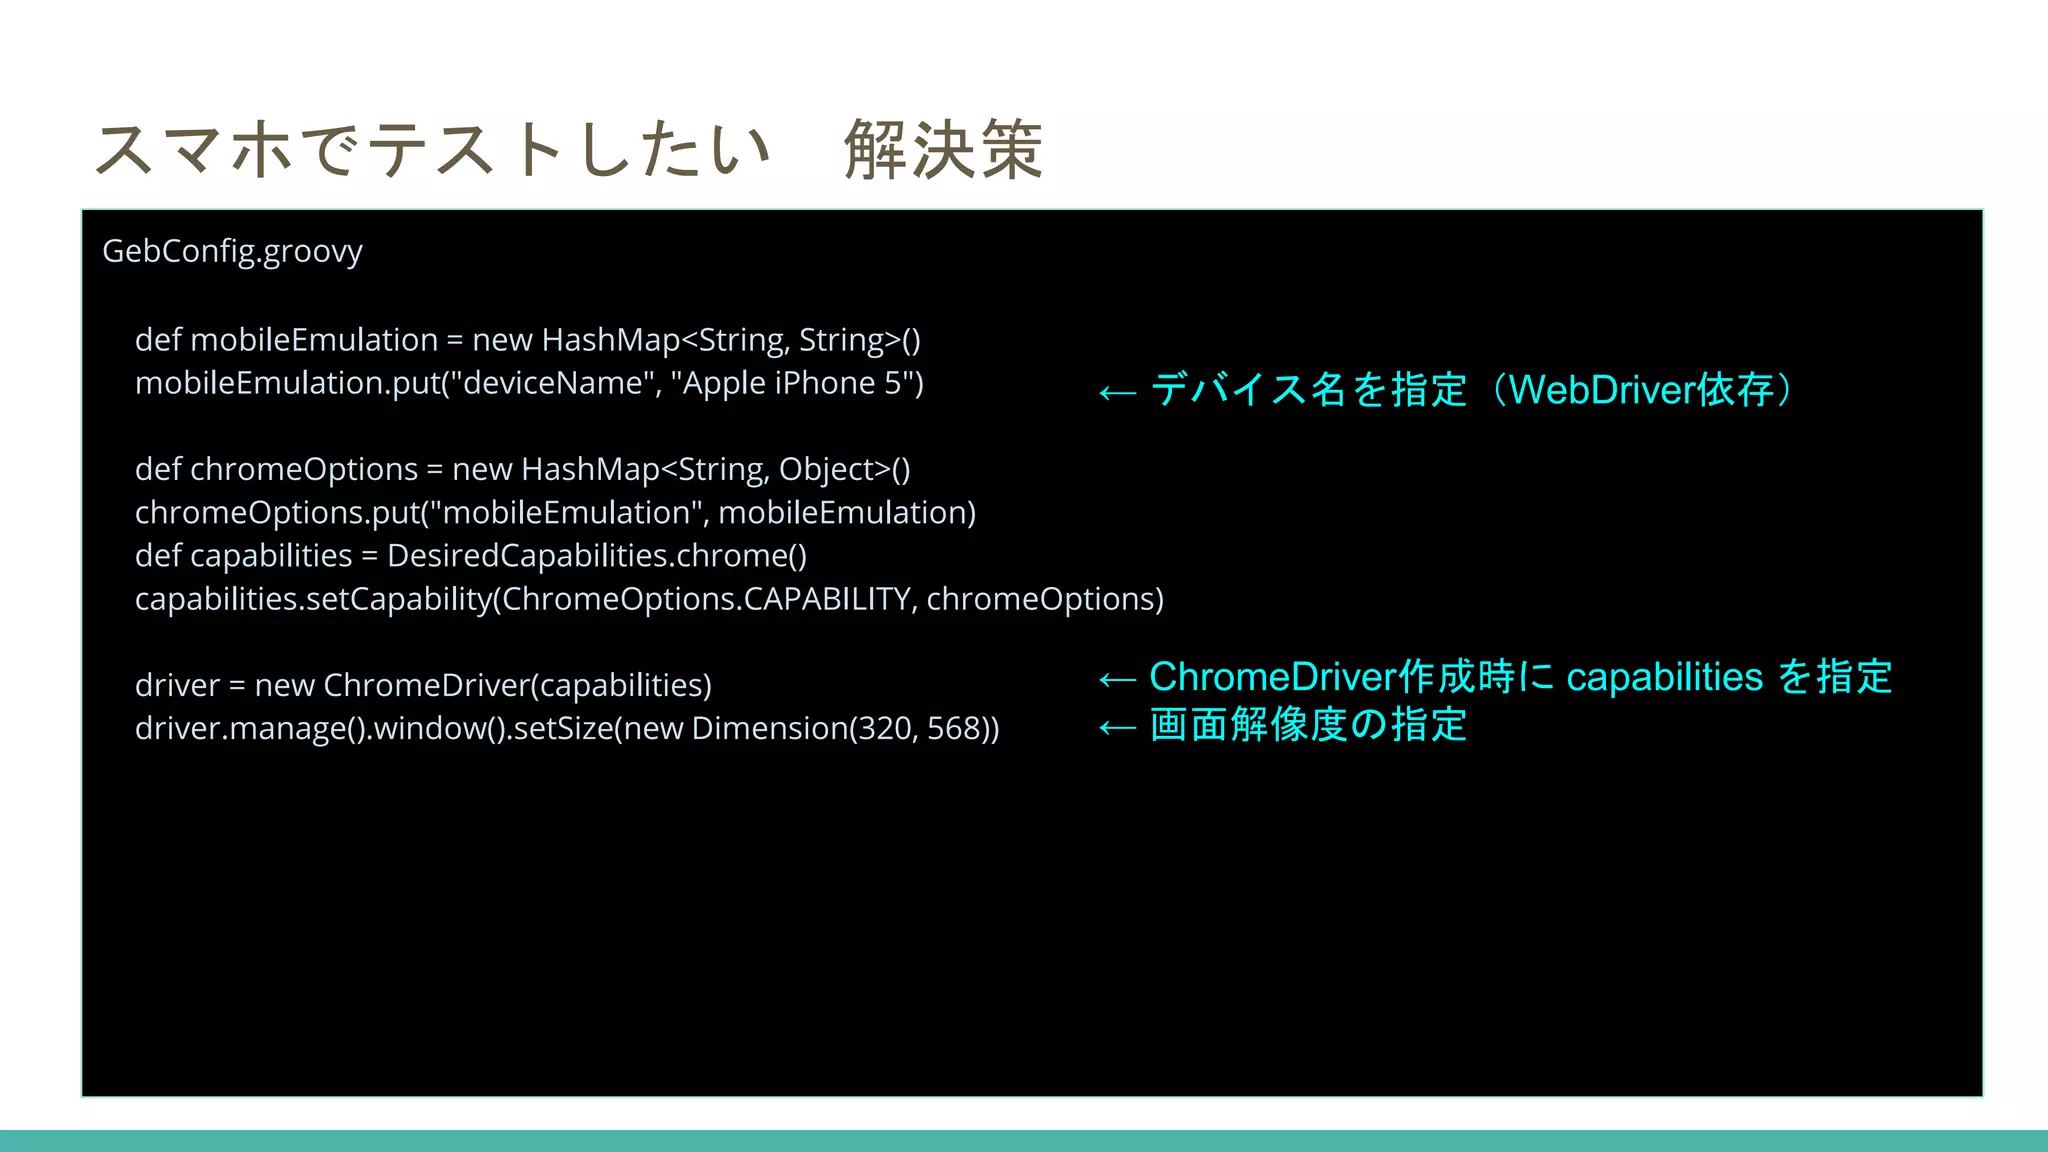
スマホでテストしたい 解決策 GebConfig.groovy def mobileEmulation
= new HashMap<String, String>() mobileEmulation.put("deviceName", "Apple iPhone 5") def chromeOptions = new HashMap<String, Object>() chromeOptions.put("mobileEmulation", mobileEmulation) def capabilities = DesiredCapabilities.chrome() capabilities.setCapability(ChromeOptions.CAPABILITY, chromeOptions) driver = new ChromeDriver(capabilities) driver.manage().window().setSize(new Dimension(320, 568)) ← デバイス名を指定(WebDriver依存) ← ChromeDriver作成時に capabilities を指定 ← 画面解像度の指定
48.
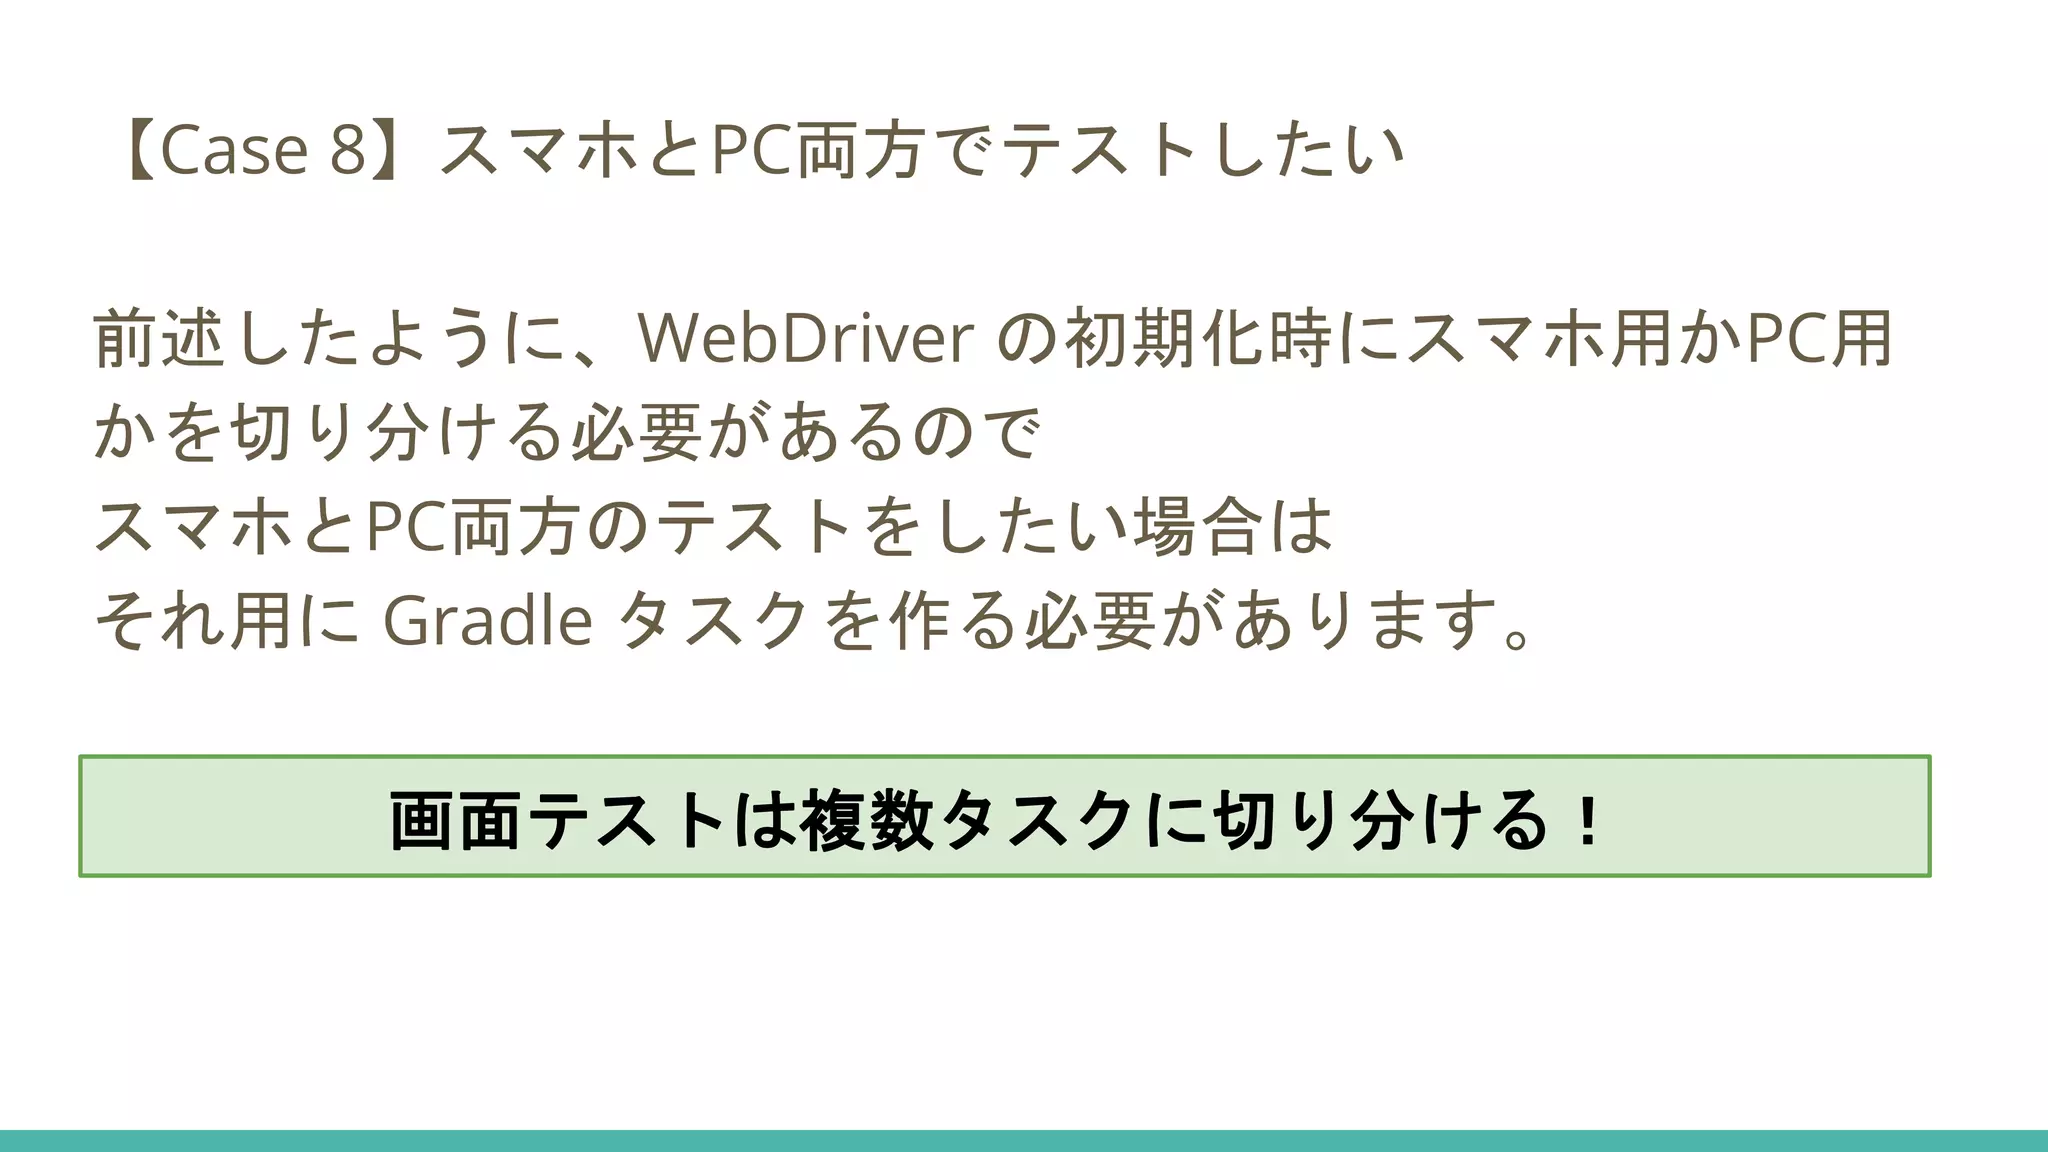
【Case 8】スマホとPC両方でテストしたい 前述したように、WebDriver の初期化時にスマホ用かPC用 かを切り分ける必要があるので スマホとPC両方のテストをしたい場合は それ用に
Gradle タスクを作る必要があります。 画面テストは複数タスクに切り分ける!
49.
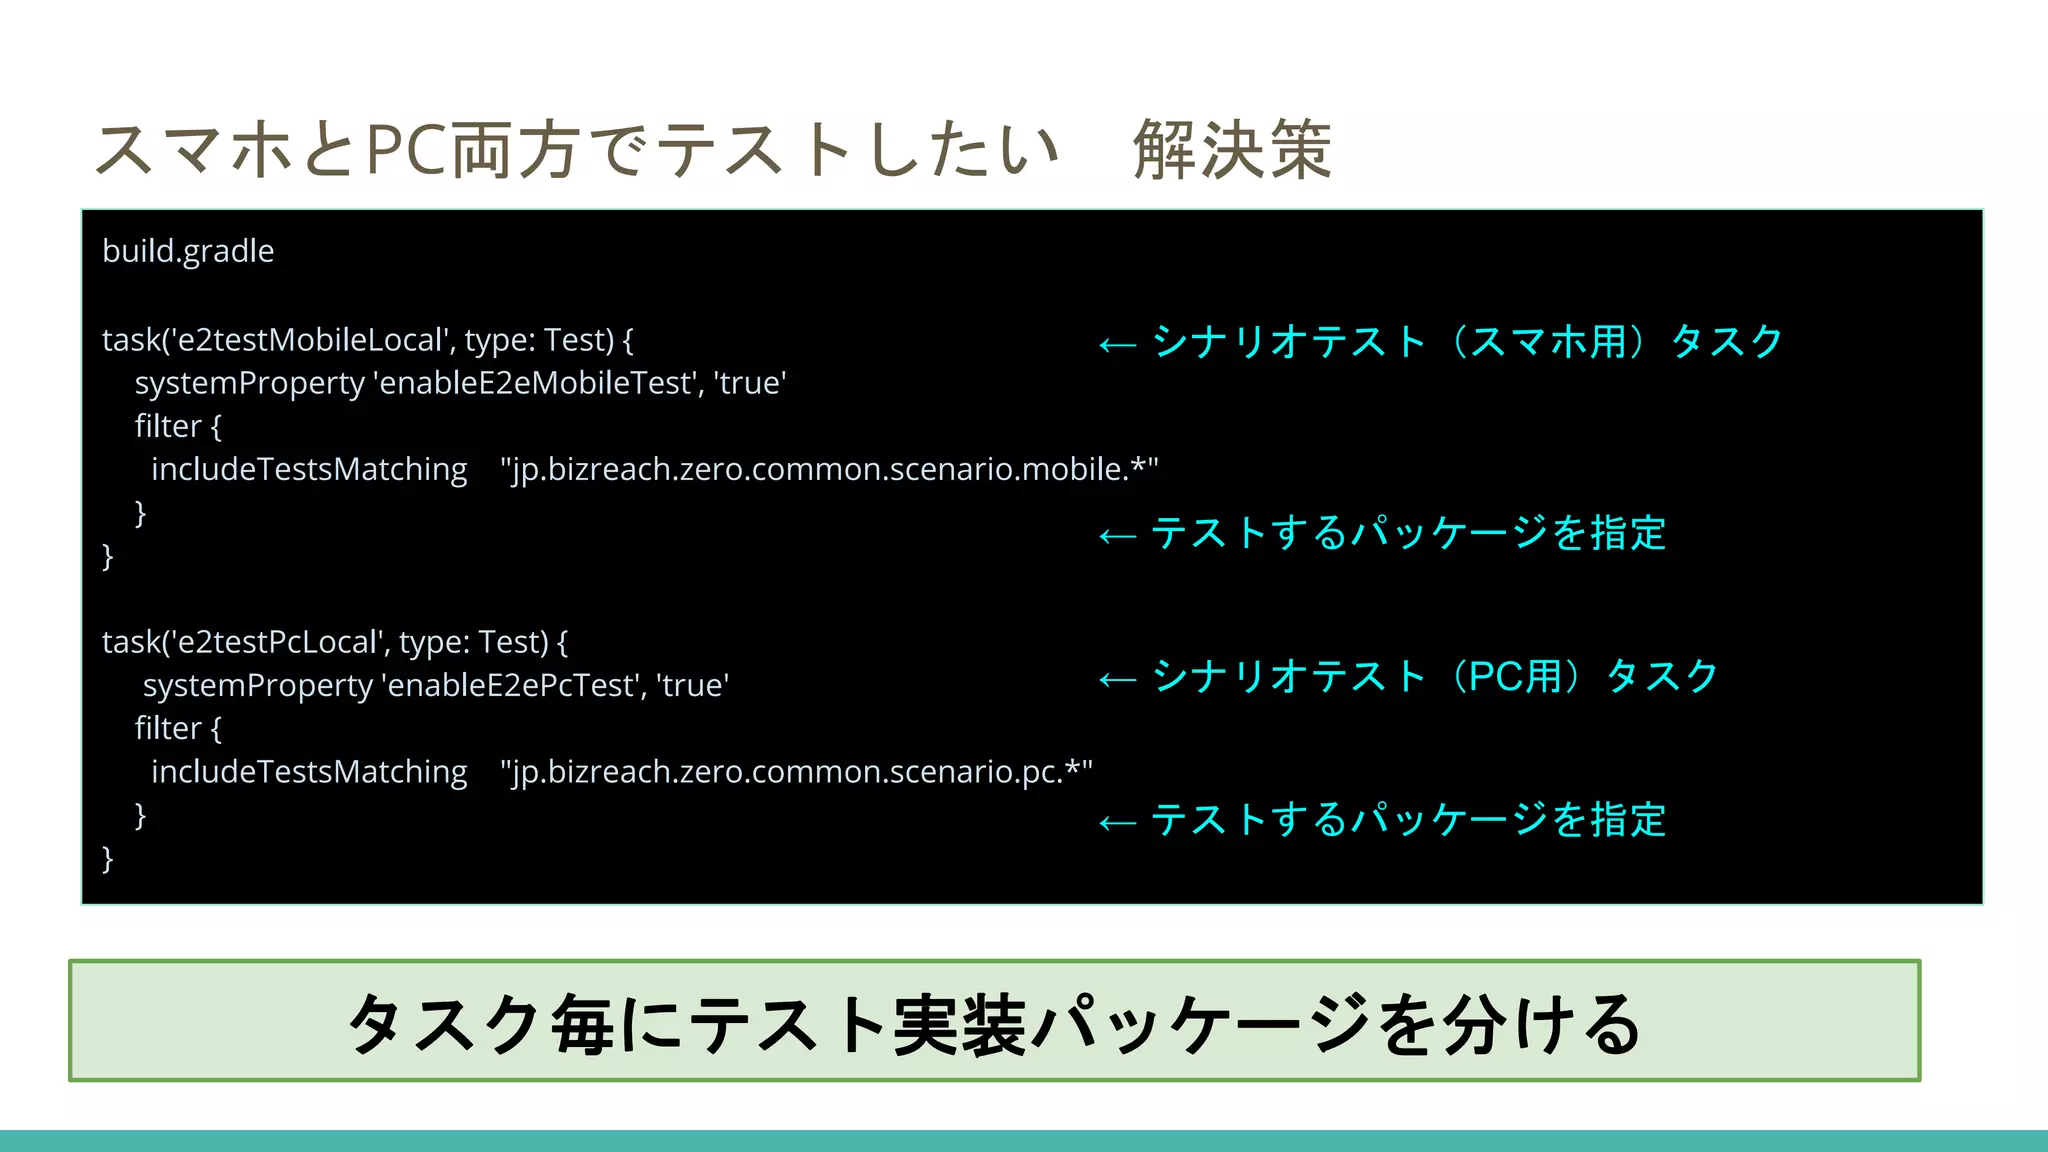
スマホとPC両方でテストしたい 解決策 build.gradle task('e2testMobileLocal', type:
Test) { systemProperty 'enableE2eMobileTest', 'true' filter { includeTestsMatching "jp.bizreach.zero.common.scenario.mobile.*" } } task('e2testPcLocal', type: Test) { systemProperty 'enableE2ePcTest', 'true' filter { includeTestsMatching "jp.bizreach.zero.common.scenario.pc.*" } } ← シナリオテスト(スマホ用)タスク ← テストするパッケージを指定 ← シナリオテスト(PC用)タスク ← テストするパッケージを指定 タスク毎にテスト実装パッケージを分ける
50.
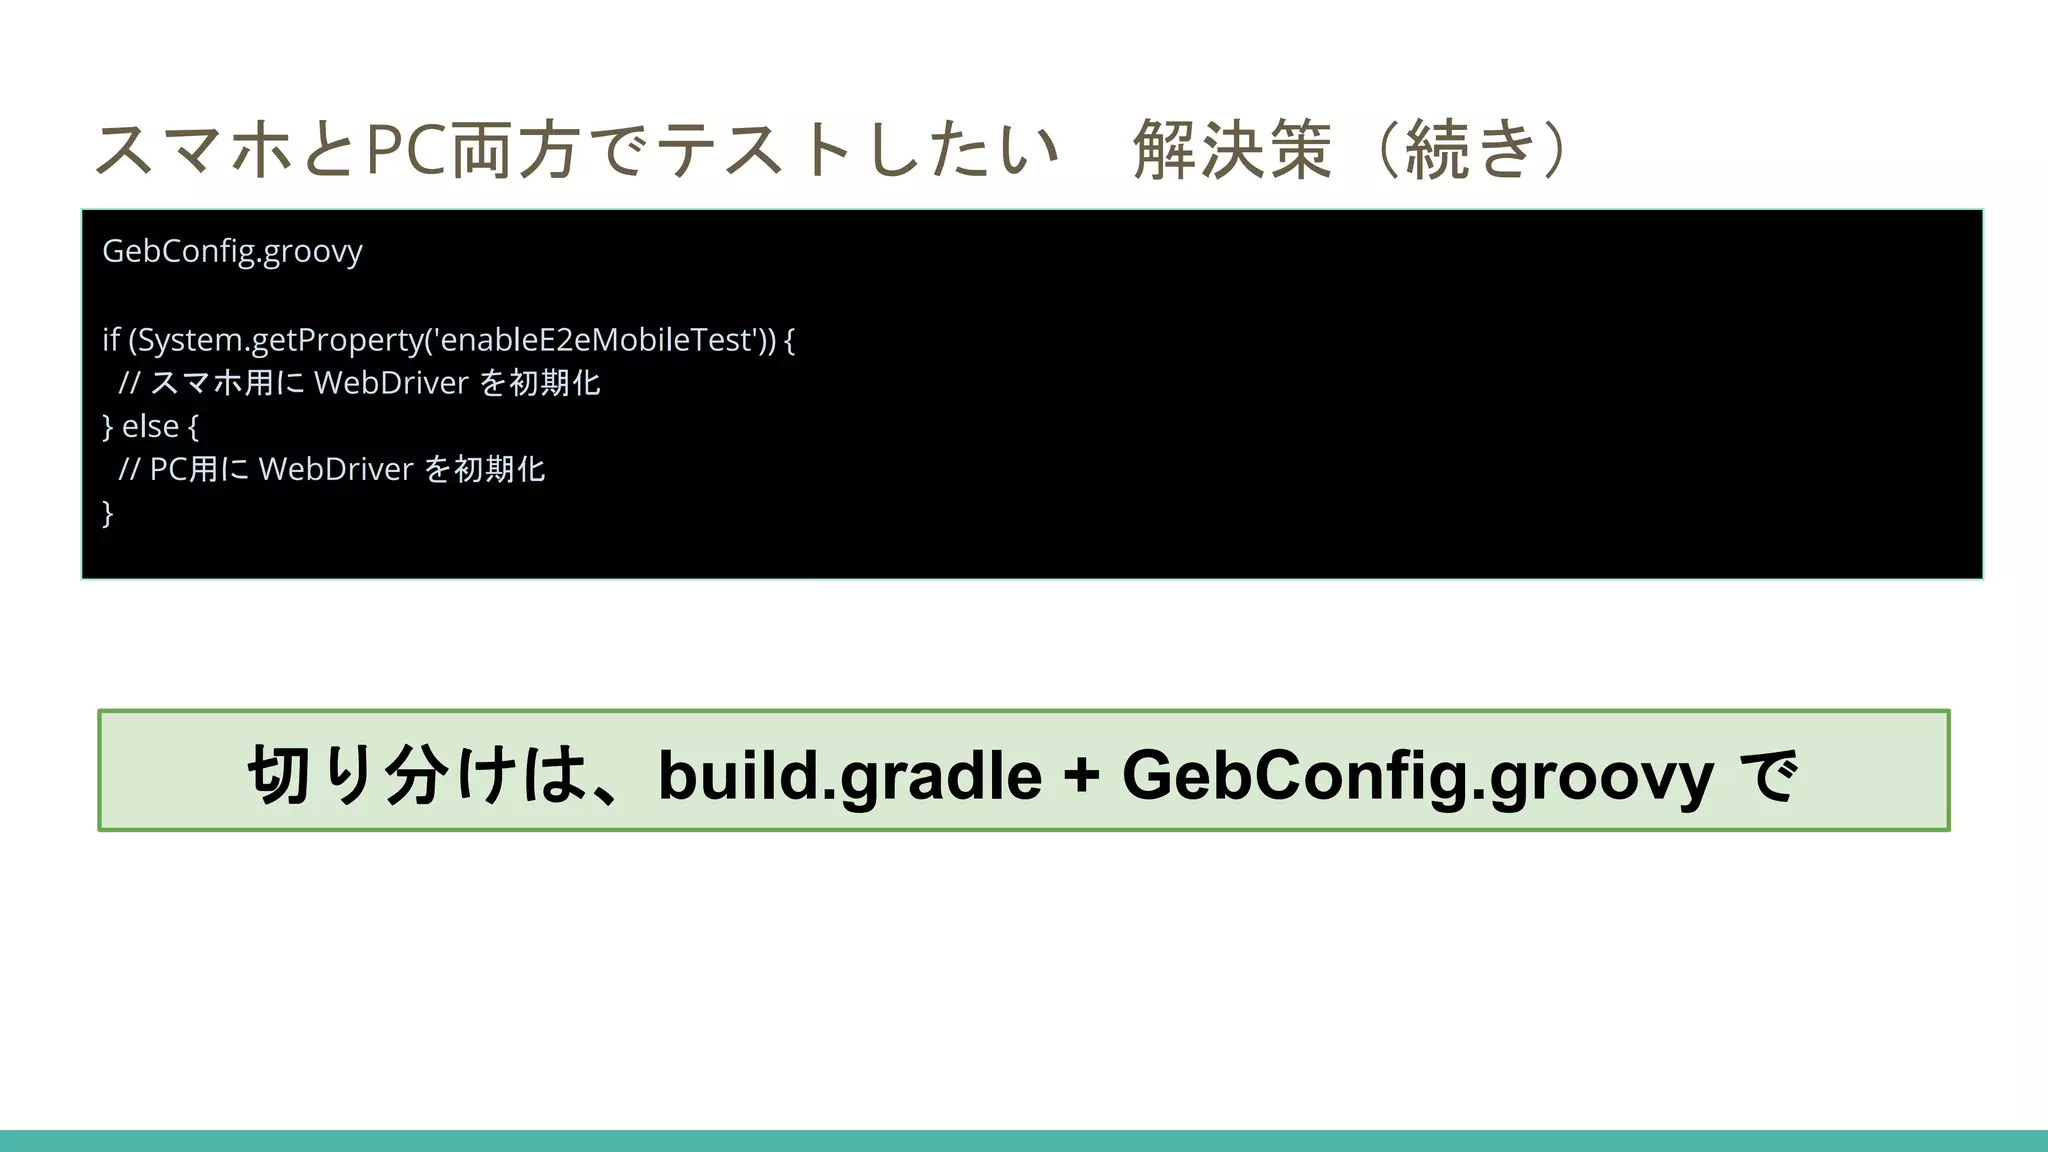
スマホとPC両方でテストしたい 解決策(続き) GebConfig.groovy if (System.getProperty('enableE2eMobileTest'))
{ // スマホ用に WebDriver を初期化 } else { // PC用に WebDriver を初期化 } 切り分けは、build.gradle + GebConfig.groovy で
51.
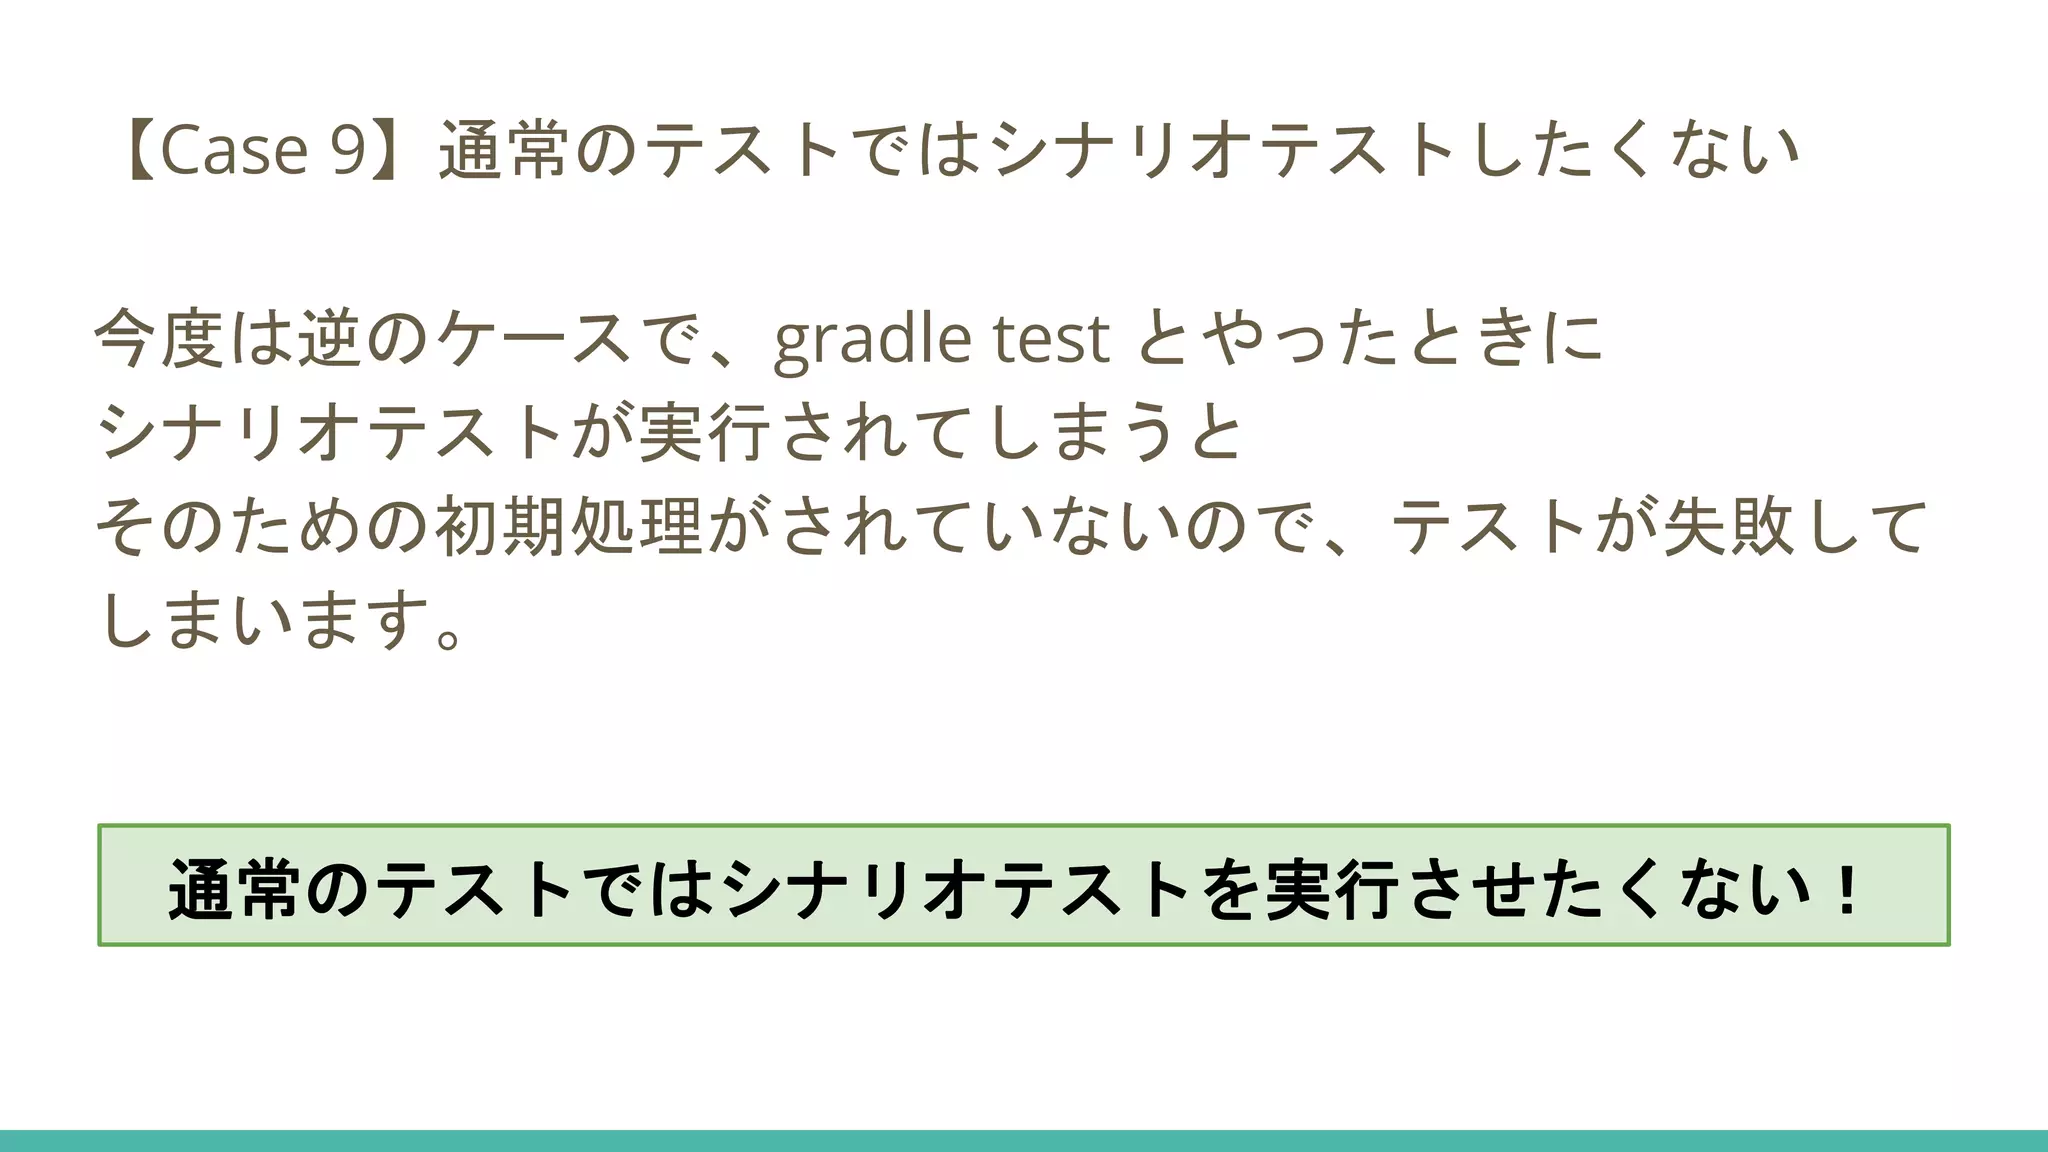
【Case 9】通常のテストではシナリオテストしたくない 今度は逆のケースで、gradle test
とやったときに シナリオテストが実行されてしまうと そのための初期処理がされていないので、テストが失敗して しまいます。 通常のテストではシナリオテストを実行させたくない!
52.
通常のテストではシナリオテストしたくない 解決策 @IgnoreIf({ sys['enableE2ePcTest']
== null}) class CompanyScoutScenarioSpec extends AbstractScenarioGebSpec { ... } ↑ 特定のシステム変数がセットされている場合のみテストを実行 ※ sys[...] は System.getProperty の簡易記法(Spock) Spock の @IgnoreIf で解決!
53.
通常のテストではシナリオテストしたくない 解決策2 ただしこれだと、IDEからテスト実行した時に テストがスキップされてしまう。 @IgnoreIf は基底クラスのSpecに付けても機能しないので、 各Specに付ける必要があります。 @IgnoreIf({
sys['enableE2ePcTest'] == null && sys['idea.junit.sm_runner'] == null}) class CompanyScoutScenarioSpec extends AbstractScenarioGebSpec { ... } ↑ IntelliJ対応 IDEからテスト実行したときの環境変数を使う!
54.
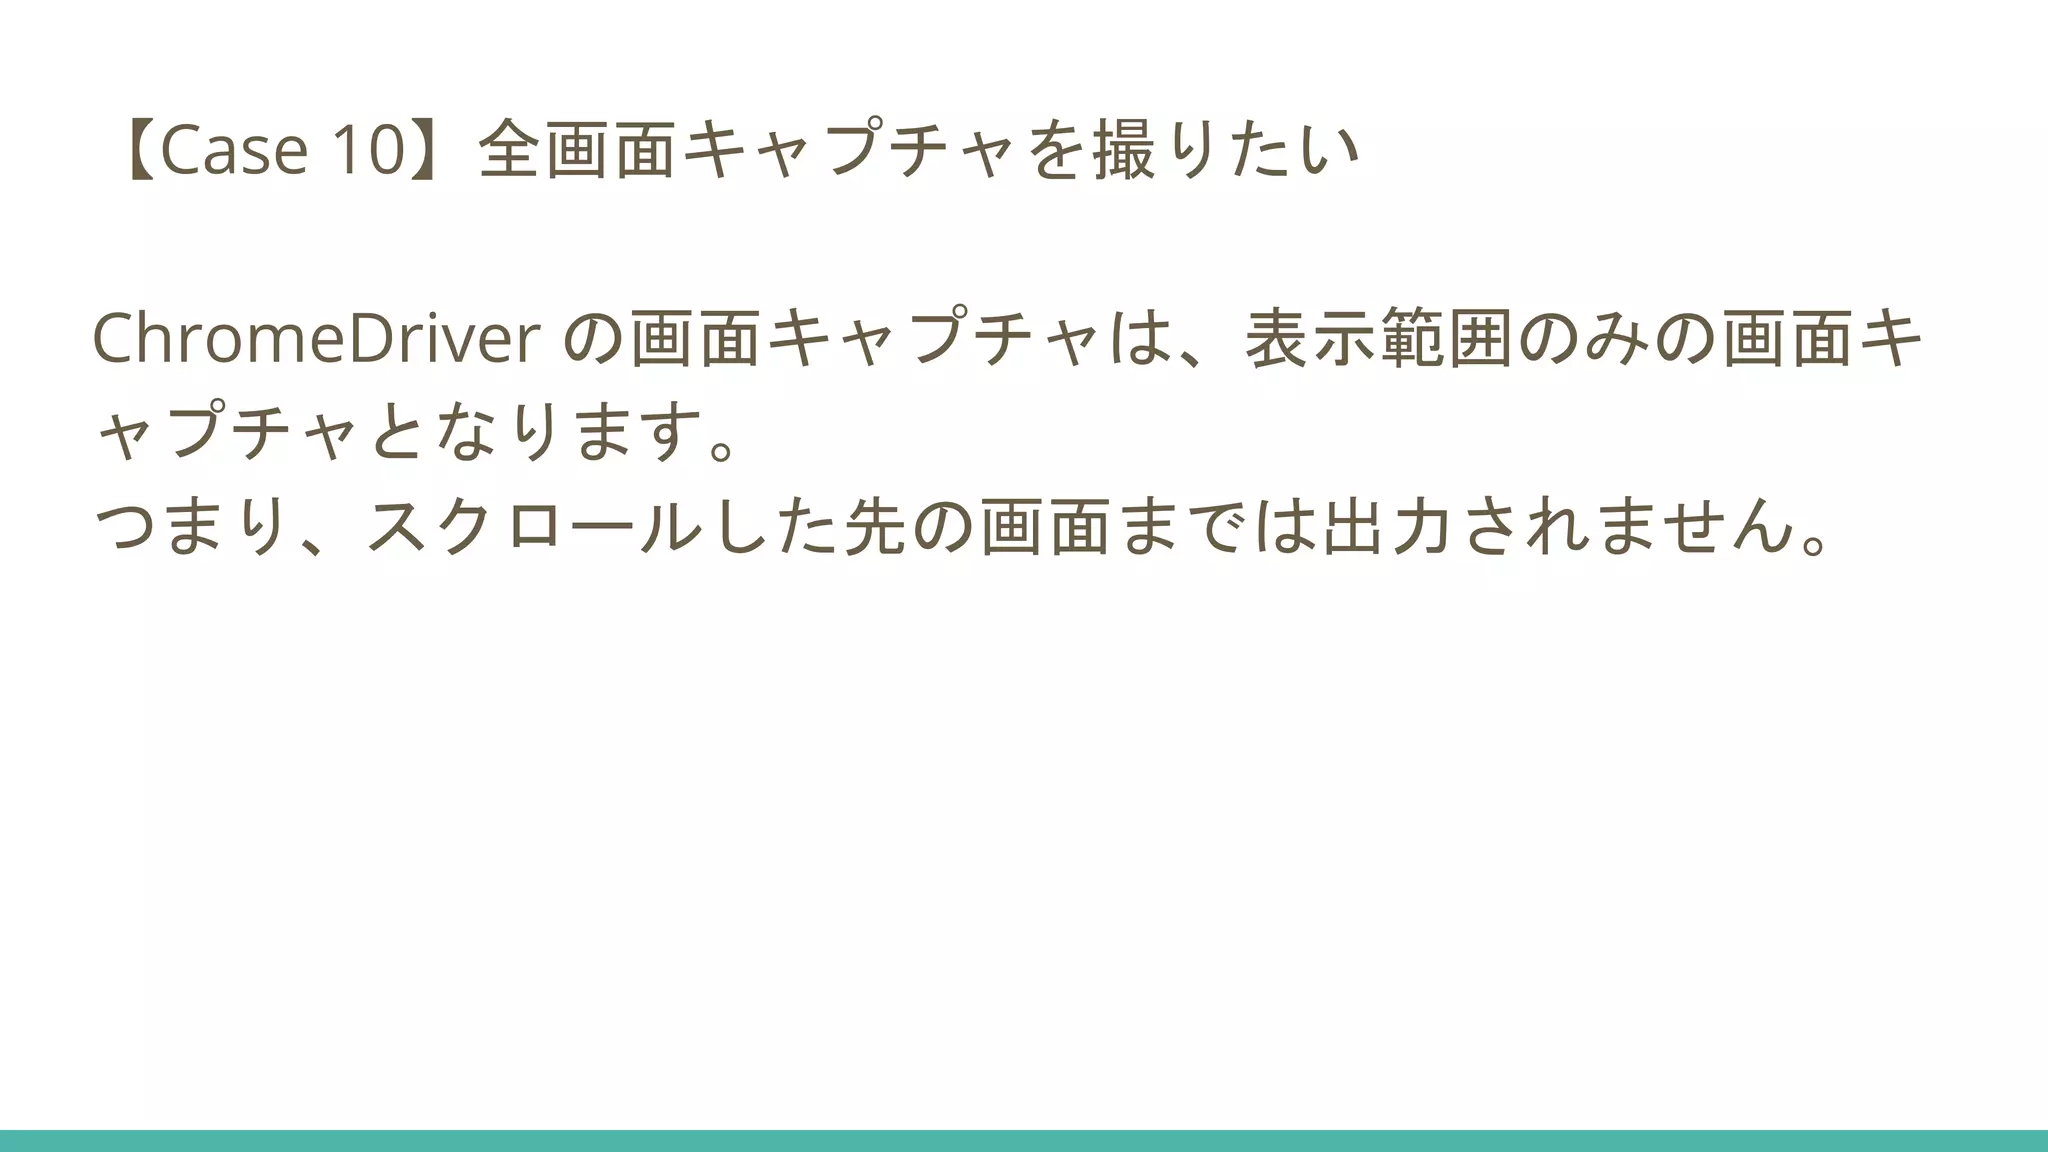
【Case 10】全画面キャプチャを撮りたい ChromeDriver の画面キャプチャは、表示範囲のみの画面キ ャプチャとなります。 つまり、スクロールした先の画面までは出力されません。
55.
【Case 10】全画面キャプチャを撮りたい これを解決するために AShot
という ライブラリがあるのでこれを使います。
56.
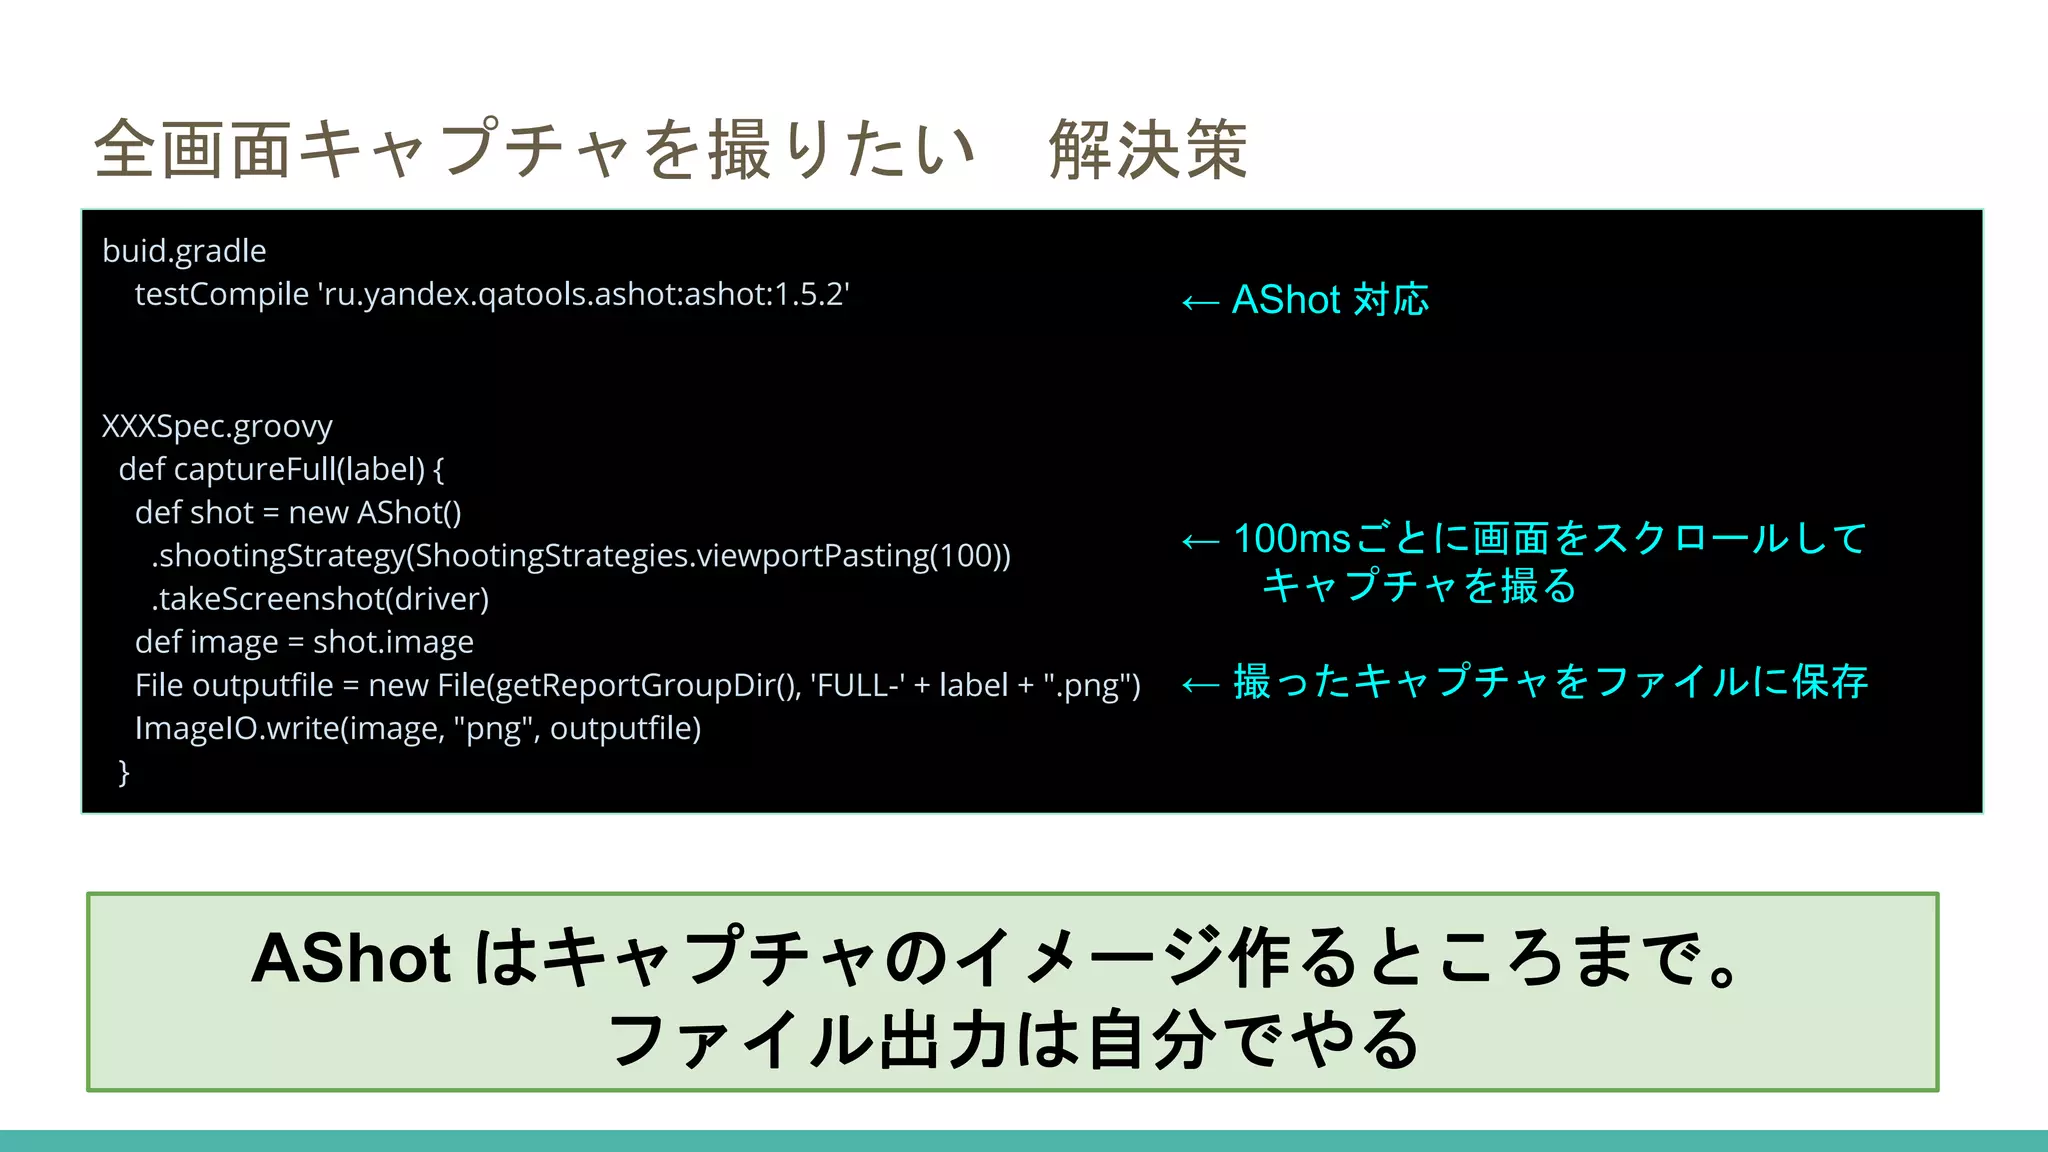
全画面キャプチャを撮りたい 解決策 buid.gradle testCompile 'ru.yandex.qatools.ashot:ashot:1.5.2' XXXSpec.groovy def
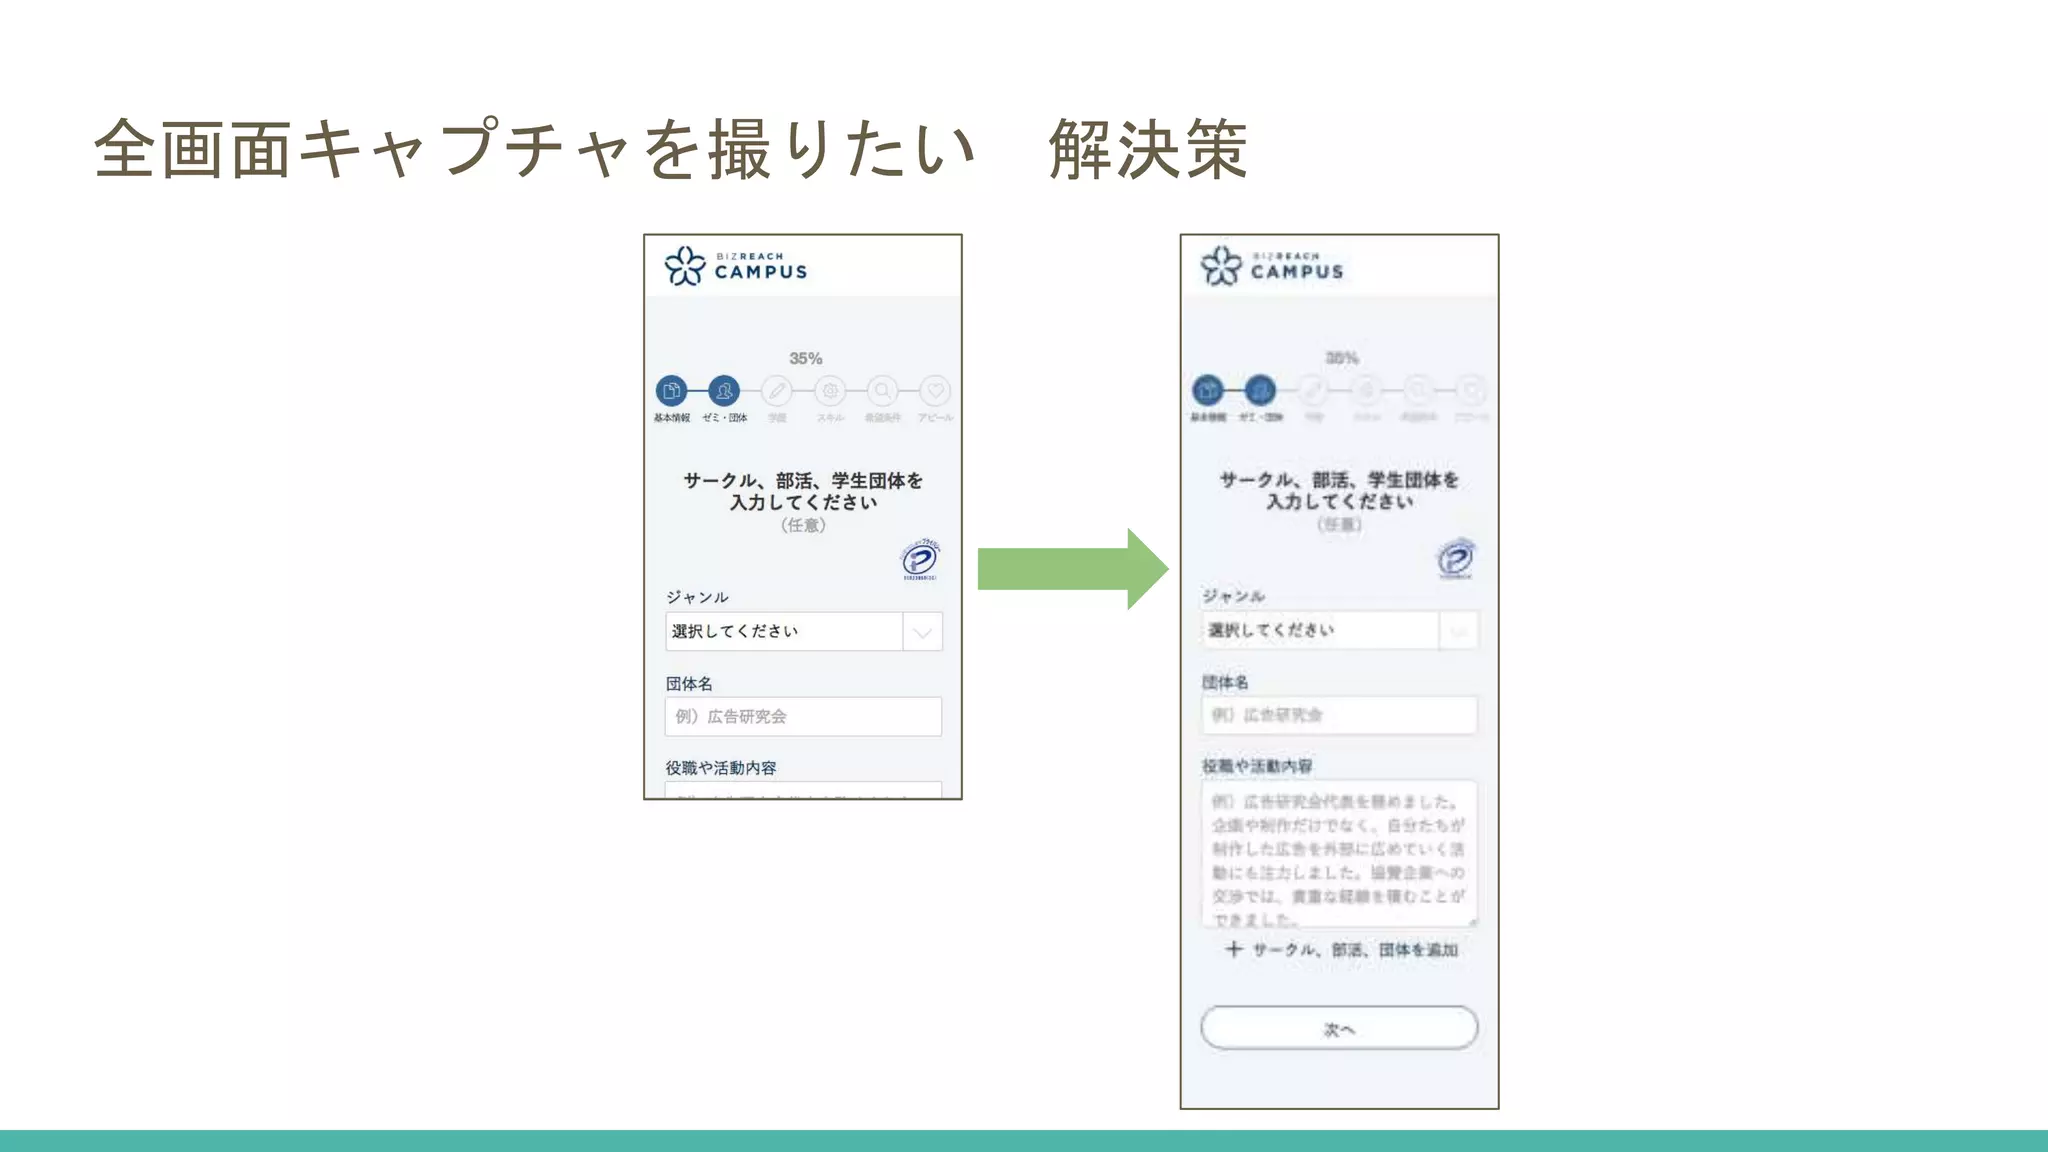
captureFull(label) { def shot = new AShot() .shootingStrategy(ShootingStrategies.viewportPasting(100)) .takeScreenshot(driver) def image = shot.image File outputfile = new File(getReportGroupDir(), 'FULL-' + label + ".png") ImageIO.write(image, "png", outputfile) } ← AShot 対応 ← 100msごとに画面をスクロールして キャプチャを撮る ← 撮ったキャプチャをファイルに保存 AShot はキャプチャのイメージ作るところまで。 ファイル出力は自分でやる
57.
全画面キャプチャを撮りたい 解決策
58.
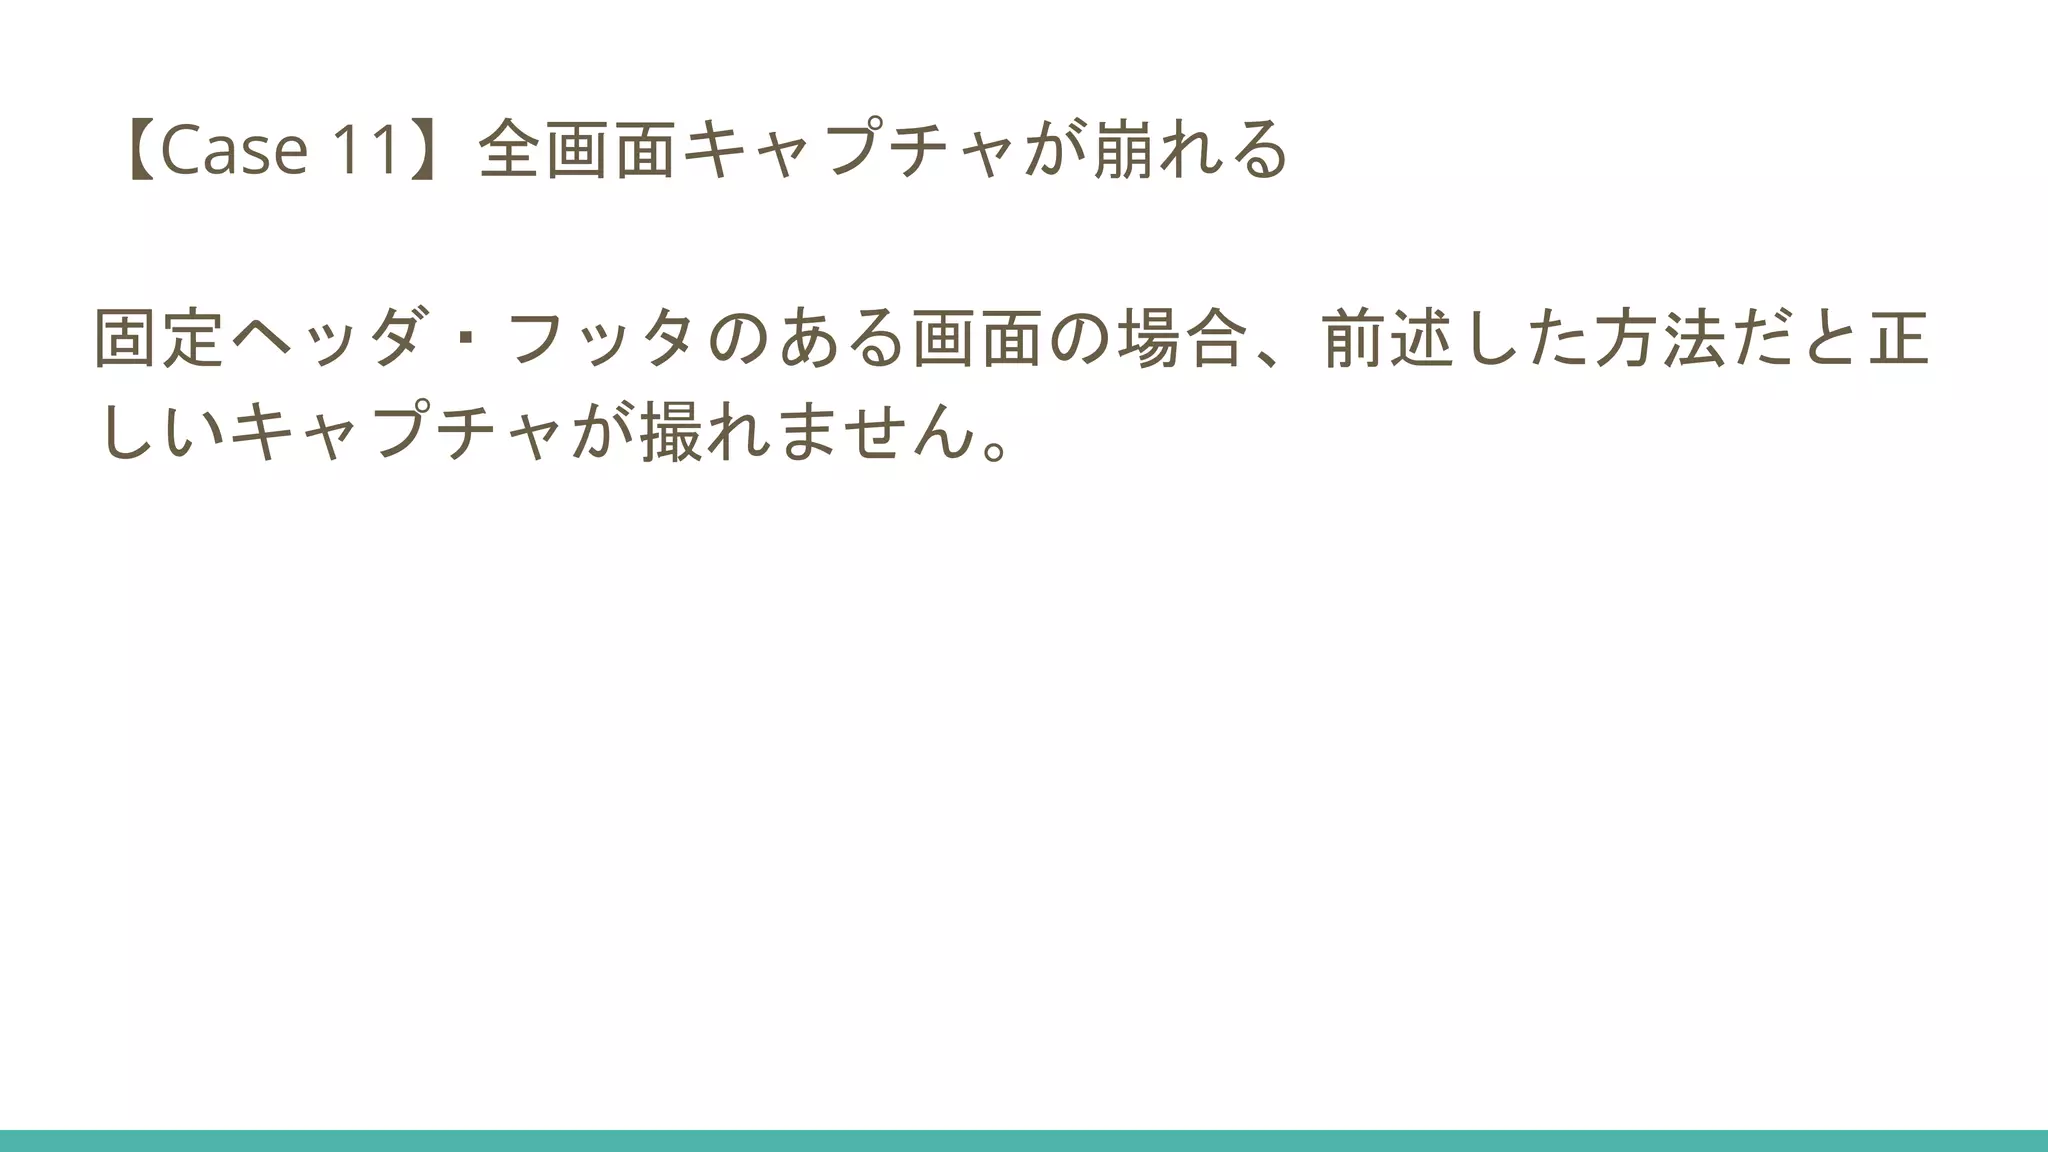
【Case 11】全画面キャプチャが崩れる 固定ヘッダ・フッタのある画面の場合、前述した方法だと正 しいキャプチャが撮れません。
59.
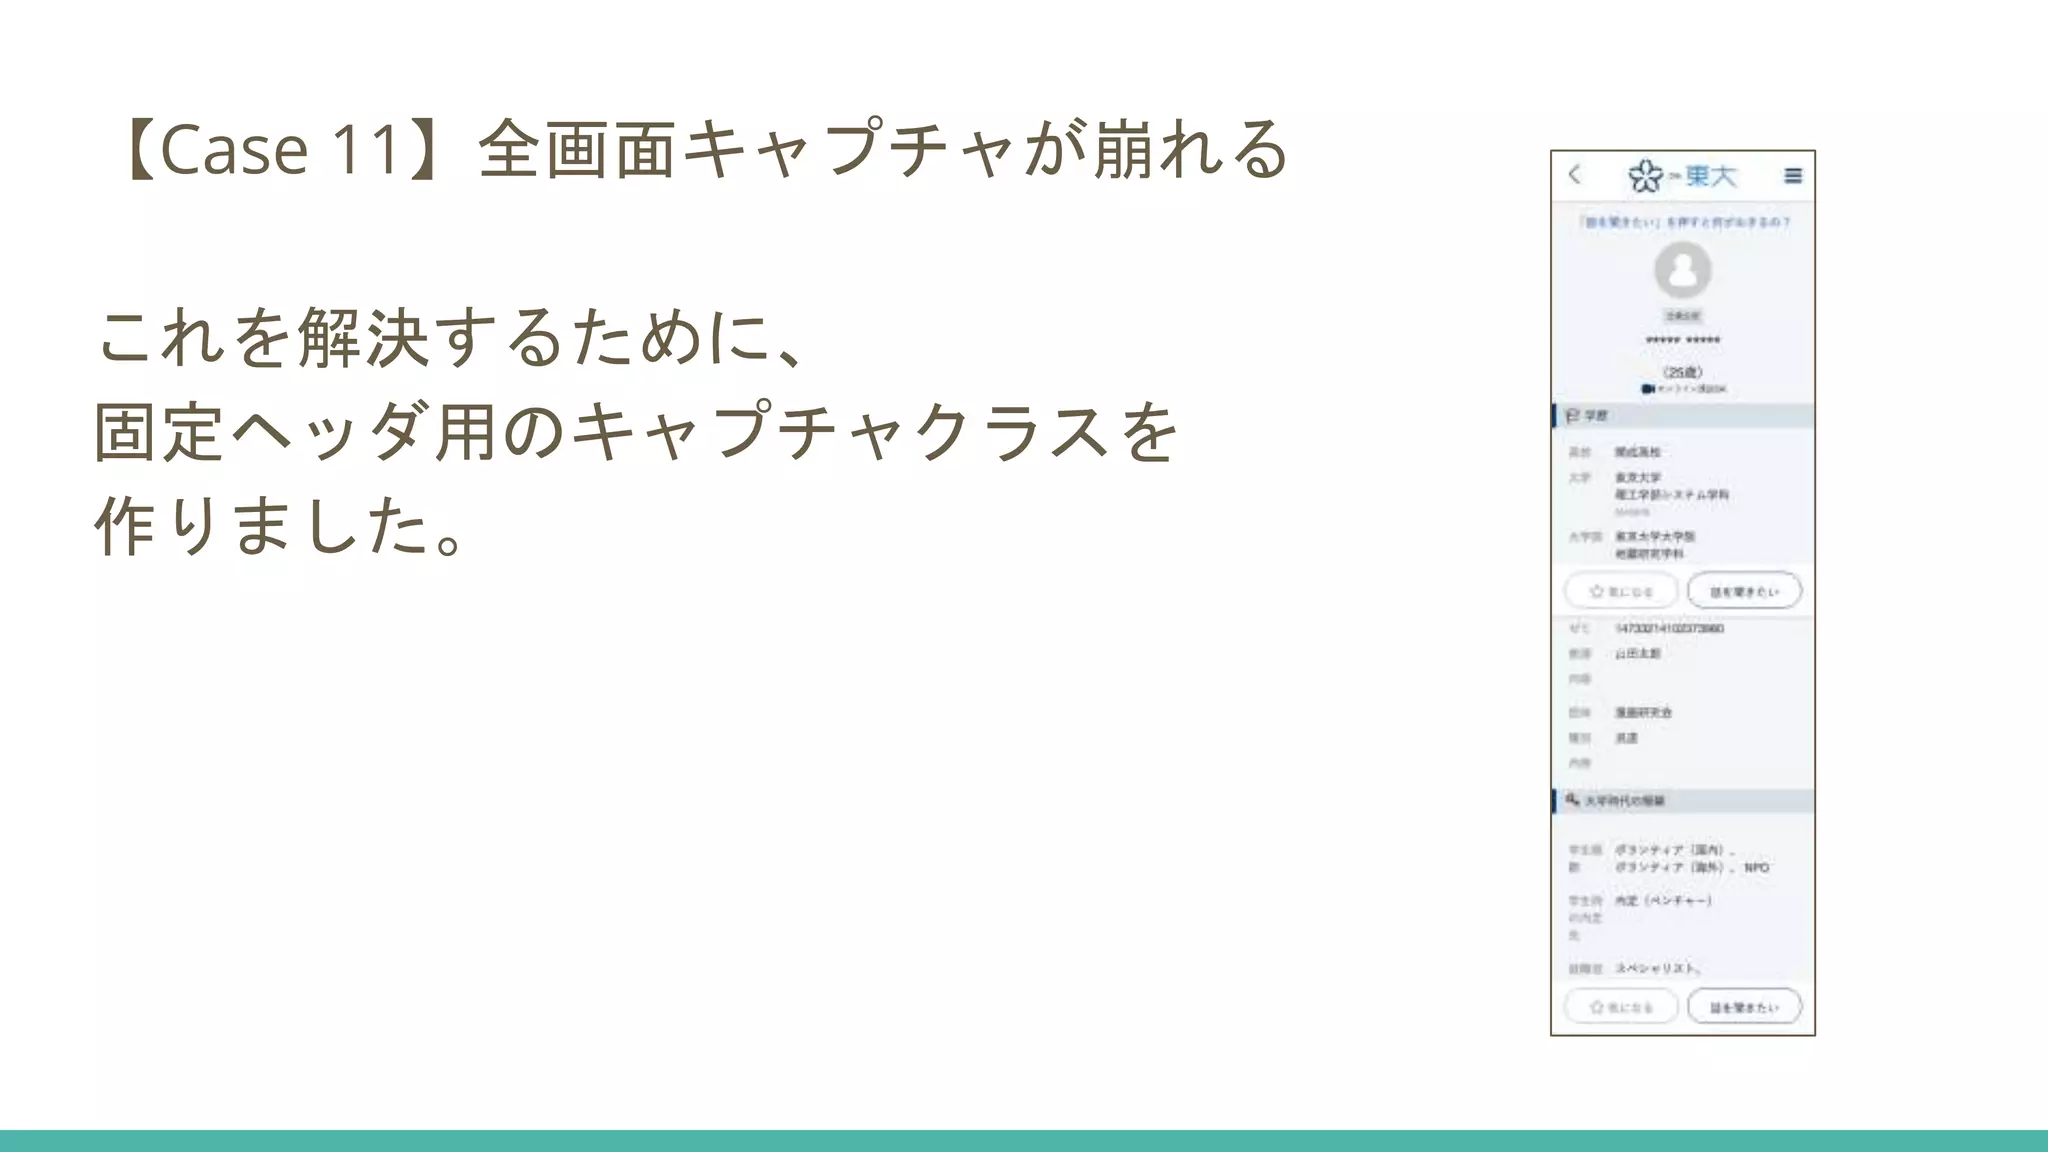
【Case 11】全画面キャプチャが崩れる これを解決するために、 固定ヘッダ用のキャプチャクラスを 作りました。
60.
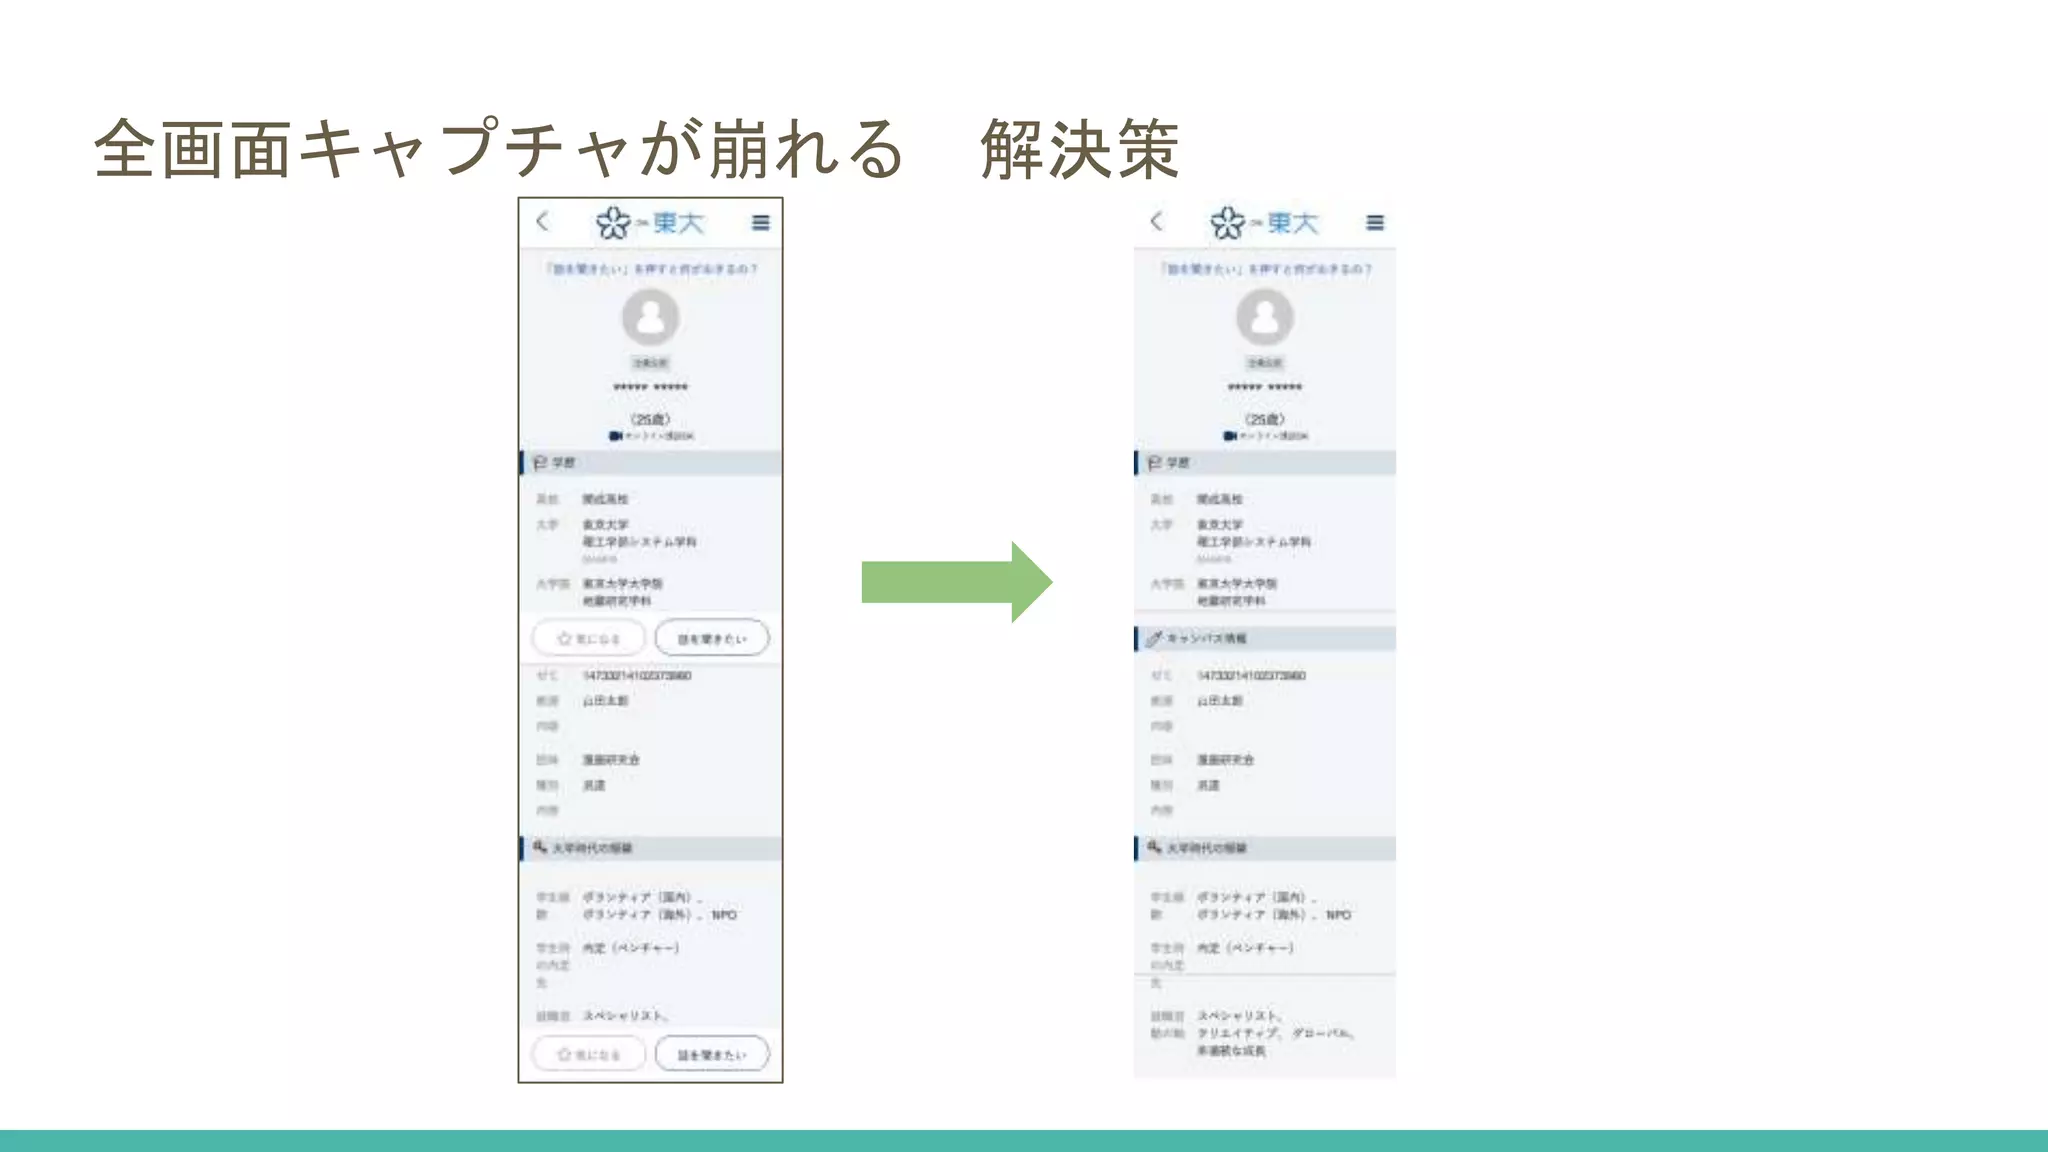
全画面キャプチャが崩れる 解決策 def captureFull(label,
prop = [:]) { capture label def fixedHeaderHeight = 60 def fixedFooterHeight = 0 if (prop['footer']) { fixedFooterHeight = prop['footer'].getHeight() } def shootingStrategy = new CustomizeViewportPastingDecorator( new SimpleShootingStrategy(), fixedHeaderHeight, fixedFooterHeight).withScrollTimeout(100) def shot = new AShot() .shootingStrategy(shootingStrategy) .takeScreenshot(driver) def image = shot.image File outputfile = new File(getReportGroupDir(), 'FULL-' + label + ".png") ImageIO.write(image, "png", outputfile) } https://gist.github.com/naoki-iwami/4cf5e6aed62b39bb7fd15dbf5adc0940 ← ヘッダは60pxで固定 ← フッタは画面に応じて変わるので 引数に [ ‘footer’: $(‘.footer’) ] のように渡す ↑ ヘッダとフッタの高さを指定して ShootingStrategy を作成
61.
全画面キャプチャが崩れる 解決策
62.
ここまで出来るようになりました。 ・テスト成功率の向上(95%以上) ・キャプチャが付与されたテストレポートの出力 ・テストの一発実行 ・スマホ端末でのテスト ・全画面キャプチャ
63.
しかしまだまだ、足りない点はあります。 ・検証環境でもテストしたい ・テストレポートをチーム全員で共有したい ・キャプチャを一覧で確認する画面が欲しい ・テストレポートの履歴を残したい ・シナリオテスト実行時のカバレッジを計測したい ・テスト実行時間をもっと速くしたい 次回があれば、これらについてもトライしていきます。
64.
最後にちょっと宣伝 ビズリーチでは、共に働いてくれる仲間を募集しています。 https://www.bizreach.co.jp/recruit/ ・エンジニア ・デザイナー ・プロダクトマネージャ プロダクトの力を信じている人の 応募をお待ちしています!
65.
ご清聴ありがとうございました at BIZREACH 2016.9.13
Download


![テストケースを作るのが大変 解決策
・フォームへの入力補助
formInput(
'lastName': '山田',
'firstName': '太郎'
)
・イベントハンドラ
findClickableElement('reportObSubmit').click()
・共通的な画面処理(ユーザ登録など)
registerUser()
・ランダム文字列生成
def email = createRandomEmail()
・ポップアップ関連
waitShowPopup($('#jsi-popup-apply'))
・正規表現で指定可能なURLのアサーション
waitForUrl(~/events¥/[0-9]+/)
← これは必須。
name属性やID指定、JSライブラリ対応など
← イベントハンドラは
JSライブラリに合わせた対応が望ましい
← 複数のシナリオで使う処理は共通化する
← DBのユニーク制約への対応
← 使っているポップアップのライブラリに応じて
← これが無いとアサーションが難しい場合がある](https://image.slidesharecdn.com/web-160915073408/75/Web-10-35-2048.jpg)
![テストレポートにキャプチャが無い 解決策
やや強引ですが、Gradle スクリプト内でレポートHTMLにキ
ャプチャ画像を貼り付けています。
task appendCaptureToReport() << {
def File basedir = project.projectDir
def root = new File(basedir, 'build/reports/tests/capture')
// キャプチャ画像ファイル一覧を取得
def buffs = [:]
root.eachFileRecurse(FileType.FILES) {
buffs[dir] << picName
}
… コードが長いので、全文は gist で
https://gist.github.com/naoki-iwami/c5ceba0b02bee3b6bbcd1545c111ab98
}](https://image.slidesharecdn.com/web-160915073408/75/Web-10-38-2048.jpg)
![通常のテストではシナリオテストしたくない 解決策
@IgnoreIf({ sys['enableE2ePcTest'] == null})
class CompanyScoutScenarioSpec extends AbstractScenarioGebSpec {
...
}
↑ 特定のシステム変数がセットされている場合のみテストを実行
※ sys[...] は System.getProperty の簡易記法(Spock)
Spock の @IgnoreIf で解決!](https://image.slidesharecdn.com/web-160915073408/75/Web-10-52-2048.jpg)
![通常のテストではシナリオテストしたくない 解決策2
ただしこれだと、IDEからテスト実行した時に
テストがスキップされてしまう。
@IgnoreIf は基底クラスのSpecに付けても機能しないので、
各Specに付ける必要があります。
@IgnoreIf({ sys['enableE2ePcTest'] == null && sys['idea.junit.sm_runner'] == null})
class CompanyScoutScenarioSpec extends AbstractScenarioGebSpec {
...
}
↑ IntelliJ対応
IDEからテスト実行したときの環境変数を使う!](https://image.slidesharecdn.com/web-160915073408/75/Web-10-53-2048.jpg)

![全画面キャプチャが崩れる 解決策
def captureFull(label, prop = [:]) {
capture label
def fixedHeaderHeight = 60
def fixedFooterHeight = 0
if (prop['footer']) {
fixedFooterHeight = prop['footer'].getHeight()
}
def shootingStrategy = new CustomizeViewportPastingDecorator(
new SimpleShootingStrategy(), fixedHeaderHeight, fixedFooterHeight).withScrollTimeout(100)
def shot = new AShot()
.shootingStrategy(shootingStrategy)
.takeScreenshot(driver)
def image = shot.image
File outputfile = new File(getReportGroupDir(), 'FULL-' + label + ".png")
ImageIO.write(image, "png", outputfile)
}
https://gist.github.com/naoki-iwami/4cf5e6aed62b39bb7fd15dbf5adc0940
← ヘッダは60pxで固定
← フッタは画面に応じて変わるので
引数に [ ‘footer’: $(‘.footer’) ]
のように渡す
↑ ヘッダとフッタの高さを指定して
ShootingStrategy を作成](https://image.slidesharecdn.com/web-160915073408/75/Web-10-60-2048.jpg)


![テスト自動化ツール[Selenium]を検討してみて](https://cdn.slidesharecdn.com/ss_thumbnails/20160723selenium-160724074540-thumbnail.jpg?width=640&height=640&fit=bounds)


