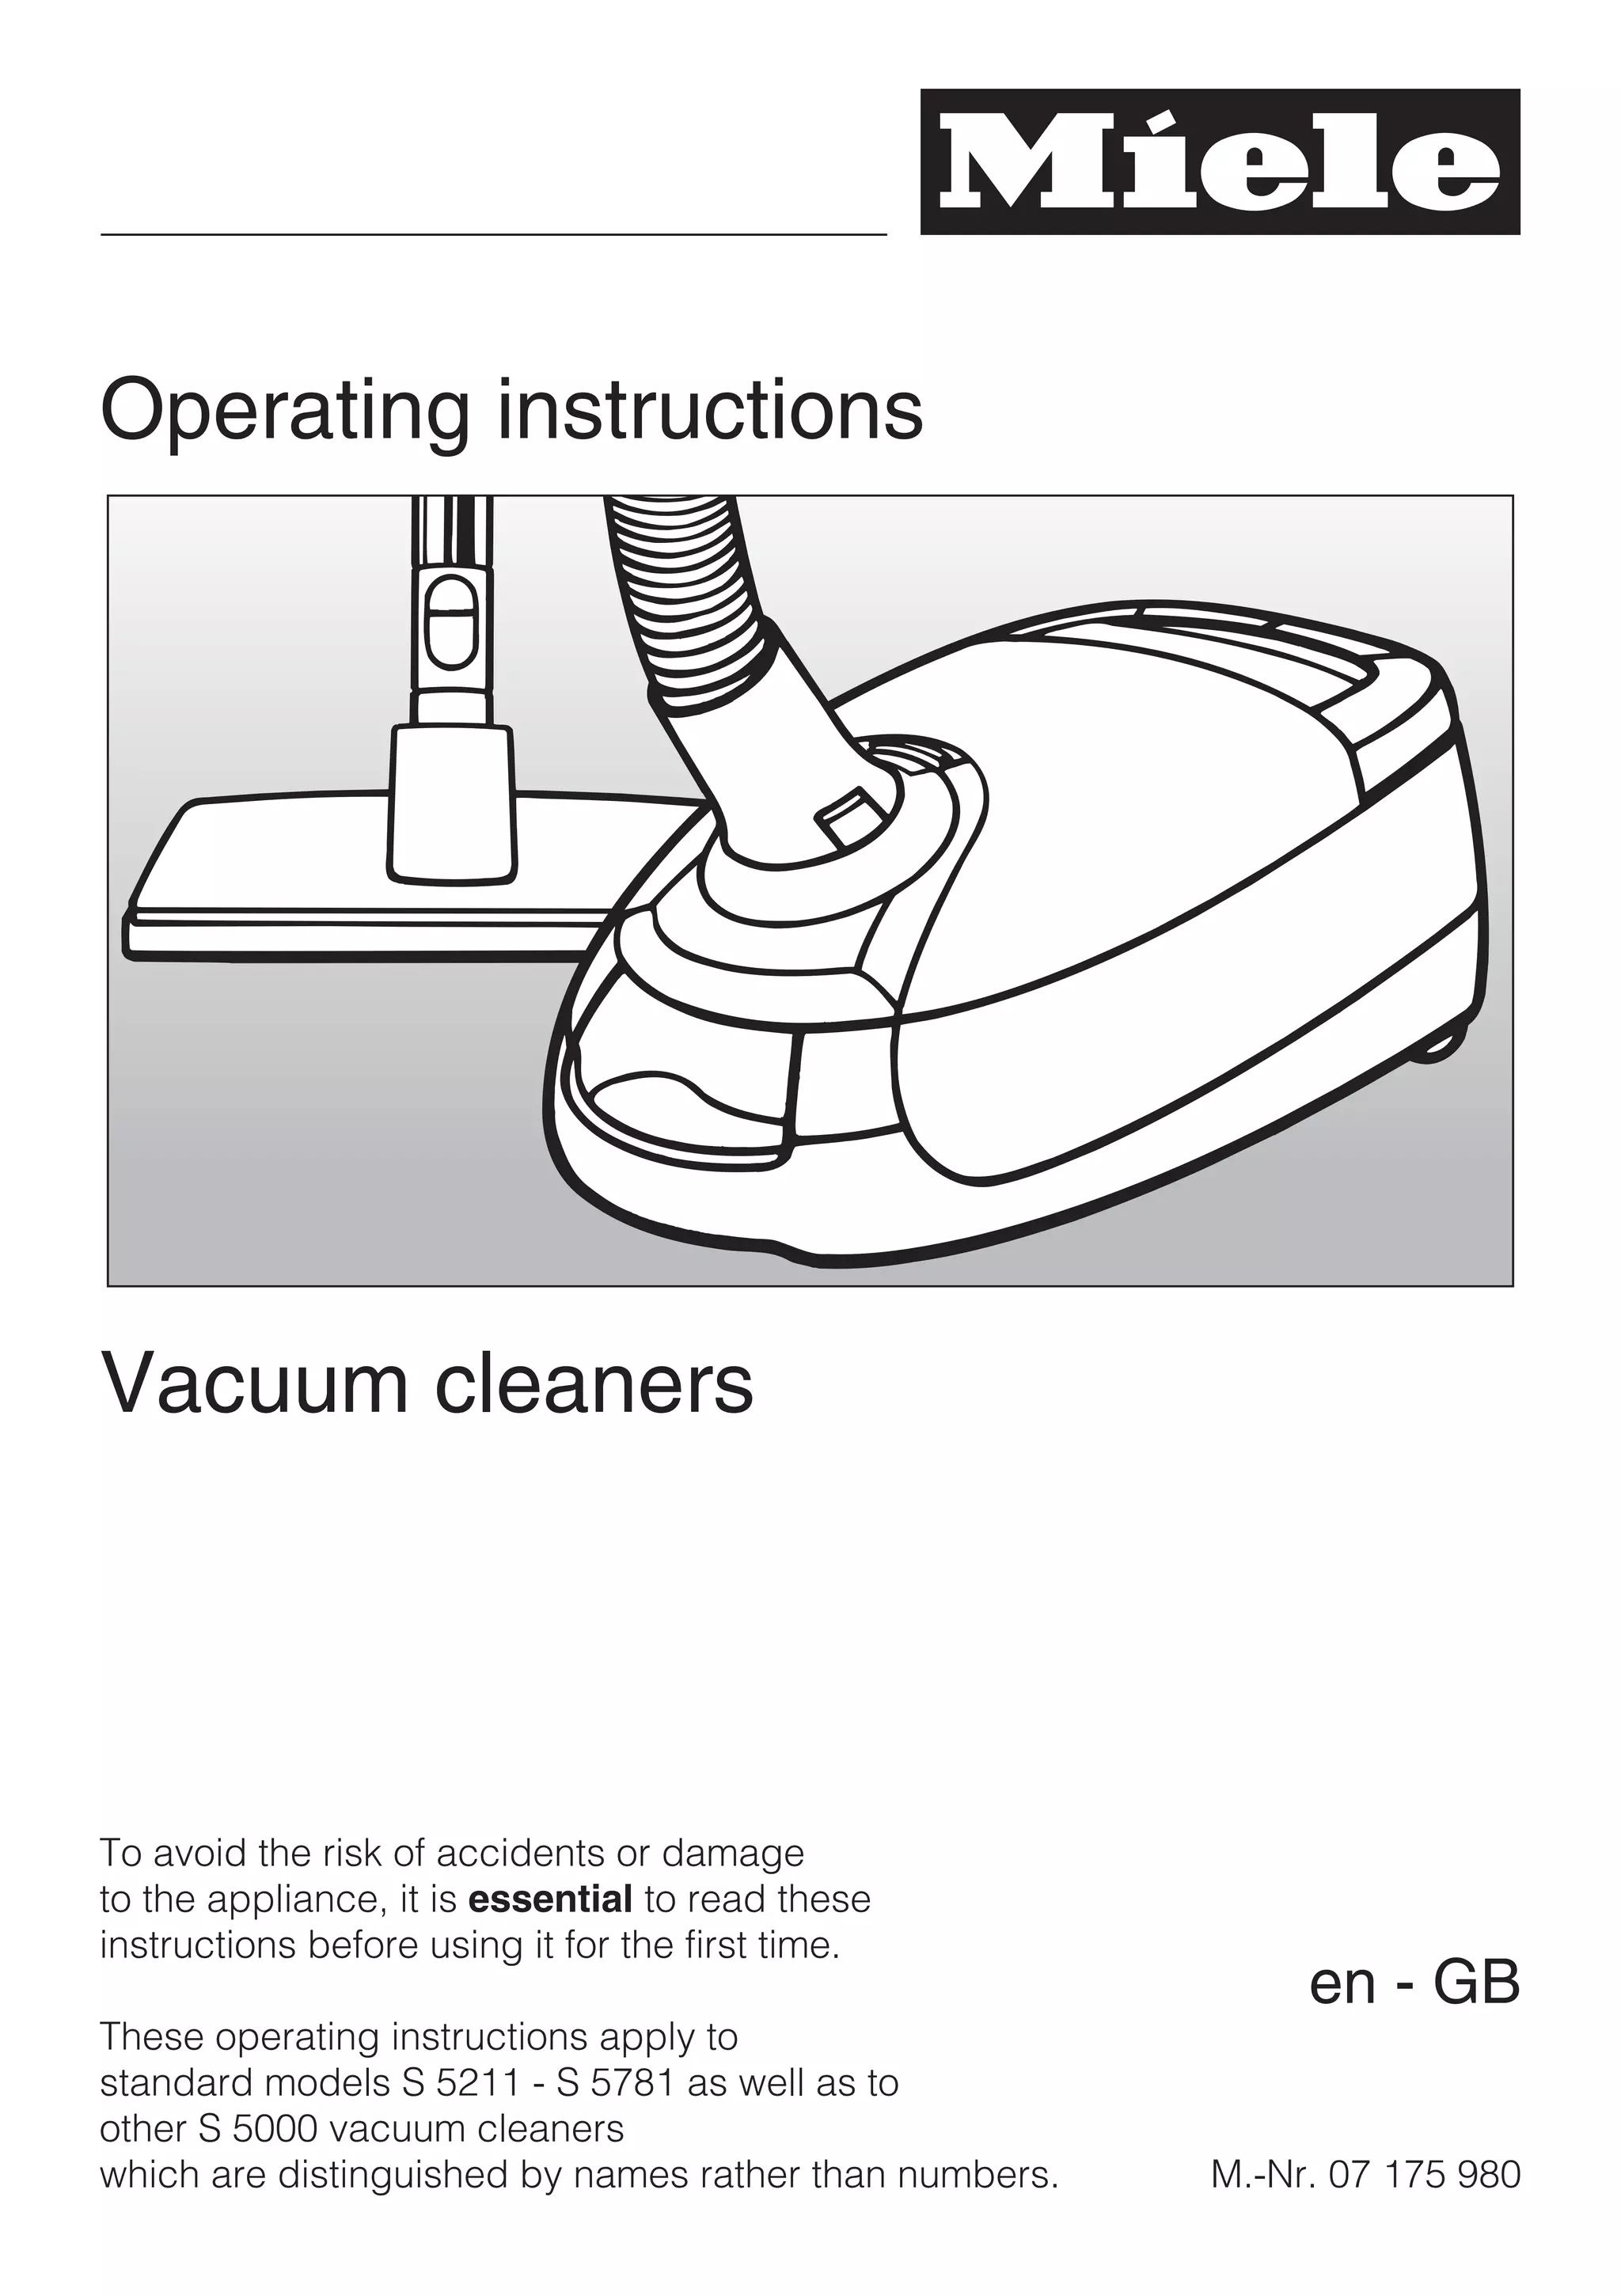
SlideShare a Scribd company logo
1 of 44
Download to read offline
Operating instructions
Vacuum cleaners
To avoid the risk of accidents or damage
to the appliance, it is essential to read these
instructions before using it for the first time.
These operating instructions apply to
standard models S 5211 - S 5781 as well as to
other S 5000 vacuum cleaners
which are distinguished by names rather than numbers. M.-Nr. 07 175 980
en - GB
Caring for the environment
Description of the appliance
Warning and Safety instructions
Preparing for use
Accessories supplied
Using the accessories supplied
Use
Mains cable . . . . . . . . . . . . . . . . . . . . . . . . . . . . . . . . . . . . . . . . . . . . . . . . . . . . . . 16
Switching on and off . . . . . . . . . . . . . . . . . . . . . . . . . . . . . . . . . . . . . . . . . . . . . . . 17
Adjusting the suction power . . . . . . . . . . . . . . . . . . . . . . . . . . . . . . . . . . . . . . . . . 18
Opening the air inlet valve . . . . . . . . . . . . . . . . . . . . . . . . . . . . . . . . . . . . . . . . . . . 20
Setting down, transportation and storage
Maintenance and care
Purchasing new dustbags and filters . . . . . . . . . . . . . . . . . . . . . . . . . . . . . . . . . . 23
Ordering the correct dustbags and filters . . . . . . . . . . . . . . . . . . . . . . . . . . . . . . . 23
When to change the dustbag . . . . . . . . . . . . . . . . . . . . . . . . . . . . . . . . . . . . . . . . 24
Replacing the dustbag . . . . . . . . . . . . . . . . . . . . . . . . . . . . . . . . . . . . . . . . . . . . . 25
When to change the exhaust filter . . . . . . . . . . . . . . . . . . . . . . . . . . . . . . . . . . . . . 26
Exhaust filter change indicator . . . . . . . . . . . . . . . . . . . . . . . . . . . . . . . . . . . . . . . 26
Replacing the Super Air Clean filter . . . . . . . . . . . . . . . . . . . . . . . . . . . . . . . . . . . 27
Replacing an Active Air Clean filter or an Active HEPA filter. . . . . . . . . . . . . . . . . 28
Replacing one type of exhaust filter with another . . . . . . . . . . . . . . . . . . . . . . . . . 29
When to change the dust compartment filter (for motor protection) . . . . . . . . . . . 30
How to change the dust compartment filter . . . . . . . . . . . . . . . . . . . . . . . . . . . . . 30
When to change the battery in the radio-operated handle . . . . . . . . . . . . . . . . . . 31
How to change the battery in the radio-operated handle . . . . . . . . . . . . . . . . . . . 31
When to change the thread lifters . . . . . . . . . . . . . . . . . . . . . . . . . . . . . . . . . . . . . 32
To replace the thread lifters. . . . . . . . . . . . . . . . . . . . . . . . . . . . . . . . . . . . . . . . . . 32
Cleaning and care
Problem solving guide / After sales service
Optional accessories
Electrical connection for the UK
Contents
2
Disposal of packing material
The transport and protective packing
has been selected from materials which
are environmentally friendly for disposal
and can normally be recycled.
Ensure that any plastic, wrappings,
bags etc. are disposed of safely and
kept out of the reach of babies and
young children. Danger of suffocation.
Rather than just throwing these
materials away, please recycle them.
Disposing of the dustbag and
filters
These are made from environmentally
friendly materials, and can be disposed
of with the normal household waste, as
long as they have been used
exclusively for general household dust.
Disposal of your old appliance
Electrical and electronic appliances
often contain materials which, if
handled or disposed of incorrectly,
could be potentially hazardous to
human health and to the environment.
They are, however, essential for the
correct functioning of your appliance.
Please do not therefore dispose of it
with your household waste.
Please dispose of it at your local
community waste collection / recycling
centre or ask your Dealer for advice.
Ensure that it presents no danger to
children while being stored for
disposal.
Caring for the environment
3
The illustration shows the maximum number of features available on these Miele
vacuum cleaners.
Certain models are supplied as standard with the following accessories which are
not illustrated on this page. These floorheads and brushes are supplied with their
own operating instructions.
– Electrobrush
– ACCU NOVA rechargeable powerbrush
– Turbobrush
– ALLERGOTEC floorhead
Description of the appliance
4
aHandle (some models have an air inlet valve in the handle)*
bSuction power selector + / -*
cStand-by button for pauses in vacuuming*
dLED*
eRelease button
fTelescopic tube*
gRelease buttons for the telescopic tube*
hConnection socket
iSocket for Electrobrush*
jDust compartment release button
kDust compartment filter (for motor protection)
lHyClean dustbag
mFloorhead*
nCarrying handle
oElectrobrush socket cover holder
pParking attachment (on both sides of vacuum cleaner)
qExhaust filter*
rFoot switch for automatic cable rewind
sSuction power selector*
tMains cable
uExhaust filter change indicator (Re-set button)*
vOverheating warning light ,*
wParking system
xStand-by indicator*
yOn/Off foot control s
zRelease button for accessories compartment
{Dustbag change indicator
Those features marked * depend on the model, and may vary or not be available
on your model.
Description of the appliance
5
This vacuum cleaner meets statutory
safety requirements. Improper use
can, however, lead to personal injury
and material damage.
To avoid the risk of accidents and
damage to the vacuum cleaner,
read these instructions carefully
before using it for the first time. They
contain important notes on its safety,
operation and maintenance.
Keep these instructions in a safe
place and ensure new users are
familiar with the content. Pass them
on to any future owner.
Always disconnect the vacuum
cleaner from the mains supply when
you have finished using it, as well as
for maintenance work and cleaning.
Switch it off at the wall socket and
unplug it.
Correct application
~ This vacuum cleaner must only be
used for domestic household purposes
to vacuum dry floor surfaces. Do not
use on people or animals.
Any other usage, modification or
alteration is at the owner's risk and
could be dangerous.
The manufacturer cannot be held liable
for damage resulting from improper or
incorrect use of the appliance.
~ This appliance is not intended for
use by persons (including children)
with reduced physical, sensory or
mental capabilities, or lack of
experience or knowledge, unless they
are supervised whilst using it or have
been shown how to use it by a person
responsible for their safety.
Safety with children
~ This vacuum cleaner is not a toy! To
avoid the risk of injury, keep children
well away, and do not allow them to
play with it or to use the controls.
Supervise children whilst you are using
it.
~ Older children may only use the
vacuum cleaner if its operation has
been clearly explained to them, and
they are able to use it safely,
recognising the dangers of incorrect
use.
~ Models with radio controls on the
handle: Keep batteries out of the reach
of children.
Warning and Safety instructions
6
Technical safety
~ Ensure that the connection data on
the data plate (voltage and frequency)
match the mains electricity supply. It is
essential that they match to avoid
damage to the appliance.
~ The plug must be fitted with a 13 A
fuse (UK).
~ Before using the vacuum cleaner,
check for any signs of damage. Do not
use a damaged appliance: it could be
dangerous.
~ The socket on the vacuum cleaner
(depending on model) must only be
used for the Miele Electrobrush
specified for use with this appliance.
~ There is a metal inlay underneath
the handle which is designed to avoid
the unpleasant effects of electrostatic
discharges. Please make sure that you
keep your hand in constant contact with
this metal strip during vacuuming.
~ Do not pull or carry the vacuum
cleaner by the cable and be careful not
to damage the cable when withdrawing
the plug from the socket.
– Keep the cable away from sharp
edges and do not let it be squashed,
for example, under a door.
– Avoid running the vacuum cleaner
over the cable.
This could damage the cable, plug or
socket and pose a safety hazard. The
appliance must not be used if any of
these have suffered damage.
~ If the cable is damaged it must be
replaced together with a complete
cable rewind. For safety reasons this
must only be done by the Miele Service
Department or a Miele authorised
service technician.
~ While the vacuum cleaner is under
guarantee, repairs should only be
undertaken by a service technician
authorised by Miele. Otherwise the
guarantee will be invalidated.
~ Repairs should only be carried out
by a Miele authorised service
technician. Repairs and other work by
unqualified persons could be
dangerous. The manufacturer cannot
be held liable for unauthorised work.
~ It is important to switch the vacuum
cleaner off before changing over
accessories and floorheads, especially
an Electro- or Turbobrush.
~ Do not let the vacuum cleaner get
wet. Clean only with a dry cloth or
slightly damp cloth when disconnected
from the mains supply. If moisture gets
into the appliance, there is a risk of
electric shock.
Warning and Safety instructions
7
Correct use
~ To avoid the risk of damage, do not
use the vacuum cleaner without the
dustbag, dust compartment filter and
exhaust filter in place. Otherwise it
could get damaged.
~ If a dustbag is not inserted, the dust
compartment cover does not normally
close. Do not force it.
~ Do not vacuum up anything which
has been burning or is still glowing e.g.
cigarettes, ashes or coal, whether
glowing or apparently extinguished.
The cleaner might catch fire.
~ Do not vacuum up any water, liquid
or damp dirt. This will cause major
faults and could seriously impair the
functioning and electrical safety of the
appliance. Wait until any freshly
cleaned or shampooed carpets or floor
coverings are completely dry before
attempting to vacuum.
~ Do not vacuum toner dust. Toner,
such as that used in printers and
photocopiers, can conduct electricity.
The filter system in the vacuum cleaner
may not filter it completely, causing the
toner to be blown back into the room by
the fan.
~ Do not vacuum up any inflammable
or combustible liquids or gases and do
not vacuum in areas where such
substances are stored. The cleaner
might explode.
~ Do not vacuum up items which are
heavy, hard or have sharp edges. They
could cause a blockage and damage
the appliance.
~ Floor attachments, accessories and
tubes must not be used at head level to
avoid the risk of injury, e.g. to eyes and
ears.
~ Monitor the change dustbag
indicator and change the dustbag if
necessary. Check the exhaust and dust
compartment filters at the same time
and change them too if necessary. A
full bag or blocked filter will reduce the
suction power of the cleaner. A
temperature limiter switches the
vacuum cleaner off automatically if it
gets too hot. See "Problem solving
guide".
~ Important information on the
handling of batteries (for models with
radio controls on the handle):
– Do not use rechargeable batteries.
– Do not short circuit or recharge
batteries, or throw them into a fire.
Danger of explosion.
– Disposing of batteries: Remove the
batteries from the radio control
handle and dispose of them in your
recycling bin. Do not dispose of them
with the normal household waste.
Warning and Safety instructions
8
Accessories
Miele accessories including
floorheads, filters and dustbags are
available to order from your Miele
retailer, the Miele Spare Parts
Department or via the internet on
www.miele-shop.com.
~ The Miele Electrobrush is a motor
driven accessory for use only with Miele
vacuum cleaners. The cleaner must not
be used with an electrobrush produced
by another manufacturer.
~ To avoid the risk of injury when
vacuuming with a Miele Electrobrush or
Turbobrush, do not touch the rotating
roller brush.
~ It is not advisable to vacuum directly
with the handle, i.e. without an
accessory attached as the rim could
get damaged and you could hurt
yourself on sharp edges.
~ Miele vacuum cleaner bags are
disposable and intended to be used
only once. Do not attempt to re-use.
Blocked pores reduce the efficiency of
the cleaner.
~ To ensure safety only use genuine
Miele dustbags, filters and accessories.
This will ensure optimum performance
of the appliance throughout its life.
The manufacturer cannot be held
liable for damage caused by
non-compliance with these Warning
and Safety instructions.
Warning and Safety instructions
9
Attaching the suction hose
^ Insert the hose connector into the
socket until it clicks into position. To
do this, line up the guides on the two
pieces.
Removing the suction hose
from the cleaner
^ Press the release buttons at the side
of the hose connector, and lift the
hose from the socket.
Connecting the handle to the
suction tube
^ Insert the handle into the suction tube
until it clicks into position. To do this,
line up the guides on the two pieces.
^ To release the handle from the
suction tube, press the locking button
(see arrow) and pull the handle away
from the suction tube.
Preparing for use
10
Your vacuum cleaner is fitted with one
of the following telescopic tubes,
depending on the model:
– 2-part telescopic tube
– Triscopic telescopic tube
Adjusting the 2-part telescopic
suction tube
One part of this telescopic tube is
packed inside the other and can be
adjusted to suit your height for
comfortable vacuum cleaning.
^ Press the telescopic release button
(see arrow) to release the tubes and
adjust to the required height.
Adjusting the triscopic suction
tube
The triscopic tube has three sections.
Two sections of the telescopic tube are
packed together inside a third outer
tube.
^ Press the release button (see arrow
a) to release the lower tube and pull
it right out until it clicks. Press the
button again when you want to retract
the tube again. The tube will click into
place.
^ Press the telescopic tube release
button b to release the tubes and
adjust to the required height.
Preparing for use
11
Fitting the standard floorhead
^ Push the suction tube into the
floorhead and turn it clockwise or
anti-clockwise until it clicks into
position.
^ To release the floorhead from the
suction tube, press the locking button
(see arrow) and pull the suction tube
away from the floorhead.
The floorhead can be used for all
normal cleaning of carpets and rugs. It
can also be used with the brush
protruding to vacuum hard flooring. For
hard flooring, such as stone and
parquet, we recommend using one of
the special Miele floor brushes (see
"Optional accessories").
Important: please observe the
flooring manufacturer's cleaning and
care instructions.
Vacuum carpets and rugs with the
brush retracted:
^ Press the foot control ö.
Clean hard flooring which is not
susceptible to scratching with the brush
protruding:
^ Press the foot control ä.
The ALLERGOTEC floorhead, the
Turbobrush, the ACCU NOVA
powerbrush and the Electrobrush
Some models may be supplied as stan-
dard with one of these accessories (see
"Optional accessories"). Please refer to
the separate operating instructions
supplied with these brushes for
instructions on use and maintenance.
Preparing for use
12
The following accessories are supplied:
aCrevice nozzle
bDusting brush with natural bristles
cUpholstery nozzle
To open the accessories
compartment
^ Press the release button to open the
accessories compartment lid.
^ Take out the accessory you require.
^ Press down firmly on the lid to close
it.
Accessories supplied
13
Crevice nozzle
For cleaning in folds, crevices or
corners.
Dusting brush with natural
bristles
For cleaning skirting boards, ornate or
carved articles, etc.
The head of the dusting brush can be
swivelled to attain the best cleaning
position.
Using the accessories supplied
14
Upholstery nozzle
For cleaning upholstery, mattresses,
cushions, curtains, covers etc.
Floorhead
For general use and also for vacuuming
stairs.
For safety reasons when vacuuming
stairs it is best to start at the bottom
of the stairs and move upwards.
Using the accessories supplied
15
Mains cable
Unwinding the cable
^ Pull out the mains cable to the
required length (max. approx. 6.5 m).
Warning: If vacuuming for longer
than 30 minutes, the mains cable
must be pulled out to its fullest
extent. Otherwise there is a danger
of overheating and damage.
Rewinding the cable
^ Switch off at the wall socket and
remove the plug.
^ Press the rewind foot switch. The
cable will rewind automatically.
Use
16
Switching on and off
^ Step on the On/Off foot control s.
Models with radio controls on the
handle
To pause the appliance during
operation:
^ Press the stand-by button on the
handle.
Warning: The stand-by button is
designed to pause the vacuum
cleaner for short periods of time
whilst vacuuming. After vacuuming,
the device has to be switched off
and unplugged from the mains
supply.
The LED will indicate each time a
button is pressed on the handle.
At the end of the pause, you can do
one of the following:
^ Press the stand-by button again to
switch the vacuum cleaner back on
at the setting you were using before
pausing it.
^ Press the + button to switch the
vacuum cleaner back on using the
highest power setting.
^ Press the - button to switch the
vacuum cleaner back on using the
lowest power setting.
Use
17
Vacuuming
^ When vacuuming, pull the cleaner
behind you on its wheels. You can
stand it upright for vacuuming stairs
and curtains etc.
Warning: When vacuuming
especially fine dust, e.g. sawdust,
sand, plaster, flour, talcum powder
etc., electrostatic charges build up
naturally. Under certain conditions
these charges will be released. To
avoid the unpleasant effects of these
discharges, a metal inlay has been
incorporated into the underside of
the handle. Please make sure that
you keep your hand in constant
contact with this metal strip during
vacuuming.
Adjusting the suction power
The suction power can be regulated to
suit the type of flooring. The higher the
wattage, the more powerful the suction.
Reducing the suction power reduces
the amount of effort required to
manoeuvre the floorhead.
Some models also have symbols on the
controls. The symbols indicate the type
of use the settings are suitable for:
a - curtains, lightweight fabrics
b - upholstery, cushions
c - carpets, rugs and runners
( - for daily energy-saving vacuuming
e - lightly soiled rugs and fitted
carpets
f - heavily soiled hard flooring, and
for intensive cleaning of carpets
The controls vary from model to model.
The different options are described on
the following pages.
Use
18
Rotary selector
^ Turn the suction power selector
manually to the suction power setting
you require.
+ / – foot controls
Press and hold the + or – foot control
until the power setting you require lights
up green.
^ Press the + control to select a higher
setting.
^ Press the - control to select a lower
setting.
+ / – controls with AutoEco
setting
When you switch your vacuum cleaner
on the energy saving "AutoEco" setting
is selected automatically.
^ Press the + control to change to
"Turbo", the highest power setting.
^ Press the - foot control to change to
"Min.", the lowest power setting.
The power setting which is currently
selected will light up white.
Use
19
+ / - controls on the handle
(radio-operated)
Press and hold the + or – button until
the symbol for the power setting you
require shows in the display on the
cleaner.
^ Press the + button to select a higher
setting.
^ Press the - button to select a lower
setting.
The LED will indicate each time a button
is pressed on the handle.
Opening the air inlet valve
(not on models with radio-controls on
the handle)
It is easy to reduce the suction power
for a short time, e.g. to prevent rugs or
other objects being sucked into the
vacuum cleaner.
^ Open the air inlet valve far enough to
reduce the suction power.
The floorhead will be easier to
manoeuvre. Close the valve up again
when you are ready to use full power
again.
Use
20
Parking system
(cannot be used with the SEB 234 L
Electrobrush)
A parking system has been designed
for conveniently parking the suction
tube and floorhead during pauses.
^ Slot the floorhead into the parking
attachment at the back of the vacuum
cleaner.
Switching on and off with the parking
system
Some models are fitted with an On/Off
switch in the parking system.
The cleaner is automatically switched
off when the floorhead is placed in the
parking attachment. Lifting the
floorhead out of the parking attachment
switches the cleaner on again.
If your vacuum cleaner is equipped
with "+ / - foot controls" or "+ / - foot
controls with "AutoEco" setting, you can
de-activate or activate the parking
system's On/Off function.
^ Switch the vacuum cleaner off with
the On/Off foot control.
^ Press and hold the + and – foot
controls in, and at the same time
switch the vacuum cleaner on with
the On/Off foot control.
Setting down, transportation and storage
21
Transportation and storage
^ Stand the vacuum cleaner upright
when it is not being used and during
storage.
^ Slot the floorhead downwards into
one of the parking attachments on
either side of the vacuum cleaner
(the parking attachments cannot be
used with the SEB 234 L
Electrobrush).
^ Retract the telescopic tube fully.
This makes the cleaner easier to carry
or store.
Setting down, transportation and storage
22
Warning: Always disconnect the
vacuum cleaner from the electrical
supply for maintenance work and for
cleaning. Switch off at the wall
socket and remove the plug. If using
the ACCU NOVA powerbrush,
switch this off as well.
The Miele filter system consists of three
filters which must be replaced from
time to time to ensure that your vacuum
cleaner performs efficiently.
– Dustbag
– Exhaust filter
– Dust compartment filter (for motor
protection)
Warning: To ensure that your
vacuum cleaner functions correctly,
cleans hygienically and gives you
many years of trouble-free
operation, please only use genuine
Miele approved dustbags and filters.
The use of non-Miele approved
dustbags and accessories could
invalidate your warranty and cause
damage to your product.
Purchasing new dustbags and
filters
Replacement dustags and filters can
be obtained from your local Miele
retailer, the Miele Spare Parts
Department (see back cover for contact
details) or via the internet on
www.miele-shop.com.
Ordering the correct dustbags
and filters
When ordering dustbags for this
cleaner, ask for Miele HyClean
dustbags with blue holders, and the
code G/N.
A Super Air Clean exhaust filter and a
dust compartment filter are supplied
with every packet of Miele dustbags. If
you wish to purchase exhaust filters or
dust compartment filters separately,
please quote the model number of your
appliance when ordering to ensure you
get the correct items.
You can replace the exhaust filter fitted
in the vacuum cleaner with one of the
other Miele exhaust filters if you wish
(see "Optional accessories").
Maintenance and care
23
When to change the dustbag
Change the dustbag when the colour
marker in the dustbag change indicator
fills the display, or sooner if it is no
longer effective (see possible reasons
for this below).
Miele dustbags are disposable, and
designed for single use only.
Do not attempt to re-use them as
suction would be reduced.
Checking the dustbag change
indicator
^ Attach the standard floorhead to the
suction tube. Do not use any of the
other floorheads or attachments as
they will cause the dustbag change
indicator to give a false reading.
^ Switch on the vacuum cleaner using
the On/Off foot control s, and select
the highest power setting.
^ Lift the floorhead off the floor a little. If
the marker completely fills the
dustbag change indicator, you
should replace the dustbag with a
new one.
How the dustbag change indicator
works
The dustbag change indicator is set for
normal household dust. Normal
household dust would contain a mixture
of dust, hair, carpet fluff, threads, grit
etc.
However, if the vacuum cleaner has
been used to suck up fine dust, such
as plaster, brick dust, cement or flour,
the pores of the dustbag will become
blocked very quickly. This affects the
air permeability of the bag, and the
marker will indicate that the bag is "full"
even when it is not. If this happens you
must still change the dustbag because
suction power will be greatly reduced
by blocked pores in the dustbag.
If, on the other hand, you have
vacuumed up a large amount of hair
and carpet fluff which typically contains
a lot of air, the indicator may fail to
react even though the bag is full. You
should still change it! Both these
extremes can occur.
Maintenance and care
24
Replacing the dustbag
^ Press the release button for the dust
compartment lid and raise the lid as
far as it will go.
The dustbag has a closing flap which
closes automatically when the dust
compartment lid is raised to prevent
any dust escaping.
^ Pull the dustbag out by the grip next
to the self-closing flap on the collar.
^ Fit the new dustbag into the holder as
far as it will go. Leave it folded up
when you take it out of the box.
^ Close the dust compartment lid
securely, making sure it clicks into
position. Take care not to trap the
dustbag when doing so.
Warning: The lid will not close
without a dustbag in place, or if the
dustbag is incorrectly fitted. Do not
force it.
Maintenance and care
25
When to change the exhaust
filter
Depending on the model, your vacuum
cleaner will be fitted as standard with
one of the following exhaust filters:
a a Super Air Clean filter
Replace this filter every time you start a
new packet of Miele dustbags. A Super
Air Clean exhaust filter and a dust
compartment filter are supplied with
every packet of Miele dustbags.
b an Active Air Clean filter (black)
c an Active HEPA filter (blue)
These types of filter need to be
changed approx. once a year. Make a
note of the date on the filter.
Exhaust filter change indicator
Certain models are fitted with an
exhaust filter change indicator (reset
button) to show you when to change
your Active Air Clean b or Active HEPA
c filter.
The indicator lights up after approx. 50
hours of operation, which is equivalent
to about a year of average use. The
vacuum cleaner can still be used with
the exhaust filter indicator lit up.
However, the suction power will be
reduced as will the effectiveness of the
filter if it is not replaced in good time.
The filter change indicator light is
irrelevant if a Super Air Clean filter (a) is
fitted, as long as it is replaced every
time a new packet of Miele dustbags is
started. The indicator light will go out
when the reset button is pressed.
Maintenance and care
26
Replacing the Super Air Clean
filter
Do not use more than one exhaust
filter at a time.
^ Open the dust compartment lid.
^ Release the filter grille and raise it
upwards. Grasp the used Super Air
Clean filter by the clean, unsoiled
section (see arrow) and take it out.
^ Replace it with a new Super Air Clean
filter.
If you wish to replace the Super Air
Clean filter with an Active Air Clean
filter or with an Active HEPA filter ,
see "Replacing one type of exhaust
filter with another".
^ Close the filter grille.
^ Close the dust compartment lid
firmly. It should click into place.
Maintenance and care
27
Replacing an Active Air Clean
filter or an Active HEPA filter
Do not use more than one exhaust
filter at a time.
^ Open the dust compartment lid.
^ Raise the filter and remove it.
^ Replace it with a new Active Air
Clean filter or a new Active HEPA
filter and plress it down into place.
If you wish to replace the Active Air
Clean filter or the Active HEPA filter
with a Super Air Clean filter, see
"Replacing one type of exhaust filter
with another".
^ Close the dust compartment lid
firmly. It should click into place.
Re-setting the exhaust filter change
indicator
If your vacuum cleaner is fitted with an
exhaust filter change indicator, this
needs to be re-set each time the filter is
replaced. To do this the vacuum
cleaner must be switched on.
^ Press the reset button.
The exhaust filter change indicator
goes out and resets to zero.
The filter change indicator can only
be reset by pressing the reset
button after the light has come on.
Pressing the button at any other time
will have no effect.
Maintenance and care
28
Replacing one type of exhaust
filter with another
Depending on model, your vacuum
cleaner will be fitted as standard with
one of the following exhaust filters:
a a Super Air Clean filter
b an Active Air Clean filter (black),
c an Active HEPA filter (blue).
Please note
1. If you wish to replace the Super Air
Clean filter a with an Active Air Clean
filter b or an Active HEPA filter c, it is
essential that you remove the filter grille
before fitting the new type of filter.
2. If you wish to replace the Active Air
Clean filter b or the Active HEPA filter c
with a Super Air Clean filter a, then it is
essential that you also fit the filter
grille*.
* Filter grille - see "Optional accessories".
Do not use more than one exhaust
filter at a time.
The exhaust filter indicator light (with
reset button) that is fitted on certain
models is designed to come on
when the Active Air Clean or Active
HEPA filter needs to be changed.
The filter change indicator light is
irrelevant if a Super Air Clean filter is
being used, as long as it is replaced
every time a new packet of Miele
dustbags is started. The indicator
light will go out when the reset
button is pressed.
Maintenance and care
29
When to change the dust
compartment filter (for motor
protection)
Replace this filter every time you start a
new packet of dustbags. A dust
compartment filter is supplied with
every packet of Miele dustbags.
How to change the dust
compartment filter
^ Open the dust compartment lid.
^ Unclip the filter frame and remove the
old filter. Hold by the clean, unsoiled
section (see arrow) to remove it.
^ Replace with a new dust
compartment filter.
^ Close the filter frame.
^ Close the dust compartment lid
firmly. It should click into place.
Maintenance and care
30
When to change the battery in
the radio-operated handle
Approx. every 18 months. One 3 V
battery (CR 2032) is required.
The vacuum cleaner can still be
used when the battery has run out or
if there is no battery fitted.
^ Switch the vacuum cleaner on using
the On/Off foot control. The vacuum
cleaner is ready to use (in stand-by
mode).
^ Press the re-set button for the
exhaust filter change indicator.
The vacuum cleaner can continue to be
used, but only at maximum power.
How to change the battery in
the radio-operated handle
^ Open the cover to the battery
compartment using a screwdriver.
^ Replace with a new battery, taking
care to fit it correctly (check the
polarity).
^ Replace the cover.
^ Dispose of the old battery
responsibly.
Maintenance and care
31
When to change the thread
lifters
The thread lifters on the suction inlet of
the floorhead and the upholstery nozzle
can be replaced.
Check them from time to time if the pile
has worn down.
To replace the thread lifters
^ Use a knife or similar object to
remove them from the slots.
^ Fit new thread lifters.
Upholstery nozzle, 190 mm
^ Disengage the thread lifter unit at
each side of the upholstery nozzle
using a coin.
^ Fit a new thread lifter unit and lock
into position.
If thread or hair has wound around
the bearing on the floorhead roller
aRelease the bearing (with bayonet
fitting) using a coin.
bPress the bearing out, and remove.
cTake out the roller.
Remove any threads and hair, replace
the roller and refit the bearing.
Replacement parts are available from
your Miele dealer or from the Miele
Spare Parts Department (see back
cover for contact details).
Maintenance and care
32
Warning: Always disconnect the
vacuum cleaner from the electricity
supply for maintenance work and for
cleaning. Switch off at the wall
socket and remove the plug. If
using the ACCU NOVA powerbrush,
switch this off as well.
Vacuum cleaner and accessories
External surfaces of the vacuum
cleaner and of the accessories can be
cleaned with a dry or a slightly damp
cloth, or with a proprietary cleaner
suitable for plastic.
Do not use abrasive cleaners, glass
cleaners or all-purpose cleaners.
Because of their chemical
composition they could cause
serious damage to plastic
components.
Dust compartment
The dust compartment can, if
necessary, be cleaned using a dry
duster, brush or, if available, a second
vacuum cleaner to vacuum the dust
out.
Do not let the vacuum cleaner get
wet. If moisture gets into the
appliance, there is a risk of electric
shock.
E-Cloth
A microfibre “E-Cloth” is available from
the Miele UK Spare Parts Department
which is suitable for cleaning surfaces
such as stainless steel, glass, plastic
and chrome without the use of
chemicals.
Cleaning and care
33
The vacuum cleaner switches off
automatically.
On certain models, the overheating
warning light also comes on.
A temperature limiter switches the
vacuum cleaner off automatically if it
gets too hot. Some models also have a
warning light , which comes on to
indicate that it has overheated.
This can occur if, for instance, large
articles block the suction tube or when
the filter bag is full or contains particles
of fine dust. A heavily soiled exhaust or
dust compartment filter can also be the
cause of overheating. Switch the
vacuum cleaner off immediately using
the On/Off foot control s. Disconnect
from the electricity supply. Switch off at
the wall socket and remove the plug.
After removing the cause, wait for
approx. 20 - 30 minutes to allow the
vacuum cleaner to cool down. It can
then be switched on again.
After sales service
In the event of a fault that you cannot
easily remedy, please contact
– your Miele Dealer
or
– the Miele Customer Contact Centre
(see back cover for address).
Please note that telephone calls may
be monitored and recorded to
improve our service.
Problem solving guide / After sales service
34
Miele accessories including
floorheads, filters and dustbags are
available to order from your local
Miele retailer, the Miele Spare Parts
Department or via the internet on
www.miele-shop.com.
Important: please observe the
flooring manufacturer's cleaning and
care instructions.
Certain models are supplied as
standard with one or more of the
following accessories:
Electrobrushes
Electrobrushes can only be used on
models fitted with an electrobrush socket.
If there is no Electrobrush socket, an
ACCU NOVA rechargeable powerbrush
can be used instead.
Electrobrush SEB 216-3
The Electrobrush SEB 216-3 is
particularly suitable for intensive
vacuuming of carpets which are
subject to hard wear. It is very effective
at removing deep seated dirt and
preventing areas of frequent use being
trodden into a path.
Electrobrush SEB 234 L
The Electrobrush SEB 234 L is 60 mm
wider than the SEB 216-3, and is more
powerful, making it ideal for cleaning
larger floor areas.
It has the following additional features
compared to the SEB 216-3:
– Adjustable height settings
– A headlamp to light up the area
being vacuumed
– A multi-function indicator lamp
Optional accessories
35
ACCU NOVA rechargeable
powerbrush
Unlike the SEB 216-3 and the SEB 234
L, this Electrobrush is battery operated,
and can therefore be used on models
which do not have an Electrobrush
socket.
ALLERGOTEC 3 floorhead
The level of cleanliness of the floor
shows in a colour "traffic light" display
when vacuuming. The ALLERGOTEC
floorhead is designed specially for the
daily hygienic cleaning of all floor
surfaces.
Turbobrush STB 205-3
The Turbobrush is particularly suitable
for vacuuming cut-pile carpeting, and is
operated by the suction power of the
vacuum cleaner. It has a rotating brush
and is very effective at picking up
thread, hairs and fluff.
Optional accessories
36
Hand-held Turbobrush
The hand-held Turbobrush is intended
for vacuuming upholstery, mattresses,
car seats, carpeted stairs and other
areas inaccessible to the standard
Turbobrush.
Universal brush
For dusting books, shelves, etc.
Radiator brush
(Can only be used if attached to the
crevice nozzle).
For cleaning radiators, narrow shelves
and crevices.
Optional accessories
37
SBB 235-3 Hard floor brush
This brush is designed for use on hard
flooring such as tiled or stone floors.
Parquet 3 floor brush
This brush has natural bristles and is
designed for use on parquet floors and
other surfaces which are susceptible to
scratching such as laminate flooring.
The parquet floor brush can be cleaned
with the vacuum cleaner using the
crevice nozzle if necessary.
SBB 300-3 floor brush
This brush is designed for use on hard
flooring such as tiled or stone floors
and has a swivel joint making it
particularly good for accessing
awkward corners and niches.
SBB 400-3 floor brush
The SBB 400-3 floor brush is 90 mm
wider than the SBB 300-3 floor brush
and has a swivel joint making it ideal for
cleaning larger floor areas.
Optional accessories
38
Mattress nozzle
For cleaning upholstery, mattresses,
cushions, curtains, covers etc.
Crevice nozzle (300 mm)
For cleaning in folds, crevices or
corners.
Hygiene seal with active charcoal
This prevents dust and odours from
escaping when the suction hose is
removed for transportation or storage.
It can be secured to the suction hose
during vacuuming.
Optional accessories
39
Micro Set
This set is specially designed for
cleaning small objects and difficult to
reach areas (such as PC keyboards,
stereo equipment, intricately carved
furniture and ornaments, models etc).
It consists of:
– Micro-hose with combination nozzle
(crevice nozzle and dusting brush)
– Micro dusting brush
– Micro crevice nozzle
– Angled extension
Micro-hose with combination nozzle
The micro-hose with combination
nozzle is ideal for cleaning awkward to
reach places, such as vents and stereo
equipment and also small intricate
objects, such as model railways or
cars.
CarClean Set Pllus
The CarClean Set Plus has been
designed as an accessory for Miele
cylinder vacuum cleaners for valeting
the interior of cars.
It consists of:
– Hand-held Turbobrush
– Micro-hose with combination nozzle
(crevice nozzle and dusting brush)
– Crevice nozzle (300 mm)
These are supplied in a carry case
together with a 3 m long suction hose
with hose clip.
Optional accessories
40
Hose adapter
For extending the suction hose by
approx. 1.5 m.
The adapter is fitted between the hand
piece and the suction hose.
Upholstery nozzle, 190 mm
Extra wide upholstery nozzle, ideal for
cleaning upholstery, mattresses and
pillows quickly.
Flexible crevice nozzle SFD 20,
560 mm
This extra long, flexible crevice nozzle
is excellent for cleaning difficutl to
reach areas.
Optional accessories
41
Active Air Clean filter
A special active charcoal filter, which
removes odours coming from the dirt in
the dustbag, keeping unpleasant smells
to a minimum. The Active Air Clean filter
replaces the filter fitted in the vacuum
cleaner. There is no difference in the
filtration levels between the Active Air
Clean filter and the Super Air Clean filter.
Active HEPA filter
A combination filter which complies
with the requirements of EN 1822 HEPA
classification 12. It is able to filter out
very fine particles and
micro-organisms. The active charcoal
layer absorbs odours from the dust
collected in the dustbag. This filter is
specially appropriate for allergy
sufferers and users requiring
exceptional standards of hygiene.
The Active HEPA filter replaces the filter
fitted in the vacuum cleaner.
Do not use aroma capsules in your
cleaner if you use either of these
filters. The charcoal in the will
absorb their aroma, rendering them
ineffective.
Filter grille
The filter grille is required if you wish to
fit a Super Air Clean filter instead of an
Active Air Clean filter or an Active HEPA
filter (see "Maintenance and care -
Replacing one type of exhaust filter with
another").
Optional accessories
42
All electrical work should be carried out
by a suitably qualified and competent
person in strict accordance with current
national and local safety regulations
(BS 7671 in the UK).
The voltage and connected load are
given on the data plate located
underneath the vacuum cleaner. Please
ensure that these match the household
mains supply. The fuse rating is quoted
on the plug.
The appliance is supplied with a cable
and moulded plug ready for connection
to a 230-240 V/50 Hz a.c. single phase
supply.
Non-rewireable plugs BS 1363
The fuse cover must be re-fitted when
changing the fuse, and if the fuse cover
is lost the plug must not be used until a
suitable replacement is obtained. The
colour of the correct replacement cover
is that of the coloured insert in the base
of the plug, or the colour that is
embossed in words on the base of the
plug, (as applicable to the design of
plug fitted).
Replacement fuses should be ASTA
approved to BS1362 and have the
correct rating. Replacement fuses and
fuse covers may be purchased from
your local electrical supplier.
Electrical connection for the UK
43
Alteration rights reserved / S 5000 / 0808 M.-Nr. 07 175 980 / 01

More Related Content

Similar to Vacuam

Microondas / microwave tmw 18 bih
Microondas / microwave tmw 18 bihMicroondas / microwave tmw 18 bih
Microondas / microwave tmw 18 bih
dan_alex
 
Sony PMW-320K Operation Manual
Sony PMW-320K Operation ManualSony PMW-320K Operation Manual
Sony PMW-320K Operation Manual
AV ProfShop
 
John deere 4100 compact utility tractor service repair manual
John deere 4100 compact utility tractor service repair manualJohn deere 4100 compact utility tractor service repair manual
John deere 4100 compact utility tractor service repair manual
fhhsjdkmem
 

Similar to Vacuam (19)

Vacuum.Cleanner_Miele_s312i-2 (EN)
Vacuum.Cleanner_Miele_s312i-2 (EN)Vacuum.Cleanner_Miele_s312i-2 (EN)
Vacuum.Cleanner_Miele_s312i-2 (EN)
 
Avtron IR Bullet Camera Aa 4544-6044 p-fsr2-manual
Avtron IR Bullet Camera Aa 4544-6044 p-fsr2-manualAvtron IR Bullet Camera Aa 4544-6044 p-fsr2-manual
Avtron IR Bullet Camera Aa 4544-6044 p-fsr2-manual
 
Avtron IR Bullet Camera Aa 4545 p-6045-fsr3-manual
Avtron IR Bullet Camera Aa 4545 p-6045-fsr3-manualAvtron IR Bullet Camera Aa 4545 p-6045-fsr3-manual
Avtron IR Bullet Camera Aa 4545 p-6045-fsr3-manual
 
Avtron IR Bullet Camera Aa 4547 p-6047-fsr4-manual
Avtron IR Bullet Camera Aa 4547 p-6047-fsr4-manualAvtron IR Bullet Camera Aa 4547 p-6047-fsr4-manual
Avtron IR Bullet Camera Aa 4547 p-6047-fsr4-manual
 
Microondas / microwave tmw 18 bih
Microondas / microwave tmw 18 bihMicroondas / microwave tmw 18 bih
Microondas / microwave tmw 18 bih
 
Avtron Dome Camera Aa 6003-fs-manual
Avtron Dome Camera Aa 6003-fs-manualAvtron Dome Camera Aa 6003-fs-manual
Avtron Dome Camera Aa 6003-fs-manual
 
Daewoo doosan solar 015 plus excavator service repair manual
Daewoo doosan solar 015 plus excavator service repair manualDaewoo doosan solar 015 plus excavator service repair manual
Daewoo doosan solar 015 plus excavator service repair manual
 
Daewoo doosan solar 015 plus excavator service repair manual
Daewoo doosan solar 015 plus excavator service repair manualDaewoo doosan solar 015 plus excavator service repair manual
Daewoo doosan solar 015 plus excavator service repair manual
 
Daewoo doosan solar 015 plus excavator service repair manual
Daewoo doosan solar 015 plus excavator service repair manualDaewoo doosan solar 015 plus excavator service repair manual
Daewoo doosan solar 015 plus excavator service repair manual
 
Daewoo doosan solar 015 plus excavator service repair manual
Daewoo doosan solar 015 plus excavator service repair manualDaewoo doosan solar 015 plus excavator service repair manual
Daewoo doosan solar 015 plus excavator service repair manual
 
Daewoo doosan solar 015 plus excavator service repair manual
Daewoo doosan solar 015 plus excavator service repair manualDaewoo doosan solar 015 plus excavator service repair manual
Daewoo doosan solar 015 plus excavator service repair manual
 
Avtron Pinhole Lens Camera Aa 4522 p-fs-manual
Avtron Pinhole Lens Camera Aa 4522 p-fs-manualAvtron Pinhole Lens Camera Aa 4522 p-fs-manual
Avtron Pinhole Lens Camera Aa 4522 p-fs-manual
 
Ecosys fs1020mfpdaad
Ecosys fs1020mfpdaadEcosys fs1020mfpdaad
Ecosys fs1020mfpdaad
 
Sewing machine janome book dc3050
Sewing machine janome book dc3050Sewing machine janome book dc3050
Sewing machine janome book dc3050
 
Sony PMW-320K Operation Manual
Sony PMW-320K Operation ManualSony PMW-320K Operation Manual
Sony PMW-320K Operation Manual
 
John deere 4100 compact utility tractor service repair manual
John deere 4100 compact utility tractor service repair manualJohn deere 4100 compact utility tractor service repair manual
John deere 4100 compact utility tractor service repair manual
 
John deere 4100 compact utility tractor service repair manual
John deere 4100 compact utility tractor service repair manualJohn deere 4100 compact utility tractor service repair manual
John deere 4100 compact utility tractor service repair manual
 
John deere 4100 compact utility tractor service repair manual
John deere 4100 compact utility tractor service repair manualJohn deere 4100 compact utility tractor service repair manual
John deere 4100 compact utility tractor service repair manual
 
John deere 4100 compact utility tractor service repair manual
John deere 4100 compact utility tractor service repair manualJohn deere 4100 compact utility tractor service repair manual
John deere 4100 compact utility tractor service repair manual
 

More from মোঃ হারুন রশিদ (11)

Hand cutter
Hand cutterHand cutter
Hand cutter
 
Pattan cutter
Pattan cutterPattan cutter
Pattan cutter
 
Fast jet lite
Fast jet liteFast jet lite
Fast jet lite
 
Fastjet pro
Fastjet proFastjet pro
Fastjet pro
 
Duet single-ply-brochure
Duet single-ply-brochureDuet single-ply-brochure
Duet single-ply-brochure
 
Duet
DuetDuet
Duet
 
Catalog vacuum-cleaner hittaci
Catalog vacuum-cleaner hittaciCatalog vacuum-cleaner hittaci
Catalog vacuum-cleaner hittaci
 
526 ir
526 ir526 ir
526 ir
 
Flex jet e_brochure_english
Flex jet e_brochure_englishFlex jet e_brochure_english
Flex jet e_brochure_english
 
Flex jet ex_brochure_engl
Flex jet ex_brochure_englFlex jet ex_brochure_engl
Flex jet ex_brochure_engl
 
Layout for auto cutter
Layout for auto cutterLayout for auto cutter
Layout for auto cutter
 

Recently uploaded

Abortion Pill for sale in Riyadh ((+918761049707) Get Cytotec in Dammam
Abortion Pill for sale in Riyadh ((+918761049707) Get Cytotec in DammamAbortion Pill for sale in Riyadh ((+918761049707) Get Cytotec in Dammam
Abortion Pill for sale in Riyadh ((+918761049707) Get Cytotec in Dammam
ahmedjiabur940
 
一比一定(购)国立南方理工学院毕业证(Southern毕业证)成绩单学位证
一比一定(购)国立南方理工学院毕业证(Southern毕业证)成绩单学位证一比一定(购)国立南方理工学院毕业证(Southern毕业证)成绩单学位证
一比一定(购)国立南方理工学院毕业证(Southern毕业证)成绩单学位证
wpkuukw
 
怎样办理昆士兰大学毕业证(UQ毕业证书)成绩单留信认证
怎样办理昆士兰大学毕业证(UQ毕业证书)成绩单留信认证怎样办理昆士兰大学毕业证(UQ毕业证书)成绩单留信认证
怎样办理昆士兰大学毕业证(UQ毕业证书)成绩单留信认证
ehyxf
 
Jual Obat Aborsi Samarinda ( No.1 ) 088980685493 Obat Penggugur Kandungan Cy...
Jual Obat Aborsi Samarinda (  No.1 ) 088980685493 Obat Penggugur Kandungan Cy...Jual Obat Aborsi Samarinda (  No.1 ) 088980685493 Obat Penggugur Kandungan Cy...
Jual Obat Aborsi Samarinda ( No.1 ) 088980685493 Obat Penggugur Kandungan Cy...
Obat Aborsi 088980685493 Jual Obat Aborsi
 
怎样办理斯威本科技大学毕业证(SUT毕业证书)成绩单留信认证
怎样办理斯威本科技大学毕业证(SUT毕业证书)成绩单留信认证怎样办理斯威本科技大学毕业证(SUT毕业证书)成绩单留信认证
怎样办理斯威本科技大学毕业证(SUT毕业证书)成绩单留信认证
tufbav
 
怎样办理阿德莱德大学毕业证(Adelaide毕业证书)成绩单留信认证
怎样办理阿德莱德大学毕业证(Adelaide毕业证书)成绩单留信认证怎样办理阿德莱德大学毕业证(Adelaide毕业证书)成绩单留信认证
怎样办理阿德莱德大学毕业证(Adelaide毕业证书)成绩单留信认证
ehyxf
 
Abortion pills in Jeddah |+966572737505 | Get Cytotec
Abortion pills in Jeddah |+966572737505 | Get CytotecAbortion pills in Jeddah |+966572737505 | Get Cytotec
Abortion pills in Jeddah |+966572737505 | Get Cytotec
Abortion pills in Riyadh +966572737505 get cytotec
 
In Riyadh Saudi Arabia |+966572737505 | Buy Cytotec| Get Abortion pills
In Riyadh Saudi Arabia |+966572737505 | Buy Cytotec| Get Abortion pillsIn Riyadh Saudi Arabia |+966572737505 | Buy Cytotec| Get Abortion pills
In Riyadh Saudi Arabia |+966572737505 | Buy Cytotec| Get Abortion pills
Abortion pills in Riyadh +966572737505 get cytotec
 
Buy Abortion pills in Riyadh |+966572737505 | Get Cytotec
Buy Abortion pills in Riyadh |+966572737505 | Get CytotecBuy Abortion pills in Riyadh |+966572737505 | Get Cytotec
Buy Abortion pills in Riyadh |+966572737505 | Get Cytotec
Abortion pills in Riyadh +966572737505 get cytotec
 
Top profile Call Girls In Udgir [ 7014168258 ] Call Me For Genuine Models We ...
Top profile Call Girls In Udgir [ 7014168258 ] Call Me For Genuine Models We ...Top profile Call Girls In Udgir [ 7014168258 ] Call Me For Genuine Models We ...
Top profile Call Girls In Udgir [ 7014168258 ] Call Me For Genuine Models We ...
gajnagarg
 
在线制作(ANU毕业证书)澳大利亚国立大学毕业证成绩单原版一比一
在线制作(ANU毕业证书)澳大利亚国立大学毕业证成绩单原版一比一在线制作(ANU毕业证书)澳大利亚国立大学毕业证成绩单原版一比一
在线制作(ANU毕业证书)澳大利亚国立大学毕业证成绩单原版一比一
ougvy
 
一比一定(购)UNITEC理工学院毕业证(UNITEC毕业证)成绩单学位证
一比一定(购)UNITEC理工学院毕业证(UNITEC毕业证)成绩单学位证一比一定(购)UNITEC理工学院毕业证(UNITEC毕业证)成绩单学位证
一比一定(购)UNITEC理工学院毕业证(UNITEC毕业证)成绩单学位证
wpkuukw
 
Top profile Call Girls In Palghar [ 7014168258 ] Call Me For Genuine Models W...
Top profile Call Girls In Palghar [ 7014168258 ] Call Me For Genuine Models W...Top profile Call Girls In Palghar [ 7014168258 ] Call Me For Genuine Models W...
Top profile Call Girls In Palghar [ 7014168258 ] Call Me For Genuine Models W...
gajnagarg
 
一比一维多利亚大学毕业证(victoria毕业证)成绩单学位证如何办理
一比一维多利亚大学毕业证(victoria毕业证)成绩单学位证如何办理一比一维多利亚大学毕业证(victoria毕业证)成绩单学位证如何办理
一比一维多利亚大学毕业证(victoria毕业证)成绩单学位证如何办理
uodye
 
CRISIS COMMUNICATION presentation=-Rishabh(11195)-group ppt (4).pptx
CRISIS COMMUNICATION presentation=-Rishabh(11195)-group ppt (4).pptxCRISIS COMMUNICATION presentation=-Rishabh(11195)-group ppt (4).pptx
CRISIS COMMUNICATION presentation=-Rishabh(11195)-group ppt (4).pptx
Rishabh332761
 

Recently uploaded (20)

Abortion Pill for sale in Riyadh ((+918761049707) Get Cytotec in Dammam
Abortion Pill for sale in Riyadh ((+918761049707) Get Cytotec in DammamAbortion Pill for sale in Riyadh ((+918761049707) Get Cytotec in Dammam
Abortion Pill for sale in Riyadh ((+918761049707) Get Cytotec in Dammam
 
一比一定(购)国立南方理工学院毕业证(Southern毕业证)成绩单学位证
一比一定(购)国立南方理工学院毕业证(Southern毕业证)成绩单学位证一比一定(购)国立南方理工学院毕业证(Southern毕业证)成绩单学位证
一比一定(购)国立南方理工学院毕业证(Southern毕业证)成绩单学位证
 
怎样办理昆士兰大学毕业证(UQ毕业证书)成绩单留信认证
怎样办理昆士兰大学毕业证(UQ毕业证书)成绩单留信认证怎样办理昆士兰大学毕业证(UQ毕业证书)成绩单留信认证
怎样办理昆士兰大学毕业证(UQ毕业证书)成绩单留信认证
 
Jual Obat Aborsi Samarinda ( No.1 ) 088980685493 Obat Penggugur Kandungan Cy...
Jual Obat Aborsi Samarinda (  No.1 ) 088980685493 Obat Penggugur Kandungan Cy...Jual Obat Aborsi Samarinda (  No.1 ) 088980685493 Obat Penggugur Kandungan Cy...
Jual Obat Aborsi Samarinda ( No.1 ) 088980685493 Obat Penggugur Kandungan Cy...
 
怎样办理斯威本科技大学毕业证(SUT毕业证书)成绩单留信认证
怎样办理斯威本科技大学毕业证(SUT毕业证书)成绩单留信认证怎样办理斯威本科技大学毕业证(SUT毕业证书)成绩单留信认证
怎样办理斯威本科技大学毕业证(SUT毕业证书)成绩单留信认证
 
怎样办理阿德莱德大学毕业证(Adelaide毕业证书)成绩单留信认证
怎样办理阿德莱德大学毕业证(Adelaide毕业证书)成绩单留信认证怎样办理阿德莱德大学毕业证(Adelaide毕业证书)成绩单留信认证
怎样办理阿德莱德大学毕业证(Adelaide毕业证书)成绩单留信认证
 
Call Girls Amethi 9332606886 HOT & SEXY Models beautiful and charming call g...
Call Girls Amethi  9332606886 HOT & SEXY Models beautiful and charming call g...Call Girls Amethi  9332606886 HOT & SEXY Models beautiful and charming call g...
Call Girls Amethi 9332606886 HOT & SEXY Models beautiful and charming call g...
 
Abortion pills in Jeddah |+966572737505 | Get Cytotec
Abortion pills in Jeddah |+966572737505 | Get CytotecAbortion pills in Jeddah |+966572737505 | Get Cytotec
Abortion pills in Jeddah |+966572737505 | Get Cytotec
 
Guwahati Escorts Service Girl ^ 9332606886, WhatsApp Anytime Guwahati
Guwahati Escorts Service Girl ^ 9332606886, WhatsApp Anytime GuwahatiGuwahati Escorts Service Girl ^ 9332606886, WhatsApp Anytime Guwahati
Guwahati Escorts Service Girl ^ 9332606886, WhatsApp Anytime Guwahati
 
Critical Commentary Social Work Ethics.pptx
Critical Commentary Social Work Ethics.pptxCritical Commentary Social Work Ethics.pptx
Critical Commentary Social Work Ethics.pptx
 
In Riyadh Saudi Arabia |+966572737505 | Buy Cytotec| Get Abortion pills
In Riyadh Saudi Arabia |+966572737505 | Buy Cytotec| Get Abortion pillsIn Riyadh Saudi Arabia |+966572737505 | Buy Cytotec| Get Abortion pills
In Riyadh Saudi Arabia |+966572737505 | Buy Cytotec| Get Abortion pills
 
Buy Abortion pills in Riyadh |+966572737505 | Get Cytotec
Buy Abortion pills in Riyadh |+966572737505 | Get CytotecBuy Abortion pills in Riyadh |+966572737505 | Get Cytotec
Buy Abortion pills in Riyadh |+966572737505 | Get Cytotec
 
Top profile Call Girls In Udgir [ 7014168258 ] Call Me For Genuine Models We ...
Top profile Call Girls In Udgir [ 7014168258 ] Call Me For Genuine Models We ...Top profile Call Girls In Udgir [ 7014168258 ] Call Me For Genuine Models We ...
Top profile Call Girls In Udgir [ 7014168258 ] Call Me For Genuine Models We ...
 
在线制作(ANU毕业证书)澳大利亚国立大学毕业证成绩单原版一比一
在线制作(ANU毕业证书)澳大利亚国立大学毕业证成绩单原版一比一在线制作(ANU毕业证书)澳大利亚国立大学毕业证成绩单原版一比一
在线制作(ANU毕业证书)澳大利亚国立大学毕业证成绩单原版一比一
 
一比一定(购)UNITEC理工学院毕业证(UNITEC毕业证)成绩单学位证
一比一定(购)UNITEC理工学院毕业证(UNITEC毕业证)成绩单学位证一比一定(购)UNITEC理工学院毕业证(UNITEC毕业证)成绩单学位证
一比一定(购)UNITEC理工学院毕业证(UNITEC毕业证)成绩单学位证
 
Hilti's Latest Battery - Hire Depot.pptx
Hilti's Latest Battery - Hire Depot.pptxHilti's Latest Battery - Hire Depot.pptx
Hilti's Latest Battery - Hire Depot.pptx
 
Top profile Call Girls In Palghar [ 7014168258 ] Call Me For Genuine Models W...
Top profile Call Girls In Palghar [ 7014168258 ] Call Me For Genuine Models W...Top profile Call Girls In Palghar [ 7014168258 ] Call Me For Genuine Models W...
Top profile Call Girls In Palghar [ 7014168258 ] Call Me For Genuine Models W...
 
一比一维多利亚大学毕业证(victoria毕业证)成绩单学位证如何办理
一比一维多利亚大学毕业证(victoria毕业证)成绩单学位证如何办理一比一维多利亚大学毕业证(victoria毕业证)成绩单学位证如何办理
一比一维多利亚大学毕业证(victoria毕业证)成绩单学位证如何办理
 
CRISIS COMMUNICATION presentation=-Rishabh(11195)-group ppt (4).pptx
CRISIS COMMUNICATION presentation=-Rishabh(11195)-group ppt (4).pptxCRISIS COMMUNICATION presentation=-Rishabh(11195)-group ppt (4).pptx
CRISIS COMMUNICATION presentation=-Rishabh(11195)-group ppt (4).pptx
 
Vashi Affordable Call Girls ,07506202331,Vasai Virar Charming Call Girl
Vashi Affordable Call Girls ,07506202331,Vasai Virar Charming Call GirlVashi Affordable Call Girls ,07506202331,Vasai Virar Charming Call Girl
Vashi Affordable Call Girls ,07506202331,Vasai Virar Charming Call Girl
 

Vacuam

  • 1. Operating instructions Vacuum cleaners To avoid the risk of accidents or damage to the appliance, it is essential to read these instructions before using it for the first time. These operating instructions apply to standard models S 5211 - S 5781 as well as to other S 5000 vacuum cleaners which are distinguished by names rather than numbers. M.-Nr. 07 175 980 en - GB
  • 2. Caring for the environment Description of the appliance Warning and Safety instructions Preparing for use Accessories supplied Using the accessories supplied Use Mains cable . . . . . . . . . . . . . . . . . . . . . . . . . . . . . . . . . . . . . . . . . . . . . . . . . . . . . . 16 Switching on and off . . . . . . . . . . . . . . . . . . . . . . . . . . . . . . . . . . . . . . . . . . . . . . . 17 Adjusting the suction power . . . . . . . . . . . . . . . . . . . . . . . . . . . . . . . . . . . . . . . . . 18 Opening the air inlet valve . . . . . . . . . . . . . . . . . . . . . . . . . . . . . . . . . . . . . . . . . . . 20 Setting down, transportation and storage Maintenance and care Purchasing new dustbags and filters . . . . . . . . . . . . . . . . . . . . . . . . . . . . . . . . . . 23 Ordering the correct dustbags and filters . . . . . . . . . . . . . . . . . . . . . . . . . . . . . . . 23 When to change the dustbag . . . . . . . . . . . . . . . . . . . . . . . . . . . . . . . . . . . . . . . . 24 Replacing the dustbag . . . . . . . . . . . . . . . . . . . . . . . . . . . . . . . . . . . . . . . . . . . . . 25 When to change the exhaust filter . . . . . . . . . . . . . . . . . . . . . . . . . . . . . . . . . . . . . 26 Exhaust filter change indicator . . . . . . . . . . . . . . . . . . . . . . . . . . . . . . . . . . . . . . . 26 Replacing the Super Air Clean filter . . . . . . . . . . . . . . . . . . . . . . . . . . . . . . . . . . . 27 Replacing an Active Air Clean filter or an Active HEPA filter. . . . . . . . . . . . . . . . . 28 Replacing one type of exhaust filter with another . . . . . . . . . . . . . . . . . . . . . . . . . 29 When to change the dust compartment filter (for motor protection) . . . . . . . . . . . 30 How to change the dust compartment filter . . . . . . . . . . . . . . . . . . . . . . . . . . . . . 30 When to change the battery in the radio-operated handle . . . . . . . . . . . . . . . . . . 31 How to change the battery in the radio-operated handle . . . . . . . . . . . . . . . . . . . 31 When to change the thread lifters . . . . . . . . . . . . . . . . . . . . . . . . . . . . . . . . . . . . . 32 To replace the thread lifters. . . . . . . . . . . . . . . . . . . . . . . . . . . . . . . . . . . . . . . . . . 32 Cleaning and care Problem solving guide / After sales service Optional accessories Electrical connection for the UK Contents 2
  • 3. Disposal of packing material The transport and protective packing has been selected from materials which are environmentally friendly for disposal and can normally be recycled. Ensure that any plastic, wrappings, bags etc. are disposed of safely and kept out of the reach of babies and young children. Danger of suffocation. Rather than just throwing these materials away, please recycle them. Disposing of the dustbag and filters These are made from environmentally friendly materials, and can be disposed of with the normal household waste, as long as they have been used exclusively for general household dust. Disposal of your old appliance Electrical and electronic appliances often contain materials which, if handled or disposed of incorrectly, could be potentially hazardous to human health and to the environment. They are, however, essential for the correct functioning of your appliance. Please do not therefore dispose of it with your household waste. Please dispose of it at your local community waste collection / recycling centre or ask your Dealer for advice. Ensure that it presents no danger to children while being stored for disposal. Caring for the environment 3
  • 4. The illustration shows the maximum number of features available on these Miele vacuum cleaners. Certain models are supplied as standard with the following accessories which are not illustrated on this page. These floorheads and brushes are supplied with their own operating instructions. – Electrobrush – ACCU NOVA rechargeable powerbrush – Turbobrush – ALLERGOTEC floorhead Description of the appliance 4
  • 5. aHandle (some models have an air inlet valve in the handle)* bSuction power selector + / -* cStand-by button for pauses in vacuuming* dLED* eRelease button fTelescopic tube* gRelease buttons for the telescopic tube* hConnection socket iSocket for Electrobrush* jDust compartment release button kDust compartment filter (for motor protection) lHyClean dustbag mFloorhead* nCarrying handle oElectrobrush socket cover holder pParking attachment (on both sides of vacuum cleaner) qExhaust filter* rFoot switch for automatic cable rewind sSuction power selector* tMains cable uExhaust filter change indicator (Re-set button)* vOverheating warning light ,* wParking system xStand-by indicator* yOn/Off foot control s zRelease button for accessories compartment {Dustbag change indicator Those features marked * depend on the model, and may vary or not be available on your model. Description of the appliance 5
  • 6. This vacuum cleaner meets statutory safety requirements. Improper use can, however, lead to personal injury and material damage. To avoid the risk of accidents and damage to the vacuum cleaner, read these instructions carefully before using it for the first time. They contain important notes on its safety, operation and maintenance. Keep these instructions in a safe place and ensure new users are familiar with the content. Pass them on to any future owner. Always disconnect the vacuum cleaner from the mains supply when you have finished using it, as well as for maintenance work and cleaning. Switch it off at the wall socket and unplug it. Correct application ~ This vacuum cleaner must only be used for domestic household purposes to vacuum dry floor surfaces. Do not use on people or animals. Any other usage, modification or alteration is at the owner's risk and could be dangerous. The manufacturer cannot be held liable for damage resulting from improper or incorrect use of the appliance. ~ This appliance is not intended for use by persons (including children) with reduced physical, sensory or mental capabilities, or lack of experience or knowledge, unless they are supervised whilst using it or have been shown how to use it by a person responsible for their safety. Safety with children ~ This vacuum cleaner is not a toy! To avoid the risk of injury, keep children well away, and do not allow them to play with it or to use the controls. Supervise children whilst you are using it. ~ Older children may only use the vacuum cleaner if its operation has been clearly explained to them, and they are able to use it safely, recognising the dangers of incorrect use. ~ Models with radio controls on the handle: Keep batteries out of the reach of children. Warning and Safety instructions 6
  • 7. Technical safety ~ Ensure that the connection data on the data plate (voltage and frequency) match the mains electricity supply. It is essential that they match to avoid damage to the appliance. ~ The plug must be fitted with a 13 A fuse (UK). ~ Before using the vacuum cleaner, check for any signs of damage. Do not use a damaged appliance: it could be dangerous. ~ The socket on the vacuum cleaner (depending on model) must only be used for the Miele Electrobrush specified for use with this appliance. ~ There is a metal inlay underneath the handle which is designed to avoid the unpleasant effects of electrostatic discharges. Please make sure that you keep your hand in constant contact with this metal strip during vacuuming. ~ Do not pull or carry the vacuum cleaner by the cable and be careful not to damage the cable when withdrawing the plug from the socket. – Keep the cable away from sharp edges and do not let it be squashed, for example, under a door. – Avoid running the vacuum cleaner over the cable. This could damage the cable, plug or socket and pose a safety hazard. The appliance must not be used if any of these have suffered damage. ~ If the cable is damaged it must be replaced together with a complete cable rewind. For safety reasons this must only be done by the Miele Service Department or a Miele authorised service technician. ~ While the vacuum cleaner is under guarantee, repairs should only be undertaken by a service technician authorised by Miele. Otherwise the guarantee will be invalidated. ~ Repairs should only be carried out by a Miele authorised service technician. Repairs and other work by unqualified persons could be dangerous. The manufacturer cannot be held liable for unauthorised work. ~ It is important to switch the vacuum cleaner off before changing over accessories and floorheads, especially an Electro- or Turbobrush. ~ Do not let the vacuum cleaner get wet. Clean only with a dry cloth or slightly damp cloth when disconnected from the mains supply. If moisture gets into the appliance, there is a risk of electric shock. Warning and Safety instructions 7
  • 8. Correct use ~ To avoid the risk of damage, do not use the vacuum cleaner without the dustbag, dust compartment filter and exhaust filter in place. Otherwise it could get damaged. ~ If a dustbag is not inserted, the dust compartment cover does not normally close. Do not force it. ~ Do not vacuum up anything which has been burning or is still glowing e.g. cigarettes, ashes or coal, whether glowing or apparently extinguished. The cleaner might catch fire. ~ Do not vacuum up any water, liquid or damp dirt. This will cause major faults and could seriously impair the functioning and electrical safety of the appliance. Wait until any freshly cleaned or shampooed carpets or floor coverings are completely dry before attempting to vacuum. ~ Do not vacuum toner dust. Toner, such as that used in printers and photocopiers, can conduct electricity. The filter system in the vacuum cleaner may not filter it completely, causing the toner to be blown back into the room by the fan. ~ Do not vacuum up any inflammable or combustible liquids or gases and do not vacuum in areas where such substances are stored. The cleaner might explode. ~ Do not vacuum up items which are heavy, hard or have sharp edges. They could cause a blockage and damage the appliance. ~ Floor attachments, accessories and tubes must not be used at head level to avoid the risk of injury, e.g. to eyes and ears. ~ Monitor the change dustbag indicator and change the dustbag if necessary. Check the exhaust and dust compartment filters at the same time and change them too if necessary. A full bag or blocked filter will reduce the suction power of the cleaner. A temperature limiter switches the vacuum cleaner off automatically if it gets too hot. See "Problem solving guide". ~ Important information on the handling of batteries (for models with radio controls on the handle): – Do not use rechargeable batteries. – Do not short circuit or recharge batteries, or throw them into a fire. Danger of explosion. – Disposing of batteries: Remove the batteries from the radio control handle and dispose of them in your recycling bin. Do not dispose of them with the normal household waste. Warning and Safety instructions 8
  • 9. Accessories Miele accessories including floorheads, filters and dustbags are available to order from your Miele retailer, the Miele Spare Parts Department or via the internet on www.miele-shop.com. ~ The Miele Electrobrush is a motor driven accessory for use only with Miele vacuum cleaners. The cleaner must not be used with an electrobrush produced by another manufacturer. ~ To avoid the risk of injury when vacuuming with a Miele Electrobrush or Turbobrush, do not touch the rotating roller brush. ~ It is not advisable to vacuum directly with the handle, i.e. without an accessory attached as the rim could get damaged and you could hurt yourself on sharp edges. ~ Miele vacuum cleaner bags are disposable and intended to be used only once. Do not attempt to re-use. Blocked pores reduce the efficiency of the cleaner. ~ To ensure safety only use genuine Miele dustbags, filters and accessories. This will ensure optimum performance of the appliance throughout its life. The manufacturer cannot be held liable for damage caused by non-compliance with these Warning and Safety instructions. Warning and Safety instructions 9
  • 10. Attaching the suction hose ^ Insert the hose connector into the socket until it clicks into position. To do this, line up the guides on the two pieces. Removing the suction hose from the cleaner ^ Press the release buttons at the side of the hose connector, and lift the hose from the socket. Connecting the handle to the suction tube ^ Insert the handle into the suction tube until it clicks into position. To do this, line up the guides on the two pieces. ^ To release the handle from the suction tube, press the locking button (see arrow) and pull the handle away from the suction tube. Preparing for use 10
  • 11. Your vacuum cleaner is fitted with one of the following telescopic tubes, depending on the model: – 2-part telescopic tube – Triscopic telescopic tube Adjusting the 2-part telescopic suction tube One part of this telescopic tube is packed inside the other and can be adjusted to suit your height for comfortable vacuum cleaning. ^ Press the telescopic release button (see arrow) to release the tubes and adjust to the required height. Adjusting the triscopic suction tube The triscopic tube has three sections. Two sections of the telescopic tube are packed together inside a third outer tube. ^ Press the release button (see arrow a) to release the lower tube and pull it right out until it clicks. Press the button again when you want to retract the tube again. The tube will click into place. ^ Press the telescopic tube release button b to release the tubes and adjust to the required height. Preparing for use 11
  • 12. Fitting the standard floorhead ^ Push the suction tube into the floorhead and turn it clockwise or anti-clockwise until it clicks into position. ^ To release the floorhead from the suction tube, press the locking button (see arrow) and pull the suction tube away from the floorhead. The floorhead can be used for all normal cleaning of carpets and rugs. It can also be used with the brush protruding to vacuum hard flooring. For hard flooring, such as stone and parquet, we recommend using one of the special Miele floor brushes (see "Optional accessories"). Important: please observe the flooring manufacturer's cleaning and care instructions. Vacuum carpets and rugs with the brush retracted: ^ Press the foot control ö. Clean hard flooring which is not susceptible to scratching with the brush protruding: ^ Press the foot control ä. The ALLERGOTEC floorhead, the Turbobrush, the ACCU NOVA powerbrush and the Electrobrush Some models may be supplied as stan- dard with one of these accessories (see "Optional accessories"). Please refer to the separate operating instructions supplied with these brushes for instructions on use and maintenance. Preparing for use 12
  • 13. The following accessories are supplied: aCrevice nozzle bDusting brush with natural bristles cUpholstery nozzle To open the accessories compartment ^ Press the release button to open the accessories compartment lid. ^ Take out the accessory you require. ^ Press down firmly on the lid to close it. Accessories supplied 13
  • 14. Crevice nozzle For cleaning in folds, crevices or corners. Dusting brush with natural bristles For cleaning skirting boards, ornate or carved articles, etc. The head of the dusting brush can be swivelled to attain the best cleaning position. Using the accessories supplied 14
  • 15. Upholstery nozzle For cleaning upholstery, mattresses, cushions, curtains, covers etc. Floorhead For general use and also for vacuuming stairs. For safety reasons when vacuuming stairs it is best to start at the bottom of the stairs and move upwards. Using the accessories supplied 15
  • 16. Mains cable Unwinding the cable ^ Pull out the mains cable to the required length (max. approx. 6.5 m). Warning: If vacuuming for longer than 30 minutes, the mains cable must be pulled out to its fullest extent. Otherwise there is a danger of overheating and damage. Rewinding the cable ^ Switch off at the wall socket and remove the plug. ^ Press the rewind foot switch. The cable will rewind automatically. Use 16
  • 17. Switching on and off ^ Step on the On/Off foot control s. Models with radio controls on the handle To pause the appliance during operation: ^ Press the stand-by button on the handle. Warning: The stand-by button is designed to pause the vacuum cleaner for short periods of time whilst vacuuming. After vacuuming, the device has to be switched off and unplugged from the mains supply. The LED will indicate each time a button is pressed on the handle. At the end of the pause, you can do one of the following: ^ Press the stand-by button again to switch the vacuum cleaner back on at the setting you were using before pausing it. ^ Press the + button to switch the vacuum cleaner back on using the highest power setting. ^ Press the - button to switch the vacuum cleaner back on using the lowest power setting. Use 17
  • 18. Vacuuming ^ When vacuuming, pull the cleaner behind you on its wheels. You can stand it upright for vacuuming stairs and curtains etc. Warning: When vacuuming especially fine dust, e.g. sawdust, sand, plaster, flour, talcum powder etc., electrostatic charges build up naturally. Under certain conditions these charges will be released. To avoid the unpleasant effects of these discharges, a metal inlay has been incorporated into the underside of the handle. Please make sure that you keep your hand in constant contact with this metal strip during vacuuming. Adjusting the suction power The suction power can be regulated to suit the type of flooring. The higher the wattage, the more powerful the suction. Reducing the suction power reduces the amount of effort required to manoeuvre the floorhead. Some models also have symbols on the controls. The symbols indicate the type of use the settings are suitable for: a - curtains, lightweight fabrics b - upholstery, cushions c - carpets, rugs and runners ( - for daily energy-saving vacuuming e - lightly soiled rugs and fitted carpets f - heavily soiled hard flooring, and for intensive cleaning of carpets The controls vary from model to model. The different options are described on the following pages. Use 18
  • 19. Rotary selector ^ Turn the suction power selector manually to the suction power setting you require. + / – foot controls Press and hold the + or – foot control until the power setting you require lights up green. ^ Press the + control to select a higher setting. ^ Press the - control to select a lower setting. + / – controls with AutoEco setting When you switch your vacuum cleaner on the energy saving "AutoEco" setting is selected automatically. ^ Press the + control to change to "Turbo", the highest power setting. ^ Press the - foot control to change to "Min.", the lowest power setting. The power setting which is currently selected will light up white. Use 19
  • 20. + / - controls on the handle (radio-operated) Press and hold the + or – button until the symbol for the power setting you require shows in the display on the cleaner. ^ Press the + button to select a higher setting. ^ Press the - button to select a lower setting. The LED will indicate each time a button is pressed on the handle. Opening the air inlet valve (not on models with radio-controls on the handle) It is easy to reduce the suction power for a short time, e.g. to prevent rugs or other objects being sucked into the vacuum cleaner. ^ Open the air inlet valve far enough to reduce the suction power. The floorhead will be easier to manoeuvre. Close the valve up again when you are ready to use full power again. Use 20
  • 21. Parking system (cannot be used with the SEB 234 L Electrobrush) A parking system has been designed for conveniently parking the suction tube and floorhead during pauses. ^ Slot the floorhead into the parking attachment at the back of the vacuum cleaner. Switching on and off with the parking system Some models are fitted with an On/Off switch in the parking system. The cleaner is automatically switched off when the floorhead is placed in the parking attachment. Lifting the floorhead out of the parking attachment switches the cleaner on again. If your vacuum cleaner is equipped with "+ / - foot controls" or "+ / - foot controls with "AutoEco" setting, you can de-activate or activate the parking system's On/Off function. ^ Switch the vacuum cleaner off with the On/Off foot control. ^ Press and hold the + and – foot controls in, and at the same time switch the vacuum cleaner on with the On/Off foot control. Setting down, transportation and storage 21
  • 22. Transportation and storage ^ Stand the vacuum cleaner upright when it is not being used and during storage. ^ Slot the floorhead downwards into one of the parking attachments on either side of the vacuum cleaner (the parking attachments cannot be used with the SEB 234 L Electrobrush). ^ Retract the telescopic tube fully. This makes the cleaner easier to carry or store. Setting down, transportation and storage 22
  • 23. Warning: Always disconnect the vacuum cleaner from the electrical supply for maintenance work and for cleaning. Switch off at the wall socket and remove the plug. If using the ACCU NOVA powerbrush, switch this off as well. The Miele filter system consists of three filters which must be replaced from time to time to ensure that your vacuum cleaner performs efficiently. – Dustbag – Exhaust filter – Dust compartment filter (for motor protection) Warning: To ensure that your vacuum cleaner functions correctly, cleans hygienically and gives you many years of trouble-free operation, please only use genuine Miele approved dustbags and filters. The use of non-Miele approved dustbags and accessories could invalidate your warranty and cause damage to your product. Purchasing new dustbags and filters Replacement dustags and filters can be obtained from your local Miele retailer, the Miele Spare Parts Department (see back cover for contact details) or via the internet on www.miele-shop.com. Ordering the correct dustbags and filters When ordering dustbags for this cleaner, ask for Miele HyClean dustbags with blue holders, and the code G/N. A Super Air Clean exhaust filter and a dust compartment filter are supplied with every packet of Miele dustbags. If you wish to purchase exhaust filters or dust compartment filters separately, please quote the model number of your appliance when ordering to ensure you get the correct items. You can replace the exhaust filter fitted in the vacuum cleaner with one of the other Miele exhaust filters if you wish (see "Optional accessories"). Maintenance and care 23
  • 24. When to change the dustbag Change the dustbag when the colour marker in the dustbag change indicator fills the display, or sooner if it is no longer effective (see possible reasons for this below). Miele dustbags are disposable, and designed for single use only. Do not attempt to re-use them as suction would be reduced. Checking the dustbag change indicator ^ Attach the standard floorhead to the suction tube. Do not use any of the other floorheads or attachments as they will cause the dustbag change indicator to give a false reading. ^ Switch on the vacuum cleaner using the On/Off foot control s, and select the highest power setting. ^ Lift the floorhead off the floor a little. If the marker completely fills the dustbag change indicator, you should replace the dustbag with a new one. How the dustbag change indicator works The dustbag change indicator is set for normal household dust. Normal household dust would contain a mixture of dust, hair, carpet fluff, threads, grit etc. However, if the vacuum cleaner has been used to suck up fine dust, such as plaster, brick dust, cement or flour, the pores of the dustbag will become blocked very quickly. This affects the air permeability of the bag, and the marker will indicate that the bag is "full" even when it is not. If this happens you must still change the dustbag because suction power will be greatly reduced by blocked pores in the dustbag. If, on the other hand, you have vacuumed up a large amount of hair and carpet fluff which typically contains a lot of air, the indicator may fail to react even though the bag is full. You should still change it! Both these extremes can occur. Maintenance and care 24
  • 25. Replacing the dustbag ^ Press the release button for the dust compartment lid and raise the lid as far as it will go. The dustbag has a closing flap which closes automatically when the dust compartment lid is raised to prevent any dust escaping. ^ Pull the dustbag out by the grip next to the self-closing flap on the collar. ^ Fit the new dustbag into the holder as far as it will go. Leave it folded up when you take it out of the box. ^ Close the dust compartment lid securely, making sure it clicks into position. Take care not to trap the dustbag when doing so. Warning: The lid will not close without a dustbag in place, or if the dustbag is incorrectly fitted. Do not force it. Maintenance and care 25
  • 26. When to change the exhaust filter Depending on the model, your vacuum cleaner will be fitted as standard with one of the following exhaust filters: a a Super Air Clean filter Replace this filter every time you start a new packet of Miele dustbags. A Super Air Clean exhaust filter and a dust compartment filter are supplied with every packet of Miele dustbags. b an Active Air Clean filter (black) c an Active HEPA filter (blue) These types of filter need to be changed approx. once a year. Make a note of the date on the filter. Exhaust filter change indicator Certain models are fitted with an exhaust filter change indicator (reset button) to show you when to change your Active Air Clean b or Active HEPA c filter. The indicator lights up after approx. 50 hours of operation, which is equivalent to about a year of average use. The vacuum cleaner can still be used with the exhaust filter indicator lit up. However, the suction power will be reduced as will the effectiveness of the filter if it is not replaced in good time. The filter change indicator light is irrelevant if a Super Air Clean filter (a) is fitted, as long as it is replaced every time a new packet of Miele dustbags is started. The indicator light will go out when the reset button is pressed. Maintenance and care 26
  • 27. Replacing the Super Air Clean filter Do not use more than one exhaust filter at a time. ^ Open the dust compartment lid. ^ Release the filter grille and raise it upwards. Grasp the used Super Air Clean filter by the clean, unsoiled section (see arrow) and take it out. ^ Replace it with a new Super Air Clean filter. If you wish to replace the Super Air Clean filter with an Active Air Clean filter or with an Active HEPA filter , see "Replacing one type of exhaust filter with another". ^ Close the filter grille. ^ Close the dust compartment lid firmly. It should click into place. Maintenance and care 27
  • 28. Replacing an Active Air Clean filter or an Active HEPA filter Do not use more than one exhaust filter at a time. ^ Open the dust compartment lid. ^ Raise the filter and remove it. ^ Replace it with a new Active Air Clean filter or a new Active HEPA filter and plress it down into place. If you wish to replace the Active Air Clean filter or the Active HEPA filter with a Super Air Clean filter, see "Replacing one type of exhaust filter with another". ^ Close the dust compartment lid firmly. It should click into place. Re-setting the exhaust filter change indicator If your vacuum cleaner is fitted with an exhaust filter change indicator, this needs to be re-set each time the filter is replaced. To do this the vacuum cleaner must be switched on. ^ Press the reset button. The exhaust filter change indicator goes out and resets to zero. The filter change indicator can only be reset by pressing the reset button after the light has come on. Pressing the button at any other time will have no effect. Maintenance and care 28
  • 29. Replacing one type of exhaust filter with another Depending on model, your vacuum cleaner will be fitted as standard with one of the following exhaust filters: a a Super Air Clean filter b an Active Air Clean filter (black), c an Active HEPA filter (blue). Please note 1. If you wish to replace the Super Air Clean filter a with an Active Air Clean filter b or an Active HEPA filter c, it is essential that you remove the filter grille before fitting the new type of filter. 2. If you wish to replace the Active Air Clean filter b or the Active HEPA filter c with a Super Air Clean filter a, then it is essential that you also fit the filter grille*. * Filter grille - see "Optional accessories". Do not use more than one exhaust filter at a time. The exhaust filter indicator light (with reset button) that is fitted on certain models is designed to come on when the Active Air Clean or Active HEPA filter needs to be changed. The filter change indicator light is irrelevant if a Super Air Clean filter is being used, as long as it is replaced every time a new packet of Miele dustbags is started. The indicator light will go out when the reset button is pressed. Maintenance and care 29
  • 30. When to change the dust compartment filter (for motor protection) Replace this filter every time you start a new packet of dustbags. A dust compartment filter is supplied with every packet of Miele dustbags. How to change the dust compartment filter ^ Open the dust compartment lid. ^ Unclip the filter frame and remove the old filter. Hold by the clean, unsoiled section (see arrow) to remove it. ^ Replace with a new dust compartment filter. ^ Close the filter frame. ^ Close the dust compartment lid firmly. It should click into place. Maintenance and care 30
  • 31. When to change the battery in the radio-operated handle Approx. every 18 months. One 3 V battery (CR 2032) is required. The vacuum cleaner can still be used when the battery has run out or if there is no battery fitted. ^ Switch the vacuum cleaner on using the On/Off foot control. The vacuum cleaner is ready to use (in stand-by mode). ^ Press the re-set button for the exhaust filter change indicator. The vacuum cleaner can continue to be used, but only at maximum power. How to change the battery in the radio-operated handle ^ Open the cover to the battery compartment using a screwdriver. ^ Replace with a new battery, taking care to fit it correctly (check the polarity). ^ Replace the cover. ^ Dispose of the old battery responsibly. Maintenance and care 31
  • 32. When to change the thread lifters The thread lifters on the suction inlet of the floorhead and the upholstery nozzle can be replaced. Check them from time to time if the pile has worn down. To replace the thread lifters ^ Use a knife or similar object to remove them from the slots. ^ Fit new thread lifters. Upholstery nozzle, 190 mm ^ Disengage the thread lifter unit at each side of the upholstery nozzle using a coin. ^ Fit a new thread lifter unit and lock into position. If thread or hair has wound around the bearing on the floorhead roller aRelease the bearing (with bayonet fitting) using a coin. bPress the bearing out, and remove. cTake out the roller. Remove any threads and hair, replace the roller and refit the bearing. Replacement parts are available from your Miele dealer or from the Miele Spare Parts Department (see back cover for contact details). Maintenance and care 32
  • 33. Warning: Always disconnect the vacuum cleaner from the electricity supply for maintenance work and for cleaning. Switch off at the wall socket and remove the plug. If using the ACCU NOVA powerbrush, switch this off as well. Vacuum cleaner and accessories External surfaces of the vacuum cleaner and of the accessories can be cleaned with a dry or a slightly damp cloth, or with a proprietary cleaner suitable for plastic. Do not use abrasive cleaners, glass cleaners or all-purpose cleaners. Because of their chemical composition they could cause serious damage to plastic components. Dust compartment The dust compartment can, if necessary, be cleaned using a dry duster, brush or, if available, a second vacuum cleaner to vacuum the dust out. Do not let the vacuum cleaner get wet. If moisture gets into the appliance, there is a risk of electric shock. E-Cloth A microfibre “E-Cloth” is available from the Miele UK Spare Parts Department which is suitable for cleaning surfaces such as stainless steel, glass, plastic and chrome without the use of chemicals. Cleaning and care 33
  • 34. The vacuum cleaner switches off automatically. On certain models, the overheating warning light also comes on. A temperature limiter switches the vacuum cleaner off automatically if it gets too hot. Some models also have a warning light , which comes on to indicate that it has overheated. This can occur if, for instance, large articles block the suction tube or when the filter bag is full or contains particles of fine dust. A heavily soiled exhaust or dust compartment filter can also be the cause of overheating. Switch the vacuum cleaner off immediately using the On/Off foot control s. Disconnect from the electricity supply. Switch off at the wall socket and remove the plug. After removing the cause, wait for approx. 20 - 30 minutes to allow the vacuum cleaner to cool down. It can then be switched on again. After sales service In the event of a fault that you cannot easily remedy, please contact – your Miele Dealer or – the Miele Customer Contact Centre (see back cover for address). Please note that telephone calls may be monitored and recorded to improve our service. Problem solving guide / After sales service 34
  • 35. Miele accessories including floorheads, filters and dustbags are available to order from your local Miele retailer, the Miele Spare Parts Department or via the internet on www.miele-shop.com. Important: please observe the flooring manufacturer's cleaning and care instructions. Certain models are supplied as standard with one or more of the following accessories: Electrobrushes Electrobrushes can only be used on models fitted with an electrobrush socket. If there is no Electrobrush socket, an ACCU NOVA rechargeable powerbrush can be used instead. Electrobrush SEB 216-3 The Electrobrush SEB 216-3 is particularly suitable for intensive vacuuming of carpets which are subject to hard wear. It is very effective at removing deep seated dirt and preventing areas of frequent use being trodden into a path. Electrobrush SEB 234 L The Electrobrush SEB 234 L is 60 mm wider than the SEB 216-3, and is more powerful, making it ideal for cleaning larger floor areas. It has the following additional features compared to the SEB 216-3: – Adjustable height settings – A headlamp to light up the area being vacuumed – A multi-function indicator lamp Optional accessories 35
  • 36. ACCU NOVA rechargeable powerbrush Unlike the SEB 216-3 and the SEB 234 L, this Electrobrush is battery operated, and can therefore be used on models which do not have an Electrobrush socket. ALLERGOTEC 3 floorhead The level of cleanliness of the floor shows in a colour "traffic light" display when vacuuming. The ALLERGOTEC floorhead is designed specially for the daily hygienic cleaning of all floor surfaces. Turbobrush STB 205-3 The Turbobrush is particularly suitable for vacuuming cut-pile carpeting, and is operated by the suction power of the vacuum cleaner. It has a rotating brush and is very effective at picking up thread, hairs and fluff. Optional accessories 36
  • 37. Hand-held Turbobrush The hand-held Turbobrush is intended for vacuuming upholstery, mattresses, car seats, carpeted stairs and other areas inaccessible to the standard Turbobrush. Universal brush For dusting books, shelves, etc. Radiator brush (Can only be used if attached to the crevice nozzle). For cleaning radiators, narrow shelves and crevices. Optional accessories 37
  • 38. SBB 235-3 Hard floor brush This brush is designed for use on hard flooring such as tiled or stone floors. Parquet 3 floor brush This brush has natural bristles and is designed for use on parquet floors and other surfaces which are susceptible to scratching such as laminate flooring. The parquet floor brush can be cleaned with the vacuum cleaner using the crevice nozzle if necessary. SBB 300-3 floor brush This brush is designed for use on hard flooring such as tiled or stone floors and has a swivel joint making it particularly good for accessing awkward corners and niches. SBB 400-3 floor brush The SBB 400-3 floor brush is 90 mm wider than the SBB 300-3 floor brush and has a swivel joint making it ideal for cleaning larger floor areas. Optional accessories 38
  • 39. Mattress nozzle For cleaning upholstery, mattresses, cushions, curtains, covers etc. Crevice nozzle (300 mm) For cleaning in folds, crevices or corners. Hygiene seal with active charcoal This prevents dust and odours from escaping when the suction hose is removed for transportation or storage. It can be secured to the suction hose during vacuuming. Optional accessories 39
  • 40. Micro Set This set is specially designed for cleaning small objects and difficult to reach areas (such as PC keyboards, stereo equipment, intricately carved furniture and ornaments, models etc). It consists of: – Micro-hose with combination nozzle (crevice nozzle and dusting brush) – Micro dusting brush – Micro crevice nozzle – Angled extension Micro-hose with combination nozzle The micro-hose with combination nozzle is ideal for cleaning awkward to reach places, such as vents and stereo equipment and also small intricate objects, such as model railways or cars. CarClean Set Pllus The CarClean Set Plus has been designed as an accessory for Miele cylinder vacuum cleaners for valeting the interior of cars. It consists of: – Hand-held Turbobrush – Micro-hose with combination nozzle (crevice nozzle and dusting brush) – Crevice nozzle (300 mm) These are supplied in a carry case together with a 3 m long suction hose with hose clip. Optional accessories 40
  • 41. Hose adapter For extending the suction hose by approx. 1.5 m. The adapter is fitted between the hand piece and the suction hose. Upholstery nozzle, 190 mm Extra wide upholstery nozzle, ideal for cleaning upholstery, mattresses and pillows quickly. Flexible crevice nozzle SFD 20, 560 mm This extra long, flexible crevice nozzle is excellent for cleaning difficutl to reach areas. Optional accessories 41
  • 42. Active Air Clean filter A special active charcoal filter, which removes odours coming from the dirt in the dustbag, keeping unpleasant smells to a minimum. The Active Air Clean filter replaces the filter fitted in the vacuum cleaner. There is no difference in the filtration levels between the Active Air Clean filter and the Super Air Clean filter. Active HEPA filter A combination filter which complies with the requirements of EN 1822 HEPA classification 12. It is able to filter out very fine particles and micro-organisms. The active charcoal layer absorbs odours from the dust collected in the dustbag. This filter is specially appropriate for allergy sufferers and users requiring exceptional standards of hygiene. The Active HEPA filter replaces the filter fitted in the vacuum cleaner. Do not use aroma capsules in your cleaner if you use either of these filters. The charcoal in the will absorb their aroma, rendering them ineffective. Filter grille The filter grille is required if you wish to fit a Super Air Clean filter instead of an Active Air Clean filter or an Active HEPA filter (see "Maintenance and care - Replacing one type of exhaust filter with another"). Optional accessories 42
  • 43. All electrical work should be carried out by a suitably qualified and competent person in strict accordance with current national and local safety regulations (BS 7671 in the UK). The voltage and connected load are given on the data plate located underneath the vacuum cleaner. Please ensure that these match the household mains supply. The fuse rating is quoted on the plug. The appliance is supplied with a cable and moulded plug ready for connection to a 230-240 V/50 Hz a.c. single phase supply. Non-rewireable plugs BS 1363 The fuse cover must be re-fitted when changing the fuse, and if the fuse cover is lost the plug must not be used until a suitable replacement is obtained. The colour of the correct replacement cover is that of the coloured insert in the base of the plug, or the colour that is embossed in words on the base of the plug, (as applicable to the design of plug fitted). Replacement fuses should be ASTA approved to BS1362 and have the correct rating. Replacement fuses and fuse covers may be purchased from your local electrical supplier. Electrical connection for the UK 43
  • 44. Alteration rights reserved / S 5000 / 0808 M.-Nr. 07 175 980 / 01