SlideShare a Scribd company logo
1 of 52
Download to read offline
Operating Instructions
Digital Video Camera
Model No. NV-GS90
Before use, please read these instructions completely.
LSQT1291 B
EB
LSQT1291_ENG.book 1 ページ 2008年3月5日 水曜日 午前9時41分
2
LSQT1291
Dear Customer,
We would like to take this opportunity to thank you for purchasing this Panasonic Movie Camera.
Please read these Operating Instructions carefully and keep them handy for future reference. Please
note that the actual controls and components, menu items, etc. of your Movie Camera may look
somewhat different from those shown in the illustrations in these Operating Instructions.
Caution for AC mains lead
For your safety, please read the following text
carefully.
This appliance is supplied with a moulded three
pin mains plug for your safety and
convenience.
A 5-ampere fuse is fitted in this plug.
Should the fuse need to be replaced please
ensure that the replacement fuse has a rating
of 5-ampere and that it is approved by ASTA or
BSI to BS1362.
Check for the ASTA mark Ï or the BSI mark
Ì on the body of the fuse.
If the plug contains a removable fuse cover you
must ensure that it is refitted when the fuse is
replaced.
If you lose the fuse cover the plug must not be
used until a replacement cover is obtained.
A replacement fuse cover can be purchased
from your local dealer.
If a new plug is to be fitted please observe the
wiring code as stated below.
If in any doubt please consult a qualified
electrician.
IMPORTANT
The wires in this mains lead are coloured in
accordance with the following code:
Blue: Neutral, Brown: Live.
As these colours may not correspond with the
coloured markings identifying the terminals in
your plug, proceed as follows:
The wire which is coloured Blue must be
connected to the terminal which is marked with
the letter N or coloured Black or Blue.
The wire which is coloured Brown must be
connected to the terminal which is marked with
the letter L or coloured Brown or Red.
WARNING: DO NOT CONNECT EITHER
WIRE TO THE EARTH TERMINAL WHICH IS
MARKED WITH THE LETTER E, BY THE
EARTH SYMBOL Ó OR COLOURED
GREEN OR GREEN/YELLOW.
THIS PLUG IS NOT WATERPROOF—KEEP
DRY.
Before use
Remove the connector cover.
How to replace the fuse
The location of the fuse differ according to the
type of AC mains plug (figures A and B).
Confirm the AC mains plug fitted and follow the
instructions below.
Illustrations may differ from actual AC mains plug.
1. Open the fuse cover with a screwdriver.
2. Replace the fuse and close or attach the
fuse cover.
CAUTION!
IF THE FITTED MOULDED PLUG IS
UNSUITABLE FOR THE SOCKET OUTLET IN
YOUR HOME THEN THE FUSE SHOULD BE
REMOVED AND THE PLUG CUT OFF AND
DISPOSED OF SAFELY.
THERE IS A DANGER OF SEVERE
ELECTRICAL SHOCK IF THE CUT OFF PLUG
IS INSERTED INTO ANY 13-AMPERE
SOCKET.
Fuse cover
Figure A Figure B
Figure A Figure B
Fuse
(5 ampere)
Fuse
(5 ampere)
LSQT1291_ENG.book 2 ページ 2008年3月5日 水曜日 午前9時41分
3
LSQT1291
Information for Your Safety
Operating instructions
≥All other company and product names in the
operating instructions are trademarks of their
respective corporations.
Pages for reference
Pages for reference are indicated by dashes
either side of a number, for example: -00-
The menu operation flow is indicated by >> in the
description.
Use only the recommended accessories.
≥Do not use any other AV cables except the
supplied one.
≥When you use the cable which are sold
separately, please make sure to use the one
whose length is less than 3 meters.
ª Carefully observe copyright laws.
Recording of pre-recorded tapes or discs or
other published or broadcast material for
purposes other than your own private use
may infringe copyright laws. Even for the
purpose of private use, recording of certain
material may be restricted.
≥U.S. Patent Nos. 6,836,549; 6,381,747;
7,050,698; 6,516,132; and 5,583,936.
≥This product incorporates copyright protection
technology that is protected by U.S. patents and
other intellectual property rights. Use of this
copyright protection technology must be
authorized by Macrovision, and is intended for
home and other limited viewing uses only
unless otherwise authorized by Macrovision.
Reverse engineering or disassembly is
prohibited.
WARNING:
TO REDUCE THE RISK OF FIRE, ELECTRIC
SHOCK OR PRODUCT DAMAGE,
≥DO NOT EXPOSE THIS APPARATUS TO RAIN,
MOISTURE, DRIPPING OR SPLASHING AND
THAT NO OBJECTS FILLED WITH LIQUIDS,
SUCH AS VASES, SHALL BE PLACED ON THE
APPARATUS.
≥USE ONLY THE RECOMMENDED
ACCESSORIES.
≥DO NOT REMOVE THE COVER (OR BACK);
THERE ARE NO USER SERVICEABLE PARTS
INSIDE. REFER SERVICING TO QUALIFIED
SERVICE PERSONNEL.
CAUTION!
≥DO NOT INSTALL OR PLACE THIS UNIT IN A
BOOKCASE, BUILT-IN CABINET OR IN
ANOTHER CONFINED SPACE. ENSURE THE
UNIT IS WELL VENTILATED. TO PREVENT RISK
OF ELECTRIC SHOCK OR FIRE HAZARD DUE
TO OVERHEATING, ENSURE THAT CURTAINS
AND ANY OTHER MATERIALS DO NOT
OBSTRUCT THE VENTILATION VENTS.
≥DO NOT OBSTRUCT THE UNIT’S VENTILATION
OPENINGS WITH NEWSPAPERS,
TABLECLOTHS, CURTAINS, AND SIMILAR
ITEMS.
≥DO NOT PLACE SOURCES OF NAKED FLAMES,
SUCH AS LIGHTED CANDLES, ON THE UNIT.
≥DISPOSE OF BATTERIES IN AN
ENVIRONMENTALLY FRIENDLY MANNER.
The socket outlet shall be installed near the
equipment and easily accessible.
The mains plug of the power supply cord shall
remain readily operable.
To completely disconnect this apparatus from
the AC Mains, disconnect the power supply
cord plug from AC receptacle.
Product Identification Marking is located on the
bottom of units.
LSQT1291_ENG.book 3 ページ 2008年3月5日 水曜日 午前9時41分
4
LSQT1291
Information on Disposal for Users of
Waste Electrical & Electronic Equipment
(private households)
This symbol on the
products and/or
accompanying
documents means
that used electrical
and electronic
products should not
be mixed with
general household
waste.
For proper
treatment, recovery
and recycling, please take these products to
designated collection points, where they will
be accepted on a free of charge basis.
Alternatively, in some countries you may be
able to return your products to your local
retailer upon the purchase of an equivalent
new product.
Disposing of this product correctly will help to
save valuable resources and prevent any
potential negative effects on human health
and the environment which could otherwise
arise from inappropriate waste handling.
Please contact your local authority for further
details of your nearest designated collection
point.
Penalties may be applicable for incorrect
disposal of this waste, in accordance with
national legislation.
For business users in the European
Union
If you wish to discard electrical and
electronic equipment, please contact your
dealer or supplier for further information.
Information on Disposal in other
Countries outside the European Union
This symbol is only valid in the European
Union.
If you wish to discard this product, please
contact your local authorities or dealer and
ask for the correct method of disposal.
LSQT1291_ENG.book 4 ページ 2008年3月5日 水曜日 午前9時41分
5
LSQT1291
Contents
Caution for AC mains lead ....................................2
Information for Your Safety...................................3
Before using
Accessories...........................................................6
Optional.................................................................6
Parts identification and handling...........................7
The grip belt..........................................................8
Using the lens cover .............................................9
Power supply ........................................................9
Charging time and recordable time.....................11
Selecting a mode
(Turning the camera on/off)..............................11
Setting date and time..........................................13
Using the LCD monitor........................................13
Using the viewfinder............................................14
Quick start...........................................................14
Inserting/removing a cassette .............................15
How to use the joystick .......................................16
Help mode...........................................................17
Switching the language.......................................18
Using the menu screen.......................................18
Adjusting LCD monitor/viewfinder.......................19
Recording with the built-in LED video light .........19
Record mode
Check before recording.......................................20
Recording on a tape............................................21
Recording check .................................................21
Blank search function..........................................22
Recording a still picture on a tape
(Photoshot).......................................................22
Zoom in/out function ...........................................23
Recording yourself ..............................................24
Backlight compensation function ........................24
Colour night view function...................................25
Soft skin mode ....................................................25
Fade in/fade out function ....................................26
Wind noise reduction function.............................26
Wide/4:3 function ................................................27
Image stabilizer function .....................................27
Guideline function ...............................................27
Auto slow shutter mode ......................................28
Recording in various situations
(Scene mode)...................................................28
Recording in natural colours
(White balance) ................................................29
Manual focus adjustment ....................................30
Manual shutter speed/aperture adjustment ........31
Playback mode
Playing back tape................................................32
Frame-by-frame playback ...................................33
Playback on TV...................................................33
Edit mode
Copying onto a DVD recorder or a VCR
(Dubbing)..........................................................34
Using the DV Cable for Recording
(Digital Dubbing)...............................................35
Using the movie camera as a
Web Camera ....................................................35
Using on Macintosh.............................................36
Notes...................................................................37
Menu
Menu list..............................................................38
Menus related to taking pictures .........................39
Menus related to playback ..................................39
Other menus .......................................................39
Others
Indications...........................................................40
Warning/alarm indications...................................41
Functions cannot be used simultaneously ..........42
Before requesting repair
(Problems and solutions)..................................42
Cautions for Use .................................................45
Explanation of terms ...........................................49
Specifications
Specifications......................................................50
Index ...................................................................51
LSQT1291_ENG.book 5 ページ 2008年3月5日 水曜日 午前9時41分
Before using
6
LSQT1291
Before using
ª Sales and Support Information
Customer Care Centre
≥For customers within the UK: 0844 844 3852
≥For customers within the Republic of lreland:
01 289 8333
≥Visit our website for product information
≥E-mail: customer.care@panasonic.co.uk
Technical Support for AV Software
≥For customers within the UK: 0844 844 3869
≥For customers within the Republic of lreland:
01 289 8333
Direct Sales at Panasonic UK
≥Order accessory and consumable items for your
product with ease and confidence by phoning
our Customer Care Centre Monday–Thursday
9.00 a.m.–5.30 p.m., Friday 9.30 a.m.– 5.30 p.m.
(Excluding public holidays)
≥Or go on line through our Internet Accessory
ordering application at www.panasonic.co.uk.
≥Most major credit and debit cards accepted.
≥All enquiries transactions and distribution
facilities are provided directly by Panasonic UK
Ltd.
≥It couldn’t be simpler!
≥Also available through our Internet is direct
shopping for a wide range of finished products,
take a browse on our website for further details.
Interested in purchasing an extended guarantee?
Please call 0870 240 6284 or visit our website
www.panasonic.co.uk/guarantee.
Accessories
The followings are the accessories supplied with
this product.
1) AC adaptor, DC input lead, AC mains lead
-10-
2) Battery pack -9-
≥The supplied battery pack is not available as
spare part, see the list of optional batteries
below for alternative battery.
3) AV cable -33-, -34-
Optional
1) Battery pack (lithium/VW-VBG130/1320 mAh)
2) Battery pack (lithium/VW-VBG260/2640 mAh)
3) Battery pack (lithium/VW-VBG6*/5800 mAh)
4) Battery pack holder kit (VW-VH04)
5) Shoe adaptor (VW-SK12E)
6) Video DC light (VW-LDC102E)
7) Light bulb for video DC light (VZ-LL10E)
8) Tripod (VW-CT45E)
9) DV cable (VW-CD1E)
≥Some optional accessories may not be
available in some countries.
* The battery pack holder kit VW-VH04 (optional)
is necessary.
1)
2) 3)
K2CT3CA00004
K2KC4CB00022
or
K2KC4CB00020
LSSB0017
VSK0698
K2GJ2DC00015
or
K2GJ2DC00011
LSQT1291_ENG.book 6 ページ 2008年3月5日 水曜日 午前9時41分
Before using
7
LSQT1291
Parts identification and handling
ª Camera
(1) White balance sensor -30-
(2) Lens cover open/close switch [ ] -9-
(3) Grip belt -8-
(4) Lens
(5) Lens cover
(6) Built-in LED video light -19-
(7) Microphone (built-in, stereo) -23-, -26-
(8) Audio-video output terminal [A/V] -33-, -34-
≥Use the supplied AV cable only, otherwise
audio may not be played back normally.
(9) Viewfinder -14-, -48-
(10) Battery holder -10-
(11) DC input terminal [DC/C.C.IN] -10-
(12) Battery release lever [BATTERY] -10-
(13) Status indicator -11-
(14) Mode dial -11-
(15) Optical image stabilizer button [O.I.S.] -27-
(16) Menu button [MENU] -18-
(17) Joystick -16-
(18) Recording start/stop button -21-
(4)
(3)
(7)
(1)
(6)
(2)
(5)
/
(8)
Due to limitations in LCD production
technology, there may be some tiny bright or
dark spots on the viewfinder screen.
However, this is not a malfunction and does
not affect the recorded picture.
BATTERY
(9)
(10)
(11)
(12)
(13)
(14)
(15)
(16)
(17)
(18)
LSQT1291_ENG.book 7 ページ 2008年3月5日 水曜日 午前9時41分
Before using
8
LSQT1291
(19) LCD monitor -13-, -48-
(20) LCD monitor open part -13-
(21) Speaker -32-
(22) Mode select buttons [AUTO]/
[MANUAL AF/MF] -20-, -28-, -29-, -30-, -31-
(23) Reset button [RESET] -41-, -44-
(24) USB terminal [ ] -35-
(25) Light button [LIGHT] -19-
(26) DV output terminal [DV] -34-, -35-
(27) Cassette holder -15-
(28) Cassette eject lever [OPEN/EJECT] -15-
(29) Cassette cover -15-
(30) Zoom lever [W/T] -23-
Volume lever [sVOLr] -32-
(31) Photoshot button [ ] -22-
(32) Eyepiece corrector knob -14-
(33) Tripod receptacle
This is a hole for attaching the camera to optional
tripod. (Please carefully read the operating
instructions for how to attach the tripod to the
camera.)
The grip belt
Adjust the belt length so it fits your hand.
1 Adjust the belt length and the pad position.
1 Flip the belt.
2 Adjust the length.
3 Fix the belt.
Due to limitations in LCD production
technology, there may be some tiny bright or
dark spots on the LCD monitor screen.
However, this is not a malfunction and does
not affect the recorded picture.
(19)
(20)
(23)
(24)
(25)
(26)
(21)(22)
(27)
(28)
(29)
(30)
(31)
(32)
(33)
LSQT1291_ENG.book 8 ページ 2008年3月5日 水曜日 午前9時41分
Before using
9
LSQT1291
Using the lens cover
For the lens protection, be sure to close the lens
cover when not in use.
1 Slide the lens cover open/close switch to
[ ].
Power supply
ª Charging the battery
When this product is purchased, the battery is not
charged. Charge the battery before using this product.
≥Battery charging time (-11-)
≥We recommend using Panasonic batteries. (-6-)
≥If you use other batteries, we cannot guarantee
the quality of this product.
≥If the DC input lead is connected to the AC
adaptor, then the battery will not get charged.
Remove the DC input lead from the AC adaptor.
1 Connect the AC mains lead to the AC
adaptor and the AC mains socket.
2 Put the battery on the battery mount by
aligning the mark, and then securely plug it in.
ª Charging lamp
Lights up: Charging
Goes off: Charging completed
Flashing: When the battery temperature is
excessively high or low, the lamp
flashes and the charging time will be
longer than normal. Remove dirt,
foreign objects or dust on the
terminals of the battery or the AC
adaptor. If the lamp is still flashing,
something may be wrong with the
battery or AC adaptor.
Contact your dealer.
It has been found that counterfeit battery packs
which look very similar to the genuine product
are made available to purchase in some
markets. Some of these battery packs are not
adequately protected with internal protection to
meet the requirements of appropriate safety
standards. There is a possibility that these
battery packs may lead to fire or explosion.
Please be advised that we are not liable for any
accident or failure occurring as a result of use of
a counterfeit battery pack. To ensure that safe
products are used we would recommend that a
genuine Panasonic battery pack is used.
≥Be aware that many batteries sold at
extremely cheap prices or in situations where
it is difficult to verify the actual products
before purchase have proven to be
counterfeit.
1
2
LSQT1291_ENG.book 9 ページ 2008年3月5日 水曜日 午前9時41分
Before using
10
LSQT1291
ª Connecting to the AC outlet
The unit is in the standby condition when the AC
adaptor is connected. The primary circuit is
always “live” as long as the AC adaptor is
connected to an electrical outlet.
1 Connect the AC mains lead to the AC
adaptor and the AC mains socket.
2 Connect the DC input lead to the AC
adaptor.
3 Connect the DC input lead to this product.
≥Do not use the power cord for other
equipment since the power cord is exclusively
designed for the movie camera. Or do not use
the power cord of other equipment for the
movie camera.
ª Fitting the battery
Push the battery against the battery holder and
slide it until it clicks.
ª Removing the battery
While sliding the [BATTERY] lever, slide the
battery to remove it.
≥Hold the battery with your hand so it does not
fall.
≥Before removing the battery, be sure to set the
Mode dial to OFF and check that the status
indicator is off.
≥Do not heat or expose to flame.
≥Do not leave a battery pack in an automobile
exposed to direct sunlight for a long period of
time with doors and windows closed.
Notice about the rechargeable battery
The battery is designated recyclable.
Please follow your local recycling regulations.
1
2
3
CAUTION
Danger of explosion if battery is
incorrectly replaced. Replace only with
the same or equivalent type
recommended by the manufacturer.
Dispose of used batteries according to
the manufacturer’s instructions.
Warning
Risk of fire, explosion and burns. Do not
disassemble, heat above 60 xC or
incinerate.
BATTERY
LSQT1291_ENG.book 10 ページ 2008年3月5日 水曜日 午前9時41分
Before using
11
LSQT1291
Charging time and recordable time
The times shown in the tables below are for when
the temperature is 25 oC and the humidity is 60%.
If the temperature is higher or lower than 25 oC,
the charging time will become longer.
A Charging time
B Maximum continuously recordable time
C Actual recordable time
(The actual recordable time refers to the
recordable time on a tape when repeatedly
starting/stopping recording, turning the unit on/off,
moving the zoom lever, etc.)
“1 h 40 min” indicates 1 hour 40 minutes.
≥The charging time and recordable time shown in
the table are approximations. The times indicate
the recordable times when the viewfinder is
used. The times in parentheses indicate the
recordable times when the LCD monitor is used.
≥We recommend the Battery Pack VW-VBG130,
VW-VBG260 and VW-VBG6 for long time
recording (2 hours or more for continuous
recording, 1 hour or more for actual recording).
≥The actual time may become shorter than this.
The recordable time shown in the table are
approximations. The recordable time will
become shorter in the following cases:
≥When you use both the viewfinder and the
LCD monitor simultaneously while rotating
the LCD monitor frontward to record yourself
etc.
≥The batteries heat up after use or charging. The
main unit of the movie camera being used will
also heat up. This is normal.
≥Along with the reduction of the battery capacity,
the display will change: # #
# # . If the battery
discharges, then ( ) will flash.
Selecting a mode
(Turning the camera on/off)
When recording, open the lens cover before
turning the unit on. (-9-) If the unit is turned on with
the lens cover closed, the automatic white
balance adjustment (-49-) may not function
properly.
Rotate the mode dial to select the desired mode
or OFF.
≥Rotate the mode dial slowly.
ª How to turn on the power
1 While pressing the lock release button, set
the mode dial to select the desired mode
≥Rotate the mode dial while at the same time
pressing in the lock release button A if
changing from OFF to another mode.
≥Align with the mark B.
≥The status indicator lights red and the power
turns on.
Supplied
battery
(7.2 V/
640 mAh)
A 1 h 40 min
B 1 h 45 min
(1 h 30 min)
C 55 min
(45 min)
VW-VBG130
(7.2 V/
1320 mAh)
A 2 h 35 min
B 3 h
(2 h 40 min)
C 1 h 35 min
(1 h 20 min)
VW-VBG260
(7.2 V/
2640 mAh)
A 4 h 40 min
B 6 h 5 min
(5 h 20 min)
C 3 h 10 min
(2 h 45 min)
VW-VBG6
(7.2 V/
5800 mAh)
A 9 h 25 min
B 14 h 5 min
(12 h 15 min)
C 7 h 25 min
(6 h 25 min)
A
B
LSQT1291_ENG.book 11 ページ 2008年3月5日 水曜日 午前9時41分
Before using
12
LSQT1291
ª How to turn off the power
1 Set the mode dial to OFF.
≥The status indicator goes off when the power
turns off.
ª How to turn the power on and off with
the LCD monitor/viewfinder
When the mode dial is set to Tape Recording
Mode, the power can be turned on and off with
the LCD monitor and the viewfinder.
1 Open the LCD monitor out or extend the
viewfinder to turn on the power. (-13-, -14-)
≥The LCD monitor or the viewfinder will be
activated.
2 Close the LCD monitor and retract the
viewfinder to turn off the power.
≥The power will not turn off unless the LCD
monitor is closed and the viewfinder is
retracted.
≥The status indicator automatically goes off
and the power turns off. (If quick start is set to
[ON] (-14-), the unit goes into quick start
standby mode and the status indicator lights
green.)
≥The power does not turn off even if the
LCD monitor is closed and the viewfinder
is retracted while recording on a tape.
3 Open the LCD monitor or extend the
viewfinder to turn the power on and use the
movie camera again.
≥The status indicator lights red and the power
turns on.
TAPE RECORDING MODE
Use this when you record the
image on a tape.
TAPE PLAYBACK MODE
Use this to play back a tape.
OFF The power turns off.
Set the mode dial to OFF when this unit is not
being used.
LSQT1291_ENG.book 12 ページ 2008年3月5日 水曜日 午前9時41分
Before using
13
LSQT1291
Setting date and time
When the movie camera is turned on for the first
time, [SET DATE AND TIME] will appear.
≥Select [YES] and press the centre of the
joystick. Do steps 2 and 3 below to set the date/
time.
If the screen shows the incorrect date/time, then
adjust it.
≥Set to Tape Recording Mode.
1 Set [BASIC] >> [CLOCK SET] >> [YES]. (-18-)
2 Move the joystick left or right in order to
select the item to be set. Then move the
joystick up or down to set the desired value.
≥The year will change as follows:
2000, 2001, ..., 2089, 2000, ...
≥The 24-hour clock is used.
3 Press the joystick to determine the setting.
≥The clock function starts at [00] seconds.
ª About date/time
≥The date and time function are driven by a
built-in lithium battery.
≥Make sure to check the time before recording
because the built-in clock is not very accurate.
ª Recharging the built-in lithium battery
≥If [0] or [--] appears when the camera is
turning on, then the built-in lithium battery has
run down. Use the steps below to charge the
battery. When turn on the power for the first time
after charging, [SET DATE AND TIME] will
appear. Select [YES] and set the date and time.
Connect the AC adaptor to the camera or attach
the battery to the camera, and the built-in lithium
battery will be recharged. Leave the camera as
is for approx. 24 hours, and the battery will drive
the date and time for approx. 6 months. (The
battery is still being recharged even if the mode
dial is set to OFF.)
Using the LCD monitor
You can record the image while viewing it on the
opened LCD monitor.
1 Put a finger on the LCD monitor open part
and pull the LCD monitor out in the
direction of the arrow.
≥It can open up to 90o.
2 Adjust the angle of the LCD monitor
according to your preference.
≥It can rotate up to 180o 1 towards the lens or
90o 2 towards the viewfinder.
≥The brightness and colour level of the LCD
monitor can be adjusted from the menu.
≥If it is forcibly opened or rotated, the camera
may be damaged or fail.
≥If the LCD monitor is rotated by 180o towards
the lens and the viewfinder is extended (when
recording yourself), the LCD monitor and the
viewfinder simultaneously light.
WARNING
THE LITHIUM BATTERY IN THIS
EQUIPMENT MUST ONLY BE REPLACED
BY QUALIFIED PERSONNEL. WHEN
NECESSARY, CONTACT YOUR LOCAL
PANASONIC SUPPLIER.
LSQT1291_ENG.book 13 ページ 2008年3月5日 水曜日 午前9時41分
Before using
14
LSQT1291
Using the viewfinder
ª Extending the viewfinder
1 Pull out the viewfinder and extend it by
pinching the extension knob.
≥The viewfinder will be activated. (If the LCD
monitor is opened, the viewfinder will be
deactivated.)
ª Adjusting the field of view
1 Adjust the focus by sliding the eyepiece
corrector knob.
≥You can adjust the brightness of the viewfinder
from the menu.
Quick start
When quick start is on the battery power is still
being consumed, even when the LCD monitor
and the viewfinder are closed.
The camera will resume recording/pause mode
about 1.7 seconds after the LCD monitor or the
viewfinder is reopened.
≥Please note in quick start mode approximately
half the pause recording power is being
consumed. Using quick start mode will reduce
the battery recording/playback time.
≥This is only activated in the following cases.
≥While using the battery
A tape is inserted, while the Tape Recording
Mode is set.
≥While using the AC adaptor
Quick Start can be used even if a tape is not
inserted.
≥Set to Tape Recording Mode.
1 Set [SETUP] >> [QUICK START] >> [ON].
(-18-)
2 Close the LCD monitor and retract the
viewfinder while the mode dial is set to
Tape Recording Mode.
≥The status indicator lights green and the unit
goes into quick start standby mode.
≥The movie camera will not go into quick start
standby mode unless the LCD monitor is
closed and the viewfinder is retracted.
3 Open the LCD monitor or extend the
viewfinder.
≥The status indicator lights red and the camera
is put into recording pause approx.
1.7 seconds after it is turned on.
12:34:56
12:34:56
12:34:56
1. 1. 2008
1. 1. 2008
1. 1. 2008
12:34:56
1. 1. 2008
LSQT1291_ENG.book 14 ページ 2008年3月5日 水曜日 午前9時41分
Before using
15
LSQT1291
ª To cancel Quick Start
1 Set [SETUP] >> [QUICK START] >> [OFF].
(-18-)
≥The status indicator goes off and the power
turns off if the mode dial is set to OFF while the
unit is in quick start standby mode.
≥If the standby continues for approx. 30 minutes,
then the status indicator will go off and the
camera will be completely turned off.
≥In the following cases, quick start is cancelled
and the power turns off.
≥When the Mode dial is moved.
≥When the battery or AC adaptor is removed.
≥When the tape is removed while using the
battery in Tape Recording Mode.
≥When the movie camera is quick-started with
the white balance on automatic, it may take
some time until the white balance is adjusted if
the scene being recorded has a light source
different from the scene last recorded. (When
the colour night view function is used, however,
the white balance of the scene last recorded is
retained.)
≥If the power is turned on in quick start standby
mode, the zoom magnification becomes 2k and
the picture size may differ from what it was
before quick start standby mode.
≥If [POWER SAVE] (-39-) is set to [5 MINUTES]
and the unit automatically goes into quick start
standby mode, close the LCD monitor and
retract the viewfinder and then open the LCD
monitor or extend the viewfinder again.
Inserting/removing a cassette
1 Fit the AC adaptor or the battery and turn on
the power.
2 Slide the [OPEN/EJECT] lever and open the
cassette cover.
≥When the cover is fully opened, the cassette
holder will come out.
3 After the cassette holder is opened, insert/
remove the cassette.
≥When inserting a cassette, orient it as shown
in the figure, and then securely insert it as far
as it goes.
≥When removing, pull it straight out.
4 Push the [PUSH] mark 1 in order to close
the cassette holder.
≥The cassette holder is housed.
5 Only after the cassette holder is completely
housed, close the cassette cover tightly.
≥When inserting a previously recorded cassette,
use the blank search function to find the position
where you want to continue recording. If you are
overwriting a previously recorded cassette, be
sure to find the position where you want to
continue recording.
≥When closing the cassette cover, do not get
anything, such as a cable, caught in the cover.
Caution:
Take care not to trap your fingers under the
cassette holder when closing it.
OPEN/
EJECT
1
PUSH
LSQT1291_ENG.book 15 ページ 2008年3月5日 水曜日 午前9時41分
Before using
16
LSQT1291
≥After use, be sure to rewind the cassette
completely, remove it and put it in a case. Store
the case in an upright position. (-48-)
≥If the indicator of the condensation does not
display on the LCD monitor and/or the
viewfinder and you notice condensation on the
lens or the main unit, do not open the cassette
cover otherwise condensation may be formed
on the heads or the cassette tape. (-45-)
ª When the cassette holder does not
come out
≥Close the cassette cover completely, and then
open it again completely.
≥Check if the battery has run down.
≥Check if the cassette compartment cover is in
contact with grip belt as shown below. If so, be
sure the grip belt stays clear of the cover when
opening.
ª When the cassette holder cannot be
housed
≥Set the mode dial to OFF, then to another mode
again.
≥Check if the battery has run down.
ª Accidental erasure prevention
If the accidental erasure prevention slider 1 of a
cassette is opened (slide in the direction of the
[SAVE] arrow), the cassette cannot be recorded.
When recording, close the accidental erasure
prevention slider of the cassette (slide in the
direction of the [REC] arrow).
How to use the joystick
ª Basic joystick operations
Operations on the menu screen
Move the joystick up, down, left or right to select
an item, and then push in the centre to set it.
ª Joystick and screen display
Push the centre of the joystick, and icons will be
displayed on the screen. Each time the joystick is
moved down, the indication changes.
(In the Tape playback mode, the icons will be
automatically displayed on the screen.)
1) Tape Recording Mode
(When the [AUTO] button is pressed to
set to auto mode)
≥1 is displayed while recording on a tape.
R E C
SAVE
1
1 Select by moving up.
2 Select by moving down.
3 Select by moving left.
4 Select by moving right.
5 Determine by pushing the centre.
1/3
2 Fade -26-
3 Backlight compensation -24-
1 Help mode -17-
2/3
2 Soft skin mode -25-
3 Colour night view -25-
3/3
2 Recording check -21-
1 Blank search -22-
3
2
4
1
5
1
LSQT1291_ENG.book 16 ページ 2008年3月5日 水曜日 午前9時41分
Before using
17
LSQT1291
2) Tape Recording Mode
(When the [MANUAL AF/MF] button is
pressed to set to manual mode)
≥1 is displayed while recording on a tape.
≥2 is displayed only When the [MANUAL AF/
MF] button is pressed again to set to manual
focus mode.
3) Tape Playback Mode
Help mode
Select an icon for an explanation of the function.
≥Set to Tape Recording Mode.
1 Press the joystick to display the icon during
the recording pause. Move the joystick
down until icon 1 appears.
2 Move the joystick right to select the Help
mode icon [ ].
3 Move the joystick up, left, or right to select
the desired icon.
≥An explanation of the selected icon is
displayed on the screen.
≥Each time the joystick is moved down, the
indication changes.
ª To exit the Help mode
Select [EXIT] or press the [MENU] button.
≥When the Help mode is used, it is not possible
to record or set the functions.
4/4
2 Iris or gain value -31-
3 White balance -29-
1 Shutter speed -31-
5/5
2
Manual focus adjustment -30-
1
3 Playback/pause -32-
4 Stop -32-
2 Rewind (review playback) -32-
1 Fast forward (cue playback) -32-
2
1
2
1
LSQT1291_ENG.book 17 ページ 2008年3月5日 水曜日 午前9時41分
Before using
18
LSQT1291
Switching the language
You can switch the language on the screen
display or the menu screen.
1 Set [LANGUAGE] >> select the desired
language.
Using the menu screen
For each individual menu, please refer to -38-.
1 Press the [MENU] button.
≥The menu corresponding to the mode
selected by the mode dial is displayed.
≥Do not switch the mode dial when the menu is
displayed.
2 Move the joystick up or down in order to
select the top menu.
3 Move the joystick right or press it to set the
selection.
4 Move the joystick up or down in order to
select the sub-menu.
5 Move the joystick right or press it to set the
selection.
6 Move the joystick up or down in order to
select the item to be set.
7 Press the joystick to determine the setting.
ª To exit the menu screen
Press the [MENU] button.
ª To get back to the previous screen
Move the joystick left.
ª About the menu setting
≥The menu is not displayed while recording on a
tape. Also, you cannot record on a tape while
the menu is displayed.
MENU
LSQT1291_ENG.book 18 ページ 2008年3月5日 水曜日 午前9時41分
Before using
19
LSQT1291
Adjusting LCD monitor/viewfinder
ª Adjusting the brightness and colour
level
1 Set [SETUP] >> [LCD SET] or [EVF SET] >>
[YES].
2 Move the joystick up or down in order to
select the item to be adjusted.
[LCD SET]
: Brightness of the LCD monitor
: Colour level of the LCD monitor
[EVF SET]
: Brightness of the viewfinder
3 Move the joystick left or right to move the
bar indication representing the brightness.
4 Press the [MENU] button or the joystick to
complete the settings.
≥When the LCD monitor is rotated by 180°
towards the lens, the brightness of the LCD
monitor cannot be adjusted.
≥To adjust the brightness of the viewfinder, close
the LCD monitor and extend the viewfinder to
activate it.
≥These settings will not affect the images actually
recorded.
Recording with the built-in LED
video light
1 Press the [LIGHT] button.
≥The [ ] indication appears on the LCD
monitor.
ª To cancel the built-in LED video light
Press the [LIGHT] button again.
≥The subject should be within 1.5 metres of the
movie camera.
≥Using the LED video light reduces battery time.
≥Set the LED video light to off when not in use.
≥Do not look directly into the light.
≥Using the colour night view function at the same
time will make conditions even brighter.
≥The LED video light enables simply lightening
the images taken in a dimly-lit place. We also
recommend using it in a bright place to obtain
high quality images.
LIGHT
LSQT1291_ENG.book 19 ページ 2008年3月5日 水曜日 午前9時41分
Record mode
20
LSQT1291
Record mode
Check before recording
Check the following before recording important
events such as weddings or when the movie
camera has not been used for a long time.
Conduct a test recording to make sure that the
image recording and the audio recording work
properly.
ª Basic camera holding
1) Hold the camera with both hands.
2) Run your hand through the grip belt.
3) Do not cover the microphones or sensors with
your hands.
4) Keep your arms near your body.
5) Slightly open your legs.
≥When you are in the open air, record pictures
with the sunlight as far in the background as
possible. If the subject is backlit, it will become
dark in the recording.
ª Check points
≥Grip belt adjustment (-8-)
≥Open the LCD monitor or extend the viewfinder
(Recording cannot start while the LCD monitor
is closed and the viewfinder is retracted. Even if
the LCD monitor and viewfinder are closed
during recording, the power will not turn off until
recording stops.)
≥Adjustment of LCD monitor/viewfinder (-19-)
≥Power supply (-9-)
≥Insert a cassette (-15-)
≥Setting date/time (-13-)
≥Setting SP/LP mode
ª About auto mode
≥Press the [AUTO] button and the colour balance
(white balance) and focusing will be adjusted
automatically.
(The [ ] indication appears on the screen.)
≥Auto white balance: -49-
≥Auto focusing: -49-
≥Depending on the brightness of the subject etc.,
the aperature and shutter speed are
automatically adjusted for an optimum
brightness. (The shutter speed is adjusted to a
maximum of 1/250.)
≥Colour balance and focus may not be adjusted
depending on light sources or scenes. If so,
manually adjust the white balance and focus.
≥Scene mode setting (-28-)
≥White balance setting (-29-)
≥Shutter speed setting (-31-)
≥Iris/gain value setting (-31-)
≥Focus setting (-30-)
ª Recording mode
You can switch the tape recording mode.
≥Set to Tape Recording Mode.
1 Set [BASIC] >> [REC SPEED] >> [SP] or
[LP].
If the LP mode is selected, the recording time will
be 1.5 times the SP mode, but some functions will
be disabled.
≥We recommend using the SP mode for
important recording.
≥In order to fully exhibit the performances of the
LP mode, we recommend using Panasonic
cassettes marked LP mode.
≥In the LP mode, the picture quality will not be
degraded in comparison with the SP mode, but
mosaic noise may appear on the playback
image or some functions may be disabled.
≥Playback on other digital video equipment
or on digital video equipment without the LP
mode.
≥Playback of the image on other digital video
equipment recorded in the LP mode.
≥Frame-by-frame playback.
1)
4)
5)
2)
3)
AUTO
MANUAL
AF/MF
LSQT1291_ENG.book 20 ページ 2008年3月5日 水曜日 午前9時41分
Record mode
21
LSQT1291
Recording on a tape
When recording, open the lens cover before
turning the unit on. (-9-) If the unit is turned on
with the lens cover closed, the automatic
white balance adjustment (-49-) may not
function properly.
When this unit is purchased, the aspect ratio is
set to [16:9] for recording images compatible with
a wide-screen TV. To make this unit compatible
with regular TVs (4:3), change the
[REC ASPECT] setting before recording the
images (-27-) or change the [TV ASPECT] setting
when watching them on the connected TV (-33-).
≥Set to Tape Recording Mode.
1 Press the recording start/stop button to
start recording.
2 Press the recording start/stop button again
to pause recording.
≥For the recording time on a tape, refer to -11-.
≥Carry out a recording check to verify that the
image is recorded properly.
≥In order to find the unrecorded section, carry out
the blank search (-22-).
ª On-screen display in the tape
recording mode
1) Recording time elapse
2) Remaining tape indication
ª Concerning the remaining tape time
indication on the screen
≥The remaining tape time is indicated in minutes.
(When it reaches less than 3 minutes, the
indication starts flashing.)
≥During a 15 seconds or shorter recording, the
remaining tape time indication may not be
displayed or the remaining tape time may not be
displayed correctly.
≥In some cases, the remaining tape time
indication may display remaining tape time that
is 2 to 3 minutes shorter than the actual
remaining tape time.
Recording check
The last image recorded is played back for 2 to
3 seconds. After checking, the camera will be set
to a recording pause.
≥Set to Tape Recording Mode.
1 Press the joystick to display the icon during
the recording pause. Move the joystick
down until icon 1 appears.
2 Move the joystick left to select the
recording check icon [ ].
≥The [RECORDING CHECK STARTED]
indication appears on the screen of the movie
camera.
;
;
0h00m10s00f
0h00m10s00f
0h00m10s00f
1)
R 0:30
R 0:30
R 0:30 2)
R 0:30
R 0:30
R 0:30
0h00m10s00f
0h00m10s00f
0h00m10s00f
1
LSQT1291_ENG.book 21 ページ 2008年3月5日 水曜日 午前9時41分
Record mode
22
LSQT1291
Blank search function
Searches for the last part of the image recorded
(unused part of the tape). After the search is
finished, the blank search function is cancelled
and the camera is put into recording pause.
≥Set to Tape Recording Mode.
1 Press the joystick to display the icon during
the recording pause. Move the joystick
down until icon 1 appears.
2 Move the joystick right to select the blank
search icon [ ].
3 When the confirmation message appears,
select [YES] and press the centre of the
joystick.
ª Stopping blank search midway
through
Move the joystick down to select the [∫] icon.
≥If the cassette tape has no blank part, then the
camera will stop at the end of the tape.
≥The camera stops at a point approx. 1 second
before the end of the last image recorded.
When you start recording at that point, the
image can be recorded seamlessly from the last
image.
Recording a still picture on a tape
(Photoshot)
Still pictures can be recorded from the movie
camera lens.
≥Set to Tape Recording Mode.
1 Press the [ ] button in the recording
pause mode.
≥The movie camera records a still picture for
about 7 seconds and then switches back to
the recording pause mode.
≥If you set [ADVANCED] >> [SHTR EFFECT] >>
[ON], you can add image and a sound like
releasing the shutter.
≥Photoshot recording results in slightly inferior
image quality.
ª Continuous photoshot
If you set [ADVANCED] >> [SHTR EFFECT] >>
[ON] and keep the [ ] button pressed, the movie
camera will continuously record still pictures in
approx. 0.7 seconds intervals until the button is
released.
≥The screen blinks and, at the same time, a
shutter clicking sound is recorded.
1
LSQT1291_ENG.book 22 ページ 2008年3月5日 水曜日 午前9時41分
Record mode
23
LSQT1291
Zoom in/out function
You can zoom in up to 42k optically.
≥Set to Tape Recording Mode.
1 Wide-angle recording (zoom out):
Push the [W/T] lever towards [W].
Close-up recording (zoom in):
Push the [W/T] lever towards [T].
≥When zooming in and recording images while
holding the movie camera by hand, we
recommend using the image stabilizer function.
≥When you are zooming on a faraway subject, a
sharper focus is achieved if the recording
subject is 1.3 metres or further from the movie
camera.
≥When the zoom speed is high, the subject may
not be focused easily.
≥When the zoom magnification is 1k, the movie
camera can focus on a subject approx. 2 cm
distant from the lens.
≥Be aware that a mechanical sound may be
recorded when the [W/T] lever is released while
zooming. Gently move the zoom lever back to
it's original possition before releasing it.
ª Digital zoom function
If the zoom magnification exceeds 42 times, then
the digital zoom function will be activated. The
digital zoom function allows you to select a
magnification from 70k to 2000k.
≥Set to Tape Recording Mode.
1 Set [ADVANCED] >> [D.ZOOM] >> [70k] or
[2000k].
[OFF]: Optical zoom only (Up to 42k)
[70k]: Digital zoom (Up to 70k)
[2000k]: Digital zoom (Up to 2000k)
≥The larger the digital zoom magnification, the
more the image quality is degraded.
ª About the variable speed zoom
function
≥The zoom speed varies according to the amount
of movement of the [W/T] lever.
ª To use the zoom microphone function
Interlocked with the zooming operation, the
microphone will collect sounds clearly far away
with the tele-shot or those in the vicinity with the
wide-angle shot.
≥Set to Tape Recording Mode.
1 Set [ADVANCED] >> [ZOOM MIC] >> [ON].
1t
t W T
5t
t W T
42
42t
t W T
70
70t
t W T
ZOOM
ZOOM
ZOOM
LSQT1291_ENG.book 23 ページ 2008年3月5日 水曜日 午前9時41分
Record mode
24
LSQT1291
Recording yourself
You can record yourself while viewing the LCD
monitor. You can record persons in front of the
camera while presenting them the image. The
image is horizontally flipped as if you see a mirror
image. (However the image to be recorded is not
altered.)
≥Extend the viewfinder to see the picture
while recording.
1 Rotate the LCD monitor towards the lens
side.
≥When the Wide function is set, a vertically oriented
display appears on the viewfinder screen, this is
normal and not indicative of any trouble.
≥When the LCD monitor is rotated towards the
lens side, the icon will not be displayed even if
you push the centre of the joystick.
Backlight compensation function
This protects a backlit subject from being
darkened.
≥Set to Tape Recording Mode.
1 Press the joystick to display the icon. Move
the joystick down until icon 1 appears.
2 Move the joystick up to select the backlight
compensation icon [ ].
≥The [BACKLIGHT COMPENSATION ON]
indication appears on the screen of the movie
camera.
≥The image on the screen will become
brighter.
ª To return to normal recording
Select the [ ] icon again.
≥The [BACKLIGHT COMPENSATION OFF]
indication appears on the screen of the movie
camera.
≥The backlight compensation function is
cancelled when you turn off the power or
operate the mode dial.
≥The backlight compensation is cancelled when
you activate the colour night view function.
1
LSQT1291_ENG.book 24 ページ 2008年3月5日 水曜日 午前9時41分
Record mode
25
LSQT1291
Colour night view function
This function allows you to record colour subjects
in dark locations to stand out against the
background.
Attach the camera to a tripod, and you can record
images free from vibration.
≥Recorded scene is seen as if frames were
missed.
≥Set to Tape Recording Mode.
1 Press the joystick to display the icon. Move
the joystick down until icon 1 appears.
2 Move the joystick up to select the colour
night view icon [ ].
≥The [COLOUR NIGHT VIEW ON] indication
appears on the screen of the movie camera.
≥If it is difficult to focus, adjust the focus
manually. (-30-)
ª To cancel the colour night view
function
Select the [ ] icon again.
≥The [COLOUR NIGHT VIEW OFF] indication
appears on the screen of the movie camera.
≥If set in a bright place, the screen may become
whitish for a while.
≥The colour night view function makes the signal
charging time of the CCD up to approximately
25k longer than usual, so that dark scenes (a
minimum of 2 lx) can be recorded brightly. For
this reason, bright dots that are usually invisible
may be seen, but this is not a malfunction.
≥The colour night view function is cancelled when
you turn off the power or operate the mode dial.
Soft skin mode
This allows the skin colour to be recorded in a
softer tone. This is more effective if you record the
bust image of a person.
≥Set to Tape Recording Mode.
1 Press the joystick to display the icon. Move
the joystick down until icon 1 appears.
2 Move the joystick left to select the soft skin
icon [ ].
≥The [SOFT SKIN MODE ON] indication
appears on the screen of the movie camera.
ª To cancel the soft skin mode
Select the [ ] icon again.
≥The [SOFT SKIN MODE OFF] indication
appears on the screen of the movie camera.
≥If the background or anything else in the scene
has colours similar to the skin colour, they will
also be smoothed.
≥If the brightness is insufficient, the effect may
not be clear.
1
1
LSQT1291_ENG.book 25 ページ 2008年3月5日 水曜日 午前9時41分
Record mode
26
LSQT1291
Fade in/fade out function
Fade in
The image and audio gradually appear.
Fade out
The image and audio gradually disappear.
≥Set to Tape Recording Mode.
1 Press the joystick to display the icon. Move
the joystick down until icon 1 appears.
2 Move the joystick left to select the fade icon
[ ].
≥The [FADE ON] indication appears on the
screen of the movie camera.
3 Press the recording start/stop button.
Start recording. (fade in)
When you start recording, the image/audio
disappears completely and the image/audio
gradually appears.
Pause recording. (fade out)
The image/audio gradually disappears. After the
image/audio completely disappears, recording
stops.
ª To cancel fading
Select the [ ] icon again.
≥The [FADE OFF] indication appears on the
screen of the movie camera.
ª To select the colour for fade in/out
The colour which appears in fading pictures can
be selected.
1 Set [ADVANCED] >> [FADE COLOUR] >>
[WHITE] or [BLACK].
≥While the fade in/fade out function is selected, it
takes several seconds to display the image
when you start recording images. Besides, it
also takes several seconds to pause recording.
Wind noise reduction function
This reduces the wind noise coming into the
microphone when recording.
≥Set to Tape Recording Mode.
1 Set [BASIC] >> [WIND CUT] >> [ON].
ª To cancel the wind noise reduction
function
Set [BASIC] >> [WIND CUT] >> [OFF].
≥The default setting is [ON].
≥Reduces the wind noise depending on the wind
strength. (If this function is activated in strong
winds, the stereo effect may be reduced. When
the wind weakens, the stereo effect will be
restored.)
1
LSQT1291_ENG.book 26 ページ 2008年3月5日 水曜日 午前9時41分
Record mode
27
LSQT1291
Wide/4:3 function
This allows you to record images compatible with
wide-screen TVs.
Wide Function
Images are recorded with a 16:9 aspect ratio.
4:3 Function
Images are recorded with a 4:3 aspect ratio.
≥Set to Tape Recording Mode.
1 Wide Function
Set [BASIC] >> [REC ASPECT] >> [16:9].
4:3 Function
Set [BASIC] >> [REC ASPECT] >> [4:3].
ª To cancel the Wide/4:3 function
Wide Function
Set [BASIC] >> [REC ASPECT] >> [4:3].
4:3 Function
Set [BASIC] >> [REC ASPECT] >> [16:9].
≥The default setting is [16:9].
≥In the wide-screen mode, the menu screens,
operation icons and other screen displays
appear horizontally oriented.
≥When images are played back on a TV screen,
the date/time indication may be erased in some
cases.
≥Depending on the TV, the picture quality may
deteriorate.
≥If still pictures recorded with a 4:3 aspect ratio
are played back when [TV ASPECT] is set to
[16:9], part of the operation icons and other
displays will appear on the black bands on the
left and right of the picture.
≥Concerning the TV to be connected and TV
used for playback.
≥When playing back images taken by this unit
on a TV screen, change the setting
established by Tape playback mode [SETUP]
>> [TV ASPECT] to match the aspect ratio
(4:3 or 16:9) of the TV monitor to be
connected. (-33-)
≥Depending on the settings of the TV
connected, the images may not be displayed
properly. For more information, please read
the operating instructions for the TV.
Image stabilizer function
Reduces the image shaking due to hand
movement when recording.
≥Set to Tape Recording Mode.
1 Press the [O.I.S.] button.
ª To cancel the image stabilizer function
Press the [O.I.S.] button again.
≥In the following cases, the image stabilizer
function may not work effectively.
≥When the digital zoom is used
≥When the camera is shaken greatly
≥When you record a moving subject while
tracking it
Guideline function
View the slope and the balance of the image
while recording.
You can check if the image is level while
recording motion pictures. The function can also
be used to estimate the balance of the
composition.
≥Set to Tape Recording Mode.
1 Set [ADVANCED] >> [GUIDE LINES] >>
[ON].
ª To cancel the guideline function
Set [ADVANCED] >> [GUIDE LINES] >> [OFF].
≥The guide lines do not appear on the images
actually recorded.
LSQT1291_ENG.book 27 ページ 2008年3月5日 水曜日 午前9時41分
Record mode
28
LSQT1291
Auto slow shutter mode
You can record bright pictures even in dark
places by slowing the shutter speed.
≥Set to Tape Recording Mode.
1 Set [ADVANCED] >> [AUTO SLW SHTR] >>
[ON].
≥When auto slow shutter mode is selected, the
shutter speed is adjusted between 1/25 and
1/250 depending on the surrounding brightness.
≥When adjusting the shutter speed manually, it
can be adjusted between 1/25 and 1/8000. (-31-)
ª To cancel the slow shutter mode
Set [ADVANCED] >> [AUTO SLW SHTR] >>
[OFF].
≥If [AUTO SLW SHTR] is set to [OFF], then the
shutter speed will be set between 1/50 and
1/250. (When adjusting the shutter speed
manually, it can be adjusted between 1/50 and
1/8000.)
≥This function’s default setting is [ON].
≥If the scene is low in brightness or contrast, the
subject may not be focused in on.
≥When the shutter speed becomes 1/25, the
screen may be seen as if frames are missed
and afterimages may appear.
Recording in various situations
(Scene mode)
When you record images in different situations,
this mode automatically sets optimum shutter
speeds and apertures.
≥Set to Tape Recording Mode.
1 Press the [MANUAL AF/MF] button.
2 Set [BASIC] >> [SCENE MODE] >> select the
desired mode.
1) [5] Sports mode
≥To record sports scenes or scenes where
there are quick motions
2) [ ] Portrait mode
≥To make persons stand out against the
background
3) [ ] Low light mode
≥To record dark scenes so they are brighter
4) [ ] Spotlight mode
≥To record subjects spotlit in a party or
theatre
5) [ ] Surf & snow mode
≥To record images at dazzling places such
as ski slopes and beaches
ª To cancel the scene mode function
Set [BASIC] >> [SCENE MODE] >> [OFF] or
press the [AUTO] button.
MANUAL
AF/MF
3)
1)
5)
2)
4)
LSQT1291_ENG.book 28 ページ 2008年3月5日 水曜日 午前9時41分
Record mode
29
LSQT1291
Sports mode
≥For playback pause of recorded pictures, this
mode presents free of camera shakes.
≥During normal playback, the image
movement may not look smooth.
≥Avoid recording under fluorescent light,
mercury light or sodium light because the
colour and brightness of the playback image
may change.
≥If you record a subject illuminated with strong
light or a highly reflective subject, vertical
lines of light may appear.
≥If the brightness is insufficient, the sports
mode does not function. The [5] indication
flashes.
≥If this mode is used indoors, the screen may
flicker.
Portrait mode
≥If this mode is used indoors, the screen may
flicker. If so, change the scene mode setting
to [OFF].
Low light mode
≥Extremely dark scenes may not be able to be
recorded finely.
Spotlight mode
≥If the recording subject is extremely bright,
the recorded image may become whitish and
the periphery of the recorded image
extremely dark.
Surf & snow mode
≥If the recording subject is extremely bright,
the recorded image may become whitish.
Recording in natural colours
(White balance)
The automatic white balance function may not
reproduce natural colours depending on the
scenes or lighting conditions. If so, you can adjust
the white balance manually.
≥Set to Tape Recording Mode.
1 Press the [MANUAL AF/MF] button.
2 Move the joystick up to select the white
balance icon [ ].
3 Move the joystick left or right in order to
select the white balance mode.
1) Auto white balance adjustment [ ]
2) Indoor mode (for recording under
incandescent lamps) [ ]
3) Outdoor mode [ ]
4) Manual adjustment mode [ ]
MANUAL
AF/MF
1 1
1
1 AWB
3)
1) 2)
4)
AWB
LSQT1291_ENG.book 29 ページ 2008年3月5日 水曜日 午前9時41分
Record mode
30
LSQT1291
ª To restore to the automatic
adjustment
Move the joystick left or right until the [ ]
indication appears. Or, press the [AUTO] button.
≥ When the unit is turned on with the lens cover
closed, the automatic white balance adjustment
may not function properly. Please turn the unit
on after opening the lens cover.
≥When setting both the white balance and the
iris/gain, set the white balance first.
≥Whenever recording conditions change, re-set
the white balance for correct adjustment.
ª To set the white balance manually
Select [ ] in Step 3. Then, while viewing a white
subject on the entire screen, move the joystick up
to select the [ ] indication.
ª About flashing of the [ ] indication
When the manual adjustment mode is
selected
≥Flashing indicates that the white balance
previously adjusted is stored. This setting is
stored until the white balance is adjusted again.
When white balance cannot be set in the
manual adjustment mode
≥White balance may not be adjusted properly in
the manual adjustment mode in dark places. If
so, use the auto white balance mode.
During setting in the manual adjustment mode
≥When the setting is completed, it will keep lit.
ª About the white balance sensor
The white balance sensor detects the type of light
source during recording.
≥Do not cover the white balance sensor during
recording, or it may not function properly.
Manual focus adjustment
If auto focusing is difficult due to the conditions,
then manual focusing is available.
≥Set to Tape Recording Mode.
1 Press the [MANUAL AF/MF] button until the
icon 1 appears.
≥The [ ] indication and the manual focus
[MF] indication is displayed.
2 Move the joystick left or right in order to
adjust the focus.
≥When focused with a wide angle, the subject
may not be in focus when zoomed in. First,
zoom in on the subject, and then focus on it.
ª To restore to the automatic
adjustment
Press the [MANUAL AF/MF] button again or
press the [AUTO] button.
AWB
1
MANUAL
AF/MF
MNL
LSQT1291_ENG.book 30 ページ 2008年3月5日 水曜日 午前9時41分
Record mode
31
LSQT1291
Manual shutter speed/aperture
adjustment
Shutter Speed
Adjust it when recording fast-moving subjects.
Aperture
Adjust it when the screen is too bright or too dark.
≥Set to Tape Recording Mode.
1 Press the [MANUAL AF/MF] button.
2 Move the joystick left or right to select the
shutter aperture icon [ ] or shutter speed
icon [ ].
3 Move the joystick left or right in order to
adjust the shutter speed or aperture.
1) Shutter speed
2) (Aperture) Iris/gain value
ª To restore to automatic adjustment
Press the [AUTO] button.
Manual shutter speed adjustment
≥Avoid recording under fluorescent light, mercury
light or sodium light because the colour and
brightness of the playback image may change.
≥If you increase the shutter speed manually, the
sensitivity lowers and accordingly the gain value
increases automatically, which may increase
the noises on the screen.
≥You may see vertical lines of light in the
playback image of a brightly shining subject or
highly reflective subject, but this is not a
malfunction.
≥During normal playback, image movement may
not look smooth.
≥When recording in the extremely bright place,
the colour of the screen may change or flickers.
If so, adjust the shutter speed manually to 1/50
or 1/100.
Manual iris/gain adjustment
≥Set the shutter speed before setting the
aperture (iris/gain) when manually adjusting
both settings.
≥If the value does not become “OPEN”, you
cannot adjust the gain value.
≥If the gain value is increased, the noise on the
screen increases.
≥Depending on the zoom magnification, there are
iris values that are not displayed.
ª Shutter speed range
1/25 to 1/8000 seconds: Tape Recording Mode
The shutter speed closer to 1/8000 is faster.
If [AUTO SLW SHTR] is set to [OFF], then the
shutter speed will be set between 1/50 and
1/8000.
ª Iris/gain value range
CLOSE (Closed), F16, ..., F2.0,
OPEN (Opened: F1.8) 0dB, ..., 18dB
Value closer to [CLOSE] darken the image.
Value closer to [18dB] brighten the image.
Values with dB are gain values.
MANUAL
AF/MF
1/1000
MNL
1)
1/50
F2.0
0dB
MNL
2)
1/25
LSQT1291_ENG.book 31 ページ 2008年3月5日 水曜日 午前9時41分
Playback mode
32
LSQT1291
Playback mode
Playing back tape
≥Set to Tape Playback Mode.
(An operation icon automatically appears on
the LCD monitor.)
1 Operate with joystick.
1/;: Playback/Pause
6: Rewind/Review playback (Reverts to
playback with the 1/; icon.)
5: Fast forward/Cue playback (Reverts to
playback with the 1/; icon.)
∫: Stop
≥The power will not turn off when the LCD
monitor and the viewfinder are closed and
retracted during Tape Playback Mode.
≥During cue/review playback, fast-moving
images may show noise as a mosaic.
≥Before and after cue/review playback, the
screen may become black for a moment or
images may be disturbed.
ª To adjust volume
Adjust the speaker volume for playback.
1 Move the [sVOLr] lever to adjust the
volume.
Towards [r]: increases the volume
Towards [s]: decreases the volume
(Nearer the bar to [r], larger the volume.)
≥When the adjustment is completed, the volume
indication will disappear.
≥If you do not hear the sound, check the settings
of [SETUP] >> [12bit AUDIO].
ª Repeat playback
When the tape end is reached, the tape will be
rewound and played back again.
1 Set [ADVANCED] >> [REPEAT PLAY] >>
[ON].
≥The [ ] indication appears. (In order to
cancel the repeat playback mode, set
[REPEAT PLAY] >> [OFF] or turn off the
power.)
ª Settings on the audio
≥If you cannot listen to the desired audio when
playing back a tape, check the settings in
[SETUP] >> [12bit AUDIO].
≥When you record the audio in [12bit] and set
[SETUP] >> [12bit AUDIO] >> [MIX], the audio
will be played back in stereo sound regardless
of the settings in [AUDIO OUT].
LSQT1291_ENG.book 32 ページ 2008年3月5日 水曜日 午前9時41分
Playback mode
33
LSQT1291
Frame-by-frame playback
≥Set to Tape Playback Mode.
1 During playback, move the joystick up to
select the [1/;] icon to pause playback.
2 Push the [sVOLr] lever.
Towards [T]: normal direction
Towards [W]: reversed direction
≥If you keep pushing the lever, then the images
will continuously be played back frame by
frame.
≥The pause icon appears for an instant.
Continuous frame-by-frame playback will start
after the pause icon disappears.
ª To return to normal playback
Move the joystick up to select the [1/;] icon to
start playback.
Playback on TV
Images recorded by this camera can be played
back on a TV.
≥Insert a recorded tape into this camera.
≥Be sure that the power of the unit is turned off
before connecting it to a TV.
1 Connect the movie camera and a TV.
≥Connect the movie camera and a TV by using
the AV cable 1.
≥If your TV is not equipped with AV Input
Sockets, the 21-pin Adaptor (purchase
separately) is necessary. Consult your dealer.
2 Turn on this camera and set the mode dial
to the Tape Playback Mode.
3 Select the input channel on the TV.
≥If the images are not played back correctly on
the TV (e.g. they are displayed vertically),
perform the menu operations in accordance
with the aspect ratio of the TV monitor.
Set [SETUP] >> [TV ASPECT] >> [16:9] or
[4:3].
4 Move the joystick up to select the [1/;]
icon to start playback.
≥The image and audio are output on the TV.
5 Move the joystick down to select the [∫]
icon to stop playback.
≥Use the AC adaptor to free you from worrying
about the battery running down.
ª If the image or audio from this camera
is not output on the TV
≥Check that the plugs are inserted as far as they
go.
≥Check the [12bit AUDIO] settings. (-39-)
≥Check the connected terminal.
≥Check the TV’s input setting (input switch).
(For more information, please read the
operating instructions for the TV.)
;
;
1
[VIDEO IN]
[AUDIO IN]
A/V
21-pin Adaptor
LSQT1291_ENG.book 33 ページ 2008年3月5日 水曜日 午前9時41分
Edit mode
34
LSQT1291
Edit mode
Copying onto a DVD recorder or a
VCR (Dubbing)
Pictures recorded by the movie camera can be
stored on a DVD-RAM or other such media. Refer
to the instructions for the recorder.
≥Place a recorded cassette in the movie
camera, and an unrecorded DVD-RAM or
cassette in the DVD recorder or VCR.
1 Connect the movie camera and the
recorder.
Connecting with the AV cable
≥Connect the movie camera and the recorder
by using the AV cable 1.
≥If your recorder is not equipped with AV Input
Sockets, the 21-pin Adaptor (purchase
separately) is necessary. Consult your dealer.
Connecting with the optional DV cable
(Only for equipment with a DV terminal)
2 Turn on the movie camera and set to Tape
Playback Mode.
3 Select the input channel on the TV set and
recorder.
4 Move the joystick up to select the [1/;]
icon to start playback. (Player)
≥The image and sound are reproduced.
5 Start recording. (Recorder)
6 Stop recording. (Recorder)
7 Move the joystick down to select the [∫]
icon to stop playback. (Player)
≥If you record (dub) images onto another video
device and then play them back on a wide-
screen TV, the images may be stretched
vertically. In this case, refer to the operating
instructions for the device that you are recording
(dubbing) to or read the operating instructions
for the TV and set to 16:9 (full).
≥For more information, refer to the operating
instructions for your TV set and recorder.
≥When you do not need functional indications or
date and time indication, respectively set
[SETUP] >> [DISPLAY] >> [OFF] or set [BASIC]
>> [DATE/TIME] >> [OFF] in the Tape Playback
Mode.
(When you connect the movie camera and a
recorder with the DV cable, these indications
may not appear.)
ª When neither image nor sound from
the movie camera is output to the TV
set
≥Check that the plugs are inserted as far as they
go.
≥Check the [12bit AUDIO] settings. (-39-)
≥Check the connected terminal.

CVC


A.DUB
AV3 IN L MONO
AUDIO
R
TIMER REC
REC/OTR
EXT LINK /
6 /6
1
[VIDEO IN]
[AUDIO IN]
A/V
21-pin Adaptor
2
(L2)
(L2)
S /
LSQT1291_ENG.book 34 ページ 2008年3月5日 水曜日 午前9時41分
Edit mode
35
LSQT1291
Using the DV Cable for Recording
(Digital Dubbing)
By connecting other digital video equipment with
DV terminal and the movie camera by using the
DV cable VW-CD1E (optional) 1, high-image-
quality dubbing can be done in digital format.
This model cannot be used as a Recorder.
≥Set to Tape Playback Mode.
(Player/recorder)
1 Connect the movie camera and digital video
equipment with the DV cable.
2 Start playback. (Player)
3 Start recording. (Recorder)
4 Stop playback. (Player)
≥Do not plug or unplug the DV cable during
dubbing, or the dubbing may not be completed
properly.
≥Even if you use a device equipped with DV
terminals such as IEEE1394, you may not be
able to perform digital dubbing in some cases.
For more information, see the instructions for
equipment connected.
≥Regardless of the menu settings on the
recorder, digital dubbing is carried out in the
same mode as the [AUDIO REC] mode of the
playback tape.
≥The images on the recorder monitor may be
disturbed, but it does not affect the recorded
images.
Using the movie camera as a Web
Camera
To upgrade Windows XP to SP2, click [start] 
[All Programs (Programs)]  [Windows Update].
If the movie camera is connected to your personal
computer, you can send video and sound from
the movie camera to the other parties via the
network. Audio may also be exchanged if the
personal computer is configured accordingly.
(You can use the microphone equipped with the
personal computer instead of the one on the
movie camera.)
Software:
Windows Live Messenger 8.0/8.1
(Windows XP/Vista)
Windows XP: DirectX 9.0c
Windows Vista: DirectX 10
ª Connecting the movie camera to
personal computer (For using as a
Web Camera)
1 Set the movie camera to tape playback
mode or tape recording mode.
2 Connect the movie camera to personal
computer with type A-to-B USB cable
(not supplied).
1) USB cable (Type A-to-B)
2) USB terminal
3) The Web Camera mode screen
3 Start the Windows Live Messenger.
≥Click [start]  [Programs] 
[Windows Live Messenger].
1
3)
2)
1)
LSQT1291_ENG.book 35 ページ 2008年3月5日 水曜日 午前9時41分
Edit mode
36
LSQT1291
ª When you use the movie camera as a
Web Camera
When you use the movie camera as a Web
Camera in the tape playback mode, the indication
of the operation icon is different from the one in
usual operation.
1 In usual operation
2 In the Web Camera mode
(Tape playback mode)
≥Even if you move the joystick up/down/right/left
( , ∫, 5, 6), the selected direction on
the operation icon is not lit in yellow.
≥The operation icon blinks on instead of
appearing from the side of the screen when you
press the centre of the joystick.
≥If the movie camera is used as a Web Camera,
the quality of the video to be exchanged will
depend on the Internet connection status.
≥In the Web Camera mode, video (picture)
cannot be recorded onto a tape.
≥In the Web Camera mode, the audio may be
interrupted in the midway of communication
depending on the communication environment
or the performance of the personal computer.
≥If you connect the USB cable while you operate
a tape in the tape playback mode, the tape will
be stopped.
≥If you connect the USB cable in the Web
Camera mode (tape recording mode), the time
code indication, the SP/LP indication, or icons
disappear.
≥In the Web Camera mode (tape playback
mode), the operation icon is changed.
≥If the movie camera is used as a Web Camera
while virus checking software is running, the
movie camera’s operation may stop midway
through. In this case, exit the Messenger,
reconnect the movie camera and restart the
Messenger.
Using on Macintosh
ª Operating environment on iMovie HD
OS:
With pre-installed;
Mac OS X v10.4
CPU:
PowerPC G5
Intel Core Duo
Intel Core Solo
Interface:
DV (FireWire) terminal (IEEE1394.a)
≥iMovie HD, included with any new Macintosh or
sold with iLife.
1 Set the movie camera to Tape Playback
Mode.
2 Connect the movie camera to your
Macintosh with the DV Interface Cable
(optional).
≥For more information, please contact Apple Inc.
at http://www.apple.com.
1 2
LSQT1291_ENG.book 36 ページ 2008年3月5日 水曜日 午前9時41分
Edit mode
37
LSQT1291
Notes
≥Microsoft®, Windows®, Windows Vista® and
DirectX®
are either registered trademarks or
trademarks of the Microsoft Corporation in the
United States and/or other countries.
≥Intel®
, Core™ and Pentium®
are either
registered trademarks or trademarks of Intel
Corporation in the United States and/or other
countries.
≥Apple, Mac OS, iMovie HD, FireWire are either
registered trademarks or trademarks of Apple
Inc. in the United States and/or other countries.
≥All other names, company names, product
names, etc. in these instructions are the
trademarks or registered trademarks of their
respective corporations.
≥Microsoft product screen shot(s) reprinted with
permission from Microsoft Corporation.
≥The names of the products you are using may
differ from the names given in the text.
Depending on the operating environment and
other factors, the contents of the screens used
in these instructions may not necessarily match
what you will see on your screen.
≥Although the screens in these operating
instructions are shown in English for the sake of
example, other languages are supported as
well.
≥These instructions do not cover the basic
operations of the personal computer or define
any terms. For this information, refer to the
operating instructions which accompany your
personal computer.
LSQT1291_ENG.book 37 ページ 2008年3月5日 水曜日 午前9時41分
Menu
38
LSQT1291
Menu
Menu list
Menu figures and illustrations are provided for
easy-to-understand explanations, and so they are
different from the actual menu indications.
ª [TAPE RECORDING MENU]
1) [BASIC]
[SCENE MODE] -28-
[REC SPEED] -20-
[WIND CUT] -26-
[REC ASPECT] -27-
[CLOCK SET] -13-
2) [ADVANCED]
[GUIDE LINES] -27-
[FADE COLOUR] -26-
[AUDIO REC] -39-
[D.ZOOM] -23-
[ZOOM MIC] -23-
[SHTR EFFECT] -22-
[AUTO SLW SHTR] -28-
3) [SETUP]
[DISPLAY] -39-
[DATE/TIME] -39-
[POWER SAVE] -39-
[QUICK START] -14-
[BEEP SOUND] -39-
[LCD SET] -19-
[EVF SET] -19-
[INITIAL SET] -39-
[DEMO MODE] -39-
4) [LANGUAGE] -18-
ª [TAPE PLAYBACK MENU]
1) [BASIC]
[DATE/TIME] -39-
2) [ADVANCED]
[REPEAT PLAY] -32-
3) [SETUP]
[12bit AUDIO] -39-
[AUDIO OUT] -39-
[DISPLAY] -39-
[LCD SET] -19-
[EVF SET] -19-
[POWER SAVE] -39-
[TV ASPECT] -33-
4) [LANGUAGE] -18-
LSQT1291_ENG.book 38 ページ 2008年3月5日 水曜日 午前9時41分
Menu
39
LSQT1291
Menus related to taking pictures
ª [DATE/TIME]
This switches between date and time indications.
≥The movie camera automatically records the
date and time of picture taking on the tape.
ª [AUDIO REC]
Switches the audio (PCM audio) recording
systems.
[12bit]: Records audio in “12 bit 32 kHz 4 tracks”.
(The original sound recorded is preserved
after audio dubbing.)
[16bit]: Records audio in “16 bit 48 kHz 2 tracks”.
Audio can be recorded in higher quality.
(The original sound recorded is erased
after audio dubbing.)
≥Audio dubbing cannot be performed on this unit. If
you want to edit the sound on a model with an
audio dubbing function, set [12bit] to take pictures.
ª [DISPLAY]
Set to [ON] and the display mode can be switched
to all functions. Set to [OFF] and it can be
switched to minimum display.
ª [BEEP SOUND]
Set to [ON] and confirmation/alarm beeps are
issued as follows.
1 Beep
≥When you start recording
≥When you turn on the power
≥When the unit goes from quick start standby
mode to recording pause
2 Beeps
≥When you pause recording
≥When you turn off the power
≥When the unit goes into quick start standby
mode
2 Beeps for 4 times
≥When a cassette with its erasure prevention tab
set to [SAVE] is inserted, condensation occurs
(-45-), and at other times. Check the sentence
displayed on the screen. (-41-)
ª [POWER SAVE]
[OFF]: When about 5 minutes passed
without any operation, the standby
mode automatically will be set. In
the standby mode, [;] blinks and
it takes time more than usual to
start recording after you press the
recording start/stop button.
[5 MINUTES]: When about 5 minutes passed
without any operation, the movie
camera automatically turns off to
protect the tape or to prevent the
battery from running down. When
you use the movie camera, turn it
on again.
≥In the following cases, the power may not turn
off even when set [POWER SAVE] 
[5 MINUTES].
≥When connecting to the AC outlet
(When using the AC adapter)
≥When connecting the USB cable or the DV
cable to a personal computer or other
equipment
Menus related to playback
ª [12bit AUDIO]
If you want to edit the sound on a model with an
audio dubbing function, set [12bit] to take
pictures.
You can switch the sound (PCM Audio) when
playing back a tape with sound recorded in
[12bit].
[ST1]: It only plays back the original sound
recorded.
[ST2]: It only plays back the sound on the tape
added with audio dubbing.
[MIX]: It simultaneously plays back both [ST1]
and [ST2] sounds.
≥Audio dubbing cannot be performed on this unit.
When playing back a tape recorded on this unit,
you will not be able to hear the sound if [ST2] is
set. Set [ST1].
ª [AUDIO OUT]
This switches the sound to be played back.
[STEREO]: Stereo sound (main sound and sub
sound)
[L]: Left channel sound (main sound)
[R]: Right channel sound (sub sound)
Other menus
ª [INITIAL SET]
When there is a menu that cannot be selected
depending on a combination of functions, set to
[YES] for changing the menu settings back to the
initial shipping condition.
(Language setting cannot be back to the initial
shipping condition.)
ª [DEMO MODE]
If you set to [DEMO MODE]  [ON] without
inserting a cassette, the movie camera is
automatically set to the demonstration mode for
introducing its functions. If any button is pressed
or operated, the demonstration mode is
cancelled. If no operations take place for approx.
10 minutes, the demonstration mode
automatically starts. To terminate the
demonstration mode, insert a cassette, or set to
[DEMO MODE]  [OFF]. For normal use, set this
function to [OFF].
LSQT1291_ENG.book 39 ページ 2008年3月5日 水曜日 午前9時41分
Others
40
LSQT1291
Others
Indications
Various functions and the movie camera status
are shown on the screen.
Basic indications
: Remaining battery power
0h00m00s00f: Time code
15:30:45: Date/Time indication
Recording indications
R 0:45: Remaining tape time
≥Remaining tape time is indicated in minutes.
(When it reaches less than 3 minutes, the
indication starts flashing.)
SP: Standard Play mode
(Recording speed mode) -20-
LP: Long Play mode
(Recording speed mode) -20-
¥: Recording -21-
; (Green): Recording pause -21-
; (Green flash):
Standby mode
; (Red): Fade out
: Recording check -21-
: Wide mode -27-
: Automatic mode -20-
: Manual mode -28-
MF: Manual focus -30-
5k: Zoom magnification indication
-23-
: Backlight mode -24-
: OIS -27-
1/500: Shutter speed -31-
F2.4: F number -31-
6dB: Gain value -31-
: WEB CAMERA mode
(Recording) -35-
: Soft skin mode -25-
: Fade (White) -26-
: Fade (Black) -26-
: Colour night view function -25-
: Blank search -22-
: Video Light is on -19-
: Zoom microphone -23-
: Wind noise reduction -26-
5: Sports mode (Scene mode) -28-
: Portrait mode (Scene mode) -28-
: Low light mode (Scene mode)
-28-
: Spotlight mode (Scene mode)
-28-
: Surf  snow mode (Scene mode)
-28-
: Auto white balance -29-
: Indoor mode (recording under
incandescent lamps) -29-
: Outdoor mode -29-
: White balance adjustment mode
-29-
Playback indications
1: Playback -32-
;: Pause -32-
5: Fast-forward/Cue playback -32-
6: Rewind/Review playback -32-
;1/2;: Frame-by-frame playback -33-
: Repeat playback -32-
: WEB CAMERA mode (Playback)
-35-
12bit, 16bit: Audio recording mode -39-
: Volume adjustment -32-
16:9
AUTO
MNL
ZOOM
AWB
LSQT1291_ENG.book 40 ページ 2008年3月5日 水曜日 午前9時41分
Others
41
LSQT1291
Warning/alarm indications
If any one of the following indications lights up or
flashes, please check the movie camera.
Confirmatory indications
Y: A cassette with the accidental erasure
prevention slider placed in the [SAVE]
position is inserted.
No cassette is inserted.
[--]/0:
The built-in battery is low. -13-
°: The warning/alarm indication appears when
you record yourself. Turn the LCD monitor
towards the viewfinder and check the
warning/alarm indication.
2END:
The tape came to the end during recording.
:: The video heads are dirty. -45-
Textual indications
3DEW DETECT/3EJECT TAPE:
Condensation has occurred. Take out the
cassette and wait for a while. It takes some
time until the cassette holder opens, but this
is not a malfunction. -45-
LOW BATTERY:
The battery is low. Recharge it. -9-
NO TAPE :
No tape is inserted. -15-
TAPE END:
The tape came to the end during recording.
CHECK REC TAB:
You are attempting to record pictures on a
tape with the accidental erasure prevention
slider placed in the [SAVE] position.
You are attempting digital dubbing on a tape
with the accidental erasure prevention slider
placed in the [SAVE] position.
WRONG TAPE FORMAT:
You are attempting to play back a tape
section that has been recorded with a
different TV system. This cassette is
incompatible.
CLOSE CASSETTE DOOR:
The cassette cover is open. Close the
cassette cover. -15-
COPY PROTECTED:
Images cannot be recorded correctly
because the medium is protected by a copy
guard.
NEED HEAD CLEANING:
The video heads are dirty. -45-
PUSH THE RESET SWITCH:
An irregularity in the equipment has been
detected. Press the [RESET] button (-44-).
This may solve the problem.
DISCONNECT USB CABLE:
You are attempting to record pictures on a
tape with the USB cable connected to the
movie camera.
CAN NOT USE USB:
You are connecting the USB cable with the
DV cable connected.
CHANGE TO MANUAL MODE:
You are attempting to select the item on the
[SCENE MODE] when the movie camera is
set to [AUTO].
LSQT1291_ENG.book 41 ページ 2008年3月5日 水曜日 午前9時41分
Others
42
LSQT1291
Functions cannot be used
simultaneously
Some functions in the movie camera are disabled
or cannot be selected due to its specifications.
The table below shows examples of functions
restricted by conditions.
Before requesting repair
(Problems and solutions)
Power/Body
1: The movie camera power cannot be turned
on.
• Is the battery fully charged? Use a fully
charged battery.
• The battery protection circuit may have
operated. Attach the battery to the AC adaptor
for 5 to 10 seconds. If the movie camera still
cannot be used, the battery is faulty.
• Is the LCD monitor open or the viewfinder
extend?
2: The movie camera power is turned off
automatically.
• If you do not use the unit for approximately
5 minutes, the power is automatically turned off
to conserve the battery charge. To resume
recording, turn the power back on. The power
will not turn off automatically when the power
save function is set to [OFF]. (-39-)
3: The movie camera power does not stay on
long enough.
• Is the battery low? If the remaining battery
power indication is flashing or the message
“LOW BATTERY” is displayed, the battery has
run down. Charge the battery or attach a fully
charged battery. (-9-)
• Has condensation occurred? When you carry
the movie camera from a cold place into a
warm place, condensation may occur inside it.
If so, the power is turned off automatically,
disabling all operations except for taking
cassettes out. Wait until the condensation
indication disappears. (-45-)
4: Battery runs down quickly.
• Is the battery fully charged? Charge it with the
AC adaptor. (-9-)
• Are you using the battery in an extremely cold
place? The battery is affected by ambient
temperature. In cold places, the operating time
of the battery becomes shorter.
• Has the battery worn out? The battery has a
limited life. If the operating time is still too short
even after the battery is fully charged,
depending on the usage, the battery has worn
out and can no longer be used.
Functions Conditions which disable
the functions
≥Backlight
compensation
≥When the iris/gain is set
≥When the colour night
view function is used
≥Help mode
≥Blank search
≥Soft skin
≥Recording
check
≥Colour Night
View
≥While recording to a tape
≥Scene mode ≥When the movie camera
is set to [AUTO]
≥When the colour night
view function is used
≥When the built-in LED
video light is on
≥Change of
white balance
≥When digital zoom (42k
or higher) is used
≥When the colour night
view function is used
≥Adjusting the
shutter speed,
iris/gain
≥When the colour night
view function is used
≥When the scene mode is
used
LSQT1291_ENG.book 42 ページ 2008年3月5日 水曜日 午前9時41分
Others
43
LSQT1291
5: The movie camera cannot be operated
though powered up.
The movie camera does not operate
normally.
• The movie camera cannot be operated unless
you open the LCD monitor or extend the
viewfinder.
• Remove the cassette and then press the
[RESET] button. (-44-) If normal conditions are
not restored yet, turn off the power. Then,
about 1 minute later, turn on the power again.
6: The cassette cannot be removed.
• Does the status indicator comes on when
opening the cassette cover? (-15-) Make sure
that the battery and the AC adaptor are
properly connected. (-10-)
• Is the battery in use discharged? Charge the
battery and remove the cassette.
• Close the cassette cover completely, and fully
open it again. (-15-)
7: No operation other than cassette removal
can be performed.
• Has condensation occurred? Wait until the
condensation indication disappears. (-45-)
Recording
1: Recording does not start although power is
supplied to the movie camera and the
cassette is correctly inserted.
• Is the accidental erasure prevention slider on
the cassette open? If it is open (set to [SAVE]),
recording cannot be performed. (-16-)
• Is the tape wound to the end? Insert a new
cassette.
• Is the recording mode set? When in the
playback mode, recording cannot be
performed. (-11-)
• Has condensation occurred? No operation
other than cassette removal can be performed
when condensation occurs. Wait until the
condensation indication disappears. (-45-)
• Is the cassette cover open? If the cover is
open, the movie camera may not operate
normally. Close the cassette cover. (-15-)
2: The screen has changed suddenly.
• Has the demonstration started? In the Tape
Recording mode, if you set [DEMO MODE] 
[ON] without inserting a cassette, the
demonstration starts. For normal use, set this
function to [OFF]. (-39-)
3: A cassette cannot be inserted.
• Has condensation occurred? Wait until the
condensation indication disappears.
4: Auto focus function does not work.
• Is manual focus mode selected? If auto focus
mode is selected, focus is automatically
adjusted.
• There are some recording subjects and
surroundings for which the auto focus does not
operate correctly. (-49-) If so, use the manual
focus mode to adjust the focus. (-30-)
Indications
1: A sentence is displayed in red in the screen
centre.
• Read the contents and respond to them. (-41-)
2: The remaining tape time indication
disappears.
• The remaining tape time indication may
disappear temporarily during frame-by-frame
playback or other operation. If you continue
ordinary recording or playback, the indication is
restored.
3: The remaining tape time Indication does not
match the actual remaining tape time.
• If scenes of less than 15 seconds are
continuously recorded, the remaining tape time
cannot be correctly displayed.
• In some cases, the remaining tape time
indication may show remaining tape time that is
2 to 3 minutes shorter than the actual
remaining tape time.
4: A function indication such as mode
indication, remaining tape time indication,
or time code indication is not shown.
• If you set [SETUP]  [DISPLAY]  [OFF],
indications other than the tape running
condition, warning, and date indications
disappear.
5: “CHECK THE LENS COVER.” is displayed.
• Open the lens cover before turning the unit on.
• This message may appear if you try to record in
extremely dark places.
LSQT1291_ENG.book 43 ページ 2008年3月5日 水曜日 午前9時41分
Others
44
LSQT1291
Playback (Sound)
1: Sound is not played back from the built-in
speaker of the movie camera.
• Is the volume too low? During playback, push
the [sVOLr] lever to display the volume
indication and adjust it. (-32-)
2: Different sounds are reproduced at the
same time.
• Have you set [SETUP]  [AUDIO OUT] 
[STEREO] and reproduced a picture containing
the main sound and sub sound? Set to [L] to
hear main sound, and set to [R] to hear the sub
sound. (-39-)
3: Sounds cannot be played back.
• Have you set [SETUP]  [12bit AUDIO] 
[ST2]? Set [12bit AUDIO]  [ST1]. (-39-)
Playback (Pictures)
1: Mosaic-pattern noise appears on images
during cue or review playback.
• This phenomenon is characteristic of digital
video systems. It is not a malfunction.
2: Horizontal stripes appear on images during
cue and review playback.
• Horizontal stripes may appear depending on
the scene, but this is not a malfunction.
3: Although the movie camera is correctly
connected to a TV, playback images cannot
be seen.
The images are vertical.
• Have you selected video input on the TV?
Please read the operating instructions of your
TV and select the channel that matches the
input terminals used for the connection.
• Is the [TV ASPECT] setting correct? Change
the setting to match the aspect ratio of the TV.
[SETUP]  [TV ASPECT]  [16:9] or [4:3].
4: Playback picture is not clear.
• Are the heads of the movie camera dirty? If the
heads are dirty, playback image cannot be
clear. Clean the heads by using the head
cleaner for digital video (optional). (-45-)
• If the terminal for the AV cable is soiled, noises
may appear on the screen. Wipe the soil off the
terminal with a soft cloth, and then connect the
cable to the A/V terminal.
• Is a picture containing a copyright protection
signal (copy guard) being recorded? When a
protected picture is played back by the movie
camera, mosaic-like patterns appear on the
picture.
Others
1: The indication disappears, the screen is
frozen, or no operation can be performed.
• Turn off the power to the movie camera. If the
power cannot be turned off, press the [RESET]
button, or detach the battery or the AC adaptor
and then reattach it. After that, turn on the
power again. If normal operation is still not
restored, detach the power connected, and
consult the dealer who you purchased the
movie camera from.
2: “PUSH THE RESET SWITCH” is displayed.
• An irregularity in the movie camera has been
automatically detected. Remove the cassette
for data protection and then press the [RESET]
button with the boss A. The movie camera will
be activated.
• If you do not press the [RESET] button, the
power to the movie camera is turned off
automatically about 1 minute later.
• Even after you press the [RESET] button, the
indication may still appear repeatedly. If so, the
movie camera needs repair. Detach the power
connected, and consult the dealer who you
purchased the movie camera from. Do not
attempt to repair the appliance by yourself.
3: The warning/alarm indication [°] appears
when the camera is operated in the WEB
camera mode.
• Did you press the menu button or the recording
start/stop button? You cannot use the menu or
record onto the tape in the WEB camera mode.
• Did you attempt to play a tape without inserting
it? Insert a tape.
• Did you attempt to play a tape with copyright
protection (copy guard)? Pictures of the tape
with copyright protection (copy guard) cannot
be displayed on the PC. (The audio of the tape
can be played.)
A
RESET
LSQT1291_ENG.book 44 ページ 2008年3月5日 水曜日 午前9時41分
Others
45
LSQT1291
Cautions for Use
ª About condensation
If you turn the movie camera on when
condensation occurs on the head or the tape,
condensation Indication [3] (yellow or red) is
displayed on the viewfinder or the LCD monitor
and the messages [3DEW DETECT] or
[3EJECT TAPE] (only when the tape is
inserted) appear. If so, follow the procedure
below.
1 Remove the tape if it is inserted.
≥It takes about 20 seconds to open the
cassette holder. This is not a malfunction.
2 Leave the movie camera with the cassette
cover closed to cool or warm it to the
ambient temperature.
≥The status indicator blinks for about 1 minute
and then the movie camera automatically
turns off. Leave it for about 1.5 to 2 hours.
3 Turn the movie camera on again, set it to
the Tape Recording/Playback Mode and
then check if the condensation indication
disappears.
Especially in cold areas, moisture may be frozen.
If so, it may take more time before the
condensation indication disappears.
Watch for condensation even before the
condensation indication is displayed.
≥If the indicator of the condensation does not
display on the LCD monitor and/or the
viewfinder and you notice condensation on the
lens or the main unit, do not open the cassette
cover otherwise condensation may be formed
on the heads or the cassette tape.
When the lens is fogged:
Remove the battery or AC adaptor and leave the
unit for about 1 hour. When the unit becomes
close to the ambient temperature, the fog
disappears naturally.
ª About dirty heads
If video heads (the parts that closely contact
with the tape) become dirty, normal recording
and playback are not properly performed.
Clean the heads with the digital video head
cleaner.
≥Insert the head cleaner into the movie camera,
set it to the Tape Playback Mode, and play it
back for about 10 seconds. (If you do not stop
the playback, it automatically stops about
15 seconds later.)
≥We recommend cleaning the heads periodically.
If the heads become dirty, “NEED HEAD
CLEANING” appears during recording. During
playback, moreover, the following symptoms
appear.
≥Mosaic-like noise appears partially or the
sound is interrupted.
≥Black or blue mosaic-like horizontal stripes
appear.
≥The whole screen becomes black and there is
no picture and sound.
When normal playback cannot be performed
even after the head cleaning.
One possible cause is that normal recording
could not be performed because the heads were
dirty at the time of recording. Clean the heads,
and perform recording and playback again. If
normal playback can be performed, the heads are
clean. Before an important recording, be sure to
conduct a test recording to make sure that normal
recording can be performed.
≥If the heads become dirty soon after cleaning,
the problem may be attributable to the tape. If
so, try another cassette.
≥During playback, the picture or sound may be
interrupted momentarily, but this is not a
malfunction of the movie camera. (One possible
cause is that the playback is interrupted by dirt
or dust that momentarily adheres to the heads.)
LSQT1291_ENG.book 45 ページ 2008年3月5日 水曜日 午前9時41分
Others
46
LSQT1291
ª About the movie camera
≥When the movie camera is used for a long time,
the camera body becomes warm, but this is not
a malfunction.
Keep the Digital Video Camera as far away as
possible from electromagnetic equipment
(such as microwave ovens, TVs, video games
etc.).
≥If you use the Digital Video Camera on top of or
near a TV, the pictures and sound on the Digital
Video Camera may be disrupted by
electromagnetic wave radiation.
≥Do not use the Digital Video Camera near cell
phones because doing so may result in noise
adversely affecting the pictures and sound.
≥Recorded data may be damaged, or pictures
may be distorted, by strong magnetic fields
created by speakers or large motors.
≥Electromagnetic wave radiation generated by
microprocessors may adversely affect the
Digital Video Camera, disturbing the pictures
and sound.
≥If the Digital Video Camera is adversely affected
by electromagnetic equipment and stops
functioning properly, turn the Digital Video
Camera off and remove the battery or
disconnect AC adaptor. Then reinsert the
battery or reconnect AC adaptor and turn the
Digital Video camera on.
Do not use the Digital Video Camera near
radio transmitters or high-voltage lines.
≥If you record near radio transmitters or
high-voltage lines, the recorded pictures and
sound may be adversely affected.
Do not spray insecticides or volatile
chemicals onto the movie camera.
≥If the movie camera is sprayed with such
chemicals, the camera body may become
deformed and the surface finish may peel off.
≥Do not keep rubber or plastic products in
contact with the movie camera for a long time.
When you use your movie camera in a sandy
or dusty place such as on a beach, do not let
sand or fine dust get into the body and
terminals of the movie camera. Also, protect
the movie camera from getting wet.
≥Sand or dust may damage the movie camera or
cassette. (Care should be taken when inserting
and removing a cassette.)
≥If sea water splashes onto the movie camera,
wet a soft cloth with tap water, wring it well, and
use it to wipe the camera body carefully. Then,
wipe it again thoroughly with a soft dry cloth.
While carrying the movie camera, do not drop
or bump it.
≥A strong impact on the movie camera may
break its housing, causing it to malfunction.
Do not use benzine, paint thinner or alcohol
for cleaning the movie camera.
≥Before cleaning, detach the battery or pull out
the AC mains lead from the AC mains socket.
≥The camera body may be discoloured and the
surface finish may peel off.
≥Wipe the movie camera with a soft dry cloth to
remove dust and fingerprints. To remove
stubborn stains, wring well a cloth that is soaked
in a neutral detergent diluted with water and
wipe the movie camera with it. Afterwards, wipe
it with a dry cloth.
≥When you use a chemical dust cloth, follow the
instructions.
Do not use this movie camera for surveillance
purposes or other business use.
≥If you use the movie camera for a long time, the
internal temperature increases and,
consequently, this may cause malfunction.
≥This movie camera is not intended for business
use.
When you are not going to use the movie
camera for an extended time.
≥When storing the unit in a cupboard or a
cabinet, it is recommended that you put a
desiccant (silica gel) in with it.
LSQT1291_ENG.book 46 ページ 2008年3月5日 水曜日 午前9時41分
uputstvo panasonic nv-gs90.pdf

More Related Content

Similar to uputstvo panasonic nv-gs90.pdf

Jual Miring!! Total Station Focus 8?? Call 087778355373-0856180442
Jual Miring!! Total Station Focus 8?? Call 087778355373-0856180442Jual Miring!! Total Station Focus 8?? Call 087778355373-0856180442
Jual Miring!! Total Station Focus 8?? Call 087778355373-0856180442ALAMSURVEY
 
JVC VF-HP790 LCD Studio Viewfinder
JVC VF-HP790 LCD Studio ViewfinderJVC VF-HP790 LCD Studio Viewfinder
JVC VF-HP790 LCD Studio ViewfinderAV ProfShop
 
Ampeg SVT3 PRO 450W Lambalı Bas Gitar Kafa Amfisi gitarpazar.com manual kulla...
Ampeg SVT3 PRO 450W Lambalı Bas Gitar Kafa Amfisi gitarpazar.com manual kulla...Ampeg SVT3 PRO 450W Lambalı Bas Gitar Kafa Amfisi gitarpazar.com manual kulla...
Ampeg SVT3 PRO 450W Lambalı Bas Gitar Kafa Amfisi gitarpazar.com manual kulla...GitarPazar
 
Ampeg SVT4 PRO 1800W Lambalı Bas Gitar Amfi Kafası gitarpazar manul kullanim ...
Ampeg SVT4 PRO 1800W Lambalı Bas Gitar Amfi Kafası gitarpazar manul kullanim ...Ampeg SVT4 PRO 1800W Lambalı Bas Gitar Amfi Kafası gitarpazar manul kullanim ...
Ampeg SVT4 PRO 1800W Lambalı Bas Gitar Amfi Kafası gitarpazar manul kullanim ...GitarPazar
 
8928 a 8930a_usermanual_concise
8928 a 8930a_usermanual_concise8928 a 8930a_usermanual_concise
8928 a 8930a_usermanual_conciseSchoolVision Inc.
 
8928 a 8930a_usermanual_concise
8928 a 8930a_usermanual_concise8928 a 8930a_usermanual_concise
8928 a 8930a_usermanual_conciseSchoolVision Inc.
 
Lcr 800 user manual (1)
Lcr 800 user manual (1)Lcr 800 user manual (1)
Lcr 800 user manual (1)Slim Abid
 
Finepix hs30exr manual_01
Finepix hs30exr manual_01Finepix hs30exr manual_01
Finepix hs30exr manual_01Cirnatu Catalin
 
4 m1 pwr-manual-v2
4 m1 pwr-manual-v24 m1 pwr-manual-v2
4 m1 pwr-manual-v2Avalonhk Lin
 
Casio Privia Px-800 manual
Casio Privia Px-800 manualCasio Privia Px-800 manual
Casio Privia Px-800 manualcelsotu
 

Similar to uputstvo panasonic nv-gs90.pdf (20)

Manual HMC40.pdf
Manual HMC40.pdfManual HMC40.pdf
Manual HMC40.pdf
 
W3ug 122 162-ap5331
W3ug 122 162-ap5331W3ug 122 162-ap5331
W3ug 122 162-ap5331
 
Tv pt50 lc13
Tv pt50 lc13Tv pt50 lc13
Tv pt50 lc13
 
Aw16 ge
Aw16 geAw16 ge
Aw16 ge
 
Jual Miring!! Total Station Focus 8?? Call 087778355373-0856180442
Jual Miring!! Total Station Focus 8?? Call 087778355373-0856180442Jual Miring!! Total Station Focus 8?? Call 087778355373-0856180442
Jual Miring!! Total Station Focus 8?? Call 087778355373-0856180442
 
JVC VF-HP790 LCD Studio Viewfinder
JVC VF-HP790 LCD Studio ViewfinderJVC VF-HP790 LCD Studio Viewfinder
JVC VF-HP790 LCD Studio Viewfinder
 
Ampeg SVT3 PRO 450W Lambalı Bas Gitar Kafa Amfisi gitarpazar.com manual kulla...
Ampeg SVT3 PRO 450W Lambalı Bas Gitar Kafa Amfisi gitarpazar.com manual kulla...Ampeg SVT3 PRO 450W Lambalı Bas Gitar Kafa Amfisi gitarpazar.com manual kulla...
Ampeg SVT3 PRO 450W Lambalı Bas Gitar Kafa Amfisi gitarpazar.com manual kulla...
 
Ampeg SVT4 PRO 1800W Lambalı Bas Gitar Amfi Kafası gitarpazar manul kullanim ...
Ampeg SVT4 PRO 1800W Lambalı Bas Gitar Amfi Kafası gitarpazar manul kullanim ...Ampeg SVT4 PRO 1800W Lambalı Bas Gitar Amfi Kafası gitarpazar manul kullanim ...
Ampeg SVT4 PRO 1800W Lambalı Bas Gitar Amfi Kafası gitarpazar manul kullanim ...
 
8928 a 8930a_usermanual_concise
8928 a 8930a_usermanual_concise8928 a 8930a_usermanual_concise
8928 a 8930a_usermanual_concise
 
8928 a 8930a_usermanual_concise
8928 a 8930a_usermanual_concise8928 a 8930a_usermanual_concise
8928 a 8930a_usermanual_concise
 
Thump th 15 a
Thump th 15 aThump th 15 a
Thump th 15 a
 
Korg1 10
Korg1 10Korg1 10
Korg1 10
 
Lcr 800 user manual (1)
Lcr 800 user manual (1)Lcr 800 user manual (1)
Lcr 800 user manual (1)
 
Rev500
Rev500Rev500
Rev500
 
Sl1200 mk5
Sl1200 mk5Sl1200 mk5
Sl1200 mk5
 
U325u en 7 (1)
U325u en 7 (1)U325u en 7 (1)
U325u en 7 (1)
 
Finepix hs30exr manual_01
Finepix hs30exr manual_01Finepix hs30exr manual_01
Finepix hs30exr manual_01
 
4 m1 pwr-manual-v2
4 m1 pwr-manual-v24 m1 pwr-manual-v2
4 m1 pwr-manual-v2
 
Casio Privia Px-800 manual
Casio Privia Px-800 manualCasio Privia Px-800 manual
Casio Privia Px-800 manual
 
Sony nex5manual
Sony nex5manualSony nex5manual
Sony nex5manual
 

Recently uploaded

Pragati Maidan Call Girls : ☎ 8527673949, Low rate Call Girls
Pragati Maidan Call Girls : ☎ 8527673949, Low rate Call GirlsPragati Maidan Call Girls : ☎ 8527673949, Low rate Call Girls
Pragati Maidan Call Girls : ☎ 8527673949, Low rate Call Girlsashishs7044
 
Karachi Escorts | +923070433345 | Escort Service in Karachi
Karachi Escorts | +923070433345 | Escort Service in KarachiKarachi Escorts | +923070433345 | Escort Service in Karachi
Karachi Escorts | +923070433345 | Escort Service in KarachiAyesha Khan
 
Retail Store Scavanger Hunt - Foundation College Park
Retail Store Scavanger Hunt - Foundation College ParkRetail Store Scavanger Hunt - Foundation College Park
Retail Store Scavanger Hunt - Foundation College Parkjosebenzaquen
 
Call Girls in Islamabad | 03274100048 | Call Girl Service
Call Girls in Islamabad | 03274100048 | Call Girl ServiceCall Girls in Islamabad | 03274100048 | Call Girl Service
Call Girls in Islamabad | 03274100048 | Call Girl ServiceAyesha Khan
 
FULL ENJOY - 9953040155 Call Girls in Laxmi Nagar | Delhi
FULL ENJOY - 9953040155 Call Girls in Laxmi Nagar | DelhiFULL ENJOY - 9953040155 Call Girls in Laxmi Nagar | Delhi
FULL ENJOY - 9953040155 Call Girls in Laxmi Nagar | DelhiMalviyaNagarCallGirl
 
FULL ENJOY - 9953040155 Call Girls in Gandhi Vihar | Delhi
FULL ENJOY - 9953040155 Call Girls in Gandhi Vihar | DelhiFULL ENJOY - 9953040155 Call Girls in Gandhi Vihar | Delhi
FULL ENJOY - 9953040155 Call Girls in Gandhi Vihar | DelhiMalviyaNagarCallGirl
 
Call Girl in Bur Dubai O5286O4116 Indian Call Girls in Bur Dubai By VIP Bur D...
Call Girl in Bur Dubai O5286O4116 Indian Call Girls in Bur Dubai By VIP Bur D...Call Girl in Bur Dubai O5286O4116 Indian Call Girls in Bur Dubai By VIP Bur D...
Call Girl in Bur Dubai O5286O4116 Indian Call Girls in Bur Dubai By VIP Bur D...dajasot375
 
Russian⚡ Call Girls In Sector 104 Noida✨8375860717⚡Escorts Service
Russian⚡ Call Girls In Sector 104 Noida✨8375860717⚡Escorts ServiceRussian⚡ Call Girls In Sector 104 Noida✨8375860717⚡Escorts Service
Russian⚡ Call Girls In Sector 104 Noida✨8375860717⚡Escorts Servicedoor45step
 
Akola Call Girls #9907093804 Contact Number Escorts Service Akola
Akola Call Girls #9907093804 Contact Number Escorts Service AkolaAkola Call Girls #9907093804 Contact Number Escorts Service Akola
Akola Call Girls #9907093804 Contact Number Escorts Service Akolasrsj9000
 
Mandi House Call Girls : ☎ 8527673949, Low rate Call Girls
Mandi House Call Girls : ☎ 8527673949, Low rate Call GirlsMandi House Call Girls : ☎ 8527673949, Low rate Call Girls
Mandi House Call Girls : ☎ 8527673949, Low rate Call Girlsashishs7044
 
FULL ENJOY - 9953040155 Call Girls in Noida | Delhi
FULL ENJOY - 9953040155 Call Girls in Noida | DelhiFULL ENJOY - 9953040155 Call Girls in Noida | Delhi
FULL ENJOY - 9953040155 Call Girls in Noida | DelhiMalviyaNagarCallGirl
 
Patrakarpuram ) Cheap Call Girls In Lucknow (Adult Only) 🧈 8923113531 𓀓 Esco...
Patrakarpuram ) Cheap Call Girls In Lucknow  (Adult Only) 🧈 8923113531 𓀓 Esco...Patrakarpuram ) Cheap Call Girls In Lucknow  (Adult Only) 🧈 8923113531 𓀓 Esco...
Patrakarpuram ) Cheap Call Girls In Lucknow (Adult Only) 🧈 8923113531 𓀓 Esco...akbard9823
 
MinSheng Gaofeng Estate commercial storyboard
MinSheng Gaofeng Estate commercial storyboardMinSheng Gaofeng Estate commercial storyboard
MinSheng Gaofeng Estate commercial storyboardjessica288382
 
Low Rate Call Girls in Laxmi Nagar Delhi Call 9990771857
Low Rate Call Girls in Laxmi Nagar Delhi Call 9990771857Low Rate Call Girls in Laxmi Nagar Delhi Call 9990771857
Low Rate Call Girls in Laxmi Nagar Delhi Call 9990771857delhimodel235
 
Hazratganj ] (Call Girls) in Lucknow - 450+ Call Girl Cash Payment 🧄 89231135...
Hazratganj ] (Call Girls) in Lucknow - 450+ Call Girl Cash Payment 🧄 89231135...Hazratganj ] (Call Girls) in Lucknow - 450+ Call Girl Cash Payment 🧄 89231135...
Hazratganj ] (Call Girls) in Lucknow - 450+ Call Girl Cash Payment 🧄 89231135...akbard9823
 
Strip Zagor Extra 322 - Dva ortaka.pdf
Strip   Zagor Extra 322 - Dva ortaka.pdfStrip   Zagor Extra 322 - Dva ortaka.pdf
Strip Zagor Extra 322 - Dva ortaka.pdfStripovizijacom
 
Downtown Call Girls O5O91O128O Pakistani Call Girls in Downtown
Downtown Call Girls O5O91O128O Pakistani Call Girls in DowntownDowntown Call Girls O5O91O128O Pakistani Call Girls in Downtown
Downtown Call Girls O5O91O128O Pakistani Call Girls in Downtowndajasot375
 
Jagat Puri Call Girls : ☎ 8527673949, Low rate Call Girls
Jagat Puri Call Girls : ☎ 8527673949, Low rate Call GirlsJagat Puri Call Girls : ☎ 8527673949, Low rate Call Girls
Jagat Puri Call Girls : ☎ 8527673949, Low rate Call Girlsashishs7044
 
FULL ENJOY - 9953040155 Call Girls in Uttam Nagar | Delhi
FULL ENJOY - 9953040155 Call Girls in Uttam Nagar | DelhiFULL ENJOY - 9953040155 Call Girls in Uttam Nagar | Delhi
FULL ENJOY - 9953040155 Call Girls in Uttam Nagar | DelhiMalviyaNagarCallGirl
 
FULL ENJOY - 9953040155 Call Girls in Paschim Vihar | Delhi
FULL ENJOY - 9953040155 Call Girls in Paschim Vihar | DelhiFULL ENJOY - 9953040155 Call Girls in Paschim Vihar | Delhi
FULL ENJOY - 9953040155 Call Girls in Paschim Vihar | DelhiMalviyaNagarCallGirl
 

Recently uploaded (20)

Pragati Maidan Call Girls : ☎ 8527673949, Low rate Call Girls
Pragati Maidan Call Girls : ☎ 8527673949, Low rate Call GirlsPragati Maidan Call Girls : ☎ 8527673949, Low rate Call Girls
Pragati Maidan Call Girls : ☎ 8527673949, Low rate Call Girls
 
Karachi Escorts | +923070433345 | Escort Service in Karachi
Karachi Escorts | +923070433345 | Escort Service in KarachiKarachi Escorts | +923070433345 | Escort Service in Karachi
Karachi Escorts | +923070433345 | Escort Service in Karachi
 
Retail Store Scavanger Hunt - Foundation College Park
Retail Store Scavanger Hunt - Foundation College ParkRetail Store Scavanger Hunt - Foundation College Park
Retail Store Scavanger Hunt - Foundation College Park
 
Call Girls in Islamabad | 03274100048 | Call Girl Service
Call Girls in Islamabad | 03274100048 | Call Girl ServiceCall Girls in Islamabad | 03274100048 | Call Girl Service
Call Girls in Islamabad | 03274100048 | Call Girl Service
 
FULL ENJOY - 9953040155 Call Girls in Laxmi Nagar | Delhi
FULL ENJOY - 9953040155 Call Girls in Laxmi Nagar | DelhiFULL ENJOY - 9953040155 Call Girls in Laxmi Nagar | Delhi
FULL ENJOY - 9953040155 Call Girls in Laxmi Nagar | Delhi
 
FULL ENJOY - 9953040155 Call Girls in Gandhi Vihar | Delhi
FULL ENJOY - 9953040155 Call Girls in Gandhi Vihar | DelhiFULL ENJOY - 9953040155 Call Girls in Gandhi Vihar | Delhi
FULL ENJOY - 9953040155 Call Girls in Gandhi Vihar | Delhi
 
Call Girl in Bur Dubai O5286O4116 Indian Call Girls in Bur Dubai By VIP Bur D...
Call Girl in Bur Dubai O5286O4116 Indian Call Girls in Bur Dubai By VIP Bur D...Call Girl in Bur Dubai O5286O4116 Indian Call Girls in Bur Dubai By VIP Bur D...
Call Girl in Bur Dubai O5286O4116 Indian Call Girls in Bur Dubai By VIP Bur D...
 
Russian⚡ Call Girls In Sector 104 Noida✨8375860717⚡Escorts Service
Russian⚡ Call Girls In Sector 104 Noida✨8375860717⚡Escorts ServiceRussian⚡ Call Girls In Sector 104 Noida✨8375860717⚡Escorts Service
Russian⚡ Call Girls In Sector 104 Noida✨8375860717⚡Escorts Service
 
Akola Call Girls #9907093804 Contact Number Escorts Service Akola
Akola Call Girls #9907093804 Contact Number Escorts Service AkolaAkola Call Girls #9907093804 Contact Number Escorts Service Akola
Akola Call Girls #9907093804 Contact Number Escorts Service Akola
 
Mandi House Call Girls : ☎ 8527673949, Low rate Call Girls
Mandi House Call Girls : ☎ 8527673949, Low rate Call GirlsMandi House Call Girls : ☎ 8527673949, Low rate Call Girls
Mandi House Call Girls : ☎ 8527673949, Low rate Call Girls
 
FULL ENJOY - 9953040155 Call Girls in Noida | Delhi
FULL ENJOY - 9953040155 Call Girls in Noida | DelhiFULL ENJOY - 9953040155 Call Girls in Noida | Delhi
FULL ENJOY - 9953040155 Call Girls in Noida | Delhi
 
Patrakarpuram ) Cheap Call Girls In Lucknow (Adult Only) 🧈 8923113531 𓀓 Esco...
Patrakarpuram ) Cheap Call Girls In Lucknow  (Adult Only) 🧈 8923113531 𓀓 Esco...Patrakarpuram ) Cheap Call Girls In Lucknow  (Adult Only) 🧈 8923113531 𓀓 Esco...
Patrakarpuram ) Cheap Call Girls In Lucknow (Adult Only) 🧈 8923113531 𓀓 Esco...
 
MinSheng Gaofeng Estate commercial storyboard
MinSheng Gaofeng Estate commercial storyboardMinSheng Gaofeng Estate commercial storyboard
MinSheng Gaofeng Estate commercial storyboard
 
Low Rate Call Girls in Laxmi Nagar Delhi Call 9990771857
Low Rate Call Girls in Laxmi Nagar Delhi Call 9990771857Low Rate Call Girls in Laxmi Nagar Delhi Call 9990771857
Low Rate Call Girls in Laxmi Nagar Delhi Call 9990771857
 
Hazratganj ] (Call Girls) in Lucknow - 450+ Call Girl Cash Payment 🧄 89231135...
Hazratganj ] (Call Girls) in Lucknow - 450+ Call Girl Cash Payment 🧄 89231135...Hazratganj ] (Call Girls) in Lucknow - 450+ Call Girl Cash Payment 🧄 89231135...
Hazratganj ] (Call Girls) in Lucknow - 450+ Call Girl Cash Payment 🧄 89231135...
 
Strip Zagor Extra 322 - Dva ortaka.pdf
Strip   Zagor Extra 322 - Dva ortaka.pdfStrip   Zagor Extra 322 - Dva ortaka.pdf
Strip Zagor Extra 322 - Dva ortaka.pdf
 
Downtown Call Girls O5O91O128O Pakistani Call Girls in Downtown
Downtown Call Girls O5O91O128O Pakistani Call Girls in DowntownDowntown Call Girls O5O91O128O Pakistani Call Girls in Downtown
Downtown Call Girls O5O91O128O Pakistani Call Girls in Downtown
 
Jagat Puri Call Girls : ☎ 8527673949, Low rate Call Girls
Jagat Puri Call Girls : ☎ 8527673949, Low rate Call GirlsJagat Puri Call Girls : ☎ 8527673949, Low rate Call Girls
Jagat Puri Call Girls : ☎ 8527673949, Low rate Call Girls
 
FULL ENJOY - 9953040155 Call Girls in Uttam Nagar | Delhi
FULL ENJOY - 9953040155 Call Girls in Uttam Nagar | DelhiFULL ENJOY - 9953040155 Call Girls in Uttam Nagar | Delhi
FULL ENJOY - 9953040155 Call Girls in Uttam Nagar | Delhi
 
FULL ENJOY - 9953040155 Call Girls in Paschim Vihar | Delhi
FULL ENJOY - 9953040155 Call Girls in Paschim Vihar | DelhiFULL ENJOY - 9953040155 Call Girls in Paschim Vihar | Delhi
FULL ENJOY - 9953040155 Call Girls in Paschim Vihar | Delhi
 

uputstvo panasonic nv-gs90.pdf

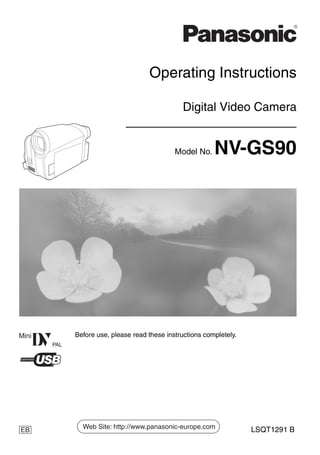
  • 1. Operating Instructions Digital Video Camera Model No. NV-GS90 Before use, please read these instructions completely. LSQT1291 B EB LSQT1291_ENG.book 1 ページ 2008年3月5日 水曜日 午前9時41分
  • 2. 2 LSQT1291 Dear Customer, We would like to take this opportunity to thank you for purchasing this Panasonic Movie Camera. Please read these Operating Instructions carefully and keep them handy for future reference. Please note that the actual controls and components, menu items, etc. of your Movie Camera may look somewhat different from those shown in the illustrations in these Operating Instructions. Caution for AC mains lead For your safety, please read the following text carefully. This appliance is supplied with a moulded three pin mains plug for your safety and convenience. A 5-ampere fuse is fitted in this plug. Should the fuse need to be replaced please ensure that the replacement fuse has a rating of 5-ampere and that it is approved by ASTA or BSI to BS1362. Check for the ASTA mark Ï or the BSI mark Ì on the body of the fuse. If the plug contains a removable fuse cover you must ensure that it is refitted when the fuse is replaced. If you lose the fuse cover the plug must not be used until a replacement cover is obtained. A replacement fuse cover can be purchased from your local dealer. If a new plug is to be fitted please observe the wiring code as stated below. If in any doubt please consult a qualified electrician. IMPORTANT The wires in this mains lead are coloured in accordance with the following code: Blue: Neutral, Brown: Live. As these colours may not correspond with the coloured markings identifying the terminals in your plug, proceed as follows: The wire which is coloured Blue must be connected to the terminal which is marked with the letter N or coloured Black or Blue. The wire which is coloured Brown must be connected to the terminal which is marked with the letter L or coloured Brown or Red. WARNING: DO NOT CONNECT EITHER WIRE TO THE EARTH TERMINAL WHICH IS MARKED WITH THE LETTER E, BY THE EARTH SYMBOL Ó OR COLOURED GREEN OR GREEN/YELLOW. THIS PLUG IS NOT WATERPROOF—KEEP DRY. Before use Remove the connector cover. How to replace the fuse The location of the fuse differ according to the type of AC mains plug (figures A and B). Confirm the AC mains plug fitted and follow the instructions below. Illustrations may differ from actual AC mains plug. 1. Open the fuse cover with a screwdriver. 2. Replace the fuse and close or attach the fuse cover. CAUTION! IF THE FITTED MOULDED PLUG IS UNSUITABLE FOR THE SOCKET OUTLET IN YOUR HOME THEN THE FUSE SHOULD BE REMOVED AND THE PLUG CUT OFF AND DISPOSED OF SAFELY. THERE IS A DANGER OF SEVERE ELECTRICAL SHOCK IF THE CUT OFF PLUG IS INSERTED INTO ANY 13-AMPERE SOCKET. Fuse cover Figure A Figure B Figure A Figure B Fuse (5 ampere) Fuse (5 ampere) LSQT1291_ENG.book 2 ページ 2008年3月5日 水曜日 午前9時41分
  • 3. 3 LSQT1291 Information for Your Safety Operating instructions ≥All other company and product names in the operating instructions are trademarks of their respective corporations. Pages for reference Pages for reference are indicated by dashes either side of a number, for example: -00- The menu operation flow is indicated by >> in the description. Use only the recommended accessories. ≥Do not use any other AV cables except the supplied one. ≥When you use the cable which are sold separately, please make sure to use the one whose length is less than 3 meters. ª Carefully observe copyright laws. Recording of pre-recorded tapes or discs or other published or broadcast material for purposes other than your own private use may infringe copyright laws. Even for the purpose of private use, recording of certain material may be restricted. ≥U.S. Patent Nos. 6,836,549; 6,381,747; 7,050,698; 6,516,132; and 5,583,936. ≥This product incorporates copyright protection technology that is protected by U.S. patents and other intellectual property rights. Use of this copyright protection technology must be authorized by Macrovision, and is intended for home and other limited viewing uses only unless otherwise authorized by Macrovision. Reverse engineering or disassembly is prohibited. WARNING: TO REDUCE THE RISK OF FIRE, ELECTRIC SHOCK OR PRODUCT DAMAGE, ≥DO NOT EXPOSE THIS APPARATUS TO RAIN, MOISTURE, DRIPPING OR SPLASHING AND THAT NO OBJECTS FILLED WITH LIQUIDS, SUCH AS VASES, SHALL BE PLACED ON THE APPARATUS. ≥USE ONLY THE RECOMMENDED ACCESSORIES. ≥DO NOT REMOVE THE COVER (OR BACK); THERE ARE NO USER SERVICEABLE PARTS INSIDE. REFER SERVICING TO QUALIFIED SERVICE PERSONNEL. CAUTION! ≥DO NOT INSTALL OR PLACE THIS UNIT IN A BOOKCASE, BUILT-IN CABINET OR IN ANOTHER CONFINED SPACE. ENSURE THE UNIT IS WELL VENTILATED. TO PREVENT RISK OF ELECTRIC SHOCK OR FIRE HAZARD DUE TO OVERHEATING, ENSURE THAT CURTAINS AND ANY OTHER MATERIALS DO NOT OBSTRUCT THE VENTILATION VENTS. ≥DO NOT OBSTRUCT THE UNIT’S VENTILATION OPENINGS WITH NEWSPAPERS, TABLECLOTHS, CURTAINS, AND SIMILAR ITEMS. ≥DO NOT PLACE SOURCES OF NAKED FLAMES, SUCH AS LIGHTED CANDLES, ON THE UNIT. ≥DISPOSE OF BATTERIES IN AN ENVIRONMENTALLY FRIENDLY MANNER. The socket outlet shall be installed near the equipment and easily accessible. The mains plug of the power supply cord shall remain readily operable. To completely disconnect this apparatus from the AC Mains, disconnect the power supply cord plug from AC receptacle. Product Identification Marking is located on the bottom of units. LSQT1291_ENG.book 3 ページ 2008年3月5日 水曜日 午前9時41分
  • 4. 4 LSQT1291 Information on Disposal for Users of Waste Electrical & Electronic Equipment (private households) This symbol on the products and/or accompanying documents means that used electrical and electronic products should not be mixed with general household waste. For proper treatment, recovery and recycling, please take these products to designated collection points, where they will be accepted on a free of charge basis. Alternatively, in some countries you may be able to return your products to your local retailer upon the purchase of an equivalent new product. Disposing of this product correctly will help to save valuable resources and prevent any potential negative effects on human health and the environment which could otherwise arise from inappropriate waste handling. Please contact your local authority for further details of your nearest designated collection point. Penalties may be applicable for incorrect disposal of this waste, in accordance with national legislation. For business users in the European Union If you wish to discard electrical and electronic equipment, please contact your dealer or supplier for further information. Information on Disposal in other Countries outside the European Union This symbol is only valid in the European Union. If you wish to discard this product, please contact your local authorities or dealer and ask for the correct method of disposal. LSQT1291_ENG.book 4 ページ 2008年3月5日 水曜日 午前9時41分
  • 5. 5 LSQT1291 Contents Caution for AC mains lead ....................................2 Information for Your Safety...................................3 Before using Accessories...........................................................6 Optional.................................................................6 Parts identification and handling...........................7 The grip belt..........................................................8 Using the lens cover .............................................9 Power supply ........................................................9 Charging time and recordable time.....................11 Selecting a mode (Turning the camera on/off)..............................11 Setting date and time..........................................13 Using the LCD monitor........................................13 Using the viewfinder............................................14 Quick start...........................................................14 Inserting/removing a cassette .............................15 How to use the joystick .......................................16 Help mode...........................................................17 Switching the language.......................................18 Using the menu screen.......................................18 Adjusting LCD monitor/viewfinder.......................19 Recording with the built-in LED video light .........19 Record mode Check before recording.......................................20 Recording on a tape............................................21 Recording check .................................................21 Blank search function..........................................22 Recording a still picture on a tape (Photoshot).......................................................22 Zoom in/out function ...........................................23 Recording yourself ..............................................24 Backlight compensation function ........................24 Colour night view function...................................25 Soft skin mode ....................................................25 Fade in/fade out function ....................................26 Wind noise reduction function.............................26 Wide/4:3 function ................................................27 Image stabilizer function .....................................27 Guideline function ...............................................27 Auto slow shutter mode ......................................28 Recording in various situations (Scene mode)...................................................28 Recording in natural colours (White balance) ................................................29 Manual focus adjustment ....................................30 Manual shutter speed/aperture adjustment ........31 Playback mode Playing back tape................................................32 Frame-by-frame playback ...................................33 Playback on TV...................................................33 Edit mode Copying onto a DVD recorder or a VCR (Dubbing)..........................................................34 Using the DV Cable for Recording (Digital Dubbing)...............................................35 Using the movie camera as a Web Camera ....................................................35 Using on Macintosh.............................................36 Notes...................................................................37 Menu Menu list..............................................................38 Menus related to taking pictures .........................39 Menus related to playback ..................................39 Other menus .......................................................39 Others Indications...........................................................40 Warning/alarm indications...................................41 Functions cannot be used simultaneously ..........42 Before requesting repair (Problems and solutions)..................................42 Cautions for Use .................................................45 Explanation of terms ...........................................49 Specifications Specifications......................................................50 Index ...................................................................51 LSQT1291_ENG.book 5 ページ 2008年3月5日 水曜日 午前9時41分
  • 6. Before using 6 LSQT1291 Before using ª Sales and Support Information Customer Care Centre ≥For customers within the UK: 0844 844 3852 ≥For customers within the Republic of lreland: 01 289 8333 ≥Visit our website for product information ≥E-mail: customer.care@panasonic.co.uk Technical Support for AV Software ≥For customers within the UK: 0844 844 3869 ≥For customers within the Republic of lreland: 01 289 8333 Direct Sales at Panasonic UK ≥Order accessory and consumable items for your product with ease and confidence by phoning our Customer Care Centre Monday–Thursday 9.00 a.m.–5.30 p.m., Friday 9.30 a.m.– 5.30 p.m. (Excluding public holidays) ≥Or go on line through our Internet Accessory ordering application at www.panasonic.co.uk. ≥Most major credit and debit cards accepted. ≥All enquiries transactions and distribution facilities are provided directly by Panasonic UK Ltd. ≥It couldn’t be simpler! ≥Also available through our Internet is direct shopping for a wide range of finished products, take a browse on our website for further details. Interested in purchasing an extended guarantee? Please call 0870 240 6284 or visit our website www.panasonic.co.uk/guarantee. Accessories The followings are the accessories supplied with this product. 1) AC adaptor, DC input lead, AC mains lead -10- 2) Battery pack -9- ≥The supplied battery pack is not available as spare part, see the list of optional batteries below for alternative battery. 3) AV cable -33-, -34- Optional 1) Battery pack (lithium/VW-VBG130/1320 mAh) 2) Battery pack (lithium/VW-VBG260/2640 mAh) 3) Battery pack (lithium/VW-VBG6*/5800 mAh) 4) Battery pack holder kit (VW-VH04) 5) Shoe adaptor (VW-SK12E) 6) Video DC light (VW-LDC102E) 7) Light bulb for video DC light (VZ-LL10E) 8) Tripod (VW-CT45E) 9) DV cable (VW-CD1E) ≥Some optional accessories may not be available in some countries. * The battery pack holder kit VW-VH04 (optional) is necessary. 1) 2) 3) K2CT3CA00004 K2KC4CB00022 or K2KC4CB00020 LSSB0017 VSK0698 K2GJ2DC00015 or K2GJ2DC00011 LSQT1291_ENG.book 6 ページ 2008年3月5日 水曜日 午前9時41分
  • 7. Before using 7 LSQT1291 Parts identification and handling ª Camera (1) White balance sensor -30- (2) Lens cover open/close switch [ ] -9- (3) Grip belt -8- (4) Lens (5) Lens cover (6) Built-in LED video light -19- (7) Microphone (built-in, stereo) -23-, -26- (8) Audio-video output terminal [A/V] -33-, -34- ≥Use the supplied AV cable only, otherwise audio may not be played back normally. (9) Viewfinder -14-, -48- (10) Battery holder -10- (11) DC input terminal [DC/C.C.IN] -10- (12) Battery release lever [BATTERY] -10- (13) Status indicator -11- (14) Mode dial -11- (15) Optical image stabilizer button [O.I.S.] -27- (16) Menu button [MENU] -18- (17) Joystick -16- (18) Recording start/stop button -21- (4) (3) (7) (1) (6) (2) (5) / (8) Due to limitations in LCD production technology, there may be some tiny bright or dark spots on the viewfinder screen. However, this is not a malfunction and does not affect the recorded picture. BATTERY (9) (10) (11) (12) (13) (14) (15) (16) (17) (18) LSQT1291_ENG.book 7 ページ 2008年3月5日 水曜日 午前9時41分
  • 8. Before using 8 LSQT1291 (19) LCD monitor -13-, -48- (20) LCD monitor open part -13- (21) Speaker -32- (22) Mode select buttons [AUTO]/ [MANUAL AF/MF] -20-, -28-, -29-, -30-, -31- (23) Reset button [RESET] -41-, -44- (24) USB terminal [ ] -35- (25) Light button [LIGHT] -19- (26) DV output terminal [DV] -34-, -35- (27) Cassette holder -15- (28) Cassette eject lever [OPEN/EJECT] -15- (29) Cassette cover -15- (30) Zoom lever [W/T] -23- Volume lever [sVOLr] -32- (31) Photoshot button [ ] -22- (32) Eyepiece corrector knob -14- (33) Tripod receptacle This is a hole for attaching the camera to optional tripod. (Please carefully read the operating instructions for how to attach the tripod to the camera.) The grip belt Adjust the belt length so it fits your hand. 1 Adjust the belt length and the pad position. 1 Flip the belt. 2 Adjust the length. 3 Fix the belt. Due to limitations in LCD production technology, there may be some tiny bright or dark spots on the LCD monitor screen. However, this is not a malfunction and does not affect the recorded picture. (19) (20) (23) (24) (25) (26) (21)(22) (27) (28) (29) (30) (31) (32) (33) LSQT1291_ENG.book 8 ページ 2008年3月5日 水曜日 午前9時41分
  • 9. Before using 9 LSQT1291 Using the lens cover For the lens protection, be sure to close the lens cover when not in use. 1 Slide the lens cover open/close switch to [ ]. Power supply ª Charging the battery When this product is purchased, the battery is not charged. Charge the battery before using this product. ≥Battery charging time (-11-) ≥We recommend using Panasonic batteries. (-6-) ≥If you use other batteries, we cannot guarantee the quality of this product. ≥If the DC input lead is connected to the AC adaptor, then the battery will not get charged. Remove the DC input lead from the AC adaptor. 1 Connect the AC mains lead to the AC adaptor and the AC mains socket. 2 Put the battery on the battery mount by aligning the mark, and then securely plug it in. ª Charging lamp Lights up: Charging Goes off: Charging completed Flashing: When the battery temperature is excessively high or low, the lamp flashes and the charging time will be longer than normal. Remove dirt, foreign objects or dust on the terminals of the battery or the AC adaptor. If the lamp is still flashing, something may be wrong with the battery or AC adaptor. Contact your dealer. It has been found that counterfeit battery packs which look very similar to the genuine product are made available to purchase in some markets. Some of these battery packs are not adequately protected with internal protection to meet the requirements of appropriate safety standards. There is a possibility that these battery packs may lead to fire or explosion. Please be advised that we are not liable for any accident or failure occurring as a result of use of a counterfeit battery pack. To ensure that safe products are used we would recommend that a genuine Panasonic battery pack is used. ≥Be aware that many batteries sold at extremely cheap prices or in situations where it is difficult to verify the actual products before purchase have proven to be counterfeit. 1 2 LSQT1291_ENG.book 9 ページ 2008年3月5日 水曜日 午前9時41分
  • 10. Before using 10 LSQT1291 ª Connecting to the AC outlet The unit is in the standby condition when the AC adaptor is connected. The primary circuit is always “live” as long as the AC adaptor is connected to an electrical outlet. 1 Connect the AC mains lead to the AC adaptor and the AC mains socket. 2 Connect the DC input lead to the AC adaptor. 3 Connect the DC input lead to this product. ≥Do not use the power cord for other equipment since the power cord is exclusively designed for the movie camera. Or do not use the power cord of other equipment for the movie camera. ª Fitting the battery Push the battery against the battery holder and slide it until it clicks. ª Removing the battery While sliding the [BATTERY] lever, slide the battery to remove it. ≥Hold the battery with your hand so it does not fall. ≥Before removing the battery, be sure to set the Mode dial to OFF and check that the status indicator is off. ≥Do not heat or expose to flame. ≥Do not leave a battery pack in an automobile exposed to direct sunlight for a long period of time with doors and windows closed. Notice about the rechargeable battery The battery is designated recyclable. Please follow your local recycling regulations. 1 2 3 CAUTION Danger of explosion if battery is incorrectly replaced. Replace only with the same or equivalent type recommended by the manufacturer. Dispose of used batteries according to the manufacturer’s instructions. Warning Risk of fire, explosion and burns. Do not disassemble, heat above 60 xC or incinerate. BATTERY LSQT1291_ENG.book 10 ページ 2008年3月5日 水曜日 午前9時41分
  • 11. Before using 11 LSQT1291 Charging time and recordable time The times shown in the tables below are for when the temperature is 25 oC and the humidity is 60%. If the temperature is higher or lower than 25 oC, the charging time will become longer. A Charging time B Maximum continuously recordable time C Actual recordable time (The actual recordable time refers to the recordable time on a tape when repeatedly starting/stopping recording, turning the unit on/off, moving the zoom lever, etc.) “1 h 40 min” indicates 1 hour 40 minutes. ≥The charging time and recordable time shown in the table are approximations. The times indicate the recordable times when the viewfinder is used. The times in parentheses indicate the recordable times when the LCD monitor is used. ≥We recommend the Battery Pack VW-VBG130, VW-VBG260 and VW-VBG6 for long time recording (2 hours or more for continuous recording, 1 hour or more for actual recording). ≥The actual time may become shorter than this. The recordable time shown in the table are approximations. The recordable time will become shorter in the following cases: ≥When you use both the viewfinder and the LCD monitor simultaneously while rotating the LCD monitor frontward to record yourself etc. ≥The batteries heat up after use or charging. The main unit of the movie camera being used will also heat up. This is normal. ≥Along with the reduction of the battery capacity, the display will change: # # # # . If the battery discharges, then ( ) will flash. Selecting a mode (Turning the camera on/off) When recording, open the lens cover before turning the unit on. (-9-) If the unit is turned on with the lens cover closed, the automatic white balance adjustment (-49-) may not function properly. Rotate the mode dial to select the desired mode or OFF. ≥Rotate the mode dial slowly. ª How to turn on the power 1 While pressing the lock release button, set the mode dial to select the desired mode ≥Rotate the mode dial while at the same time pressing in the lock release button A if changing from OFF to another mode. ≥Align with the mark B. ≥The status indicator lights red and the power turns on. Supplied battery (7.2 V/ 640 mAh) A 1 h 40 min B 1 h 45 min (1 h 30 min) C 55 min (45 min) VW-VBG130 (7.2 V/ 1320 mAh) A 2 h 35 min B 3 h (2 h 40 min) C 1 h 35 min (1 h 20 min) VW-VBG260 (7.2 V/ 2640 mAh) A 4 h 40 min B 6 h 5 min (5 h 20 min) C 3 h 10 min (2 h 45 min) VW-VBG6 (7.2 V/ 5800 mAh) A 9 h 25 min B 14 h 5 min (12 h 15 min) C 7 h 25 min (6 h 25 min) A B LSQT1291_ENG.book 11 ページ 2008年3月5日 水曜日 午前9時41分
  • 12. Before using 12 LSQT1291 ª How to turn off the power 1 Set the mode dial to OFF. ≥The status indicator goes off when the power turns off. ª How to turn the power on and off with the LCD monitor/viewfinder When the mode dial is set to Tape Recording Mode, the power can be turned on and off with the LCD monitor and the viewfinder. 1 Open the LCD monitor out or extend the viewfinder to turn on the power. (-13-, -14-) ≥The LCD monitor or the viewfinder will be activated. 2 Close the LCD monitor and retract the viewfinder to turn off the power. ≥The power will not turn off unless the LCD monitor is closed and the viewfinder is retracted. ≥The status indicator automatically goes off and the power turns off. (If quick start is set to [ON] (-14-), the unit goes into quick start standby mode and the status indicator lights green.) ≥The power does not turn off even if the LCD monitor is closed and the viewfinder is retracted while recording on a tape. 3 Open the LCD monitor or extend the viewfinder to turn the power on and use the movie camera again. ≥The status indicator lights red and the power turns on. TAPE RECORDING MODE Use this when you record the image on a tape. TAPE PLAYBACK MODE Use this to play back a tape. OFF The power turns off. Set the mode dial to OFF when this unit is not being used. LSQT1291_ENG.book 12 ページ 2008年3月5日 水曜日 午前9時41分
  • 13. Before using 13 LSQT1291 Setting date and time When the movie camera is turned on for the first time, [SET DATE AND TIME] will appear. ≥Select [YES] and press the centre of the joystick. Do steps 2 and 3 below to set the date/ time. If the screen shows the incorrect date/time, then adjust it. ≥Set to Tape Recording Mode. 1 Set [BASIC] >> [CLOCK SET] >> [YES]. (-18-) 2 Move the joystick left or right in order to select the item to be set. Then move the joystick up or down to set the desired value. ≥The year will change as follows: 2000, 2001, ..., 2089, 2000, ... ≥The 24-hour clock is used. 3 Press the joystick to determine the setting. ≥The clock function starts at [00] seconds. ª About date/time ≥The date and time function are driven by a built-in lithium battery. ≥Make sure to check the time before recording because the built-in clock is not very accurate. ª Recharging the built-in lithium battery ≥If [0] or [--] appears when the camera is turning on, then the built-in lithium battery has run down. Use the steps below to charge the battery. When turn on the power for the first time after charging, [SET DATE AND TIME] will appear. Select [YES] and set the date and time. Connect the AC adaptor to the camera or attach the battery to the camera, and the built-in lithium battery will be recharged. Leave the camera as is for approx. 24 hours, and the battery will drive the date and time for approx. 6 months. (The battery is still being recharged even if the mode dial is set to OFF.) Using the LCD monitor You can record the image while viewing it on the opened LCD monitor. 1 Put a finger on the LCD monitor open part and pull the LCD monitor out in the direction of the arrow. ≥It can open up to 90o. 2 Adjust the angle of the LCD monitor according to your preference. ≥It can rotate up to 180o 1 towards the lens or 90o 2 towards the viewfinder. ≥The brightness and colour level of the LCD monitor can be adjusted from the menu. ≥If it is forcibly opened or rotated, the camera may be damaged or fail. ≥If the LCD monitor is rotated by 180o towards the lens and the viewfinder is extended (when recording yourself), the LCD monitor and the viewfinder simultaneously light. WARNING THE LITHIUM BATTERY IN THIS EQUIPMENT MUST ONLY BE REPLACED BY QUALIFIED PERSONNEL. WHEN NECESSARY, CONTACT YOUR LOCAL PANASONIC SUPPLIER. LSQT1291_ENG.book 13 ページ 2008年3月5日 水曜日 午前9時41分
  • 14. Before using 14 LSQT1291 Using the viewfinder ª Extending the viewfinder 1 Pull out the viewfinder and extend it by pinching the extension knob. ≥The viewfinder will be activated. (If the LCD monitor is opened, the viewfinder will be deactivated.) ª Adjusting the field of view 1 Adjust the focus by sliding the eyepiece corrector knob. ≥You can adjust the brightness of the viewfinder from the menu. Quick start When quick start is on the battery power is still being consumed, even when the LCD monitor and the viewfinder are closed. The camera will resume recording/pause mode about 1.7 seconds after the LCD monitor or the viewfinder is reopened. ≥Please note in quick start mode approximately half the pause recording power is being consumed. Using quick start mode will reduce the battery recording/playback time. ≥This is only activated in the following cases. ≥While using the battery A tape is inserted, while the Tape Recording Mode is set. ≥While using the AC adaptor Quick Start can be used even if a tape is not inserted. ≥Set to Tape Recording Mode. 1 Set [SETUP] >> [QUICK START] >> [ON]. (-18-) 2 Close the LCD monitor and retract the viewfinder while the mode dial is set to Tape Recording Mode. ≥The status indicator lights green and the unit goes into quick start standby mode. ≥The movie camera will not go into quick start standby mode unless the LCD monitor is closed and the viewfinder is retracted. 3 Open the LCD monitor or extend the viewfinder. ≥The status indicator lights red and the camera is put into recording pause approx. 1.7 seconds after it is turned on. 12:34:56 12:34:56 12:34:56 1. 1. 2008 1. 1. 2008 1. 1. 2008 12:34:56 1. 1. 2008 LSQT1291_ENG.book 14 ページ 2008年3月5日 水曜日 午前9時41分
  • 15. Before using 15 LSQT1291 ª To cancel Quick Start 1 Set [SETUP] >> [QUICK START] >> [OFF]. (-18-) ≥The status indicator goes off and the power turns off if the mode dial is set to OFF while the unit is in quick start standby mode. ≥If the standby continues for approx. 30 minutes, then the status indicator will go off and the camera will be completely turned off. ≥In the following cases, quick start is cancelled and the power turns off. ≥When the Mode dial is moved. ≥When the battery or AC adaptor is removed. ≥When the tape is removed while using the battery in Tape Recording Mode. ≥When the movie camera is quick-started with the white balance on automatic, it may take some time until the white balance is adjusted if the scene being recorded has a light source different from the scene last recorded. (When the colour night view function is used, however, the white balance of the scene last recorded is retained.) ≥If the power is turned on in quick start standby mode, the zoom magnification becomes 2k and the picture size may differ from what it was before quick start standby mode. ≥If [POWER SAVE] (-39-) is set to [5 MINUTES] and the unit automatically goes into quick start standby mode, close the LCD monitor and retract the viewfinder and then open the LCD monitor or extend the viewfinder again. Inserting/removing a cassette 1 Fit the AC adaptor or the battery and turn on the power. 2 Slide the [OPEN/EJECT] lever and open the cassette cover. ≥When the cover is fully opened, the cassette holder will come out. 3 After the cassette holder is opened, insert/ remove the cassette. ≥When inserting a cassette, orient it as shown in the figure, and then securely insert it as far as it goes. ≥When removing, pull it straight out. 4 Push the [PUSH] mark 1 in order to close the cassette holder. ≥The cassette holder is housed. 5 Only after the cassette holder is completely housed, close the cassette cover tightly. ≥When inserting a previously recorded cassette, use the blank search function to find the position where you want to continue recording. If you are overwriting a previously recorded cassette, be sure to find the position where you want to continue recording. ≥When closing the cassette cover, do not get anything, such as a cable, caught in the cover. Caution: Take care not to trap your fingers under the cassette holder when closing it. OPEN/ EJECT 1 PUSH LSQT1291_ENG.book 15 ページ 2008年3月5日 水曜日 午前9時41分
  • 16. Before using 16 LSQT1291 ≥After use, be sure to rewind the cassette completely, remove it and put it in a case. Store the case in an upright position. (-48-) ≥If the indicator of the condensation does not display on the LCD monitor and/or the viewfinder and you notice condensation on the lens or the main unit, do not open the cassette cover otherwise condensation may be formed on the heads or the cassette tape. (-45-) ª When the cassette holder does not come out ≥Close the cassette cover completely, and then open it again completely. ≥Check if the battery has run down. ≥Check if the cassette compartment cover is in contact with grip belt as shown below. If so, be sure the grip belt stays clear of the cover when opening. ª When the cassette holder cannot be housed ≥Set the mode dial to OFF, then to another mode again. ≥Check if the battery has run down. ª Accidental erasure prevention If the accidental erasure prevention slider 1 of a cassette is opened (slide in the direction of the [SAVE] arrow), the cassette cannot be recorded. When recording, close the accidental erasure prevention slider of the cassette (slide in the direction of the [REC] arrow). How to use the joystick ª Basic joystick operations Operations on the menu screen Move the joystick up, down, left or right to select an item, and then push in the centre to set it. ª Joystick and screen display Push the centre of the joystick, and icons will be displayed on the screen. Each time the joystick is moved down, the indication changes. (In the Tape playback mode, the icons will be automatically displayed on the screen.) 1) Tape Recording Mode (When the [AUTO] button is pressed to set to auto mode) ≥1 is displayed while recording on a tape. R E C SAVE 1 1 Select by moving up. 2 Select by moving down. 3 Select by moving left. 4 Select by moving right. 5 Determine by pushing the centre. 1/3 2 Fade -26- 3 Backlight compensation -24- 1 Help mode -17- 2/3 2 Soft skin mode -25- 3 Colour night view -25- 3/3 2 Recording check -21- 1 Blank search -22- 3 2 4 1 5 1 LSQT1291_ENG.book 16 ページ 2008年3月5日 水曜日 午前9時41分
  • 17. Before using 17 LSQT1291 2) Tape Recording Mode (When the [MANUAL AF/MF] button is pressed to set to manual mode) ≥1 is displayed while recording on a tape. ≥2 is displayed only When the [MANUAL AF/ MF] button is pressed again to set to manual focus mode. 3) Tape Playback Mode Help mode Select an icon for an explanation of the function. ≥Set to Tape Recording Mode. 1 Press the joystick to display the icon during the recording pause. Move the joystick down until icon 1 appears. 2 Move the joystick right to select the Help mode icon [ ]. 3 Move the joystick up, left, or right to select the desired icon. ≥An explanation of the selected icon is displayed on the screen. ≥Each time the joystick is moved down, the indication changes. ª To exit the Help mode Select [EXIT] or press the [MENU] button. ≥When the Help mode is used, it is not possible to record or set the functions. 4/4 2 Iris or gain value -31- 3 White balance -29- 1 Shutter speed -31- 5/5 2 Manual focus adjustment -30- 1 3 Playback/pause -32- 4 Stop -32- 2 Rewind (review playback) -32- 1 Fast forward (cue playback) -32- 2 1 2 1 LSQT1291_ENG.book 17 ページ 2008年3月5日 水曜日 午前9時41分
  • 18. Before using 18 LSQT1291 Switching the language You can switch the language on the screen display or the menu screen. 1 Set [LANGUAGE] >> select the desired language. Using the menu screen For each individual menu, please refer to -38-. 1 Press the [MENU] button. ≥The menu corresponding to the mode selected by the mode dial is displayed. ≥Do not switch the mode dial when the menu is displayed. 2 Move the joystick up or down in order to select the top menu. 3 Move the joystick right or press it to set the selection. 4 Move the joystick up or down in order to select the sub-menu. 5 Move the joystick right or press it to set the selection. 6 Move the joystick up or down in order to select the item to be set. 7 Press the joystick to determine the setting. ª To exit the menu screen Press the [MENU] button. ª To get back to the previous screen Move the joystick left. ª About the menu setting ≥The menu is not displayed while recording on a tape. Also, you cannot record on a tape while the menu is displayed. MENU LSQT1291_ENG.book 18 ページ 2008年3月5日 水曜日 午前9時41分
  • 19. Before using 19 LSQT1291 Adjusting LCD monitor/viewfinder ª Adjusting the brightness and colour level 1 Set [SETUP] >> [LCD SET] or [EVF SET] >> [YES]. 2 Move the joystick up or down in order to select the item to be adjusted. [LCD SET] : Brightness of the LCD monitor : Colour level of the LCD monitor [EVF SET] : Brightness of the viewfinder 3 Move the joystick left or right to move the bar indication representing the brightness. 4 Press the [MENU] button or the joystick to complete the settings. ≥When the LCD monitor is rotated by 180° towards the lens, the brightness of the LCD monitor cannot be adjusted. ≥To adjust the brightness of the viewfinder, close the LCD monitor and extend the viewfinder to activate it. ≥These settings will not affect the images actually recorded. Recording with the built-in LED video light 1 Press the [LIGHT] button. ≥The [ ] indication appears on the LCD monitor. ª To cancel the built-in LED video light Press the [LIGHT] button again. ≥The subject should be within 1.5 metres of the movie camera. ≥Using the LED video light reduces battery time. ≥Set the LED video light to off when not in use. ≥Do not look directly into the light. ≥Using the colour night view function at the same time will make conditions even brighter. ≥The LED video light enables simply lightening the images taken in a dimly-lit place. We also recommend using it in a bright place to obtain high quality images. LIGHT LSQT1291_ENG.book 19 ページ 2008年3月5日 水曜日 午前9時41分
  • 20. Record mode 20 LSQT1291 Record mode Check before recording Check the following before recording important events such as weddings or when the movie camera has not been used for a long time. Conduct a test recording to make sure that the image recording and the audio recording work properly. ª Basic camera holding 1) Hold the camera with both hands. 2) Run your hand through the grip belt. 3) Do not cover the microphones or sensors with your hands. 4) Keep your arms near your body. 5) Slightly open your legs. ≥When you are in the open air, record pictures with the sunlight as far in the background as possible. If the subject is backlit, it will become dark in the recording. ª Check points ≥Grip belt adjustment (-8-) ≥Open the LCD monitor or extend the viewfinder (Recording cannot start while the LCD monitor is closed and the viewfinder is retracted. Even if the LCD monitor and viewfinder are closed during recording, the power will not turn off until recording stops.) ≥Adjustment of LCD monitor/viewfinder (-19-) ≥Power supply (-9-) ≥Insert a cassette (-15-) ≥Setting date/time (-13-) ≥Setting SP/LP mode ª About auto mode ≥Press the [AUTO] button and the colour balance (white balance) and focusing will be adjusted automatically. (The [ ] indication appears on the screen.) ≥Auto white balance: -49- ≥Auto focusing: -49- ≥Depending on the brightness of the subject etc., the aperature and shutter speed are automatically adjusted for an optimum brightness. (The shutter speed is adjusted to a maximum of 1/250.) ≥Colour balance and focus may not be adjusted depending on light sources or scenes. If so, manually adjust the white balance and focus. ≥Scene mode setting (-28-) ≥White balance setting (-29-) ≥Shutter speed setting (-31-) ≥Iris/gain value setting (-31-) ≥Focus setting (-30-) ª Recording mode You can switch the tape recording mode. ≥Set to Tape Recording Mode. 1 Set [BASIC] >> [REC SPEED] >> [SP] or [LP]. If the LP mode is selected, the recording time will be 1.5 times the SP mode, but some functions will be disabled. ≥We recommend using the SP mode for important recording. ≥In order to fully exhibit the performances of the LP mode, we recommend using Panasonic cassettes marked LP mode. ≥In the LP mode, the picture quality will not be degraded in comparison with the SP mode, but mosaic noise may appear on the playback image or some functions may be disabled. ≥Playback on other digital video equipment or on digital video equipment without the LP mode. ≥Playback of the image on other digital video equipment recorded in the LP mode. ≥Frame-by-frame playback. 1) 4) 5) 2) 3) AUTO MANUAL AF/MF LSQT1291_ENG.book 20 ページ 2008年3月5日 水曜日 午前9時41分
  • 21. Record mode 21 LSQT1291 Recording on a tape When recording, open the lens cover before turning the unit on. (-9-) If the unit is turned on with the lens cover closed, the automatic white balance adjustment (-49-) may not function properly. When this unit is purchased, the aspect ratio is set to [16:9] for recording images compatible with a wide-screen TV. To make this unit compatible with regular TVs (4:3), change the [REC ASPECT] setting before recording the images (-27-) or change the [TV ASPECT] setting when watching them on the connected TV (-33-). ≥Set to Tape Recording Mode. 1 Press the recording start/stop button to start recording. 2 Press the recording start/stop button again to pause recording. ≥For the recording time on a tape, refer to -11-. ≥Carry out a recording check to verify that the image is recorded properly. ≥In order to find the unrecorded section, carry out the blank search (-22-). ª On-screen display in the tape recording mode 1) Recording time elapse 2) Remaining tape indication ª Concerning the remaining tape time indication on the screen ≥The remaining tape time is indicated in minutes. (When it reaches less than 3 minutes, the indication starts flashing.) ≥During a 15 seconds or shorter recording, the remaining tape time indication may not be displayed or the remaining tape time may not be displayed correctly. ≥In some cases, the remaining tape time indication may display remaining tape time that is 2 to 3 minutes shorter than the actual remaining tape time. Recording check The last image recorded is played back for 2 to 3 seconds. After checking, the camera will be set to a recording pause. ≥Set to Tape Recording Mode. 1 Press the joystick to display the icon during the recording pause. Move the joystick down until icon 1 appears. 2 Move the joystick left to select the recording check icon [ ]. ≥The [RECORDING CHECK STARTED] indication appears on the screen of the movie camera. ; ; 0h00m10s00f 0h00m10s00f 0h00m10s00f 1) R 0:30 R 0:30 R 0:30 2) R 0:30 R 0:30 R 0:30 0h00m10s00f 0h00m10s00f 0h00m10s00f 1 LSQT1291_ENG.book 21 ページ 2008年3月5日 水曜日 午前9時41分
  • 22. Record mode 22 LSQT1291 Blank search function Searches for the last part of the image recorded (unused part of the tape). After the search is finished, the blank search function is cancelled and the camera is put into recording pause. ≥Set to Tape Recording Mode. 1 Press the joystick to display the icon during the recording pause. Move the joystick down until icon 1 appears. 2 Move the joystick right to select the blank search icon [ ]. 3 When the confirmation message appears, select [YES] and press the centre of the joystick. ª Stopping blank search midway through Move the joystick down to select the [∫] icon. ≥If the cassette tape has no blank part, then the camera will stop at the end of the tape. ≥The camera stops at a point approx. 1 second before the end of the last image recorded. When you start recording at that point, the image can be recorded seamlessly from the last image. Recording a still picture on a tape (Photoshot) Still pictures can be recorded from the movie camera lens. ≥Set to Tape Recording Mode. 1 Press the [ ] button in the recording pause mode. ≥The movie camera records a still picture for about 7 seconds and then switches back to the recording pause mode. ≥If you set [ADVANCED] >> [SHTR EFFECT] >> [ON], you can add image and a sound like releasing the shutter. ≥Photoshot recording results in slightly inferior image quality. ª Continuous photoshot If you set [ADVANCED] >> [SHTR EFFECT] >> [ON] and keep the [ ] button pressed, the movie camera will continuously record still pictures in approx. 0.7 seconds intervals until the button is released. ≥The screen blinks and, at the same time, a shutter clicking sound is recorded. 1 LSQT1291_ENG.book 22 ページ 2008年3月5日 水曜日 午前9時41分
  • 23. Record mode 23 LSQT1291 Zoom in/out function You can zoom in up to 42k optically. ≥Set to Tape Recording Mode. 1 Wide-angle recording (zoom out): Push the [W/T] lever towards [W]. Close-up recording (zoom in): Push the [W/T] lever towards [T]. ≥When zooming in and recording images while holding the movie camera by hand, we recommend using the image stabilizer function. ≥When you are zooming on a faraway subject, a sharper focus is achieved if the recording subject is 1.3 metres or further from the movie camera. ≥When the zoom speed is high, the subject may not be focused easily. ≥When the zoom magnification is 1k, the movie camera can focus on a subject approx. 2 cm distant from the lens. ≥Be aware that a mechanical sound may be recorded when the [W/T] lever is released while zooming. Gently move the zoom lever back to it's original possition before releasing it. ª Digital zoom function If the zoom magnification exceeds 42 times, then the digital zoom function will be activated. The digital zoom function allows you to select a magnification from 70k to 2000k. ≥Set to Tape Recording Mode. 1 Set [ADVANCED] >> [D.ZOOM] >> [70k] or [2000k]. [OFF]: Optical zoom only (Up to 42k) [70k]: Digital zoom (Up to 70k) [2000k]: Digital zoom (Up to 2000k) ≥The larger the digital zoom magnification, the more the image quality is degraded. ª About the variable speed zoom function ≥The zoom speed varies according to the amount of movement of the [W/T] lever. ª To use the zoom microphone function Interlocked with the zooming operation, the microphone will collect sounds clearly far away with the tele-shot or those in the vicinity with the wide-angle shot. ≥Set to Tape Recording Mode. 1 Set [ADVANCED] >> [ZOOM MIC] >> [ON]. 1t t W T 5t t W T 42 42t t W T 70 70t t W T ZOOM ZOOM ZOOM LSQT1291_ENG.book 23 ページ 2008年3月5日 水曜日 午前9時41分
  • 24. Record mode 24 LSQT1291 Recording yourself You can record yourself while viewing the LCD monitor. You can record persons in front of the camera while presenting them the image. The image is horizontally flipped as if you see a mirror image. (However the image to be recorded is not altered.) ≥Extend the viewfinder to see the picture while recording. 1 Rotate the LCD monitor towards the lens side. ≥When the Wide function is set, a vertically oriented display appears on the viewfinder screen, this is normal and not indicative of any trouble. ≥When the LCD monitor is rotated towards the lens side, the icon will not be displayed even if you push the centre of the joystick. Backlight compensation function This protects a backlit subject from being darkened. ≥Set to Tape Recording Mode. 1 Press the joystick to display the icon. Move the joystick down until icon 1 appears. 2 Move the joystick up to select the backlight compensation icon [ ]. ≥The [BACKLIGHT COMPENSATION ON] indication appears on the screen of the movie camera. ≥The image on the screen will become brighter. ª To return to normal recording Select the [ ] icon again. ≥The [BACKLIGHT COMPENSATION OFF] indication appears on the screen of the movie camera. ≥The backlight compensation function is cancelled when you turn off the power or operate the mode dial. ≥The backlight compensation is cancelled when you activate the colour night view function. 1 LSQT1291_ENG.book 24 ページ 2008年3月5日 水曜日 午前9時41分
  • 25. Record mode 25 LSQT1291 Colour night view function This function allows you to record colour subjects in dark locations to stand out against the background. Attach the camera to a tripod, and you can record images free from vibration. ≥Recorded scene is seen as if frames were missed. ≥Set to Tape Recording Mode. 1 Press the joystick to display the icon. Move the joystick down until icon 1 appears. 2 Move the joystick up to select the colour night view icon [ ]. ≥The [COLOUR NIGHT VIEW ON] indication appears on the screen of the movie camera. ≥If it is difficult to focus, adjust the focus manually. (-30-) ª To cancel the colour night view function Select the [ ] icon again. ≥The [COLOUR NIGHT VIEW OFF] indication appears on the screen of the movie camera. ≥If set in a bright place, the screen may become whitish for a while. ≥The colour night view function makes the signal charging time of the CCD up to approximately 25k longer than usual, so that dark scenes (a minimum of 2 lx) can be recorded brightly. For this reason, bright dots that are usually invisible may be seen, but this is not a malfunction. ≥The colour night view function is cancelled when you turn off the power or operate the mode dial. Soft skin mode This allows the skin colour to be recorded in a softer tone. This is more effective if you record the bust image of a person. ≥Set to Tape Recording Mode. 1 Press the joystick to display the icon. Move the joystick down until icon 1 appears. 2 Move the joystick left to select the soft skin icon [ ]. ≥The [SOFT SKIN MODE ON] indication appears on the screen of the movie camera. ª To cancel the soft skin mode Select the [ ] icon again. ≥The [SOFT SKIN MODE OFF] indication appears on the screen of the movie camera. ≥If the background or anything else in the scene has colours similar to the skin colour, they will also be smoothed. ≥If the brightness is insufficient, the effect may not be clear. 1 1 LSQT1291_ENG.book 25 ページ 2008年3月5日 水曜日 午前9時41分
  • 26. Record mode 26 LSQT1291 Fade in/fade out function Fade in The image and audio gradually appear. Fade out The image and audio gradually disappear. ≥Set to Tape Recording Mode. 1 Press the joystick to display the icon. Move the joystick down until icon 1 appears. 2 Move the joystick left to select the fade icon [ ]. ≥The [FADE ON] indication appears on the screen of the movie camera. 3 Press the recording start/stop button. Start recording. (fade in) When you start recording, the image/audio disappears completely and the image/audio gradually appears. Pause recording. (fade out) The image/audio gradually disappears. After the image/audio completely disappears, recording stops. ª To cancel fading Select the [ ] icon again. ≥The [FADE OFF] indication appears on the screen of the movie camera. ª To select the colour for fade in/out The colour which appears in fading pictures can be selected. 1 Set [ADVANCED] >> [FADE COLOUR] >> [WHITE] or [BLACK]. ≥While the fade in/fade out function is selected, it takes several seconds to display the image when you start recording images. Besides, it also takes several seconds to pause recording. Wind noise reduction function This reduces the wind noise coming into the microphone when recording. ≥Set to Tape Recording Mode. 1 Set [BASIC] >> [WIND CUT] >> [ON]. ª To cancel the wind noise reduction function Set [BASIC] >> [WIND CUT] >> [OFF]. ≥The default setting is [ON]. ≥Reduces the wind noise depending on the wind strength. (If this function is activated in strong winds, the stereo effect may be reduced. When the wind weakens, the stereo effect will be restored.) 1 LSQT1291_ENG.book 26 ページ 2008年3月5日 水曜日 午前9時41分
  • 27. Record mode 27 LSQT1291 Wide/4:3 function This allows you to record images compatible with wide-screen TVs. Wide Function Images are recorded with a 16:9 aspect ratio. 4:3 Function Images are recorded with a 4:3 aspect ratio. ≥Set to Tape Recording Mode. 1 Wide Function Set [BASIC] >> [REC ASPECT] >> [16:9]. 4:3 Function Set [BASIC] >> [REC ASPECT] >> [4:3]. ª To cancel the Wide/4:3 function Wide Function Set [BASIC] >> [REC ASPECT] >> [4:3]. 4:3 Function Set [BASIC] >> [REC ASPECT] >> [16:9]. ≥The default setting is [16:9]. ≥In the wide-screen mode, the menu screens, operation icons and other screen displays appear horizontally oriented. ≥When images are played back on a TV screen, the date/time indication may be erased in some cases. ≥Depending on the TV, the picture quality may deteriorate. ≥If still pictures recorded with a 4:3 aspect ratio are played back when [TV ASPECT] is set to [16:9], part of the operation icons and other displays will appear on the black bands on the left and right of the picture. ≥Concerning the TV to be connected and TV used for playback. ≥When playing back images taken by this unit on a TV screen, change the setting established by Tape playback mode [SETUP] >> [TV ASPECT] to match the aspect ratio (4:3 or 16:9) of the TV monitor to be connected. (-33-) ≥Depending on the settings of the TV connected, the images may not be displayed properly. For more information, please read the operating instructions for the TV. Image stabilizer function Reduces the image shaking due to hand movement when recording. ≥Set to Tape Recording Mode. 1 Press the [O.I.S.] button. ª To cancel the image stabilizer function Press the [O.I.S.] button again. ≥In the following cases, the image stabilizer function may not work effectively. ≥When the digital zoom is used ≥When the camera is shaken greatly ≥When you record a moving subject while tracking it Guideline function View the slope and the balance of the image while recording. You can check if the image is level while recording motion pictures. The function can also be used to estimate the balance of the composition. ≥Set to Tape Recording Mode. 1 Set [ADVANCED] >> [GUIDE LINES] >> [ON]. ª To cancel the guideline function Set [ADVANCED] >> [GUIDE LINES] >> [OFF]. ≥The guide lines do not appear on the images actually recorded. LSQT1291_ENG.book 27 ページ 2008年3月5日 水曜日 午前9時41分
  • 28. Record mode 28 LSQT1291 Auto slow shutter mode You can record bright pictures even in dark places by slowing the shutter speed. ≥Set to Tape Recording Mode. 1 Set [ADVANCED] >> [AUTO SLW SHTR] >> [ON]. ≥When auto slow shutter mode is selected, the shutter speed is adjusted between 1/25 and 1/250 depending on the surrounding brightness. ≥When adjusting the shutter speed manually, it can be adjusted between 1/25 and 1/8000. (-31-) ª To cancel the slow shutter mode Set [ADVANCED] >> [AUTO SLW SHTR] >> [OFF]. ≥If [AUTO SLW SHTR] is set to [OFF], then the shutter speed will be set between 1/50 and 1/250. (When adjusting the shutter speed manually, it can be adjusted between 1/50 and 1/8000.) ≥This function’s default setting is [ON]. ≥If the scene is low in brightness or contrast, the subject may not be focused in on. ≥When the shutter speed becomes 1/25, the screen may be seen as if frames are missed and afterimages may appear. Recording in various situations (Scene mode) When you record images in different situations, this mode automatically sets optimum shutter speeds and apertures. ≥Set to Tape Recording Mode. 1 Press the [MANUAL AF/MF] button. 2 Set [BASIC] >> [SCENE MODE] >> select the desired mode. 1) [5] Sports mode ≥To record sports scenes or scenes where there are quick motions 2) [ ] Portrait mode ≥To make persons stand out against the background 3) [ ] Low light mode ≥To record dark scenes so they are brighter 4) [ ] Spotlight mode ≥To record subjects spotlit in a party or theatre 5) [ ] Surf & snow mode ≥To record images at dazzling places such as ski slopes and beaches ª To cancel the scene mode function Set [BASIC] >> [SCENE MODE] >> [OFF] or press the [AUTO] button. MANUAL AF/MF 3) 1) 5) 2) 4) LSQT1291_ENG.book 28 ページ 2008年3月5日 水曜日 午前9時41分
  • 29. Record mode 29 LSQT1291 Sports mode ≥For playback pause of recorded pictures, this mode presents free of camera shakes. ≥During normal playback, the image movement may not look smooth. ≥Avoid recording under fluorescent light, mercury light or sodium light because the colour and brightness of the playback image may change. ≥If you record a subject illuminated with strong light or a highly reflective subject, vertical lines of light may appear. ≥If the brightness is insufficient, the sports mode does not function. The [5] indication flashes. ≥If this mode is used indoors, the screen may flicker. Portrait mode ≥If this mode is used indoors, the screen may flicker. If so, change the scene mode setting to [OFF]. Low light mode ≥Extremely dark scenes may not be able to be recorded finely. Spotlight mode ≥If the recording subject is extremely bright, the recorded image may become whitish and the periphery of the recorded image extremely dark. Surf & snow mode ≥If the recording subject is extremely bright, the recorded image may become whitish. Recording in natural colours (White balance) The automatic white balance function may not reproduce natural colours depending on the scenes or lighting conditions. If so, you can adjust the white balance manually. ≥Set to Tape Recording Mode. 1 Press the [MANUAL AF/MF] button. 2 Move the joystick up to select the white balance icon [ ]. 3 Move the joystick left or right in order to select the white balance mode. 1) Auto white balance adjustment [ ] 2) Indoor mode (for recording under incandescent lamps) [ ] 3) Outdoor mode [ ] 4) Manual adjustment mode [ ] MANUAL AF/MF 1 1 1 1 AWB 3) 1) 2) 4) AWB LSQT1291_ENG.book 29 ページ 2008年3月5日 水曜日 午前9時41分
  • 30. Record mode 30 LSQT1291 ª To restore to the automatic adjustment Move the joystick left or right until the [ ] indication appears. Or, press the [AUTO] button. ≥ When the unit is turned on with the lens cover closed, the automatic white balance adjustment may not function properly. Please turn the unit on after opening the lens cover. ≥When setting both the white balance and the iris/gain, set the white balance first. ≥Whenever recording conditions change, re-set the white balance for correct adjustment. ª To set the white balance manually Select [ ] in Step 3. Then, while viewing a white subject on the entire screen, move the joystick up to select the [ ] indication. ª About flashing of the [ ] indication When the manual adjustment mode is selected ≥Flashing indicates that the white balance previously adjusted is stored. This setting is stored until the white balance is adjusted again. When white balance cannot be set in the manual adjustment mode ≥White balance may not be adjusted properly in the manual adjustment mode in dark places. If so, use the auto white balance mode. During setting in the manual adjustment mode ≥When the setting is completed, it will keep lit. ª About the white balance sensor The white balance sensor detects the type of light source during recording. ≥Do not cover the white balance sensor during recording, or it may not function properly. Manual focus adjustment If auto focusing is difficult due to the conditions, then manual focusing is available. ≥Set to Tape Recording Mode. 1 Press the [MANUAL AF/MF] button until the icon 1 appears. ≥The [ ] indication and the manual focus [MF] indication is displayed. 2 Move the joystick left or right in order to adjust the focus. ≥When focused with a wide angle, the subject may not be in focus when zoomed in. First, zoom in on the subject, and then focus on it. ª To restore to the automatic adjustment Press the [MANUAL AF/MF] button again or press the [AUTO] button. AWB 1 MANUAL AF/MF MNL LSQT1291_ENG.book 30 ページ 2008年3月5日 水曜日 午前9時41分
  • 31. Record mode 31 LSQT1291 Manual shutter speed/aperture adjustment Shutter Speed Adjust it when recording fast-moving subjects. Aperture Adjust it when the screen is too bright or too dark. ≥Set to Tape Recording Mode. 1 Press the [MANUAL AF/MF] button. 2 Move the joystick left or right to select the shutter aperture icon [ ] or shutter speed icon [ ]. 3 Move the joystick left or right in order to adjust the shutter speed or aperture. 1) Shutter speed 2) (Aperture) Iris/gain value ª To restore to automatic adjustment Press the [AUTO] button. Manual shutter speed adjustment ≥Avoid recording under fluorescent light, mercury light or sodium light because the colour and brightness of the playback image may change. ≥If you increase the shutter speed manually, the sensitivity lowers and accordingly the gain value increases automatically, which may increase the noises on the screen. ≥You may see vertical lines of light in the playback image of a brightly shining subject or highly reflective subject, but this is not a malfunction. ≥During normal playback, image movement may not look smooth. ≥When recording in the extremely bright place, the colour of the screen may change or flickers. If so, adjust the shutter speed manually to 1/50 or 1/100. Manual iris/gain adjustment ≥Set the shutter speed before setting the aperture (iris/gain) when manually adjusting both settings. ≥If the value does not become “OPEN”, you cannot adjust the gain value. ≥If the gain value is increased, the noise on the screen increases. ≥Depending on the zoom magnification, there are iris values that are not displayed. ª Shutter speed range 1/25 to 1/8000 seconds: Tape Recording Mode The shutter speed closer to 1/8000 is faster. If [AUTO SLW SHTR] is set to [OFF], then the shutter speed will be set between 1/50 and 1/8000. ª Iris/gain value range CLOSE (Closed), F16, ..., F2.0, OPEN (Opened: F1.8) 0dB, ..., 18dB Value closer to [CLOSE] darken the image. Value closer to [18dB] brighten the image. Values with dB are gain values. MANUAL AF/MF 1/1000 MNL 1) 1/50 F2.0 0dB MNL 2) 1/25 LSQT1291_ENG.book 31 ページ 2008年3月5日 水曜日 午前9時41分
  • 32. Playback mode 32 LSQT1291 Playback mode Playing back tape ≥Set to Tape Playback Mode. (An operation icon automatically appears on the LCD monitor.) 1 Operate with joystick. 1/;: Playback/Pause 6: Rewind/Review playback (Reverts to playback with the 1/; icon.) 5: Fast forward/Cue playback (Reverts to playback with the 1/; icon.) ∫: Stop ≥The power will not turn off when the LCD monitor and the viewfinder are closed and retracted during Tape Playback Mode. ≥During cue/review playback, fast-moving images may show noise as a mosaic. ≥Before and after cue/review playback, the screen may become black for a moment or images may be disturbed. ª To adjust volume Adjust the speaker volume for playback. 1 Move the [sVOLr] lever to adjust the volume. Towards [r]: increases the volume Towards [s]: decreases the volume (Nearer the bar to [r], larger the volume.) ≥When the adjustment is completed, the volume indication will disappear. ≥If you do not hear the sound, check the settings of [SETUP] >> [12bit AUDIO]. ª Repeat playback When the tape end is reached, the tape will be rewound and played back again. 1 Set [ADVANCED] >> [REPEAT PLAY] >> [ON]. ≥The [ ] indication appears. (In order to cancel the repeat playback mode, set [REPEAT PLAY] >> [OFF] or turn off the power.) ª Settings on the audio ≥If you cannot listen to the desired audio when playing back a tape, check the settings in [SETUP] >> [12bit AUDIO]. ≥When you record the audio in [12bit] and set [SETUP] >> [12bit AUDIO] >> [MIX], the audio will be played back in stereo sound regardless of the settings in [AUDIO OUT]. LSQT1291_ENG.book 32 ページ 2008年3月5日 水曜日 午前9時41分
  • 33. Playback mode 33 LSQT1291 Frame-by-frame playback ≥Set to Tape Playback Mode. 1 During playback, move the joystick up to select the [1/;] icon to pause playback. 2 Push the [sVOLr] lever. Towards [T]: normal direction Towards [W]: reversed direction ≥If you keep pushing the lever, then the images will continuously be played back frame by frame. ≥The pause icon appears for an instant. Continuous frame-by-frame playback will start after the pause icon disappears. ª To return to normal playback Move the joystick up to select the [1/;] icon to start playback. Playback on TV Images recorded by this camera can be played back on a TV. ≥Insert a recorded tape into this camera. ≥Be sure that the power of the unit is turned off before connecting it to a TV. 1 Connect the movie camera and a TV. ≥Connect the movie camera and a TV by using the AV cable 1. ≥If your TV is not equipped with AV Input Sockets, the 21-pin Adaptor (purchase separately) is necessary. Consult your dealer. 2 Turn on this camera and set the mode dial to the Tape Playback Mode. 3 Select the input channel on the TV. ≥If the images are not played back correctly on the TV (e.g. they are displayed vertically), perform the menu operations in accordance with the aspect ratio of the TV monitor. Set [SETUP] >> [TV ASPECT] >> [16:9] or [4:3]. 4 Move the joystick up to select the [1/;] icon to start playback. ≥The image and audio are output on the TV. 5 Move the joystick down to select the [∫] icon to stop playback. ≥Use the AC adaptor to free you from worrying about the battery running down. ª If the image or audio from this camera is not output on the TV ≥Check that the plugs are inserted as far as they go. ≥Check the [12bit AUDIO] settings. (-39-) ≥Check the connected terminal. ≥Check the TV’s input setting (input switch). (For more information, please read the operating instructions for the TV.) ; ; 1 [VIDEO IN] [AUDIO IN] A/V 21-pin Adaptor LSQT1291_ENG.book 33 ページ 2008年3月5日 水曜日 午前9時41分
  • 34. Edit mode 34 LSQT1291 Edit mode Copying onto a DVD recorder or a VCR (Dubbing) Pictures recorded by the movie camera can be stored on a DVD-RAM or other such media. Refer to the instructions for the recorder. ≥Place a recorded cassette in the movie camera, and an unrecorded DVD-RAM or cassette in the DVD recorder or VCR. 1 Connect the movie camera and the recorder. Connecting with the AV cable ≥Connect the movie camera and the recorder by using the AV cable 1. ≥If your recorder is not equipped with AV Input Sockets, the 21-pin Adaptor (purchase separately) is necessary. Consult your dealer. Connecting with the optional DV cable (Only for equipment with a DV terminal) 2 Turn on the movie camera and set to Tape Playback Mode. 3 Select the input channel on the TV set and recorder. 4 Move the joystick up to select the [1/;] icon to start playback. (Player) ≥The image and sound are reproduced. 5 Start recording. (Recorder) 6 Stop recording. (Recorder) 7 Move the joystick down to select the [∫] icon to stop playback. (Player) ≥If you record (dub) images onto another video device and then play them back on a wide- screen TV, the images may be stretched vertically. In this case, refer to the operating instructions for the device that you are recording (dubbing) to or read the operating instructions for the TV and set to 16:9 (full). ≥For more information, refer to the operating instructions for your TV set and recorder. ≥When you do not need functional indications or date and time indication, respectively set [SETUP] >> [DISPLAY] >> [OFF] or set [BASIC] >> [DATE/TIME] >> [OFF] in the Tape Playback Mode. (When you connect the movie camera and a recorder with the DV cable, these indications may not appear.) ª When neither image nor sound from the movie camera is output to the TV set ≥Check that the plugs are inserted as far as they go. ≥Check the [12bit AUDIO] settings. (-39-) ≥Check the connected terminal. CVC A.DUB AV3 IN L MONO AUDIO R TIMER REC REC/OTR EXT LINK / 6 /6 1 [VIDEO IN] [AUDIO IN] A/V 21-pin Adaptor 2 (L2) (L2) S / LSQT1291_ENG.book 34 ページ 2008年3月5日 水曜日 午前9時41分
  • 35. Edit mode 35 LSQT1291 Using the DV Cable for Recording (Digital Dubbing) By connecting other digital video equipment with DV terminal and the movie camera by using the DV cable VW-CD1E (optional) 1, high-image- quality dubbing can be done in digital format. This model cannot be used as a Recorder. ≥Set to Tape Playback Mode. (Player/recorder) 1 Connect the movie camera and digital video equipment with the DV cable. 2 Start playback. (Player) 3 Start recording. (Recorder) 4 Stop playback. (Player) ≥Do not plug or unplug the DV cable during dubbing, or the dubbing may not be completed properly. ≥Even if you use a device equipped with DV terminals such as IEEE1394, you may not be able to perform digital dubbing in some cases. For more information, see the instructions for equipment connected. ≥Regardless of the menu settings on the recorder, digital dubbing is carried out in the same mode as the [AUDIO REC] mode of the playback tape. ≥The images on the recorder monitor may be disturbed, but it does not affect the recorded images. Using the movie camera as a Web Camera To upgrade Windows XP to SP2, click [start] [All Programs (Programs)] [Windows Update]. If the movie camera is connected to your personal computer, you can send video and sound from the movie camera to the other parties via the network. Audio may also be exchanged if the personal computer is configured accordingly. (You can use the microphone equipped with the personal computer instead of the one on the movie camera.) Software: Windows Live Messenger 8.0/8.1 (Windows XP/Vista) Windows XP: DirectX 9.0c Windows Vista: DirectX 10 ª Connecting the movie camera to personal computer (For using as a Web Camera) 1 Set the movie camera to tape playback mode or tape recording mode. 2 Connect the movie camera to personal computer with type A-to-B USB cable (not supplied). 1) USB cable (Type A-to-B) 2) USB terminal 3) The Web Camera mode screen 3 Start the Windows Live Messenger. ≥Click [start] [Programs] [Windows Live Messenger]. 1 3) 2) 1) LSQT1291_ENG.book 35 ページ 2008年3月5日 水曜日 午前9時41分
  • 36. Edit mode 36 LSQT1291 ª When you use the movie camera as a Web Camera When you use the movie camera as a Web Camera in the tape playback mode, the indication of the operation icon is different from the one in usual operation. 1 In usual operation 2 In the Web Camera mode (Tape playback mode) ≥Even if you move the joystick up/down/right/left ( , ∫, 5, 6), the selected direction on the operation icon is not lit in yellow. ≥The operation icon blinks on instead of appearing from the side of the screen when you press the centre of the joystick. ≥If the movie camera is used as a Web Camera, the quality of the video to be exchanged will depend on the Internet connection status. ≥In the Web Camera mode, video (picture) cannot be recorded onto a tape. ≥In the Web Camera mode, the audio may be interrupted in the midway of communication depending on the communication environment or the performance of the personal computer. ≥If you connect the USB cable while you operate a tape in the tape playback mode, the tape will be stopped. ≥If you connect the USB cable in the Web Camera mode (tape recording mode), the time code indication, the SP/LP indication, or icons disappear. ≥In the Web Camera mode (tape playback mode), the operation icon is changed. ≥If the movie camera is used as a Web Camera while virus checking software is running, the movie camera’s operation may stop midway through. In this case, exit the Messenger, reconnect the movie camera and restart the Messenger. Using on Macintosh ª Operating environment on iMovie HD OS: With pre-installed; Mac OS X v10.4 CPU: PowerPC G5 Intel Core Duo Intel Core Solo Interface: DV (FireWire) terminal (IEEE1394.a) ≥iMovie HD, included with any new Macintosh or sold with iLife. 1 Set the movie camera to Tape Playback Mode. 2 Connect the movie camera to your Macintosh with the DV Interface Cable (optional). ≥For more information, please contact Apple Inc. at http://www.apple.com. 1 2 LSQT1291_ENG.book 36 ページ 2008年3月5日 水曜日 午前9時41分
  • 37. Edit mode 37 LSQT1291 Notes ≥Microsoft®, Windows®, Windows Vista® and DirectX® are either registered trademarks or trademarks of the Microsoft Corporation in the United States and/or other countries. ≥Intel® , Core™ and Pentium® are either registered trademarks or trademarks of Intel Corporation in the United States and/or other countries. ≥Apple, Mac OS, iMovie HD, FireWire are either registered trademarks or trademarks of Apple Inc. in the United States and/or other countries. ≥All other names, company names, product names, etc. in these instructions are the trademarks or registered trademarks of their respective corporations. ≥Microsoft product screen shot(s) reprinted with permission from Microsoft Corporation. ≥The names of the products you are using may differ from the names given in the text. Depending on the operating environment and other factors, the contents of the screens used in these instructions may not necessarily match what you will see on your screen. ≥Although the screens in these operating instructions are shown in English for the sake of example, other languages are supported as well. ≥These instructions do not cover the basic operations of the personal computer or define any terms. For this information, refer to the operating instructions which accompany your personal computer. LSQT1291_ENG.book 37 ページ 2008年3月5日 水曜日 午前9時41分
  • 38. Menu 38 LSQT1291 Menu Menu list Menu figures and illustrations are provided for easy-to-understand explanations, and so they are different from the actual menu indications. ª [TAPE RECORDING MENU] 1) [BASIC] [SCENE MODE] -28- [REC SPEED] -20- [WIND CUT] -26- [REC ASPECT] -27- [CLOCK SET] -13- 2) [ADVANCED] [GUIDE LINES] -27- [FADE COLOUR] -26- [AUDIO REC] -39- [D.ZOOM] -23- [ZOOM MIC] -23- [SHTR EFFECT] -22- [AUTO SLW SHTR] -28- 3) [SETUP] [DISPLAY] -39- [DATE/TIME] -39- [POWER SAVE] -39- [QUICK START] -14- [BEEP SOUND] -39- [LCD SET] -19- [EVF SET] -19- [INITIAL SET] -39- [DEMO MODE] -39- 4) [LANGUAGE] -18- ª [TAPE PLAYBACK MENU] 1) [BASIC] [DATE/TIME] -39- 2) [ADVANCED] [REPEAT PLAY] -32- 3) [SETUP] [12bit AUDIO] -39- [AUDIO OUT] -39- [DISPLAY] -39- [LCD SET] -19- [EVF SET] -19- [POWER SAVE] -39- [TV ASPECT] -33- 4) [LANGUAGE] -18- LSQT1291_ENG.book 38 ページ 2008年3月5日 水曜日 午前9時41分
  • 39. Menu 39 LSQT1291 Menus related to taking pictures ª [DATE/TIME] This switches between date and time indications. ≥The movie camera automatically records the date and time of picture taking on the tape. ª [AUDIO REC] Switches the audio (PCM audio) recording systems. [12bit]: Records audio in “12 bit 32 kHz 4 tracks”. (The original sound recorded is preserved after audio dubbing.) [16bit]: Records audio in “16 bit 48 kHz 2 tracks”. Audio can be recorded in higher quality. (The original sound recorded is erased after audio dubbing.) ≥Audio dubbing cannot be performed on this unit. If you want to edit the sound on a model with an audio dubbing function, set [12bit] to take pictures. ª [DISPLAY] Set to [ON] and the display mode can be switched to all functions. Set to [OFF] and it can be switched to minimum display. ª [BEEP SOUND] Set to [ON] and confirmation/alarm beeps are issued as follows. 1 Beep ≥When you start recording ≥When you turn on the power ≥When the unit goes from quick start standby mode to recording pause 2 Beeps ≥When you pause recording ≥When you turn off the power ≥When the unit goes into quick start standby mode 2 Beeps for 4 times ≥When a cassette with its erasure prevention tab set to [SAVE] is inserted, condensation occurs (-45-), and at other times. Check the sentence displayed on the screen. (-41-) ª [POWER SAVE] [OFF]: When about 5 minutes passed without any operation, the standby mode automatically will be set. In the standby mode, [;] blinks and it takes time more than usual to start recording after you press the recording start/stop button. [5 MINUTES]: When about 5 minutes passed without any operation, the movie camera automatically turns off to protect the tape or to prevent the battery from running down. When you use the movie camera, turn it on again. ≥In the following cases, the power may not turn off even when set [POWER SAVE] [5 MINUTES]. ≥When connecting to the AC outlet (When using the AC adapter) ≥When connecting the USB cable or the DV cable to a personal computer or other equipment Menus related to playback ª [12bit AUDIO] If you want to edit the sound on a model with an audio dubbing function, set [12bit] to take pictures. You can switch the sound (PCM Audio) when playing back a tape with sound recorded in [12bit]. [ST1]: It only plays back the original sound recorded. [ST2]: It only plays back the sound on the tape added with audio dubbing. [MIX]: It simultaneously plays back both [ST1] and [ST2] sounds. ≥Audio dubbing cannot be performed on this unit. When playing back a tape recorded on this unit, you will not be able to hear the sound if [ST2] is set. Set [ST1]. ª [AUDIO OUT] This switches the sound to be played back. [STEREO]: Stereo sound (main sound and sub sound) [L]: Left channel sound (main sound) [R]: Right channel sound (sub sound) Other menus ª [INITIAL SET] When there is a menu that cannot be selected depending on a combination of functions, set to [YES] for changing the menu settings back to the initial shipping condition. (Language setting cannot be back to the initial shipping condition.) ª [DEMO MODE] If you set to [DEMO MODE] [ON] without inserting a cassette, the movie camera is automatically set to the demonstration mode for introducing its functions. If any button is pressed or operated, the demonstration mode is cancelled. If no operations take place for approx. 10 minutes, the demonstration mode automatically starts. To terminate the demonstration mode, insert a cassette, or set to [DEMO MODE] [OFF]. For normal use, set this function to [OFF]. LSQT1291_ENG.book 39 ページ 2008年3月5日 水曜日 午前9時41分
  • 40. Others 40 LSQT1291 Others Indications Various functions and the movie camera status are shown on the screen. Basic indications : Remaining battery power 0h00m00s00f: Time code 15:30:45: Date/Time indication Recording indications R 0:45: Remaining tape time ≥Remaining tape time is indicated in minutes. (When it reaches less than 3 minutes, the indication starts flashing.) SP: Standard Play mode (Recording speed mode) -20- LP: Long Play mode (Recording speed mode) -20- ¥: Recording -21- ; (Green): Recording pause -21- ; (Green flash): Standby mode ; (Red): Fade out : Recording check -21- : Wide mode -27- : Automatic mode -20- : Manual mode -28- MF: Manual focus -30- 5k: Zoom magnification indication -23- : Backlight mode -24- : OIS -27- 1/500: Shutter speed -31- F2.4: F number -31- 6dB: Gain value -31- : WEB CAMERA mode (Recording) -35- : Soft skin mode -25- : Fade (White) -26- : Fade (Black) -26- : Colour night view function -25- : Blank search -22- : Video Light is on -19- : Zoom microphone -23- : Wind noise reduction -26- 5: Sports mode (Scene mode) -28- : Portrait mode (Scene mode) -28- : Low light mode (Scene mode) -28- : Spotlight mode (Scene mode) -28- : Surf snow mode (Scene mode) -28- : Auto white balance -29- : Indoor mode (recording under incandescent lamps) -29- : Outdoor mode -29- : White balance adjustment mode -29- Playback indications 1: Playback -32- ;: Pause -32- 5: Fast-forward/Cue playback -32- 6: Rewind/Review playback -32- ;1/2;: Frame-by-frame playback -33- : Repeat playback -32- : WEB CAMERA mode (Playback) -35- 12bit, 16bit: Audio recording mode -39- : Volume adjustment -32- 16:9 AUTO MNL ZOOM AWB LSQT1291_ENG.book 40 ページ 2008年3月5日 水曜日 午前9時41分
  • 41. Others 41 LSQT1291 Warning/alarm indications If any one of the following indications lights up or flashes, please check the movie camera. Confirmatory indications Y: A cassette with the accidental erasure prevention slider placed in the [SAVE] position is inserted. No cassette is inserted. [--]/0: The built-in battery is low. -13- °: The warning/alarm indication appears when you record yourself. Turn the LCD monitor towards the viewfinder and check the warning/alarm indication. 2END: The tape came to the end during recording. :: The video heads are dirty. -45- Textual indications 3DEW DETECT/3EJECT TAPE: Condensation has occurred. Take out the cassette and wait for a while. It takes some time until the cassette holder opens, but this is not a malfunction. -45- LOW BATTERY: The battery is low. Recharge it. -9- NO TAPE : No tape is inserted. -15- TAPE END: The tape came to the end during recording. CHECK REC TAB: You are attempting to record pictures on a tape with the accidental erasure prevention slider placed in the [SAVE] position. You are attempting digital dubbing on a tape with the accidental erasure prevention slider placed in the [SAVE] position. WRONG TAPE FORMAT: You are attempting to play back a tape section that has been recorded with a different TV system. This cassette is incompatible. CLOSE CASSETTE DOOR: The cassette cover is open. Close the cassette cover. -15- COPY PROTECTED: Images cannot be recorded correctly because the medium is protected by a copy guard. NEED HEAD CLEANING: The video heads are dirty. -45- PUSH THE RESET SWITCH: An irregularity in the equipment has been detected. Press the [RESET] button (-44-). This may solve the problem. DISCONNECT USB CABLE: You are attempting to record pictures on a tape with the USB cable connected to the movie camera. CAN NOT USE USB: You are connecting the USB cable with the DV cable connected. CHANGE TO MANUAL MODE: You are attempting to select the item on the [SCENE MODE] when the movie camera is set to [AUTO]. LSQT1291_ENG.book 41 ページ 2008年3月5日 水曜日 午前9時41分
  • 42. Others 42 LSQT1291 Functions cannot be used simultaneously Some functions in the movie camera are disabled or cannot be selected due to its specifications. The table below shows examples of functions restricted by conditions. Before requesting repair (Problems and solutions) Power/Body 1: The movie camera power cannot be turned on. • Is the battery fully charged? Use a fully charged battery. • The battery protection circuit may have operated. Attach the battery to the AC adaptor for 5 to 10 seconds. If the movie camera still cannot be used, the battery is faulty. • Is the LCD monitor open or the viewfinder extend? 2: The movie camera power is turned off automatically. • If you do not use the unit for approximately 5 minutes, the power is automatically turned off to conserve the battery charge. To resume recording, turn the power back on. The power will not turn off automatically when the power save function is set to [OFF]. (-39-) 3: The movie camera power does not stay on long enough. • Is the battery low? If the remaining battery power indication is flashing or the message “LOW BATTERY” is displayed, the battery has run down. Charge the battery or attach a fully charged battery. (-9-) • Has condensation occurred? When you carry the movie camera from a cold place into a warm place, condensation may occur inside it. If so, the power is turned off automatically, disabling all operations except for taking cassettes out. Wait until the condensation indication disappears. (-45-) 4: Battery runs down quickly. • Is the battery fully charged? Charge it with the AC adaptor. (-9-) • Are you using the battery in an extremely cold place? The battery is affected by ambient temperature. In cold places, the operating time of the battery becomes shorter. • Has the battery worn out? The battery has a limited life. If the operating time is still too short even after the battery is fully charged, depending on the usage, the battery has worn out and can no longer be used. Functions Conditions which disable the functions ≥Backlight compensation ≥When the iris/gain is set ≥When the colour night view function is used ≥Help mode ≥Blank search ≥Soft skin ≥Recording check ≥Colour Night View ≥While recording to a tape ≥Scene mode ≥When the movie camera is set to [AUTO] ≥When the colour night view function is used ≥When the built-in LED video light is on ≥Change of white balance ≥When digital zoom (42k or higher) is used ≥When the colour night view function is used ≥Adjusting the shutter speed, iris/gain ≥When the colour night view function is used ≥When the scene mode is used LSQT1291_ENG.book 42 ページ 2008年3月5日 水曜日 午前9時41分
  • 43. Others 43 LSQT1291 5: The movie camera cannot be operated though powered up. The movie camera does not operate normally. • The movie camera cannot be operated unless you open the LCD monitor or extend the viewfinder. • Remove the cassette and then press the [RESET] button. (-44-) If normal conditions are not restored yet, turn off the power. Then, about 1 minute later, turn on the power again. 6: The cassette cannot be removed. • Does the status indicator comes on when opening the cassette cover? (-15-) Make sure that the battery and the AC adaptor are properly connected. (-10-) • Is the battery in use discharged? Charge the battery and remove the cassette. • Close the cassette cover completely, and fully open it again. (-15-) 7: No operation other than cassette removal can be performed. • Has condensation occurred? Wait until the condensation indication disappears. (-45-) Recording 1: Recording does not start although power is supplied to the movie camera and the cassette is correctly inserted. • Is the accidental erasure prevention slider on the cassette open? If it is open (set to [SAVE]), recording cannot be performed. (-16-) • Is the tape wound to the end? Insert a new cassette. • Is the recording mode set? When in the playback mode, recording cannot be performed. (-11-) • Has condensation occurred? No operation other than cassette removal can be performed when condensation occurs. Wait until the condensation indication disappears. (-45-) • Is the cassette cover open? If the cover is open, the movie camera may not operate normally. Close the cassette cover. (-15-) 2: The screen has changed suddenly. • Has the demonstration started? In the Tape Recording mode, if you set [DEMO MODE] [ON] without inserting a cassette, the demonstration starts. For normal use, set this function to [OFF]. (-39-) 3: A cassette cannot be inserted. • Has condensation occurred? Wait until the condensation indication disappears. 4: Auto focus function does not work. • Is manual focus mode selected? If auto focus mode is selected, focus is automatically adjusted. • There are some recording subjects and surroundings for which the auto focus does not operate correctly. (-49-) If so, use the manual focus mode to adjust the focus. (-30-) Indications 1: A sentence is displayed in red in the screen centre. • Read the contents and respond to them. (-41-) 2: The remaining tape time indication disappears. • The remaining tape time indication may disappear temporarily during frame-by-frame playback or other operation. If you continue ordinary recording or playback, the indication is restored. 3: The remaining tape time Indication does not match the actual remaining tape time. • If scenes of less than 15 seconds are continuously recorded, the remaining tape time cannot be correctly displayed. • In some cases, the remaining tape time indication may show remaining tape time that is 2 to 3 minutes shorter than the actual remaining tape time. 4: A function indication such as mode indication, remaining tape time indication, or time code indication is not shown. • If you set [SETUP] [DISPLAY] [OFF], indications other than the tape running condition, warning, and date indications disappear. 5: “CHECK THE LENS COVER.” is displayed. • Open the lens cover before turning the unit on. • This message may appear if you try to record in extremely dark places. LSQT1291_ENG.book 43 ページ 2008年3月5日 水曜日 午前9時41分
  • 44. Others 44 LSQT1291 Playback (Sound) 1: Sound is not played back from the built-in speaker of the movie camera. • Is the volume too low? During playback, push the [sVOLr] lever to display the volume indication and adjust it. (-32-) 2: Different sounds are reproduced at the same time. • Have you set [SETUP] [AUDIO OUT] [STEREO] and reproduced a picture containing the main sound and sub sound? Set to [L] to hear main sound, and set to [R] to hear the sub sound. (-39-) 3: Sounds cannot be played back. • Have you set [SETUP] [12bit AUDIO] [ST2]? Set [12bit AUDIO] [ST1]. (-39-) Playback (Pictures) 1: Mosaic-pattern noise appears on images during cue or review playback. • This phenomenon is characteristic of digital video systems. It is not a malfunction. 2: Horizontal stripes appear on images during cue and review playback. • Horizontal stripes may appear depending on the scene, but this is not a malfunction. 3: Although the movie camera is correctly connected to a TV, playback images cannot be seen. The images are vertical. • Have you selected video input on the TV? Please read the operating instructions of your TV and select the channel that matches the input terminals used for the connection. • Is the [TV ASPECT] setting correct? Change the setting to match the aspect ratio of the TV. [SETUP] [TV ASPECT] [16:9] or [4:3]. 4: Playback picture is not clear. • Are the heads of the movie camera dirty? If the heads are dirty, playback image cannot be clear. Clean the heads by using the head cleaner for digital video (optional). (-45-) • If the terminal for the AV cable is soiled, noises may appear on the screen. Wipe the soil off the terminal with a soft cloth, and then connect the cable to the A/V terminal. • Is a picture containing a copyright protection signal (copy guard) being recorded? When a protected picture is played back by the movie camera, mosaic-like patterns appear on the picture. Others 1: The indication disappears, the screen is frozen, or no operation can be performed. • Turn off the power to the movie camera. If the power cannot be turned off, press the [RESET] button, or detach the battery or the AC adaptor and then reattach it. After that, turn on the power again. If normal operation is still not restored, detach the power connected, and consult the dealer who you purchased the movie camera from. 2: “PUSH THE RESET SWITCH” is displayed. • An irregularity in the movie camera has been automatically detected. Remove the cassette for data protection and then press the [RESET] button with the boss A. The movie camera will be activated. • If you do not press the [RESET] button, the power to the movie camera is turned off automatically about 1 minute later. • Even after you press the [RESET] button, the indication may still appear repeatedly. If so, the movie camera needs repair. Detach the power connected, and consult the dealer who you purchased the movie camera from. Do not attempt to repair the appliance by yourself. 3: The warning/alarm indication [°] appears when the camera is operated in the WEB camera mode. • Did you press the menu button or the recording start/stop button? You cannot use the menu or record onto the tape in the WEB camera mode. • Did you attempt to play a tape without inserting it? Insert a tape. • Did you attempt to play a tape with copyright protection (copy guard)? Pictures of the tape with copyright protection (copy guard) cannot be displayed on the PC. (The audio of the tape can be played.) A RESET LSQT1291_ENG.book 44 ページ 2008年3月5日 水曜日 午前9時41分
  • 45. Others 45 LSQT1291 Cautions for Use ª About condensation If you turn the movie camera on when condensation occurs on the head or the tape, condensation Indication [3] (yellow or red) is displayed on the viewfinder or the LCD monitor and the messages [3DEW DETECT] or [3EJECT TAPE] (only when the tape is inserted) appear. If so, follow the procedure below. 1 Remove the tape if it is inserted. ≥It takes about 20 seconds to open the cassette holder. This is not a malfunction. 2 Leave the movie camera with the cassette cover closed to cool or warm it to the ambient temperature. ≥The status indicator blinks for about 1 minute and then the movie camera automatically turns off. Leave it for about 1.5 to 2 hours. 3 Turn the movie camera on again, set it to the Tape Recording/Playback Mode and then check if the condensation indication disappears. Especially in cold areas, moisture may be frozen. If so, it may take more time before the condensation indication disappears. Watch for condensation even before the condensation indication is displayed. ≥If the indicator of the condensation does not display on the LCD monitor and/or the viewfinder and you notice condensation on the lens or the main unit, do not open the cassette cover otherwise condensation may be formed on the heads or the cassette tape. When the lens is fogged: Remove the battery or AC adaptor and leave the unit for about 1 hour. When the unit becomes close to the ambient temperature, the fog disappears naturally. ª About dirty heads If video heads (the parts that closely contact with the tape) become dirty, normal recording and playback are not properly performed. Clean the heads with the digital video head cleaner. ≥Insert the head cleaner into the movie camera, set it to the Tape Playback Mode, and play it back for about 10 seconds. (If you do not stop the playback, it automatically stops about 15 seconds later.) ≥We recommend cleaning the heads periodically. If the heads become dirty, “NEED HEAD CLEANING” appears during recording. During playback, moreover, the following symptoms appear. ≥Mosaic-like noise appears partially or the sound is interrupted. ≥Black or blue mosaic-like horizontal stripes appear. ≥The whole screen becomes black and there is no picture and sound. When normal playback cannot be performed even after the head cleaning. One possible cause is that normal recording could not be performed because the heads were dirty at the time of recording. Clean the heads, and perform recording and playback again. If normal playback can be performed, the heads are clean. Before an important recording, be sure to conduct a test recording to make sure that normal recording can be performed. ≥If the heads become dirty soon after cleaning, the problem may be attributable to the tape. If so, try another cassette. ≥During playback, the picture or sound may be interrupted momentarily, but this is not a malfunction of the movie camera. (One possible cause is that the playback is interrupted by dirt or dust that momentarily adheres to the heads.) LSQT1291_ENG.book 45 ページ 2008年3月5日 水曜日 午前9時41分
  • 46. Others 46 LSQT1291 ª About the movie camera ≥When the movie camera is used for a long time, the camera body becomes warm, but this is not a malfunction. Keep the Digital Video Camera as far away as possible from electromagnetic equipment (such as microwave ovens, TVs, video games etc.). ≥If you use the Digital Video Camera on top of or near a TV, the pictures and sound on the Digital Video Camera may be disrupted by electromagnetic wave radiation. ≥Do not use the Digital Video Camera near cell phones because doing so may result in noise adversely affecting the pictures and sound. ≥Recorded data may be damaged, or pictures may be distorted, by strong magnetic fields created by speakers or large motors. ≥Electromagnetic wave radiation generated by microprocessors may adversely affect the Digital Video Camera, disturbing the pictures and sound. ≥If the Digital Video Camera is adversely affected by electromagnetic equipment and stops functioning properly, turn the Digital Video Camera off and remove the battery or disconnect AC adaptor. Then reinsert the battery or reconnect AC adaptor and turn the Digital Video camera on. Do not use the Digital Video Camera near radio transmitters or high-voltage lines. ≥If you record near radio transmitters or high-voltage lines, the recorded pictures and sound may be adversely affected. Do not spray insecticides or volatile chemicals onto the movie camera. ≥If the movie camera is sprayed with such chemicals, the camera body may become deformed and the surface finish may peel off. ≥Do not keep rubber or plastic products in contact with the movie camera for a long time. When you use your movie camera in a sandy or dusty place such as on a beach, do not let sand or fine dust get into the body and terminals of the movie camera. Also, protect the movie camera from getting wet. ≥Sand or dust may damage the movie camera or cassette. (Care should be taken when inserting and removing a cassette.) ≥If sea water splashes onto the movie camera, wet a soft cloth with tap water, wring it well, and use it to wipe the camera body carefully. Then, wipe it again thoroughly with a soft dry cloth. While carrying the movie camera, do not drop or bump it. ≥A strong impact on the movie camera may break its housing, causing it to malfunction. Do not use benzine, paint thinner or alcohol for cleaning the movie camera. ≥Before cleaning, detach the battery or pull out the AC mains lead from the AC mains socket. ≥The camera body may be discoloured and the surface finish may peel off. ≥Wipe the movie camera with a soft dry cloth to remove dust and fingerprints. To remove stubborn stains, wring well a cloth that is soaked in a neutral detergent diluted with water and wipe the movie camera with it. Afterwards, wipe it with a dry cloth. ≥When you use a chemical dust cloth, follow the instructions. Do not use this movie camera for surveillance purposes or other business use. ≥If you use the movie camera for a long time, the internal temperature increases and, consequently, this may cause malfunction. ≥This movie camera is not intended for business use. When you are not going to use the movie camera for an extended time. ≥When storing the unit in a cupboard or a cabinet, it is recommended that you put a desiccant (silica gel) in with it. LSQT1291_ENG.book 46 ページ 2008年3月5日 水曜日 午前9時41分