Download to read offline
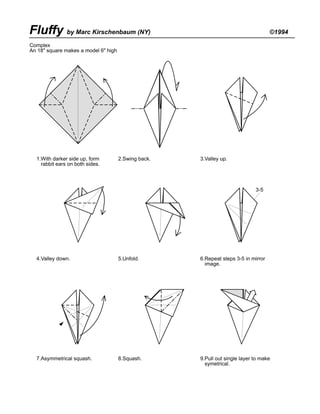
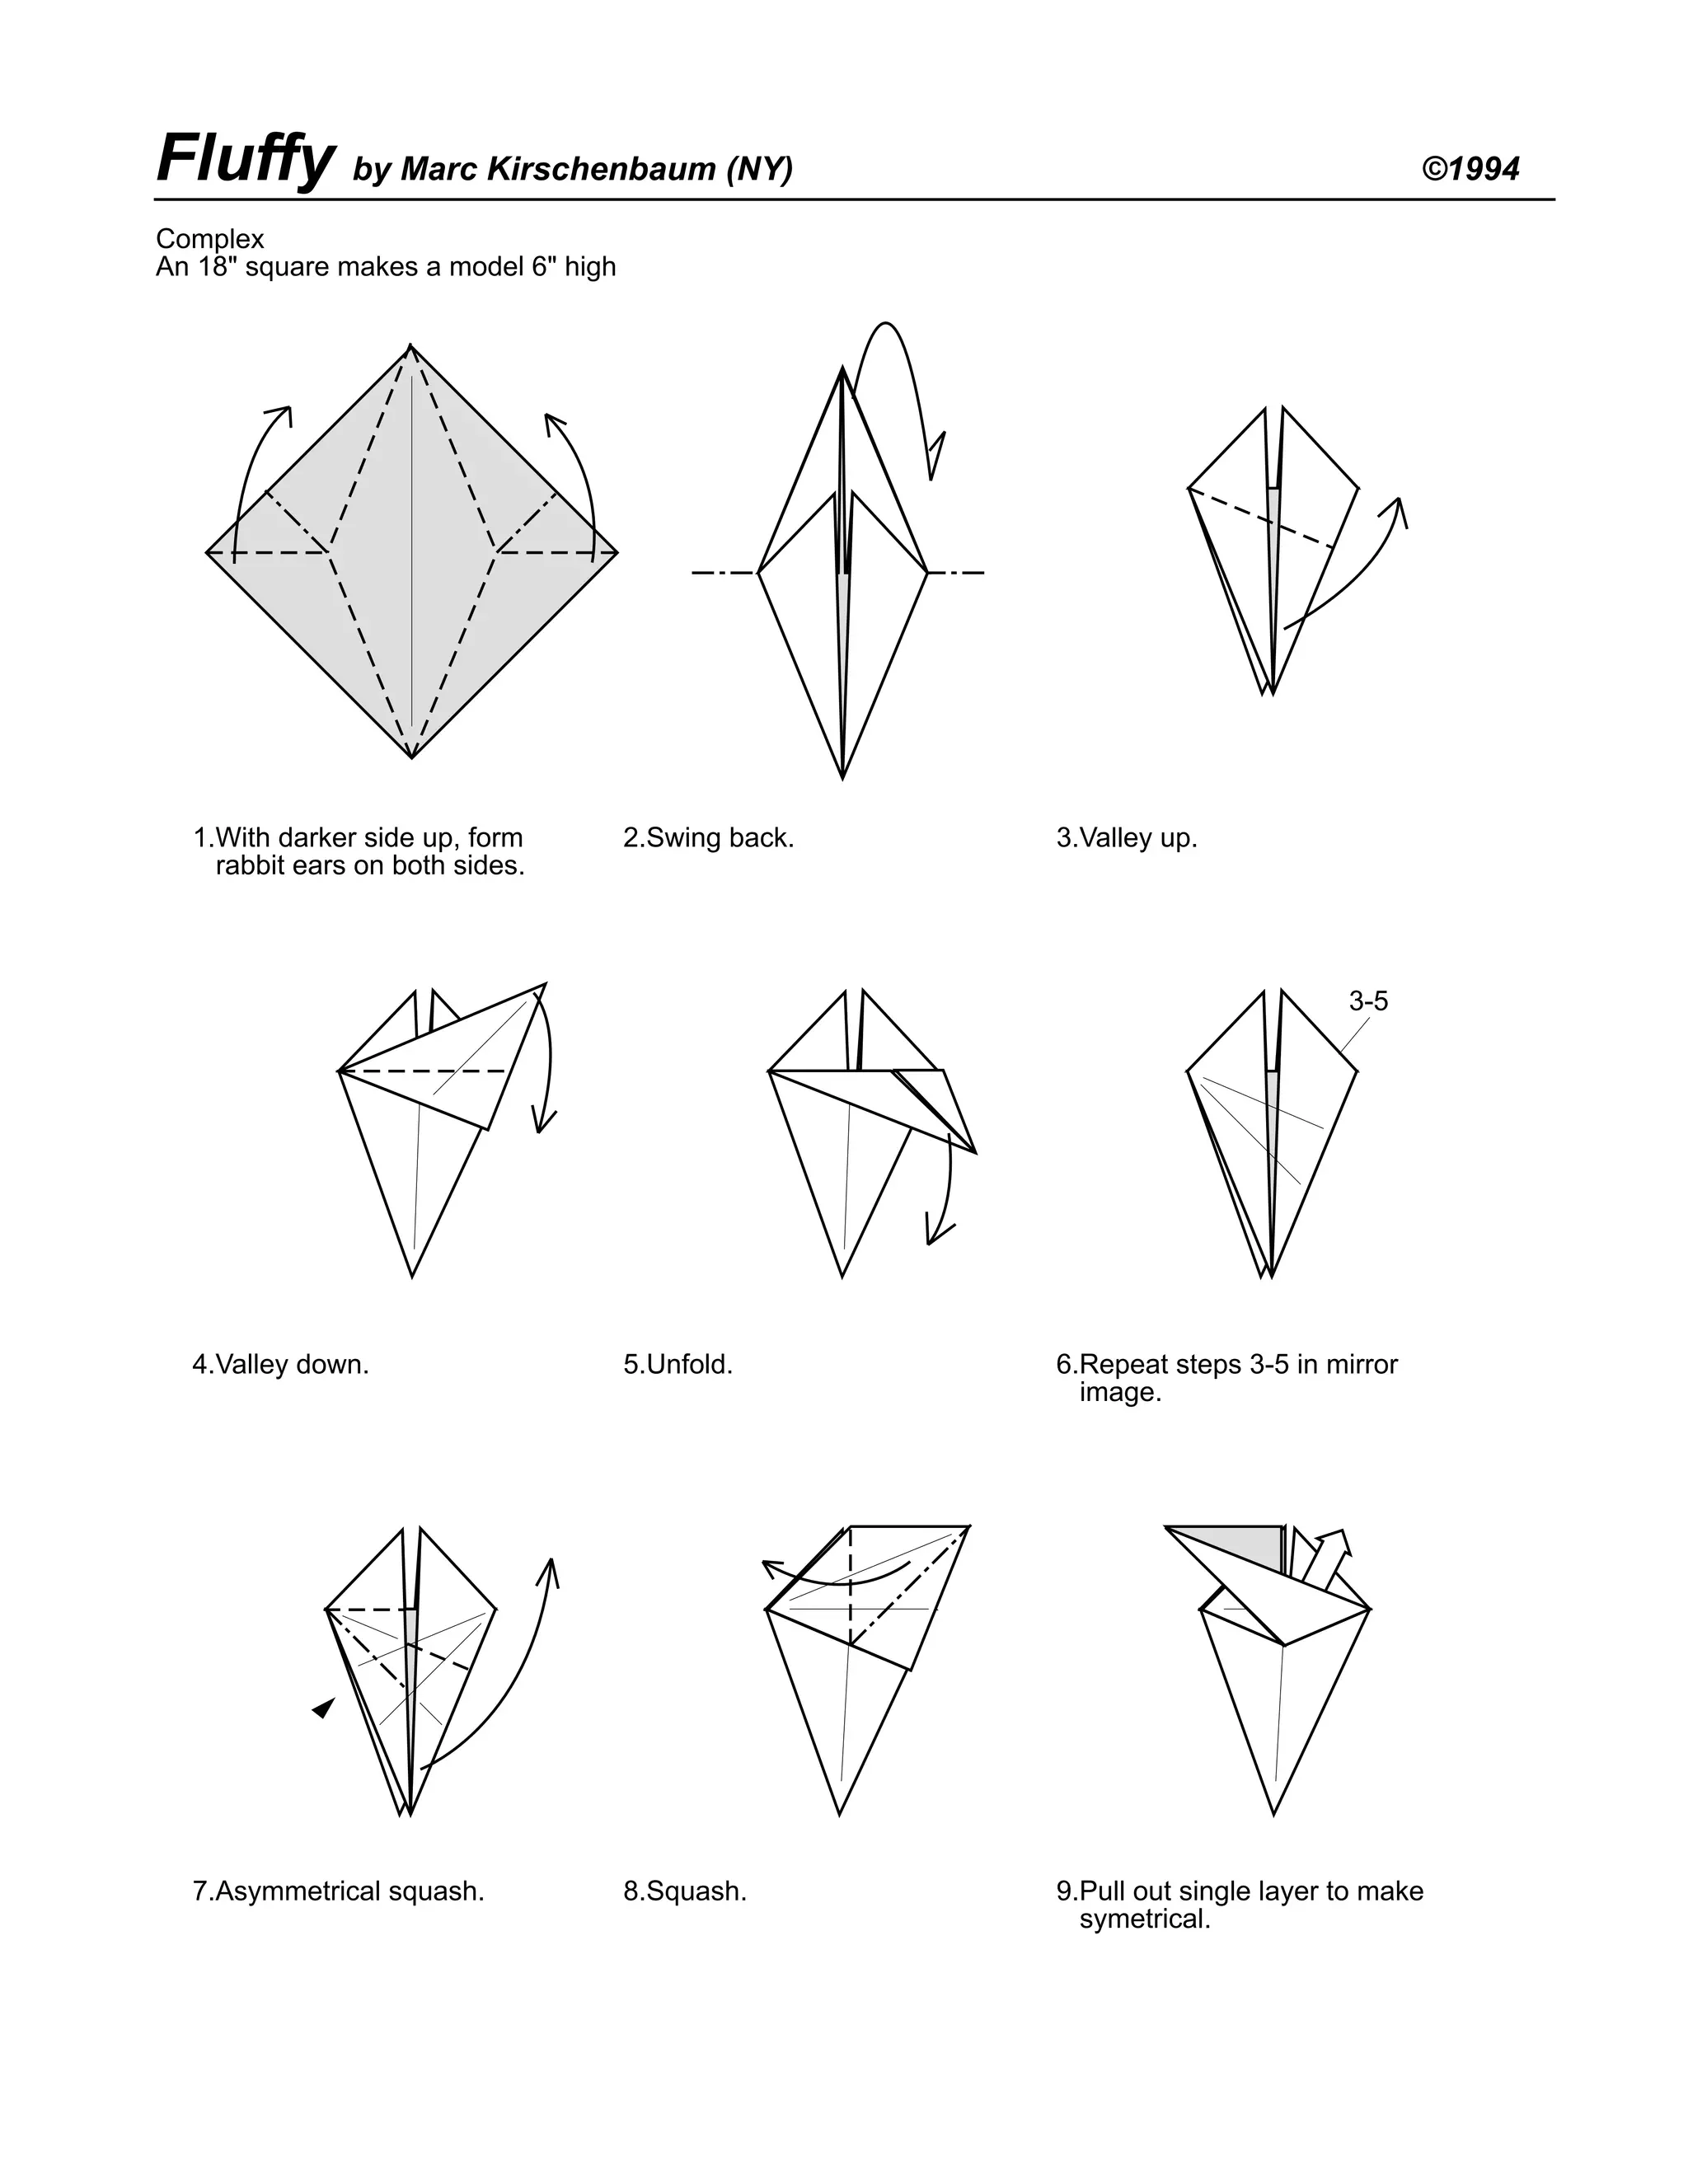
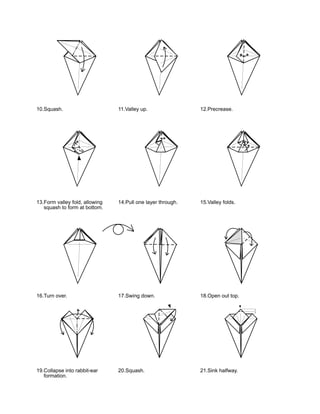
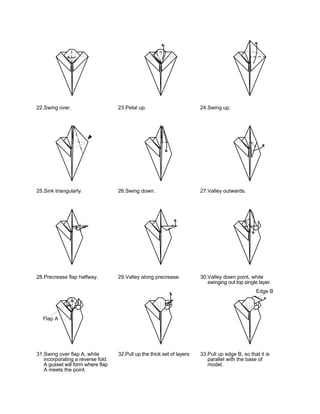
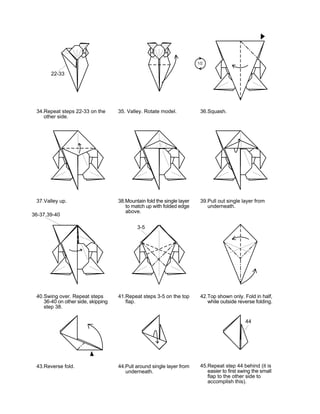
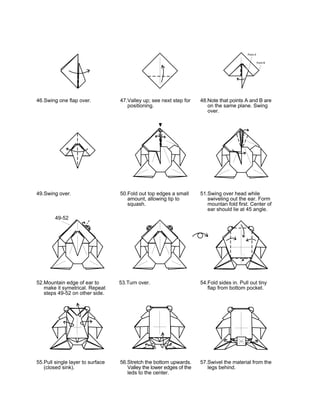
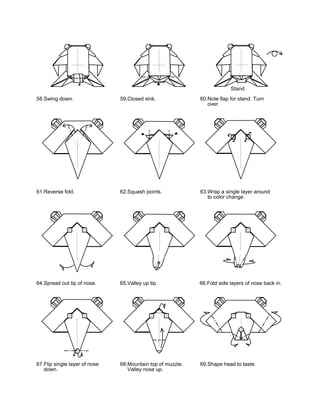
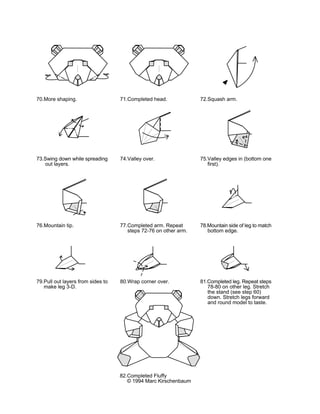

1. This document provides instructions to fold a complex origami figure of Fluffy, with 82 steps and illustrations. 2. The key steps include forming rabbit ears, asymmetrical squashing, precreasing, swinging and collapsing layers to form the body and limbs, and shaping the head, arms, and legs. 3. Following all the steps results in a fully shaped and detailed origami figure of Fluffy standing on a folded stand.


![Origami [Near 300 Project 990 Pages]](https://cdn.slidesharecdn.com/ss_thumbnails/origaminear300project-990pages-090827043424-phpapp01-thumbnail.jpg?width=640&height=640&fit=bounds)


