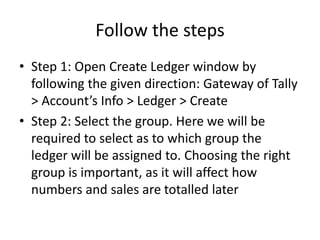
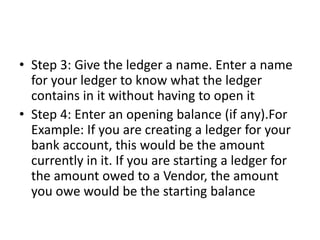
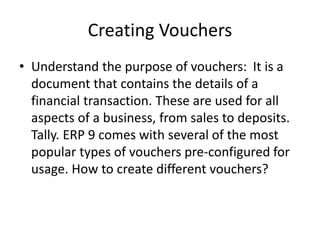
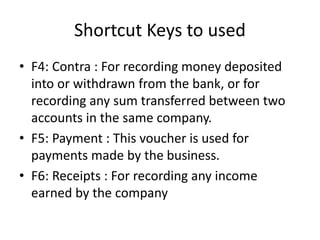
TALLY ERP 9
Tally. ERP 9 has advanced integration
capabilities in the form of Application
programming interfaces to make the
software extensible.
DESCRIPTION
• Tally. ERP 9 permits business owners and their
associates to interact more in accounts related
discussions and is a complete product that retains
its original simplicity yet offers comprehensive
business functionalities such as Accounting,
Finance, Inventory, Sales, Purchase, Point of Sale,
Manufacturing, Costing, Job Costing, Payroll and
Branch Management along with compliance
capabilities for Excise, TDS, TCS and now GST too!
How to use Tally. ERP 9?
• Tally is nothing but accounting in digital
format. Maintaining accounts in manual
books, we write accounting entries as debit
and credit. In Tally, we create entries the same
way. So how do we do it Tally then?
• The entire thing could be pictured as the
installation of any machinery in the
workplace.
Process 1: Installation : (Buying a
machine, we first install it for using it)
• Tally software can be purchased and
downloaded from the Tally website. We
can download a 30-day trial version if we are
not sure if we want to use it yet. Tally 9 is for
Windows only. We can also use Tally in
Educational Mode, which allows you to learn
how to use the software without having to
purchase a license. Some features are
restricted in this mod
Process 2: Navigation :
• (After installation is complete, we use it’s
hardware supports or software supports to use
the machine)
• Tally. ERP 9 is designed to be navigated by using
the keyboard. While we can click any option we
want, everything in Tally has a keyboard shortcut.
The Shortcut as we say is usually the key
displayed next to each available option. Learning
how to get around with the keyboard will
increase efficiency.
Process 3: Create a company
• To use Tally, we will first need to create a
company in the program. Even when we are
not using tally professionally, we still need to
create a company using the following steps :
• Step 1: In the opening menu, select "Create
Company"
• Step 2: Enter Company details :
• Enter the company name as it appears on
banking records
After create company
• Enter the company address, statutory
compliance, telephone number, and email
• Step 3: Turn on "Auto Backup" to ensure that a
copy of all your work is saved in case something
happens to the original.
• Step 4: Choose your currency
• Step 5: If you are using Tally to just manage your
accounts, then select "Accounts only" in the
Maintain menu and If you are using Tally for
inventory management as well, select "Accounts
with inventory".
Process 4 : Usage:
• How to use Tally. ERP 9 in Detail
• Creating Ledgers
• Understanding what ledgers are for: Ledgers
in Tally record all of the transactions for that
account. One will need to create a ledger for
each account that they do business with. Two
ledgers are included in Tally by default: "Cash"
and "Profit and Loss Account". We can create
as many other ledgers as we need. How to ?
Follow the steps
• Step 1: Open Create Ledger window by
following the given direction: Gateway of Tally
> Account’s Info > Ledger > Create
• Step 2: Select the group. Here we will be
required to select as to which group the
ledger will be assigned to. Choosing the right
group is important, as it will affect how
numbers and sales are totalled later
• Step 3: Give the ledger a name. Enter a name
for your ledger to know what the ledger
contains in it without having to open it
• Step 4: Enter an opening balance (if any).For
Example: If you are creating a ledger for your
bank account, this would be the amount
currently in it. If you are starting a ledger for
the amount owed to a Vendor, the amount
you owe would be the starting balance
Creating Vouchers
• Understand the purpose of vouchers: It is a
document that contains the details of a
financial transaction. These are used for all
aspects of a business, from sales to deposits.
Tally. ERP 9 comes with several of the most
popular types of vouchers pre-configured for
usage. How to create different vouchers?
Follow the steps
• Step 1: Open the vouchers screen using the
following direction: Gateway of Tally >
Accounting Vouchers
• Step 2: In this step, we can choose the
voucher we want to create. Here’s is the list :
• Here’s is the list
Shortcut Keys to used
• F4: Contra : For recording money deposited
into or withdrawn from the bank, or for
recording any sum transferred between two
accounts in the same company.
• F5: Payment : This voucher is used for
payments made by the business.
• F6: Receipts : For recording any income
earned by the company
• (sales, rent, interest, etc.) and for recording
the proceeds received from Sundry debtors.
• F7: Journal : For recording all adjustment or
due entries such as prepaid expense, accrued
income etc., For recording purchase of assets
for recording Input tax reversal entries,
reverse charge entries under GST.
• F8: Sales : This is used for recording all the
sales made by the company.
• F9: Purchase : This is used for recording all the
inventories purchased by the company in the
course of business.
Last step
• Step 3: Enter the required information.
The information needed to complete the
voucher will vary depending on the type of
voucher we want to create. We will have to
typically need to determine which ledger the
voucher will be attached to, as well as enter
the date and names of any involved parties.

TALLY ERP 9

  • 1.
    TALLY ERP 9 Tally.ERP 9 has advanced integration capabilities in the form of Application programming interfaces to make the software extensible.
  • 3.
    DESCRIPTION • Tally. ERP9 permits business owners and their associates to interact more in accounts related discussions and is a complete product that retains its original simplicity yet offers comprehensive business functionalities such as Accounting, Finance, Inventory, Sales, Purchase, Point of Sale, Manufacturing, Costing, Job Costing, Payroll and Branch Management along with compliance capabilities for Excise, TDS, TCS and now GST too!
  • 4.
    How to useTally. ERP 9? • Tally is nothing but accounting in digital format. Maintaining accounts in manual books, we write accounting entries as debit and credit. In Tally, we create entries the same way. So how do we do it Tally then? • The entire thing could be pictured as the installation of any machinery in the workplace.
  • 5.
    Process 1: Installation: (Buying a machine, we first install it for using it) • Tally software can be purchased and downloaded from the Tally website. We can download a 30-day trial version if we are not sure if we want to use it yet. Tally 9 is for Windows only. We can also use Tally in Educational Mode, which allows you to learn how to use the software without having to purchase a license. Some features are restricted in this mod
  • 6.
    Process 2: Navigation: • (After installation is complete, we use it’s hardware supports or software supports to use the machine) • Tally. ERP 9 is designed to be navigated by using the keyboard. While we can click any option we want, everything in Tally has a keyboard shortcut. The Shortcut as we say is usually the key displayed next to each available option. Learning how to get around with the keyboard will increase efficiency.
  • 7.
    Process 3: Createa company • To use Tally, we will first need to create a company in the program. Even when we are not using tally professionally, we still need to create a company using the following steps : • Step 1: In the opening menu, select "Create Company" • Step 2: Enter Company details : • Enter the company name as it appears on banking records
  • 8.
    After create company •Enter the company address, statutory compliance, telephone number, and email • Step 3: Turn on "Auto Backup" to ensure that a copy of all your work is saved in case something happens to the original. • Step 4: Choose your currency • Step 5: If you are using Tally to just manage your accounts, then select "Accounts only" in the Maintain menu and If you are using Tally for inventory management as well, select "Accounts with inventory".
  • 9.
    Process 4 :Usage: • How to use Tally. ERP 9 in Detail • Creating Ledgers • Understanding what ledgers are for: Ledgers in Tally record all of the transactions for that account. One will need to create a ledger for each account that they do business with. Two ledgers are included in Tally by default: "Cash" and "Profit and Loss Account". We can create as many other ledgers as we need. How to ?
  • 10.
    Follow the steps •Step 1: Open Create Ledger window by following the given direction: Gateway of Tally > Account’s Info > Ledger > Create • Step 2: Select the group. Here we will be required to select as to which group the ledger will be assigned to. Choosing the right group is important, as it will affect how numbers and sales are totalled later
  • 11.
    • Step 3:Give the ledger a name. Enter a name for your ledger to know what the ledger contains in it without having to open it • Step 4: Enter an opening balance (if any).For Example: If you are creating a ledger for your bank account, this would be the amount currently in it. If you are starting a ledger for the amount owed to a Vendor, the amount you owe would be the starting balance
  • 12.
    Creating Vouchers • Understandthe purpose of vouchers: It is a document that contains the details of a financial transaction. These are used for all aspects of a business, from sales to deposits. Tally. ERP 9 comes with several of the most popular types of vouchers pre-configured for usage. How to create different vouchers?
  • 13.
    Follow the steps •Step 1: Open the vouchers screen using the following direction: Gateway of Tally > Accounting Vouchers • Step 2: In this step, we can choose the voucher we want to create. Here’s is the list : • Here’s is the list
  • 14.
    Shortcut Keys toused • F4: Contra : For recording money deposited into or withdrawn from the bank, or for recording any sum transferred between two accounts in the same company. • F5: Payment : This voucher is used for payments made by the business. • F6: Receipts : For recording any income earned by the company
  • 15.
    • (sales, rent,interest, etc.) and for recording the proceeds received from Sundry debtors. • F7: Journal : For recording all adjustment or due entries such as prepaid expense, accrued income etc., For recording purchase of assets for recording Input tax reversal entries, reverse charge entries under GST.
  • 16.
    • F8: Sales: This is used for recording all the sales made by the company. • F9: Purchase : This is used for recording all the inventories purchased by the company in the course of business.
  • 17.
    Last step • Step3: Enter the required information. The information needed to complete the voucher will vary depending on the type of voucher we want to create. We will have to typically need to determine which ledger the voucher will be attached to, as well as enter the date and names of any involved parties.