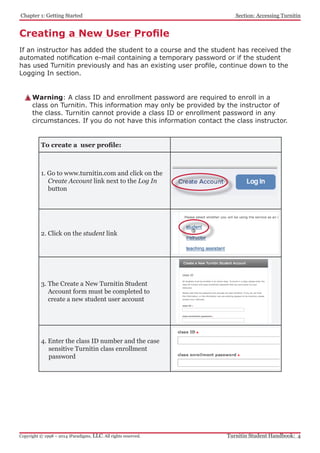
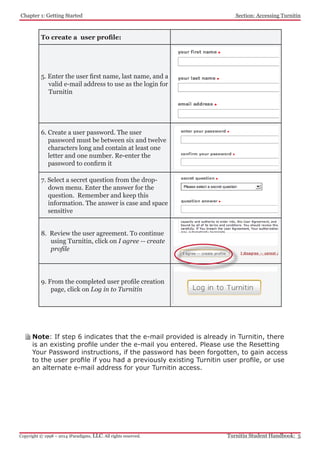
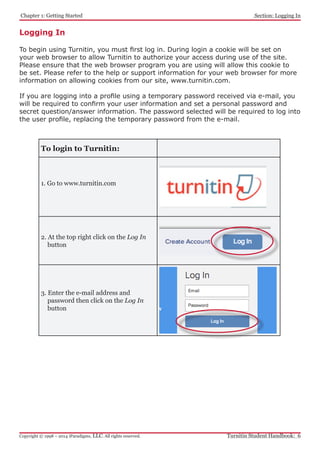
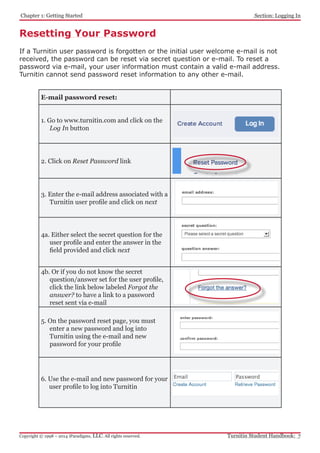
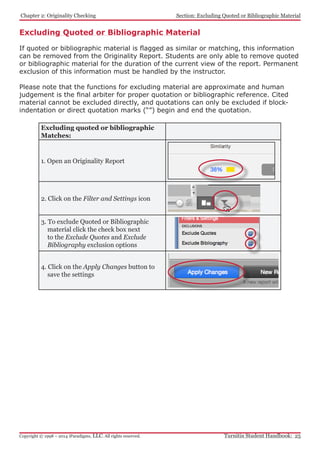
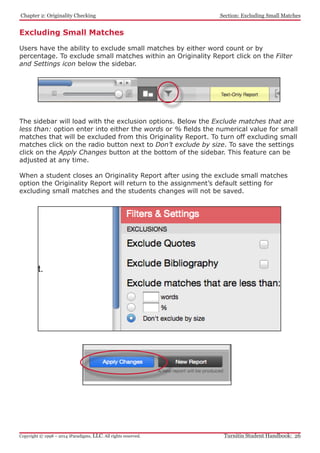
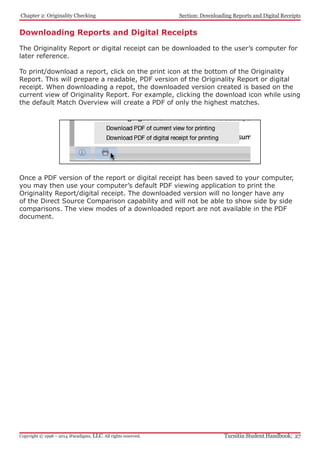
This document provides a 3 chapter summary of the Turnitin Student User Manual. Chapter 1 discusses getting started with Turnitin including creating a user profile, resetting passwords, enrolling in classes, and submitting papers. It outlines the file types and size limits for submissions. Chapter 2 introduces OriginalityReports which check submissions for matching text in Turnitin's database or on the internet. The summary provides an overview of the key information students need to understand to set up and use their Turnitin account.
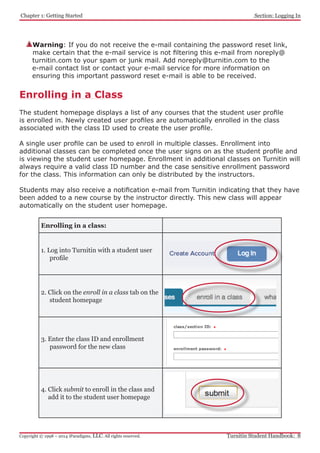
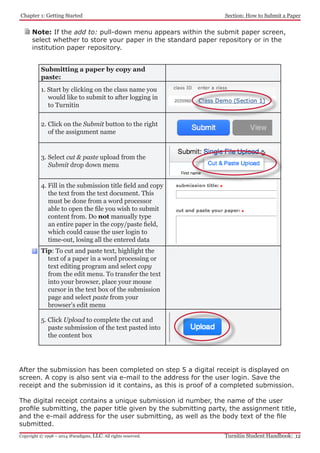


![Book review 1[1]](https://cdn.slidesharecdn.com/ss_thumbnails/bookreview11-141209005931-conversion-gate01-thumbnail.jpg?width=640&height=640&fit=bounds)

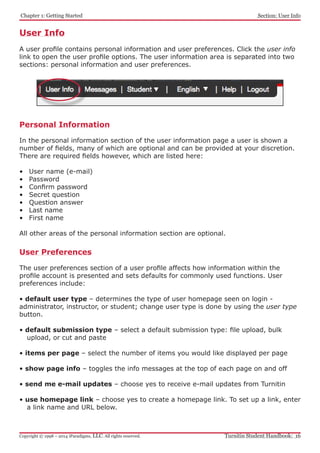
![Communication skills submission_1(0)[1]](https://cdn.slidesharecdn.com/ss_thumbnails/communicationskillssubmission101-141209005233-conversion-gate01-thumbnail.jpg?width=640&height=640&fit=bounds)


