STORZ & BICKEL - VAPORIZZATORE VOLCANO CLASSIC E DIGIT - ISTRUZIONI PER L'USO (IN INGLESE) >> By PuntoG
•
0 likes•326 views

PUNTOG - HEAD SHOP - VAPE SHOP - HEMP SHOP - GROW SHOP VENDITA E ASSISTENZA ON LINE SU VAPORIZZATORI www.puntog-shop.com Mobile +39 345 889 3933 Email : info@puntog-shop.com ORDINI TELEFONICI PER VAPORIZZATORI Spediamo la merce in tutta Italia con Consegna in pacco assolutamente robusto. Riceverai la merce entro tre giorni lavorativi dall’ordine. Chiama Ora!

Recommended
Recommended
More Related Content
Viewers also liked
Viewers also liked (6)
Similar to STORZ & BICKEL - VAPORIZZATORE VOLCANO CLASSIC E DIGIT - ISTRUZIONI PER L'USO (IN INGLESE) >> By PuntoG
Similar to STORZ & BICKEL - VAPORIZZATORE VOLCANO CLASSIC E DIGIT - ISTRUZIONI PER L'USO (IN INGLESE) >> By PuntoG (18)
More from PuntoG Head Shop Vape Shop Hemp shop
More from PuntoG Head Shop Vape Shop Hemp shop (10)
Recently uploaded
Recently uploaded (20)
STORZ & BICKEL - VAPORIZZATORE VOLCANO CLASSIC E DIGIT - ISTRUZIONI PER L'USO (IN INGLESE) >> By PuntoG
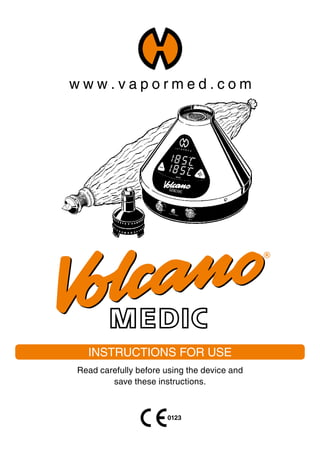
- 1. Instructions for use Read carefully before using the device and save these instructions.
- 2. 3 Table of Contents ............................................................ Page 1. Product Overview, Scope of Delivery, Service ......................... 6 2. Explanation of Symbols, Safety Recommendations ................ 9 3. Intended Use ........................................................................... 13 4. Important Remarks .................................................................. 14 4.1. Operating Conditions, .................................................... 16 4.2. Storage and Transport Conditions ................................ 16 5. The VOLCANO MEDIC Hot Air Generator .............................. 17 5.1. Unpacking ...................................................................... 17 5.2. Installation ...................................................................... 17 5.3. Operation ....................................................................... 17 5.4. Commissioning .............................................................. 18 5.5. Heating Up ..................................................................... 18 5.6. Temperature Setting ...................................................... 19 6. The Use of Dronabinol (THC) dissolved in Alcohol ................................................................. 20 6.1. The Efficiency of vaporized Dronabinol (THC) .......................................................... 20 6.2. Preparation .................................................................... 21 6.3. Application ..................................................................... 21 6.4. Inhalation from the Valve Balloon ................................. 25 Instructions for use English
- 3. 54 Table of Contents ............................................................Page 7. The Use of Hemp Flowers (Cannabis Flos) ............................ 27 7.1. The Efficiency of Cannabinoids vaporized from Hemp Flowers (Cannabis Flos) ............................ 27 7.2. Preparation ................................................................... 30 7.3. Application .................................................................... 30 7.4. Inhalation from the Valve Balloon ............................... 33 8. Accessories: Dosing Capsules and Magazine ....................... 35 8.1. Filling the Dosing Capsules with ground hemp flowers .............................................. 35 8.2. Filling the Dosing Capsules with Dronabinol ............... 36 8.3. Inserting the Dosing Capsules ...................................... 37 9. Hygiene ................................................................................... 38 9.1. General ......................................................................... 38 9.2. Material Resistance ...................................................... 38 9.3. Disposable MEDIC VALVE Lip Piece for Hygienic Use ............................................................. 39 9.4. Filling Chamber and Valve Balloon .............................. 40 - Cleaning of the Filling Chamber, Inspecting/Maintenance of the Filling Chamber, Reusability of the Filling Chamber, Reusability of the Valve Balloon, Storage 9.5. Disassembly and Assembly .......................................... 42 - Filling Chamber, Filling Chamber Cap, Mouthpiece Disassembling the Filling Chamber Cap, Disassembling the Filling Chamber, Drying, Assembly of Filling Chamber Cap, Assembling the Filling Chamber Table of Contents ............................................................Page 10. Hot Air Generator ..................................................................... 45 10.1. Cleaning ......................................................................... 45 10.2. Care and Maintenance .................................................. 45 10.3. Storage ........................................................................... 46 10.4. In Case of Problems ...................................................... 46 10.5. Disposal ......................................................................... 46 10.6. Troubleshooting ............................................................. 47 10.7. Periodic Safety Checks ................................................. 48 10.8. Technical Specifications ............................................... 48 10.9. Guidance and Manufacturer‘s Declaration – Electromagnetic Emissions ........................................... 49 11. Spare Parts and Accessories .................................................. 56 12. Declaration of CE Conformity ................................................. 57 13. Warranty, Liability, Repair Service .......................................... 58 14. Proof of the Annual Safety Checks .......................................... 61 Instructions for use English Instructions for use English
- 4. 76 Product Overview Delivery includes VOLCANO MEDIC Vaporization System: 1 pc. VOLCANO MEDIC Hot Air Generator 1 pc. Herb Mill (not shown) 1 pc. Instructions for Use (not shown) 2 pcs. Air Filters 1 pc. MEDIC VALVE Filling Chamber 5 pcs. MEDIC VALVE Balloon (standard size 12.5 l) with Mouthpiece 3 pcs. Lip Piece 1 pc. Cleaning Brush (not shown) 6 pcs. Screens 1 pc. Liquid Pad 3 pcs. Filling Chamber Clips (not shown) 1 pc. Cap Ring (not shown) Please check whether all components have been included. If not, please inform our Service Center. 1. Product Overview, Scope of Delivery, Service 1. Product Overview, Scope of Delivery, Service Liquid Pad Screen Set Valve Balloon with Mouthpiece and Lip Piece Filling Chamber with Cap Ventilation Slot “AIR” Button (Pump) “HEAT” Button (Heater) Plus Temperature Button Minus Temperature Button Set Temperature Display Actual Temperature Display Air Filter Air Filter Cap Heater Control Lamp Hot Air Outlet
- 5. 98 1. Product Overview, Scope of Delivery, Service Operating life: The Hot Air Generator and the Filling Chamber have an average expected operating life of: - approx. 1,000 operating hours - max. 5 to 6 years Service Contact in case of technical problems or questions about the device: Storz & Bickel Service Center Tel.: +49-74 61-96 97 07-0 · e-mail: info@vapormed.com For repairs, warranty claims, or disposal, please send the device to the following address: Storz & Bickel GmbH & Co. KG Service Center In Grubenäcker 5-9 78532 Tuttlingen, Germany Please read the following safety recommendations thoroughly and carefully before using the device. These Instructions for Use are a significant part of the VOLCANO MEDIC Vaporization System and must be provided to the user. These instructions given in this In- structions for Use must be strictly observed as they are extremely important to ensure safety during installation, use and maintenance of the VOLCANO MEDIC Vaporiza- tion System. Please keep this brochure in a safe place for future reference. You may download the current version of the Instructions for Use for the VOLCANO MEDIC Vaporization System on www.vapormed.com Explanation of Symbols SN Please follow these instructions carefully! according to IEC 60601: 2005) Warning! In order to avoid injuries to persons and damage to the equipment, it is mandatory to observe instructions marked with this symbol. Note/Tip! This symbol always gives you technical information or useful tips regarding the VOLCANO MEDIC Vaporization System. The medical product was introduced after 13 August 2005. The product may not be disposed of in normal household waste. The X on the trash can indicates the necessity of disposing of this product separately. Symbol for the manufacturer – the manufacturer‘s name and address are next to the symbol Safety Category II device Symbol for serial number – followed by the serial number of the medical product. 2. Explanation of Symbols, Safety RECommendations
- 6. REF IP 21 0123 1110 EU conformity symbol A 4-digit number after the CE marking indicates that a notified body is involved in the conformity assessment procedure. Safety tested and production monitored by TUEV SUED according to IEC 60601-1, CAN/CSA C22.2 No. 60601-1. Device protected against foreign bodies with a diameter larger than 12 mm and against vertically falling water drops (according to IEC 60529). Symbol for order number – followed by the order number of the corresponding medical product (or part) 2. Explanation of Symbols, Safety RECommendations Contains or presence of phthalate Air pressure limitation Caution! Hot surfaces! Never leave Filling Chamber on the VOLCANO MEDIC Hot Air Generator. Keep away from sunlight Protect against moisture and humidity Interference may occur in the vicinity of equipment marked with the following symbol. Temperature limits of ambient temperature Humidity limitation Safety Recommendations The packaging material (plastic bags, styrofoam material, boxes, etc.) must be kept out of the reach of children as it is a potential source of danger. People who require assistance must be supervised constantly during inhalation. Such persons often underestimate the hazards involved (e.g. strangulation with the power cord), so resulting in injury. The device contains small parts which can block the respiratory tract and lead to choking. Therefore, make sure that you always keep the Hot Air Generator and accessories out of the reach of babies and infants. Before connecting the Hot Air Gen- erator, make sure that the information given on the type label on the bottom side of the Hot Air Generator cor- responds to the mains supply at the place of installation. If there are any problems during operation, immediately pull out the power plug from the socket. The power cord must be unwound over its entire length (avoid rolling up and overlapping the cord). It must not be exposed to any impacts and must be kept out of the reach of children. Also, it must not be kept near liquids or sources of heat and must not be damaged. Do not wind the power cord tightly, nor pull it over sharp edges and never crush or kink it. If the power cord is damaged, please contact our Service Center to have it replaced. Never try to repair a power cord yourself! The use of multiple sockets and/or extension cables is not recommend- ed. However, if this is absolutely necessary, only products with a quality certificate (such as UL, IMQ, VED, +S etc.) may be used, provided the specified power exceeds the power required (A= Ampere) by the devices that are connected. If you have any concerns, ask a specialist to check whether the electrical system is in accordance with the local safety regulations. Install the Hot Air Generator on a stable and dry surface at a sufficient distance from sources of heat (oven,stove, fireplace etc.) and in a place where the ambient tem- perature cannot drop below +5°C (+41°F). Store the Hot Air Genera- tor in a dry place protected against the effects of weather and out of the reach of children or unqualified persons. It must not be installed in damp locations (such as bathrooms etc.). The Hot Air Generator may only be repaired by our Service Center. In correctly performed repairs without the use of original spare parts can- prove dangerous to the user. 2. Explanation of Symbols, Safety RECommendations
- 7. 1312 Do not operate the Hot Air Generator close to flammable objects such as curtains, tablecloths, or paper. Keep the Hot Air Generator away from pets (e.g. hamsters, mice) and other animals which could damage the power cord insulation. Danger to life when opening the Hot Air Generator as live components and connections are exposed. The Hot Air Generator must never be repaired or transported when the power plug is plugged in. To pull the power plug from the socket, pull the power plug directly, never pull the power cord. The Hot Air Generator must never be operated when the power cord is faulty. Do not put any objects into the open- ings of the device. Do not leave the Vaporizer unattend- ed during operation. After use, switch off the heater and the air pump. The ventilation slots as well as the hot air outlet of the Hot Air Genera- tor may not be closed, obstructed or blocked while the device is being used nor while it is cooling down. Caution! Hot surface! Do not touch the hot air outlet and the Filling Chamber when they are hot. The Filling Chamber may only be placed on the hot air outlet while filling the Valve Balloon. After fill- ing the Valve Balloon, the Filling Chamber must be removed from the hot air generator in order to avoid overheating of the Filling Chamber (Caution! Hot surface!). Do not put any body parts or objects in the hot air stream. Before cleaning, pull out the po wer cord from the socket. The Hot Air Generator should be cleaned only with a dry cloth - or a damp cloth if absolutely necessary. Never im- merse the Hot Air Generator in water or in other liquids or clean it with a direct water or steam jet. The Hot Air Generator must not be used in damp or wet conditions. The Hot Air Generator is protected against falling water drops (IP 21). The device should nevertheless be protected against moisture and rain. Do not use in the bathroom or above water. Never touch the Hot Air Generator with wet or damp parts of the body. Never put containers containing liquids on the Hot Air Generator. 2. Explanation of Symbols, Safety RECommendations Never operate the Hot Air Genera- tor when it is wet or damp. If the Hot Air Generator gets wet, it must be checked by our Service Center for damage to electrical components. Do not use in an atmosphere with risk of explosion or ignition. Never allow the Vaporizer to be used by children or unqualified persons. Only use original Storz & Bickel ac- cessories and spare parts. 2. Explanation of Symbols, Safety RECommendations The manufacturer is not re- sponsible for any damage or personal injury caused by inappropriate, incorrect or irre- sponsible use. The VOLCANO MEDIC Vaporization System is intended for vaporizing and then inhaling dronabinol (THC) dissolved in alcohol or cannabinoids from hemp flowers (cannabis flos). The goal is the application of the ac- tive ingredients in the human body via the alveoli for the appropriate medi- cal indication. It is suitable for the temporary inhalative application of cannabinoids prescribed by a physi- cian for use at home, in a hospital, or doctor‘s office. 3. Intended Use
- 8. 1514 The VOLCANO MEDIC Va- porization System ensures the highly effective, safe, and fast-acting application of cannabi- noids. The patient must undergo a medical examination before the be- ginning of treatment. The VOLCANO MEDIC Vaporiza- tion System is not intended for use in children and youth under age 18. Adults may use the device following the Instructions for Use or physician‘s instructions. The device is not to be used, if the user has respiratory tract or lung conditions. Depending on the density, the vapor could irritate respiratory tracts or lungs, which can lead to coughing. The application and inhalation is described in Chapters 6.4. and 7.4. “Inhalation from the Valve Balloon”, pages 25 and 33. The Valve Balloon with Mouthpiece is intended for only one user and may not be shared among patients. The Valve Balloon can be re-used several times, but only by one person (see Chapter 9. “Hygiene”, page 38). A new Valve Balloon with Mouthpiece may be used for a maximum of 2 weeks. At a certain dosage, cannabis can have a psychotropic (mind-altering) effect. There is thus a potential for abuse, which governments in nearly all coun- tries of the world counteract with cor- responding laws. Use only medicinal hemp flowers (cannabis flos) prescribed by your physician and purchased from a phar- macy. Otherwise you may be at risk of breaking the law. In case of doubt, ask your physician, pharmacist, or the responsible au- thorities about the current laws at your place of residence. Dronabinol is the international non- proprietary name for Delta-9-tetrahy- drocannabinol (THC) which is known as the most effective cannabinoid for medical use. Cannabinoids vaporize at tempera- tures over 185°C (365°F) and then form an aerosol with an average drop- let size (MMAD) of 0.64 µm (microm- eter) that can be inhaled and respired. The droplets are absorbed in the al- veoli and enter the bloodstream (sys- temic absorption). When cannabinoids are inhaled, the onset of the effect takes approx. 1-2 min. and the effects last for 2-4 hours. 4. Important Remarks 4. Important Remarks For application, a distinction must be made between the vaporization of dronabinol (THC) dissolved in alcohol and the vaporization of cannabinoids from hemp flowers (cannabis flos). Our Service Centre is availa- ble to answer your questions and receive your comments and suggestion concerning the VOL- CANO MEDIC Vaporization System. If questions occur about the medical use of cannabinoids or cannnabis please contact your doctor, pharma- cist or manufacturer of medical hemp flowers (Cannabis flos).
- 9. 1716 4. Important Remarks 4.1. Operating Conditions Ambient conditions in which the specified aerosol characteristics are guaranteed: 4.2. Storage and Transport Conditions The device features interference sup- pression acc. to EN 60601-1-2 (see Chapter 10. “Hot Air Generator”, page 45). Radiofrequency emitting equipment (e.g. mobile phones) should not be used in the immediate vicinity of the device. In case of doubt, contact qual- ified personnel. Do not store or transport any parts of the VOLCANO MEDIC Vaporization System in direct sunlight, wet rooms (e.g. bathroom) or near damp objects. Extreme fluctuations in ambient tem- perature can lead to condensation and damage the device‘s function. Atmospheric pressure: 700 hPa to 1060 hPa Atmospheric pressure: 700 hPa to 1060 hPa Ambient temperature: +10°C to +40°C (+50°F to +104°F) +40°C +10°C Ambient temperature: -20°C to +60°C (-4°F to +140°F) +60°C -20°C Relative humidity of ambient air: 30% to 80% 30% - 80% Relative humidity: 20% to 80% 20% - 80% 5. THE VOLCANO MEDIC Hot Air Generator 5.1. Unpacking The box contains all components as well as the Instructions for Use. Keep the Instructions for Use for future ref- erence. Take out the accessories and the Hot Air Generator from the box. Immedi- ately after unpacking, check whether the Hot Air Generator, the accesso- ries, the power cord and the plug are all included in the delivery and work properly. If you notice any defects, inform the seller or the delivery agent immediately. The packing material (plastic bags, styrofoam material, boxes etc.) must be kept out of the reach of children as it is a poten- tial source of danger. Please dispose of the packing mate- rial in a proper and environmentally friendly manner. We recommend keeping the original packaging in case it is required later (transport, Service Center, etc.). 5.2. Installation Before installing the Hot Air Gen- erator make sure that the information given on the type label on the bottom side of the device corresponds to the local mains supply data. All parts of the electrical system must comply with currently applicable offi- cial regulations. Put the Hot Air Generator on a flat and stable surface. Take care that the power cord cannot be damaged through kinking, crush- ing or pulling. Improper installation may lead to personal injury or ma- terial damages, for which the manufacturer cannot be held respon- sible. 5.3. Operation The Hot Air Generator was developed for vaporizing the cannabinoids listed in the in- structions. Any other use is inappro- priate and potentially dangerous. For use and maintenance, the user must always follow the instructions given in the Instructions for Use. If you have any concerns, or if there are any problems, immediately switch off the Hot Air Generator and discon- nect the power plug from the socket. Do not try to remedy the defect your- self. Contact our Service Center di- rectly. Allow the device to cool down before it is packed away.
- 10. 1918 5. THE VOLCANO MEDIC Hot Air Generator 5.4. Commissioning Do not leave the device unat- tended while it is being opera- ted. Put the Hot Air Generator on a flat and stable surface. Check whether the mains voltage cor- responds to the voltage rating stated on the device. The power cord and the plug must be in perfect condition. Only connect the Hot Air Generator to a properly installed socket. The man- ufacturer will not bear any responsibil- ity whatsoever if this accident preven- tion measure is not taken. The device is safely disconnected from the mains only when the plug is removed from the socket. When the power plug is plugged in, the LED display of the device lights up briefly. At the same time, an inter- nal software query is performed. The green dot on the display shows that the Hot Air Generator is connected to the power supply. 5.5. Heating Up To switch on the heater, push the but- ton labeled “HEAT”. The set/actual temperature will light up, signaling that the heater is switched on. At the same time, the yellow control lamp will light up to indicate that the device is heating up. The upper, red display shows the actual temperature in the Filling Chamber with the air pump switched on, and the lower, green display shows the desired set tem- perature. The heating process is com- pleted when the set value is equal to the actual value. Heating up can take up to 5 minutes depending upon the chosen temperature. After the heating process is completed, the tempera- ture is constantly maintained at the set value. The luminous intensity of the yellow control lamp corresponds to the intensity of the heating process. For technical reasons the temperature in the Filling Chamber cannot be meas- ured during vaporization. During op- eration the temperature is measured at the heat exchanger. The display in- dicates the reference values for the attached Filling Chamber with the air pump switched on. 5. THE VOLCANO MEDIC Hot Air Generator 5.6. Temperature Setting Plus temperature button Minus temperature button Actual temperature display (red) Set temperature display (green) When you press the plus button, the set value is increased, and when you press the minus button, the set value is decreased. When you briefly tap on the plus or minus button, the set values are in- creased or decreased respectively in 1-degree increments. If you keep the plus or minus button pressed, the set values start running continuously in the corresponding di- rection. If you simultaneously tap on the plus button and the minus button, the dis- play changes from degree Celsius to degree Fahrenheit and vice versa. If the actual value is higher than the set value, you can speed up the cooling down process by switching on the air pump. 30 minutes after the last time a button is pressed, the devi- ce automatically switches off. As long as the heater has a substan- tial amount of residual warmth, the temperature is displayed until it drops below +40°C (+104°F). Then the display turns off, and the green dot on the display indicates that the Hot Air Generator is connected to the mains supply. The device is safely discon- nected from the mains only when the plug is removed from the socket.
- 11. 2120 6. THE Use of Dronabinol Use only approved dronabinol (THC) that is sold to pharmacies for making up prescriptions. The pharmacy produces an alcohol solution according to your physician‘s prescription (generally 2.5% THC) for inhalation with the VOLCANO MEDIC Vaporization System. 6.1. Efficiency of vaporized Dronabinol (THC) By following the procedure listed in the Instructions for Use the systemic bioavailability of vaporized dronabi- nol is approximately 40%. For comparison: The systemic bio- availability of cannabinoids adminis- tered orally is below 15%. When observing the Instructions for Use and with a vaporization temperature of 210°C (410°F) the following reference values are validated in studies: If dosage is too low increase the amount of dronabinol. If dosage is too high reduce the amount of dronabinol. Drug (Filling Chamber Content) Dronabinol/THC (10 mg) THC: 10 mg approx. 6 mg approx. 4 mg Cannabinoid content in drug Cannabinoid con- tent in Valve Balloon after vaporization with 210°C (410°F) Cannabinoid content in blood stream (systemic bioavailability) after inhalation 6. THE Use of Dronabinol Preparation to use the Liquid Pad When using dronabinol (THC) dis- solved in alcohol, the Screens in the Filling Chamber are not needed and should be removed. The Liquid Pad is inserted in the Fill- ing Chamber instead of the lower Screen. Applying drops with a pipette 6.2. Preparation Make sure to use the Mouth- piece only with attached Lip Piece before every operation (see Chapter 9.3. “Disposable MED- IC VALVE Lip Piece for Hygienic Use”, page 39) Turn the Filling Chamber Cap counter- clockwise in order to remove it from the Filling Chamber. Remove Filling Chamber Cap Dronabinol (THC) dissolved in oil is not suitable for vapori- zation and is intended for oral administration. 6.3. Application Turn the Filling Chamber upside down and use a pipette to drop the dronabi- nol (THC) dissolved in alcohol onto the center of the bottom of the Liquid Pad. The Liquid Pad can hold up to 20 drops. At the beginning of treatment, apply a maximum of two drops and carefully increase to the appropriate dosage. Always follow your doctor‘s recom- mendations! Next screw on the Filling Chamber Cap again.
- 12. 2322 Please make sure to not overfill the Liquid Pad. It can contain up to 5 drops. Dronabinol (THC) is available as an alcoholic solution. The advantage of this is that the liquid is distributed more equally around the stainless steel wire of the Liquid Pad, yielding a larger surface area that can be vaporized. However, the alcohol must first be separated from the dronabinol, as al- cohol should not be inhaled. Press the “HEAT” button set tempera- ture to 100°C (212°F) and allow the device to heat up. When the temperature has reached 100°C (212°F), place the Filling Chamber with Cap and Liquid Pad onto the Hot Air Generator and make sure it clicks into place. Then press the “AIR” button to pump air through the Liquid Pad. The dronabinol does not vaporize at this temperature, but the alcohol evaporates quickly (within 30 sec.). Since alcohol has a characteristic odor, you can easily determine by smelling whether the Filling Chamber is alcohol free. Dronabinol has nei- ther odor nor taste. Suitable for vaporizing small amounts of dronabinol (THC), is the Filling Chamber Reduc- er, which is available as an accessory, along with the small Liquid Pads and the Dosing Capsules. The Filling Chamber Reducer is inserted instead of the Filling Chamber Cylinder (see Chapter 9.5. “Disassembling and As- sembling the Filling Chamber”, page 42). Either the small Liquid Pad (meas- urements 15 x 5 mm) or the Dosing Capsule containing a Liquid Pad (measurements 13 x 6 mm) are to be inserted into the Filling Chamber Reducer. Screw on Filling Chamber Cap Insert either a small Liquid Pad directly into the Filling Chamber Reducer or a Dosing Capsule equipped with a Liquid Pad 6. THE Use of Dronabinol Separate alcohol Stretch Valve Balloon tight When the Filling Chamber is free of alcohol, press the “AIR” button again to switch off the airflow. The dronabinol, which evaporates only at higher temperatures – over 157°C (315°F), remains in the Liquid Pad. Next remove the Filling Chamber, press the heat button again and set the temperature to 210°C (410°F) and continue heating. The dronabinol is vaporized in the first few seconds of filling the Valve Balloon. However you should continue filling the Valve Ballon (approx. 35 sec.) as the additional air dilutes the aerosol, which makes inhalation easier, espe- cially for higher dosages. When the temperature reaches 210°C (410°F), place the Filling Chamber 6. THE Use of Dronabinol and then the Valve Balloon on and al- low them to click in place. This opens the Valve. Stretch the Valve Balloon tight before setting it onto the Filling Chamber so that when filling, the Valve Balloon sits upright on the Hot Air Generator. Press the “AIR” button. The Valve Balloon will now fill with dronabinol aerosol.
- 13. 2524 Remove Valve Balloon with Filling Chamber Caution! Hot surface! Do not touch any compo- nents of the Filling Chamber (except at the textured grip) until they have cooled down after the Valve Balloon has been filled. Separate the Valve Balloon from the Filling Chamber. The Valve closes automatically after separation and the aerosol in the Valve Balloon cannot escape. Detach Valve Balloon from Filling Chamber Do not leave the Filling Chamber on the hot air outlet of the VOLCANO MEDIC when “HEAT” is switched on – except for separating the alcohol or filling the Valve Balloon. Non-observance may cause the Fill- ing Chamber to overheat and may cause burns. Caution! Hot surface! When the Valve Balloon is filled, press the “AIR” button and shut off the air pump and remove the Valve Balloon together with the Filling Chamber. To do so, hold the Filling Chamber Cap at the textured grip. 6. THE Use of Dronabinol 6.4. Inhalation from the Valve Balloon Attach the Mouthpiece with attached Lip Piece to the Valve and allow it to lock in place. Attach the Mouthpiece with attached Lip Piece onto the Valve Balloon Correct position of the Mouthpiece with Lip Piece on the Valve Press Mouthpiece against lips to inhale To inhale, put the Mouthpiece to your lips and lightly press against the Mouthpiece with your lips. By doing As the content of the Valve Balloon deflates, it may be completely emptied by stretching the Valve Balloon taut and subsequently inhaling the content 6. THE Use of Dronabinol so, the Valve opens and the aerosol can be inhaled from the Valve Balloon. As soon as you remove the pressure from the Mouthpiece, the Valve auto- matically closes.
- 14. Stretch Valve Balloon tight 2726 The Valve Balloon is not suit- able for storing the aerosol for long periods, as it will con- dense on the interior surface of the Balloon in time (a few hours). Inhale the contents of the Valve Bal- loon within 10 minutes. Breathing Technique Inhale only half as much as possible. Hold your breath a few seconds and then breathe out slowly. We recommend consciously concen- trating on your inhalation. The can- nabinoid aerosol is absorbed by the alveoli and into the bloodstream. The onset of the effect takes approx. 1-2 min. End of Inhalation Disconnect the power plug from the socket after inhalation. 6. THE Use of Dronabinol 7. THE USE OF HEMP FLOWERS Use only standardized, medicinal hemp flowers (cannabis flos) that have been tested by licensed produc- ers for authenticity, purity, and patho- gens according to the directives of the competent authorities in your country. Under no circumstances should you use cannabis from the illegal black market or any other cannabis that has not been sub- jected to recognised quality controls. The amount of active ingredients in these products is generally unknown, may fluctuate considerably, and they often contain herbicides, fertilizers, bacteria, etc. 7.1. The Efficiency of Cannabi- noids vaporized from Hemp Flowers (Cannabis Flos) By following the procedure listed in the Instructions for Use the systemic bioavailability of cannabinoids vapor- ized from hemp flowers is approx. 29- 40%. For comparison: The systemic bio- availability of cannabinoids aminis- tered orally is below 15%. The following factors determine the cannbinoid concentration in the Valve Balloon: Temperature - Higher vaporiza- tion temperatures cause a higher cannbinoid concentration in the Valve Balloon, lower vaporiza- tion temperatures cause a lower cannabinoid concentration in the Valve Balloon. Quantity - Higher quantities in the Filling Chamber cause a higher cannbinoid concentration in the Valve Balloon, lower quantities in the Filling Chamber cause a lower cannabinoid concentration in the Valve Balloon. Quality - Higher cannabinoid concentrations in the plant mate- rial cause a higher cannabinoid concentration in the Valve Balloon, lower cannabinoid concentrations in the plant material cause a lower cannabinoid concentration in the Valve Balloon. To obtain a reproducible dosage with good efficiency, it is recommended to vaporize small quanitites (100 mg) in the Filling Chamber at top tempera- ture (210°C/410°F) in a single Valve Balloon only.
- 15. 2928 7. THE USE OF HEMP FLOWERS After consulting your physician, if your doctor recommends that you are able to determine your requirement for active ingredients yourself (titration), due to the relatively rapid effect (ap- prox. 1-2 minutes), you may put higher quantities cannabis (up to 500 mg) into the Filling Chamber and vaporize at lower temperatures. Thus, you can fill mutiple Valve Bal- loons with vapors of active ingredients with a single Filling Chamber filling. With this method no reproducible doses are achieved; for this reason, it is only appropriate for experienced users. When observing the Instructions for Use and with a vaporization tem- perature of 185°C (365°F) the follow- ing reference values are validated in studies: When observing the Instructions for Use and with a vaporization temperature of 210°C (410°F) the following reference values are validated in studies: If dosage is too low increase the amount of cannabis. If dosage is too high reduce the vaporization temperature. Drug (Filling Chamber Content) Bedrocan (100 mg) Bediol (100 mg) THC: approx.19 mg THC: approx.6 mg CBD: approx.7,5mg approx. 8 mg approx. 3,5 mg approx. 4,5 mg approx. 5,5 mg approx. 2,4 mg approx. 3 mg Cannabinoid content in drug Cannabinoid con- tent in Valve Balloon after vaporization with 210°C (410°F) Cannabinoid content in blood stream (systemic bioavailability) after inhalation 7. THE USE OF HEMP FLOWERS The charts show the concentration of active ingredients approx. 5 minutes after the filling of the Valve Balloon. Due to exhalation the actual systematic bioavail- ability (blood content) is approx. 35% lower than the cannabinoid content in the Valve Balloon. Cannabinoid concentration per Balloon Filling at 185°C (365°F) with 250 mg filling quantity mg 10 8 6 4 2 0 1 2 3 4 5 6 7 8 9 10 Bedrocan (THC) Bediol (CBD) Bediol (THC) Multiple Balloon Fillings from a single 250 mg sample Cannabinoid concentration per Balloon Filling at 185°C (365°F) with 500 mg filling quantity mg Multiple Balloon Fillings from a single 500 mg sample 10 8 6 4 2 0 1 2 3 4 5 6 7 8 9 10 Bedrocan (THC) Bediol (CBD) Bediol (THC)
- 16. 3130 Grind the hemp flowers with the en- closed herb mill. Place a hazelnut- sized amount in the Herb Mill and rotate 4-5 times. Hemp flowers are ground most easily when they are cooled or frozen. The fridge or freezer are suited for storing hemp flowers. Depending on the amount of active ingredients and the recommended dosage by a physician, fill the Filling Chamber with ground hemp flowers. Next screw on the Filling Chamber Cap again. Screw on Filling Chamber Cap 7.2. Preparation Make sure to use the Mouth- piece only with attached Lip Piece before every operation (see Chapter 9.3. “Disposable MED- IC VALVE Lip Piece for Hygienic Use”, page 39) Turn the Filling Chamber Cap counter- clockwise in order to remove it from the Filling Chamber. For consistent and reproduci- ble dosage with e. g. 100 mg, use each Filling Chamber portion only once to fill a Valve Bal- loon. Other conditions for a reproducible dosage are: using standardized can- nabis, consistent amount, consistent temperature, consistent Valve Bal- loon Size (standard size 1.25 l) and same breathing technique when in- haling. 7.3. Application Remove Filling Chamber Cap Fill Filling Chamber 7. THE USE OF HEMP FLOWERS Stretch Valve Balloon tight Fill the Filling Chamber Reducer with ground hemp flowers directly or with a filled Dosing Capsule Take care that the Screens are not obstructed with plant material. To guarantee opti- mal results, we recommend cleaning the Screens after each vaporization cycle with the Cleaning Brush sup- plied with the device. Suitable for vaporizing small amounts of hemp flowers, is the Filling Chamber Reducer, which is available as an accessory, along with the Dosing Capsules. The Filling Chamber Reducer is in- serted instead of the Filling Chamber Cylinder (see Chapter 9.5. „Disas- sembling and Assembling the Filling Chamber“, page 42). The Filling Chamber Reducer can be filled with ground hemp flowers direct- ly. Dosing Capsules containing hemp flowers can be inserted into the Filling Chamber Reducer as well. 7. THE USE OF HEMP FLOWERS ture is equal to the set temperature put the Filling Chamber with Cap on the Hot Air Generator and allow it to lock in place. Put the Valve Balloon on the Filling Chamber and allow it to lock in place. This will open the Valve. Before putting the Valve Balloon on the Filling Chamber, stretch it tight so that the Valve Balloon is placed verti- cally on the Hot Air Generator when it is filled. Press the “AIR” button. The Valve Balloon will now fill with the can- nabis aerosol. Press the “HEAT” button to switch on the heater. When the actual tempera-
- 17. 3332 7. THE USE OF HEMP FLOWERS Remove Valve Balloon with Filling Chamber Caution! Hot surface! Do not touch any compo- nents of the Filling Chamber (except at the textured grip) until it has cooled down after the Valve Balloon has been filled. Separate the Valve Balloon from the Filling Chamber. The Valve closes automatically after separation and the aerosol in the Valve Balloon cannot escape. Separate Valve Balloon from Filling Chamber Do not leave the Filling Chamber on the hot air outlet of the VOLCANO MEDIC when “HEAT” is switched on - except for filling the Valve Balloon. Non-observance may cause the Fill- ing Chamber to overheat and may cause burns. When the Valve Balloon is filled, switch off the air pump and remove the Valve Balloon together with the Filling Chamber. To do so, hold the Filling Chamber Cap at the textured grip. Caution! Hot surface! 7. THE USE OF HEMP FLOWERS 7.4. Inhalation from the Valve Balloon Attach the Mouthpiece with attached Lip Piece to the Valve and allow it to lock in place. Press Mouthpiece against lips to inhale As soon as you remove the pressure from the Mouthpiece, the Valve auto- matically closes. Attach the Mouthpiece with attached Lip Piece to the Valve Balloon Correct position of the Mouthpiece with Lip Piece on the Valve To inhale, put the Mouthpiece to your lips and press them lightly against the Mouthpiece. By doing so, the Valve opens and the aerosol can be inhaled from the Valve Balloon.
- 18. Stretch Valve Balloon tight 3534 The Valve Balloon is not suit- able for storing the aerosol for long periods, as it will con- dense on the interior surface of the Valve Balloon in time (a few hours). Inhale the contents of the Valve Bal- loon within 10 minutes. 7. THE USE OF HEMP FLOWERS When the content of the Valve Balloon is almost emptied, you can empty the Balloon completely by stretching it tight. Breathing Technique Inhale only half as much air as pos- sible. Hold your breath for a few sec- onds and exhale slowly. We recommend consciously concen- trating on you inhalation. The can- nabinoid aerosol is absorbed by the alveoli and into the bloodstream. The onset of the effect takes approx. 1-2 min. End of Inhalation Disconnect the power plug from the socket after inhalation. Open the Cap of the Filling Chamber by turning it counterclockwise and discard the used plant material. 8. ACCESSORIES: DOSING CAPSULES AND MAGAZINE If necessary, grind the hemp flowers. Weight out the amount, which is rec- ommended by the doctor, and fill the Dosing Capsule by using the Maga- zine Cap (funnel). Dosing Capsules with Magazine With the Dosing Capsules, which are available as accessories, you can fill ground hemp flowers or dronabinol using the Liquid Pads into the Dosing Capsules in advance and store them in the Magazine. This makes usage easy. This way, patients with fine motor dysfunction for example, can have their daily dose pre-filled in Dosing Capsules by the nursing staff. 8.1. Filling the Dosing Capsules with ground hemp flowers Currently, patients in practically all countries, which allow the use of hemp flowers for medical purposes, get a prescription of a certain amount of dried hemp flowers. These hemp flowers are delivered either as whole pieces or already ground and have to be portioned and weight out by the patient according to the doctor‘s directive. In case the hemp flowers are not ground, they have to be ground with the included Herb Mill first. Hemp flowers are ground most easily when they are cooled or frozen. The fridge or freezer are suited for storing hemp flowers. The Dosing Capsules can be filled with e.g. 50, 100 or up to 150 mg ground hemp flowers per capsule and be stored in the Magazine as a reserve. Dosing Capsule with removed cap
- 19. 3736 8. ACCESSORIES: DOSING CAPSULES AND MAGAZINE Dosing Capsule while being filled with Magazin Cap (funnel) Attaching the Magazine Cap Dosing Capsule with removed cap and inserted Liquid Pad Attach the cap onto the Dosing Cap- sule. Repeat the filling process until the desired amount of Dosing Cap- sules is filled and insert them into the magazine. The magazine can hold up to 8 Dosing Capsules. After filing the Dosing Capsules, at- tach the Magazine Cap and close it by turning it clockwise. 8.2. Filling the Dosing Capsules with Dronabinol The Dosing Capsules with inserted Liquid Pad can be filled with up to 5 drops of dronabinol and store them in the Magazine. Please make sure to not overfill the Liquid Pad. 8. ACCESSORIES: DOSING CAPSULES AND MAGAZINE The Dosing Capsule inserted into the Filling Chamber Reducer 8.3. Inserting the Dosing Capsules First, the Filling Chamber Reducer, that is available as an accessory as well, is to be inserted instead of the Filling Chamber Cylinder (see Chapter 9.5. “Disassembling and As- sembling the Filling Chamber“, page 42), afterwards, insert the Dosing Capsules into the Filling Chamber Reducer. Next screw on the Filling Chamber Cap again. Screw on Filling Chamber Cap The Filling Chamber Reducer can be filled directly as well (without a Dosing Capsule), see Chapters 6.3. and 7.3. “Applica- tion”, pages 21 and 30.
- 20. 3938 9. HYGIENE 9.1. General Caution! To avoid a health risk – e.g. in- fection from a contaminated Filling Chamber or a contaminated Valve Balloon – the following hygiene instructions must be followed. In a physician‘s practice or a in a clinic, the hygiene requirements of the RKI (Robert Koch Institute), the BfArM (German Federal Institute for Drugs and Medical Devices) or comparable institutions in your country, have to be observed. The VOLCANO MEDIC Vaporization System is intended for multiple use. a) Filling Chamber The Filling Chamber must be cleaned if there is visible residue or when a new Valve Balloon is used. b) Valve Balloon The Valve Balloon may be used by one person only. Make sure that the equipment is al- lowed to dry thoroughly after every cleaning. Condensation or residual moisture may encourage bacterial growth. Please note Chapter 9.2. “Ma- terial Resistance” on this page. Inspect the component parts of the Filling Chamber regularly and replace defective (broken, misshapen, dis- colored) parts. Replace the Valve Bal- loon after 70 applications or at least 14 days after the first use. The Lip Piece of the VOLCANO MEDIC Vaporization System is equipped with a check valve. This check valve reduces the danger of a potential contamination inside the Valve Balloon by preventing breathing into the Valve Balloon. This ensures that the Valve Balloon can be re-used several times. 9.2. Material Resistance of the VOLCANO MEDIC Vaporiza- tion System Please ensure that the Mouthpiece, the Filling Chamber, the Lip Piece and the Hot Air Generator do not come in contact with the following chemicals: organic, mineral and oxidating acids (min. permissible pH 5.5) strong bases (max. permissible pH 10). We recommend using neutral/enzymatic or slightly alkaline cleaners. organic solvents (e.g. aldehyde, ether, ketone, benzene) oxidation agents (e.g. hydrogen peroxide) halogens (chlorine, iodine, bro- mine) aromatic/halogenated hydrocar- bons 9. HYGIENE phenol derivatives, amin com- pounds (in high concentrations) oils and greases Clean the parts of the VOLCANO MEDIC Vaporization System only with soft brushes, never with metal brushes or steel wool. 9.3. Disposable MEDIC VALVE Lip Piece for Hygienic Use The Lip Piece will be delivered brand new and in a low-germ, but not fully- sterile state. The Lip Piece is equipped with a check valve. This check valve reduces the dan- ger of a potential contamination inside the Valve Balloon by preventing breathing into the Valve Balloon. This ensures that the Valve Balloon can be re-used several times before it has to be disposed (see Chapter 9.4. “Reusability of the Valve Balloon”, page 41). Valve Balloon with Mouthpiece and Lip Piece The Lip Piece is put on the Mouth- piece, slid until stop and is then ready for operation. The Valve Balloon with Mouthpiece and the Lip Piece may be used by only one person. A Lip Piece may be used for max. 4 hours after initial operation if it is un- damaged and clean. Afterwards, it must be disposed of in the household waste and a new Lip Piece must be used due to hygienic reasons. Every further use beyond this or the use of damaged and/or contaminated products respectively is the user‘s re- sponsibility. We assume no liability if this recom- mendation is ignored. Please note that damaged or brittle Lip Pieces are not to be used.
- 21. 4140 9. HYGIENE 9.4. Filling Chamber and Valve Balloon Cleaning the Filling Chamber Clean your sink and the surround- ing area. Disassemble the Filling Chamber (see sections “Disassembly and Assembly” of the Filling Chamber, page 42). Remove stubborn residue inside the Filling Chamber Cylinder and cap cylinder (if necessary, with ethyl alcohol). Place all component parts of the Filling Chamber in warm (40-50°C, 104-122°F) soapy water for at least 5 min. (commercial dish soap without disinfectants and with as few additives as possible, used ac- cording to manufacturer‘s recom- mendations, avoiding excessive foam) and ensure that all parts are completely covered and contain no air bubbles. Use a soft brush (bottle brush) or a soft, clean cloth to remove impurities that is used only for this purpose, never metal brushes or steel wool. Clean until there are no visible impurities on the parts. Remove the parts from the soapy water and rinse them for at least 1 min. under running water. Allow the liquid inside to run out completely and shake any remain- ing water out of the parts. Avoid any contact with unclean surfaces, especially the floor. Do not immerse any plastic components in ethanol or al- cohol for longer than an hour. Extended contact with ethanol or al- cohol can lead to discoloration or em- brittlement of plastic parts. Note: If the tap water is very hard, re- sulting in the formation of a white film on the surface of the parts, we recom- mend replacing the Filling Chamber more frequently. Possible alternative: The compo- nent parts of the Filling Chamber can also be cleaned in a dishwasher using a commercially available dishwasher detergent. 9. HYGIENE Put the component parts of the Filling Chamber in a suit- able place in the dishwasher. Small parts (e.g. Filling Chamber Clips) can be lost or may damage the dishwasher if improperly placed. In case of doubt, do not clean the small parts of the Filling Chamber (Filling Chamber Clips, Screens) in the dishwasher. Inspecting/Maintenance of the Filling Chamber After cleaning, check all component parts of the Filling Chamber for sur- face damage, tears, softening or hard- ening, soiling, discoloration, or exces- sive limescale and discard damaged Filling Chambers. Then reassemble the Filling Cham- ber (see Chapter 9.5. “Disassembling and Assembling the Filling Chamber”, page 42). Reusability of the Filling Chamber The Filling Chamber (incl. Screens and Liquid Pad) is intended for multi- ple use. It requires no particular hygienic re- processing (see Chapter 9.4. “Clean- ing the Filling Chamber”, page 40). The Filling Chamber must be cleaned: if there is residue (condensate) on the inside of the Filling Chamber, when a new Valve Balloon and Mouthpiece is used, when a new patient uses it. Before every use, check the Filling Chamber for damage and wear and tear (see section “Inspecting/Maintenance of the Filling Chamber”, page 41). A defective Filling Chamber or part must be replaced immediately. Reusability of the Valve Balloon The Valve Balloon is intended for mul- tiple uses without hygienical repro- cessing. It may be used only by one person for a maximum of 70 times and a maxi- mum of 14 days after the initial use. Then a new Valve Balloon with Mouth- piece must be used. Before each vaporization, check from the outside whether there is any mois- ture (condensation) inside the Valve Balloon. If there is any moisture in the Valve Balloon or if the Valve is damaged, the Valve Balloon may no longer be used and must be disposed of with house- hold waste.
- 22. 4342 9. HYGIENE Storage Store Filling Chamber, Mouthpiece, Lip Piece and Valve Balloon in a dry, dust- free place away from contamination. 9.5. Disassembly and Assembly Filling Chamber and Filling Cham- ber Cap Please allow the Filling Chamber and the Cap to cool down before disas- sembling them. All component parts of the Filling Chamber must be cleaned at the in- tervals prescribed in Chapter 9.4. “Reusability of the Filling Chamber”, page 41. Disassemble the Filling Chamber as follows: Turn the Filling Chamber Cap coun- terclockwise in order to remove it from the Filling Chamber. Disassembling the Filling Cham- ber Cap Use, e.g., the handle of the Cleaning Brush to press the upper Screen down in order to push it out. No Screens are needed when using dronabinol. Push the cap cylinder downwards out of the cap housing. At the same time the cap ring will be stripped off. Push out the upper Screen with the help of the Cleaning Brush Push the cap cylinder out of the cap housingRemove Filling Chamber Cap 9. HYGIENE Disassembling the Filling Chamber Push the lower Screen or the Liquid Pad upwards out of the Filling Cham- ber Cylinder. Push the Filling Chamber Cylinder upwards out of the Filling Chamber Housing. Push the Filling Chamber Cylinder out of the Filling Chamber Housing When the Filling Chamber Cylinder is pushed out, the three Filling Chamber Clips are loosened and fall out of the Filling Chamber Housing. Drying All component parts of the Filling Chamber must be completely dry be- fore reassembly. Put all component parts of the Filling Chamber on a clean, dry, and absor- bent pad and allow them to dry thor- oughly. A hair dryer may be used for faster drying. Do not dry in wet rooms (e.g. not in the bathroom). Assembly of Filling Chamber Cap Slide the cap cylinder into the cap housing until it clicks, then pull the cap ring from above over the cap cylinder to the cap housing. When using hemp flowers, push the upper Screen from below into the cap cylinder until it clicks into the desig- nated notch. When using dronabinol solution, the two Screens are not needed. Only the Liquid Pad is inserted instead of the lower Screen. Lower Screen Filling Chamber Cylinder Filling Chamber Housing 3 pcs. Filling Chamber Clip
- 23. Filling Chamber Cylinder Filling Chamber Housing Filling Chamber Clip Insert Filling Chamber Clips The upper Screen has to be placed carefully into the intended notch. Non- observance may result in plant parti- cles in the Valve Balloon that might be inhaled subsequently. Assembling the Filling Chamber Push the Filling Chamber Cylinder from above into the Filling Chamber Housing and allow it to lock in place. Insert the Filling Chamber Clips in the openings provided for them in the foot of the Filling Chamber Housing. Please ensure that the Filling Cham- ber Clips are placed properly as shown in the illustration. Insert the Screen or the Liquid Pad into the Filling Chamber from above. Screw Filling Chamber Cap on Filling Chamber. Cap Ring Cap Housing Cap Cylinder Upper Screen 4544 9. HYGIENE 10. HOT AIR GENERATOR 10.1. Cleaning Before maintenance, the device has to be switched off and the power plug has to be unplugged. For home use it is sufficient to clean the housing of the Hot Air Generator with a damp cloth. Do not hold the de- vice under running water. In a physician‘s office or clinic, the housing of the Hot Air Generator can be cleaned and disinfected with a sur- face disinfectant. The surface disinfectant should be certified (e.g. VAH/DGHM or FDA approval or CE marking), be suitable for disinfecting the Hot Air Generator, and compatible with the Hot Air Gen- erator (see Chapter 9.2. “Material Re- sistance”, page 38). Use only a soft clean cloth for wiping. The cloth may be damp, but not wet. Prevent liquid from entering the Hot Air Generator. The tests for the material resistance of the Hot Air Generator for surface disinfection were made using the dis- infectant “neoform MED Spray” from Dr. Weigert. Liquid entering the Hot Air Generator can damage the electrical parts and cause malfunctions. If any liquid does get into the Hot Air Generator, contact our Service Cent- er immediately. 10.2. Care and Maintenance Before any maintenance work is done, the device has to be switched off and the power plug has to be unplugged. At the bottom of the Hot Air Generator is an Air Filter. The Air Filter must be inspected for contamination every four weeks by turning the Air Filter Cap counter- clockwise and removing the Air Filter. Reassemble in reverse order
- 24. 4746 10.3. Storage Store the Hot Air Generator in a dry place protected against the effects of weather and out of the reach of chil- dren or unqualified persons. 10.4. In Case of Problems Immediately unplug the power cord and ensure that no one can connect the Hot Air Generator to the mains supply again without this being no- ticed. If there are any faults in the electron- ics of the Hot Air Generator VOLCA- NO MEDIC, you can perform a reset by pulling out the power plug and plugging it again after waiting for mini- mum three seconds. The Hot Air Generator has two inter- nal fuses (F1 and F2). As these fuses are used only in case of a defect in the Hot Air Generator, they can be replaced only by our Service Center. Put the Hot Air Generator in the origi- nal packaging or pack it properly in other packing material and take it to our Service Center. 10.5. Disposal If the Hot Air Generator is irreparably damaged, please do not simply throw it away. As it is made of high quality, complete- ly recyclable components, it should be brought to a material recycling centre in your town or sent to our Ser- vice Center for disposal. 10. HOT AIR GENERATOR Problem Possible cause/remedy No green light signal visible on the VOLCANO MEDIC display; no activation of the heater or pump possible. Please make sure that the current is on and that the fuse (in the mains fuse box) is switched on and is not defective. If the Hot Air Generator still does not function, the inter- nal fuses may have been triggered. In this case, send the VOLCANO MEDIC Hot Air Generator to our Service Center. No aerosol is formed. Check the set and actual temperature. Make sure the Filling Chamber and/or Valve Balloon were correctly attached. Check whether dronabinol has been added to the Liquid Pad or whether there is fresh, unused cannabis flos in the Filling Chamber. The Valve Balloon does not fill up. Check whether the pump is turned on. Check whether the Filling Chamber and/or Valve Balloon are correctly attached. The device switches off (automatic switch-off of the VOLCANO MEDIC). No button was pressed in the last 30 minutes – this leads to automatic switch-off. Switch heater or pump on again. Plant particles in the Valve Balloon (when using can- nabis flos). Check whether the Screen in the Filling Chamber Cap is clogged or is not inserted into the notch properly. Check whether the Filling Chamber was cleaned accord- ing to the Instructions for Use. 10. HOT AIR GENERATOR 10.6. Troubleshooting If the device does not function properly when the power plug is connected to the power socket, please check the Hot Air Generator using the tips in the following table:
- 25. 10.9. Information on Electromagnetic Compatibility Guidance and Manufacturer’s Declaration – Electromagnetic Emissions The VOLCANO MEDIC Vaporization System is intended for use in the electro- magnetic environment specified below. The customer or the user of the VOL- CANO MEDIC Vaporization System should assure that it is used in such an en- vironment. RF emissions CISPR 11 RF emissions CISPR 11 Harmonic emissions IEC 61000-3-2 Voltage fluctuations/ flicker emissions IEC 61000-3-3 Group 1 Class B Class A Complies The VOLCANO MEDIC Vaporization System uses RF energy only for its internal function. Therefore, its RF emissions are very low and are not likely to cause any interference in nearby electronic equipment. The VOLCANO MEDIC Vaporization System is suitable for use in all establishments, including domestic establishments and those directly connected to the public low-voltage power supply network that supplies buildings used for domestic purposes. Electromagnetic environment - guidanceEmissions test Compliance 4948 If the preceding tips do not yield the desired results, or for any other defects or prob- lems not mentioned here, please pull the power plug and contact our Ser- vice Center immediately. Do not open the Hot Air Gen- erator! Without special tools and specialized knowledge, any attempt to open the device will cause damage to it. Such an attempt will invalidate the warranty claim. Do not try to remedy the defect your- self. Contact directly our Service Center. 10.7. Periodic Safety Checks The following safety checks should be performed at least every 24 months by a qualified person who has ade- quate training, knowledge, and practi- cal experience to perform these tests. Inspect the device and accesso- ries for mechanical and functional damage. Inspect the safety labels for leg- ibility. Verify that the device functions properly as described in the Instructions for Use. The safety check is to be recorded in a device log and data of control results are to be documented. If the device is not functioning prop- erly or fails any of the above tests, the device has to be repaired. 10.8. Technical Specifications VOLCANO MEDIC Vaporization System Voltage: 220-240 V / 50-60 Hz (alternatively available with 110-120 V / 50-60 Hz) The specification is located on the bottom side of the VOLCANO MEDIC Hot Air Generator. Power consumption: 120 VA Air pump output: 10 VA Air temperature: adjustable between approx. 40 - 210°C (104 - 410°F) Air flow: approx. 12 l/min Valve Balloon Size: approx. 12.5 liters Size of the Hot Air Generator: 20.0 x 18.0 cm (7.9 x 7.1 inch) Weight of the Hot Air Generator with power cord, Filling Chamber, and Valve Balloon with Mouthpiece: ap- prox. 1.8 kg (3.9 lbs) Safety category II Please unplug to disconnect from the mains current. Internal fuses F1 and F2: T 1.25 A (applies to 110-120 V and 220-240 V devices) These fuses may be replaced only by our Service Center. 10. HOT AIR GENERATOR 10. HOT AIR GENERATOR Subject to technical changes. Patents: DE 198 03 376; DE 100 42 396; EP 0 933 093; EP 1 884 254; US 6,513,524. Manufacturer Storz Bickel GmbH Co. KG In Grubenäcker 5-9, 78532 Tuttlingen, Germany
- 26. Immunity test IEC 60601 test level Compliance level Electromagnetic environment – guidance Electrostatic discharge (ESD) IEC 61000-4-2 Electrical fast transient/burst IEC 61000-4-4 Surge IEC 61000-4-5 ± 6 kV contact discharge ± 8 kV air discharge ± 2 kV for power supply lines ± 1 kV for input/ output lines ± 1 kV line(s) to line(s) ± 2 kV line(s) to earth ± 6 kV contact discharge ± 8 kV air discharge ± 2 kV for power supply lines not applicable: input/output lines are non-existent ± 1 kV line(s) to line(s) ± 2 kV line(s) to earth Floors should be wood, concrete or ceramic tile. If floors are covered with synthetic material, the relative humidity should be at least 30 %. Mains power quality should be that of a typical residential, commercial or hospital environment. Mains power quality should be that of a typical residential, commercial or hospital environment. Guidance and Manufacturer’s Declaration – Electromagnetic Immunity The VOLCANO MEDIC Vaporization System is intended for use in the electro- magnetic environment specified below. The customer or the user of the VOL- CANO MEDIC Vaporization System should assure that it is used in such an en- vironment. Voltage dips, short interruptions and voltage variations on power supply input lines IEC 61000-4-11 Power frequency (50/60 Hz) magnetic field IEC 61000-4-8 5 % Uτ (95 % dip in Uτ) for ½ cycle 40 % Uτ (60 % dip in Uτ) for 5 cycles 70 % Uτ (30 % dip in Uτ) for 25 cycles 5 % Uτ (95 % dip in Uτ) for 5 s 3 A/m 5 % Uτ (95 % dip in Uτ) for ½ cycle 40 % Uτ (60 % dip in Uτ) for 5 cycles 70 % Uτ (30 % dip in Uτ) for 25 cycles 5 % Uτ (95 % dip in Uτ) for 5 s 3 A/m Mains power quality should be that of a typical residential, commercial or hospital environment. If the user of the VOLCANO MEDIC Vaporization System requires continued operation during power mains interruptions, it is recommended that the VOLCANO MEDIC Vaporization System be powered from an uninterruptible power supply. Power frequency magnetic fields should be at levels characteristic of a typical location in a typical residential, commercial or hospital environment. Note: Uτ is the a.c. mains voltage prior to application of the test level. Immunity test IEC 60601 test level Compliance level Electromagnetic environment – guidance 5150 10. HOT AIR GENERATOR 10. HOT AIR GENERATOR
- 27. Conducted RF IEC 61000-4-6 Radiated RF IEC 61000-4-3 3 Vrms 150 kHz to 80 MHz 3 V/m 80 MHz to 2,5 GHz 3 Vrms 3 V/m Portable and mobile RF communications equipment should be used no closer to any part of the VOLCANO MEDIC Vaporization System, including cables, than the recommended separation distance calculated from the equation applicable to the frequency of the transmitter. Recommended separation distance : d = 1,2 √P d = 1,2 √P für 80 MHz bis 800 MHz d = 2,3 √P für 800 MHz bis 2,5 GHz Immunity test IEC 60601 test level Compliance level Electromagnetic environment – guidance Guidance and Manufacturer’s Declaration – Electromagnetic Immunity The VOLCANO MEDIC Vaporization System is intended for use in the electro- magnetic environment specified below. The customer or the user of the VOL- CANO MEDIC Vaporization System should assure that it is used in such an en- vironment. Where P is the maximum output power rating of the transmitter in watts [W] according to the transmitter manufacturer and d is the recommend- ed separation distance in meters [m]. Field strengths from fixed RF transmitters, as determined by an electromagnetic site survey¹), should be less than the compliance level in each frequency range²). Interference may occur in the vicinity of equipment marked with the following symbol: Note 1: At 80 MHz and 800 MHz, the higher frequency range applies. Note 2: These guidelines may not apply in all situations. Electromagnetic propagation is affected by absorption and reflection from structures, objects and people. Immunity test IEC 60601 test level Compliance level Electromagnetic environment – guidance 5352 10. HOT AIR GENERATOR 10. HOT AIR GENERATOR
- 28. 5554 10. HOT AIR GENERATOR ¹) Field strengths from fixed transmit- ters, such as base stations for radio (cellular/cordless) telephones and land mobile radios, amateur radio, AM and FM radio broadcast and TV broadcast cannot be predicted theo- retically with accuracy. To assess the electromagnetic environment due to fixed RF transmitters, an electromag- netic site survey should be considered. If the measured field strength in the lo- cation in which the VOLCANO MEDIC Vaporization System is used exceeds the applicable RF compliance level above, the VOLCANO MEDIC Vapori- zation System should be observed to verify normal operation. If abnormal performance is observed, additional measures may be necessary, such as re-orienting or relocating the VOL- CANO MEDIC Vaporization System. ²) Over the frequency range 150 kHz to 80 MHz, field strengths should be less than 3 V/m. Recommended Separation Distances between portable and mobile RF Communications Equipment and the VOLCANO MEDIC Hot Air Generator The VOLCANO MEDIC Hot Air Generator is intended for use in an electromag- netic environment in which radiated RF disturbances are controlled. The customer or the user of the VOLCANO MEDIC Hot Air Generator can help prevent electro- magnetic interference by maintaining a minimum distance between portable and mobile RF communications equipment (transmitters) and the VOLCANO MEDIC Hot Air Generator as recommended below, according to the maximum output power of the communications equipment. Rated maximum output power of transmitter [W] Separation distance according to frequency of transmitter [m] 0,01 0,12 0,12 0,23 0,73 2,3 7,3 23 0,38 1,2 3,8 12 0,38 1,2 3,8 12 0,1 1 10 100 150 kHz – 80 MHz d = 1,2 √P 80 MHz – 800 MHz d = 1,2 √P 800 MHz – 2,5 d = 2,3 √P 10. HOT AIR GENERATOR For transmitters rated at a maximum output power not listed above, the recommended separation distance d in meters [m] can be determined using the equation applicable to the frequency of the transmitter, where P is the maximum output power rating of the transmitter in watts [W] according to the transmitter manufacturer. Note 1 At 80 MHz and 800 MHz, the higher frequency range applies. Note 2 These guidelines may not apply in all situations. Electromagnetic propaga- tion is affected by absorption and re- flection from structures, objects and people. Medical electrical equipment is sub- ject to special precautions with re- spect to electromagnetic compatibil- ity. The relevant verification according to EN 60601-1-2 is available.
- 29. 5756 11. SPARE PARTS / ACCESSORIES REF 01 00 M ........................................ VOLCANO MEDIC Vaporization System REF 05 01 M .................................................... MEDIC VALVE Replacement Set REF 03 01 M ....................................................... MEDIC VALVE Filling Chamber REF 03 10 M ................................................. MEDIC VALVE Normal Screen Set REF 03 11 M ...................................................... MEDIC VALVE Fine Screen Set REF 03 39 M ....................................... MEDIC VALVE Normal Screen Set, small REF 03 34 M ......................................................... MEDIC VALVE Liquid Pad Set REF 06 02 M ...................................................... MEDIC VALVE Wear Tear Set REF 03 03 M ........................................ MEDIC VALVE Filling Chamber Housing with Cap Housing REF 04 05 M .............................................. MEDIC VALVE Lip Piece Set, 10 pcs. REF 03 07 M ................................. MEDIC VALVE Filling Chamber with Reducer REF 03 06 M ........................................ MEDIC VALVE Filling Chamber Reducer REF 09 32 ........................................................ Magazine with 8 Dosing Capsule REF 09 33 .............................................................. Dosing Capsule Set, 40 pcs. . REF 09 36 M ......... MEDIC VALVE Magazine with 8 Dosing Capsule for Liquids REF 09 38 M ............... MEDIC VALVE Dosing Capsules for Liquids Set, 40 pcs. REF 03 35 M ...................... MEDIC VALVE Liquid Pad Set for Dosing Capsules REF 03 37 M .............................................. MEDIC VALVE Liquid Pad Set, small REF 09 30 ............................................................................................... Herb Mill REF 01 10 .......................................................... VOLCANO MEDIC Air Filter Set REF 01 11 ......................................................... VOLCANO MEDIC Air Filter Cap REF 09 37 .............................................................................. Cleaning Brush Set All spare parts and other products may be conveniently ordered from www.vapormed.com. 12. DECLARATION OF CE CONFORMITY Medical products: 93/42/EWG Low Voltage Directive: 73/23/EWG Electromagnetic Compatibility: 89/336/EWG Medical electrical equipment: IEC 60601-1:2005+A1:2012 The devices fulfill the requirements of the following directives and standards: UL medical safety testing: UL 60601-1:2003 Medical electrical equipment: CAN/CSA-C22.2 No. 601.1-M90
- 30. 5958 Manufacturer’s Representations and Warranties These representations and warranties are applicable to all end-customers (the “Customers” and each, individu- ally, a “Customer”) purchasing prod- ucts (the “Products”) sold by Storz Bickel GmbH Co. KG (the “Com- pany”). Warranty and Limitations Company warrants solely to the origi- nal purchaser of the Products that for the warranty period (as defined below), the Products will be free from defects in materials and workmanship under normal use, and will conform to Company’s published specifications of the Products. Notwithstanding the foregoing, Com- pany retains its right to deviate from its published specifications due to the latest innovations and improvements in function and design of the Products. The foregoing warranty is subject to the proper storage, transportation and use of the Products, and does not include defects due to normal wear and tear or deterioration, including, but not limited to, defects in Screens, Air Filters, Valve Balloons and parts subject to wear and tear. Upon delivery, Customer shall imme- diately inspect the Products for con- formity and visible defects. Customer shall give Company imme- diate written notice of any non-con- formities or visible defects regarding the Products and contact Company in writing concerning return or repair, as the case may be. Warranty Customer shall notify Company in writing of any defects of the Products. Company’s sole obligation under the foregoing warranty is, at Company’s option, to repair or correct any such covered defect or to replace or ex- change the Product, provided Cus- tomer has returned the Products with a copy of the original invoice to the Company or one of its authorized re- pair shops at his own cost. Any repaired, corrected, replaced or exchanged Products shall be subject to the warranty set forth in section “Warranty and Limitations”, following their repair, correction, replacement or exchange. If Company has received notification from Customer, and no defects of the Product could be discovered, Cus- tomer shall bear the costs that Com- pany incurred as a result of the notice. The “warranty period” begins on the date on which the Products are being physically delivered to Customer’s site, and is valied for thirty six (36) months for the VOLCANO MEDIC. 13. WARRANTY, LIABILITY, REPAIR SERVICE 13. WARRANTY, LIABILITY, REPAIR SERVICE Company does not authorize any per- son or party to assume or create for it any other obligation or liability in con- nection with the Products except as set forth herein. All requests and notices under this warranty shall be directed to: Storz Bickel GmbH Co. KG In Grubenäcker 5-9, 78532 Tuttlingen, Germany phone +49-74 61 - 96 97 07-0 fax +49-74 61 - 96 97 07-7 email: info@vapormed.com The warranty set forth in section “War- ranty and Limitations” is made in lieu of all other warranties (whether ex- press or implied), rights or conditions, and Customer acknowledges that except for such limited warranty, the Products are provided “as is”. Company specifically disclaims, with- out limitation, all other warranties, express or implied, of any kind, in- cluding, without limitation, the implied warranties of merchantability and fitness for a particular purpose, non- infringement, and those warranties arising from a course of performance, a course of dealing or trade usage. Liability Handling of these Products is to be as stated in the Instructions for Use. The user accepts full liability for im- proper handling and usage of these Products. The intended application only refers to dronabinol (THC) and approved medical cannabis from the pharmacy only. Repair of these Products is only to be done by our Service Center or one of our authorized repair shops. Only original Storz Bickel parts are to be used. Failure to comply with any of the points mentioned in these Instruc- tions for Use release Storz Bickel GmbH Co. KG from any and all li- ability. Limitation of Liability In no event shall Company be liable for any indirect, incidental, punitive, special or consequential damages, including but not limited to, damages for loss of profits, revenue, goodwill or use, incurred by Customer or any third party, whether in an action in contract, tort, strict liability, or imposed by stat- ute, or otherwise, even if advised of the possibility of such damages. Company’s liability for damages aris- ing out of or in connection with this agreement shall in no event exceed the purchase price of the Products. It is agreed and acknowledged that the provisions of this agreement allo- cate the risks between Company and Customer, that Company’s pricing re- flects this allocation of risk, and but for this allocation and limitation of liability,
- 31. Date SC Finding Comments Signature Name / Title OK not OK OK not OK OK not OK OK not OK OK not OK OK not OK OK not OK OK not OK OK not OK OK not OK OK not OK OK not OK 6160 13. WARRANTY, LIABILITY, REPAIR SERVICE Company would not have entered into this agreement. In jurisdictions that limit the scope of or preclude limitations or exclusion of remedies or damages, or of liability, such as liability for gross negligence or willful misconduct or do not allow implied warranties to be excluded, the limitation or exclusion of warran- ties, remedies, damages or liability set forth above are intended to apply to the maximum extent permitted by applicable law. Customer may also have other rights that vary by state, country or other ju- risdiction. The information contained in these Instructions for Use are based on our experience and is current and com- plete to the best of our knowledge an ability at the time of printing. Storz Bickel GmbH Co. KG does not ac- cept responsibility for errors, omis- sions or incorrect interpretations of the contents or any information herein. Users are advised that all ap- plications and uses of the Products described must conform to applicable local laws, ordinances and codes and users of the Products are advised that they are solely responsible for deter- mining and assuring the suitability of any Product for the intended applica- tion. Repair Service After the warranty period has expired, or if there are any defects which are not covered under warranty, our ser- vice department will repair the defect after providing the Customer with an estimate and receiving the payment. Copyright No part of this document may be reproduced in any form (by printing, photocopying or other means) or processed, duplicated or circulated electronically without the prior writ- ten approval of Storz Bickel GmbH Co. KG. 14. Proof of the Annual Safety Checks (SC)
- 32. Manufacturer and Distributor: STORZ BICKEL GMBH CO. KG In Grubenäcker 5-9 · 78532 Tuttlingen/Germany Phone +49-7461-969707-0 · Fax +49-7461-969707-7 E-Mail: info@vapormed.com ©bySTORZBICKELGmbHCo.KG·VMAL-50-213-EN02-2017·Subjecttoalterations·Allrightsreserved