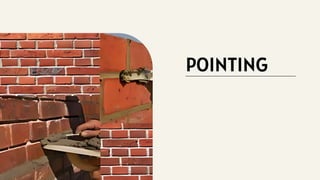
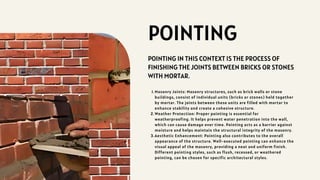
POINTING
POINTING IN THISCONTEXT IS THE PROCESS OF
FINISHING THE JOINTS BETWEEN BRICKS OR STONES
WITH MORTAR.
Masonry Joints: Masonry structures, such as brick walls or stone
buildings, consist of individual units (bricks or stones) held together
by mortar. The joints between these units are filled with mortar to
enhance stability and create a cohesive structure.
1.
Weather Protection: Proper pointing is essential for
weatherproofing. It helps prevent water penetration into the wall,
which can cause damage over time. Pointing acts as a barrier against
moisture and helps maintain the structural integrity of the masonry.
2.
Aesthetic Enhancement: Pointing also contributes to the overall
appearance of the structure. Well-executed pointing can enhance the
visual appeal of the masonry, providing a neat and uniform finish.
Different pointing styles, such as flush, recessed, or weathered
pointing, can be chosen for specific architectural styles.
3.
4.
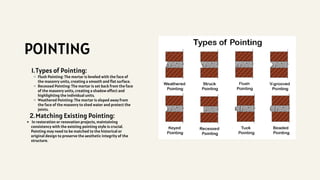
POINTING
Types of Pointing:
1.
FlushPointing: The mortar is leveled with the face of
the masonry units, creating a smooth and flat surface.
Recessed Pointing: The mortar is set back from the face
of the masonry units, creating a shadow effect and
highlighting the individual units.
Weathered Pointing: The mortar is sloped away from
the face of the masonry to shed water and protect the
joints.
Matching Existing Pointing:
2.
In restoration or renovation projects, maintaining
consistency with the existing pointing style is crucial.
Pointing may need to be matched to the historical or
original design to preserve the aesthetic integrity of the
structure.
5.
POINTING
Mortar Mix:
Portland Cement:A common component in mortar mixes, providing strength.
Lime: Used to improve workability and flexibility. It can be hydraulic lime or non-hydraulic lime.
Sand: The main aggregate in mortar, with varying grades for different applications
Types of Mortar:
Cement Mortar: Commonly used for pointing, especially in modern construction. It offers strength and durability.
Lime Mortar: Suitable for historic or softer masonry, as it allows for greater flexibility and breathability.
Hybrid Mortar: A mix of cement and lime, combining the strengths of both.
Pigments:
Integral Pigments: Added directly to the mortar mix to achieve colored pointing.
Surface-Applied Pigments: Applied on the surface of the cured mortar for color enhancement.
Additives:
Polymer Additives: Improve the flexibility, adhesion, and water resistance of mortar.
Retarders or Accelerators: Adjust the setting time of the mortar.
6.
Pre-Mixed Pointing Compounds:
Ready-MixMortar: Convenient, pre-packaged mortar mixes that only require the addition of
water.
Water:
Clean Water: Essential for mixing the mortar to the right consistency.
Bonding Agents:
Latex or Acrylic Bonding Agents: Improve adhesion between the existing masonry and the new
mortar.
Tools for Application:
Pointing Trowel: Used for applying and shaping the mortar.
Jointer or Raker: Helps create a neat finish and shape joints.
Cleaning Agents:
Brushes: Used for cleaning excess mortar from the masonry surface.
Water: Employed during the cleaning process.
7.
RATE
The rate ofpointing for estimation in architecture refers to the speed at which pointing work can be
completed during a construction or renovation project.
Project Size and Complexity:
Larger projects with extensive masonry surfaces or intricate architectural detailing may require more time for
pointing.
Type of Pointing:
Different pointing styles (flush, recessed, weathered, etc.) may vary in the time required for precision and
detailing.
Mortar Mix and Curing Time:
The type of mortar used and its curing time can impact the rate of pointing. Some mortars set more quickly
than others.
Skill and Experience of Workers:
The proficiency and experience of the construction team can significantly affect the rate of pointing. Skilled
workers may complete tasks more efficiently.
Weather Conditions:
Adverse weather conditions, such as rain or extreme temperatures, can slow down the pointing process.
8.
Accessibility:
The ease ofaccess to the masonry elements can influence the speed of pointing. Difficult-
to-reach areas may require more time and effort.
Tools and Equipment:
The availability and condition of the necessary tools and equipment, such as pointing
trowels and jointers, can impact efficiency.
Project Phases:
Pointing may be part of a larger construction or renovation project. The overall project
schedule and sequencing of tasks can affect the rate of pointing.
Regulatory Compliance:
Compliance with building codes and regulations may add additional steps to the pointing
process, impacting the overall rate.
Preparation and Cleanup:
Adequate preparation and cleanup time should be factored into the estimation. These
activities contribute to the overall rate of pointing.
9.
Flush Pointing:
1.
Description: Inflush pointing, the mortar is leveled with the face of the masonry units, creating a smooth
and flat surface.
Use: Commonly used for modern construction where a clean and uniform appearance is desired.
Raked or Weathered Pointing:
2.
Description: In raked or weathered pointing, the mortar is sloped away from the face of the masonry,
creating a slightly recessed joint.
Use: This method is often employed for traditional or rustic aesthetics. It helps shed water away from the
joint.
Recessed Pointing:
3.
Description: Similar to raked pointing, recessed pointing involves setting the mortar back from the face of
the masonry units, creating a shadow effect.
Use: This method is chosen for its decorative appeal, emphasizing the individual units.
Tuckpointing:
4.
Description: Tuckpointing involves using two different colors of mortar to create the illusion of a fine joint. A
primary mortar color matches the masonry, and a thin line of a contrasting color is added.
Use: Often used for decorative purposes or to give the appearance of finely cut bricks.
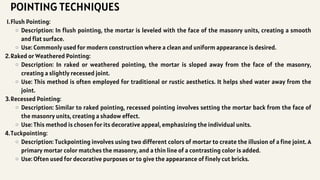
POINTING TECHNIQUES
10.
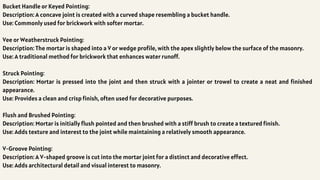
Bucket Handle orKeyed Pointing:
Description: A concave joint is created with a curved shape resembling a bucket handle.
Use: Commonly used for brickwork with softer mortar.
Vee or Weatherstruck Pointing:
Description: The mortar is shaped into a V or wedge profile, with the apex slightly below the surface of the masonry.
Use: A traditional method for brickwork that enhances water runoff.
Struck Pointing:
Description: Mortar is pressed into the joint and then struck with a jointer or trowel to create a neat and finished
appearance.
Use: Provides a clean and crisp finish, often used for decorative purposes.
Flush and Brushed Pointing:
Description: Mortar is initially flush pointed and then brushed with a stiff brush to create a textured finish.
Use: Adds texture and interest to the joint while maintaining a relatively smooth appearance.
V-Groove Pointing:
Description: A V-shaped groove is cut into the mortar joint for a distinct and decorative effect.
Use: Adds architectural detail and visual interest to masonry.
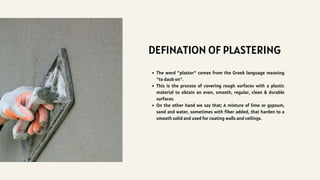
DEFINATION OF PLASTERING
Theword "plaster" comes from the Greek language meaning
"to daub on".
This is the process of covering rough surfaces with a plastic
material to obtain an even, smooth, regular, clean & durable
surfaces.
On the other hand we say that; A mixture of lime or gypsum,
sand and water, sometimes with fiber added, that harden to a
smooth solid and used for coating walls and ceilings.
13.
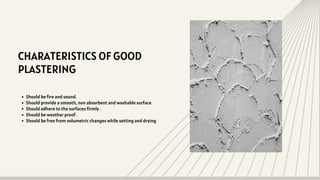
Should be fireand sound.
Should provide a smooth, non absorbent and washable surface
Should adhere to the surfaces firmly .
Should be weather proof .
Should be free from volumetric changes while setting and drying
CHARATERISTICS OF GOOD
PLASTERING
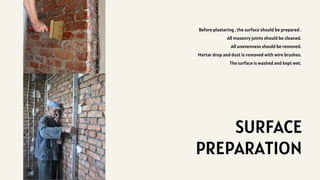
SURFACE
PREPARATION
Before plastering ,the surface should be prepared .
All masonry joints should be cleaned.
All unevenness should be removed.
Mortar drop and dust is removed with wire brushes.
The surface is washed and kept wet.
16.
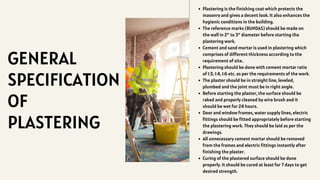
GENERAL
SPECIFICATION
OF
PLASTERING
Plastering is thefinishing coat which protects the
masonry and gives a decent look. It also enhances the
hygienic conditions in the building.
The reference marks (BUNDAS) should be made on
the wall in 2″ to 3″ diameter before starting the
plastering work.
Cement and sand mortar is used in plastering which
comprises of different thickness according to the
requirement of site..
Plastering should be done with cement mortar ratio
of 1:3, 1:4, 1:6 etc. as per the requirements of the work.
The plaster should be in straight line, leveled,
plumbed and the joint must be in right angle.
Before starting the plaster, the surface should be
raked and properly cleaned by wire brush and it
should be wet for 24 hours.
Door and window frames, water supply lines, electric
fittings should be fitted appropriately before starting
the plastering work. They should be laid as per the
drawings.
All unnecessary cement mortar should be removed
from the frames and electric fittings instantly after
finishing the plaster.
Curing of the plastered surface should be done
properly. It should be cured at least for 7 days to get
desired strength.
17.
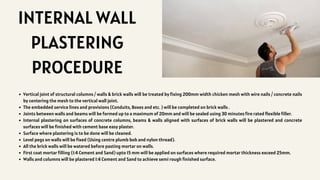
INTERNAL WALL
PLASTERING
PROCEDURE
Vertical jointof structural columns / walls & brick walls will be treated by fixing 200mm width chicken mesh with wire nails / concrete nails
by centering the mesh to the vertical wall joint.
The embedded service lines and provisions (Conduits, Boxes and etc. ) will be completed on brick walls .
Joints between walls and beams will be formed up to a maximum of 20mm and will be sealed using 30 minutes fire rated flexible filler.
Internal plastering on surfaces of concrete columns, beams & walls aligned with surfaces of brick walls will be plastered and concrete
surfaces will be finished with cement base easy plaster.
Surface where plastering is to be done will be cleaned.
Level pegs on walls will be fixed (Using centre plumb bob and nylon thread).
All the brick walls will be watered before pasting mortar on walls.
First coat mortar filling (1:4 Cement and Sand) upto 15 mm will be applied on surfaces where required mortar thickness exceed 25mm.
Walls and columns will be plastered 1:4 Cement and Sand to achieve semi rough finished surface.
18.
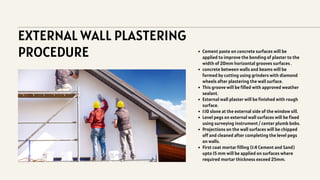
EXTERNAL WALL PLASTERING
PROCEDURECement paste on concrete surfaces will be
applied to improve the bonding of plaster to the
width of 20mm horizontal grooves surfaces .
concrete between walls and beams will be
formed by cutting using grinders with diamond
wheels after plastering the wall surface.
This groove will be filled with approved weather
sealant.
External wall plaster will be finished with rough
surface.
1:10 slone at the external side of the window sill.
Level pegs on external wall surfaces will be fixed
using surveying instrument / center plumb bobs.
Projections on the wall surfaces will be chipped
off and cleaned after completing the level pegs
on walls.
First coat mortar filling (1:4 Cement and Sand)
upto 15 mm will be applied on surfaces where
required mortar thickness exceed 25mm.
19.
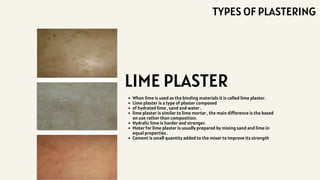
When lime isused as the binding materials it is called lime plaster.
Lime plaster is a type of plaster composed
of hydrated lime , sand and water .
lime plaster is similar to lime mortar , the main difference is the based
on use rather than composition.
Hydralic lime is harder and stronger.
Moter for lime plaster is usually prepared by mixing sand and lime in
equal properties .
Cement is small quantity added to the mixer to improve its strength
LIME PLASTER
TYPES OF PLASTERING
20.
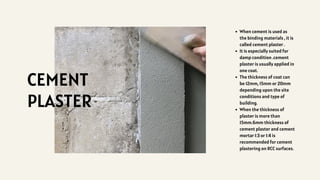
CEMENT
PLASTER
When cement isused as
the binding materials , it is
called cement plaster .
It is especially suited for
damp condition .cement
plaster is usually applied in
one coat.
The thickness of coat can
be 12mm, 15mm or 20mm
depending upon the site
conditions and type of
building.
When the thickness of
plaster is more than
15mm.6mm thickness of
cement plaster and cement
mortar 1:3 or 1:4 is
recommended for cement
plastering on RCC surfaces.
21.
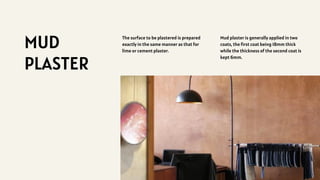
MUD
PLASTER
The surface tobe plastered is prepared
exactly in the same manner as that for
lime or cement plaster.
Mud plaster is generally applied in two
coats, the first coat being 18mm thick
while the thickness of the second coat is
kept 6mm.
22.
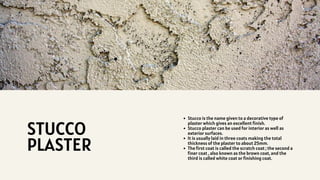
Stucco is thename given to a decorative type of
plaster which gives an excellent finish.
Stucco plaster can be used for interior as well as
exterior surfaces.
It is usually laid in three coats making the total
thickness of the plaster to about 25mm.
The first coat is called the scratch coat ; the second a
finer coat , also known as the brown coat, and the
third is called white coat or finishing coat.
STUCCO
PLASTER
23.
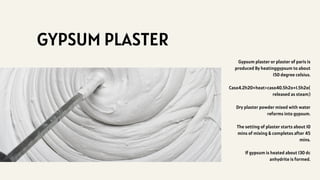
GYPSUM PLASTER
Gypsum plasteror plaster of paris is
produced By heatinggypsum to about
150 degree celsius.
Caso4.2h20+heat>caso40.5h2o+1.5h2o(
released as steam)
Dry plaster powder mixed with water
reforms into gypsum.
The setting of plaster starts about 10
mins of mixing & completes after 45
mins.
If gypsum is heated about 130 dc
anhydrite is formed.
24.
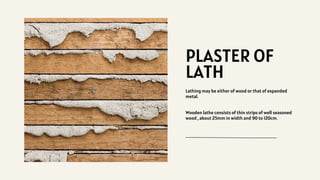
PLASTER OF
LATH
Lathing maybe either of wood or that of expanded
metal.
Wooden lathe consists of thin strips of well seasoned
wood , about 25mm in width and 90 to 120cm.
25.
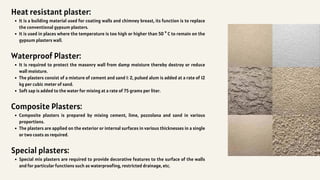
Heat resistant plaster:
Itis a building material used for coating walls and chimney breast, its function is to replace
the conventional gypsum plasters.
It is used in places where the temperature is too high or higher than 50 ° C to remain on the
gypsum plasters wall.
Waterproof Plaster:
It is required to protect the masonry wall from damp moisture thereby destroy or reduce
wall moisture.
The plasters consist of a mixture of cement and sand 1: 2, pulsed alum is added at a rate of 12
kg per cubic meter of sand.
Soft sap is added to the water for mixing at a rate of 75 grams per liter.
Composite Plasters:
Composite plasters is prepared by mixing cement, lime, pozzolana and sand in various
proportions.
The plasters are applied on the exterior or internal surfaces in various thicknesses in a single
or two coats as required.
Special plasters:
Special mix plasters are required to provide decorative features to the surface of the walls
and for particular functions such as waterproofing, restricted drainage, etc.
26.
The general specificationof Lime plastering are:
Single Coat lime plaster - 12mm or 15mm
Two coats of work lime plaster - 18mm or 20mm
Three coats of lime plaster - 25mm
The lime plaster is prepared by using lime putty that is kept in standing water for at
least 72 hours before their use. This will help in completely slaking the lime. The lime
plaster must not be made from slaked lime
The general specification of cement plastering are:
Single coat cement plastering - 12 or 15 or 20mm
Cement plaster with a floating coat of neat cement - 12 or 15 or 20mm
Cement plaster 2 coats work - 18mm
Cement ceiling plaster - 6mm
Cement plaster for slab bearing - 6mm
External rendering with cement plaster 2 coats- 18mm
The plaster that is employed must be plastic so that it can properly adhere to the
masonry or the concrete surface. More cement in this will result in shrinkage, which
is not desired. A slow-strength developing cement like C-33 grade than using a fast
developing cement say C-53 for plastering. C-53 tends to crack more than C-33.
The general specification of gypsum plastering are:
Color of the surface after drying of plaster: White Setting Time of plaster: 25-30
Minutes Area covered by plaster (considering 12mm thickness): 21 sq. per 25 kg Bag
Compressive Strength of plaster: 60-70 kg/cm2 Shelf Life of plaster: 4 Months
Package size of one bag: 25 kg per bag
SPECIFICATION
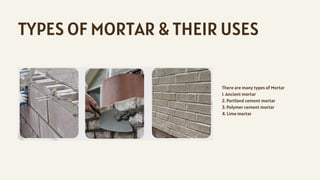
TYPES OF MORTAR& THEIR USES
There are many types of Mortar
1. Ancient mortar
2. Portland cement mortar
3. Polymer cement mortar
4. Lime mortar
30.
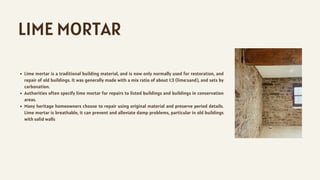
LIME MORTAR
Lime mortaris a traditional building material, and is now only normally used for restoration, and
repair of old buildings. It was generally made with a mix ratio of about 1:3 (lime:sand), and sets by
carbonation.
Authorities often specify lime mortar for repairs to listed buildings and buildings in conservation
areas.
Many heritage homeowners choose to repair using original material and preserve period details.
Lime mortar is breathable, it can prevent and alleviate damp problems, particular in old buildings
with solid walls
31.
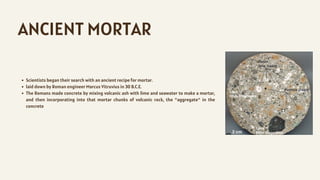
ANCIENT MORTAR
Scientists begantheir search with an ancient recipe for mortar.
laid down by Roman engineer Marcus Vitruvius in 30 B.C.E.
The Romans made concrete by mixing volcanic ash with lime and seawater to make a mortar,
and then incorporating into that mortar chunks of volcanic rock, the "aggregate" in the
concrete
32.
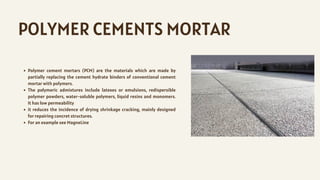
POLYMER CEMENTS MORTAR
Polymercement mortars (PCM) are the materials which are made by
partially replacing the cement hydrate binders of conventional cement
mortar with polymers.
The polymeric admixtures include latexes or emulsions, redispersible
polymer powders, water-soluble polymers, liquid resins and monomers.
It has low permeability
it reduces the incidence of drying shrinkage cracking, mainly designed
for repairing concret structures.
For an example see MagneLine
33.
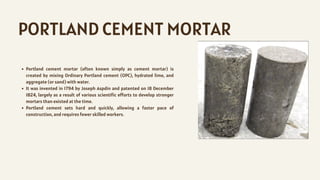
PORTLAND CEMENT MORTAR
Portlandcement mortar (often known simply as cement mortar) is
created by mixing Ordinary Portland cement (OPC), hydrated lime, and
aggregate (or sand) with water.
It was invented in 1794 by Joseph Aspdin and patented on 18 December
1824, largely as a result of various scientific efforts to develop stronger
mortars than existed at the time.
Portland cement sets hard and quickly, allowing a faster pace of
construction, and requires fewer skilled workers.
34.
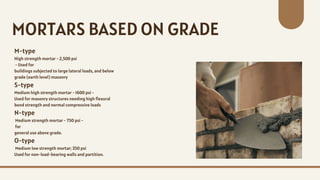
M-type
High strength mortar- 2,500 psi
- Used for
buildings subjected to large lateral loads, and below
grade (earth level) masonry
S-type
Medium high strength mortar - 1600 psi -
Used for masonry structures needing high flexural
bond strength and normal compressive loads
N-type
Medium strength mortar - 750 psi -
for
general use above grade.
O-type
Medium low strength mortar; 350 psi
Used for non-load-bearing walls and partition.
MORTARS BASED ON GRADE
35.
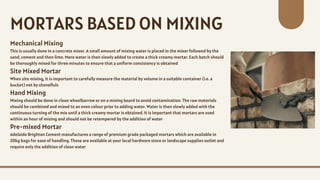
Mechanical Mixing
This isusually done in a concrete mixer. A small amount of mixing water is placed in the mixer followed by the
sand, cement and then lime. More water is then slowly added to create a thick creamy mortar. Each batch should
be thoroughly mixed for three minutes to ensure that a uniform consistency is obtained
Site Mixed Mortar
When site mixing, it is important to carefully measure the material by volume in a suitable container (i.e. a
bucket) not by shovelfuls
Hand Mixing
Mixing should be done in clean wheelbarrow or on a mixing board to avoid contamination. The raw materials
should be combined and mixed to an even colour prior to adding water. Water is then slowly added with the
continuous turning of the mix until a thick creamy mortar is obtained. It is important that mortars are used
within an hour of mixing and should not be retempered by the addition of water
Pre-mixed Mortar
Adelaide Brighton Cement manufactures a range of premium grade packaged mortars which are available in
20kg bags for ease of handling. These are available at your local hardware store or landscape supplies outlet and
require only the addition of clean water
MORTARS BASED ON MIXING
36.
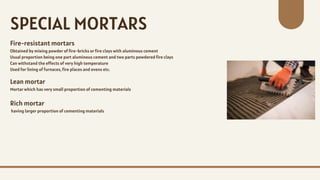
Fire-resistant mortars
Obtained bymixing powder of fire-bricks or fire clays with aluminous cement
Usual proportion being one part aluminous cement and two parts powdered fire clays
Can withstand the effects of very high temperature
Used for lining of furnaces, fire places and ovens etc.
SPECIAL MORTARS
Lean mortar
Mortar which has very small proportion of cementing materials
Rich mortar
having larger proportion of cementing materials
37.
PREPERATION OF MORTARS
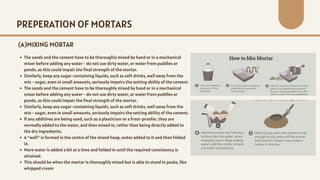
Thesands and the cement have to be thoroughly mixed by hand or in a mechanical
mixer before adding any water - do not use dirty water, or water from puddles or
ponds, as this could impair the final strength of the mortar.
Similarly, keep any sugar-containing liquids, such as soft drinks, well away from the
mix - sugar, even in small amounts, seriously impairs the setting ability of the cement.
The sands and the cement have to be thoroughly mixed by hand or in a mechanical
mixer before adding any water - do not use dirty water, or water from puddles or
ponds, as this could impair the final strength of the mortar.
Similarly, keep any sugar-containing liquids, such as soft drinks, well away from the
mix - sugar, even in small amounts, seriously impairs the setting ability of the cement.
If any additives are being used, such as a plasticizer or a frost-proofer, they are
normally added to the water, and then mixed in, rather than being directly added to
the dry ingredients.
A "well" is formed in the centre of the mixed heap, water added to it and then folded
in.
More water is added a bit at a time and folded in until the required consistency is
attained.
This should be when the mortar is thoroughly mixed but is able to stand in peaks, like
whipped cream
(A)MIXING MORTAR
38.
A cushion andmakes the masonry units to bear against one another and thus provides
strength to the wall A seal in between the masonry units, and keeps the water and air
from penetrating it
A bonding agent to make the individual units to adhere to one another
A surface enhancer , proving beautiful contrast and appearance
it provides force or cohesion between the structural unit.
It acts as a medium for distributing the forces throughout the structure uniformly.
Additional strength and resistance against the rain penetration and other such
weathering agencies.
In stone or brick masonry, it fills up empty joints, a thin liquid mortar used for such
purposes is termed, Grout.
FUNCTIONS OF CEMENT MORTAR
39.
The mortar mixshould be workable- easily transported to the place of application.
It should develop adequate strength in tension, compression, and bond
It should capable of retaining sufficient water during its applicatior
It should be sufficiently plastic easily placed on the bed for construction in the form of
a thin, smooth, and uniform layer
It should be durable and strong in itself on drying and hardening at the same time. It
should not react in any way with construction units
It should set and garden quickly construction could be done with speed
It should not develop any cracks on drying and should be able to maintain its
appearance for a quite long period
It should capable of developing the designed stresses
It should be economical to make without compromising on any of the qualities.
CHARACTERISTICS
40.
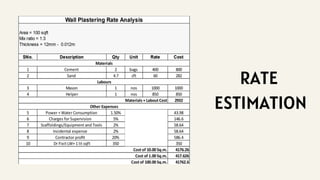
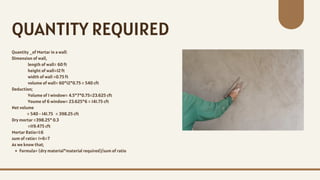
Quantity _of Mortarin a wall:
Dimension of wall,
length of wall= 60 ft
height of wall=12 ft
width of wall =0.75 ft
volume of wall= 60*12*0.75 = 540 cft
Deduction;
Volume of 1 window= 4.5*7*0.75=23.625 cft
Voume of 6 window= 23.625*6 = 141.75 cft
Net volume
= 540 - 141.75 = 398.25 cft
Dry mortar =398.25* 0.3
=119.475 cft
Mortar Ratio=1:6
sum of ratio= 1+6=7
As we know that;
Formula= (dry material*material required)/sum of ratio
QUANTITY REQUIRED
41.
Site mixed
the mortaris prepared on site by the mason
Pre-mixed wet
the mortar is commercially prepared off-site and shipped in tubs
ready to use. A retarder is added to the mixture to ensure the mortar in tubs does not
set up before being placed in the wall.
Pre-mixed dry
the mortar is commercially prepared off-site. Water is added to the
mix by the mason on site. The supply of mortar is not typically specified but rather
determined by the mason based on site conditions
SUPPLYING THE MORTAR
MORTARS ARE SUPPLIED TO THE JOB SITE IN THREE WAYS: