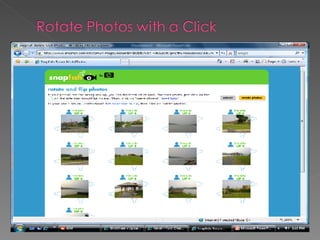
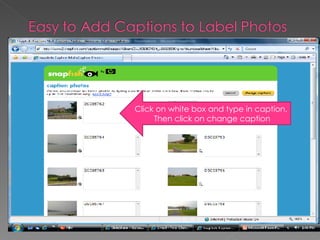
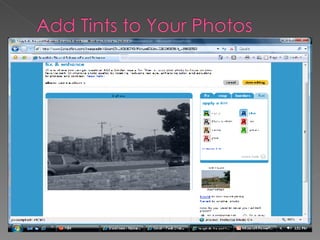
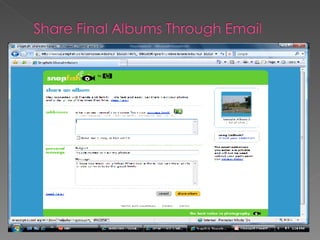
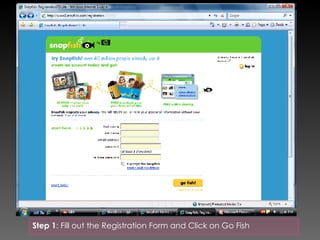
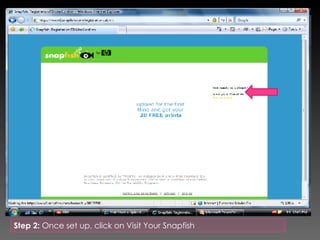
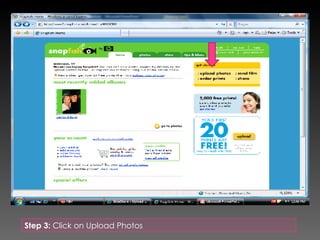
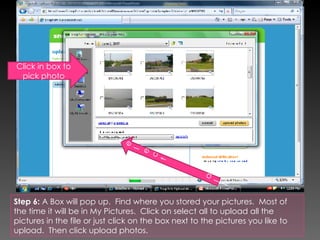
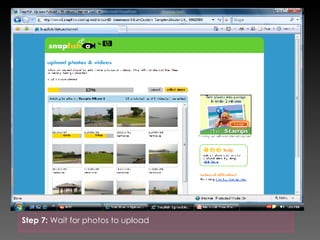
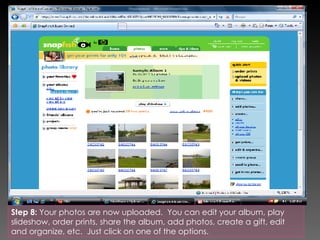
Click on white box and type in caption.  Then click on change caption


Classroom
Privacy Own Web Address Alert Students/Parents


Step 1 : Fill out the Registration Form and Click on Go Fish
Step 2:  Once set up, click on Visit Your Snapfish
Step 3:  Click on Upload Photos
Step 4:  Give your Album a title, date, and description to keep your albums organized. When done, click the yellow upload album button. title Date Description
Step 5:  Click on Select photos & video to upload photos
Step 6:  A Box will pop up.  Find where you stored your pictures.  Most of the time it will be in My Pictures.  Click on select all to upload all the pictures in the file or just click on the box next to the pictures you like to upload.  Then click upload photos.  Select  all Click in box to pick photo
Step 7:  Wait for photos to upload
Step 8:  Your photos are now uploaded.  You can edit your album, play slideshow, order prints, share the album, add photos, create a gift, edit and organize, etc.  Just click on one of the options.
 

Snapfish for the Classroom

  • 1.
  • 2.
  • 3.
  • 4.
  • 5.
  • 6.
  • 7.
    Click on whitebox and type in caption. Then click on change caption
  • 8.
  • 9.
  • 10.
  • 11.
  • 12.
    Privacy Own WebAddress Alert Students/Parents
  • 13.
  • 14.
  • 15.
  • 16.
    Step 1 :Fill out the Registration Form and Click on Go Fish
  • 17.
    Step 2: Once set up, click on Visit Your Snapfish
  • 18.
    Step 3: Click on Upload Photos
  • 19.
    Step 4: Give your Album a title, date, and description to keep your albums organized. When done, click the yellow upload album button. title Date Description
  • 20.
    Step 5: Click on Select photos & video to upload photos
  • 21.
    Step 6: A Box will pop up. Find where you stored your pictures. Most of the time it will be in My Pictures. Click on select all to upload all the pictures in the file or just click on the box next to the pictures you like to upload. Then click upload photos. Select all Click in box to pick photo
  • 22.
    Step 7: Wait for photos to upload
  • 23.
    Step 8: Your photos are now uploaded. You can edit your album, play slideshow, order prints, share the album, add photos, create a gift, edit and organize, etc. Just click on one of the options.
  • 24.