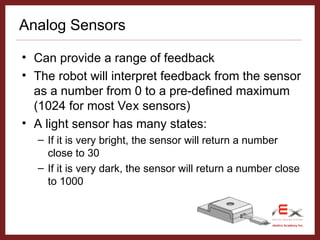
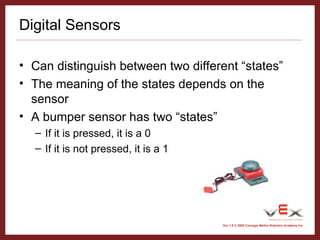
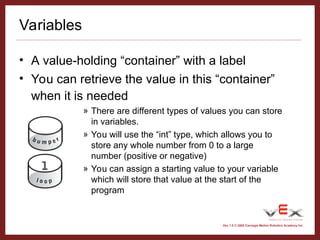
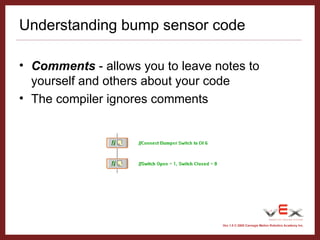
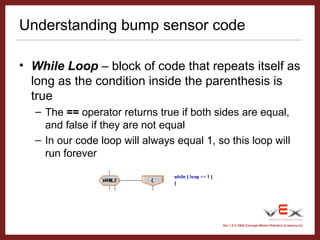
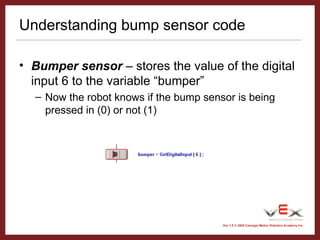
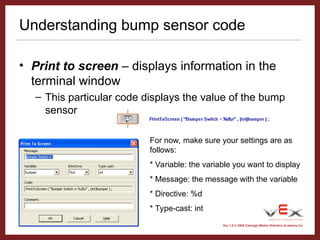
Vex 1.0 © 2005 Carnegie Mellon Robotics Academy Inc.
Introduction to Sensors
Vex 1.0 © 2005 Carnegie Mellon Robotics Academy Inc.
What are sensors?
• Your answers here!
Vex 1.0 © 2005 Carnegie Mellon Robotics Academy Inc.
What are sensors?
• A sensor tells a robot one simple thing about it’s
environment
– Temperature
– Distance
– Light intensity
• Allow robots to see and feel the physical world
through which they travel
• Two main types of sensors: digital and analog
Vex 1.0 © 2005 Carnegie Mellon Robotics Academy Inc.
Analog Sensors
• Can provide a range of feedback
• The robot will interpret feedback from the sensor
as a number from 0 to a pre-defined maximum
(1024 for most Vex sensors)
• A light sensor has many states:
– If it is very bright, the sensor will return a number
close to 30
– If it is very dark, the sensor will return a number close
to 1000
Vex 1.0 © 2005 Carnegie Mellon Robotics Academy Inc.
Digital Sensors
• Can distinguish between two different “states”
• The meaning of the states depends on the
sensor
• A bumper sensor has two “states”
– If it is pressed, it is a 0
– If it is not pressed, it is a 1
Vex 1.0 © 2005 Carnegie Mellon Robotics Academy Inc.
Variables
• A value-holding “container” with a label
• You can retrieve the value in this “container”
when it is needed
» There are different types of values you can store
in variables.
» You will use the “int” type, which allows you to
store any whole number from 0 to a large
number (positive or negative)
» You can assign a starting value to your variable
which will store that value at the start of the
program
Vex 1.0 © 2005 Carnegie Mellon Robotics Academy Inc.
Bump Sensor Introduction
• Open the project “BUMPERTEST.ECP”
• Download it to your robot and open the terminal
window
Vex 1.0 © 2005 Carnegie Mellon Robotics Academy Inc.
Understanding bump sensor code
• Comments - allows you to leave notes to
yourself and others about your code
• The compiler ignores comments
Vex 1.0 © 2005 Carnegie Mellon Robotics Academy Inc.
Understanding bump sensor code
• While Loop – block of code that repeats itself as
long as the condition inside the parenthesis is
true
– The == operator returns true if both sides are equal,
and false if they are not equal
– In our code loop will always equal 1, so this loop will
run forever
Vex 1.0 © 2005 Carnegie Mellon Robotics Academy Inc.
Understanding bump sensor code
• Bumper sensor – stores the value of the digital
input 6 to the variable “bumper”
– Now the robot knows if the bump sensor is being
pressed in (0) or not (1)
Vex 1.0 © 2005 Carnegie Mellon Robotics Academy Inc.
Understanding bump sensor code
• Print to screen – displays information in the
terminal window
– This particular code displays the value of the bump
sensor
For now, make sure your settings are as
follows:
* Variable: the variable you want to display
* Message: the message with the variable
* Directive: %d
* Type-cast: int
Vex 1.0 © 2005 Carnegie Mellon Robotics Academy Inc.
Writing your own code
• We are going to write a program that runs one
motor until a bump sensor is pressed in
• Begin by opening easyC

sensors for business an technology device

  • 1.
    Vex 1.0 ©2005 Carnegie Mellon Robotics Academy Inc. Introduction to Sensors
  • 2.
    Vex 1.0 ©2005 Carnegie Mellon Robotics Academy Inc. What are sensors? • Your answers here!
  • 3.
    Vex 1.0 ©2005 Carnegie Mellon Robotics Academy Inc. What are sensors? • A sensor tells a robot one simple thing about it’s environment – Temperature – Distance – Light intensity • Allow robots to see and feel the physical world through which they travel • Two main types of sensors: digital and analog
  • 4.
    Vex 1.0 ©2005 Carnegie Mellon Robotics Academy Inc. Analog Sensors • Can provide a range of feedback • The robot will interpret feedback from the sensor as a number from 0 to a pre-defined maximum (1024 for most Vex sensors) • A light sensor has many states: – If it is very bright, the sensor will return a number close to 30 – If it is very dark, the sensor will return a number close to 1000
  • 5.
    Vex 1.0 ©2005 Carnegie Mellon Robotics Academy Inc. Digital Sensors • Can distinguish between two different “states” • The meaning of the states depends on the sensor • A bumper sensor has two “states” – If it is pressed, it is a 0 – If it is not pressed, it is a 1
  • 6.
    Vex 1.0 ©2005 Carnegie Mellon Robotics Academy Inc. Variables • A value-holding “container” with a label • You can retrieve the value in this “container” when it is needed » There are different types of values you can store in variables. » You will use the “int” type, which allows you to store any whole number from 0 to a large number (positive or negative) » You can assign a starting value to your variable which will store that value at the start of the program
  • 7.
    Vex 1.0 ©2005 Carnegie Mellon Robotics Academy Inc. Bump Sensor Introduction • Open the project “BUMPERTEST.ECP” • Download it to your robot and open the terminal window
  • 8.
    Vex 1.0 ©2005 Carnegie Mellon Robotics Academy Inc. Understanding bump sensor code • Comments - allows you to leave notes to yourself and others about your code • The compiler ignores comments
  • 9.
    Vex 1.0 ©2005 Carnegie Mellon Robotics Academy Inc. Understanding bump sensor code • While Loop – block of code that repeats itself as long as the condition inside the parenthesis is true – The == operator returns true if both sides are equal, and false if they are not equal – In our code loop will always equal 1, so this loop will run forever
  • 10.
    Vex 1.0 ©2005 Carnegie Mellon Robotics Academy Inc. Understanding bump sensor code • Bumper sensor – stores the value of the digital input 6 to the variable “bumper” – Now the robot knows if the bump sensor is being pressed in (0) or not (1)
  • 11.
    Vex 1.0 ©2005 Carnegie Mellon Robotics Academy Inc. Understanding bump sensor code • Print to screen – displays information in the terminal window – This particular code displays the value of the bump sensor For now, make sure your settings are as follows: * Variable: the variable you want to display * Message: the message with the variable * Directive: %d * Type-cast: int
  • 12.
    Vex 1.0 ©2005 Carnegie Mellon Robotics Academy Inc. Writing your own code • We are going to write a program that runs one motor until a bump sensor is pressed in • Begin by opening easyC