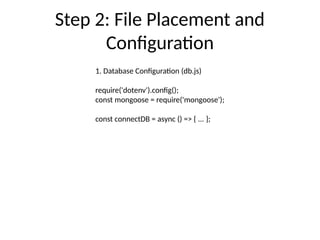
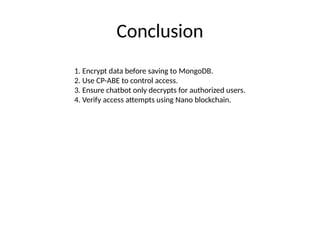
Project Setup and Security
Implementation
AES Encryption, CP-ABE Access
Control, and Blockchain Integration
Step 1: Project Setup
Install necessary libraries:
npm install mongoose dotenv cryptojs openabe
Create .env file:
MONGO_URI=mongodb+srv://<username>:<password>@cluster.mongodb.net/<database>
Step 2: File Placement and
Configuration
1. Database Configuration (db.js)
require('dotenv').config();
const mongoose = require('mongoose');
const connectDB = async () => { ... };
Step 3: AES Encryption
(encryption.js)
const crypto = require('crypto');
const algorithm = 'aes-256-cbc';
const key = crypto.randomBytes(32);
exports.encrypt = (text) => { ... };
Step 4: Model Creation
(HealthcareData.js)
const mongoose = require('mongoose');
const HealthcareDataSchema = new mongoose.Schema({
encryptedData: String,
iv: String,
createdAt: { type: Date, default: Date.now }
});
Step 5: CP-ABE Access Control
const { OpenABE } = require('openabe');
exports.encryptWithPolicy = async (policy, data) => { ... };
exports.decryptWithAttributes = async (attributes, data) => { ... };
Step 6: Chatbot Integration
chatbot.on('message', async (msg) => {
const entry = await HealthcareData.findById(msg.id);
const data = decrypt(entry.encryptedData, entry.iv);
chatbot.sendMessage(msg.chat.id, `Data: ${data}`);
});
Step 7: Blockchain Verification
const axios = require('axios');
const verifyAccess = async (hash) => {
const url = `https://nanexplorer.com/api/block/${hash}`;
const response = await axios.get(url);
return response.data ? true : false;
};
Conclusion
1. Encrypt data before saving to MongoDB.
2. Use CP-ABE to control access.
3. Ensure chatbot only decrypts for authorized users.
4. Verify access attempts using Nano blockchain.

Project_Setup_and_Implementation_that helps in smart contract.pptx

  • 1.
    Project Setup andSecurity Implementation AES Encryption, CP-ABE Access Control, and Blockchain Integration
  • 2.
    Step 1: ProjectSetup Install necessary libraries: npm install mongoose dotenv cryptojs openabe Create .env file: MONGO_URI=mongodb+srv://<username>:<password>@cluster.mongodb.net/<database>
  • 3.
    Step 2: FilePlacement and Configuration 1. Database Configuration (db.js) require('dotenv').config(); const mongoose = require('mongoose'); const connectDB = async () => { ... };
  • 4.
    Step 3: AESEncryption (encryption.js) const crypto = require('crypto'); const algorithm = 'aes-256-cbc'; const key = crypto.randomBytes(32); exports.encrypt = (text) => { ... };
  • 5.
    Step 4: ModelCreation (HealthcareData.js) const mongoose = require('mongoose'); const HealthcareDataSchema = new mongoose.Schema({ encryptedData: String, iv: String, createdAt: { type: Date, default: Date.now } });
  • 6.
    Step 5: CP-ABEAccess Control const { OpenABE } = require('openabe'); exports.encryptWithPolicy = async (policy, data) => { ... }; exports.decryptWithAttributes = async (attributes, data) => { ... };
  • 7.
    Step 6: ChatbotIntegration chatbot.on('message', async (msg) => { const entry = await HealthcareData.findById(msg.id); const data = decrypt(entry.encryptedData, entry.iv); chatbot.sendMessage(msg.chat.id, `Data: ${data}`); });
  • 8.
    Step 7: BlockchainVerification const axios = require('axios'); const verifyAccess = async (hash) => { const url = `https://nanexplorer.com/api/block/${hash}`; const response = await axios.get(url); return response.data ? true : false; };
  • 9.
    Conclusion 1. Encrypt databefore saving to MongoDB. 2. Use CP-ABE to control access. 3. Ensure chatbot only decrypts for authorized users. 4. Verify access attempts using Nano blockchain.