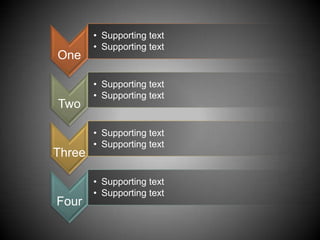
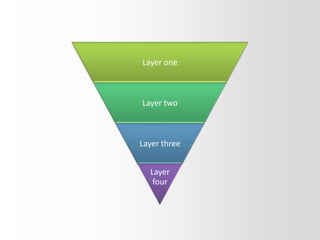
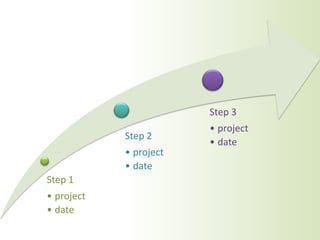
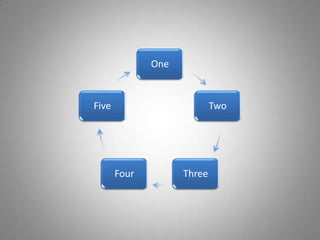
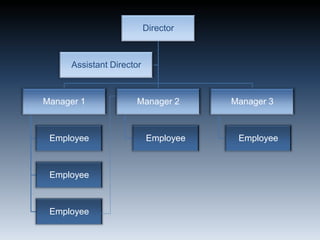
SlideShare a Scribd company logo
1 of 27
Animated Hierarchy and Process Graphics with SmartArt Microsoft
All photos in this template courtesy of	 Bill Staples

More Related Content

Featured

How to Prepare For a Successful Job Search for 2024
How to Prepare For a Successful Job Search for 2024How to Prepare For a Successful Job Search for 2024
How to Prepare For a Successful Job Search for 2024Albert Qian
 
Social Media Marketing Trends 2024 // The Global Indie Insights
Social Media Marketing Trends 2024 // The Global Indie InsightsSocial Media Marketing Trends 2024 // The Global Indie Insights
Social Media Marketing Trends 2024 // The Global Indie InsightsKurio // The Social Media Age(ncy)
 
Trends In Paid Search: Navigating The Digital Landscape In 2024
Trends In Paid Search: Navigating The Digital Landscape In 2024Trends In Paid Search: Navigating The Digital Landscape In 2024
Trends In Paid Search: Navigating The Digital Landscape In 2024Search Engine Journal
 
5 Public speaking tips from TED - Visualized summary
5 Public speaking tips from TED - Visualized summary5 Public speaking tips from TED - Visualized summary
5 Public speaking tips from TED - Visualized summarySpeakerHub
 
ChatGPT and the Future of Work - Clark Boyd
ChatGPT and the Future of Work - Clark Boyd ChatGPT and the Future of Work - Clark Boyd
ChatGPT and the Future of Work - Clark Boyd Clark Boyd
 
Getting into the tech field. what next
Getting into the tech field. what next Getting into the tech field. what next
Getting into the tech field. what next Tessa Mero
 
Google's Just Not That Into You: Understanding Core Updates & Search Intent
Google's Just Not That Into You: Understanding Core Updates & Search IntentGoogle's Just Not That Into You: Understanding Core Updates & Search Intent
Google's Just Not That Into You: Understanding Core Updates & Search IntentLily Ray
 
Time Management & Productivity - Best Practices
Time Management & Productivity -  Best PracticesTime Management & Productivity -  Best Practices
Time Management & Productivity - Best PracticesVit Horky
 
The six step guide to practical project management
The six step guide to practical project managementThe six step guide to practical project management
The six step guide to practical project managementMindGenius
 
Beginners Guide to TikTok for Search - Rachel Pearson - We are Tilt __ Bright...
Beginners Guide to TikTok for Search - Rachel Pearson - We are Tilt __ Bright...Beginners Guide to TikTok for Search - Rachel Pearson - We are Tilt __ Bright...
Beginners Guide to TikTok for Search - Rachel Pearson - We are Tilt __ Bright...RachelPearson36
 
Unlocking the Power of ChatGPT and AI in Testing - A Real-World Look, present...
Unlocking the Power of ChatGPT and AI in Testing - A Real-World Look, present...Unlocking the Power of ChatGPT and AI in Testing - A Real-World Look, present...
Unlocking the Power of ChatGPT and AI in Testing - A Real-World Look, present...Applitools
 
12 Ways to Increase Your Influence at Work
12 Ways to Increase Your Influence at Work12 Ways to Increase Your Influence at Work
12 Ways to Increase Your Influence at WorkGetSmarter
 
Ride the Storm: Navigating Through Unstable Periods / Katerina Rudko (Belka G...
Ride the Storm: Navigating Through Unstable Periods / Katerina Rudko (Belka G...Ride the Storm: Navigating Through Unstable Periods / Katerina Rudko (Belka G...
Ride the Storm: Navigating Through Unstable Periods / Katerina Rudko (Belka G...DevGAMM Conference
 
Barbie - Brand Strategy Presentation
Barbie - Brand Strategy PresentationBarbie - Brand Strategy Presentation
Barbie - Brand Strategy PresentationErica Santiago
 
Good Stuff Happens in 1:1 Meetings: Why you need them and how to do them well
Good Stuff Happens in 1:1 Meetings: Why you need them and how to do them wellGood Stuff Happens in 1:1 Meetings: Why you need them and how to do them well
Good Stuff Happens in 1:1 Meetings: Why you need them and how to do them wellSaba Software
 
Introduction to C Programming Language
Introduction to C Programming LanguageIntroduction to C Programming Language
Introduction to C Programming LanguageSimplilearn
 

Featured (20)

How to Prepare For a Successful Job Search for 2024
How to Prepare For a Successful Job Search for 2024How to Prepare For a Successful Job Search for 2024
How to Prepare For a Successful Job Search for 2024
 
Social Media Marketing Trends 2024 // The Global Indie Insights
Social Media Marketing Trends 2024 // The Global Indie InsightsSocial Media Marketing Trends 2024 // The Global Indie Insights
Social Media Marketing Trends 2024 // The Global Indie Insights
 
Trends In Paid Search: Navigating The Digital Landscape In 2024
Trends In Paid Search: Navigating The Digital Landscape In 2024Trends In Paid Search: Navigating The Digital Landscape In 2024
Trends In Paid Search: Navigating The Digital Landscape In 2024
 
5 Public speaking tips from TED - Visualized summary
5 Public speaking tips from TED - Visualized summary5 Public speaking tips from TED - Visualized summary
5 Public speaking tips from TED - Visualized summary
 
ChatGPT and the Future of Work - Clark Boyd
ChatGPT and the Future of Work - Clark Boyd ChatGPT and the Future of Work - Clark Boyd
ChatGPT and the Future of Work - Clark Boyd
 
Getting into the tech field. what next
Getting into the tech field. what next Getting into the tech field. what next
Getting into the tech field. what next
 
Google's Just Not That Into You: Understanding Core Updates & Search Intent
Google's Just Not That Into You: Understanding Core Updates & Search IntentGoogle's Just Not That Into You: Understanding Core Updates & Search Intent
Google's Just Not That Into You: Understanding Core Updates & Search Intent
 
How to have difficult conversations
How to have difficult conversations How to have difficult conversations
How to have difficult conversations
 
Introduction to Data Science
Introduction to Data ScienceIntroduction to Data Science
Introduction to Data Science
 
Time Management & Productivity - Best Practices
Time Management & Productivity -  Best PracticesTime Management & Productivity -  Best Practices
Time Management & Productivity - Best Practices
 
The six step guide to practical project management
The six step guide to practical project managementThe six step guide to practical project management
The six step guide to practical project management
 
Beginners Guide to TikTok for Search - Rachel Pearson - We are Tilt __ Bright...
Beginners Guide to TikTok for Search - Rachel Pearson - We are Tilt __ Bright...Beginners Guide to TikTok for Search - Rachel Pearson - We are Tilt __ Bright...
Beginners Guide to TikTok for Search - Rachel Pearson - We are Tilt __ Bright...
 
Unlocking the Power of ChatGPT and AI in Testing - A Real-World Look, present...
Unlocking the Power of ChatGPT and AI in Testing - A Real-World Look, present...Unlocking the Power of ChatGPT and AI in Testing - A Real-World Look, present...
Unlocking the Power of ChatGPT and AI in Testing - A Real-World Look, present...
 
12 Ways to Increase Your Influence at Work
12 Ways to Increase Your Influence at Work12 Ways to Increase Your Influence at Work
12 Ways to Increase Your Influence at Work
 
ChatGPT webinar slides
ChatGPT webinar slidesChatGPT webinar slides
ChatGPT webinar slides
 
More than Just Lines on a Map: Best Practices for U.S Bike Routes
More than Just Lines on a Map: Best Practices for U.S Bike RoutesMore than Just Lines on a Map: Best Practices for U.S Bike Routes
More than Just Lines on a Map: Best Practices for U.S Bike Routes
 
Ride the Storm: Navigating Through Unstable Periods / Katerina Rudko (Belka G...
Ride the Storm: Navigating Through Unstable Periods / Katerina Rudko (Belka G...Ride the Storm: Navigating Through Unstable Periods / Katerina Rudko (Belka G...
Ride the Storm: Navigating Through Unstable Periods / Katerina Rudko (Belka G...
 
Barbie - Brand Strategy Presentation
Barbie - Brand Strategy PresentationBarbie - Brand Strategy Presentation
Barbie - Brand Strategy Presentation
 
Good Stuff Happens in 1:1 Meetings: Why you need them and how to do them well
Good Stuff Happens in 1:1 Meetings: Why you need them and how to do them wellGood Stuff Happens in 1:1 Meetings: Why you need them and how to do them well
Good Stuff Happens in 1:1 Meetings: Why you need them and how to do them well
 
Introduction to C Programming Language
Introduction to C Programming LanguageIntroduction to C Programming Language
Introduction to C Programming Language
 

Power point teaching smartart

  • 1. Animated Hierarchy and Process Graphics with SmartArt Microsoft
  • 2.
  • 3.
  • 4.
  • 5.
  • 6.
  • 7.
  • 8.
  • 9.
  • 10.
  • 11.
  • 12.
  • 13.
  • 14.
  • 15.
  • 16.
  • 17.
  • 18.
  • 19.
  • 20.
  • 21.
  • 22.
  • 23.
  • 24.
  • 25.
  • 26.
  • 27. All photos in this template courtesy of Bill Staples

Editor's Notes

  1. For reproduction steps for this slide, refer to the PowerPoint template titled “Combined picture and text effects for PowerPoint slides” (ANI_TEXT.potx), slide number 8.
  2. SmartArt custom animation effects: pictures peek-in(Basic)To reproduce the SmartArt effects on this page, do the following:On the Home tab, in the Slides group, click Layout, and then clickBlank. On the Insert tab, in the Illustrations group, click SmartArt.In the Choose a SmartArt Graphic dialog box, in the left pane, click Matrix. In the Matrix pane, double-click Titled Matrix (second option from the left) to insert the graphic into the slide. Select the graphic. Under SmartArt Tools, on the Format tab, click Size, and then do the following:In the Height box, enter 5.67”.In the Width box, enter 8.5”.Under SmartArt Tools, on the Format tab, click Arrange, click Align, and then do the following:Click Align to Slide.Click Align Middle. Click Align Center. Select the graphic, and then click one of the arrows on the left border. In the Type your text here dialog box, enter text in the top-level bullet only (text for the rounded rectangle at the center of the graphic). To remove the [Text] placeholder in the second-level bullets, select each bullet and press SPACE.On the slide, select the graphic. Under SmartArtTools, on the Design tab, in the SmartArtStyles group, click More, and then under Best Match for Document click Moderate Effect.Select the rounded rectangle at the center of the graphic. On the Home tab, in the Font group, select 28 from the Font Size list, click the arrow next to Font Color, and then click White, Background 1 (first row, first option from the left).With the rounded rectangle selected, under SmartArtTools, on the Format tab, in the bottom right corner of the ShapeStyles group, click the FormatShape dialog box launcher. In the FormatShape dialog box, click Fill in the left pane, select Gradient fill in the Fill pane, and then do the following:In the Type list, select Linear.In the Direction list, select LinearUp (second row, second option from the left).Under Gradient stops, click Add or Remove until three stops appear in the drop-down list.Also under Gradient stops, customize the gradient stops as follows:Select Stop 1 from the list, and then do the following:In the Stop position box, enter 0%.Click the button next to Color, and then under Theme ColorsclickWhite, Background 1, Darker 35% (fifth row, first option from the left).Select Stop 2 from the list, and then do the following: In the Stop position box, enter 80%.Click the button next to Color, and then under Theme ColorsclickWhite, Background 1, Darker 35% (fifth row, first option from the left).Select Stop 3 from the list, and then do the following: In the Stop position box, enter 100%.Click the button next to Color, and then under Theme ColorsclickWhite, Background 1, Darker 15% (third row, first option from the left).Right-click the top left shape in the graphic, and then click Format Shape. In the Format Shape dialog box, in the left pane, click Fill. In the Fill pane, click Picture or texture fill,and then under Insert from, click File.In the Insert Picture dialog box, select a picture and then click Insert. Right-click the top right shape in the graphic, and then click Format Shape. In the Format Shape dialog box, in the left pane, click Fill. In the Fill pane, click Picture or texture fill,and then under Insert from, click File.In the Insert Picture dialog box, select a picture and then click Insert. Right-click the bottom left shape in the graphic, and then click Format Shape. In the Format Shape dialog box, in the left pane, click Fill. In the Fill pane, click Picture or texture fill,and then under Insert from, click File.In the Insert Picture dialog box, select a picture and then click Insert. Right-click the bottom right shape in the graphic, and then click Format Shape. In the Format Shape dialog box, in the left pane, click Fill. In the Fill pane, click Picture or texture fill,and then under Insert from, click File.In the Insert Picture dialog box, select a picture and then click Insert. To reproduce the animation effects on this slide, do the following:On the Animations tab, in the Animations group, click CustomAnimation.On the slide, select the graphic, and then do the following in the CustomAnimation task pane: Click Add Effect, point to Entrance, and then click MoreEffects. In the Add Entrance Effect dialog box, under Subtle, click Expand. Under Modify: Expand, in the Speed list, select Fast.Under Modify: Expand, in the Start list, select After Previous.Also in the Custom Animation task pane, click the arrow to the right of theanimation effect, and then click EffectOptions. In the Expand dialog box, on the SmartArt Animation tab, in the Group Graphic list, select One by one.Also in the Custom Animation taskpane, click the double-arrow below the animation effect to expand the list of effects, and then do the following:Press and hold CTRL, and then select all five animation effects in the Custom Animation task pane. Under Modify: Expand, in the Start list, select With Previous.Press and hold CTRL, select the second, third, fourth, and fifth animation effects (expand effects for the picture-filled rectangles), and then do the following:Click Change, point to Entrance, and then click MoreEffects. In the Change Entrance Effect dialog box, under Basic, click Peek In. Under Modify: Peek In, in the Speed list, select Fast.Select the second animation effect. Under Modify: Peek In, in the Start list, select After Previous.Select the third animation effect. Under Modify: Peek In, in theDirection list, select From Left.Select the fourth animation effect. Under Modify: Peek In, in the Direction list, select From Right.Select the fifth animation effect. Under Modify: Peek In, in the Direction list, select From Top.To reproduce the background effects on this slide, do the following:Right-click the slide background area, and then click Format Background. In the Format Background dialog box, click Fill in the left pane, select Gradient fill in the Fill pane, and then do the following:In the Type list, select Radial.Click the button next to Direction, and then click From Corner (fifth option from the left).Under Gradient stops, click Add or Remove until two stops appear in the drop-down list.Also under Gradient stops, customize the gradient stops as follows:Select Stop 1 from the list, and then do the following:In the Stop position box, enter 0%.Click the button next to Color, and then under Theme ColorsclickWhite, Background 1 (first row, first option from the left).Select Stop 2 from the list, and then do the following: In the Stop position box, enter 71%.Click the button next to Color, and then under Theme ColorsclickWhite, Background 1, Darker 15% (third row, first option from the left).
  3. SmartArt custom animation effects: continuous picture list(Basic)To reproduce the SmartArt effects on this slide, do the following:On the Home tab, in the Slides group, click Layout, and then clickBlank. On the Insert tab, in the Illustrations group, click SmartArt. In the Choose a SmartArt Graphic dialog box, in the left pane, click List. In the List pane, double-click Continuous Picture List (third row, fourth option from the left) to insert the graphic into the slide.On the slide, select the graphic. Under SmartArt Tools, on the Format tab, click Size, and then do the following:In the Height box, enter 5.05”.In the Width box, enter 7.57”.Under SmartArt Tools, on the Format tab, click Arrange, click Align, and then do the following:Click Align to Slide.Click Align Middle. Click Align Center. Select the graphic, and then click one of the arrows on the left border. In the Type your text here dialog box, enter text.Select the graphic. Under SmartArtTools, on the Design tab, in the SmartArtStyles group, click More, and then under Best Match for Document clickselect Moderate Effect (fourth option from the left).Click each of the three picture placeholders in the SmartArt graphic, and then in the Insert Picture dialog box, select a picture and click Insert.Press and hold CTRL, and then select the three circle pictures on the slide.Under PictureTools, on theFormat tab, in the PictureStyles group, click PictureEffects, point toGlow, and then do the following:Under Glow Variations, click Accent color 1, 8 pt glow(second row, first option from the left).Point to MoreGlowColors,and then under Theme Colors click Orange, Accent 6, Lighter 80% (second row, 10th option from the left).Select the left-right arrow at the bottom of the SmartArt graphic. Under SmartArtTools, on the Format tab, in the ShapeStyles group, click the arrow next to ShapeFill, point to Gradient, and then click MoreGradients. In the Format Shape dialog box, click Fill in the left pane,select Gradient fill in the Fill pane, and then do the following:In the Type list, select Linear.Click the button next to Direction, and then select Linear Right (first row, fourth option from the left).Under Gradient stops, click Add or Remove until three stops appear in the drop-down list.Also under Gradient stops, customize the gradient stops as follows:Select Stop 1 from the list, and then do the following:In the Stop position box, enter 0%.Click the button next to Color, and then under Theme ColorsclickOrange, Accent 6, Darker 25% (fifth row, 10th option from the left).Select Stop 2 from the list, and then do the following: In the Stop position box, enter 50%.Click the button next to Color, and then click MoreColors. In the Colors dialog box,on theCustom tab, enter values for Red: 255, Green: 192, Blue: 0.Select Stop 3 from the list, and then do the following: In the Stop position box, enter 100%.Click the button next to Color, and then under Theme ColorsclickOrange, Accent 6, Darker 25% (fifth row, 10th option from the left).Press and hold CTRL, and then select the three rounded rectangles on the slide. On the Home tab, in the Font group, select Gill Sans MT from the Font list, enter 30 pt in the Font Size box, click the arrow next to Font Color, and then click White, Background 1 (first row, first option from the left).Under SmartArtTools, on the Format tab, in the ShapeStyles group, click Shape Effects, point to Reflection, and then under ReflectionVariations click Tight reflection, touching (first row, first option from the left).Under SmartArtTools, on the Format tab, in the ShapeStyles group, click Shape Fill, point to Gradient, and then click More Gradients. In the Format Shape dialog box, in the left pane, click Fill, select Gradient fill in the Fill pane, and then do the following:In the Type list, select Linear.In the Direction list, select Linear Down (first row, second option from the left).Under Gradient stops, click Add or Remove until two stops appear in the drop-down list.Also under Gradient stops, customize the gradient stops as follows:Select Stop 1 from the list, and then do the following:In the Stop position box, enter 19%.Click the button next to Color, and then under Theme ColorsclickBlack, Text 1 (first row, second option from the left). Select Stop 2 from the list, and then do the following: In the Stop position box, enter100%.Click the button next to Color, and then under Theme ColorsclickBlack, Text 1, Lighter 50% (second row, second option from the left).To reproduce the animation effects on this slide, do the following:On the Animations tab, in the Animations group, click CustomAnimation.On the slide, select the graphic. In the Custom Animation task pane, do the following:Click Add Effect, point to Entrance, and then clickMoreEffects. In the Add Entrance Effect dialog box, underModerate, clickStretch. Under Modify: Stretch, in the Speed list, selectFast.Also in the CustomAnimation task pane, click the arrow to the right of the animation effect, and then click Effect Options. In the Stretch dialog box, on the SmartArtAnimation tab, in the Group graphic list, select One by One.Also in the CustomAnimation task pane, click the double arrows under the animation effect to expand the list of effects. Press and hold CTRL, and then select all of the animation effects in the Custom Animation task pane. Under Modify: Stretch, in the Start list, selectWith Previous.Select the first animation effect (stretch effect for the left-right arrow) in the CustomAnimation task pane. Under Modify: Stretch, click the arrow to the right of the effect, and then click Timing. In the Stretch dialog box, on the Timing tab, do the following: In the Delay box, enter 0.5.In the Speed box, enter 1.5 seconds.Press and hold CTRL, and then select the second and third animation effects (stretch effects for the left panel) in the CustomAnimation task pane. Under Modify: Stretch, in the Direction list, select From Right. Also in the Custom Animation task pane, with the second and third animation effects still selected, click the arrow to the right of one of those effects, and then click Timing. In the Stretch dialog box, on the Timing tab, in the Delay box, enter 1, and then click OK.Press and hold CTRL, and then select the sixth and seventh animation effects (stretch effects for the right panel) in the Custom Animation task pane. Under Modify: Stretch, in the Direction list, select From Left. Also in the Custom Animation task pane, with the sixth and seventh animation effects still selected, click the arrow to the right of one of those effects, and then click Timing. In the Stretch dialog box, on the Timing tab, in the Delay box, enter 1.To reproduce the background effects on this slide, do the following:Right-click the slide background area, and then click Format Background. In the Format Background dialog box, click Fill in the left pane, select Gradient fill in the Fill pane, and then do the following:In the Type list, select Radial.Click the button next to Direction, and then click From Center(third option from the left). Under Gradient stops, click Add or Remove until two stops appear in the drop-down list.Also under Gradient stops, customize the gradient stops as follows:Select Stop 1 from the list, and then do the following:In the Stop position box, enter 0%.Click the button next to Color, and then under Theme Colors click White, Background 1 (first row, first option from the left).Select Stop 2 from the list, and then do the following: In the Stop position box, enter 100%.Click the button next to Color, and then under Theme Colors click Black, Text 1, Lighter 25% (fourth row, second option from the left).
  4. SmartArtcustom animation effects: vertical bullet list(Basic)To reproduce the SmartArt effects on this slide, do the following:On the Home tab, in the Slides group, click Layout, and then clickBlank. On the Insert tab, in the Illustrations group, click SmartArt. In the Choose a SmartArt Graphic dialog box, in the left pane, click List. In the List pane, click Vertical Bullet List (first row, third option from the left), and then click OK to insert the graphic into the slide.To create another row, select the bottom, first-level (color-filled) rectangle, and then under SmartArtTools, on the Design tab, in the CreateGraphic group, click the arrow next to AddShape, and select AddShapeAfter.To add bullet text area, select the new first-level (color-filled) rectangle, and then under SmartArtTools, on the Design tab, in the CreateGraphic group, click AddBullet.To enter text, select the graphic, and then click one of the arrows on the left border. In the Type your text here dialog box, enter text for each level. (Note: In the example slide, the first-level text is “Topic One,” “Topic Two,” and “Topic Three.” The second-level text is “Supporting Text.”)Select the border of the SmartArt graphic. Drag the left center sizing handle to the left edge of the slide to resize the width of the SmartArt graphic.To reproduce the rectangle effects on this slide, do the following:Press and hold CTRL, and select the three color-filled rectangles (in the example above, these are the “Topic One,” “Topic Two,” and “Topic Three” rectangles).Under SmartArtTools, on the Format tab, in the Shapes group, click ChangeShape, and under Rectangles select RoundDiagonalCornerRectangle (ninth option from the left).Under SmartArtTools, on the Format tab, in the ShapeStyles group, click ShapeEffects, point to Presets and select Preset 7 (second row, third option from the left). On the Home tab, in the Font group do the following:In the Font list, select FranklinGothicDemiCond.In the FontSize box, enter 32 pt.Click Shadow.On the Home tab, in the bottom right corner of the Drawing group, click the FormatShape dialog box launcher. In the FormatShape dialog box, click TextBox in the left pane, and in the TextBox pane, under Internalmargin, in the Left box enter 3”. Select the first color-filled rectangle from the top (in the example slide, “Topic One”).On the Home tab, in the bottom right corner of the Drawing group, click the FormatShape dialog box launcher. In the FormatShape dialog box, click Fill in the left pane, select Gradientfill in the Fill pane, and then do the following:In the Type list, select Linear.Click the button next to Direction, and then click Linear Right(first row, fourth option from the left). Under Gradient stops, click Add or Remove until two stops appear in the drop-down list.Also under Gradient stops, customize the gradient stops that you added as follows:Select Stop 1 from the list, and then do the following:In the Stop position box, enter 0%.Click the button next to Color, and then under ThemeColors select Olive Green, Accent 3 (first row, seventh option from the left). In the Transparency box, enter 90%Select Stop 2 from the list, and then do the following: In the Stop position box, enter 100%.Click the button next to Color, and then under ThemeColors select Olive Green, Accent 3 (first row, seventh option from the left). In the Transparency box, enter 0%.Select the second color-filled rectangle from the top (in the example above, “Topic Two”).On the Home tab, in the bottom right corner of the Drawing group, click the FormatShape dialog box launcher. In the FormatShape dialog box, click Fill in the left pane, select Gradientfill in the Fill pane, and then do the following:In the Type list, select Linear.Click the button next to Direction, and then click Linear Right(first row, fourth option from the left). Under Gradient stops, click Add or Remove until two stops appear in the drop-down list.Also under Gradient stops, customize the gradient stops that you added as follows:Select Stop 1 from the list, and then do the following:In the Stop position box, enter 0%.Click the button next to Color, and then under ThemeColors select Blue, Accent 1 (first row, the fifth option from the left). In the Transparency box, enter 90%Select Stop 2 from the list, and then do the following: In the Stop position box, enter 100%.Click the button next to Color, and then under ThemeColors select Blue, Accent 1 (first row, the fifth option from the left). In the Transparency box, enter 0%.Select the third color-filled rectangle from the top (in the example slide, “Topic Three”).On the Home tab, in the bottom right corner of the Drawing group, click the FormatShape dialog box launcher. In the FormatShape dialog box, click Fill in the left pane, select Gradientfill in the Fill pane, and then do the following:In the Type list, select Linear.Click the button next to Direction, and then click Linear Right(first row, fourth option from the left). Under Gradient stops, click Add or Remove until two stops appear in the drop-down list.Also under Gradient stops, customize the gradient stops that you added as follows:Select Stop 1 from the list, and then do the following:In the Stop position box, enter 0%.Click the button next to Color, and then under ThemeColors select Orange, Accent 6 (first row, 10th option from the left). In the Transparency box, enter 90%Select Stop 2 from the list, and then do the following: In the Stop position box, enter 100%.Click the button next to Color, and then under ThemeColors select Orange, Accent 6 (first row, 10th option from the left). In the Transparency box, enter 0%.To reproduce the bulleted text on this slide, do the following:Press and hold CTRL, and select the three second-level, bulleted text boxes. On the Home tab, in the Font group, do the following:In the Font list, select FranklinGothicMediumCond.In the FontSize box, enter 22 pt.In the FontColor list, select White, Background 1, Darker 50% (sixth row, first option from the left).On the Home tab, in the bottom right corner of theDrawing group, click the FormatShape dialog box launcher. In the FormatShape dialog box, select TextBox in the left pane, and in the TextBox pane do the following:Under Textlayout, in the Verticalalignment list select Middle.Under Internalmargin, do the following: In the Left box, enter 3.8”.In the Top box, enter 0.2”.In the Right box, enter 0.17”.In the Bottom box, enter 0.2”. Increase the height of the SmartArt graphic by dragging the top or bottom sizing handle. To reproduce the animation effects on this slide, do the following:On the Animations tab, in the Animations group, click CustomAnimation.Select the SmartArt graphic on the slide, and then in the CustomAnimation task pane, do the following:Click AddEffect, point to Entrance, and select MoreEffects. In the AddEntranceEffect dialog box, under Moderate,select Ascend.Click the arrow to the right of the ascend entrance effect, and then select EffectOptions. In the Ascend dialog box, do the following:On the Timing tab, in the Speed list, select 1 seconds (Fast).On the SmartArtAnimation tab, in the Groupgraphic list, select Onebyone. Click the double arrow below the animation effect to expand the list of effects.Press and hold CTRL, and select all the effects in the CustomAnimation task pane. Then under Modify: Ascend, in the Start list, select AfterPrevious.Press and hold CTRL, and select the second, fourth, and sixth effects (ascend entrance effects) in the CustomAnimation task pane. Click Change, point to Entrance, and then select MoreEffects. In the ChangeEntranceEffect dialog box, under Moderate, select EaseIn.To reproduce the background effects on this slide, do the following:Right-clickthe slide background area, and then click Format Background. In the Format Background dialog box, click Fill in the left pane, select Gradient fill in the Fill pane, and then do the following:In the Type list, select Linear.Click the button next to Direction, and then click Linear Left (first row, fifth option from the left). Under Gradient stops, click Add or Remove until three stops appear in the drop-down list.Also under Gradient stops, customize the gradient stops that you added as follows:Select Stop 1 from the list, and then do the following:In the Stop position box, enter 60%.Click the button next to Color, and then under ThemeColors select White, Background 1 (first row, first option from the left). Select Stop 2 from the list, and then do the following: In the Stop position box, enter 90%.Click the button next to Color, and then under ThemeColors select White, Background 1, Darker 25% (fourth row, first option from the left). Select Stop 3 from the list, and then do the following: In the Stop position box, enter 100%.Click the button next to Color, and then under ThemeColors select Black, Text 1, Lighter 50% (second row, second option from the left).
  5. SmartArt customanimation effects: vertical chevron list with dark colors(Basic)To reproduce the SmartArt effects on this slide, do the following:On the Home tab, in the Slides group, click Layout, and then clickBlank. On the Insert tab, in the Illustrations group, click SmartArt. In the Choose a SmartArt Graphic dialog box, in the left pane, click List. In the List pane, click Vertical Chevron List (fourth row, fourth option from the left), and then click OK to insert the graphic into the slide.To create a fourth chevron, select the third chevron at the bottom of the graphic, and then under SmartArtTools, on the Design tab, in the CreateGraphic group, click the arrow next to AddShape, and select AddShapeAfter.To add bullets for the fourth chevron, select the fourth chevron, and then under SmartArtTools, on the Design tab, in the CreateGraphic group, click AddBullet.To enter text, select the SmartArt graphic, and then click one of the arrows on the left border. In the Type your text here dialog box, enter text for each level. (Note: In the example slide, the first-level text boxes contain “One,” “Two,” “Three,” and “Four.” The second-level text is “Supporting Text.”)On the slide, select the SmartArt graphic and drag the right center sizing handle to the right edge of the slide.With the SmartArt graphic still selected, on the DesignTab, in the Themes group, click Colors, and then under Built-In select Median. (Note: If this action is taken in a PowerPoint presentation containing more than one slide, the theme will be applied to all of the slides.)With the SmartArt graphic still selected, under SmartArtTools, on the Design tab, in the SmartArtStyles group, click MoreStyles, and then under 3-D select Inset (first row, second option from the left). Also under SmartArtTools, on the Design tab, in the SmartArtStyles group, click ChangeColors, and then under Colorful select Colorful -AccentColors (first option from the left). To reproduce the chevron effects on this slide, do the following:Press and hold CTRL, and select all four chevrons in the SmartArt graphic. On the Home tab, in the Font group, in the Font list select Franklin Gothic Medium Cond, and then in the FontSize box select 28.On the Home tab, in the bottom right corner of the Drawing group, click the FormatShape dialog box launcher. In the FormatShape dialog box, click TextBox in the left pane, and in the TextBox pane do the following:Under Textlayout, in the Verticalalignment list select Bottom.Under Internalmargin, do the following: In the Left box, enter 0”. In the Right box, enter 0”. In the Bottom box, enter 0”. In the Top box, enter 0.6”.To reproduce the rectangle effects on this slide, do the following:Press and hold CTRL, and the four of the rectangles (with bulleted text). On the Home tab, in the Font group, do the following:In the Font list, select FranklinGothicBook.In the FontSize box, enter 21.In the FontColor list, underThemeColors select White, Background 1 (first row, first option from the left).On the Home tab, in the bottom right corner of the Drawing group, click the Format Shapedialog box launcher. In the Format Shape dialog box, click Fill in the left pane, select Gradientfill in the Fill pane, and then do the following:In the Type list, select Linear.Click the button next to Direction, and then click Linear Down (first row, second option from the left). Under Gradient stops, click Add or Remove until two stops appear in the drop-down list.Also under Gradient stops, customize the gradient stops that you added as follows:Select Stop 1 from the list, and then do the following:In the Stop position box, enter 0%.Click the button next to Color, and then under ThemeColors select Black, Text 1 (first row, second option from the left).In the Transparency box, enter 100%. Select Stop 2 from the list, and then do the following: In the Stop position box, enter 100%.Click the button next to Color, and then under ThemeColors select Black, Text 1 (first row, second option from the left).In the Transparency box, enter 45%. Also in the FormatShape dialog box, click Shadow in the left pane, and in the Shadow pane, in the Presets list, select NoShadow.Also in the FormatShape dialog box, click 3-DFormat in the left pane, and in the 3-DFormat pane, underBevel, in the Top list select NoBevel.Select the top rectangle with bulleted text.On the Home tab, in the bottom right corner of the Drawing group, click the FormatShape dialog box launcher. In the FormatShape dialog box, click LineColor in the left pane, select Gradientfill in the LineColor pane, and then do the following:In the Type list, select Linear.Click the button next to Direction, and then click Linear Down (first row, second option from the left). Under Gradient stops, click Add or Remove until two stops appear in the drop-down list.Also under Gradient stops, customize the gradient stops that you added as follows:Select Stop 1 from the list, and then do the following:In the Stop position box, enter 0%.Click the button next to Color, and then under ThemeColors select Orange, Accent 2 (first row, sixth option from the left).In the Transparency box, enter 100%. Select Stop 2 from the list, and then do the following: In the Stop position box, enter 100%.Click the button next to Color, and then under ThemeColors select Orange, Accent 2 (first row, sixth option from the left).In the Transparency box, enter 0%. Select the second rectangle from the top with bulleted text.On the Home tab, in the bottom right corner of the Drawing group, click the FormatShape dialog box launcher. In the FormatShape dialog box, click LineColor in the left pane, select Gradientfill in the LineColor pane, and then do the following:In the Type list, select Linear.Click the button next to Direction, and then click Linear Down (first row, second option from the left). Under Gradient stops, click Add or Remove until two stops appear in the drop-down list.Also under Gradient stops, customize the gradient stops that you added as follows:Select Stop 1 from the list, and then do the following:In the Stop position box, enter 0%.Click the button next to Color, and then under ThemeColors select Olive Green, Accent 3 (first row, seventh option from the left).In the Transparency box, enter 100%. Select Stop 2 from the list, and then do the following: In the Stop position box, enter 100%.Click the button next to Color, and then under ThemeColors select Olive Green, Accent 3 (first row, seventh option from the left).In the Transparency box, enter 0%. Select the third rectangle from the top with bulleted text.On the Home tab, in the bottom right corner of the Drawing group, click the FormatShape dialog box launcher. In the FormatShape dialog box, click LineColor in the left pane, select Gradient fill in the LineColor pane, and then do the following:In the Type list, select Linear.Click the button next to Direction, and then click Linear Down (first row, second option from the left). Under Gradient stops, click Add or Remove until two stops appear in the drop-down list.Also under Gradient stops, customize the gradient stops that you added as follows:Select Stop 1 from the list, and then do the following:In the Stop position box, enter 0%.Click the button next to Color, and then under ThemeColors select Gold, Accent 4 (first row, eighth option from the left).In the Transparency box, enter 100%. Select Stop 2 from the list, and then do the following: In the Stop position box, enter 100%.Click the button next to Color, and then under ThemeColors select Gold, Accent 4 (first row, eighth option from the left).In the Transparency box, enter 0%. Select the fourth rectangle from the top with bulleted text.On the Home tab, in the bottom right corner of the Drawing group, click the FormatShape dialog box launcher. In the FormatShape dialog box, click LineColor in the left pane, select Gradient fill in the LineColor pane, and then do the following:In the Type list, select Linear.Click the button next to Direction, and then click Linear Down (first row, second option from the left). Under Gradient stops, click Add or Remove until two stops appear in the drop-down list.Also under Gradient stops, customize the gradient stops that you added as follows:Select Stop 1 from the list, and then do the following:In the Stop position box, enter 0%.Click the button next to Color, and then under ThemeColors select Green, Accent 5 (first row, ninth option from the left).In the Transparency box, enter 100%. Select Stop 2 from the list, and then do the following: In the Stop position box, enter 100%.Click the button next to Color, and then under ThemeColors select Green, Accent 5 (first row, ninth option from the left).In the Transparency box, enter 0%. To reproduce the animation effects on this slide, do the following: On the Animations tab, in the Animations group, click CustomAnimation.Select the SmartArt graphic, and then in the CustomAnimation task pane do the following:Click AddEffect, point to Entrance, and select MoreEffects. In the AddEntranceEffect dialog box, under Moderate select Grow & Turn.Click the arrow to the right of the animation effect (grow & turn effect for the graphic), select EffectOptions, and then in the Grow & Turn dialog box, do the following:On the Timing tab, in the Speed list, select 0.5 seconds (Very Fast).On the SmartArtAnimation tab, in the Groupgraphic list, select Onebyone.Click the double arrow to expand the contents of the list in theCustomAnimation task pane.Press and hold CTRL, and select the second, fourth, sixth, and eighth effects (grow & turn entrance effects), and then do the following:Click Change, point to Entrance and select MoreEffects. In the ChangeEntranceEffect dialog box, under Moderate select EaseIn.With the four ease-in entrance effects still selected, under Modify: Ease In do the following:In the Start list, select WithPrevious.In the Speed list, select Fast.Select the grow & turn entrance effect (first effect in the list), and under Modify: Grow & Turn, in the Start list, select WithPrevious.To reproduce the background effects on this slide, do the following:Right-click the slide background area, and then click Format Background. In the Format Background dialog box, click Fill in the left pane, select Gradient fill in the Fill pane, and then do the following:In the Type list, select Radial.Click the button next to Direction, and then click From Center (third option from the left). Under Gradient stops, click Add or Remove until two stops appear in the drop-down list.Also under Gradient stops, customize the gradient stops that you added as follows:Select Stop 1 from the list, and then do the following:In the Stop position box, enter 20%.Click the button next to Color, and then under ThemeColors select White, Background 1, Darker 25% (fourth row, first option from the left). Select Stop 2 from the list, and then do the following: In the Stop position box, enter 100%.Click the button next to Color, and then under ThemeColors select Black, Text 1 (first row, second option from the left).
  6. Transition effect: wedge(Basic)Tip: This transition can be used with SmartArt Cycle layouts, pie charts, or other circular graphics.To reproduce the SmartArt effects on this slide, do the following:On the Home tab, in the Slides group, click Blank.On the Insert tab, in theIllustrations group, click SmartArt.In the Choose a SmartArt Graphic dialog box, in the left pane, click Cycle.In the Cycle pane, click Radial Cycle (third row, first option from the left), and then click OK to insert the graphic into the slide.To create a fifth circle shape, select the small circle at the bottom of the graphic, and then under SmartArtTools, on the Design tab, in the CreateGraphic group, click the arrow next to AddShape, and click AddShapeAfter.Select the graphic, and then click one of the arrows on the left border. In the Type your text here dialog box, enter text.On the slide, select the graphic. Under SmartArtTools, on the Design tab, in the SmartArtStyles group, click ChangeColors, and then underColorful click Colorful Range – Accent Colors 4 to 5 (fourth option from the left).Under SmartArtTools, on the Design tab, in the SmartArtStyles group, click More, and then under 3-D click Polished (first row, first option from the left).To reproduce the animation effects on this slide, do the following:On the Animations tab, in the Transitionto This Slide group, click More. Under Wipes, click Wedge (fifth option from the left).To reproduce the background effects on this slide, do the following:Right-click the slide background, and then click Format Background. In the Format Background dialog box, click Fill in the left pane, select Gradient fill in the Fill pane, and then do the following:In the Type list, select Radial.In the Direction list, click From Center (third option from the left).Under Gradient stops, click Add or Remove until two stops appear in the drop-down list.Also under Gradient stops, customize the gradient stops as follows:Select Stop 1 from the list, and then do the following:In the Stop position box, enter 10%.Click the button next to Color, and then under Theme Colors click White, Background 1 (first row, first option from the left).Select Stop 2 from the list, and then do the following: In the Stop position box, enter 100%.Click the button next to Color, and then under Theme Colors click Black, Text 1 (first row, second option from the left).
  7. SmartArt custom animation effects: expand and peek in(Basic)To reproduce the SmartArt effects on this slide, do the following:On the Home tab, in the Slides group, click Layout, and then clickBlank. On the Insert tab, in the Illustrations group, click SmartArt. In the Choose a SmartArt Graphic dialog box, in the left pane, click Matrix. In the Matrix pane, click Titled Matrix (second option from the left), and then click OK to insert the graphic into the slide.Select the graphic, and then click one of the arrows on the left border. In the Type your text here dialog box, enter text.On the slide, select the graphic. Under SmartArtTools, on the Design tab, in the SmartArtStyles group, do the following: Click ChangeColors, and then under Colorful click Colorful - Accent Colors (first option from the left).Click More, and then under Best Match for Document click Moderate Effect (fourth option from the left).On the Home tab, in the Font group, select Calibri from the Font list, and then select 24 from the Font Size list.On the slide, select the text in the center rounded rectangle of the graphic.On the Home tab, in the Font group, select 28 from the Font Size list, click the arrow next to Font Color,and then under Theme Colors click White, Background 1 (first row, first option from the left).Right-click the rounded rectangle in the center of the graphic, and then click Format Shape.In the Format Shape dialog box, in the left pane, click Fill, select Gradient fill in the Fill pane, and then do the following:In the Type list, select Linear.Click the button next to Direction, and then click Linear Up (second row, second option from the left).Under Gradient stops, click Add or Remove until three stops appear in the drop-down list.Also under Gradient stops, customize the gradient stops as follows:Select Stop 1 from the list, and then do the following:In the Stop position box, enter 0%.Click the button next to Color, and then under Theme Colors click White, Background 1, Darker 35% (fifth row, first option from the left).Select Stop 2 from the list, and then do the following: In the Stop position box, enter 80%.Click the button next to Color, and then under Theme Colors click White, Background 1, Darker 35% (fifth row, first option from the left).Select Stop 3 from the list, and then do the following:In the Stop position box, enter 100%.Click the button next to Color, and then under Theme Colors click White, Background 1, Darker 15%(third row, first option from the left).To reproduce the animation effects on this slide, do the following:On the Animations tab, in the Animations group, click CustomAnimation.On the slide, select the graphic. In the CustomAnimation task pane, do the following: Click Add Effect, point to Entrance, and then click MoreEffects. In the Add Entrance Effect dialog box, under Subtle, click Expand. Under Modify: Expand, in the Speed list, select Fast.Also in the Custom Animation task pane, select the expand effect. Click the arrow to the right of the expand effect, and then click Effect Options. In the Expand dialog box, on the SmartArt Animation tab, in the Group graphic list, select One by one.Also in the Custom Animation task pane, click the double arrow under the expand effect to expand the contents of the list of effects.Press and hold CTRL, and then select all five expand effects in the Custom Animation pane. Under Modify: Expand, in the Start list, select With Previous.Press and hold CTRL, select the second, third, fourth, and fifth expand effects in the Custom Animation pane, and then do the following:Under Modify: Expand, click Change, point to Entrance, and then click More Effects. In the Change Entrance Effect dialog box, under Basic, click Peek In, and then click OK.Under Modify: Peek In, in the Speed list, select Fast.Also in the CustomAnimation task pane, do the following:Select the second expand effect. Under Modify: Peek In, in the Start list, select After Previous.Select the third expand effect. Under Modify: Peek In, in theDirection list, select From Left.Select the fourth expand effect. Under Modify: Peek In, in the Direction list, select From Right.Select the fifth expand effect. Under Modify: Peek In, in the Direction list, select From Top.To reproduce the background effects on this slide, do the following:Right-click the slide background area, and then click Format Background. In the Format Background dialog box, click Fill in the left pane, select Gradient fill in the Fill pane, and then do the following:In the Type list, select Radial.Click the button next to Direction, and then click From Corner (second option from the left).Under Gradient stops, click Add or Remove until two stops appear in the drop-down list.Also under Gradient stops, customize the gradient stops as follows:Select Stop 1 from the list, and then do the following:In the Stop position box, enter 0%.Click the button next to Color, and then under Theme Colors click White, Background 1 (first row, first option from the left).Select Stop 2 from the list, and then do the following: In the Stop position box, enter 100%.Click the button next to Color, and then under Theme Colors click White, Background 1, Darker 15% (third row, first option from the left).
  8. SmartArt custom animation effects: pyramid stretch from top(Basic)To reproduce the SmartArt effects on this slide, do the following:On the Home tab, in the Slides group, click Layout, and then clickBlank. On the Insert tab, in the Illustrations group, click SmartArt. In the Choose a SmartArt Graphic dialog box, in the left pane, click Pyramid. In the Pyramid pane, click Inverted Pyramid (third row, first option from the left), and then click OK to insert the graphic into the slide.On the slide, right-click the top layer in the graphic, point to Add Shape, then click Add Shape Before. Select the graphic, and then click one of the arrows on the left border. In the Type your text here dialog box, enter text. (Note: If the text is too long to fit into one line in the bottom layer, split the text into two lines.)Select the graphic. Under SmartArtTools, on the Design tab, in the SmartArtStyles group, do the following: Click ChangeColors, and then under Colorful click Colorful Range - Accent Colors 3 to 4 (third option from the left).Click More, and then under Best Match for Document click Intense Effect (fifth option from the left).On the Home tab, in the Font group, select Calibri from the Font list, select 20 from the Font Size list, click the arrow next to Font Color, and then under Theme Colors click White, Background 1 (first row, first option from the left).Select the graphic. Under SmartArt Tools, on the Format tab, click Size, and then do the following:In the Height box, enter 5.07”.In the Width box, enter 5.53”.Under SmartArt Tools, on the Format tab, click Arrange, click Align, and then do the following:Click Align to Slide.Click Align Middle. Click Align Center. To reproduce the animation effects on this slide, do the following:On the Animations tab, in the Animations group, click CustomAnimation.On the slide, select the graphic. In the CustomAnimation task pane, do the following:Click Add Effect, point to Entrance, and then click MoreEffects. In the Add Entrance Effect dialog box, under Moderate, click Stretch. Under Modify: Stretch, in the Direction list, select From Top.Under Modify: Stretch, in the Speed list, select Fast.Also in the Custom Animation task pane, select the stretch effect. Click the arrow to the right of the stretch effect, and then click EffectOptions. In the Stretch dialog box, on the Smart Art Animation tab, in the Group Graphic list, select One by one.Also in the Custom Animation taskpane, click the double arrow under the expand effect to expand the contents of the list of effects.Press and hold CTRL, and then select all four stretch effects in the Custom Animation task pane. Under Modify: Stretch, in the Start list, select After Previous.To reproduce the background effects on this slide, do the following:Right-click the slide background area, and then click Format Background. In the Format Background dialog box, click Fill in the left pane, select Gradient fill in the Fill pane, and then do the following:In the Type list, select Linear.In the Direction list, click Linear Right (first row, fourth option from the left).Under Gradient stops, click Add or Remove until two stops appear in the drop-down list.Also under Gradient stops, customize the gradient stops as follows:Select Stop 1 from the list, and then do the following:In the Stop position box, enter 0%.Click the button next to Color, and then under Theme Colorsclick White, Background 1 (first row, first option from the left).In the Transparency box, enter 70%.Select Stop 2 from the list, and then do the following: In the Stop position box, enter 100%.Click the button next to Color, and then under Theme Colorsclick White, Background 1, Darker 15% (third row, first option from the left).
  9. SmartArt custom animation effects: upward arrow process(Basic)To reproduce the SmartArt effects on this slide, do the following:On the Home tab, in the Slides group, click Layout, and then clickBlank. On the Insert tab, in the Illustrations group, click SmartArt. In the Choose a SmartArt Graphic dialog box, in the left pane, click Process. In the Process pane, click Upward Arrow (sixth row, third option from the left), and then click OK to insert the graphic into the slide.Select the graphic, and then click one of the arrows on the left border. In the Type your text here dialog box, enter text. (Note: To create a bulleted list below each heading, select the heading text box in the Type your text here dialog box, and then under SmartArtTools, on the Design tab, in the CreateGraphic group, click AddBullet. Enter text into the new bullet text box.)On the slide, select the graphic. Under SmartArtTools, on the Design tab, in the SmartArtStyles group, do the following:Click ChangeColors, and then under Colorful click Colorful Range - Accent Colors 3 to 4 (third option from the left).Click More, and then under Best Match for Document click Intense Effect (fifth option from the left).On the Home tab, in the Font group, select Calibri from the Font list, and then select 24 from the Font Size list.Select the text in the first text box from the left. Under SmartArtTools, on the Format tab, in the WordArtStyles group, click the arrow next to TextFill, and then under Theme Colors clickOliveGreen, Accent 3, Darker 25% (fifth row, seventh option from the left).Select the text in the second text box from the left. Under SmartArtTools, on the Format tab, in the WordArtStyles group, click the arrow next to TextFill, and then under Theme Colors clickAqua, Accent 5, Darker 25% (fifth row, ninth option from the left).Select the text in the third text box from the left. Under SmartArtTools, on the Format tab, in the WordArtStyles group, click the arrow next to TextFill, and then under Theme Colors clickPurple, Accent 4, Darker 25% (fifth row, eighth option from the left).To reproduce the animation effects on this slide, do the following:On the Animations tab, in the Animations group, click CustomAnimation.On the slide, select the graphic. In the CustomAnimation task pane, do the following:Click Add Effect, point to Entrance, and then click MoreEffects. In the Add Entrance Effect dialog box, under Basic, click Wipe. Under Modify: Wipe, in the Direction list, select From Left.Under Modify: Wipe, in the Speed list, select Fast.Also in the Custom Animation task pane, select the wipe effect. Click the arrow to the right of the wipe effect, and then click Effect Options. In the Wipe dialog box, on the SmartArt Animation tab, in the Group graphic list, select One by one.Also in the Custom Animation task pane, click the double arrow under the wipe effect to expand the contents of the list of effects.Also in the Custom Animation task pane, select the second wipe effect and then do the following:Click Change, point to Entrance, and then click More Effects. In the Change Entrance Effect dialog box, under Exciting, click Curve Up.Under Modify: Curve Up,in the Start list, select With Previous. Under Modify: Curve Up,in the Speed list, select Very Fast.Also in the Custom Animation taskpane, select the third wipe effect and then do the following:Click Change, point to Entrance, and then click More Effects.In the Change Entrance Effect dialog box, under Moderate, click Descend.Under Modify: Descend,in the Start list, select With Previous. Under Modify: Descend,in the Speed list, select Very Fast.Click the arrow to the right of the third wipe effect, and then click Timing. In the Descend dialog box, on the Timing tab, in the Delay box, enter 0.5.Also in the Custom Animation task pane, select the fourth wipe effect and then do the following:Click Change, point to Entrance, and then click More Effects.In the Change Entrance Effect dialog box, under Exciting, click Curve Up.Under Modify: Curve Up,in the Start list, select On Click. Under Modify: Curve Up,in the Speed list, select Very Fast.Also in the Custom Animation taskpane, select the fifth wipe effect and then do the following:Click Change, point to Entrance, and then click More Effects.In the Change Entrance Effect dialog box, under Moderate, click Descend.Under Modify: Descend,in the Start list, select After Previous. Under Modify: Descend,in the Speed list, select Very Fast.Also in the Custom Animation task pane, select the sixth wipe effect and then do the following:Click Change, point to Entrance, and then click More Effects.In the Change Entrance Effect dialog box, under Exciting, click Curve Up.Under Modify: Curve Up,in the Start list, select On Click. Under Modify: Curve Up,in the Speed list, select Very Fast.Also in the Custom Animation task pane, select the seventh wipe effect and then do the following:Click Change, point to Entrance, and then click More Effects.In the Change Entrance Effect dialog box, under Moderate, click Descend.Under Modify: Descend,in the Start list, select After Previous. Under Modify: Descend,in the Speed list, select Very Fast.To reproduce the background effects on this slide, do the following:Right-click the slide background area, and then click Format Background. In the Format Background dialog box, click Fill in the left pane, select Gradient fill in the Fill pane, and then do the following:In the Type list, select Linear.In the Direction list, click Linear Right (first row, fourth option from the left).Under Gradient stops, click Add or Remove until two stops appear in the drop-down list.Also under Gradient stops, customize the gradient stops that you added as follows:Select Stop 1 from the list, and then do the following:In the Stop position box, enter 39%.Click the button next to Color, and then under Theme Colors click White, Background 1 (first row, first option from the left).Select Stop 2 from the list, and then do the following: In the Stop position box, enter 100%.Click the button next to Color, and then under Theme Colors click Olive Green, Accent 3, Lighter 60%(third row, seventh option from the left).To increase the size of the SmartArt graphic so that it spans the entire slide, do the following:On the slide, select the graphic. Point to the top right corner of the graphic border, until a two-headed arrow appears. Drag the top right corner of the graphic border into the top right corner of the slide. Point to the bottom left corner of the graphic border, until a two-headed arrow appears. Drag the bottom left corner of the graphic border into the bottom left corner of the slide.
  10. SmartArt custom animation effects: trapezoid list(Basic)To reproduce the SmartArt effects on this slide, do the following:On the Home tab, in the Slides group, click Layout, and then clickBlank. On the Insert tab, in the Illustrations group, click SmartArt. In the Choose a SmartArt Graphic dialog box, in the left pane, click List. In the List pane, click Trapezoid List (fifth row, second option from the left), and then click OK to insert the graphic into the slide.To create a fourth shape in the graphic, select the third shape from the left, and then under SmartArtTools, on the Design tab, in the CreateGraphic group, click the arrow under AddShape and select AddShapeAfter.Select the graphic, and then click one of the arrows on the left border. In the Type your text here dialog box, enter text. (Note: To create a bulleted list below each heading, select the heading text box in the Type your text here dialog box, and then under SmartArtTools, on the Design tab, in the CreateGraphic group, click AddBullet. Enter text into the new bullet text box.)On the slide, select the graphic. Under SmartArtTools, on the Design tab, in the SmartArtStyles group, do the following:Click ChangeColors, and then under Accent 5 click Gradient Range - Accent 5 (third option from the left).Click More, and then under 3-D click Polished (first row, first option from the left).On the Home tab, in the Font group, select TwCen MT Condensed from the Font list, and then select 24 from the Font Size list. Select the text in one of the headings. On the Home tab, in the Font group, select 28 from the Font Size list. Repeat this process for the text in the other headings. Press and hold SHIFT, and then select all four of the quadrangles in the graphic. On the Home tab, in the bottom right corner of the Drawing group, click the Format Shape dialog box launcher. In the Format Shape dialog box, in the left pane, click Text Box. In the Text Box pane, under Text layout, in the Vertical alignment list, select Middle.Select the graphic. Under SmartArt Tools, on the Format tab, click Size, and then do the following:In the Height box, enter 3.74”.In the Width box, enter 6.67”.Under SmartArt Tools, on the Format tab, click Arrange, click Align, and then do the following:Click Align to Slide.Click Align Middle. Click Align Center. To reproduce the animation effects on this slide, do the following:On the Animations tab, in the Animations group, click CustomAnimation.On the slide, select the graphic. In the CustomAnimation task pane, do the following:Click Add Effect, point to Entrance, and then click MoreEffects. In the Add Entrance Effect dialog box, under Moderate, click Stretch. Under Modify: Stretch, in the Direction list, select From Right.Under Modify: Stretch, in the Speed list, select Fast.Also in the CustomAnimation task pane, click Add Effect, point to Motion Paths, and then click Right. On the slide, right-click the motion path effect, and then click ReversePathDirection.Press and hold CTRL, and then select both animation effects in the Custom Animation task pane. Click the arrow to the right of the secondanimation effect (right motion path), and then click EffectOptions. In the Motion Path dialog box, on the SmartArt Animation tab, in the Group graphic list, select One by one.Also in the Custom Animation task pane, click the double arrow under each of the animation effects to expand the contents of the list of effects.Press and hold CTRL, and then select the first, second, third, and fourth animation effects (stretch effects) in the Custom Animation task pane. Under Modify: Stretch, in the Start list, select After Previous.Press and hold CTRL, select the fifth, sixth, seventh, and eighth animation effects (right motion paths) in the Custom Animation task pane, and then do the following: Under Modify: Right, in the Start list, select With Previous.Under Modify: Right, in the Speed list, select Fast.Also in the Custom Animation task pane, do the following to reorder the list of effects:Drag the fifth animation effect (first right motion path) until it is second in the list of effects.Drag the sixth animation effect (second right motion path) until it is fourth in the list of effects.Drag the seventh animation effect (third right motion path) until it is sixth in the list of effects.To reproduce the background effects on this slide, do the following:Right-click the slide background area, and then click Format Background. In the Format Background dialog box, click Fill in the left pane, select Gradient fill in the Fill pane, and then do the following:In the Type list, select Radial.In the Direction list, click From Corner (fourth option from the left).Under Gradient stops, click Add or Remove until two stops appear in the drop-down list.Also under Gradient stops, customize the gradient stops that you added as follows:Select Stop 1 from the list, and then do the following:In the Stop position box, enter 0%.Click the button next to Color, and then under Theme Colors click White, Background 1 (first row, first option from the left).Select Stop 2 from the list, and then do the following: In the Stop position box, enter 100%.Click the button next to Color, and then under Theme Colors clickWhite, Background 1, Darker 35% (fifth row, first option from the left).
  11. SmartArt custom animation effects: vertical chevron list with bright colors(Basic)To reproduce the SmartArt effects on this slide, do the following:On the Home tab, in the Slides group, click Layout, and then clickBlank. On the Insert tab, in the Illustrations group, click SmartArt. In the Choose a SmartArt Graphic dialog box, in the left pane, click List. In the List pane, click Vertical Chevron List (fourth row, fourth option from the left), and then click OK to insert the graphic into the slide.Select the graphic, and then click one of the arrows on the left border. In the Type your text here dialog box, enter text. Select the graphic. Under SmartArt Tools, on the Format tab, click Size, and then do the following:In the Height box, enter 5.35”.In the Width box, enter 6.86”.Under SmartArt Tools, on the Format tab, click Arrange, click Align, and then do the following:Click Align to Slide.Click Align Middle. Click Align Center. On the slide, select the graphic. On the Design tab, in the Themes group, click Colors,and then under Built-in click Solstice. (Note: If this action is taken in a PowerPoint presentation containing more than one slide, the color scheme will be applied to all of the slides.)Under SmartArtTools, on the Design tab, in the SmartArtStyles group, do the following:Click ChangeColors and then under Colorful click Colorful Range – Accent Colors 4 to 5 (fourth option from the left).Click More, and then under 3-D click Polished (first row, first option from the left).Press and hold CTRL, and then select the three chevron shapes (topic headings). On the Home tab, in the Font group, select Gill Sans MT Condensed from the Font list, and then enter 35 in the Font Size box.Press and hold CTRL, and then select the three rectangles (bulleted lists). On the Home tab, in the Font group, select Gill Sans MT Condensed from the Font list, and then enter 33 in the Font Size box. Under SmartArtTools, on the Format tab, in the Shape Styles group, click the arrow next to Shape Fill, point to Gradient, and then click More Gradients. In the Format Shape dialog box, click Fill in the left pane, select Gradient fill in the Fill pane, and then do the following:In the Type list, select Linear.Click the button next to Direction, and then click Linear Down (first row, second option from the left).Under Gradient stops, click Add or Remove until two stops appear in the drop-down list.Also under Gradient stops, customize the gradient stops as follows:Select Stop 1 from the list, and then do the following:In the Stop position box, enter 20%.Click the button next to Color, and then under Theme Colors click White, Background 1 (first row, first option from the left).In the Transparency box, enter 73%.Select Stop 2 from the list, and then do the following: In the Stop position box, enter 100%.Click the button next to Color, and then under Theme Colors click White, Background 1 (first row, first option from the left).In the Transparency box, enter 0%.To reproduce the animation effects on this slide, do the following:On the Animations tab, in the Animations group, click CustomAnimation.On the slide, select the graphic. In the CustomAnimation task pane, do the following:Click Add Effect, point to Entrance, and then click MoreEffects. In the Add Entrance Effect dialog box, under Moderate, click Descend.Under Modify: Descend, in the Speed list, select VeryFast.Also in the CustomAnimation task pane, select the animation effect. Click the arrow to the right of the animation effect, and then click EffectOptions. In the Descend dialog box, on the SmartArtAnimation tab, in the Group graphic list, select One by one, and then click OK.Also in the Custom Animation taskpane, click the double arrow under the animation effect to expand the contents of the list of effects, and then do the following:Select the first animation effect (descend effect for the first topic heading). Under Modify: Descend, in the Start list, select After Previous. Press and hold CTRL, select the second, fourth, and sixthanimation effects (descend effects for the bulleted lists), and then do the following:Click Change, point to Entrance, and then click More Effects. In the Change Entrance Effect dialog box, under Moderate, click Stretch, and then click OK.Under Modify: Stretch, in the Direction list, select From Left. Under Modify: Stretch, in the Speed list, select Fast.To reproduce the background effects on this slide, do the following:Right-click the slide background area, and then click Format Background. In the Format Background dialog box, click Fill in the left pane, select Gradient fill in the Fill pane, and then do the following:In the Type list, select Linear.In the Direction list, click Linear Up (second row, second option from the left).Under Gradient stops, click Add or Remove until two stops appear in the drop-down list.Also under Gradient stops, customize the gradient stops that you added as follows:Select Stop 1 from the list, and then do the following:In the Stop position box, enter 20%.Click the button next to Color, and then under Theme Colors click White, Background 1 (first row, first option from the left).In the Transparency box, enter 0%.Select Stop 2 from the list, and then do the following: In the Stop position box, enter 100%.Click the button next to Color, and then under Theme Colors clickWhite, Background 1, Darker 50% (sixth row, first option from the left).
  12. SmartArt custom animation effects: horizontal picture list(Intermediate)To reproduce the SmartArt effects on this page, do the following:On the Home tab, in the Slides group, click Layout, and then clickBlank. On the Insert tab, in the Illustrations group, click SmartArt.In the Choose a SmartArt Graphic dialog box, in the left pane, click List. In the List pane, double-click Horizontal Picture List (third row, third option from the left) to insert the graphic into the slide. Press and hold CTRL, and select the picture placeholder and text shape (top and bottom shape) in one of the objects. Under SmartArt Tools,on the Design tab, in the Create Graphic group, click Add Shape, and then click Add Shape After. Repeat this process one more time for a total of five picture placeholders and text shapes. Select the graphic. Under SmartArt Tools, on the Format tab, click Size, and then do the following:In the Height box, enter 4.44”.In the Width box, enter 9.25”.Under SmartArt Tools, on the Format tab, click Arrange, click Align, and then do the following:Click Align to Slide.Click Align Middle. Click Align Center. Select the graphic, and then click one of the arrows on the left border. In the Type your text here dialog box, enter text.Press and hold CTRL, and then select all five text boxes in the graphic. On the Home tab, in the Font group, select Corbel from the Font list,and then enter 22 in the Font Size box.Select the graphic. Under SmartArtTools, on the Design tab, in the SmartArtStyles group, do the following: Click ChangeColors, and then under Colorful click Colorful Range – Accent Colors 2 to 3 (second option from the left).Click More, and then under Best Match for Document click Moderate Effect (fourth option from the left).Select the rounded rectangle at the top of the graphic. Under SmartArtTools, on the Format tab, in the ShapeStyles group, click the arrow next to ShapeFill, and then under Theme Colors clickWhite, Background 1, Darker 35% (fifth row, first option from the left).Click each of the five picture placeholders in the SmartArt graphic, select a picture, and then click Insert.To reproduce the animation effects on this slide, do the following:On the Animations tab, in the Animations group, click CustomAnimation.On the slide, select the graphic. In the CustomAnimation task pane, do the following:Click Add Effect, point to Entrance, and then click MoreEffects. In the Add Entrance Effect dialog box, under Moderate, click Ascend. Under Modify: Ascend, in the Speed list, select Fast.Also in the Custom Animation taskpane, click the arrow to the right of the animation effect, and then click Effect Options. In the Ascend dialog box, on the SmartArtAnimation tab, in the Group Graphic list, select One by one.Also in the Custom Animation task pane, click the double-arrow below the animation effect to expand the list of effects.Also in the Custom Animation task pane, do the following to modify the list of effects:Select the first animation effect, and then do the following:Click Change, point toEntrance, and then clickMoreEffects. In the Change Entrance Effect dialog box, under Moderate, click Compress. Under Modify: Compress, in the Start list, select With Previous.Press and hold CTRL, select the third, fifth, seventh, ninth, and 11th animation effects (effects for the text shapes), and then do the following:Click Change, point toEntrance, and then clickMoreEffects. In the Change Entrance Effect dialog box, under Basic, click Peek In, and then click OK. Under Modify: Peek In, in the Direction list, select From Top.Under Modify: Peek In, in the Speed list, select Fast.Press and hold CTRL, select the second, fourth, sixth, eighth, and 10th animation effects (effects for the pictures). Under Modify: Ascend, in the Start list, selectAfter Previous.To reproduce the background effects on this slide, do the following:Right-click the slide background area, and then click Format Background. In the Format Background dialog box, click Fill in the left pane, select Gradient fill in the Fill pane, and then do the following:In the Type list, select Linear.Click the button next to Direction, and then click Linear Down (first row, second option from the left).Under Gradient stops, click Add or Remove until two stops appear in the drop-down list.Also under Gradient stops, customize the gradient stops as follows:Select Stop 1 from the list, and then do the following:In the Stop position box, enter 0%.Click the button next to Color, click More Colors, and then in the Colors dialog box, on the Custom tab, enter values for Red: 130, Green: 126, and Blue: 102.Select Stop 2 from the list, and then do the following: In the Stop position box, enter 71%.Click the button next to Color, and then click Black, Text 1(first row, second option from the left).
  13. SmartArt custom animation effects: vertical picture list(Intermediate)To reproduce the SmartArt effects on this slide, do the following:On the Home tab, in the Slides group, click Layout, and then clickBlank. On the Insert tab, in the Illustrations group, click SmartArt. In the Choose a SmartArt Graphic dialog box, in the left pane, click List. In the List pane, double-click Vertical Picture List (fourth row, first option from the left) to insert the graphic into the slide. To create a fourth shape in the graphic, select the third shape from the top, and then under SmartArtTools, on the Design tab, in the CreateGraphic group, click the arrow next to AddShape, and then click AddShapeBefore. Repeat this process to create a fifth shape.Select the graphic. Under SmartArt Tools, on the Format tab, click Size, and then do the following:In the Height box, enter 6.38”.In the Width box, enter 7.91”.Under SmartArt Tools, on the Format tab, click Arrange, click Align, and then do the following:Click Align to Slide.Click Align Middle. Click Align Center. Select the graphic, and then click one of the arrows on the left border. In the Type your text here dialog box, click each of the second-level bullets and then press DELETE until there are only three first-level bullets remaining (one for each shape). Enter text for each shape into the first-level bullets.On the slide, select the graphic. On the Home tab, in the Font group, select 14 from the Font Size list.Under SmartArtTools, on the Design tab, in the SmartArtStyles group, click More,and then under Best Match for Document click Moderate Effect (fourth option from the left). On the Design tab, in the Themes group, click Colors, and then click Civic. (Note: If this action is taken in a PowerPoint presentation containing more than one slide, the theme colors will be applied to all of the slides.) Under SmartArtTools, on the Design tab, in the SmartArtStyles group, click Change Colors, and then under Colorful click Colorful Range – Accent Colors 3 to 4 (third option from the left). Click each of the five picture placeholders in the graphic, and then in the Insert Picture dialog box, select a picture and click Insert.Press and hold CTRL, and then select all five of the pictures on the slide. Under SmartArtTools, on the Format tab, in the Shapes group, click ChangeShape, and then under Rectangles clickRoundDiagonalCornerRectangle (ninth option from the left).Under SmartArtTools, on the Format tab, in the Shape Styles group, click Shape Effects, point to Glow, and then do the following:Under Glow Variations, select Accent color 1, 5 pt glow (first row, first option from the left).Point to More Glow Colors, and then under Theme Colors click White, Background 1 (first row, first option from the left).Press and hold CTRL, and then select all of the larger rounded rectangles. Under SmartArtTools, on the Format tab, in the Shapes group, click ChangeShape, and then under Rectangles clickRoundDiagonalCornerRectangle (ninth option from the left). To reproduce the animation effects on this slide, do the following:On the Animations tab, in the Animations group, click CustomAnimation.On the slide, select the graphic. In the Custom Animation taskpane, do the following:Click Add Effect, point to Entrance, and then clickMoreEffects. In the Add Entrance Effect dialog box, underSubtle, clickFade,and then click OK. Under Modify: Fade, in the Speed list, selectFast. Click Add Effect, point to Motion Paths, and then clickRight. Under Modify: Right, do the following:In the Start list, selectWith Previous.In the Speed list, select Fast. On the slide, right-click the right motion path and then click ReversePathDirection.Press and hold CTRL, and then select the two animationeffects in the Custom Animation task pane. Click the arrow to the right of one of those effects, and then clickEffectOptions. In theEffect Options dialog box, on the SmartArtAnimation tab, in the Group Graphic list, select One by One.Also in the CustomAnimation task pane, do the following:Click the double arrows under each effect to expand the list of effects.Select the first animation effect (fade effect for the first rectangle). Under Modify: Fade, in the Start list, select With Previous.Also in the CustomAnimation task pane, select the 11th animation effect (motion path for the first picture). On the slide, point to the starting point (green arrow) of the selected motion path until the cursor becomes a two-headed arrow. Press and hold SHIFT to constrain the path to a straight horizontal line, and then drag the starting point to the left of the endpoint (red arrow). Also in the CustomAnimation task pane, do the following:Drag the 11th effect until it is second in the list of effects. Drag the 12th effect (motion path for the first large rectangle) until it is fourth in the list of effects. Also in the CustomAnimation task pane, select the 13th animation effect (motion path for the second picture). On the slide, point to the starting point (green arrow) of the selected motion path until the cursor becomes a two-headed arrow. Press and hold SHIFT, and then drag the starting point to the left of the endpoint (red arrow), into the same position as the green arrow for the first picture motion path. Also in the CustomAnimation task pane, do the following:Drag the 13th animationeffect until it is sixth in the list of effects. Under Modify: Right, in the Start list, select With Previous.Drag the 14th animation effect (motion path for the second large rectangle) until it is eighth in the list of effects. Select the 15th animation effect (motion path for the third picture). On the slide, point to the starting point (green arrow) of the selected motion path until the cursor becomes a two-headed arrow. Press and hold SHIFT, and then drag the starting point to the left of the endpoint (red arrow), into the same position as the starting point for the first picture motion path. Also in the CustomAnimation task pane, do the following:Drag the 15th animation effect until it is 10th in the list of effects. Under Modify: Right, in the Start list, select With Previous.Drag the 16th animation effect (motion path for the third large rectangle) until it is 12th in the list of effects. Select the 17th animation effect (motion path for the fourth picture). On the slide, point to the starting point (green arrow) of the selected motion path until the cursor becomes a two-headed arrow. Press and hold SHIFT, and then drag the starting point to the left of the endpoint (red arrow), into the same position as the starting point for the first picture motion path. Also in the CustomAnimation task pane, do the following:Dragthe 17th animation effect until it is 14th in the list of effects. Under Modify: Right, in the Start list, select With Previous.Drag the 18th animation effect (motion path for the fourth large rectangle) until it is 16th in the list of effects.Select the 19th animation effect (motion path for the fifth picture). On the slide, point to the starting point (green arrow) of the selected motion path until the cursor becomes a two-headed arrow. Press and hold SHIFT, and then drag the starting point to the left of the endpoint (red arrow), into the same position as the starting point for the first picture motion path.Also in the CustomAnimation task pane, drag the 19th animation effect until it is 18th in the list of effects. Under Modify: Right, in the Start list, select With Previous.To reproduce the background effects on this slide, do the following:Right-click the slide background area, and then click Format Background. In the Format Background dialog box, click Fill in the left pane, select Gradient fill in the Fill pane, and then do the following:In the Type list, select Radial.Click the button next to Direction, and then click From Corner (fifth option from the left).Under Gradient stops, click Add or Remove until two stops appear in the drop-down list.Also under Gradient stops, customize the gradient stops as follows:Select Stop 1 from the list, and then do the following:In the Stop position box, enter 0%.Click the button next to Color, and then under Theme Colors click White, Background 1 (first row, first option from the left).Select Stop 2 from the list, and then do the following: In the Stop position box, enter 100%.Click the button next to Color, and then under Theme Colors click White, Background 1, Darker 25%(fourth row, first option from the left).
  14. SmartArt custom animation effects: stretch and curve up(Intermediate)To reproduce the SmartArt effects on this slide, do the following:On the Home tab, in the Slides group, click Layout, and then click Blank.On the Insert tab, in the Illustrations group, click SmartArt. In the Choose a SmartArt Graphic dialog box, in the left pane, click List. In the List pane, click Vertical Block List (fourth row, third option from the left), and then click OK to insert the graphic into the slide.Select the graphic, and then click one of the arrows on the left border. In the Type your text here dialog box, enter text for each of the rectangles.Press and hold CTRL, and select each of the second-level rectangles on the slide. Drag the left sizing handle of one of the second-level rectangles to the left 0.5” to increase the width of the second-level rectangles. (Note: The first-level rectangles (rounded rectangles) will decrease in width at the same time.)Select the SmartArt graphic. Under SmartArtTools, on the Design tab, in the SmartArtStyles group, click SmartArtStyles, and under BestMatch for Document select IntenseEffect (fifth option from the left).Press and hold CTRL, and then select each of the first-level rectangles (rounded rectangles) in the SmartArt graphic.Under SmartArtTools, on the Format tab, in the WordArtStyles group, click the arrow to the right of TextFill, and under ThemeColors select White, Background 1, Darker 25%. (fourth row, first option from the left). Under SmartArtTools, on the Format tab, in the ShapeStyles group, click the arrow to the right of ShapeFill and under ThemeColors select White, Background 1 (first row, first option from the left). Select the top, second-level rectangle in the SmartArt graphic.Under SmartArtTools, on the Format tab, in the ShapeStyles group, click the arrow to the right of ShapeFill and under ThemeColors select Olive Green, Accent 3. (first row, seventh option from the left).Select the center, second-level rectangle in the SmartArt graphic.Under SmartArtTools, on the Format tab, in the ShapeStyles group, click the arrow to the right of ShapeFill and under ThemeColors select Olive Green, Accent 3, Lighter 40% (fourth row, seventh option from the left).Select bottom,second-level rectangle in the SmartArt graphic.Under SmartArtTools, on the Format tab, in the ShapeStyles group, click the arrow to the right of ShapeFill and under ThemeColors select Olive Green, Accent 3, Lighter 60% (third row, seventh option from the left).Press and hold CTRL, and select each of the second-level rectangles.On the Home tab, in the Font group, click Text Shadow, and then in the FontColor list, select White, Background 1 (first row, first option from the left). To reproduce the animation effects on this slide, do the following:On the Animation tab, in the Animation group, click CustomAnimation. Select the SmartArt graphic, and then in the CustomAnimation task pane, do the following:Click AddEffect, point to Entrance and select MoreEffects. In the AddEntranceEffect dialog box, under Exciting select Curve Up, and click OK. Click the arrow to the right of the curve up entrance effect (first effect) and select EffectOptions. In the CurveUp dialog box, do the following:On the Timing tab, in the Start list, select AfterPrevious.On the Timing tab, in the Speed list, select Fast.On the SmartArtAnimation tab, in the Groupgraphic list select One by one.Click the double arrow under the curve-up entrance effect (first effect) to expand the list of effects.Press and hold CTRL, and select the second, fourth, and sixth effects (curve-up entrance effects). Click Change, point to Entrance, and select MoreEffects. In the ChangeEntranceEffects dialog box, under Moderate, select Stretch.Press and hold CTRL, and select the second, fourth, and sixth effects. Under Modify: Stretch,do the following:In the Direction list, select FromTop.In the Speed list, select Fast. To reproduce the background effects on this slide, do the following:Right-click the slide background, and then click Format Background. In the Format Background dialog box, click Fill in the left pane, select Gradient fill in the Fill pane, and then do the following:In the Type list, select Radial.In the Direction list, click From Center (third option from the left).Under Gradient stops, click Add or Remove until two stops appear in the drop-down list.Also under Gradient stops, customize the gradient stops as follows:Select Stop 1 from the list, and then do the following:In the Stop position box, enter 33%.Click the button next to Color, and then under Theme Colors click White, Background 1 (first row, the first option from the left).Select Stop 2 from the list, and then do the following: In the Stop position box, enter 100%.Click the button next to Color, and then under Theme Colors click White, Background 1, Darker 15% (third row, first option from the left).
  15. SmartArt custom animation effects: basic radial(Intermediate)To reproduce the SmartArt on this slide, do the following:On the Home tab, in the Slides group, click Layout, and then clickBlank. On the Insert tab, in the Illustrations group, click SmartArt. In the Choose a SmartArt Graphic dialog box, in the left pane, click Relationship. In the Relationship pane, click Basic Radial (sixth row, second option from the left), and then click OK to insert the graphic into the slide.On the slide, select the SmartArtgraphic, and then click one of the arrows on the left border. In the Type your text here dialog box, in the top level bullet, enter the text for the center circle of the graphic. In the second-level bullets, enter the text for all the other shapes in the SmartArt graphic. With the SmartArt graphic still selected, on the Design tab, in the Themes group, click Colors, and then select Median. Under SmartArtTools, on the Format tab, in the Size group, do the following:In the ShapeHeight box, enter 5”.In the ShapeWidth box, enter 7.5”.Under SmartArtTools, on the Design tab, in the SmartArtStyles group, click SmartArtStyles, and then under Best Match for Document select IntenseEffect (fifth option from the left).On the Home tab, in the Font group, click the button next to FontColor, and then under ThemeColors select Black, Text 1 (first row, second option from the left). On the Home tab, in the bottom right corner of the Drawing group, click the FormatShape dialog box launcher. In the FormatShape dialog box, click 3-D Format in the left pane, and in the 3-D Format pane, under Surface, do the following:In the Material list, under SpecialEffect, select SoftEdge (first row, second option from the left).In the Lighting list, under Neutral, select Harsh (first row, fourth option from the left).In the Angle box, enter 30°.Press and hold CTRL, and select all five shapes in the SmartArt graphic. On the Home tab, in the bottom right corner of the Drawing group, click the FormatShape dialog box launcher. In the FormatShape dialog box, click Shadow in the left pane. In the Shadow pane, in the Presets list, under Outer select OffsetBottom (first row, second option from the left), and then do the following:In the Transparency box, enter 65%.In the Size box, enter 103%.In the Blur box, enter 9 pt.In the Angle box, enter 90°.In the Distance box, enter 3 pt.To reproduce the SmartArt effects on this slide, do the following:On the slide, select the center circle in the SmartArt graphic, and then on the Home tab, in the bottom right corner of the Drawing group, click the FormatShape dialog box launcher. In the FormatShape dialog box, click 3-D Format in the left pane, and in the 3-D Format pane do the following:Under Bevel, in the Top list, under Bevel, select Circle (first row, first option from the left).Also under Bevel, to the right of the Top list, in the Width box, enter 24 pt. Also under Bevel, to the right of the Top list, in the Height box, enter 12 pt.On the slide, select the top circle in the SmartArt graphic, and then on the Home tab, in the bottom right corner of the Drawing group, click the FormatShape dialog box launcher. In the FormatShape dialog box, click Fill in the left pane, and in the Fill pane do the following:Click Solidfill.Click the button next to Color, and then under ThemeColors select Orange, Accent 2 (first row, sixth option from the left).Also in the FormatShape dialog box, click 3-D Format in the left pane, and in the 3-D Format pane do the following:Under Bevel, in the Top list, under Bevel, select Circle (first row, first option from the left).Also under Bevel, to the right of the Top list, in the Width box, enter 20 pt. Also under Bevel, to the right of the Top list, in the Height box, enter 15 pt.Press and hold SHIFT, and then on the top circle, drag a corner adjustment handle toward the center to decrease the size.On the Home tab, in the Font group, in the Font Size box, enter 20.Drag the top circle approximately 0.5” to the right.Select the right circle in the SmartArt graphic, and then on the Home tab, in the bottom right corner of the Drawing group, click the FormatShape dialog box launcher. In the FormatShape dialog box, click Fill in the left pane, and in the Fill pane do the following:Click Solidfill.Click the button next to Color, and then under ThemeColors click Gold, Accent 4 (first row, eighth option from the left).Also in the FormatShape dialog box, click 3-D Format in the left pane, and in the 3-D Format pane do the following:Under Bevel, in the Top list, under Bevel, select Circle (first row, first option from the left).Also under Bevel, to the right of the Top list, in the Width box, enter 24 pt. Also under Bevel, to the right of the Top list, in the Height box, enter 12 pt.Press and hold SHIFT, and then on the right circle, drag a corner adjustment handle toward the center to decrease the size.On the Home tab, in the Font group, in the Font Size box, enter 28 pt.Drag the right circle slightly toward the right corner of the slide.One the slide, select the bottom circle in the SmartArt graphic, and then on the Home tab, in the bottom right corner of the Drawing group, click the FormatShape dialog box launcher. In the FormatShape dialog box, click Fill in the left pane, and in the Fill pane do the following:Click Solidfill.Click the button next to Color, and then under ThemeColors click Green, Accent 5 (first row, ninth option from the left)Also in the FormatShape dialog box, click 3-D Format in the left pane, and in the 3-D Format pane do the following:Under Bevel, in the Top list, select Circle (first row, first option from the left).Also under Bevel, to the right of the Top list, in the Width box enter 24 pt. Also under Bevel, to the right of the Top list, in the Height box enter 12 pt.Press and hold SHIFT, and then on the bottom circle, drag a corner adjustment handle away from the center to increase the size.On the Home tab, in the Font group, in the Font Size box, enter 28.On the slide, select the left circle in the SmartArt graphic, and then on the Home tab, in the bottom right corner of the Drawing group, click the FormatShape dialog box launcher. In the FormatShape dialog box, click Fill in the left pane, and in the Fill pane do the following:Click Solidfill.In the Color list, under ThemeColors select Olive Green, Accent 3 (first row, seventh option from the left).Also in the FormatShape dialog box, click 3-D Format in the left pane, and in the 3-D Format pane do the following:Under Bevel, in the Top list, under Bevel, select Circle (first row, first option from the left).Also under Bevel, to the right of the Top list, in the Width box, enter 30 pt. Also under Bevel, to the right of the Top list, in the Height box, enter 30 pt.Press and hold SHIFT, and then on the left circle, drag a corner adjustment handle toward the center to decrease the size.On the Home tab, in the Font group, in the Font Size box, enter 40, and then click Bold.Drag the top circle slightly toward the bottom of the slide.To reproduce the line effects on this slide, do the following:Press and hold CTRL, and then select each of the four lines connecting the circles in the SmartArt graphic. On the Home tab, in the bottom right corner of the Drawing group, click the FormatShape dialog box launcher. In the FormatShape dialog box, click Line Color in the left pane, select Gradient line in the Line Color pane, and then do the following:In the Type list, select Linear.In the Direction list, select Linear Right (first row, fourth option from the left).Under Gradient stops, click Add or Remove until two stops appear in the drop-down list.Also under Gradient stops, customize the gradient stops as follows:Select Stop 1 from the list, and then do the following:In the Stop position box, enter 0%.Click the button next to Color, and then under Theme Colors click Black, Text 1 (first row, second option from the left). Select Stop 2 from the list, and then do the following: In the Stop position box, enter 100%.Click the button next to Color, and then under Theme Colors click Black, Text 1 (first row, second option from the left). In the Transparency box, enter 100%.Also in the FormatShape dialog box, clickLineStyle in the left pane, and in the LineStyle pane do the following:In the Width box, enter 3.5 pt.In the Dashtype list, select RoundDot (second option from the top).To reproduce the animation effects on this slide, do the following:On the Animation tab, in the Animations group, click CustomAnimation. On the slide, select the SmartArt graphic, and then in the CustomAnimation task pane, to the following:Click AddEffect, point to Entrance, and select MoreEffects. In the AddEntranceEffect dialog box, under Moderate, select Zoom.Click the arrow to the right of the zoom entrance effect, and then select EffectOptions. In the Zoom dialog box, do the following:On the Effect tab, in the Zoom list, select In from ScreenCenter.On the Timing tab, in the Speed list, select 1 seconds (Fast). On the SmartArtAnimation tab, in the Group graphic list, select From center one by one. In the CustomAnimation task pane, expand the contents of the list by clicking the double arrow under the zoom entrance effect, and then do the following:Select the first effect (zoom entrance effect), and under Modify: Zoom, in the Start list, select WithPrevious.Select the second effect (zoom entrance effect), click Change, point to Entrance, and then select MoreEffects. In the ChangeEntranceEffect dialog box, under Basic, select Wipe.Click the arrow to the right of the second effect (now wipe effect) and select Effect Options, and then in the Wipe dialog box dothe following:On the Effect tab, in the Direction list, select FromBottom.On the Timing tab, in the Delay box, enter 0.5.On the Timing tab, in the Speed list, select 0.5 seconds (VeryFast).Select the fourth effect (zoom entrance effect), click Change, point to Entrance, and select MoreEffects. In the ChangeEntranceEffect dialog box, under Basic, select Wipe.Click the arrow to the right of the fourth effect (now wipe effect) and select Effect Options, and then in the Wipe dialog box, dothe following:On the Effect tab, in the Direction list, select FromLeft.On the Timing tab, in the Delay box, enter 0.5.On the Timing tab, in the Speed list, select 0.5 seconds (VeryFast).Select the sixth effect (zoom entrance effect), click Change, point to Entrance, and select MoreEffects. In the ChangeEntranceEffect dialog box, under Basic, select Wipe.Click the arrow to the right of the sixth effect (now wipe effect) and select Effect Options, and then in the Wipe dialog box, dothe following:On the Effect tab, in the Direction list, select FromLeft.On the Timing tab, in the Delay box, enter 0.5.On the Timing tab, in the Speed list, select 0.5 seconds (VeryFast).Select the eighth effect (zoom entrance effect), click Change, point to Entrance, and then select MoreEffects. In the ChangeEntranceEffect dialog box, under Basic, select Wipe.Click the arrow to the right of the eighth effect (now wipe effect) and select Effect Options, and then in the Wipe dialog box, dothe following:On the Effect tab, in the Direction list, select FromRight.On the Timing tab, in the Delay box, enter 0.5.On the Timing tab, in the Speed list, select 0.5 seconds (VeryFast).To reproduce the background on this slide, do the following:Right-click the slide background area, and then click Format Background. In the Format Background dialog box, click Fill in the left pane, select Gradient fill in the Fill pane, and then do the following:In the Type list, select Radial.In the Direction, list click From Center (third option from the left).Under Gradient stops, click Add or Remove until two stops appear in the drop-down list.Also under Gradient stops, customize the gradient stops as follows:Select Stop 1 from the list, and then do the following:In the Stop position box, enter 0%.Click the button next to Color, and then under Theme Colors click Black, Text 1, Lighter 35% (third row, second option from the left). Select Stop 2 from the list, and then do the following: In the Stop position box, enter 100%.Click the button next to Color, and then under Theme Colors clickBlack, Text 1 (first row, second option from the left).
  16. SmartArt custom animation effects: vertical block list(Intermediate)To reproduce the SmartArt effects on this slide, do the following:On the Home tab, in the Slides group, click Layout, and then clickBlank. On the Insert tab, in the Illustrations group, click SmartArt. In the Choose a SmartArt Graphic dialog box, in the left pane, click List. In the List pane, click Vertical Block List (fourth row, third option from the left), and then click OK to insert the graphic into the slide.To create a fourth row, do the following:Select the third block shape (the shape on the left side) at the bottom of the graphic, under SmartArtTools, on the Design tab, in the CreateGraphic group, click the arrow next to AddShape, and select AddShapeAfter.To add a bulleted rectangle next to the fourth block shape, select the fourth block shape, and then under SmartArtTools, on the Design tab, in the CreateGraphic group, click AddBullet.To enter numbers and text in the blocks and rectangles, select the graphic, and then click one of the arrows on the left border. In the Type your text here dialog box, enter text for each shape. (Note: In the example slide, the first-level text boxes contain “1,” “2,” “3,” and “4.” There should be only one second-level text box for each first-level box (delete the second bullet), and they contain “First statement,” “Second statement,” and so on.)To reproduce the rectangle effects on this slide, do the following:Press and hold CTRL, and then select each of the rectangles (on the right side of the graphic).Under SmartArtTools, on the Format tab, in the Shapes group, click the arrow to the right of ChangeShape, and under Rectangles select SnipDiagonalCornerRectangle (fifth option from the left).With the rectangles still selected, drag one of the left center adjustment handles 1” to the left to lengthen all four rectangles.With the rectangles still selected, on the Home tab, in the Font group, in the FontSize box, select 36, and in the FontColor list, under ThemeColors select White, Background 1 (first row, first option from the left). With the rectangles still selected, on the Home tab, in the bottom right corner of the Paragraph group, click the Paragraph dialog box launcher. In the Paragraph dialog box, under Indentation, do the following:In the BeforeText box, enter 1”.In the Special list, select Hanging.Next to the Special list, in the By box, enter 1”.Select the SmartArt graphic, and then under SmartArtTools, on the Design tab, in the SmartArtStyles group, click MoreStyles, and under 3-D select PolishedEffect (first option from the left). Select the first rectangle from the top (“First statement” in the example slide), and on the Home tab, in the Drawing group, click the arrow to the right of ShapeFill, and under ThemeColors select Red, Accent 2 (first row, sixth option from the left).Select the second rectangle from the top (“Second statement” in the example slide), and on the Home tab, in the Drawing group, click the arrow to the right of ShapeFill, and under ThemeColors select Olive Green, Accent 3 (first row, seventh option from the right).Select the third rectangle from the top (“Third statement” in the example slide), and on the Home tab, in the Drawing group, click the arrow to the right of ShapeFill, and under ThemeColors select Purple, Accent 4 (first row, eighth option from the left). Select the fourth rectangle from the top (“Fourth statement” in the example slide), and on the Home tab, in the Drawing group, click the arrow to the right of ShapeFill, and under ThemeColors select Orange, Accent 6 (first row, tenth option from the left). To reproduce the circleson this slide, do the following:Press and hold CTRL, and then select the four block shapes (the shapes on the left side) in the SmartArt graphic, and then under SmartArtTools, on the Format tab, in the Shapes group, click the arrow to the right of ChangeShape, and under BasicShapes select Oval (first row, first option from the left). On the slide, drag one of the top right adjustment handles to the left to change the ovals into circles and to decrease their size.Also with the four circles selected, drag the circles until they cover the bullet on the rectangles, and then on the Home tab, in the Font group, in the FontColor list, under ThemeColors select White, Background 1, Darker 50% (sixth row, first option from the left). Also on the Home tab, in the bottom right corner of the Drawing group, click the FormatShape dialog box launcher. In the FormatShape dialog box, click Fill in the left pane, select Gradientfill in the Fill pane, and then do the following:In the Type list, select Radial.In the Direction list, select FromCenter (third option from the left).Under Gradient stops, click Add or Remove until two stops appear in the drop-down list.Also under Gradient stops, customize the gradient stops that you added as follows:Select Stop 1 from the list, and then do the following:In the Stop position box, enter 0%.Click the button next to Color, and then under ThemeColors select White, Background 1 (first row, first option from the left). Select Stop 2 from the list, and then do the following: In the Stop position box, enter 100%.Click the button next to Color, and then under ThemeColors select White, Background 2, Darker 25% (fourth row, first option from the left). To reproduce the animation effects on this slide, do the following:On the Animations tab, in the Animations group, click CustomAnimation. On the slide, select the SmartArt graphic, and then inthe CustomAnimation task pane, do the following:Click AddEffect, point to Entrance, and select MoreEffects. In the AddEntranceEffect dialog box, under Subtle select Fade.With the SmartArt graphic still selected, clickAddEffect, point to MotionPaths, and select Right.On the slide, right-click the motion path and select ReversePathDirection. Inthe CustomAnimation task pane, do the following:Press and hold CTRL, and select the two effects in the task pane. Click the arrow to the right of the selected effects and select EffectOptions. In the EffectsOptions dialog box, do the following:On the Timing tab, in the Speed list, select Fast. On the SmartArtAnimation tab, in the Group graphic list, select Onebyone.Click the double arrows under the two effects to show all the effects for all the shapes (16 effects).Press and hold CTRL, select all of the effects, and then under Modify selected effects, in the Start list, select WithPrevious.Press and hold CTRL, select the first, third, fifth, and seventh effects (fade entrance effects), and then do the following:Click Change, point to Entrance, and select MoreEffects. In the ChangeEntranceEffect dialog box, under Moderate, select Grow & Turn.Under Modify: Grow & Turn, in the Start list, select AfterPrevious.Press and hold CTRL, and select the ninth, 11th, 13th, and 15th effects (right motion paths). Click the arrow next to one of the selected effects, and then click Remove.Drag the ninth effect (right motion path) until it is third in the list of effects.Drag the 10theffect (right motion path), until it is sixth in the list of effects.Drag the 11th effect (right motion path), until it is ninth in the list of effects.To reproduce the background effects on this slide, do the following:Right-click the slide background area, and then click Format Background. In the Format Background dialog box, click Fill in the left pane, select Gradient fill in the Fill pane, and then do the following:In the Type list, select Radial.Click the button next to Direction, and then click From Center (third option from the left). Under Gradient stops, click Add or Remove until two stops appear in the drop-down list.Also under Gradient stops, customize the gradient stops that you added as follows:Select Stop 1 from the list, and then do the following:In the Stop position box, enter 33%.Click the button next to Color, and then under ThemeColors select White, Background 1 (first row, first option from the left). Select Stop 2 from the list, and then do the following: In the Stop position box, enter 100%.Click the button next to Color, and then under ThemeColors select White, Background 1, Darker 25% (fourth row, first option from the left).
  17. SmartArt custom animation effects: radial list(Intermediate)To reproduce the SmartArt effects on this slide, do the following:On the Home tab, in the Slides group, click Layout, and then clickBlank. On the Insert tab, in the Illustrations group, click SmartArt. In the Choose a SmartArt Graphic dialog box, in the left pane, click Relationship. In the Relationship pane, click Radial List (fifth row, fourth option from the left), and then click OK to insert the graphic into the slide.To enter text, select the graphic, and then click one of the arrows on the left border. In the Type your text here dialog box, in the top level bullets, enter the text for the three, smaller circle shapes in the graphic. In the second-level bullets, type the text for the bullets to the right of the three, smaller circle shapes.On the slide, select the SmartArt, and then on the Design tab, in the Themes group, click Colors, and under Built-In, select Technic.Press and hold CTRL, and on the slide, select the large circle and all three small circles.On the Home tab, in the Drawing group, click the arrow to the right of ShapeEffects, point to Preset, and then under Presets select Preset2 (first row, second option from the left).On the slide, click the picture placeholder in the center of the large circle. In the Insert Picture dialog box, select a picture, and then click Insert. (Notes: (1) If the picture in the large circle is distorted, tile the picture as a texture by selecting the large, picture-filled circle, and then on the Home tab, in the bottom right corner of the Drawing group, click the FormatShape dialog box launcher. In the FormatShape dialog box, click Fill in the left pane, and in the Fill pane check Tilepicture as texture.(2) If necessary, change the tile position of the picture within the shape. To do this, in the FormatShape dialog box, in the Fill pane, under Tiling options, enter values into the OffsetX and OffsetY boxes to reposition the focal point of the picture. To resize the picture, in the FormatShape dialog box, in the Fill pane, under Tiling options, enter values into the Scale X and Scale Y boxes.)Select the top, small circle in the SmartArt graphic. On the Home tab, in the bottom right corner of the Drawing group, click the FormatShape dialog box launcher. In the FormatShape dialog box, click Fill in the left pane, and in the Fill pane click Solidfill, and then in the Color list, select Gray-25%, Background 2, Darker 75% (fifth row, third option from the left).Select the middle small circle in the SmartArt graphic.On the Home tab, in the bottom right corner of the Drawing group, click the FormatShape dialog box launcher. In the FormatShape dialog box, click Fill in the left pane, click Solidfill in the Fill pane, and then in the Color list select Gold, Accent 2 (first row, sixth option from the left).Select the bottom small circle in the SmartArt graphic. On the Home tab, in the bottom right corner of the Drawing group, click the FormatShape dialog box launcher. In the FormatShape dialog box, click Fill in the left pane, click Solidfill in the Fill pane, and then in the Color list select Lavender, Accent 3 (first row, seventh option from the left).Press and hold CTRL, and select all three lines connecting the large circle to the three smaller circles. On the Home tab, in the bottom right corner of the Drawing group, click the FormatShape dialog box launcher. In the FormatShape dialog box, do the following:Click LineColor in the left pane, and in the LineColor pane click Solidline.Also in the LineColor pane, in the Color list select White, Background 1, Darker 25% (fourth row, first option from the left).Also in the Format Shape dialog box, click LineStyle in the left pane, and in the LineStyle pane, do the following: In the Width box, enter 2.5 pt.In the Dashtype list, select RoundDot (second option from the top).Press and hold CTRL, and select all three text boxes in the SmartArt graphic. On the Home tab, in the Font group, in the FontSize box, enter 22.To reproduce the animation effects on this slide, do the following:On the Animations tab, in the Animations group, click CustomAnimation. Select the SmartArt graphic on the slide, and then in the CustomAnimation task pane, do the following:Click AddEffect, point to Entrance, and select MoreEffects. In the AddEntranceEffect dialog box, under Subtle, select Fade.Click the arrow to the right of the fade entrance effect and select EffectOptions. In the Fade dialog box, do the following:On the Timing tab, in the Start list, select WithPrevious.On the Timing tab, in the Speed list, select 1 seconds (Fast). On the SmartArtAnimation tab, in the Groupgraphic list, select One by one. Click the double arrow under the animation effect to expand the list of effects.Select the first effect in the list (fade entrance effect), and then click Change, point to Entrance, and select MoreEffects. In the ChangeEntranceEffect dialog box, under Moderate, select Grow & Turn.Select the second effect in the list (fade entrance effect), and then click Change, point to Entrance and select MoreEffects. In the ChangeEntranceEffect dialog box, under Basic, select Wipe.Select the second effect in the list again (wipe entrance effect). Under Modify: Wipe,do the following:In theStart list, select AfterPrevious.In the Direction list, select FromLeft.In the Speed list, select VeryFast.Select the third effect in the list (fade entrance effect), and then click Change, point to Entrance, and select MoreEffects. In the ChangeEntranceEffect dialog box, under Subtle, select FadedZoom.Select the third effect in the list again (faded zoom entrance effect). Under Modify: Faded Zoom, do the following:In the Start list, select WithPrevious.In the Speed list, select Fast.Select the fourth effect in the list (fade entrance effect), and under Modify: Fade, in the Start list select WithPrevious.Press and hold CTRL, and select the fifth and eighth effects in the list (fade entrance effects), and then click Change, point to Entrance, and select MoreEffects. In the ChangeEntranceEffect dialog box, under Basic select Wipe, and then click OK.With the fifth and eighth effects in the list still selected (wipe entrance effects), under Modify: Wipe,do the following:In the Direction list, select FromLeft.In the Speed list, select VeryFast.Press and hold CTRL, and select the sixth and ninth effects in the list (fade entrance effects). Click Change, point to Entrance, and select MoreEffects. In the ChangeEntranceEffect dialog box, under Subtle, select FadedZoom.With the sixth and ninth effects in the list still selected (faded zoom entrance effects), under Modify: Faded Zoom,do the following:In the Start list, select WithPrevious.In the Speed list, select VeryFast.Press and hold CTRL, and select the seventh and 10th animation effects in the list (fade entrance effects), and then under Modify: Fade, in the Start list, select AfterPrevious.To reproduce the background effects on this slide, do the following:Right-click the slide background area, and then click Format Background. In the Format Background dialog box, click Fill in the left pane, select Gradient fill in the Fill pane, and then do the following:In the Type list, select Radial.Click the button next to Direction, and then click From Center (third option from the left). Under Gradient stops, click Add or Remove until two stops appear in the drop-down list.Also under Gradient stops, customize the gradient stops that you added as follows:Select Stop 1 from the list, and then do the following:In the Stop position box, enter 0%.Click the button next to Color, and then under ThemeColors select White, Background 1 (first row, first option from the left). Select Stop 2 from the list, and then do the following: In the Stop position box, enter 100%.Click the button next to Color, and then under ThemeColors select White, Background 1, Darker 35% (fifth row, first option from the left).
  18. SmartArt custom animation effects: motion path and faded zoom(Intermediate)To reproduce the SmartArt effects on this page, do the following:On the Home tab, in the Slides group, click Layout, and then clickBlank. On the Insert tab, in the Illustrations group, click SmartArt. In the Choose a SmartArt Graphic dialog box, in the left pane, click Process. In the Process pane, click BasicChevronProcess (third row, first option from the left), and then click OK to insert the graphic into the slide.To create a fourth chevron shape, select the chevron shape at the right end of the graphic, and then under SmartArtTools, on the Design tab, in the CreateGraphic group, click the arrow next to AddShape, and select AddShapeAfter.Select the graphic, and then click one of the arrows on the left border. In the Type your text here dialog box, enter text.Select the graphic. Under SmartArtTools, on the Design tab, in the SmartArtStyles group, do the following:Click ChangeColors, and then under Colorful click Colorful Range – Accent Colors 3 to 4 (third option from the left).Click More, and then under 3-D, click Inset (first row, second option from the left).To reproduce the animation effects on this slide, do the following:On the Animations tab, in the Animations group, click CustomAnimation.On the slide, select the graphic. In the CustomAnimation task pane, do the following:Click Add Effect, point to Entrance, and then click MoreEffects. In the Add Entrance Effect dialog box, under Subtle, click Faded Zoom. Under Modify: Faded Zoom, in the Speed list, select Fast.Also in the Custom Animation task pane, click Add Effect, point to Motion Paths, and then click Left.Also in the Custom Animation task pane, select the second animation effect (left motion path), and then under Modify: Left,in the Speed list, select Fast.On the slide, right-click the motion path, and then click Reverse Path Direction.(Note: The green arrow will move to the left end of the motion path.)Press and hold CTRL, and then select the first and second animation effects (faded zoom effect and left motion path) in the Custom Animation task pane. Click the arrow to the right of the second animation effect (left motion path), and then click Effect Options. In the Left dialog box, on the SmartArt Animation tab, in the Group graphic list, select One by one.Also in the Custom Animation task pane, do the following:Click the double arrow under the first animation effect (faded zoom effect) to expand the contents of the list of effects.Click the double arrow under the second animation effect (left motion path) to expand the contents of the list of effects. Press and hold CTRL, and then in the Custom Animation task pane, select the first, second, third, and fourth animation effects (all four faded zoom effects). Under Modify: Faded Zoom, in the Start list, select After Previous.Press and hold CTRL, and then in the Custom Animation task pane, select the fifth, sixth, seventh, and eighth animation effects (all four left motion paths). Under Modify:Left, in the Start list, select With Previous.Also in the Custom Animation task pane, do the following to reorder the list of effects:Drag the fifth animation effect (first left motion path) until it is second in the list of effects.Drag the sixth animation effect (second left motion path) until it is fourth in the list of effects.Drag the seventh animation effect (third left motion path) until it is sixth in the list of effects.To reproduce the background effects on this slide, do the following:Right-click the slide background, and then click Format Background. In the Format Background dialog box, click Fill in the left pane, select Gradient fill in the Fill pane, and then do the following:In the Type list, select Radial.In the Direction list, click From Center (third option from the left).Under Gradient stops, click Add or Remove until two stops appear in the drop-down list.Also under Gradient stops, customize the gradient stops as follows:Select Stop 1 from the list, and then do the following:In the Stop position box, enter 0%.Click the button next to Color, and then under Theme Colors click Black, Text 1, Lighter 50% (second row, second option from the left).Select Stop 2 from the list, and then do the following: In the Stop position box, enter 100%.Click the button next to Color, and then under Theme Colors click Black, Text 1 (first row, second option from the left).
  19. SmartArt custom animation effects: expand and wipe(Intermediate)To reproduce the SmartArt effects on this slide, do the following:On the Home tab, in the Slides group, click Layout, and then clickBlank. On the Insert tab, in the Illustrations group, click SmartArt. In the Choose a SmartArt Graphic dialog box, in the left pane, click Cycle. In the Cycle pane, click Block Cycle (first row, third option from the left), and then click OK to insert the graphic into the slide.Select the graphic, and then click one of the arrows on the left border. In the Type your text here dialog box, enter text.On the slide, select the graphic. Under SmartArtTools, on the Design tab, in the SmartArtStyles group, click More, and then under 3-D click Polished (first row, first option from the left).On the Home tab, in the Font group, select Calibrifrom the Font list, and then select 24 from the Font Size list. To reproduce the animation effects on this slide, do the following:On the Animations tab, in the Animations group, click CustomAnimation.On the slide, select the graphic. In the Custom Animation task pane, do the following:Click Add Effect, point to Entrance, and then click More Effects. In the Add Entrance Effect dialog box, under Subtle, click Expand. UnderModify: Expand, in theSpeedlist, selectVery Fast.Also in the Custom Animation task pane, select the expand effect. Click the arrow to the right of the expand effect, and then click Effect Options. In the Expand dialog box, on the SmartArt Animation tab, in the Group graphic list, select One by one.Also in the Custom Animation task pane, click the double arrow under the expand effect to expand the contents of the list of effects.Press and hold CTRL, and then select all 10 animation effects in the Custom Animation task pane. Under Modify: Expand, in the Start list, select After Previous. Press and hold CTRL, and then select the second, fourth, sixth, eighth, and 10th animation effects in the Custom Animation task pane. Click Change, point to Entrance, and then click More Effects. In the Change Entrance Effect dialog box, under Basic, click Wipe. Also in the Custom Animation task pane, do the following:Select the second animation effect (first wipe effect). Under Modify: Wipe, in the Direction list, select From Top.Select the fourth animation effect (second wipe effect). Under Modify: Wipe, in the Direction list, select From Top.Select the sixth animation effect (third wipe effect). Under Modify: Wipe, in the Direction list, select From Right.Select the eighth animation effect (fourth wipe effect). Under Modify: Wipe, in the Direction list, select From Bottom.Select the 10th animation effect (fifth wipe effect). Under Modify: Wipe, in the Direction list, select From Left.To reproduce the background effects on this slide, do the following:Right-click the slide background area, and then click Format Background. In the Format Background dialog box, click Fill in the left pane, select Gradient fill in the Fill pane, and then do the following:In the Type list, select Radial.In the Direction list, click From Center (third option from the left). Under Gradient stops, click Add or Remove until two stops appear in the drop-down list.Also under Gradient stops, customize the gradient stops that you added as follows:Select Stop 1 from the list, and then do the following:In the Stop position box, enter 0%.Click the button next to Color, and then under Theme Colors click White, Background 1 (first row, first option from the left).Select Stop 2 from the list, and then do the following: In the Stop position box, enter 100%.Click the button next to Color, and then under Theme Colors click White, Background 1, Darker 50%(sixth row, first option from the left).
  20. SmartArt custom animation effects: colorful organization chart(Intermediate)Tip: The instructions below describe how to reproduce the exact organization chart and animation effects in the example above. In the animation procedures, the number of animation effects that require modification in the Custom Animation task pane will vary if the chart contains a different number of managers and employees.To reproduce the SmartArt effects on this slide, do the following:On the Home tab, in the Slides group, click Layout, and then clickBlank. On the Insert tab, in the Illustrations group, click SmartArt. In the Choose a SmartArt Graphic dialog box, in the left pane, click Hierarchy. In the Hierarchy pane, click Organization Chart (first row, first option from the left), and then click OK to insert the graphic into the slide.Select the rectangle in the second level of the hierarchy, and then press DELETE. Select the graphic, and then click one of the arrows on the left border. In the Type your text here dialog box, in the text box for the first-level rectangle, enter Director (or the name of the director). In the text boxes for the second-level rectangles, enter Manager 1, Manager 2, and Manager 3 (or the names of the managers). On the slide, do the following to add employee rectangles:Right-click the Manager 1 rectangle, point to Add Shape, and then click Add Shape Below. Repeat this process one more time for a total of two rectangles below Manager 1. Right-click the Manager 2 rectangle, point to Add Shape, and then click Add Shape Below.Right-click the Manager 3 rectangle, point to Add Shape, and then click Add Shape Below. Select the graphic, and then click one of the arrows on the left border. In the Type your text here dialog box, in the text boxes for the third-level and fourth-level rectangles, enter Employee (or the names of the employees).On the slide, select the graphic. Under SmartArt Tools, on the Format tab, click Size, and then do the following:In the Height box, enter 4.97”.In the Width box, enter 7.08”.Under SmartArt Tools, on the Format tab, click Arrange, click Align, and then do the following:Click Align to Slide.Click Align Middle. Click Align Center. Under SmartArtTools, on the Design tab, in the SmartArtStyles group, do the following:Click ChangeColors, and then under Accent click Colored Fill – Accent 1.Click More, and then under Best Match for This Document, click Intense Effect (fifth option from the left). On the Home tab, in the Font group, select Calibri from the Font list,and then select 28 from the Font Size list. Press and hold CTRL, and then select all of the rectangles (director, managers, and employees) in the graphic. Under SmartArtTools, on the Format tab, in the Shapes group, click ChangeShape, and then under Rectangles, click RoundSameSideCornerRectangle (eighth option from the left).Press and hold CTRL, and then select all of the managers (second-level rectangles). Under SmartArtTools, on the Format tab, in the ShapeStyles group, click the arrow next to ShapeFill, and then under Theme Colors click Olive Green, Accent 3 (first row, seventh option from the left).Press and hold CTRL, and then select all of the connectors between the director (first-level rectangle) and the managers (second-level rectangles). Under SmartArt Tools, on the Format tab, in the Shape Styles group, click the arrow next to Shape Outline, and then under Theme Colors click Olive Green, Accent 3 (first row, seventh option from the left).Press and hold CTRL, and then select all of the employees (third-level and fourth-level rectangles). Under SmartArtTools, on the Format tab, in the ShapeStyles group, click the arrow next to ShapeFill, and then under Theme Colors click Aqua, Accent 5, Darker 25% (fifth row, ninth option from the left).Press and hold CTRL, and then select all of the connectors between the managers (second-level rectangles) and the employees (third-level and fourth-level rectangles). Under SmartArt Tools, on the Format tab, in the Shape Styles group, click the arrow next to Shape Outline, and then under Theme Colors click Aqua, Accent 5, Darker 25% (fifth row, ninth option from the left).If you would like to modify the number of directors, managers, and employees in the chart to match the structure of your organization, do one or more of the following: To add a rectangle within a particular level, right-click one of the rectangles in that level, point to Add Shape, and then click Add Shape After or Add Shape Before. To add a rectangle above another rectangle, right-click the lower-level rectangle, point to Add Shape, and then click Add Shape Above. To add a rectangle below another rectangle, right-click the higher-level rectangle, point to Add Shape, and then click Add Shape Below. To delete a rectangle, select the rectangle and then press DELETE.To add text to new rectangles, select the graphic, and then click one of the arrows on the left border. In the Type your text here dialog box, enter text. To reproduce the animation effects on this slide, do the following:On the Animations tab, in the Animations group, click CustomAnimation.On the slide, select the graphic. In the CustomAnimationtaskpane, do the following:Click Add Effect, point to Entrance, and then click MoreEffects. In the Add Entrance Effect dialog box, under Subtle, click Fade.Under Modify: Fade, in the Speed list, select Fast.Also in the Custom Animation task pane, select the fade effect. Click the arrow to the right of the fade effect, and then click EffectOptions. In the Fade dialog box, on the SmartArtAnimation tab, in the Group graphic list, select By level one by one.Also in the Custom Animation task pane, click the double arrow under the animation effect to expand the contents of the list of effects, and then do the following:Press and hold CTRL, select the second, fourth, and sixth animation effects (effects for the connectors between the director and the manager rectangles), and then do the following: Under Modify: Fade, in the Start list, select With Previous. Under Modify: Fade, in the Speed list, select Fast.Press and hold CTRL, select the third, fifth, and seventh animation effects (effects for the manager rectangles), and then do the following: Click Change, point to Entrance, and then click MoreEffects. In the Change Entrance Effect dialog box, under Subtle, click Expand.Under Modify: Fade, in the Start list, select With Previous. Under Modify: Fade, in the Speed list, select Fast.Select the eighth animation effect (effect for the connector between Manager 1 and the third-level employee rectangle), and then do the following: Click Change, point to Entrance, and then click MoreEffects. In the Change Entrance Effect dialog box, under Subtle, click Expand.Under Modify: Expand, in the Start list, select On Click. Under Modify: Expand, in the Speed list, select Fast. Press and hold CTRL, select the 10th animation effect (effect for the connector between Manager 1 and the fourth-level employee rectangle), and then do the following:Click Change, point to Entrance, and then click MoreEffects. In the Change Entrance Effect dialog box, under Subtle, click Expand.Under Modify: Expand, in the Start list, select With Previous. Under Modify: Expand, in the Speed list, select Fast.Select the 13th animation effect (effect for the employee rectangle under Manager 2), and then do the following:Click Change, point to Entrance, and then click MoreEffects. In the Change Entrance Effect dialog box, under Subtle, click Expand. Under Modify: Expand, in the Start list, select With Previous.Under Modify: Expand, in the Speed list, select Fast. Select the 14th animation effect (effect for the connector between Manager 3 and the employee rectangle), and then do the following:Click Change, point to Entrance, and then click MoreEffects. In the Change Entrance Effect dialog box, under Subtle, click Expand. Under Modify: Expand, in the Start list, select On Click.Under Modify: Expand, in the Speed list, select Fast. Select the firstanimation effect (effect for the director rectangle), and then click Remove.To reproduce the background effects on this slide, do the following:Right-click the slide background area, and then click Format Background. In the Format Background dialog box, click Fill in the left pane, select Gradient fill in the Fill pane, and then do the following:In the Type list, select Linear.Click the button next to Direction, and then click Linear Down (first row, second option from the left).Under Gradient stops, click Add or Remove until two stops appear in the drop-down list.Also under Gradient stops, customize the gradient stops that you added as follows:Select Stop 1 from the list, and then do the following:In the Stop position box, enter 50%.Click the button next to Color, and then under Theme Colors click White, Background 1 (first row, first option from the left).Select Stop 2 from the list, and then do the following: In the Stop position box, enter 100%.Click the button next to Color, and then under Theme Colors clickWhite, Background 1, Darker 15% (third row, first option from the left).
  21. SmartArt custom animation effects: bending process(Intermediate)To reproduce the SmartArt effects on this slide, do the following:On the Home tab, in the Slides group, click Layout, and then clickBlank. On the Insert tab, in the Illustrations group, click SmartArt. In the Choose a SmartArt Graphic dialog box, in the left pane, click Process. In the Process pane, click Vertical Bending Process (fifth row, third option from the left), and then click OK to insert the graphic into the slide.Select the graphic, and then click one of the arrows on the left border. In the Type your text here dialog box, enter text. On the slide, select the graphic. Under SmartArtTools, on the Design tab, in the SmartArtStyles group, do the following:Click ChangeColors, and then under Accent 1 click Colored Fill – Accent 1 (second option from the left).Click More, and then under 3-D click Polished (first option from the left).On the Home tab, in the Font group, select Gill Sans MT from the Font list, and then select 24 from the Font Size list. Select the top left shape (starting point)in the graphic, and then do the following: Under SmartArtTools, on the Format tab, in the Shape Styles group, click the arrow next to Shape Fill, and then under Theme Colors click Olive Green, Accent 3, Darker 25% (fifth row, seventh option from the left).Under SmartArtTools, on the Format tab, in the Shapes group, click Change Shape, and then under Flowchart click Off-page Connector (second row, second option from the left).Select the bottom right shape (ending point) in the graphic, and then do the following:Under SmartArtTools, on the Format tab, in the Shape Styles group, click the arrow next to Shape Fill, and then under Theme Colors click Red, Accent 2, Darker 25% (fifth row, sixth option from the left).Under SmartArtTools, on the Format tab, in the Shapes group, click Change Shape, and then under Basic Shapes click Hexagon (first row, eighth option from the left).To reproduce the animation effects on this slide, do the following:On the Animations tab, in the Animations group, click CustomAnimation.On the slide, select the graphic. In the CustomAnimationtask pane, do the following:Click Add Effect, point to Entrance, and then click MoreEffects. In the Add Entrance Effect dialog box, under Subtle, click Fade.Under Modify: Fade, in the Speed list, select Fast.Also in the Custom Animation task pane, select the fade effect. Click the arrow to the right of the fade effect, and then click EffectOptions. In the Fade dialog box, on the SmartArtAnimation tab, in the Group graphic list, select One by one, and then click OK.Also in the Custom Animation task pane, click the double arrow under the fade effect to expand the contents of the list of effects,and then do the following:Press and hold CTRL, select the first, third, fifth, seventh, ninth, 11th, 13th, 15th, and 17th animation effects (fade effects for the rectangles), and then do the following:Click Change, point to Entrance, and then click MoreEffects. In the Change Entrance Effect dialog box, under Moderate, click Stretch.Under Modify: Stretch, in the Start list, select With Previous. Under Modify: Stretch, in the Speed list, select Fast.Press and hold CTRL, and then select the first, third, fifth, 15th, and 17thanimation effects (stretch effects for the first, second, third, eighth, and ninth rectangles in the path). Under Modify: Stretch, in the Direction list, select From Top.Press and hold CTRL, and then select the seventh and 13th animation effects (stretch effects for the fourth and seventh rectangles in the path). Under Modify: Stretch, in the Direction list, select From Left. Press and hold CTRL, and then select the ninth and 11th animation effects (stretch effects for the fifth and sixth rectangles in the path). Under Modify: Stretch, in the Direction list, select From Bottom.Press and hold CTRL, and then select the second, fourth, sixth, eighth, 10th, 12th, 14th, and 16th animation effects (fade effects for the connectors). Under Modify: Fade, in the Start list, select After Previous.Select the eighth animation effect (fade effect for the connector between the fourth and fifth rectangle). Click the arrow to the right of the eighth animation effect, and then click Timing. In the Fade dialog box, on the Timing tab, in the Delay box, enter 0.5, and then click OK.Select the 10th animation effect (fade effect for the connector between the fifth and sixth rectangle). Click the arrow to the right of the 10th animation effect, and then click Timing. In the Fade dialog box, on the Timing tab, in the Delay box, enter 0.5.To reproduce the background effects on this slide, do the following:Right-click the slide background area, and then click Format Background. In the Format Background dialog box, click Fill in the left pane, select Gradient fill in the Fill pane, and then do the following:In the Type list, select Linear.In the Direction list, click Linear Down(first row, second option from the left). Under Gradient stops, click Add or Remove until two stops appear in the drop-down list.Also under Gradient stops, customize the gradient stops that you added as follows:Select Stop 1 from the list, and then do the following:In the Stop position box, enter 0%.Click the button next to Color, and then under Theme Colorsclick Blue, Accent 1, Darker 25% (fifth row, fifth option from the left). Select Stop 2 from the list, and then do the following: In the Stop position box, enter 71%.Click the button next to Color, and then under Theme Colors clickBlack, Text 1 (first row, second option from the left).
  22. SmartArt custom animation effects: vertical box list(Intermediate)To reproduce the SmartArt effects on this slide, do the following:On the Home tab, in the Slides group, click Layout, and then clickBlank. On the Insert tab, in the Illustrations group, click SmartArt. In the Choose a SmartArt Graphic dialog box, in the left pane, click List. In the List pane, click Vertical Box List (first row, fourth option from the left), and then click OK to insert the graphic into the slide.Press and hold CTRL, and then select the third pair of rectangles from the top (both the smaller, first-level rectangle and the larger, second-level rectangle). Under SmartArtTools, on the Design tab, in the CreateGraphic group, click the arrow next to AddShape, and then click AddShapeAfter.Select the graphic, and then click one of the arrows on the left border. In the Type your text here dialog box, enter text. (Note: To create a bullet below each heading, select the heading text box in the Type your text here dialog box, and then under SmartArtTools, on the Design tab, in the CreateGraphic group, click AddBullet. Enter text into the new bullet text box.)Select the graphic. Under SmartArt Tools, on the Format tab, click Size, and then do the following:In the Height box, enter 5.92”.In the Width box, enter 6.67”.Under SmartArt Tools, on the Format tab, click Arrange, click Align, and then do the following:Click Align to Slide.Click Align Middle. Click Align Center. On the Design tab, in the Themes group, click Colors, and then under Built-in click Civic. (Note: if this action is taken in a PowerPoint presentation containing more than one slide, the color scheme will be applied to all of the slides.)Under SmartArtTools, on the Design tab, in the SmartArtStyles group, do the following:Click ChangeColors, and then under Accent 1 click Colored Fill – Accent 1 (second option from the left).Click More, and then under 3-D click Polished (first row, first option from the left).Press and hold CTRL, and then select the four larger, second-level rectangles. Under SmartArtTools, on the Format tab, in the Shapes group, click ChangeShape, and then under Rectangles click Rounded Rectangle (second option from the left).On the Home tab, in the Font group, select Franklin Gothic Book from the Font list, and then select 24 from the Font Size list.Under SmartArtTools, on the Format tab, in the Shape Styles group, click the arrow next to Shape Fill, point to Gradient, and then click More Gradients. In the Format Shape dialog box, in the left pane, click Fill, select Gradient fill in the Fill pane, and then do the following:In the Type list, select Linear.Click the button next to Direction, and then click Linear Up (second row, second option from the left).Under Gradient stops, click Add or Remove until two stops appear in the drop-down list.Also under Gradient stops, customize the gradient stops as follows:Select Stop 1 from the list, and then do the following:In the Stop position box, enter 0%.Click the button next to Color, and then under Theme Colors click White, Background 1, Darker 35% (fifth row, first option from the left).Select Stop 2 from the list, and then do the following: In the Stop position box, enter 100%.Click the button next to Color, and then click Black, Text 1, Lighter 25% (fourth row, second option from the left). Also in the Format Shape dialog box, in the left pane, click 3-D Format, and then do the following in the 3-D Format pane:Under Bevel, click the button next to Top, and then under Bevel click Circle (first row, first option from the left).Next to Top, in the Width box, enter 4 pt,and in the Height box, enter 4 pt.Under Depth,in the Depth box, enter 1 pt.Under Surface, click the button next to Material, and then under Standard click Plastic (third option from the left). Click the button next to Lighting, and then under Special click Flat (first option from the left). On the slide, press and hold CTRL, and then select the four smaller, first-level rectangles. On the Home tab, in the Font group, select Franklin Gothic Medium from the Font list, and then enter 26 in the Font Size box.Select the top first-level rectangle. Under SmartArtTools, on the Format tab, in the Shape Styles group, click the arrow next to Shape Fill, point to Gradient, and then click More Gradients. In the Format Shape dialog box, in the left pane, click Fill, select Gradient fill in the Fill pane, and then do the following:In the Type list, select Linear.Click the button next to Direction, and then click Linear Up (second row, second option from the left).Under Gradient stops, click Add or Remove until two stops appear in the drop-down list.Also under Gradient stops, customize the gradient stops as follows:Select Stop 1 from the list, and then do the following:In the Stop position box, enter 0%.Click the button next to Color, and then under Theme Colors click Teal, Accent 3, Darker 50% (sixth row, seventh option from the left).Select Stop 2 from the list, and then do the following: In the Stop position box, enter 100%.Click the button next to Color, and then under Theme Colors click Teal, Accent 3, Darker 25% (fifth row, seventh option from the left).Select the second first-level rectangle. Under SmartArtTools, on the Format tab, in the Shape Styles group, click the arrow next to Shape Fill, point to Gradient, and then click More Gradients. In the Format Shape dialog box, in the left pane, click Fill, select Gradient fill in the Fill pane, and then do the following:In the Type list, select Linear.Click the button next to Direction, and then click Linear Up (second row, second option from the left).Under Gradient stops, click Add or Remove until two stops appear in the drop-down list.Also under Gradient stops, customize the gradient stops as follows:Select Stop 1 from the list, and then do the following:In the Stop position box, enter 0%.Click the button next to Color, and then under Theme Colors click Brown, Accent 4, Darker 50% (sixth row, eighth option from the left).Select Stop 2 from the list, and then do the following: In the Stop position box, enter 100%.Click the button next to Color, and then under Theme Colors click Brown, Accent 4, Darker 25% (fifth row, eighth option from the left).Select the third first-level rectangle. Under SmartArtTools, on the Format tab, in the Shape Styles group, click the arrow next to Shape Fill, point to Gradient, and then click More Gradients. In the Format Shape dialog box, in the left pane, click Fill, select Gradient fill in the Fill pane, and then do the following:In the Type list, select Linear.Click the button next to Direction, and then click Linear Up (second row, second option from the left).Under Gradient stops, click Add or Remove until two stops appear in the drop-down list.Also under Gradient stops, customize the gradient stops as follows:Select Stop 1 from the list, and then do the following:In the Stop position box, enter 0%.Click the button next to Color, and then under Theme Colors click Green, Accent 5, Darker 50% (sixth row, ninth option from the left).Select Stop 2 from the list, and then do the following: In the Stop position box, enter 100%.Click the button next to Color, and then under Theme Colors click Green, Accent 5, Darker 25% (fifth row, ninth option from the left).Select the fourth first-level rectangle. Under SmartArtTools, on the Format tab, in the Shape Styles group, click the arrow next to Shape Fill, point to Gradient, and then click More Gradients. In the Format Shape dialog box, in the left pane, click Fill, select Gradient fill in the Fill pane, and then do the following:In the Type list, select Linear.Click the button next to Direction, and then click Linear Up (second row, second option from the left).Under Gradient stops, click Add or Remove until two stops appear in the drop-down list.Also under Gradient stops, customize the gradient stops as follows:Select Stop 1 from the list, and then do the following:In the Stop position box, enter 0%.Click the button next to Color, and then under Theme Colors click Orange, Accent 6, Darker 50% (sixth row, 10th option from the left).Select Stop 2 from the list, and then do the following: In the Stop position box, enter 100%.Click the button next to Color, and then under Theme Colors click Orange, Accent 6, Darker 20% (fifth row, 10th option from the left).To reproduce the animation effects on this slide, do the following:On the Animations tab, in the Animations group, click CustomAnimation.On the slide, select the graphic. In the CustomAnimation task pane, do the following:Click Add Effect, point to Entrance, and then click MoreEffects. In the Add Entrance Effect dialog box, under Subtle, click Expand.Under Modify: Expand, in the Speed list, select Fast.Also in the CustomAnimation task pane, select the animation effect. Click the arrow to the right of the animation effect, and then click EffectOptions. In the Expand dialog box, on the SmartArtAnimation tab, in the Group graphic list, select One by one.Also in the Custom Animation task pane, click the double arrow under the animation effect to expand the contents of the list of effects, and then do the following:Press and hold CTRL, and then select all of the animation effects. Under Modify: Expand, in the Start list, select With Previous.Press and hold CTRL, and then select the second, fourth, sixth and eighth animation effects (expand effects for the larger, second-level rectangles). Click Change, point to Entrance, and then click MoreEffects. In the Change Entrance Effect dialog box, under Moderate, click Compress. Press and hold CTRL, and then select the third, fifth, and seventh animation effects. Under Modify: Expand, in the Start list, select On Click.To reproduce the background effects on this slide, do the following:Right-click the slide background area, and then click Format Background. In the Format Background dialog box, click Fill in the left pane, select Gradient fill in the Fill pane, and then do the following:In the Type list, select Linear.Click the button next to Direction, and then click Linear Down (first row, second option from the left).Under Gradient stops, click Add or Remove until two stops appear in the drop-down list.Also under Gradient stops, customize the gradient stops that you added as follows:Select Stop 1 from the list, and then do the following:In the Stop position box, enter 63%.Click the button next to Color, and then under Theme Colors click Black, Text 1 (first row, second option from the left).Select Stop 2 from the list, and then do the following: In the Stop position box, enter 100%.Click the button next to Color, and then under Theme Colors clickBlack, Text 1, Lighter 50% (second row, second option from the left).
  23. SmartArt custom animation effects: horizontal bullet list(Intermediate)To reproduce the SmartArt effects on this slide, do the following:On the Home tab, in the Slides group, click Layout, and then clickBlank. On the Insert tab, in the Illustrations group, click SmartArt. In the Choose a SmartArt Graphic dialog box, in the left pane, click List. In the List pane, click Horizontal Bullet List (second row, first option from the left), and then click OK to insert the graphic into the slide.On the slide, in the graphic, select the third “topic” rectangle from the left. Under SmartArtTools, on the Design tab, in the CreateGraphic group, click the arrow next to AddShape, and then click AddShapeAfter.Select the graphic, and then click one of the arrows on the left border. In the Type your text here dialog box, enter text for the topic headings and bullet points. (Note: To create a bulleted list below the new, fourth “topic” rectangle, select the topic heading text box in the Type your text here dialog box, and then under SmartArtTools, on the Design tab, in the CreateGraphic group, click AddBullet. Enter text into the new bullet text box. Repeat the process to add a second bullet.)Select the graphic. Under SmartArt Tools, on the Format tab, click Size, and then do the following:In the Height box, enter 4.44”.In the Width box, enter 9.47”.Under SmartArt Tools, on the Format tab, click Arrange, click Align, and then do the following:Click Align to Slide.Click Align Middle. Click Align Center. On the slide, select the graphic. On the Design tab, in the Themes group, click Colors,and then under Built-in click Technic.(Note: if this action is taken in a PowerPoint presentation containing more than one slide, the color scheme will be applied to all of the slides.)Under SmartArtTools, on the Design tab, in the SmartArtStyles group, do the following:Click ChangeColors and then under Colorful click Colorful Range – Accent Colors 5 to 6 (fifth option from the left).Click More, and then under Best Match for Document click Intense Effect (fifth option from the left).Press and hold SHIFT, and then select all four “topic” rectangles. Under SmartArtTools, on the Format tab, in the Shapes group, click ChangeShape, and then under Rectangles click Round Single Corner Rectangle (seventh option from the left).On the Home tab, in the Font group, select Gill Sans MT Condensed from the Font list.On the Home tab, in the Paragraph group, click Align Text Left. On the Home tab, in the bottom right corner of the Drawing group, click the Format Shape dialog box launcher. In the Format Shape dialog box, in the left pane, click Text Box. In the Text Box pane, under Text layout, in the Vertical alignment list, select Bottom. Press and hold SHIFT, and then select all four bulleted-list rectangles. On the Home tab, in the Font group, select Gill Sans MT Condensed from the Font list, and then enter 22 in the Font Size box.On the Home tab, in the bottom right corner of the Drawing group, click the Format Shape dialog box launcher. In the Format Shape dialog box, in the left pane, click Text Box. In the Text Box pane, under Internal margin, do the following:In the Left box, enter 0.1”.In the Top box, enter 0.2”.In the Right box, enter 0.1”.In the Bottom box, enter 0.1”.Select the first bulleted-list rectangle from the left. Under SmartArtTools, on the Format tab, in the Shape Styles group, click the arrow next to Shape Fill, point to Gradient, and then click More Gradients. In the Format Shape dialog box, in the left pane, click Fill, select Gradient fill in the Fill pane, and then do the following:In the Type list, select Linear.Click the button next to Direction, and then click Linear Down (first row, second option from the left).Under Gradient stops, click Add or Remove until two stops appear in the drop-down list.Also under Gradient stops, customize the gradient stops as follows:Select Stop 1 from the list, and then do the following:In the Stop position box, enter 0%.Click the button next to Color, click More Colors, and then in the Colors dialog box, on the Custom tab, enter values for Red: 225, Green: 222, Blue: 215.In the Transparency box, enter 0%.Select Stop 2 from the list, and then do the following: In the Stop position box, enter 100%.Click the button next to Color, click More Colors, and then in the Colors dialog box, on the Custom tab, enter values for Red: 225, Green: 222, Blue: 215.In the Transparency box, enter 100%.Select the second bulleted-list rectangle from the left. Under SmartArtTools, on the Format tab, in the Shape Styles group, click the arrow next to Shape Fill, point to Gradient, and then click More Gradients. In the Format Shape dialog box, click Fill in the left pane, select Gradient fill in the Fill pane, and then do the following:In the Type list, select Linear.Click the button next to Direction, and then click Linear Down (first row, second option from the left).Under Gradient stops, click Add or Remove until two stops appear in the drop-down list.Also under Gradient stops, customize the gradient stops as follows:Select Stop 1 from the list, and then do the following:In the Stop position box, enter 0%.Click the button next to Color, click More Colors, and then in the Colors dialog box, on the Custom tab, enter values for Red: 222, Green: 225, Blue: 219.In the Transparency box, enter 0%.Select Stop 2 from the list, and then do the following: In the Stop position box, enter 100%.Click the button next to Color, click More Colors, and then in the Colors dialog box, on the Custom tab, enter values for Red: 222, Green: 225, Blue: 219.In the Transparency box, enter 100%.Select the third bulleted-list rectangle from the left. Under SmartArtTools, on the Format tab, in the Shape Styles group, click the arrow next to Shape Fill, point to Gradient, and then click More Gradients. In the Format Shape dialog box, in the left pane, click Fill, select Gradient fill in the Fill pane, and then do the following:In the Type list, select Linear.Click the button next to Direction, and then click Linear Down (first row, second option from the left).Under Gradient stops, click Add or Remove until two stops appear in the drop-down list.Also under Gradient stops, customize the gradient stops as follows:Select Stop 1 from the list, and then do the following:In the Stop position box, enter 0%.Click the button next to Color, click More Colors, and then in the Colors dialog box, on the Custom tab, enter values for Red: 214, Green: 220, Blue: 218.In the Transparency box, enter 0%.Select Stop 2 from the list, and then do the following: In the Stop position box, enter 100%.Click the button next to Color, click More Colors, and then in the Colors dialog box, on the Custom tab, enter values for Red: 214, Green: 220, Blue: 218.In the Transparency box, enter 100%.Select the fourth bulleted-list rectangle from the left. Under SmartArtTools, on the Format tab, in the Shape Styles group, click the arrow next to Shape Fill, point to Gradient, and then click More Gradients. In the Format Shape dialog box, in the left pane, click Fill, select Gradient fill in the Fill pane, and then do the following:In the Type list, select Linear.Click the button next to Direction, and then click Linear Down (first row, second option from the left).Under Gradient stops, click Add or Remove until two stops appear in the drop-down list.Also under Gradient stops, customize the gradient stops as follows:Select Stop 1 from the list, and then do the following:In the Stop position box, enter 0%.Click the button next to Color, click More Colors, and then in the Colors dialog box, on the Custom tab, enter values for Red: 216, Green: 217, Blue: 218.In the Transparency box, enter 0%.Select Stop 2 from the list, and then do the following: In the Stop position box, enter 100%.Click the button next to Color, click More Colors, and then in the Colors dialog box, on the Custom tab, enter values for Red: 216, Green: 217, Blue: 218.In the Transparency box, enter 100%.To reproduce the animation effects on this slide, do the following:On the Animations tab, in the Animations group, click CustomAnimation.On the slide, select the graphic. In the CustomAnimation task pane, do the following:Click Add Effect, point to Entrance, and then click MoreEffects. In the Add Entrance Effect dialog box, under Basic, click Peek In.Under Modify: Peek In, in the Direction list, select From Bottom.Under Modify: Peek In, in the Speed list, select Fast.Also in the CustomAnimation task pane, select the animation effect. Click the arrow to the right of the animation effect, and then click EffectOptions. In the Expand dialog box, on the SmartArtAnimation tab, in the Group graphic list, select One by one.Also in the Custom Animation task pane, click the double arrow under the animation effect to expand the contents of the list of effects, and then do the following:Select the first animation effect, and then under Modify: Peek In, in the Start list, select With Previous.Press and hold CTRL, select the second, fourth, sixth, and eighth animation effects (peek-in effects for the bulleted lists), and then do the following: Under Modify: Peek In, in the Start list, select With Previous.Under Modify: Peek In, in the Direction list, select From Top. To reproduce the background effects on this slide, do the following:Right-click the slide background area, and then click Format Background. In the Format Background dialog box, click Fill in the left pane, select Gradient fill in the Fill pane, and then do the following:In the Type list, select Radial.Click the button next to Direction, and then click From Center (third option from the left).Under Gradient stops, click Add or Remove until two stops appear in the drop-down list.Also under Gradient stops, customize the gradient stops that you added as follows:Select Stop 1 from the list, and then do the following:In the Stop position box, enter 0%.Click the button next to Color, and then under Theme Colors click White, Background 1 (first row, first option from the left). Select Stop 2 from the list, and then do the following: In the Stop position box, enter 100%.Click the button next to Color, and then under Theme Colors click White, Background 1, Darker 35% (fifth row, first option from the left).
  24. SmartArt custom animation effects: stacked Venn diagram(Intermediate)To reproduce the SmartArt effects on this slide, do the following:On the Home tab, in the Slides group, click Layout, and then clickBlank. On the Insert tab, in the Illustrations group, click SmartArt. In the Choose a SmartArt Graphic dialog box, in the left pane, click Relationship. In the Relationship pane, click Stacked Venn (eighth row, second option from the left), and then click OK to insert the graphic into the slide.Select the graphic, and then click one of the arrows on the left border. In the Type your text here dialog box, enter text. Select the graphic. On the Design tab, in the Themes group, click Colors,and then under Built-in click Median. (Note: if this action is taken in a PowerPoint presentation containing more than one slide, the theme color will be applied to all of the slides.)Under SmartArtTools, on the Design tab, in the SmartArtStyles group, do the following: Click ChangeColors, and then under Colorful click Colorful – Accent Colors (first option from the left).Click More, and then under 3-D click Polished (first row, first option from the left).On the Home tab, in the Font group, select Franklin Gothic Medium Cond from the Font list, and then select 28 from the Font Size list.To reproduce the animation effects on this slide, do the following:On the Animations tab, in the Animations group, click CustomAnimation.On the slide, select the graphic. In the CustomAnimation task pane, do the following:Click Add Effect, point to Entrance, and then click MoreEffects. In the Add Entrance Effect dialog box, under Basic, click Fly-In.Under Modify: Fly-In, in the Speed list, select Fast.Also in the CustomAnimation task pane, do the following:Click Add Effect, point to Entrance, and then click MoreEffects. In the Add Entrance Effect dialog box, under Subtle, click Faded Zoom.Under Modify: Faded Zoom, in the Speed list, select Fast.Also in the CustomAnimation task pane, do the following:Click Add Effect, point to Emphasis, and then click MoreEffects. In the Add Entrance Effect dialog box, under Basic, click Grow/Shrink.Under Modify: Grow/Shrink, in the Size list, in the Custom box, enter 30%, and then press ENTER. Also in the Size list, click Vertical. Under Modify: Grow/Shrink, in the Speed list, select Very Fast.Also in the CustomAnimation task pane, select the third animation effect (grow/shrink effect). Click the arrow to the right of the animation effect, click EffectOptions, and then do the following in theGrow/Shrink dialog box:On the SmartArtAnimation tab, in the Group graphic list, select One by one.On the Effect tab, under Settings, select Auto-reverse. Press and hold CTRL, and then select all three animation effects in the Custom Animation task pane. Click the arrow to the right of one of the selected effects, and then click EffectOptions. In the EffectOptions dialog box, on the SmartArtAnimation tab, in the Group graphic list, select One by one.Also in the Custom Animation task pane, click the double arrow under each animation effect to expand the contents of the list of effects, and then do the following:Select the first animation effect (first fly-in effect), and then do the following: Under Modify: Fly-In, in theStart list, select With Previous. Under Modify: Fly-In, in the Direction list, select From Bottom-Left.Select the second animation effect (second fly-in effect), and then under Modify: Fly-In,in the Direction list, select From Bottom-Right.Select the third animation effect (third fly-in effect), and then under Modify: Fly-In, in the Direction list, select From Bottom-Left.Select the fourth animation effect (fourth fly-in effect), and then under Modify: Fly-In, in the Direction list, select From Bottom-Right.Press and hold CTRL, select the fifth, sixth, seventh, eighth, ninth, 10th, 11th, and 12th animation effects (all of the faded zoom effects and grow/shrink effects), and then under Modify selected effects, in theStart list, select With Previous.Also in the Custom Animation task pane, do the following to reorder the list of effects:Drag the fifth animation effect (first faded zoom effect) until it is second in the list of effects.Drag the sixth animation effect (second faded zoom effect) until it is fourth in the list of effects.Drag the seventh animation effect (third faded zoom effect) until it is sixth in the list of effects.Drag the ninth animation effect (first grow/shrink effect) until it is third in the list of effects.Drag the 10th animation effect (second grow/shrink effect) until it is sixth in the list of effects.Drag the 11th animation effect (third grow/shrink effect) until it is ninth in the list of effects.To reproduce the background effects on this slide, do the following:Right-click the slide background area, and then click Format Background. In the Format Background dialog box, click Fill in the left pane, select Gradient fill in the right pane, and then do the following:In the Type list, select Radial.In the Direction, list click From Corner (first row, second option from the left).Under Gradient stops, click Add or Remove until two stops appear in the drop-down list.Also under Gradient stops, customize the gradient stops as follows:Select Stop 1 from the list, and then do the following:In the Stop position box, enter 0%.Click the button next to Color, and then under Theme Colors click White, Background 1 (first row, first option from the left). Select Stop 2 from the list, and then do the following: In the Stop position box, enter 100%.Click the button next to Color, and then under Theme Colors clickWhite, Background 1, Darker 35% (fifth row, first option from the left).
  25. SmartArt custom animation effects: horizontal organization chart(Intermediate)Tip: The instructions below describe how to reproduce the exact organization chart and animation effects in the example above. In the animation procedures, the number of animation effects that require modification in the Custom Animation task pane will vary if the chart contains a different number of managers and employees.To reproduce the background effects on this slide, do the following:On the Home tab, in the Slides group, click Layout, and then clickBlank. On the Design tab, in the Background group, click BackgroundStyles, and then click Style 8 (second row, fourth option from the left). (Note: If this action is taken in a PowerPoint presentation containing more than one slide, the background style will be applied to all of the slides.)To insert and arrange the SmartArt effects on this slide, do the following:On the Insert tab, in the Illustrations group, click SmartArt. In the Choose a SmartArt Graphic dialog box, in the left pane, click Hierarchy. In the Hierarchy pane, click Horizontal Labeled Hierarchy (second row, second option from the left), and then click OK to insert the graphic into the slide.Select the graphic, and then click one of the arrows on the left border. In the Type your text here dialog box, next to the first first-level bullet, enter DIRECTOR (or the name of the director). Next to the bullets for the second-level rectangles, enter MANAGER 1 and MANAGER 2 (or the names of the managers). Also in the Typeyourtext here dialog box, do the following:In the second first-level bullet, enter LEVEL 1.In the third first-level bullet, enter LEVEL 2.In the fourth first-level bullet, enter LEVEL 3.On the slide, do the following to add employee rectangles:Right-click the MANAGER 1 rectangle, point to Add Shape, and then click Add Shape Below. Right-click the MANAGER 2 rectangle, point to Add Shape, and then click Add Shape Below.Select the graphic, and then click one of the arrows on the left border. In the Type your text here dialog box, next to each of the five third-level bullets, enter EMPLOYEE (or the names of the employees).Select the graphic. Under SmartArt Tools, on the Format tab, click Size, and then do the following:In the Height box, enter6.82”.In the Width box, enter 9.3”. Under SmartArt Tools, on the Format tab, click Arrange, click Align, and then do the following:Click Align to Slide.Click Align Bottom. Click Align Center. Press and hold SHIFT, and then select all of the rectangles in the graphic. Under SmartArtTools, on the Format tab, in the Shapes group, click ChangeShape, and then under Rectangles click SnipDiagonalCornerRectangle (fifth option from the left).Press and hold SHIFT, and then select all three large level rectangles in the graphic. On the LEVEL 1 rectangle, on the middle of the left edge, drag the blue square adjustment handle slightly to the left to increase the width of all three rectangles. Press and hold SHIFT, and then select all of the director, manager, and employee rectangles. On the director rectangle, on the middle of the left edge, drag the blue square adjustment handle slightly to the left to increase the width of all the selected rectangles. If you would like to modify the number of directors, managers, and employees in the chart to match the structure of your organization, do one or more of the following: To add a rectangle within a particular level, right-click one of the rectangles in that level, point to Add Shape, and then click Add Shape After or Add Shape Before. To add a rectangle above another rectangle, right-click the lower-level rectangle, point to Add Shape, and then click Add Shape Above. To add a rectangle below another rectangle, right-click the higher-level rectangle, point to Add Shape, and then click Add Shape Below. To delete a rectangle, select the rectangle and then press DELETE.To add text to new rectangles, select the graphic, and then click one of the arrows on the left border. In the Type your text here dialog box, enter text. To reproduce the LEVEL 1 rectangle effects on this slide, do the following:On the slide, select the LEVEL 1 rectangle. On the Home tab, in the Font group, enter 24 in the Font Size box, click Character Spacing and then click Loose, and then click the arrow next to Font Color and click Blue, Accent 1, Lighter 40% (fourth row, fifth option from the left).On the Home tab, in the bottom right corner of the Drawing group, click the FormatShape dialog box launcher. In the FormatShape dialog box, click Fill in the left pane, select Gradient fill in the Fill pane, and then do the following:In the Type list, select Linear.Click the button next to Direction, and then click LinearDown (first row, second option from the left).Under Gradient stops, click Add or Remove until two stops appear in the drop-down list.Also under Gradient stops, customize the gradient stops as follows:Select Stop 1 from the list, and then do the following:In the Stop position box, enter 0%.Click the button next to Color, and then under Theme Colors click Black, Background 1 (first row, first option from the left). Select Stop 2 from the list, and then do the following: In the Stop position box, enter 100%.Click the button next to Color, and then under Theme Colors clickBlack, Background 1(first row, first option from the left).In the Transparency box, enter 100%.Also in the FormatShape dialog box, click LineColor in the left pane, select Gradient line in the LineColor pane, and then do the following:In the Type list, select Linear.Click the button next to Direction, and then click LinearDown (first row, second option from the left).Under Gradient stops, click Add or Remove until two stops appear in the drop-down list. Also under Gradient stops, customize the gradient stops as follows:Select Stop 1 from the list, and then do the following:In the Stop position box, enter 0%.Click the button next to Color, and then under Theme Colors click Blue, Accent 1, Lighter 40% (fourth row, fifth option from the left). Select Stop 2 from the list, and then do the following: In the Stop position box, enter 100%.Click the button next to Color, and then under Theme Colors clickBlack, Background 1 (first row, first option from the left). In the Transparency box, enter 100%.Also in the FormatShape dialog box, click LineStyle in the left pane. In the LineStyle pane, in the Width box, enter 1.5pt.Also in the FormatShape dialog box, click TextBox in the left pane, and then do the following in the TextBox pane:Under Textlayout, in the Verticalalignment list, select Top. Under Internalmargin, in the Left box, enter 0.19”.Under Internalmargin, in the Top box, enter 0.4”.Under Internalmargin, in the Right box, enter 0.19”.Under Internalmargin, in the Bottom box, enter 0.19”.To reproduce the LEVEL 2 rectangle effects on this slide, do the following:On the slide, select the LEVEL 2 rectangle. On the Home tab, in the Font group, enter 24 in the Font Size box, click Character Spacing and then click Loose, and then click the arrow next to Font Color and click Purple, Accent 4, Lighter 40% (fourth row, eighth option from the left).On the Home tab, in the bottom right corner of the Drawing group, click the FormatShape dialog box launcher. In the FormatShape dialog box, click Fill in the left pane, select Gradient fill in the Fill pane, and then do the following:In the Type list, select Linear.Click the button next to Direction, and then click LinearDown (first row, second option from the left).Under Gradient stops, click Add or Remove until two stops appear in the drop-down list.Also under Gradient stops, customize the gradient stops as follows:Select Stop 1 from the list, and then do the following:In the Stop position box, enter 0%.Click the button next to Color, and then under Theme Colors click Black, Background 1 (first row, first option from the left). Select Stop 2 from the list, and then do the following: In the Stop position box, enter 100%.Click the button next to Color, and then under Theme Colors clickBlack, Background 1(first row, first option from the left).In the Transparency box, enter 100%.Also in the FormatShape dialog box, click LineColor in the left pane, select Gradient line in the LineColor pane, and then do the following:In the Type list, select Linear.Click the button next to Direction, and then click LinearDown (first row, second option from the left).Under Gradient stops, click Add or Remove until two stops appear in the drop-down list. Also under Gradient stops, customize the gradient stops as follows:Select Stop 1 from the list, and then do the following:In the Stop position box, enter 0%.Click the button next to Color, and then under Theme Colors click Purple, Accent 4, Lighter 40% (fourth row, eighth option from the left). Select Stop 2 from the list, and then do the following: In the Stop position box, enter 100%.Click the button next to Color, and then under Theme Colors clickBlack, Background 1 (first row, first option from the left). In the Transparency box, enter 100%.Also in the FormatShape dialog box, click LineStyle in the left pane. In the LineStyle pane, in the Width box, enter 1.5pt.Also in the FormatShape dialog box, click TextBox in the left pane, and then do the following in the TextBox pane:Under Textlayout, in the Verticalalignment list, select Top. Under Internalmargin, in the Left box, enter 0.19”.Under Internalmargin, in the Top box, enter 0.4”.Under Internalmargin, in the Right box, enter 0.19”.Under Internalmargin, in the Bottom box, enter 0.19”.To reproduce the LEVEL 3 rectangle effects on this slide, do the following:On the slide, select the LEVEL 3 rectangle. On the Home tab, in the Font group, enter 24 in the Font Size box, click Character Spacing and then click Loose, and then click the arrow next to Font Color and click Olive Green, Accent 3, Lighter 40% (fourth row, seventh option from the left).On the Home tab, in the Drawing group, click the FormatShape Dialog Box Launcher. In the FormatShape dialog box, click Fill in the left pane, select Gradient fill in the Fill pane, and then do the following:In the Type list select Linear.Click the button next to Direction, and then clickLinearDown (first row, second option from the left).Under Gradient stops, click Add or Remove until two stops appear in the drop-down list.Also under Gradient stops, customize the gradient stops as follows:Select Stop 1 from the list, and then do the following:In the Stop position box, enter 0%.Click the button next to Color, and then under Theme Colors click Black, Background 1 (first row, first option from the left). Select Stop 2 from the list, and then do the following: In the Stop position box, enter 100%.Click the button next to Color, and then under Theme Colors clickBlack, Background 1(first row, first option from the left).In the Transparency box, enter 100%.Also in the FormatShape dialog box, click LineColor in the left pane, select Gradient line in the LineColor pane, and then do the following:In the Type list, select Linear.Click the button next to Direction, and then click LinearDown (first row, second option from the left).Under Gradient stops, click Add or Remove until two stops appear in the drop-down list. Also under Gradient stops, customize the gradient stops as follows:Select Stop 1 from the list, and then do the following:In the Stop position box, enter 0%.Click the button next to Color, and then under Theme Colors click Olive Green, Accent 3, Lighter 40% (fourth row, seventh option from the left). Select Stop 2 from the list, and then do the following: In the Stop position box, enter 100%.Click the button next to Color, and then under Theme Colors clickBlack, Background 1 (first row, first option from the left). In the Transparency box, enter 100%.Also in the FormatShape dialog box, click LineStyle in the left pane. In the LineStyle pane, in the Width box, enter 1.5pt.Also in the FormatShape dialog box, click TextBox in the left pane, and then do the following in the TextBox pane:Under Textlayout, in the Verticalalignment list, select Top. Under Internalmargin, in the Left box, enter 0.19”.Under Internalmargin, in the Top box, enter 0.4”.Under Internalmargin, in the Right box, enter 0.19”.Under Internalmargin, in the Bottom box, enter 0.19”.To reproduce the director rectangle effects on this slide, do the following:On the slide, select the director rectangle. Press the RIGHT ARROW key as needed to move the rectangle slightly off the right edge of the LEVEL 1 rectangle.On the Home tab, in the Font group, enter 23 in the FontSize box, and then click TextShadow. On the Home tab, in the bottom right corner of the Drawing group, click the FormatShape dialog box launcher. In the FormatShape dialog box, in the left pane, click Fill, select Gradient fill in the Fill pane, and then do the following:In the Type list, select Linear.Click the button next to Direction, and then click LinearDown (first row, second option from the left).Under Gradient stops, click Add or Remove until two stops appear in the drop-down list. Also under Gradient stops, customize the gradient stops as follows:Select Stop 1 from the list, and then do the following:In the Stop position box, enter 0%.Click the button next to Color, and then under Theme Colors click Blue, Accent 1, Lighter 40% (fourth row, fifth option from the left). Select Stop 2 from the list, and then do the following: In the Stop position box, enter 100%.Click the button next to Color, and then under Theme Colors clickBlue , Accent 1, Darker 25% (fifth row, fifth option from the left). Also in the FormatShape dialog box, click LineColor in the left pane. In the LineColor pane, select Solidline, click the button next to Color, and then click Blue, Accent 1, Darker 25% (fifth row, fifth option from the left). Also in the FormatShape dialog box, click LineStyle in the left pane. In the LineStyle pane, in the Width box, enter 1 pt.Also in the FormatShape dialog box, click Shadow in the left pane. In the Shadow pane, click the button next to Presets, and then under Outer click OffsetCenter (second row, second option from the left).To reproduce the manager rectangle effects on this slide, do the following:Press and hold SHIFT, and then select the manager rectangles. Press the RIGHT ARROW key as needed to move the manager rectangles slightly off the right edge of the LEVEL 2 rectangle.On the Home tab, in the Font group, enter 23 pt in the FontSize box, and then click TextShadow. On the Home tab, in the bottom right corner of the Drawing group, click the FormatShape dialog box launcher. In the FormatShape dialog box, in the left pane, click Fill, select Gradient fill in the Fill pane, and then do the following:In the Type list, select Linear.Click the button next to Direction, and then click LinearDown (first row, second option from the left).Under Gradient stops, click Add or Remove until two stops appear in the drop-down list. Also under Gradient stops, customize the gradient stops as follows:Select Stop 1 from the list, and then do the following:In the Stop position box, enter 0%.Click the button next to Color, and then under Theme Colors click Purple, Accent 4, Lighter 40% (fourth row, eighth option from the left). Select Stop 2 from the list, and then do the following: In the Stop position box, enter 100%.Click the button next to Color, and then under Theme Colors clickPurple , Accent 4, Darker 25% (fifth row, eighth option from the left). Also in the FormatShape dialog box, click LineColor in the left pane. In the LineColor pane, select Solidline, click the button next to Color, and then clickPurple, Accent 4, Darker 25% (fifth row, eighth option from the left).Also in the FormatShape dialog box, click LineStyle in the left pane. In the LineStyle pane, in the Width box, enter 1 pt. Also in the FormatShape dialog box, click Shadow in the left pane. In the Shadow pane, click the button next to Presets , and then under Outer click OffsetCenter (second row, second option from the left). To reproduce the employee rectangle effects on this slide, do the following:Press and hold SHIFT, and then select the employee rectangles. Press the RIGHT ARROW key as needed to move the employee rectangles slightly off the right edge of the LEVEL 3 rectangle.On the Home tab, in the Font group, enter 23 pt in the FontSize box, and then click TextShadow. On the Home tab, in the bottom right corner of the Drawing group, click the FormatShape dialog box launcher. In the FormatShape dialog box, in the left pane, click Fill, select Gradient fill in the Fill pane, and then do the following:In the Type list, select Linear.Click the button next to Direction, and then click LinearDown (first row, second option from the left).Under Gradient stops, click Add or Remove until two stops appear in the drop-down list. Also under Gradient stops, customize the gradient stops as follows:Select Stop 1 from the list, and then do the following:In the Stop position box, enter 0%.Click the button next to Color, and then under Theme Colors click Olive Green, Accent 3, Lighter 40% (fourth row, seventh option from the left). Select Stop 2 from the list, and then do the following: In the Stop position box, enter 100%.Click the button next to Color, and then under Theme Colors clickOlive Green, Accent 3, Darker 25% (fifth row, seventh option from the left). Also in the FormatShape dialog box, click LineColor in the left pane. In the LineColor pane, select Solidline, click the button next to Color, and then clickPurple, Accent 4, Darker 25% (fifth row, eighth option from the left).Also in the FormatShape dialog box, click LineStyle in the left pane. In the LineStyle pane, in the Width box, enter 1 pt. Also in the FormatShape dialog box, click Shadow in the left pane. In the Shadow pane, click the button next to Presets , and then under Outer click OffsetCenter (second row, second option from the left). To vertically position the director, manager, and employee rectangles on the slide, do the following:Press and hold SHIFT, and then select the top three employee rectangles. Press the UP ARROW key as needed to move the rectangles up, just below the Level 3 text box.Select the MANAGER 1 rectangle. Press the UP ARROW key as needed to move this rectangle up slightly, to realign the connecting lines to the top three employee rectangles. Select the director rectangle. Press the UP ARROW key as needed to move this rectangle up slightly, to realign the connecting lines to the manager rectangles. To reproduce the line effects on this slide, do the following:Press and hold SHIFT, and then select all of the connecting lines. On the Home tab, in the bottom right corner of theDrawing group, click the FormatShape dialog box launcher. In the FormatShape dialog box, in the left pane, click LineColor, select Solid line in the LineColor pane, and then do the following:Click the button next to Color, and then under Theme Colors clickWhite, Text 1 (first row, second option from the left).In the Transparency box, enter 80%. Also in the FormatShape dialog box, click LineStyle in the left pane. In the LineStyle pane, do the following:In the Width box, enter 2.5 pt.In the Dashtype list select RoundDot (second option from the top).To reproduce the animation effects for the rectangles on this slide, do the following:On the Animations tab, in the Animations group, click CustomAnimation.On the slide, select the graphic. In the CustomAnimationtask pane, do the following:Click the arrow next to AddEffect, point to Entrance, and then click MoreEffects. In the AddEntranceEffect dialog box, under Moderate, click Descend.Under Modify: Descend, in the Speed list, select Fast. Also in the Custom Animation task pane, select the animation effect (descend effect). Click the arrow to the right of the effect, and then click EffectOptions. In the Descend dialog box, on the SmartArtAnimation tab, in the Group graphic list, select By level one by one. Also in the Custom Animation task pane, click the double arrow under the animation effect to expand the contents of the list of effects, and then do the following:Press and hold CTRL, and then select the first four animationeffects (descend effects). Under Modify: Descend, in the Start list, select WithPrevious.Select the first animation effect. Click the arrow to the right of the effect, and then click Timing. In the Descend dialog box, on the Timing tab, in the Delay box, enter 2.Select the second animation effect. ClickChange, point to Entrance, and then click MoreEffects. In the ChangeEntranceEffect dialog box, under Moderate, click RiseUp.Select the third animation effect, and then do the following: Click Change, point to Entrance, and then click MoreEffects. In the ChangeEntranceEffect dialog box, under Moderate,click RiseUp.Click the arrow to the right of the effect (rise up entrance effect), and then click Timing. In the RiseUp dialog box, on the Timing tab, in the Delay box, enter 0.5.Select the fourth animation effect, and then do the following:Click Change, point to Entrance, and then click MoreEffects. In the ChangeEntranceEffect dialog box, under Moderate, click RiseUp.Click the arrow to the right of the effect, and then click Timing. In the RiseUp dialog box, on the Timing tab, in the Delay box, enter 1. To reproduce the animation effects for the connecting lines on this slide, do the following:Press and hold CTRL, and then select the fifth and ninth animation effects (descend entrance effects) in the Custom Animation task pane. Click Change, point to Entrance, and then click MoreEffects. In the ChangeEntranceEffect dialog box, under Basic, click Wipe. Under Modify: Wipe, do the following:In the Start list, select OnClick. In the Direction list, select FromLeft.In the Speed list, select Fast.Press and hold CTRL, and then select the seventh and 11th animation effects (descend entrance effects). Click Change, point to Entrance, and then click MoreEffects. In the ChangeEntranceEffect dialog box, under Basic, click Wipe. Under Modify: Wipe, do the following:In the Start list, select With Previous.In the Direction list, select FromLeft.In the Speed list, select Fast.With the seventh and 11th animation effects still selected, click the arrow to the right of the eleventh effect (wipe entrance effect), and then click Timing. In the Wipe dialog box, on the Timing tab, in the Delay box, enter 0.5.Select the eighth animation effect (descend entrance effect). Click the arrow to the right of the effect, and then click Timing. In the Descend dialog box, on the Timing tab, in the Delay box, enter 0.5. Press and hold CTRL, and then select the 13th, 15th, and 17th animation effects (descend entrance effects). Click Change, point to Entrance, and then click MoreEffects. In the ChangeEntranceEffects dialog box, under Basic, click Wipe. Under Modify: Wipe, do the following:In the Start list, select WithPrevious.In the Direction list, select FromLeft.In the Speed list, select Fast.Select the 13th animation effect (wipe entrance effect). Click the arrow to the right of the effect, and then click Timing. In the Wipe dialog box, on the Timing tab, in the Delay box, enter 1. Select the 15th animation effect (wipe entrance effect). Click the arrow to the right of the effect, and then click Timing. In the Wipe dialog box, on the Timing tab, in the Delay box, enter 1.5. Select the 17th animation effect (wipe entrance effect). Click the arrow to the right of the effect and select Timing. In the Wipe dialog box, on the Timing tab, in the Delay box enter 2 seconds. Select the 12th, 14th, 16th, and 18th animation effects (descend entrance effects). Under Modify: Descend, in the Start list, select WithPrevious.
  26. SmartArt custom animation effects: organization chart(Intermediate)Tip: The instructions below describe how to reproduce the exact organization chart and animation effects in the example above. In the animation procedures, the number of animation effects that require modification in the Custom Animation task pane will vary if the chart contains a different number of managers and employees.To reproduce the SmartArt effects on this slide, do the following:On the Home tab, in the Slides group, click Layout, and then clickBlank. On the Insert tab, in the Illustrations group, click SmartArt. In the Choose a SmartArt Graphic dialog box, in the left pane, click Hierarchy. In the Hierarchy pane, click Organization Chart (first row, first option from the left), and then click OK to insert the graphic into the slide.Select the graphic, and then click one of the arrows on the left border. In the Type your text here dialog box, in the text box for the first-level rectangle, enter Director (or the name of the director). In the second-level rectangle enter Assistant Director (or the name of the assistant director). In the text boxes for the third-level rectangles, enter Manager 1, Manager 2, and Manager 3 (or the names of the managers). On the slide, do the following to add more employee rectangles:Right-click the Manager 1 rectangle, point to Add Shape, and then click Add Shape Below. Repeat this process one more time for a total of three rectangles below Manager 1. Right-click the Manager 2 rectangle, point to Add Shape, and then click Add Shape Below.Right-click the Manager 3 rectangle, point to Add Shape, and then click Add Shape Below. Select the graphic, and then click one of the arrows on the left border. In the Type your text here dialog box, in the text boxes for the fourth-level rectangles, enter Employee (or the names of the employees).If you would like to modify the number of directors, managers, and employees in the chart to match the structure of your organization, do one or more of the following: To add a rectangle within a particular level, right-click one of the rectangles in that level, point to Add Shape, and then click Add Shape After or Add Shape Before. To add a rectangle below another rectangle, right-click the higher-level rectangle, point to Add Shape, and then click Add Shape Below. To delete a rectangle, select the rectangle and then press DELETE.To add text to new rectangles, select the graphic, and then click one of the arrows on the left border. In the Type your text here dialog box, enter text. Select the graphic. Under SmartArt Tools, on the Format tab, click Size, and then do the following:In the Height box, enter6.55”.In the Width box, enter 8.79”. Under SmartArt Tools, on the Format tab, click Arrange, click Align, and then do the following:Click Align to Slide.Click Align Middle. Click Align Center. To reproduce the effects for the employee rectangles on this slide, do the following:Press and hold SHIFT, and then select all of the rectangles in the slide. On one of the rectangles, on the middle of the left edge, drag the blue square adjustment handle slightly to the left to increase the width of all of the rectangles. On the slide, select the graphic. On the Home tab, in the Font group, select Gill Sans MT from the Font list, and then select 20 from the FontSize list.Press and hold SHIFT, and then select all of the rectangles in the graphic. On the Home tab, in the bottom right corner of the Drawing group, click the FormatShape dialog box launcher. In the FormatShape dialog box, click Line Color in the left pane. In the Line Color pane, select No line. Also in the FormatShape dialog box, click Shadow in the left pane. In the Shadow pane, click the button next to Presets , and then under Outer click OffsetCenter (second row, second option from the left). Also in the FormatShape dialog box, click 3-DFormat in the left pane, and then do the following in the 3-DFormat pane under Bevel:Click the button next to Top, and then click CoolSlant (first row, fourth option from the left).Next to Top, in the Width box, enter 5 pt,and in the Height box, enter 5 pt.Press and hold SHIFT, and then select all of the employee rectangles in the graphic. On the Home tab, in the bottom right corner of the Drawing group, click the FormatShape dialog box launcher. In the FormatShape dialog box, click Fill in the left pane, select Gradient fill in the Fill pane, and then do the following:In the Type list, select Linear.Click the button next to Direction, and then click LinearDown (first row, second option from the left).Under Gradient stops, click Add or Remove until two stops appear in the drop-down list. Also under Gradient stops, customize the gradient stops as follows:Select Stop 1 from the list, and then do the following:In the Stop position box, enter 0%.Click the button next to Color, and then under Theme Colors click Blue, Accent 1, Darker 50% (sixth row, fifth option from the left). Select Stop 2 from the list, and then do the following: In the Stop position box, enter 100%.Click the button next to Color, and then under Theme Colors clickBlue, Accent 1, Darker 25% (fifth row, fifth option from the left). To reproduce the effects for the manager rectangles on this slide, do the following:Press and hold SHIFT, and then select all three manager rectangles in the graphic. On the Home tab, in the bottom right corner of the Drawing group, click the FormatShape dialog box launcher. In the FormatShape dialog box, click Fill in the left pane, select Gradientfill in the Fill pane, and then do the following:In the Type list, select Linear.Click the button next to Direction, and then click LinearDown (first row, second option from the left).Under Gradient stops, click Add or Remove until two stops appear in the drop-down list. Also under Gradient stops, customize the gradient stops as follows:Select Stop 1 from the list, and then do the following:In the Stop position box, enter 0%.Click the button next to Color, and then under Theme Colors click Blue, Accent 1, Darker 25% (fifth row, fifth option from the left). Select Stop 2 from the list, and then do the following: In the Stop position box, enter 100%.Click the button next to Color, and then under Theme Colors clickBlue, Accent 1, Lighter 40% (fourth row, fifth option from the left). To reproduce the effects for the director rectangles on this slide, do the following:Press and hold SHIFT, and then the director and assistant director rectangles (first- and second-level rectangles) in the graphic. On the Home tab, in the bottom right corner of the Drawing group, click the FormatShape dialog box launcher. In the FormatShape dialog box, click Fill in the left pane, select Gradientfill in the Fill pane, and then do the following:In the Type list, select Linear.Click the button next to Direction, and then click LinearDown (first row, second option from the left).Under Gradient stops, click Add or Remove until two stops appear in the drop-down list. Also under Gradient stops, customize the gradient stops as follows:Select Stop 1 from the list, and then do the following:In the Stop position box, enter 0%.Click the button next to Color, and then under Theme Colors click Blue, Accent 1, Lighter 40% (fourth row, fifth option from the left). Select Stop 2 from the list, and then do the following: In the Stop position box, enter 100%.Click the button next to Color, and then under Theme Colors clickBlue, Accent 1, Lighter 60% (third row, fifth option from the left). Press and hold SHIFT, and then select the director and assistant director rectangles in the graphic. On the Home tab, in the Font group, click the button next to FontColor, and then clickDark Blue, Text 2 (first row, fourth option from the left).To reproduce the connecting line between Manager 2 and the last employee under Manager 1, do the following:On the Home tab, in the Drawing group, click Shapes, and then under Lines click Freeform (11th option from the left). On the slide, do the following to draw a freeform line:Click the first point on the right edge of the bottom employee rectangle. Click the second point approximately 0.5” to the right of the first point.Click the third point approximately 3.5” above the second point. Double-click the fourth point on the left edge of the Manager 2 rectangle to finish the freeform line. On the slide, select the freeform line. On the Home tab, in the bottom right corner of the Drawing group, click the Format Shape dialog box launcher. In the FormatShape dialog box, in the left pane, click LineColor. In the LineColor pane, select Solid line, click the button next to Color, and then under Theme Colors click Blue, Accent 1 (first row, fifth option from the left). Also in the FormatShape dialog box, in the left pane, click LineStyle, and then do the following in the LineStyle pane:In the Width box, enter 2 pt. In the Dashtype list, select RoundDot (second option from the top).In the Captype list, select Round. In the Jointype list, select Round.To reproduce the animation effects on this slide, do the following:On the Animations tab, in the Animations group, click CustomAnimation.On the slide, select the graphic. In the CustomAnimation task pane, do the following:Click AddEffect, point to Entrance, and then click MoreEffects. In the AddEntranceEffect dialog box, under Basic, click PeekIn. Under Modify: Peek In, in the Speed list, select VeryFast. Click the arrow to the right of the animation effect (peek in effect), and then click EffectOptions. In the Peek In dialog box, on the SmartArtAnimation tab, in the Group graphic list, select By level one by one.Also in the Custom Animation task pane, click the double arrow under the animation effect to expand the contents of the list of effects, and then do the following: Select the first animation effect (peek-in effect). Under Modify: Peek In, in the Start list, selectWithPrevious.Press and hold CTRL, and then select the second, fourth, sixth, eighth, 10th, 12th, 14th, 16th, and 18th animation effects (peek-in effects), and do the following:Click Change, point to Entrance, and then click MoreEffects. In the ChangeEntranceEffects dialog box, under Subtle, click Fade. Under Modify: Fade, in the Speed list, selectVeryFast.Select the third animation effect (peek-in effect). Under Modify: Peek In, in the Direction list, select FromRight.Press and hold CTRL, and then select the fifth, seventh, and ninth animation effects (peek-in effects). Under Modify: Peek In, in the Direction list, select FromTop.Press and hold CTRL, and then select the 11th, 13th, and 15th animation effects. Under Modify: Peek In, in the Direction list, select FromLeft.Press and hold CTRL, and then select the 11th, 12th, 13th, 14th, and 15th effects. Under Modify: Peek In, in the Start list, select With Previous.Press and hold CTRL, and then select the 17th and 19th animationeffects (peek-in effects), and then do the following under Modify: Peek In:In the Direction list, select FromLeft.In the Start list, select WithPrevious.On the slide, select the freeform line.In the CustomAnimation task pane, clickAddEffect, point to Entrance, and then click MoreEffects. In the AddEntranceEffect dialog box, under Basic, click Wipe.Also in the CustomAnimation task pane, select the 20th animation effect (wipe effect). Under Modify: Wipe,do the following:In the Start list, selectAfterPrevious. In the Direction list, select FromBottom. In the Speed list, select VeryFast.Also in the Custom Animation task pane, drag the 20th animation effect until it is 15th in the list of effects. To reproduce the background on this slide, do the following:Right-click the slide background area, and then click Format Background. In the Format Background dialog box, click Fill in the left pane, select Gradient fill in the Fill pane, and then do the following:In the Type list, select Linear.Click the button next to Direction, and then click Linear Down (first row, second option from the left)Under Gradient stops, click Add or Remove until three stops appear in the drop-down list.Also under Gradient stops, customize the gradient stops as follows:Select Stop 1 from the list, and then do the following:In the Stop position box, enter 0%.Click the button next to Color, and then under Theme Colors click Black, Text 1 (first row, second option from the left). Select Stop 2 from the list, and then do the following: In the Stop position box, enter 32%.Click the button next to Color, and then under Theme Colors clickBlue, Accent 1, Darker 50% (sixth row, fourth option from the left).Select Stop 3 from the list, and then do the following: In the Stop position box, enter 100%.Click the button next to Color, and then under Theme Colors clickBlue, Accent 1, Lighter 80% (second row, fifth option from the left).
  27. For reproduction steps for this slide, refer to the PowerPoint template titled “Static text effects for PowerPoint slides” (STATIC_TEXT.potx), slide number 17.