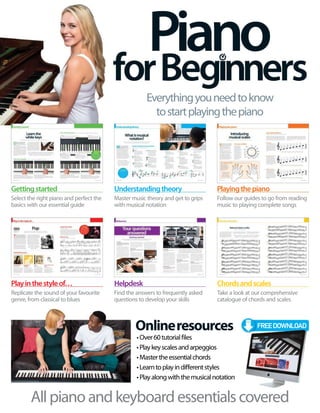
N
E
W
Everythingyouneedtoknow
tostartplayingthepiano
Piano
Mastermusicalnotation
Recordyourcompositions
Playindifferentgenrestyles
FREEDOWNLOADS
Audiofiles,sheetmusicandmore!
Learn
chords&
scales
Welcometo
Making the decision to learn a new instrument can be a whim or a long-standing ambition. Either
way, picking up an instrument for the first time is a daunting feeling, as the scale of the task sinks in.
This is particularly true if you have never learnt to play an instrument before, with all those technical
terms, scales and notation marks to decipher before you have even played a single note.This new
edition of Piano for Beginners is therefore an essential guide for piano and keyboard first-timers.
Simplifying the process through step-by-step tutorials, this bookazine will help you lay solid
foundations for years of enjoyment. From the correct way to sit at the piano to reading notation,
we start with the basics before expanding your musical horizons with easy home recording and
genre-specific tutorials.With a glossary of essential terminology, a list of chords and even access to
free online resources such as audio files, Piano for Beginners really is your go-to guide as you get
acclimatised to the musical landscape and hone your piano-playing skills.
Piano
Imagine Publishing Ltd
Richmond House
33 Richmond Hill
Bournemouth
Dorset BH2 6EZ
 +44 (0) 1202 586200
Website: www.imagine-publishing.co.uk
Twitter: @Books_Imagine
Facebook: www.facebook.com/ImagineBookazines
Publishing Director
Aaron Asadi
Head of Design
Ross Andrews
Editor in Chief
Jon White
Production Editor
Jasmin Snook
Senior Art Editor
Greg Whitaker
Art Editor
Ali Innes
Photographer
James Sheppard
Printed by
William Gibbons, 26 Planetary Road, Willenhall, West Midlands, WV13 3XT
Distributed in the UK, Eire  the Rest of the World by:
Marketforce, 5 Churchill Place, Canary Wharf, London, E14 5HU 
Tel 0203 148 3300 www.marketforce.co.uk
Distributed in Australia by
Gordon  Gotch Australia Pty Ltd, 26 Rodborough Road, Frenchs Forest, NSW, 2086 Australia
Tel: +61 2 9972 8800 Web: www.gordongotch.com.au
Disclaimer
The publisher cannot accept responsibility for any unsolicited material lost or damaged in the
post. All text and layout is the copyright of Imagine Publishing Ltd. Nothing in this bookazine may
be reproduced in whole or part without the written permission of the publisher. All copyrights are
recognised and used specifically for the purpose of criticism and review. Although the bookazine has
endeavoured to ensure all information is correct at time of print, prices and availability may change.
This bookazine is fully independent and not affiliated in any way with the companies mentioned herein.
Piano for Beginners Sixth Edition © 2016 Imagine Publishing Ltd
ISBN 978 1785 463 839
Piano
Contents
Guiding you every step of the way and providing you with everything you need
to start learning to read music and play the piano
Gettingstarted
10 Theultimateguideto
thepiano
Unleash your musical talent
20 Howtositcorrectlyat
thepiano
Perfect posture is an essential task to master
22 Learnthewhitekeys
Understand the natural keys on your piano
24 Learntheblackkeys
Getacquaintedwiththeworldofflatsandsharps
26 Usingthepiano’spedals
Advance your playing style
Understanding
theory
30 Whatismusicalnotation?
The symbols that affect the way we play a piece
32 Introducingthestaves
Thefivehorizontallinesthatenableustoreadmusic
33 Notesandtheirvalues
Some of the different types of notes you’ll find
34 Howtoreadmusicalnotation
Learn which notes go where
38 Understandtimesignatures
Explaining beats and bars
40 Interpretkeysignatures
Why they are needed and how to read them
42 Learnaboutledgerlines
Gettogripswiththeseessentialpartsofnotation
44 Changenotelengths
Learnhowthedurationofnotescanbemodified
46 Alteranote’spitch
withaccidentals
Learn what these quirky symbols mean
48 Navigatemusicnotation
Time to get score savvy and stay on track
6 Piano for Beginners
Give it a try
Lookoutforthislogooneachpage,
asitmeansthatanaudiofileis
availableonlinetohelpyoumastera
certaintutorial.
110 RecordonaPC
Learn about Audacity
114 Improveyourtechnique
withapps
Get creative with an iPhone or iPad
Playinthestyleof
We outline the various musical genres and sounds that
can be achieved on your piano
118 Pop
Pleasant progressions and simple melodies
120 Blues
Abroadgenrewithafewdefiningcharacteristics
122 Jazz
A passionate and diverse genre
124 TheClassicalperiod
Rich, obvious melodies and simple patterns
126 TheRomanticperiod
Expressing freedom and creativity
128 Contemporarypianomusic
Fusing classical and pop
Reference
132 Helpdesk
Answering common queries
142 Glossary
Musical terms explained
144 Essentialscales
All the scales you need to know
152 Chordslist
All the chords that matter
74 Learnaboutintervals
Playing two notes at the same time
78 Understandingchords
How to construct and play common chords
80 Usinginversions
Achieve a different take on chords
82 Majorchords
An essential tool for budding pianists
84 Minorchords
The mood-swingers of your chord repertoire
86 Suspendedchords
Shake things up and add some variation
88 Augmentedchords
Add a bit of spice to your chords
89 Diminishedchords
How to use them properly
90 Dominantseventhchords
Introducing four-note chords
92 Majorseventhchords
A warm, jazzy-sounding chord type
93 Minorseventhchords
How to transform a plain minor triad
94 Usechordprogressions
The first step towards writing a song
96 Left-handpatterns
Use your left hand to support a melody
98 Learnarpeggios
Break up chords to make your music flow
Thenextstep
102 Gettogripswithrecording
Start recording your very first masterpiece
104 Playthroughacomputer
HookuptoaPCorMactoaccessnewsounds
106 RecordonaMac
RecordconcertosfromthecomfortofyourMac
50 Controlthevolume
withdynamics
Inject more personality into your music
52 Setandchangethetempo
Ensureyourjigsarejollyandyourballadsareslow
54 Addarticulationstonotes
Play notes with character and style
55 Usemusicalornaments
Learn about these extra decorations
Playingthepiano
58 Warmupyourhands
Limber up before you practise
60 Introducingmusicalscales
Understand how scales are formed
62 TheCmajorscale
A great first step for beginners
66 TheFmajorscale
A scale that contains a black key
68 TheGmajorscale
The major scale that has one sharp
69 TheDmajorscale
Discover the scale with two sharps
70 TheAminorscales
The scale with three formats
72 Dminorscales
A minor scale with a flat
Piano for Beginners 7
Throughout this book,
you will see top-down
images of a keyboard with
the keys highlighted. The
darker highlights show the
keys played in the image,
while the lighter highlights
show the keys that need
to be played in the step
Notes
and keys
Middle C
Darker highlights Lighter highlights
Location
courtesy
of
Music
Is
Life,
Bournemouth
“Deciding to take the first step towards
discovering your musical talents is
worthwhile at any age”
“Learning to play an
instrument is a rewarding
journey and the piano
is a great place
to start”
8 Piano for Beginners
Give it a try
Lookoutforthislogooneachpage,
asitmeansthatanaudioand/or
videofileisavailableonlinetohelp
youmasteracertaintechnique.
Piano for Beginners 9
10 Theultimateguide
tothepiano
tChoosing the right piano
tDifferent ways to play
tTaking care of your piano
20 Howtositcorrectlyatthepiano
22 Learnthewhitekeys
24 Learntheblackkeys
26 Usingthepiano’spedals
Gettingstarted
Our ultimate guide and step-by-step tutorials will teach you all the basics, from
choosing the right piano and sitting correctly to playing your first melody
10 Piano for Beginners
Gettingstarted
D
eciding to take the first step towards
discovering your musical talents is worthwhile
at any age. Learning to play an instrument
is a rewarding journey and the piano really is
a great one to start with. Although you’ll need plenty
of time, practice and patience, the piano is a relatively
easy instrument to master, which is why it’s a popular
one to try to learn first. Many musicians find that after
conquering it, the idea of learning other instruments isn’t
as daunting.
The piano has come a long way since it was invented,
and alongside the traditional acoustic varieties, there are
now digital pianos and portable keyboards. Learning
to play the piano is the same on all three, but you’ll find
some may offer more or fewer features than others,
although this won’t have a dramatic effect on how you
play while you’re still developing your skills. Regardless of
which instrument you’re using, you can still pick up the
basics in this beginner’s guide.
So whether you want to be able to play the odd tune,
learn a particular song or compose your own musical
masterpiece, you’re in the right place. Join us and discover
what the piano has to offer. In the following pages we’ll
introduce you to the different types of pianos that are out
there and help you get started in front of the keys. You’ll
also discover how to read music and play with
Theultimateguide
tothepiano
Unleash your musical talents and learn how to play scales,
songs and masterpieces on the piano

Throughout this book, you will see top-down images of a keyboard with the keys highlighted.
The darker highlights show the keys played in the image, while the lighter highlights show the
keys that need to be played in the step. The star shows where Middle C is.
Notes and keys
Middle C
Darker highlights Lighter highlights
Piano for Beginners 11
12 Piano for Beginners
Gettingstarted
Acoustic pianos produce a naturally rich sound and
are favoured by more accomplished pianists
Acoustic pianos
Acoustic pianos are considered a percussion
instrument as felted hammers strike steel strings
inside once you press down on a key to produce
a note. The vibrations in the string then travel to a
soundboard, which amplifies the music. Generally,
the harder you press a key, the louder the sound.
Professional pianists generally favour acoustic
pianos as they feature up to eight octaves and
create a more natural, fuller sound. Due to the way
they are built, acoustic pianos do require some
level of maintenance, which means you’ll need to
have them tuned at least once every six months.
This process involves tightening the strings to
improve pitch. Although acoustic pianos are
generally larger in size, there are different styles
available, which vary in dimension.
Acoustic pianos come in different shapes
and sizes but largely fall under two main
styles: upright and grand. Upright pianos
are the smaller of the two as the interior
strings are housed vertically, meaning it
doesn’t require a large back like a grand
piano, where the strings lay vertically.
Although you can get slightly smaller
varieties of upright acoustic pianos, they
don’t differ too dramatically in size. Grand
pianos on the other hand, although large,
do come in varying sizes including small
baby grand, slightly larger parlour grand
and concert grand. The larger the back of
the grand piano, the longer the strings, and
so the richer the sound is that is produced.
Of the two acoustic varieties, grand
pianos tend to be the more expensive.
Their beautiful build and design also
makes them popular as centrepieces in
large rooms.
When compared to digital pianos,
acoustic varieties seem to offer you a lot
less for your money; however, the natural
piano tones that are produced surpass
those of an electronic model, which is
why they are favoured by professional and
traditional pianists.
Different acoustic pianos
What style of acoustic piano suits your style and needs?
Pros Cons
Richer and more natural sound quality Requires more space
Up to eight octaves available Needs regular tuning and maintenance
Beautifully designed Is not portable
Is acoustic right for you?
Pedals
You can use the pedals on your piano
to adjust tone. The left pedal (una
corda) will soften the sound, and
right pedal (sustain) lifts all the felt
dampers inside while you play, which
are usually used to stop sound
Keyboard
The keyboard on your acoustic piano features a
total of 88 keys, 52 of which are white and 36 black.
Traditionally white keys were made of ivory and
black keys wood. Once you press a key, a hammer
inside will strike the string to produce sound
Piano lid
Nearly all acoustic pianos will have a lid of some
description. Make sure this is closed when
you’re not playing as it’ll prevent dust getting in
Piano for Beginners 13
others. There are plenty of beginner-friendly
tips and advice along the way as well that’ll help you
improve and build upon your piano playing skills. So
rest your hands on the keys and let’s get started!
Buying your piano
Before you make your first piano purchase it’s
important you get a good understanding of what’s
on offer and which style of instrument best suits
your skills and needs. Pianos vary dramatically
in size, style and price. Most beginners opt for
straightforward electronic keyboards, which are
cheaper in price, portable and don’t require as
much space or maintenance. Electronic keyboards
also include creative features such as sound effects
and the ability to replicate other instrument tones.
A step up from the electronic keyboard is a digital
piano, which offers similar features but comes with
weighted keys, which you’ll also find in the classic
acoustic variety of piano. Like a keyboard you can
create sound effects and most modern varieties
of electronic piano even enable you to record the
music you create.
When it comes to the acoustic variety of piano,
there are two main types: an upright and grand.
Acoustic pianos use strings to make sound and
don’t come with any electronic functions or
features. They are also slightly larger in size and are
generally more expensive.
You can keep costs down by buying a second-
hand piano but always give it a thorough check
through before parting with your money. Ensure
acoustic pianos are tuned and electronic features
on the digital variety are working well; you should
also run through the keys to check sound. If you’re
thinking of buying online, visit your local music shop
first to test out the different varieties of piano, which
will help you make a better decision when it comes
to committing to your purchase.
Getting started
Once you’ve set up your piano and you’re ready
to play, you’ll need to ensure you’re in the correct
position before you begin. Place your sheet music
on the music rack and sit with an upright posture
on the stool, at the middle point of the keyboard,
in front of the Middle C key. If you’re sitting too
low, you’ll need to extend the height of your stool
or place a cushion on top so that you’re more
comfortable and closer to the keyboard. Your feet
should also be facing forward on the floor, more
advanced piano players will use the pedals in this
position to adjust tones and change sound quality
while playing.
Always ensure your hands can rest comfortably
on the keys, without having to stretch your arms
too far forward. All ten fingers should be rested on
the white keys with your right thumb positioned
on Middle C. This means that your right hand
should be positioned as follows; thumb – Middle
C, index finger - D, middle finger - E, ring finger - F


Soundboard
The string vibrations produce some
level of sound initially but it’s the built-
in soundboard that amplifies it so that
it’s then audible to the audience and
pianist playing. The soundboard will
vibrate at the same frequency as the
strings to do this
Insides
Acoustic upright and grand
pianos have extremely complex
insides – if something goes wrong
with your piano, it’s best to get a
trained professional to look at it
Steel strings
The strings inside a
piano are made from
steel; they vibrate
once they are hit by
the felt hammers,
which are controlled
by the piano keys
that you press to play.
Once you release a
key, a felt damper will
drop onto the string
to stop the sound
©Thi
nksto
ck
14 Piano for Beginners
Gettingstarted
Digital pianos come with some fantastic extra features
that make playing and composing music easy
Digital pianos
Digital pianos share a lot of similar features
to electronic keyboards. They are capable of
creating sound effects and can also imitate
other instruments. It’s even possible to
record the music you play on them. Unlike
keyboards, however, digital pianos come with
weighted keys, replicating the feel of playing
an acoustic piano.
Larger digital pianos can also offer a full
eight octaves like an acoustic and you may
find that playing on one isn’t that different to
using an upright or grand piano. The harder
you press the keys, for example, the louder
the sound that’s produced. However, the lack
of strings in a digital piano means that the
sound results won’t be as natural or rich, as
they use sound chips and speakers to replicate
a traditional piano tone. One of the great
things about digital pianos, however, is their
low maintenance, as they don’t require regular
tuning and there are fewer things to go wrong
with their insides.
“You may find that playing
on a digital piano isn’t that
different to using an upright
or grand piano”
Input/Output
Many digital pianos include a headphone jack
for private practising and some even enable
you to connect a mic. It’s also possible to
directly record the music you play via USB
Interface
The user interface on most digital
pianos is relatively easy to navigate.
Through this you can control the
piano’s volume, select different playing
modes and experiment with available
creative sound effects settings
Keyboard
All digital pianos come with
weighted keys, which mimic the
feeling of playing on an acoustic; the
harder you strike a key the louder
the sound. Larger and slightly more
expensive models can also offer a
full eight octaves
Build and size
The build and size of digital pianos can vary greatly – there
are even some that are sized similarly to a baby grand
piano. Most are shaped like the upright one shown here
Piano for Beginners 15
and little finger – G. Your left hand will need
to be positioned an octave lower with your fingers
positioned as follows: little finger – C, ring finger – D,
middle finger – E, index finger – F and thumb on G.
You’ll notice that there are two white keys between
your left and right thumb, which are A and B. Don’t
worry if you’re struggling with the key names – we
have in-depth tutorials on them later in the book.
If you’re a complete beginner, you can add
removable stickers to the white keys. You’ll find it
will help you locate the notes much easier while
practising as most beginner-level sheet music uses
these keys specifically. Simply use them as a guide
while learning, then once you’ve got to grips with
reading music and the correct hand positions you
can remove them.
Different ways to play
The piano is a versatile instrument. With an
extensive number of keys, 88 to be exact, there
are endless sound possibilities. Using the right
technique, and with plenty of practice, it’s possible
to play any genre or style of music.
Traditionally used for classical music, the piano
can produce soft, soothing tones but is also
capable of much louder and harder notes that are
great for adding drama to a rock song or movie
score. The piano is also widely associated with jazz
genre where it’s often played as a solo instrument
alongside the singer.
At beginner level you’re likely to focus on playing
scales and simple melodies but once you’re more
confident in front of the keys, you can explore the
music genres and begin learning songs that suit
your musical style and taste. Fortunately there are
some fantastic beginner-level music books out
there that feature classic and more current sheet
music. A lot have been simplified too, so you can
learn the basic melody of a song without having to
move too far up and down the keys. It’s a great idea
to listen to the music that you’re learning to play
too, as you’ll get a much better idea about how the
song should flow and the timings you need.
Reading music
You can play 12 notes on the piano overall, seven
of which belong to the white keys – C, D, E, F, G, A,
B, and five to the black – C sharp/D flat, D sharp/E
flat, F sharp/G flat, G sharp/A flat and A sharp/B flat.
These notes repeat up and down the keyboard. If
you have a full-size keyboard the first note on the
left-hand side will be A. On the right-hand side of
the keyboard the notes will sound higher in tone
and on the left they’ll sound lower. Familiarise
yourself with the keys and learn which notes they
represent by playing simple scales. Practise scales
regularly and eventually they will become a easy
warm-up exercise before you play.
Being able to read sheet music and really
understand it is an important part of learning to play
the piano, or any instrument for that matter. This
Is digital right for you?


Pros Cons
Possible to record music you play Sound quality is not as impressive as an acoustic
Low maintenance  doesn’t need regular tuning Requires space
Has weighted keys Is not cheap
Speakers
Unlike an acoustic piano that utilises strings
and a sound board to produce music,
a digital piano uses sound chips and
speakers. When you press a key the sound
chip determines the note, which is then
played out through the speakers
Pedals
Despite their usually cheaper price,
digital pianos will still come with a full
array of pedal. However, even if yours
doesn’t, there will still be space to
connect an external sustain
Maintenance
As its inner workings are
electrical, your digital piano
is less likely to break. This
also means it’s much easier
to maintain, and you won’t
need to open it up
©Thinkstock
16 Piano for Beginners
Gettingstarted
does require patience but by taking a practical
approach to learning, you’ll be able to pick it up in
no time.
You’ll notice that notes on sheet music appear
along five horizontal lines, which have four spaces
in between. This is called a stave or staff. On sheet
music where two hands are required to play, two
staves will be present. The top stave features a treble
clef, which looks like a very ornate G. This represents
the high keys, to be played with your right hand.
The bottom stave features a bass clef, which
appears almost like a backwards C; this represents
the low keys that are played with your left hand.
Every space and line on the stave represents a note
on the keyboard.
Get to grips with reading the top stave first as
you’ll find most beginner-level sheet music primarily
uses your right hand. Notes appear along the top
stave in succession with Middle C and D positioned
below the bottom line. The notes that sit on top of
the five lines are as follows, E, G, B, D, F, which can
be remembered as Every Good Boy Deserves Food.
The notes in between the lines spell out ‘face’: F, A,
C, E. The bottom stave, however, is different, with
the notes on top of the lines, G, B, D, F, A – Good
Boys Deserve Food Always and those in between, A,
C, E, G can be remembered as All Cows Eat Grass.
Run through them regularly and over time they
will become second nature. You’ll soon find that
you no longer need sheet music that has the letter
markings on the notes.
Practice and playing
Practice is key to mastering any musical instrument
and so it’s important to dedicate a set amount of
time a week to doing so. Be firm with yourself and
don’t get disheartened if progress is a little slow at
first. Taking at least a couple of hours out a week to
practise your scales and a particular song will help
you improve dramatically. Consider playing the
piano with others too; it will give you more of an
incentive to get better.
Once you begin to feel more confident in your
piano-playing abilities, look into joining a band or
playing music with a small group of friends. Having
others around who are musically minded will inspire
and encourage you to focus on developing your
own skills. Learning a song with a group of people
means you’ll also get more support, advice and help
when it comes to reading the music, timings and
getting a good rhythm.
As the piano has an abundance of keys it can also
be played by two people simultaneously, known as
a piano duet. To do this, one person will need to be
positioned on the left-hand side of the keyboard to
play the low notes; they are known as the Secondo
(second). The other person should be positioned to
the right-hand side of the keyboard to play the high
notes, known as the Primo (first). Specially printed
sheet music can be purchased so that both the
Primo and Secondo can play together. It’s a fantastic
way to practise, have fun and develop your skills.


Electronic keyboards are affordable, portable and offer some
great digital features that are beginner friendly
Keyboards
Most budding pianists will learn the basics of
piano playing on a keyboard. They’re not only
the most affordable option if you’re looking to
buy new, but they’re also much smaller than
an acoustic or digital piano so don’t require as
much space. They’re designed to be lightweight
and portable, so you can also set them up easily
if you’re practising on the go or going round a
friend’s house.
You’ll also find they offer some fantastic
electronic features, including demo modes,
sound effects and the ability to replicate other
instruments. In addition to this, most keyboards
come with a headphone jack, which is great if
you want to practise in private. They differ to
acoustic and digital pianos as they don’t offer
as many octaves or weighted keys and sound
quality is not as impressive.
Volume control
Unlike an acoustic piano whereby the
harder you press the key, the louder
the sound, on a keyboard you need
to adjust volume manually on the
interface. You can, however, purchase
specialist volume pedals that enable
you to adjust volume with your feet
while you play
Speakers
Like a digital piano,
a keyboard has
speakers; however,
these aren’t likely
to be of the same
quality. If you don’t
like the sound out
of the speakers,
you should be able
to connect your
headphones up to
your keyboard
Piano for Beginners 17
Pros Cons
Lightweight and portable Doesn’t have weighted keys
Reasonably priced Won’t have as many octaves
Great electronic features Requires extra accessories
Is a keyboard right for you?
Pitch bend wheel
Many modern keyboards feature a pitch
bend wheel, which is sometimes located to
the left of the keys. It can be used to adjust
the pitch of the note you’re playing up or
down. Practise using the wheel while you’re
playing the keys with your right hand
Digital features
Electronic keyboards offer a fantastic
range of digital features. You can
select and create sound effects with
the keys and even imitate other
instruments, including percussion,
brass and string instruments
Keyboard
The keys on your keyboard are made
from plastic and are not weighted so
only a light touch is needed to create
sound. Although smaller keyboards
offer a limited number of octaves, there
are larger varieties that offer more
Backing tracks
If you’re getting bored of playing your keyboard,
try playing along to some of the many backing
tracks available on most keyboards. They will
represent many different musical genres, from
bossa nova to rock and roll
Portability
Keyboards normally have fewer keys
than a digital piano and are made of
plastic, so they’re lighter and therefore
more portable. They’re great if you
need to carry your instrument around
Record
Like digital pianos,
keyboards offer you the
opportunity to record what
you play. They may also have
a metronome so you can
stay in time while recording
©Thinkstock
There’s a fantastic range of accessories available for your acoustic piano, digital piano or keyboard that
will help maintain its performance and improve playing. Here’s a look at a few essentials
Essential accessories
Like most instruments you can purchase a range of useful accessories for your
piano. Some will help maintain your instrument’s appearance and preserve the
sound quality that’s produced, while others will help improve playing when
you’re next practising or learning a new song. We’ve rounded up the top ten
accessories out there for your acoustic piano, digital piano or keyboard. Take a
look and see what you might need before you begin to play.
Headphones
Recommended buy:
Gear4music – Roland RH-5 closed
stereo headphones
Price: £29/approx $45
URL: www.gear4music.com
Most digital pianos and keyboards
come with a built-in headphone
jack. Use it to practise playing in
private. Good quality headphones
are essential for sound quality. Padded
varieties are also more comfortable if
they’re being used over long periods
of time and will help muffle out
background sounds around you.
Piano stool
Recommended buy: Quiklok – Keyboard stool BX-8
Price: £26.99/approx $49.99 URL: www.quiklok.it
A good quality stool is essential if you’re practising or playing over long periods of time. One that
comes with extra padding and the option to adjust its height is a bonus. Some varieties even
double up as storage so you can keep sheet music and your Piano for Beginners book in one
place. They are also able in a range of finishes.
Piano cover
Recommended buy: Gator Cases GKC-1648
Price: £19.99/$39.99 URL: gatorcases.com
Preventing dust from settling on your piano will help to maintain its performance and reduce
the amount of cleaning needed. You can purchase covers in a range of different sizes, fabrics and
shapes to suit the style and size of your instrument. Some keyboard covers even double up as a
carry case so you can take it with you on the road.
Keyboard stand
Recommended buy: Quiklok – Keyboard stand T/10
Price: £16.99/approx $39.99 URL: www.quiklok.it
Not all keyboards come with a stand. Some stands come at a fixed height while others are
adjustable, which is fantastic if you’re playing as part of a band and need to stand during a
performance. They are also available in different colours, sizes and shapes depending on what
suits your needs.
18 Piano for Beginners
Gettingstarted
Portable MIDI controller
Recommended buy: KORG MicroKey 37
Price: £69/$99.99 URL: www.korg.co.uk
If you have a laptop and you like to make music on the go, then you may want to check out a
MIDI controller. Chances are your main keyboard won’t be too portable, so a small option like the
KORG MicroKey is worth looking at. The keys are obviously a lot smaller, but you can hook it up
to a laptop to keep the music flowing on the go.
Piano polish
Recommended buy:
Gear4music – Piano polish 200ml
Price: £2.99 (RRP £4.99)
URL: www.gear4music.com
Keeping your piano clean is an
important part of caring for your
instrument. After you’ve dusted it
and wiped it down with a damp
cloth, use a specialist piano polish
to maintain the piano’s finish and
appearance. Always remember
to apply the polish to a clean soft
cloth first and not directly into the
piano itself.
Sustain pedal
Recommended buy: Gear4music – Casio SP-20 Sustain Pedal
Price: £26.99 (RRP £34.99) URL: www.gear4music.com
Some varieties of digital pianos and most keyboards don’t come with pedals but you can
purchase them separately. A sustain pedal has the same effect as the right pedal on an acoustic
piano, which lifts the dampers off the strings as you play to sustain the notes. Although digital
pianos and keyboards don’t have strings, the sustain pedal can still have the same effect.
Microphone
Recommended buy: Blue Microphones Snowball
Price: £49/$99 URL: bluemic.com/snowball/
Regardless of the model of your keyboard/piano,
you can use a microphone to record your favourite
tunes – originals or covers. Although prices for
microphones can go well into the thousands,
you can get a good desktop USB microphone for
around £70. You can plug it into your computer
and record directly onto there.
Piano for Beginners 19
“They’ll help
improve playing
when you’re next
practising or
learning a
new song”
Metronome
Recommended buy: Wittner Piccolo metronome
Price: £39.99/approx $55 URL: www.wittner-gmbh.de
Metronomes are used to help you keep tempo while playing. Many digital ones make a clicking
or bleeping sound to do this and traditional varieties feature a swinging pendulum. You can also
purchase them in various shapes, sizes and finishes so you can purchase one that matches the
style of your instrument.
MIDI to USB adaptor
Recommended buy: USB MIDI Adaptor kit
Price: £20.99/approx $30 URL: www.thecablestore.net
If you want to connect your keyboard or digital piano up to your computer, then you will need
to do so via USB. However, if you have an older keyboard, it may not have a USB connection. It
should have two MIDI inputs, though. With two MIDI cables and this adaptor, you will be able to
hook up your keyboard with ease.
20 Piano for Beginners
Gettingstarted
B
efore you start learning how to play the
piano, the first thing you need to do
is ensure you have the correct sitting
position. Posture is very important for piano
players, as it ensures you have the maximum level of
flexibility to reach all the keys, and it also helps you
learn the proper technique for striking the keys.
On the path to perfect posture, one of the major
things you’ll need is a proper seat. If you’re slumped
down below the piano you’ll struggle to learn the
basics, while if you’re propped high in the air you
won’t be able to hit the keys properly. You don’t
need anything really expensive; the best thing to
have is an adjustable seat, but you can also just use
pillows and cushions to alter your height.
But don’t be fooled into thinking that you’ll have
to keep a rigid position as you play the piano. The
guide to perfect posture is to have a position that
is not only comfortable and effective, but one that
allows a degree of flexibility while playing. A good
piano player doesn’t just use their hands, they swivel
their hips and move their body to make sure their
playing style is at its optimum.
Here we’ll talk you through the steps to achieving
the perfect posture so that, when you eventually
come to sit down in front of a piano, you’ll be ready
to learn the basics.
Howtositcorrectly
atthepiano
Perfect posture is an essential task to master on the
road to becoming a good piano player
The path to perfect posture
Here we’ll show you how to get the optimum position while sitting at the piano
01The correct height
When sitting at the piano you want your elbow and arm to fall freely from your
shoulder. Your forearm should be parallel to the floor, and your arm should be at
an angle slightly more than a right angle. Adjust your seat to get the right height.
03Arc your hands
Your hands should be forming an arc at the keys. Your fingers need to be almost
pointing down and not striking the keys flatly, while your wrists should be in line
with the rest of your arm. Adjust your seat if you need to.
02Sit forward
Make sure you’re sitting far enough forward on your seat so that you can move
your torso, but back enough to feel stable. Your elbows should be slightly in
front of your torso when your hands are on the keys.
04Place your hands
If you’ve followed the previous steps, you should now be in the right position.
It may feel a bit odd but you will get used to it. Place your thumbs on the same
note (we chose Middle C) and make sure you feel natural.
Location
courtesy
of
Music
Is
Life,
Bournemouth
Piano for Beginners 21
At the piano
Here we’ll show you the correct way to sit at the piano Top tip
Don’t slump
A tendency of beginners is to
immediately slump at the piano
as it feels more comfortable.
While you might prefer this
at first, in the long run it will
hinder your piano playing.
Try your best to keep
yourself in the correct
position.
Choosing or
adjusting a seat is
key when playing
the piano
Different
seats
Stool
A major benefit of a stool or bench is that you
can’t lean back. Use pillows or cushions to raise
yourself if you are too low.
Adjustable stool
An adjustable stool is perfect for playing the piano.
You can alter the height and you’ll also be able to
keep your back straight and your hips flexible.
Hands
As in the picture, ensure
that your hands form an
arc over the piano. This
will enable your fingers
to be precise when
striking the keys
Arms
The arms should almost be forming a right
angle. Your upper arm should fall freely from
your shoulder, while your forearm should be
parallel to the floor
Wrist
Beginners often like to flatten their
wrists as it feels more comfortable.
Try not to do this; your wrists
should be in line with your arm
Seat
Sit far enough forward on your seat
that you can move your hips, but
not so far forward that you’re falling
off. Be both flexible and stable
Chair
Make sure your
chair is stationary.
If it is too low, use
hard cushions and
pillows to prop
yourself up. Sit
forward to keep
your back straight.
©Think
stock
Location
courtesy
of
Music
Is
Life,
Bournemouth
22 Piano for Beginners
Gettingstarted
01 Find Middle C on the right hand
With your right hand, locate three white keys in the middle of the piano
surrounding two black keys. Place your thumb on the leftmost of these keys; this
is Middle C. To the right are D, E, F and G. If you have a full-sized 88-key keyboard,
Middle C is the 24th white key you’ll count from left to right (the fourth C).
02 Play a right-hand melody
Once you’ve found where Middle C is, you can have a go at your first basic
melody. Try the following tune, which is the first line of Mary Had A Little Lamb,
and see how you get on: E-D-C-D-E-E-E-D-D-D-E-E-E. Once you’ve mastered
that, see if you can work out the rest.
O
nce you’ve perfected your posture in
our previous tutorial, you’re almost
ready to start playing the piano. The
next step is to learn the names of the
white keys, where the different keys are located, and
how to remember them.
The white piano keys are known as the natural
keys, because they sound a natural note as opposed
to the sharps and flats of the black notes, which we’ll
explain in the next section.
The first thing you’ll want to do is find Middle C. In
the centre of the piano you should see three white
keys surrounding two black keys. The furthest left of
these three keys is Middle C. As a starting point for
beginners put the index finger of your right hand on
this key. From here you should find it comfortable
to press the keys above Middle C. Now do the same
with your left hand, this time pressing the keys
below Middle C.
There are seven natural notes on a piano: C, D, E,
F, G, A, B. You’ll notice that the pattern of two black
keys surrounded by three white keys then three
black keys surrounded by four white keys repeats
itself several times up the keyboard. The keys run
in alphabetical order from A to G. The three white
notes surrounding the two black keys are C, D, and
E, and the four white notes surrounding the three
black keys are F, G, A and B. So, if you count eight
keys right from Middle C (or, indeed, eight keys left)
you’ll be back at C. The musical distance between
these two notes is what’s known as an octave.
Learnthe
whitekeys
Understand the natural keys on your piano or keyboard before you start
Learn to play two basic melodies with these steps
Your first melodies
“The white keys are known as the natural keys,
because they sound a natural note as opposed
to the sharps and flats of the black notes”
Piano for Beginners 23
03 Find Middle C with the left hand
Again find Middle C, but this time place your left thumb on it. To the left of this
key the notes are B, A, G and then F. If you keep going left, you’ll arrive at C an
octave lower – you won’t have enough fingers to go that far though, so you’ll
have to move your wrist.
04 Play a left-hand melody
Let’s try the last line of Mary Had A Little Lamb with the left hand. Put your left
little finger on Middle C (so you’re essentially in the same position as step 2) and
have a go at the following: E-D-C-D-E-E-E-E-D-D-E-D-C. Make sure only your
little, ring and middle fingers move as they’re the only ones that need to.
Let’s take a look at how the white keys work on a keyboard
The white key names
Middle C
From Middle C the keys move up and down alphabetically.
So, to the right it’s D, E, F, G, A, B and then C again. To the
left it’s B, A, G, F, E, D and then C an octave lower
One octave up
If you go eight notes (including Middle C) to
the right you’ll be an octave higher. You’ve
actually just done your first scale; C to C is
known as C major, but more on that later
One octave down
Go eight notes (including Middle C)
to the left and you’ll be an octave
lower. The three white keys around
the two black keys are C, D and E,
while the four white keys around
three black keys are F, G, A and B
Top tip
Repeating
note names
Once you’ve learnt one set of eight
white keys, you’ve learnt them all!
The pattern repeats all way up and
down the keyboard. The white key
to the left of two black keys
will always be C, no matter
where you are on the
keyboard.
Between C and C
Play the white keys between these two C
notes (C, D, E, F, G, A, B, and C again) and you’ll
have played the C major scale. Play these notes
in any order and it should sound good
Middle C
C C
D D
E E
F G G
A A
B B
F
24 Piano for Beginners
Gettingstarted
01 Black key technique
The first thing to get right is your technique. You don’t really want to use your
thumb on the black keys. Instead, try to only use your middle three fingers. This
makes it easier to transition between white and black. There will be times when
this is unavoidable, but until this is the case, try to keep your thumb away.
02 Play with the right hand
When playing the black keys you might need to tuck your thumb under your
fingers to hit a white key. Try this now – play Middle C with your right index
finger, C# with your middle finger and then D with your thumb. Later on, you
will find this technique useful when performing scales.
T
he black keys on the piano are known as
the flat and sharp keys. In technical terms
this means they make a note half a step (or
a semitone) lower and higher respectively
in pitch from their corresponding white key.
You will notice that the black notes are grouped in
twos and threes, and taking the time to remember
which is which is also a useful way to remember
the white keys’ names. Each black key acts as both
a sharp and a flat. A sharp is a note that’s half a step
higher than the corresponding white key, and the
flats are half a step lower.
First, let’s focus on moving to the right from
Middle C. The black key immediately to the right is C
sharp (C#). This is half a step up from C. Take another
half step and you’ll be at D. Working in order from
Middle C to the right the sharps are C#, D#, F#, G#
and A#. B# and E# are C and F respectively,
although they are rarely referred to in the former
manner. Always remember that sharps are to the
right of a note.
Now find Middle C again and this time go left.
The first black key is B flat (B ). Working down in
order from Middle C the flats are B , A , G , E and
D . C and F are B and E respectively, although
again they are not usually denoted this way. Flats are
always to the left of a note.
Take some time learning what the names of the
black keys are and see if you can recognise the
difference in pitch with their corresponding
white key.
Learnthe
blackkeys
Get acquainted with the world of flats
and sharps right here
Let’s learn the names of the black keys and try a short melody
Playing the black keys
“A sharp is a note that’s
half a step higher than the
corresponding white key”
Top tip
Tones and semitones
Tones and semitones (or steps and
half steps) are common terms to
define distance between notes. A
semitone is the distance between each
key on the keyboard. Each sharp or
flat will be a semitone away from its
corresponding white key. The
distance between E  F and
B  C is also a semitone as
there are no black keys
between them.
Piano for Beginners 25
03 Play with the left hand
Let’s try the same technique with the left hand. Place your left thumb on Middle
C. Now play B with your index finger, B with your middle finger and then A with
your thumb. Practise until it feels natural. Now your thumb is on A, it frees up the
rest of your fingers to play lower notes, both black and white.
04 A quick scale
Let’s attempt a scale. Starting with your index finger on your right hand and,
working from C to F, see if you can play the white and black keys in a fluid
motion. Use your thumb for D, and end with your fourth finger on F. Once
you’ve mastered that, go back down again using the same fingers.
Let’s make sure we know what the black keys are called
Learn the names
“Black keys to the left of
white keys are flats”
White keys
If you need help, remember the
three white keys around the two
black keys are C, D and E, while the
other four are F, G, A and B
Sharps
Any black key to the right of a white key
is a sharp. From Middle C up an octave
these are C#, D#, F#, G# and A#
Flats
Black keys to the left of white keys
are flats. From C down an octave
these are B , A , G , E and D
C#
D
C#
D
D#
E
D#
E
F#
G
F#
G
G#
A
G#
A
A#
B
A#
B
26 Piano for Beginners
Gettingstarted
P
edals on a piano are used to create sounds
that you could not otherwise achieve with
your hands alone. There are two standard
foot pedals on a piano. On the left is una
corda, and on the right is sustain. Some pianos have
an additional middle pedal called the sostenuto.
However, this is not used very often.
The una corda pedal is played with your left foot
and is known as the soft pedal. It is used to enhance
softly played notes and is designed for notes that
are required to be played quietly. It will not be as
effective in softening louder notes.
The right pedal is the sustaining pedal, also
known as the damper pedal, which is used by your
right foot. It is used to elongate the sound of a note
so that it continues to resonate even when you
have let go of the key. The resonance will continue
until you lift off from the pedal. This effect is
very useful when you need notes to overlap in
harmonies or otherwise.
The final middle pedal, if your piano has one, is
the sostenuto. It is controlled with your right foot
and works similarly to the sustain pedal, but it only
sustains certain notes. Hit the notes you want to
sustain and depress the pedal; any other note will
sound the same. This allows sustained notes to be
played alongside regular notes.
Usingthe
piano’spedals
Advance your playing style by getting to grips
with the pedals on the piano
How to use the pedals
Learn when to depress and when to lift from the pedals
01Get your feet in position
You’ll need both your feet to use the pedals. You may need to adjust your
posture slightly in order to reach all the pedals, but try to retain the perfect
posture we outlined earlier.
03Be gentle
When you release from a pedal, do so gently. This not only makes the notes
sound better, but it also prevents an audible knocking noise created by the
pedal suddenly lifting upwards.
02Keep your heel on the ground
When a pedal is played your heel should remain on the ground while the pedal
is depressed with the ball of the foot. Don’t leave the floor with your heel in a
‘stomping’ manner.
04Make sure you practise
Even if your piece of music does not require it, practise with the pedals. Try to
transition smoothly between depressions and lifting, and learn how each pedal
can be best utilised.
Piano for Beginners 27
What the pedals do
Find out when and how to use the pedals
A great option if you play a keyboard
Separate pedals
Many modern electronic keyboards are able to
replicate the sound of a pedal on a regular piano.
To do this the pedal is usually supplied externally.
It plugs into the keyboard and simply flicks a
switch on the MIDI keyboard. A pedal of this sort
is known as a footswitch. Keyboards can have
multiple footswitch jacks to enable you to use
multiple pedals to produce the same sounds as
the three pedals we’ve outlined above.
If you’re using a pedal with a keyboard, try to
stick to the same techniques we’ve discussed
elsewhere. As before, keep your heel on the
floor (if possible with your pedal) and depress
and release the pedal in a gentle manner. This
will ensure that, even when using an electronic
keyboard, you can retain the same soft or deep
sound of a pedal on a regular piano and make
your music sound all the better.
Sustain
The sustain pedal continues
the sound of a note after you
have released the key, which
makes the note sound deeper,
warmer and more intense
Sostenuto
This pedal allows you to
add staccato-like effects
to your playing while
sustained notes resonate
in the background
©Thinkstock
“Keep your heel on the floor and depress and
release the pedal in a gentle manner”
Una corda
This soft pedal
allows you to make
sounds softer and
alters the timbre of
notes so that they
sound more distant
When to use them?
When the sustain pedal needs using, you may see
an ornate ‘Ped’ mark underneath the music. An
asterisk-like symbol is used when you need to stop
sustaining. Alternatively, there may be a direction at
the start of the music to use the pedal throughout
“Notation is a way of composers
expressing to musicians how to
play a piece of music through
both pitch and rhythm”
28 Piano for Beginners
Understanding
theoryLearn how to read musical notation and find
out about the different symbols and notes
you’ll see in sheet music
30 Whatismusicalnotation?
32 Introducingthestaves
33 Notesandtheirvalues
34 Howtoreadmusical
notation
38 Understandtime
signatures
40 Interpretkeysignatures
42 Learnaboutledgerlines
44 Changenotelengths
46 Alteranote’spitchwith
accidentals
48 Navigatemusicnotation
50 Controlthevolumewith
dynamics
52 Setandchangethetempo
54 Addarticulationstonotes
55 Usemusicalornaments
Piano for Beginners 29
Give it a try
Lookoutforthislogooneachpage,
asitmeansthatanaudioand/or
videofileisavailableonlinetohelp
youmasteracertaintechnique.
30 Piano for Beginners
Understandingtheory
Whatismusical
notation?
Throughout this section we will begin to look at what musical notation
is, how to read it and symbols that affect the way we play a piece
M
usical notation is a way composers
express to musicians how to play a
piece of music through both pitch
and rhythm. Music is written on a stave
which consists of five lines. Notes can be placed
either in the spaces or on the lines themselves
and represent one of the seven natural notes in
music. Musical notes are separated by vertical
lines called bar lines. Preceding the musical notes,
you will usually find a clef and time signature,
and sometimes you may see either a sharp or flat
representing a key signature within a particular
piece. Above the stave you will almost always find
a tempo marking either through a number or an
expressive term which will indicate the speed of the
piece. Underneath, a composer could add dynamic
markings. These show the volume at which they
want a particular section of music played.
“Musical notation…
how to play a piece of
music through both
pitch and rhythm”
Our guide to the most common notation
Understanding musical symbols
4
4
# #
#
01Clef
There are various types of clef that
you can use in a piece of music.
This one is called the treble clef. It
tells us the pitch of the notes that
have been written. See page 32 for
more information.
02Key signature
This will always appear at the
beginning of the piece of music.
By placing the symbols either in
the spaces or lines, it tells us the
notes that we should play as flats or
sharps. See page 40.
03Time signature
At the start of a piece of music you
will see two numbers, one on top
of the other. The top number tells
you how many beats in a bar there
are; the bottom tells you what type
of beat it is. See page 38.
=130 04Tempo marking
There are several ways of indicating
the tempo at the beginning of
a piece of music. The two most
common are via a written word
(usually in Italian) or in this case
by how many crotchet beats per
minute there are. See page 52.
05Dynamics
These tell you what volume to play
the particular phrase of music at.
The two most common are f (forte)
which is loud and p (piano) which
means quiet. Adding an m (mezzo)
before either of the two symbols
means moderately. See page 50.
06Notes
The notes in a strip of music are
the symbols that tell you both the
rhythm and pitch of the piece of
music you are playing. See page 33.
Top tip
Practise and repeat
Learning to read music can be
quite challenging at first, but the
most important thing is practice
and repetition. Through these
two basic principles, in time
you will be able to play through
music without having to
think about where the
notes are first.
4
4
# #
#
.
.
. .
.
. 
=130
01
03
06
06 07
02
04
05
08
09
.
.
.
Piano for Beginners 31
10Tenuto
A single horizontal bold line above
or below a type of musical note is a
tenuto marking. This explains to us
that we should be playing that note
to its fullest value.
11Crescendo/
Decrescendo
Similar in look to an accent, but
larger and placed under a piece of
music, this is a dynamic marking
that tells us either to get louder
(as in the example) or quieter (the
opposite of the example). These
could be replaced by the words
cresc. or decresc.
12Accidentals
These symbols are placed in front
of the note and will indicate a pitch
that is not already shown in the key
.
.
.

07Staccato
A dot above a note is a staccato
marking. This tells us to play the
note slightly shorter than we would
normally be directed to.
08Accent
When you see a horizontal arrow
above a note, this is known as an
accent. Through this symbol we
need to emphasise a note slightly
more, making the sound slightly
louder. Not to be confused with a
decrescendo, which is below a note.
09Bar line
The bar line divides the notes in
to the correct number of beats as
indicated by the time signature.
There are several different types,
including repeats and double
barlines, which are used at the end
of a piece of music.
.
.
.
.
.
.
1.
signature. The three most common
types are flats , sharps , and
naturals .
131st and 2nd
time lines
These will appear above certain
bars during a repeated section
where, during a repeat, the piece
indicates a different ending.
14Repeat bars
A double barline with two dots
means you should repeat the music
between the two sets of repeat
signs. When it’s only a left-facing
sign, repeat from the beginning.
15Tie
Two notes of the same pitch can be
tied together with this symbol. The
second note should not be played
again, but must remain heard.
#
.
.
.
.
.
.
.
.
.
.
.
.
#
1. 2.
13
14
15
12
05 10
11
.
.
.
.
.
.
Learning to read music with a friend is a
great way to speed up your development
32 Piano for Beginners
Understandingtheory
The different staves
The clef dictates which stave is which
S
taves (or staffs) are some of the most
important parts of musical notation –
without them we wouldn’t have anywhere
on which to put the notes we need to
play! Staves consist of five horizontal lines with four
spaces, with a clef on the left-hand side. Although
there are several different clefs throughout the world
of music, as pianists we only need to concentrate on
the treble clef and bass clef.
Usually, the treble clef and the stave that it sits
on dictate the notes that will need to be played
by the right hand, while the bass clef tells you the
notes that the left hand should play. However,
pianists need to play both right and left-hand parts
at the same time, so both treble and bass are joined
together by a brace (the curly bracket to the left of
the beginning of the staves) to create a grand (or
great) stave – the treble stave on top, the bass stave
on the bottom. Although many exercises will feature
just the single stave, actual piano music will nearly
always be written on the grand stave.
While the top stave will almost always have its
notes played by the right hand and the bottom
stave the left, it is not uncommon for both staves in
a grand stave to carry the same clef. If a composer
wants a passage of music with both hands playing
high up the keyboard then it’s a lot easier to write
the music for two treble staves.
Introducing
thestaves
The five horizontal lines that enable us to read music
“Although there are several different clefs, as
pianists we only need to concentrate on the
treble clef and bass clef”
The bass clef stave
This clef marks the lower of the two staves on the grand stave, and its notes
will often be played by the left hand. It’s also known as the F-clef, as the two
dots next to the curve are bisected by the note F on the bass stave. Popular
instruments whose notation is commonly written on this stave include the cello,
double bass and trombone. Note that it’s possible for a right-hand stave to carry
the bass clef should the music dictate it.
The treble stave
The treble clef stave will usually be the upper of the two staves in a grand stave,
and the notes on the treble stave will likely need to be played by the right hand.
The treble clef is also known as a G-clef as the curl of the clef passes through the
note G on the treble stave – if you’re drawing one, this curl is the best place to
start from! The clef is also used by several other popular instruments, including
the violin, flute and recorder.
The grand stave
Both the treble stave and bass stave combine to create the grand or great stave
– the stave used for almost all Western piano notation. You can tell if the two
staves are a grand stave by the curly braces to the left of the stave. This signifies
both parts must be played simultaneously. The piano isn’t the only instrument
that uses a grand stave. Although many aren’t diverse enough to necessitate
both staves, instruments such as the harp, marimba and celesta use it.
Piano for Beginners 33
Introducing the notes
Notes and their lengths in simple time
N
otes are the foundation on which
Western musical notation is based –
without them we wouldn’t know what to
play or how long to play it for. We know
what note to play by its position on the stave, which
we’ll address in the next tutorial, and we know how
long to play it for by the type of note it is.
Most notes consist of the note head (the oval-
shaped dot) and a stem either pointing up from the
right of the head, or pointing down from the left.
The only note you’re likely to see at this stage that
doesn’t have a stem is the semibreve/whole note,
which is just the note head (see below for more).
Quavers/eighth notes and shorter (ie semiquavers/
sixteenth notes) also have a ‘flag’ attached to them,
which will always be attached to the right of the
note, regardless of its stem direction. As a rule of
thumb, single note heads below the middle line of
the stave should have an upward-pointing stem,
and any above should point down. Stems on single
note heads on the middle line can go either way.
So what do these note types tell us? Well, they
dictate how long the pianist should play the note
for. For example, if a piece of music has a minim/half
note on the middle line of the treble clef stave, the
pianist should play a B for two beats. Here we run
through some of the most common notes that you
will find throughout this book.
Notesand
theirvalues
Some of the different types of notes you’ll find on the staves
“We know what note to play by its position on
the stave and we know how long to play it for
by the type of note it is”
03Crotchet/quarter note
A crotchet or quarter note lasts for one beat, so four would make up a whole bar
in 4/4 time. If you are having trouble getting to grips with how long notes last
for, it may be best to start with crotchets.
04Quaver/eighthnotesemiquaver/sixteenthnote
A quaver/eighth note is half the time value of crotchet/quarter note, and a
semiquaver/sixteenth note is half of a quaver. More than one of these in a row
can be ‘beamed’ together so the score doesn’t get littered with stems.
01Semibreve/whole note
These notes last for four beats which, in a piece of music in 4/4 or common time,
is the whole bar. They don’t have a stem; rather, they are just a note head resting
on the stave.
02Minim/half note
Minims/half notes last for two beats, so two minims in a piece of music in
4/4 time would take up the whole bar. They can be distinguished from other
stemmed notes thanks to the ‘empty’ note head.
34 Piano for Beginners
Understandingtheory
I
f you want to become a successful pianist,
you should be able to read musical notation.
You should be able to transcribe those dots and
squiggles on the stave into beautiful music that
flows from your fingertips. Fortunately, once you
have got the basics of notation down, it’s not too
hard to get to grips with. The ultimate goal is to be
able to sight read – just take one look at the sheet
music and transfer those notes immediately. We’ve
been through what the different types of staves are
and what sort of notes you’ll find on them, now we
need to discover how their positioning on the stave
affects what notes you should play.
Every white key on your keyboard corresponds to
a dot on either a line or a space of one of the staves.
For example, if you see a minim/half note on the first
line up of the treble clef stave, you should play the
E note after Middle C for two beats. If the next note
is on the line above it, then you should play a G. If
it’s in the space between these two lines, then you
should play an F. However, the same notes do not
transfer to the bass stave. If you see a minim on the
first line up for the bass stave, you should play a G
rather than an E.
You have to learn two different systems, which
can certainly be tricky at first. But with the help of
some handy mnemonics and learning tools which
we will run through in this tutorial – not to mention
a fair amount of practice – you will be reading music
in no time.
Howtoread
musicalnotation
Learn which notes go where and use simple mnemonics to
remember their positions on the staves
What the staves correspond to
The piano’s keyboard
Middle C
The most important note on the
keyboard doesn’t rest on either
stave, it occupies a ledger line
The next C
This note is also named C, but it is not Middle C.
Every 12 semitones the A-G pattern recycles –
there are eight different Cs on a full-size keyboard
Bass stave white keys
Each of these white keys has a line
or space on the bass stave. The G
rests on the bottom line, and the
A rests on the top line
Treble stave white keys
Each of these white keys has a different place on the
treble stave, whether it is on a line or a space. The E rests
on the bottom line, and the F on the top. Notes higher or
lower will rest on ledger lines outside of the stave
Piano for Beginners 35
Usually, notes written on the treble clef stave will be played by your right hand,
and they often (but not always) carry the main tune of the piece. Strangely, the
most important note on the keyboard, Middle C, doesn’t actually belong on
either the treble or bass clef – it rests on a ledger line on both, which we will talk
more about in the future. The first line up carries the E note, which is two white
keys to the right of Middle C. The following eight white keys each occupy either
a space of a line on the treble clef stave – up to the F note on the following
octave. The notes don’t stop there, however. Each subsequent note will either
rest in or above ledger lines that, in theory, can go as high as the sheet music
will allow. Ledger lines can also go below the stave – like Middle C – but any
below the A note to the left of Middle C will probably be played on the left
hand, or the stave’s clef will change to the bass clef.
The treble stave notes
What your right hand will be playing
The lines
The notes on the lines of the treble clef
stave are, from bottom to top: E, G, B,
D, F. There are many ways to remember
this, but most use a simple mnemonic
like Every Good Boy Deserves Fruit. You
may find it easier to remember if you
make up your own – especially if your
name begins with one of those letters.
If that fails, remember that the B note is
‘Bang’ in the middle.
All together
The white notes all have their special
place on the stave, so how do we
know to play black notes? Well, they’re
either preceded by a symbol or they’re
dictated by a key signature, which we’ll
go through later. Some of the black
notes have different names, but are
in fact the same note. F sharp (F#, the
black note immediately following the
F in FACE) is the same as G flat (Gb), for
example. Also included here are the D
and G notes, either side of the treble
clef stave.
The spaces
Although you could think of one, there’s
no need for a mnemonic to help you
remember the notes for the spaces
of the treble clef stave. From bottom
to top, they spell out the word ‘FACE’,
which even rhymes with ‘space’! Note
that the C in FACE is not Middle C – it is
the C note one octave above it. The F in
E, G, B, D, F (ie the top line of the stave)
is one octave above the F in FACE (the
first space from the bottom).
E G B D F
F A C E
D E F G A B C D E F G
36 Piano for Beginners
Understandingtheory
It might not be the star of the show, but if composers ignored the left-hand
parts of piano music it would be very boring indeed! The bass clef tends to carry
all notes to the left of Middle C (although ledger lines enable higher notes to
belong on the bass clef stave too). But, like the treble clef, Middle C actually rests
on a line outside of the stave, on a ledger line. On this occasion it rests on the
first ledger line above the bass stave. The first line up on the bass clef stave is
G, ten white notes to the left of Middle C. It goes all the way to A, which is only
two notes below Middle C. Of course, ledger lines enable notes to go below the
bass stave too.
Left-hand parts might not always be as intricate as right-hand parts, but it’s
still important that you learn which notes are which so you’ll be able to provide
vital accompaniment to your melodies.
The bass stave notes
Don’t forget the left hand
The lines
The lines on the bass stave read G,
B, D, F, A. As a mnemonic, you could
continue the theme we used for the
line notes on the treble stave, with
Good Boys Deserve Fruit Always. If you
think you may get confused between
the two, then thinking up your own will
help you remember. Middle C is a ‘line’
above this stave, two white notes to the
right of the A on the top line.
All together
There’s no mnemonic for all the notes
together on the bass stave but if you
remember that the first space up on the
stave is A, then you can use alphabetic
order to work out the notes going up
the stave – just remember to return to A
after reaching G! Although theoretically
you can use ledger lines to play any
note on the bass stave, you’re unlikely to
see anything past the G after Middle C
(a note that’s three ledger lines high).
The spaces
Unfortunately, the four notes in the
spaces on the bass stave don’t spell
out any body parts this time – ACEG.
You can, however, remember them
with All Cows Eat Grass, or something
less animal-based if you would prefer!
If remembering them from bottom to
top isn’t doing it for you, there’s nothing
wrong with trying top to bottom – it’s
whatever works. The C in ACEG is the C
an octave below Middle C.
G B D F A
A C E G
F G A B C D E F G A B
Piano for Beginners 37
As with musical notes, sometimes in music we need times of silence.
These are represented by different symbols called rests Rests in action…
Introducing rests How to use
rests in music
There are several different types of
rests. Each rest relates to its note
equivalent. This chart shows the
most common types.
Type of rest Note Length of rest
4 beats
2 beats
1 beat
1/2 a beat
“There are
several
different types
of rests. Each
rest relates
to its note
equivalent”
01
4
4 02
03
04
01Crotchet/
quarter rest
Crotchet/quarter rest for one beat.
02Quaver/eighth rest
Quaver/eighth rest for half a beat.
03Minim/half rest
Minim/half rest for two beats (note it
sits above the line).
04Semibreve/
whole rest
Semibreve/whole rest for one beat
(note this rests underneath the line).
In music where the time signature is
the rests can be used in this way:
4
4
An example of music How it looks in practice
Rests
This squiggly symbol is crotchet/quarter
note rest. This means that no music is to
be played for a beat. See below for more
Stacked notes
More than one note sharing the
same stem means that they are
to be played at the same time
Beamed quavers/eighth notes
These four notes are quavers/eighth
notes. They’re worth half a beat each, so
the four together make up two beats
The notes
These notes are both
As, one octave apart.
The treble stave note
is the A five white
keys to the right of
Middle C; the bass
stave note is the A
two white notes
to Middle C’s left.
Remember FACE and
All Cows Eat Grass!
38 Piano for Beginners
Understandingtheory
A
time signature will always be
found at the beginning of a piece
of music directly after the key
signature. It is very important as it
tells us exactly how to divide the beats of the
bar, in turn making it so much easier to read
a piece of music. There are two main types of
time signature: simple time and compound
time. Here’s a bit more about them.
Simple time
Simple time is a signature where the main
beat is divided into two equal beats. For
instance, in 4
4 time, the main beat is a crotchet/
quarter note, and this can be divided in two
quavers/eighth notes. The most common
forms of simple time signature are
4
4,
3
4 (most
often used in waltzes) and
2
4 (considered a
march beat).
Compound time
Compound time, much like simple time, is
where the main beat can be divided into
three beats. The lowest number is most
commonly an 8. For example, in 6
8, where
the main beat is a dotted crotchet/quarter
note, this can be split into three quavers/
eighth notes. You’re likely to see one of these
signatures in a ballad or jig.
Understand
timesignatures
There are many different ways of changing the beats of the bar
through time signatures, and each has its own distinct feel and style
“There are two main types: simple time
and compound time”
What do the numbers mean and why are they important?
Explaining time signatures
Time signatures comprise two numbers, one on
top of the other. The top number (also known
as the numerator) will indicate how many
beats are in a bar, the bottom number (the
denominator) will tell you what type of beat it
is. The most common numbers found at the
bottom of a time signature are 4 (crotchet), 8
(quavers), and 16 (semiquavers).
The numbers in time can also be replaced
by a symbol that looks like a C. This is called
common time, but also tells us that there are 4
crotchet beats to a bar.
4
4
4
4
4
4
6
8
12
8
9
8
2
4
3
4
4
4
2
4
3
4 6
8 .
Type of beat
Number
of beats in
the bar
Simple time
Compound time
is mainly used for marches and
polka music.
are most commonly found in
various types of folk music.
where the pulse is 3 crotchet beats to
a bar is essentially used for waltzes.
or common time (C), is the most
widely used of the time signatures
and is used in a variety of music
including pop and rock.
is quite common in slower blues
music and, again, also used in
folk music.
Understand exactly what is meant by
dots and ties
Dots and ties
A dot tells you that you add half the value of the note to its
original value. For example, the dotted crotchet ( . ) is 1 +
½ =1½ beats. A tie tells you to add two note values together.
For example, a crotchet plus another crotchet would be two
beats and look like this: . You would most likely use a tie
when you need a note to carry over into the next bar. If a
minim doesn’t fit in a bar, then you can tie two crotchets on
either side of the bar line.
Top tip
Stress the beat
In all time signatures, the first
beat of the bar is usually a
stressed note. In time signatures,
using four beats in a bar
( , ), the third can also be
stressed, although these notes
are not always louder or
more important.
4
4 12
8
Piano for Beginners 39
“We have used a combination of both crotchets/quarter notes and
minims/half notes to total the four beats required”
Beats in a bar
01First bar
In the first bar we have used four
crotchets/quarter notes, each
worth one beat, to complete the four
beats needed.
02Second bar
The second bar uses two minims/
half notes, each worth two beats,
which will once again total the four
we are after.
03Third bar
In the third bar, we have used a
combination of both crotchets/quarter
notes and minims/half notes to total
the four beats required.
04Fourth bar
Alternatively, we can fill an entire
four-beat bar with a semibreve/whole
note to get exactly the same effect, as
shown below in the fourth bar.
If we take as an example, there are several ways in which notes can be used in each bar
4
4
01 02 03 04
1 2 3 4
4
4
Time signature examples
Common time signatures seen throughout the book
3/4 time
This time signature dictates that there are to
be 3 crotchets/quarter notes to a bar. A dotted
minim/half note will take up the whole bar as
it lasts for 3 beats: 2 beats of the minim/half
note and 1 beat for its dot, which adds half of
the note’s original length.
4/4 time
The most common time signature, 4/4 time
consists of four crotchet/quarter note beats. As
long as the number of beats in a bar totals 4,
you can have whatever combination of notes
you please – a semibreve/whole note will take
up a bar on its own.
6/8 time
6/8 time comprises six quaver/eighth note
beats in a bar, which we have done here in
the second bar of our example. Emphasis is
placed on the first and fourth beats, which
means it’s perfect for upbeat jigs and, with a
slower tempo, ballads.
40 Piano for Beginners
Understandingtheory
K
ey signatures are shown at the beginning
of a piece of music and are either a
series of sharps or flats. You will see a key
signature immediately after the clef in a
piece of music, and this saves the composer from
having to add them after each required note. They
explain two things; firstly, the key the piece is in
and secondly, which of the notes you play as either
sharps or flats. The order that sharps and flats are
placed in a key signature will always remain the
same. There are two mnemonics that we can use
to help us remember these orders on a treble clef
stave. For sharps we can use:
Interpretkeysignatures
Explore the role of key signatures in music, learn why
they are needed and how to read them
“Key signatures
are shown at the
beginning of a piece
of music”
## # #
## #
F
C
A B
G
D E
Father Charles Goes Down And Ends Battles
Battle Ends And Down Goes Charles’ Father
For flats we can use:
So, how do we work out a major key from the
key signature? If there are no sharps or flats, it’s C
major. For sharps, you must look at the last one
in the signature. If you move it one semitone up
it will be the first note and the name of the major
key. The example below is D major.
For flats, you have to remember that F major has
one flat (Bb). For all other key signatures using two
or more flats, the penultimate flat will tell you the
name of the major key.
The penultimate flat in this example is a B. This
key signature is Bb major.
##
Last sharp
It’s all relative
Changing to minor
The sound of the piece of music will tell you if it is
a major (happy) of minor (sad) key. You can work
out the name of the relative minor key to a major
key by looking at the sixth note of the scale. A
relative minor will have the same key signature
as its major key. This example of C major shows
A as the sixth note, so C major’s relative minor is
A minor.
1st
6th
B
A
G F
E D
C
Penultimate flat
Top tip
Accidentals
Don’t think that just because you’re
playing or composing in a specific
key signature that you need to
use those sharps and flats. You can
use accidentals to play notes that
don’t belong in the signature. An
accidental is a little symbol – either
of a sharp, flat or natural – that
overrules what the key signature
dictates for the duration
of that bar.
Piano for Beginners 41
“Some musical notes may contain either a sharp,
flat or natural sign in front of them that may be
different from the key signature”
Identifying key signatures
Here is a recap on what we have learned so far
Keys
Key signatures in action
01Key signatures using sharps
Sometimes you might see a sharp (#) in the key signature. It
will be either placed on a line or on a space of the stave. This
tells you to raise the note by one semitone. This signature
has one sharp (F), so the piece is in G major or E minor.
02Key signatures using flats
Alternatively there may be a flat sign at the beginning of the
music. Again, this can either be in a line or space, but this
time you lower the note by a semitone. This key signature
has one flat, so the piece is either in F major or D minor
04Using accidentals in a piece
of music
Some musical notes may contain either a sharp, flat or
natural sign in front of them that may be different from the
key signature. This tells you to change that note according
to the sign.
03Adding naturals into
key signatures
You may see a natural sign ( ) in a key signature. This
happens most often when a piece of music changes key.
This sign cancels either the sharp or flat used in the previous
key signature.
#4
4
#4
4
4
4
#4
4
Key signature
A key signature will be found
at the beginning of a piece of
music or can also be changed
half-way through
A flat
A flat can again be
found in both the key
signature or a note and
lowers it by a semitone
Naturals
A natural sign will
cancel either a
sharp or flat on a
note within a piece
A sharp
A sharp can be found
either in a key signature
or on its own, and raises
a note by a semitone
#
#
#
#4
4
42 Piano for Beginners
Understandingtheory
W
hen you’re looking at a piece of
music to play on the piano, you’ll
notice that the treble clef and the
bass clef are joined together with
a bracket on the left-hand side. This is called the
grand stave and makes it possible for you to read
the music to play on the keyboard with both your
left and right hands simultaneously. However, as
there are more notes on the piano that can fit on
the treble, bass or even grand stave, we need ledger
lines to help. These are lines that work to extend
either the treble stave or bass stave’s five lines in
order to represent notes that appear either above or
below the stave.
For example, Middle C appears below the five
main lines of the treble clef, yet it appears above
the five main lines of the bass clef. So, to help you
recognise the note, a ledger line is placed through
the notehead, spaced equally relative to the lines
in the main stave. Middle C is then placed on the
‘imaginary’ line above or below the stave.
Many other notes will appear in your sheet music
with ledger lines. Much higher notes will appear
above the treble stave, notes in the middle of the
range will appear on ledger lines in the middle of
the grand stave and very low notes you’ll see drop
down below the bass stave.
Learnabout
ledgerlines
Get to grips with these essential parts of music notation with
our simple step-by-step guide
Line it up
How to recognise, play and use ledger lines
01Middle C
The best place to start is to find Middle C. This is the first note to be placed on a
ledger line below the treble stave or above the bass stave. On our example, you
can see that Middle C can appear in two locations, but it’s the same note.
03On the bass clef
If you take a look at the bass clef, you’ll see that ledger lines will be present
below the stave after the note F, which rests beneath the last line of the bass
clef’s five. These notes can go rather low.
02On the treble clef
Ledger lines on the treble clef begin to crop up after G, which rests above the
top line of the stave. Work out which note to play by checking its position on
the ledger line and lines below it.
04On the piano
Think about the notes on the bass clef (plus ledger lines) as keys on the left of
the piano keyboard, the ledger lines in the middle as notes in the centre, and
notes on the treble clef as notes on the right of the keyboard.
G A B C D E F G
F E D C B A G F
Piano for Beginners 43
On the keyboard
See how notes on ledger lines translate to notes on your piano
Signs you’ll see to keep things simple
Octave clefs
Too many ledger lines can get
confusing, so if the music calls for
notes that are very high or very
low in pitch, the composer can use
different clefs to help. If you see
the number 8 above a treble clef or
below a bass clef, this means that
the notes must be played an octave
higher or lower respectively. If the
notes need to be really high or low, a
‘15’ can be used above or below the
clefs. Our two examples actually tell
the pianist to play the same notes,
despite the different places on the
staves. On the ‘15’ example, the C
notes are in Middle C’s position on
the stave, but is actually the C two
octaves higher and lower.
Down low
This note with two ledger lines
is in fact C. Going from left to
right along the keyboard, it’s
the second C you’ll see – two
octaves below Middle C
Middle C – bass clef
The most important note on
the keyboard can be notated
on both staves. On the bass
stave Middle C is positioned
one ledger line above the stave
Middle C – treble clef
One ledger line below the
treble stave is where Middle
C can be found too. When it
appears here it is usually played
by the right hand
Up high
You will often see ledger lines
above the treble clef stave. This
note is A (the second A above
Middle C) and it rests on the
first ledger line above the stave
Top tip
Which hand
to use?
If you see Middle C on a
ledger line below the treble
stave, play it on the piano
with your right hand. If it
has a ledger line above the
bass stave, play with
your left hand.
44 Piano for Beginners
Understandingtheory
T
o properly understand what notes that
use dots and ties mean, you first need to
brush up on signatures and note duration.
The pace of a piece of music is governed
by its time signature. You can see this symbol at the
start of any stave, right next to the treble or bass clef.
It is usually two numbers such as 4/4 placed on top
of one another, but it can differ. The stave is divided
up into bars, and so the time signature defines the
type and amount of notes (so how many beats) that
each bar contains.
Different notes have different durations. A 4/4
time signature means that a bar needs to contain
note values in each bar that combine to equal 4
beats, for example four crotchets/quarter notes.
This is where dots and ties come in. Both work
to alter the length of a specific type of note. An
‘augmentation dot’ is, rather neatly, a small dot that
appears next to a note and instructs you to increase
that note’s duration by half. For example, if you saw
a dotted crotchet/quarter note, you would need to
play the length of the crotchet/quarter note plus
half of that duration again (so a half of a crotchet/
quarter note would be an eighth of a semibreve/
whole note).
Ties, on the other hand, work to merge notes of
the same pitch. They appear as curved lines which
link notes together and can let the duration of notes
travel across barriers, such as bars.
Changenotelengths
Learn how the duration of notes can be modified with dots and ties,
and how they fit within multiple time signatures
Dots and ties examples
A more in-depth look at duration, dots and ties
01Remember note duration
First is a semibreve/whole note. Two minims/half notes make a semibreve/
whole note, so two crotchets/quarter notes make a minim/half note. Notes
smaller than crotchets/quarter notes have flags, and each flag halves the value.
03Tied notes
You can see how the tie joins the two notes over a bar. You play tied notes as
one long note instead of separately. This example features two crotchets/quarter
notes tied together – this enables notes to carry on across bars.  
02Dotted notes
Here is a dotted minim/half note, which lasts three beats, as the dot extends a
minim’s value by half. Another crotchet/quarter note is added in to complete the
bar’s four beats for the 4/4 time signature.
04Different time signatures
This example shows dots and ties in 4/4 and 6/8 time signatures. Notice how the
dots and ties extend a note’s length and then the note durations add up in the
bars according to the specific signature.
“Dots and ties work to alter the length
of a specific type of note”
Piano for Beginners 45
Dots and ties in action
Discover how these little music markings make a difference
Adding extra dots means extra time
Double-dotted notes
Once you understand dotted
notes, double-dotted notes are
easy. The second dot simply
extends the note by a further
half of the first dot. If a minim/
half note is worth two beats,
then a dotted minim/half note
would be extended to three
beats; a double-dotted minim/
half note would be worth three
and a half beats. Look at our
examples to see how different
note durations could fit into
bars of 4/4 time. Triple-dotted
notes are also used in notation,
which makes a note 1 7/8 of its
duration. You probably won’t
come across it too much!
Top tip
All tied up
As well as the duration of
notes, ties can also be used to
carry over accidentals. These
are symbols that appear next
to notes that tell the reader
to play a note sharp, flat or
natural. See the next
page for more.
Dotted minim/half note
This is probably the most common dotted note,
as it lasts for three beats in simple time. In 6/8 time
such as this piece, it takes up the whole bar
Tied up
This minim/half note is tied up to a quaver/eighth
note, making this D last a total of five beats in
compound time, or 2.5 beats in simple time
6/8 time
In this example of a popular nursery
rhyme, a 6/8 time signature is used. This
means that there are six beats of quavers/
eighth notes per bar
Dotted crotchet/quarter note
The dot on this crotchet/quarter note extends
the note’s duration by half, meaning that it is
now extended by a further beat in 6/8 time
46 Piano for Beginners
Understandingtheory
T
he term ‘accidentals’ is given to little
symbols that turn a note into a sharp or
flat, or back to a natural. Essentially, the
symbols tell you how to modify the pitch
of the note. Flat lowers the pitch by one half step/
semitone and sharp raises the pitch by a half step/
semitone. You’ll see these symbols to the left of note
in question, and you will also notice them clinging
on to the treble and bass staves between the clef
and the time signature. This is what is known as the
key signature.
Key signatures tell musicians which key the tune
is played in, and refer to the sharps and flats that
are to be used throughout the piece – you’ll need
to memorise the ones to play from the signature. If
you’ve learnt the different scales, you will be able to
recognise key signatures much faster. For example,
if the music tells you that the key is G major, you
will know to use all of the notes from the scale of G
major, including F sharp. All key signatures except for
C major/A minor have sharps and flats in them. The
signature itself will have the little sharp or flat signs
on the corresponding line of the stave for that note.
Another accidental is the natural. When this is
next to a note it cancels out the sharp or the flat
instructed by the key signature or prior accidentals,
so you should play the natural note, ie the white key.
Alteranote’spitch
withaccidentals
Learn what these quirky symbols mean and whip
your sharps and flats into shape
Sharps, flats and naturals
Master using accidentals in just a few very simple steps
01Simple symbols
Here are the basic symbols for sharp, which looks like a hash symbol (#), flat,
which looks like a ‘b’, and natural, which looks like a box with a stick at alternate
corners. These appear next to notes and in key signatures.
03Playing with flats
In this example the symbols are on the B line and the E space on both clefs,
instructing you to play a B flat and an E flat every time you see a B or an E in the
music. G flat is not in the key signature, so an accidental must be used.
02Key it in
Notice the key signature next to the clefs. The symbols are on the F and C lines
to tell you that these notes are sharps. G sharp is not in the key signature, so an
accidental must be used if you want to notate it.
04Natural symbols
Here, F and C are played as sharps. However when you see the natural symbol,
you play the white key. You should play C natural for the duration of the bar, so
there are two C naturals in the second bar, even though there’s only one symbol.
Piano for Beginners 47
Accidentals in action
See accidentals on the page as they help the music come alive
What do you get when you double your sharps and flats?
Doubling up
A double flat is signified by using two flat
symbols (‘bb’), and the double sharp symbol
looks like an x. Whereas a flat or sharp alters a
note’s pitch by one half-step/semitone, you’ll
find that a double flat or double sharp alters
the note by a full step/tone. In our examples,
Gbb is the same as F natural because it’s two
semitones (a tone) lower, while Gx is the same
as A natural as it’s two semitones higher.
Top tip
Enharmonic
equivalents
On a piano, look at the black
key between C and D. This is
C#, as it’s a half step above C.
But it’s also a half step below
D, so it can also be called Db.
This is an enharmonic
equivalent.
C naturals
These notes would be C sharps, but the natural sign means
you must play C naturals. Unless dictated otherwise, the
rest of the Cs in the bar – such as the following note – are
naturals. This resets after the bar line, though
A tricky bar
The first note here is a C sharp, as a bar has passed
since the C natural before it. However, the second
note is C natural as it a carries a natural accidental.
If the next note had no accidental it would be C
natural, but the sharp sign means it’s C sharp
D major/B minor
Here you can see the key signature
of D major/B minor. It tells you to play
two sharps throughout the music,
which are F# and C#
“A double flat or
double sharp alters
the note by a full step
(two half steps)”
Back to sharps
Although we had a C natural in
the previous bar, since the bar has
finished we’re back to obeying the
key signature. This note is C sharp
C D E F G A B C D E F G A B
48 Piano for Beginners
Understandingtheory
L
earning to read music is like learning a
different language. There are so many
different directions, most of them in Italian,
and it can get confusing when you’re faced
with a page of music peppered with markings and
symbols. It can get especially sticky when certain
tunes require you to double-back on yourself
and repeat sections over and over. Where do you
start from and how do you know what to repeat?
The good news for beginners is that once you
understand the theory behind all this melodious
jiggery-pokery, you’ll realise that all it takes is the
memorising of a few key attributes to keep you
flowing through the bars.
The first aspect to grasp is bar lines and what
different ones mean. Then codas and segno signs
step in. These symbols, alongside some Italian
directions that we will cover in more detail soon,
will give you a clear idea of what notes and bars to
repeat and when.
The last things that you’ll need to recognise when
navigating your way around a piece of sheet music
are first and second time lines. These bars show you
when there are alternate endings to a tune or part of
a tune. In time and with a bit of practice, you’ll know
exactly what you need to play and where.
It’s best to think about these symbols as more like
road signs on a stave. They’ll point you in the right
direction and then you’ll be playing beautifully in
no time.
Navigatemusic
notation
Time to get score savvy and stay on track through
notation with repeats and endings
Repeats and endings
Get to grips with the bare essentials of what to play, when and where
01Repeat bar lines
These types of bar line instruct you to repeat parts of the music. Start-repeat
bars have dots on the right and end-repeat have dots on the left. Play bars 1–3,
repeat bars 2-3, then simply carry on.
03DS and DC
Complementing the symbols are the Italian phrasings dal segno (DS) which
means ‘from the sign’ (which is the Segno symbol), and da capo (DC) which
means ‘from the beginning’. These can be accompanied by other phrases.
02Coda and segno
These symbols are markers, used alongside Italian terms to show you where in
the music to play from or jump to. The coda symbol looks like a cross through a
circle and the segno symbol looks like a crossed S with two dots.
04Further instructions
D.C. al Fine means you should go back to the start until you reach the word ‘Fine’
(pronouned feen-ay). Once you get to Fine the piece will then end. If the D.C. al
Fine instruction is not accompanied by Fine then just play until the end.
Piano for Beginners 49
Skipping about the stave
The key elements to recognise for musical repeats
Playing musical repetition and alternate endings is easy
Time bars
Another form of repetition
comes in the form of first and
second time bars. These are
numbered brackets that appear
above the notes and change
the ending of a repeated
passage. The first time the
passage is played you play the
notation under the first time
bar. Then when the passage is
repeated, you skip the notes in
the first time bar and only play
the notes in the second time
bar. They don’t just come in 1.
and 2. form either. For example,
you would use 1. 2. 3. and 4. to
play something through four
times yet only use a different
ending the fourth time.
Top tip
Keeping it simple
The Italian abbreviations are
simpler to use than English,
eg the phrase‘DC al coda’
essentially means‘repeat from
the beginning, until you reach
a coda symbol (or phrase
al coda) then jump forward
to the next coda symbol to
continue playing’.
Repeat bars
When you see this style of bar line, repeat
all of the music either from the beginning
or that you can see sandwiched between
the two start- and end-repeat bars
Double repeat bars
This is simply a start-repeat and end-repeat bar sitting
back-to-back on the stave. It signifies the end of one
repeat phrase but also the beginning of another
Time bars
These first and second time bar lines indicate alternate
endings. When you see these, you play the music as
normal and then play the notes under the first time bar
“First and second time bars change the
ending of a repeated passage”
Alternate endings
See the repeat bar? Once you’ve played the
notes under the first time bar, you play the
repeated phrases, skip the first time bar and
finish with the second time bar
50 Piano for Beginners
Understandingtheory
W
hen you start to read music, all those
dots and symbols on the page can
look confusing. But as you get more
confident, you can then start to put
more ‘oomph’ into your music when you come
across dynamics.
Essentially, musical dynamics control the
volume of a piece. They are Italian words that are
abbreviated or symbolised alongside the notes on
the stave and are just one way that the composer
is telling you to inject more feeling and personality
into a song, rather than just routinely playing the
notes off a page.
The basic dynamics are forte (f) and piano (p).
These mean loud and quiet respectively. However
there are plenty more variations, for example
pianissimo (pp) means very quiet and fortissimo (ff)
means very loud. The word ‘mezzo’ is often added
on to these, which means moderate, so mezzo-forte
(mf) means moderately loud.
Symbols are also used. A crescendo is symbolised
with a  and means ‘getting louder’. Similarly, a
diminuendo () means getting quieter. Check out
our table of the most common musical dynamics
to learn.
As musical instruments have a limit to just how
loud or quiet they can sound, you don’t want to play
your loudest when seeing a forte symbol, only to
turn the page and realise that the piece escalates to
fortissimo and you cannot play any louder.
Controlthevolume
withdynamics
Inject more personality into your music by learning
to read and play using dynamics
Master dynamics
Get to grips with dynamics for soft, soothing melodies or clanging compositions
01Static instructions
For directions such as piano (p) and forte (f), all notes should be played at that
volume until further instruction. Here, the instructions get louder each bar, from
mezzo forte (mf), to forte (f) and then fortissimo (ff).
03All change
Quick changes in volume are marked with instructions like sforzando (sfz), which
is used for a sudden burst with an accent. In this example, the first notes are
played softly (pianissimo) and the sforzando note bursts out at the end.
02Dynamic transitions
Instructions such as crescendo and diminuendo mean that the music should
gradually begin to change. The example above is a more gradual example than
in Step 1. The right hand should get louder as the piece goes on.
04It’s all relative
You need to interpret the dynamics of the music and look at the piece’s context,
mood and style to gauge how loudly or softly you play. Remember it’s about
volume and not to be confused with ‘articulation’, which deals with expression.
Piano for Beginners 51
A dynamic sound
Take a look at musical dynamics doing what they do best
There are plenty more dynamic directions to get your head around
Different types of dynamics
We have covered the most
basic and widely used dynamic
instructions but there are plenty
of other ones that you’ll come
across. Some of these are real
tongue-twisters. If you see
pppppp on the stave, this means
pianissississississimo, or ‘as softly as
possible’. There are also combined
markings such as pianoforte
(pf) which means ‘soft and then
immediately loud’, or mezzoforte
(mfp) meaning ‘start moderately
loudly then instantly drop to a
softer volume’. There are also
symbols that will affect dynamics,
such as accents, and sometimes
the dynamic direction will just be
written out in plain English.
Top tip
Where on
the stave?
On musical scores for
instrumental parts, you will see
all of the Italian dynamics
symbols placed below the
staves. However if you look at
the score for a vocal part you’ll
notice that the dynamics
are noted above
the stave.
Diminuendo
The diminuendo () instructs the musician to
play the notes gradually quieter until another
instruction is given. Along with a crescendo, these
symbols are sometimes referred to as ‘hairpins’
Fortissimo
This piece needs to be played very loudly to start, thanks
to the fortissimo (ff) direction. However, this is followed by
a diminuendo transition, so it should get quieter
Crescendo
These diverging lines denote a crescendo, so the piece
needs to get louder until the lines stop. You may also
see a crescendo direction written as ‘cresc.’
Sforzando
After the crescendo builds the
volume, it ends with a sudden
burst of loudness as instructed
by this sforzando mark
Symbol Name Description
 Crescendo Getting louder
 Diminuendo Getting quieter
ppp Pianississimo Extremely quiet
pp Pianissimo Very quiet
p Piano Quiet
f Forte Loud
ff Fortissimo Very loud
fff Fortississimo Extremely loud
mf Mezzo forte Medium loud
mp Mezzo piano Medium quiet
fz Forzando Begin note loudly with strong
accent
sfz Sforzando Loud and accented
52 Piano for Beginners
Understandingtheory
A
nother aspect of music that helps bring
the notes to life is tempo. The word
comes from the Latin word ‘tempus’
meaning ‘time’, and indicates to the
musician how fast or slow the music should be
played. It can also direct the mood or feel.
You’ll see the tempo marked at the top of the first
stave, and it’s effective throughout the piece unless
the composer states otherwise.
There are two ways that tempo can be expressed.
The first is in beats per minute (or BPM). This is a
rather precise measurement, and you can use a
metronome to help you keep in perfect time. As a
time signature tells you the number of beats in each
bar, the tempo tells you the speed at which to play
these beats. At the top of the stave, you will see a
particular type of note (eg a crotchet/quarter note)
with the BPM value next to it. This means that the
crotchet/quarter note is specified as the beat, and
the number (eg 120) is the number of beats that
must be played per minute.
The other way of directing tempo is by a series of
Italian phrases which are much more interpretive.
Just like the Italian phrases that deal with a music’s
dynamics, you will come across many phrases that
indicate the pace or mood for the music. Check out
the table below-right for the most common terms.
Setandchange
thetempo
Ensure your jigs are jolly and your ballads are slow and beautiful by
learning the essentials of musical tempo
Speed it up or slow it down
Some key tempo phrases and symbols that you should know
01Beats per minute
To determine which type of note signifies one beat, you can generally look
at the bottom number of the time signature. Here, in 6/8 time signature, one
quaver/eighth note equals one beat, so there needs to be 140 of these a minute.
03Back to the start
As well as instructions, there are also tempo phrases to direct you. In this
example you can see the words ‘a tempo’. This means that from that point you
should continue to play the music at the original speed.
02Written directions
Here you can see the directions ‘rit.’ and ‘accel.’ which are abbreviations of the
Italian words ritardando (getting slower) and accelerando (getting faster). These
give an approximate flavour of the intended speed at which to play.
04Tempo symbols
There are some symbols that are tempo directions. This eye-like example is a
fermata. It appears above a particular note and instructs the player to hold the
note for as long as the interpretations of the musician or conductor allows.
Piano for Beginners 53
Keep the beat
A snippet of tempo directions doing what they do best
Learn these and set yourself up for the future
Common tempo directions
In addition to some of the more flamboyant
Italian tempo directions, there are a select few
that you will come across time and time again.
Concentrate on these to begin with, and you
will be off to a good start. There are also
phrases that can link tempo instructions
together, for example molto means ‘very’, so
you may spot molto vivace which means very
lively. You may also come across moderato,
which as you may guess means ‘moderately’,
for example moderato vivace.
“There are phrases
that can link tempo
instructions together”
Top tip
Set the mood
As well as general directions,
there are plenty of Italian terms
that indicate both the mood
and the tempo of a musical
arrangement. Some good
examples are appassionato
(passionately), misterioso
(mysteriously) or
tenerezza (tenderly).
Accelerando
In our example, you should get faster
throughout bar 2; however, you’re likely to
see this instruction for several more bars
Back to normal
An accelerando or ritardando instruction will often
be accompanied by an ‘a tempo’ one. This means
to return the original tempo of the piece
Define the style
You can also gain a very good idea
of the composer’s intention for the
style or mood of the piece simply by
looking at the tempo directions
Fermata
There are symbols that
can dictate tempo.
Here the power is in
the player’s hands
with a fermata, so
these notes can be
extended for as long
as desired
Word Meaning
Adagio Leisurely
Allegro Fast and lively
Andante Moderate, walking pace
Grave The slowest pace
Lento Slow
Poco a poco Gradually
Presto Very fast
Sostenuto Sustained
54 Piano for Beginners
Understandingtheory
W
hen you’re reading music, alongside
being given general direction for
the whole piece and technical
instructions on what notes to play
at what time, you will also come across markings
which tell you how to play individual notes in
terms of style. No matter what it is, you still need
to know what kind of emphasis to put on it. This is
where articulations come in.
These small symbols are found either above
or below an individual note, depending on the
position on the stave. Articulations can alter the way
you play each note as well as create relationships
between the notes themselves.
Instructions such as staccato (shown by a small
dot, but be careful not to confuse this with a ‘dotted
note’) can tell you to play the notes in a detached
and ‘clipped’ manner. Conversely, when you see the
markings for legato (lines which tie notes of different
pitches together – but different to ‘ties’ which
connect notes of the same pitch) you know to slur
the notes, with no audible spaces. Some symbols
direct you to add accents to a note, and there are
some articulations (such as sforzando, or ‘sfz’) that
deal with volume and are considered as dynamics.
There are also articulations that cross the border into
tempo territory, such as a fermata.
Addarticulations
tonotes
Play notes with character and style by familiarising
yourself with articulations
Time to articulate
Play each note perfectly as you master the use of these musical characters
01Staccato
A dot beneath (or directly above) a note instructs you to play it staccato, which
means in a detached manner. This is then taken further with stacatissimo,
which is symbolised by a small triangle beneath (or above) the note.
03Accents
When you spot these little guys, they’re telling you to put some extra force on
that one note. A normal accent (bar 1) has the triangle pointing right, but for a
stronger accent (bar 2), you’ll see it reaching upwards. .
02Legato
Here the notes are all joined with a curved line. This signifies legato, or ‘slurring’.
When you see notes written like this, play the notes together in a long, lazy drag,
with no gaps between notes until the end of the slur.
04Tenuto
A simple line above or below the note instructs you to play the note for its full
length. The note is to be separated from surrounding notes, which could mean
that it’s emphasised or played louder.
Piano for Beginners 55
I
n the same way that dynamics, tempo and
articulations all layer up to create marvellous
music, ornaments simply add to this with little
quirks and fiddly bits that enhance the tune.
They’re easy to recognise and you might find that
the hardest part is getting your fingers around them
on the piano keys!
Ornaments are noted as small symbols above
specific notes. There are four kinds that you need
to know. Start with a trill, which is really simple –
play the note and the note above it alternately in
quick succession. Next is a turn, which is also easy.
It’s four notes: the note above, the main note, the
note below and the main note again. Then there’s a
mordent, which has three notes. There are two kinds
of mordent – upper and lower. For upper mordents
you play the main note, then the note above it, then
the main note once more. Lower notes have the
same principle; you play the note below the main
note in the middle. The last ones are grace notes.
These are single-note ornaments that appear on the
stave as ‘mini notes’ next to a main note. There are
two categories: acciaccatura and appoggiatura.
All ornaments must be played to the duration of
the note they’re assigned to. For example, a trill on
a quaver/eighth note must last no longer than the
quaver/eighth note’s beat.
Usemusical
ornaments
Learn about these extra pieces of musical goodness
used to decorate a tune
Beautify the notes
Know your symbols to create intricate and flamboyant melodies
01Acciaccatura
This type of grace note is symbolised by a mini quaver/eighth note with a slash
through the tail. It is sometimes referred to as a ‘crushed note’ as it is played as
quickly as possible before the note in front of it.
03Trills and turns
To play a trill (left), alternate quickly between the main note and a whole or
half-step above. To play a turn, quickly play the note above, then the main note,
then the note below and then the main note again.
02Appoggiatura
These grace-note ornaments are similar to acciaccaturas, however they fall on
the beat of the note, not before it. An appoggiatura can consist of one or more
notes and their symbol is the same but without a slash.
04Mordents
These are upper (bar 1) and lower (bar 2) mordents. An upper mordent consists
of two main notes sandwiched around a note that’s a whole step lower. A lower
mordent is the same, but with a note higher in the middle.
56 Piano for Beginners
“Start playing the notes very slowly and
smoothly. Once you have done a few slow
repetitions, you can build up speed”
Piano for Beginners 57
Playingthe
pianoWith your new knowledge of music theory, you
can now master the building blocks of piano music:
chords, scales and arpeggios
58 Warmupyourhands
60 Introducingmusicalscales
62 TheCmajorscale
66 TheFmajorscale
68 TheGmajorscale
69 TheDmajorscale
70 TheAminorscales
72 Dminorscales
74 Learnaboutintervals
78 Understandingchords
80 Usinginversions
82 Majorchords
84 Minorchords
86 Suspendedchords
88 Augmentedchords
89 Diminishedchords
90 Dominantseventhchords
92 Majorseventhchords
93 Minorseventhchords
94 Usechordprogressions
96 Left-handpatterns
98 Learnarpeggios
58 Piano for Beginners
Playingthepiano
I
n the same way that an athlete must warm
their body up before running a race, a pianist
must warm up before they play music.
Although not as physically taxing as running the
100m, going through a few short piano exercises
before you begin is a sure way to enhance the way
you play.
Relaxing your shoulders, arms, wrists and hands
will enable you to flow through the music. Your
finger dexterity will be improved, enabling you
to both find and reach keys quickly and easily,
putting no obstacle between you and the notes
on the page. You’ll also enjoy practising piano more
too, because if you’ve warmed up properly you
won’t get achy fingers, wrists or back. Warming up
also avoids getting cramp in your hands, which
can be quite painful. If you’ve limbered up, and
your physical posture is correct, you’ll be able to
comfortably play for as long as you like.
You can also use regular hand exercises to
strengthen your fingers and even stretch your reach
to enhance the notes you’re able to play and the
way you play them.
Physical tension can translate into music. If
you’re uncomfortable, your music might sound
uncomfortable. It’s important to prepare yourself
properly before you develop any bad habits that can
be difficult to combat. Here we’ll show you some
very simple exercises to start with, which you can
then build upon for a top-notch warm-up repertoire
to kick off your practice sessions and eventually your
concerts with.
Warmup
yourhands
Limbering up before you practise and play
is an essential part of learning piano
Get your hands ready before you start playing
Two-handed warm-up
Begin slowly
Start playing the notes very slowly and smoothly. Once
you have done a few slow repetitions, you can build up
speed as your hands begin to feel loose and relaxed
Step it up
Play a few repetitions with your right hand, then switch to
your left hand and repeat. Then you can step up to playing
with both hands as you build up speed and confidence
Even it out
Listen to yourself and be sure to play an even
volume across all fingers. This exercise will
help to strengthen your 4th and 5th fingers
on each hand, which are usually the weakest
Breathe it out
It may seem obvious, but
remember to keep breathing
calmly and deeply as you exercise,
practise and play to stay relaxed
and comfortable at your piano
“Relaxing your shoulders, arms wrists and hands
will enable you to flow through the music”
Top tip
Learn your
finger patterns
To help you learn which fingers
should hit which keys, you will
often see the fingering written
beneath notes. A 5 refers to your
little finger, 4 to your ring finger,
3 to your middle finger, 2 to
your index finger and
1 to your thumb.
1 2 3 4 1 2 3 4 1 2 3 4 1 2 3 4 5 4 3 2 5 4 3 2 5 4 3 2 5 4 3 2 1
1 2 3 4 1 2 3 4 1 2 3 4 1 2 3 4 5 4 3 2 5 4 3 2 5 4 3 2 5 4 3 2 1
Piano for Beginners 59
Get set before you go
Pre-practice tips for budding pianists
02Right-hand workout
Your right hand is often the stronger of the two. Warm it up by playing simple
keys up and down the keyboard, starting with your thumb (1) on Middle C.
Start slow and then repeat to build up speed.
01Physical stretches
Gently stretch your arms and relax your shoulders. Move your hands and wrists
in gentle circular motions clockwise and anti-clockwise, then press your hands
together and tilt smoothly and gently towards and away from your body.
04Strengthening up
Complementary exercises can strengthen your fingers. Try holding down five
keys at once, then as you hold them, play the note over and over again with
your fourth finger. Then switch to your fifth. This will strengthen those fingers.
03Left-hand exercises
Follow the notation, starting with your little finger (5). Then repeat the tune, but
start on the next note higher than the previous starting note. Repeat this a few
times to get your left hand ready to go.
60 Piano for Beginners
Playingthepiano
Knowing which fingers play which notes is vital
Your piano hands
The circle of fifths
A visual and easy way of
remembering the key of a
scale is to use the circle of
fifths. This circle shows the
relationship between the 12
tones of the musical scale. To
work out how many sharps
( # ) or flats ( Ь ) a key
signature should have, follow
the circle clockwise; major
on the outside, minor on the
inside. For example, if we look
at A major, the key signature
would have three sharps
(these being F, C and G). The
inside part of the circle shows
us the relative minor (orange
letters), and in this case it
would be F# minor.
When you’re looking at the scales
played in this book, you will
notice tiny numbers next to the
notes. These are the fingers with
which you should play the notes.
Playing scales using these finger
patterns minimises effort and
enables you to concentrate on
building up speed.
“Playing scales
using these
finger patterns
minimises effort”
Major
Minor
A E
B
F
C
G
D
E
G
D
A
E
B
B
F
C
G
D
C
F G
D
A
E
B
F
1
1 #
3
3
#
#
#
#
#
#
6
6 #
5
5 #
4
4 #
2
2
#
Ь
Ь
Ь
Ь
Ь
Ь
Ь
Ь
Ь
Ь
Ь
Ь
Ь
#
##
##
#
#
#
#
#
#
#
#
##
#
##
###
Ь
Ь
Ь
Ь
Ь
Ь
Ь
Ь
Ь
Ь
Ь
Ь
Ь
Ь
Ь
Ь
Ь
Ь
Ь
Ь
Ь
S
cales in music are series of notes that are
arranged into a specific sequence which
can be either ascending or descending.
They usually start and end on the same
musically named note (ie C) separated by an
octave (the distance between eight musical
notes). The scales will normally follow a set
pattern of either semitones (half steps) or tones
(whole steps).
The three most common forms of scales are
major, a happy-sounding scale; minor, a sad-
sounding scale; and chromatic, a scale whose
sound is ambiguous and is made up of semitones.
There are, however, different types of minor scale
with subtle differences in their make-up.
Learning scales on piano is important for a
number of reasons. It will enable you to learn
your keyboard quickly, which will become very
important when performing music in various
keys. They will also help to strengthen your fingers
and increase their agility, which will improve your
ability to be able to play tricky passages.
Introducing
musicalscales
Understand how scales are formed and how important they are
5 5
4 4
3 3
2 2
1 1
Piano for Beginners 61
Scales are a great way to learn your way around a keyboard, but the way you
play them will also help you build up speed and accuracy. Okay, so you can’t
argue that they are the most exciting things to play in the world, but thanks to
their strict patterns you can play a scale on any key without even being able to
read music! Their patterns relate to the distance between the notes in the scale
and can be measured in semitones, which is the gap between each note on
the keyboard. An interval of two semitones is known as a tone. So, the interval
between C and C# is a semitone, but the interval between C and D is a tone.
But be warned; you shouldn’t make the mistake of thinking that the distance
between all white notes is a tone, though. In actual fact, the interval between
B and C, as well as E and F is only a mere semitone because there are no black
keys between them.
Learning the patterns
The theory behind some of the main types of scales
Major scale
The major scale’s pattern goes like so:
Tone, Tone, Semitone, Tone, Tone, Tone,
Semitone. If we take the C major scale
as an example, you can see that the two
semitone intervals fall where there are
adjacent white keys: between E and F,
and between B and C. Any major scale
you care to name uses this formula – as
long as you know where the first note
is you can easily work out the rest of
the scale.
Melodic minor scale
The melodic minor is a strange one
– it’s almost like two different scales.
Ascending the pattern is Tone,
Semitone, Tone, Tone, Tone, Tone,
Semitone, but descending it’s Tone,
Tone, Semitone, Tone, Tone, Semitone,
Tone. The descending pattern is the
same as a natural minor scale. It’s a little
tricky to remember two patterns on the
same scale, but once you’ve learned it
you’ll soon be able to see the value in
its flexibility.
Harmonic minor scale
The harmonic minor scale is a little
different, although it still uses a
pattern – albeit one with a slight twist.
The interval between the sixth and
seventh notes is three semitones – a
tone and a half. So, the pattern goes:
Tone, Semitone, Tone, Tone, Semitone,
Tone and a half, Semitone. Far from the
happy sound of the major scale, it has a
kind of spooky sound that distinguishes
it from the other minor scales.
Tone Tone Tone Tone Tone
Semitone Semitone
Tone Semitone Tone Tone Tone
Tone Semitone
Tone Semitone Tone Semitone Tone  half
Tone Semitone
62 Piano for Beginners
Playingthepiano
S
cales are an important part of learning to
play piano both in terms of understanding
written music and for technical
improvement. Reading musical notation
is often referred to as music theory, which is like
learning the language of music. Scales are a vital
part of music theory, just as grammar is necessary
for speaking. As you learn to play scales you will start
to understand many aspects of musical theory.
Practising scales regularly will improve the fluidity
of your playing and help your fingers to become
more adept to this new activity. Scales are great
for developing co-ordination between the hands
and are also ideal for introducing a variety of what
pianists refer to as fingering patterns. Fingerings are
marked as little numbers above the notes in piano
music and are there to guide you as to which finger
to use for the given note.
The C major scale is the perfect place to start as it
contains only the white keys of the piano and forms
the basis for all other scales. Major scales have a
happy or cheerful sound, unlike minor scales which
sound distinctly sad. The C major scale begins on
the note C, ascends up the keyboard eight notes
to the next C, then descends back down to the
C you started on. As you will discover, all scales
are essentially a pattern of notes that ascend the
keyboard, then descend back down again.
TheCmajorscale
This is a great first step for beginners because it forms
the foundation for learning scales
Commit these to memory as they will appear often
Fingering patterns
Scale fingerings
You only have five fingers, so you will run
out pretty quickly when playing an 8-note
scale! Fingering patterns show you which
fingers to use when playing your scales
Finishing off
Once you have tucked your thumb, you will have
all your fingers at your disposal again which means
you can now ascend uninterrupted to the top
Tricky tucks
For the fourth note of the scale
you will need to tuck your
thumb underneath your middle
finger so that you have enough
fingers left to finish the scale
The right hand
A common pattern for a right-hand scale is
to start with the thumb, follow on with the
next note played by the index finger and
then a third note with the middle finger
“Practising scales regularly will improve the
fluidity of your playing and help your fingers
become more adept”
Top tip
Learn your
finger numbers
In piano theory the thumbs are
labelled as number 1, index finger
is 2, middle finger is 3, ring finger is
4 and your little finger is number 5.
Learn this to ease your progress!
The correct finger patterns are
essential if you want to play
scales quickly.
Audio file
Listen to the audio files
and follow along on your
own keyboard
Give it a try
Piano for Beginners 63
Playing the C major scale
Let’s start with the right hand
01 Starting position
Start with your thumb on Middle C. This is the white key directly left of the
group of two black keys. Middle C is the fourth C from the lowest end of a
standard piano, and the closest one to the middle of the keyboard.
03 Completing the ascending scale
Next you will need to play the notes G-A-B with your index (2), middle (3) and
ring finger (4) in succession and finally finish the ascending or upwards part of
the scale with your little finger (5) on C.
02 The first four notes
Play Middle C with your thumb (1) then play the notes D and E in succession
with the index (2) and middle (3) finger. For the fourth note F, you will need to
tuck your thumb (1) underneath your middle finger.
04 Descending
Go back down the scale, or descend by following the top C (5) with B (4), then A
(3), G (2) and F (1). Your middle finger (3) then crosses over your thumb to play E
followed by D (2) and finally C (1).
1 2 3 4
1 2 3 1 2 3 4 5 5 4 3 2 1 3 2 1
64 Piano for Beginners
Playingthepiano
Switch to the left hand
You can play C major with your right hand, now try the left
01 Where to start
C major for the left hand begins with your little finger (5) and is played lower
down the piano. Place your little finger on the C that is one octave below, or
seven white keys to the left of Middle C (not including Middle C).
03 Finishing the ascending scale
Next you will need to bring your middle finger (3) over the top of your thumb to
play A. Finish the ascension by playing B with your index finger (2) and the top C
with your thumb (1).
02 The first five notes
Play the beginning C with your little finger (5), then follow that with the notes
D-E-F-G in succession with your ring finger (4), middle finger (3), index finger (2)
and then your thumb (1).
04 Descending
After playing your top C, go directly back down the scale playing B (2) then A (3).
Next, bring your thumb underneath your middle finger and complete the scale
by playing the following: G (1), F (2), E (3), D (4), C (5).
1 2 3 4
5 4 3 2 1 3 2 1 1 2 3 1 2 3 4 5
Piano for Beginners 65
1 2 3 4
5 4 3 2 1 3 2 1 1 2 3 1 2 3 4 5
1 2 3 1 2 3 4 5 5 4 3 2 1 3 2 1
03 Tricky tucks and turns
It will feel rather clumsy at first doing the thumb tucks and finger-over parts to
the scale, as these are not done simultaneously between the right and left hand.
Remember that right hand tucks first, the left hand turns over!
04 Perfecting the scale
Practise your ascension a few times slowly and when you are happy, try
descending. The same rules apply here, just follow the patterns, become more
and more used to the pattern and your co-ordination will improve.
01 The starting position
Next you can learn to play the C major scale ascending and descending with
both hands together. Place your hands on their starting notes of C, with the
right-hand thumb on Middle C and the left-hand little finger an octave below.
02 Going up
It may take a bit of practice to get used to the hands moving together. Follow
the finger pattern you have learnt for each hand to ascend up the scale. The
only difference is that both hands are playing together instead of individually.
C major with both hands
See how the right and left hand sound together
66 Piano for Beginners
Playingthepiano
M
usical notes are named after the first
seven letters of the alphabet: A, B, C,
D, E, F and G. On a piano, these notes
are represented by the white keys.
When you play your C major scale you start with
a C and then ascend up through the successive
letters to G after which the pattern returns back to
A and carries on from there. This is the same for the
entire length of the keyboard. The white keys simply
repeat A through to G over and over again.
Any set of eight notes together is referred to as
an octave and the scales you learn as a beginner
will tend to be of a single octave. In addition to
the white keys of the piano there are black keys,
although there are fewer of them. You will notice
that the black keys are grouped together in alternate
sets of two, then three. The C major scale is a great
one to start with because it does not contain any
black keys. All the other major scales, however, do
use one or more of the black keys. In musical terms,
these are referred to as either sharps or flats. The
musical symbol for a sharp is # and the symbol for
flat is b. Don’t worry if it all seems a little confusing;
things will become much clearer as you progress.
The F major is a good scale to try next as it only
contains one black key, a Bb (B flat). The Bb key is
located between the A and B white keys. So let’s get
going and start taming this scale.
TheFmajorscale
Follow on from C major with this new scale,
which contains a black key
This scale contains a black key: B flat (Bb)
Tips for playing F major
Tuck after finger 4
For logic and ease, the Bb is played
with finger 4 and the thumb is
tucked under this finger to play
the next note of the scale, C
Different fingerings
The location of the Bb key means a new fingering
pattern applies in the right hand of F major. Not
every scale has a unique pattern though. Many
share the same patterns
The right-hand pattern
Attempting to tuck your thumb
after finger 3 as you do in C major
would be very awkward. Because
Bb follows the A (3) this would not
be easy to play with your thumb
Playing Bb
Remember that you will
be replacing the white
key of B with the black
Bb key for this scale.
This replacement rule
applies to any scale that
calls for sharps or flats
Audio file
Listen to the audio files
and follow along on your
own keyboard
Give it a try
“Any set of eight notes together is referred to as
an octave and the scales you learn as a beginner
will tend to be of a single octave”
Top tip
Don’t forget
the flat!
You’ll need to play B flat in this
scale. There’s no flat accidental in
our notation for the scale because
the key signature dictates that all
B notes must be flattened.
If you do play B natural,
you’ll be able to hear
that something
is wrong!
Piano for Beginners 67
03 Your left hand
Find the F that is situated two octaves below the F used as your starting note for
the right hand. With finger 5 of your left hand, begin the scale moving through
the notes G (4) and A (3).
04 Finish the ascent, and then descend
Play Bb with finger 2, then play C (1). Finish the ascent by bringing finger 3
over your thumb to play D followed by E (2) and F (1). Descend using the same
pattern in reverse, tucking your thumb under finger 3.
01 Ascending from the starting position
Place your thumb (1) on the F key located four keys above Middle C. Follow on
with the notes G (2) and A (3), then use finger 4 to play Bb. Finally, tuck your
thumb underneath to play C and finish with the notes D (2), E (3) and F (4).
02 Descending
Your small finger gets a break in F major as the pattern does not require finger
5. To descend, simply follow the pattern outlined in Step 1 in the reverse order,
bringing finger 4 over the thumb to play the Bb.
F major on both hands
Master this one-flat scale
1 2
3 4
1 2 3 4 1 2 3 4 4 3 2 1 4 3 2 1
5 4 3 2 1 3 2 1 1 2 3 1 2 3 4 5
68 Piano for Beginners
Playingthepiano
A
s we have observed, there are seven
different white keys (notes): A, B, C, D, E,
F and G. For each set of seven white keys
however, there are only five black keys.
Each of the black keys can be known by either its
sharp name, or its flat name. Remember, the ‘flat’ of
a white key is always below the note, and the ‘sharp’
is always above.
The black key used in the F major scale is the note
Bb which replaces B for that scale. In other scales,
the same black note might be referred to as an A#.
In this way, some scales use the flat names for the
black notes used, and some use the sharp names,
but they will never use both. Adding together the
seven white keys or notes, with the five black keys
gives us the sum total of 12 notes each with its own
unique pitch or sound frequency.
There are 12 different major scales in all, one
beginning on each of the 12 notes. You have already
seen how to play C major, the scale with no sharps
or flats and F major, having one flat. The next scale
to learn is G major. This scale also contains a single
black key, but this time it is referred to as a sharp.
The sharp note in G major is F#, located between the
F and G keys.
TheGmajorscale
The major scale that’s a fifth after C has just
one sharp: F sharp
“Some scales use the flat names for the black
notes used and some use the sharp names,
but they will never use both”
01 The right hand
Start with your thumb on G (four notes above middle C) and follow the pattern:
G (1), A (2), B (3), C (1) (tuck), D (2), E (3), F# (4), G (5). Notice that the fingering
pattern is the same as C major. Descend in reverse order.
02 The left hand
Begin with your small finger on the G situated two octaves below the right hand
starting G, and follow the same fingering pattern that you learned for C major:
G (5), A (4), B (3), C (2), D (1), E (3) (bring over thumb), F# (2), G (1). Now descend.
1 2 3 1 2 3 4 5 5 4 3 2 1 3 2 1
5 4 3 2 1 3 2 1 1 2 3 1 2 3 4 5
Audio file
Listen to the audio files
and follow along on your
own keyboard
Give it a try
Piano for Beginners 69
E
very one of the 12 major scales has its own
unique set of sharps or flats. The collection
of sharps or flats found in a scale is known
as the key signature, which in written music
is situated right next to the clef at the beginning
of each line of music. So far you have learnt to play
three different major scales: C major (no sharps or
flats), F major (one flat) and G major (one sharp). F
major, containing one flat, is followed by a scale
containing two flats. Likewise, the scale that follows
G major has two sharps. This scale is D major.
You may begin to notice a pattern emerging
here concerning the scales that contain sharps.
First you learned C major, the scale without sharps
(or flats). Then came G major containing one sharp
(F#). Next you will learn the scale with two sharps,
D major. The pattern surfacing is that there are
exactly five notes between each of the scales. Start
with C (no sharps or flats), count up five notes (C-D-
E-F-G) and you arrive at G (one sharp = F#). Count
up another five notes (G-A-B-C-D) and you arrive at
D (two sharps = F# and C#). This pattern continues,
adding a sharp each time and is what is known as
the circle (or cycle) of fifths – see page 60 for more
information on it.
The F# in the D major scale replaces the F, with
the C# played instead of C. Just remember to locate
the sharps on the piano before you begin to play
the scale.
TheDmajorscale
Discover the scale with two sharps and begin to understand
the pattern of the major scales
“Remember to locate the sharps on the piano
before you begin to play the scale”
01 The right hand
Begin with your thumb on the D just above middle C. Play the following notes
to ascend up the scale: D (1), E (2), F# (3), G (1) (tucked), A (2), B (3), C# (4) and D (5).
You’ll notice the pattern is identical to C major. Descend in the reverse order.
02 The left hand
Starting on the D key two octaves below the one used for right hand, play the
following notes: D (5), E (4), F# (3), G (2), A (1), B (3), C# (2) and D (1). Again, the
pattern is the same as that of C major. Descend in reverse.
5 4 3 2 1 3 2 1 1 2 3 1 2 3 4 5
1 2 3 1 2 3 4 5 5 4 3 2 1 3 2 1
Audio file
Listen to the audio files
and follow along on your
own keyboard
Give it a try
70 Piano for Beginners
Playingthepiano
1 2 3 1 2 3 4 5 5 4 3 2 1 3 2 1
5 4 3 2 1 3 2 1 1 2 3 1 2 3 4 5
01 The right hand
Place your thumb on the A key located six keys above middle C. Follow the
same fingering pattern used for C major, playing the notes A-B-C-D-E-F-G and A.
You will discover that this scale sounds very different to a major.
02 Left hand and hands together
After ascending and descending with your right hand, do the same with the
left. Start on the A key situated an octave lower down and follow the C major
fingering pattern with the A minor notes. Now try hands together!
The A natural minor scale
T
he most important type of scale to
learn next is the minor scale. Unlike the
major scale, the minor scale comes in
three different formats: the natural minor,
the harmonic minor and the melodic minor. This
means that for any given minor scale, there is not
one pattern to master, but three. Don’t worry if this
sounds daunting as the three different formats are
all centred on the same series of notes; they just
have slight variations which are useful to learn and
understand. With a little bit of practice you will soon
be adept at playing all three types of minor scale.
The A minor scale is the equivalent to the C major
scale because it has no sharps or flats. In musical
terms, this is referred to as the relative scale (eg A
is the relative minor to C, or C is the relative major
to A). Therefore, A minor is the obvious choice as
an introduction. You can find a major key’s relative
minor by counting three semitones lower (A is three
semitones lower than C).
As already noted, there are three different kinds
of minor scale. The natural minor is the foundation
scale, sharing the exact same set of notes as its
relative major (C), but starting and ending on A
rather than C (A-B-C-D-E-F-G-A). The harmonic minor
has only one alteration: the seventh note (in this
case, a G) is raised a semitone higher and is replaced
with G#. In the melodic minor, both the sixth and
the seventh note are raised but then lowered again
during the descent.
Introducing
minorscales
Time to tackle this new type of scale
Audio file
Listen to the audio files
and follow along on your
own keyboard
Give it a try
Piano for Beginners 71
05 Raising notes in the ascending scale
A melodic minor has the same fingering pattern as A natural minor. The change
is to raise the sixth and the seventh notes, giving us: A, B, C, D, E, F#, G#, A.
03 Raising the seventh note
Follow the steps for the natural minor. The only change is to raise the seventh
note, replacing the G with a G#. You will notice an increased intensity.
06 Lowering the notes on descent
When descending, the two notes that were raised are now lowered back to their
naturals or white keys, making the descent the same as A natural minor.
04 Practising the scale
Play the A natural minor and A harmonic minor with the right hand to
understand the difference. Do the same with the left hand and hands together.
The A melodic minor scale
The A harmonic minor scale
1 2 3 1 2 3 4 5 5 4 3 2 1 3 2 1
5 4 3 2 1 3 2 1 1 2 3 1 2 3 4 5
1 2 3 1 2 3 4 5 5 4 3 2 1 3 2 1
5 4 3 2 1 3 2 1 1 2 3 1 2 3 4 5
72 Piano for Beginners
Playingthepiano
1 2 3 1 2 3 4 5 5 4 3 2 1 3 2 1
5 4 3 2 1 3 2 1 1 2 3 1 2 3 4 5
J
ust like major scales, the minor scales follow
a cycle, adding either a sharp or a flat with
each new scale. The next minor scale to learn
is D minor which has one flat; B . The relative
major scale to D minor is F major, as it also contains
the same single flat note.
As with A minor, you will learn three formats: the
natural minor, the harmonic minor and the melodic
minor. These contain only a slight change but each
sounds very unique. It is important to understand
the three types of minor scale, as their sequences
will appear in the music you will go on to learn.
The D natural minor scale uses the same notes
found in the F major scale, beginning and ending
on D: D-E-F-G-A-B -C-D. In the D harmonic minor,
the seventh note needs to be raised one semitone.
A semitone refers to the smallest possible distance
between two notes, basically the distance between
two notes directly next to each other. In most cases,
the note directly next to a white key on either side is
a black key. For example, to raise a G one semitone,
you simply go to the black note above of G#. With a
B however, the next key is a white one – C. So for B,
a semitone above is actually C.
Dminorscales
D minor follows from A minor, spicing things up
by adding a flat to its key signature
“It is important to understand the three types
of minor scale, as their sequences will appear in
the music you will go on to learn”
01 The right hand
For D natural minor, the fingering pattern used in C major is again employed.
For the right hand, the sequence is: D (1), E (2), F (3), G (1) (tucked), A (2), B (3), C
(4), D (5). Begin on the D one note above Middle C.
02 Your left hand
Once you have ascended and descended a few times with your right hand, try
the left hand beginning two octaves lower. The notes are the same as for Step 1,
and the fingering pattern is again the same as C major.
D natural minor
Audio file
Listen to the audio files
and follow along on your
own keyboard
Give it a try
Piano for Beginners 73
05 Raising B flat to B natural
For D melodic minor both the sixth and the seventh note need to be raised
during the ascent. This means B rises to B natural and C rises to C#.
03 A flat and a sharp in the same scale
Even though D minor has a B in the key signature, the raised 7th will still be
labelled as a sharp. Play with your right hand: D-E-F-G-A-B -C#-D.
06 The notes to play
On the descent you need to lower the sixth and seventh back to the notes of
the D natural minor scale: D-C-B -A-G-F-E-D.
04 The left hand
Follow the same notes as for the right hand, starting two octaves lower. Practise
the scale with hands separately, then together.
D melodic minor
D harmonic minor
1 2 3 1 2 3 4 5 5 4 3 2 1 3 2 1
5 4 3 2 1 3 2 1 1 2 3 1 2 3 4 5
1 2 3 1 2 3 4 5 5 4 3 2 1 3 2 1
5 4 3 2 1 3 2 1 1 2 3 1 2 3 4 5
74 Piano for Beginners
Playingthepiano
S
o far, we have only played one note per
hand, but the polyphonic nature of the
piano means that we can play up ten notes
at the same time. This is very rare, however,
and most of the time you will be playing two, three
or sometimes four notes with the same hand. We’ll
be talking about playing three and four notes at the
same time in the chord walkthroughs, but for now
let’s look at playing two notes together and how the
intervals between them will affect your sound.
In music theory terms, an interval is the difference
between two notes (not necessarily played at
the same time), and they are often measured in
semitones. A semitone is the interval between two
adjacent keys on the keyboard, and two of these
semitones make up a tone. So, there is a semitone
between C and C#, but a tone between C and
D. But rather than just naming intervals after the
number of semitones between the notes, they are
all called different names, which you can see in the
table to the right.
In this tutorial we will take a basic melody and
slowly add a harmony to it, identifying different
intervals in the process.
Learnabout
intervals
Take the next step and play more than one note at
the same time on the same hand
Interval Distance
Minor third 3 semitones
Major third 4 semitones
Perfect fourth 5 semitones
Tritone 6 semitones
Perfect fifth 7 semitones
Minor sixth 8 semitones
Major sixth 9 semitones
Perfect octave 12 semitones
Create a tune with intervals
See how different intervals affect a right-hand melody
02 Add a harmony
Now you’ve got a melody sorted, add a harmony to it. All our additional notes
are three or four semitones below the original melody, but you can experiment
with other intervals. We’d advise sticking to only the white keys at this point.
01 Make your melody
First of all, write a short but catchy melody of no more than two bars. We
recommend sticking with C major as it’s easier to experiment as you can play
around with only the white keys.
Audio file
Listen to the audio files
and follow along on your
own keyboard
Give it a try
Piano for Beginners 75
A developed right-hand melody with harmony
Put it into practice
04 Mixing it up
Now you know what your tune sounds like with a harmony at a constant
interval, mix it up a bit. Keep your original melody, but harmonise it with
different intervals. As long as you stick to the white notes, it should sound good.
03 A sixth below
We’re keeping our melody from Step 1, but changing up the harmony. This time
we’re keeping a harmony with a constant interval but now it’s a sixth below. You
may find this easier as you can keep your hands in the same position.
The beginning
Straight away, you can see that the
intervals between notes can vary.
Here are thirds, fourths and sixes
Run down
This passage is a mix of major and minor thirds.
Minor thirds have a distance of three semitones
between them, while major thirds have four
Ending
Our piece is in C major (no sharps or flats),
so it makes sense to end on an interval that
includes two members of the C major triad
Octaves
An under-used interval – especially in the right
hand – is the octave. It may be the same note,
but you can still get a really good sound
76 Piano for Beginners
Playingthepiano
Left-hand intervals
Building an accompaniment
01 Basic note progression
To start with, put four notes together. We’re playing in F major to vary things, but
there’s no harm in sticking in C major if you don’t feel confident, or indeed if you
want to add more to your right-hand melody.
03 Development
Just because you’re playing two notes together in intervals, you don’t need to
harmonise every note. Take this opportunity to develop your bass line, perhaps
by adding in some notes on their own, while keeping your notes from Step 2.
02 Add a harmony
Like we did with the right-hand tune, you can now add a harmony to your four
notes. As well as varying the intervals, try changing up whether they’re intervals
above or below. You can completely change the sound of your tune.
04 Use your whole hand
Of course, you can just play two or more notes at every opportunity! In fact,
doing so is a great way to get every finger on your hand moving. Try playing the
passage above with the same two fingers every time and it’ll be a struggle.
Piano for Beginners 77
Don’t forget about this convenient interval
Octaves
With all these minor thirds and perfect fifths,
it’s easy to forget about the octave. An octave
is spread across 12 semitones and eight notes.
Whatever the root note of your two-note chord,
its octave will always have the same name: the
octave of Middle C will be another C note.
Octaves have many uses too. For example,
in the right hand you can double a melody in
octaves to give it another dimension. If you want
a delicate melody high up the keyboard but you
think it sounds too weak, add in the octave below
and hear the sound get stronger. It’s best to
keep this melody simple to start with, as moving
between the octaves is hard work.
Octaves can also be used with the left hand as
a simple accompaniment pattern. It won’t work
quite as well as a melody option, but it’s a great
way to support the tune.
Thirds on both hands
Don’t be afraid to play the same interval on both
hands, although if your left hand is playing lower
down it might be best to just play single notes
F major
The tune is in F major – as you can tell by the key
signature. We’ve ended it on a straight F major
chord with all three notes represented
Run down
This is similar to the run down in our right-hand-
only piece, except there’s a perfect fourth on the
first beat of both bars
Minor seventh
These two minor thirds are on different staves,
but together they form Am7 – A minor seventh.
It adds a jazzy sound to the ending of our piece
78 Piano for Beginners
Playingthepiano
Understanding
chords
How to construct and play common chords
Chord type Formula
Major 1-3-5
Minor 1-b3-5
Diminished 1-b3-b5
Augmented 1-3-#5
Dominant 7th 1-3-5-b7
Major seventh 1-3-5-7
Minor seventh 1-b3-5-b7
Sus2/Sus4 1-2-5/1-4-5
Playing three or more notes with one hand
Right-hand chords
Finger patterns
There’s not really set finger patterns
for every chord – but most use 1-3-5
for a normal triad chord
Formulas
All chords can be constructed using the same
formula for each type. If you know what notes are
in a scale, you can use these to work out a chord
Minor seventh chord
This is D minor seventh,
which uses four fingers – as all
seventh chords do. Its formula
is 1-b3-5-b7 – D-F-A-C
Free fingers
Unless you’re playing a five-note
chord, which is quite rare, you will
have a free finger or two. Make
sure these are ready to play notes
after the chord
A
chord is a set of three or more notes
played at the same time, and they
are an integral part of music. When
they are played in sequence it is known
as a chord progression, and a well thought-out
progression can transform an average song into a
great one. Fortunately, we can use music theory and
knowledge of the scales we’ve already covered to
construct and experiment with different chords.
To play a three-note major chord (also known as
a triad), you must play the first, third, and fifth note
of its corresponding major scale. For example, if
you want to play a C major chord, you would need
to play the first, third and fifth note of the C major
scale (C-D-E-F-G-A-B-C) together – so that would be
C-E-G. The major chord isn’t the only kind to have a
formula like this. The table to the right lists many of
the most common kinds of chords and how they
are constructed.
When looking at the sheet music, you may see
letters above a stave – these are chords that the
melody is based on. If you find the right or left-hand
part too challenging, then playing the correct chord
instead will still sound great.
Audio file
Listen to the audio files
and follow along on your
own keyboard
Give it a try
Piano for Beginners 79
Different chord types
A guide to some common chords
Minor chords
Minor chords carry a sad sound, which is created by flattening the third by a
semitone (one key). Rather than play C-E-G to play C major, you play C-Eb-G for C
minor. A lower-case ‘m’ will be above the stave for a minor chord.
Major chords
Major triads are happy-sounding chords that are made by taking the first, third
and fifth note from the chord’s corresponding major scale. If a letter is written
above the stave on its own, ie just ‘D’, then this means it’s a major chord.
Left-hand chords
Don’t think that chords are exclusive to the treble clef. Although we wouldn’t
recommend playing triads low down the keyboard, left-hand chords are useful
when working out progressions, such as the one above.
Dominant seventh chords
Seventh chords have four notes, and feature the first, third, fifth and flattened
seventh notes of the corresponding major scale. C7 comprises C, E, G and Bb.
The first three notes are the same as a major triad.
C G D F
C7 G7 D7 F7
Cm Gm Dm Fm
C G Dm F7
80 Piano for Beginners
Playingthepiano
P
laying chords, no matter what kind,
would be pretty boring if all you could
do was play them the same way all the
time. No matter how you changed the
way you used them rhythmically, the notes would
always sound the same. Luckily, you can use handy
inversions to play the chords you think sound best
but in different ways.
Rather than just playing C (the root), the E (the
third) above it, and the G (the fifth) above that to
play C major, you can start on E, then play the G
above it, and then the C above the G (so you’re
playing the C that’s an octave higher than the
one play in the first chord). This is what’s known as
the first inversion of C major. It’s still C major as it
contains the three notes that make up the chord,
they’re just played in a different order. To play a
second inversion on C major, the bass note must be
G, the second note C (the same one that’s played
in the first inversion), and the third note the E after
that. Although the chords are technically the same
in name, the different sound you get can help add
interest to a piece.
Inversions aren’t just handy for varying sounds,
though – they also help transition between chords.
Let’s imagine that you want to play C major then
A minor. Rather than moving your whole hand
down the keyboard to play both chords in the root
position, you just need to move your little finger
from the G to the A. Thanks to inversions, you can
play completely different chords with the minimum
of effort.
Usinginversions
Achieve a different take on many basic chords
by employing inversions
Inversions in music
Putting it into practice
Root chord
Even with all these inversions, there’s
still no reason not to put in a chord
in root position, like this C major
F major
Middle C is the bass note here, but it’s
not C major – this is the second inversion
of F major, as it features C, A, and F
“Inversions aren’t just handy for varying sounds,
they also help transition between chords”
Audio file
Listen to the audio files
and follow along on your
own keyboard
Give it a try
C major
We start off with C major, but perhaps not
as you know it. As E is the bass note, this is
what’s known as the first inversion
Both hands
Not an inversion as such, but you can spread
chords over both hands. We’ve used G as a
bass note, with D and B on the right hand
Piano for Beginners 81
Inversion examples
See how inversions affect a chord’s structure
First inversion
We’ve used the same chords – C, G, D, and F major – but now their respective
major thirds are the bass note rather than the root. The root note is still played,
but it is an octave higher than in Step 1.
Root chords
All four of these major triads are in root position – the root of the chord (the note
which shares its name with the chord) is the bass note. To play this progression,
you have to move your right hand a lot.
Mix them up
The previous examples have all required a bit of jumping up and down the
keyboard, but by using the second inversions of G and F, it’s a lot easier to
navigate our progression. Try it for yourself!
Second inversion
Now we’re using the fifth as the bass note of our familiar four chords. Note that
even though the G and F now have bass notes lower than the original root
chord, they are still considered second inversions.
C G D F C G D F
C G D F C G D F
82 Piano for Beginners
Playingthepiano
A
major chord comprises three notes
played simultaneously: a root, a major
third and a perfect fifth. The terms
‘major third’ and ‘perfect fifth’ arise as in
the major scale of the root note these intervals are
the third and fifth tones respectively. Some major
chords are more commonly used than others, and
as your repertoire increases you may notice how
particular sequences of major chords form the basis
of many popular and classical compositions. The
root is the note that the chord is named after; C for
C major, for example. To identify the major third
count four semitones up from the root (four black
or white keys); in C major (simply noted in music as
C), the major third is E. To complete the triad count
a further three semitones up from the major third;
in C, the perfect fifth is G. Once you have mastered
this formation you can use it to calculate any major
chord. With practice you will find you can hear the
‘happy’ ambience that this structure creates in order
to identify it. If a chord does not begin on its root
note it is known as an inversion: the first inversion
begins on the major third (in C major, this would
produce the structure E-G-C); the second inversion
begins on the perfect fifth (in C major, this would
produce the structure G-C-E). Generally when
playing major chords the common fingering is 5-3-1
in the left hand and 1-3-5 in the right.
Majorchords
Major chords are an essential tool for budding pianists, as an
accompaniment or as part of a melody
Now you have perfected these major chords, use them!
Put it into practice
Bars 1 and 2
To switch between D major and A major in its first inversion,
simply move your left third and fifth fingers together by two
semitones each while keeping your thumb on the A
Bars 3 and 4
Here G major is in its second inversion and D is in
its first. A major is not completed as leaving out
the E creates a rising bass of B-C#-D
Bars 7 and 8
To move from A major in the second
inversion to D major in the first inversion
use your third finger on A as a pivot
Bars 5 and 6
The chords are now in the right hand. To move to
G major keep your thumb on the D and move your
third and fifth fingers up together by two semitones
“As your repertoire increases you may notice
how particular sequences form the basis of
many popular compositions”
Audio file
Listen to the audio files
and follow along on your
own keyboard
Give it a try
D A D G A D
D G A D
Piano for Beginners 83
Common major chords
Here we learn four common major chords – G, C, D and A – along with their inversions
G major (G-B-D)
Play the chord in its root position with the right hand and then the left. Repeat
with the first and second inversions, keeping the same fingering throughout.
Inversions add an interesting twist without clashing with an overlying melody.
D major (D-F#-A)
By now you are probably getting the hang of inversions, so see if you can
practise moving not only from root to first and first to second, but back down
from second to root. Try skipping from second to root directly.
C major (C-E-G)
Repeat the exercise you have just learnt in G major, but this time try playing a
few notes in the other hand whilst switching between inversions – there are no
accidentals in C major so any white note will fit.
A major (A-C#-E)
Once you have practised A major in its three inversions, see if you can switch
between A major in its root position and D major in its second inversion by
simply moving your third and fifth fingers up two semitones.
84 Piano for Beginners
Playingthepiano
M
inor chords (m) have a near-identical
structure to that of their respective
major; the only difference being
the major third is lowered by one
semitone – producing a minor third. Minor chords
are renowned for their solemn, melancholy tone –
think Losing My Religion by REM, or Mendelssohn’s
Symphony No. 3. However, most Western music that
is written in a major key will include some minor
chords to add to the richness of the melody. As
we will cover later in ‘Chord Progressions’, using
combinations such as G-D-Em-C is the formula for
an overwhelming majority of popular music – take
most Beatles hits.
Mastering the use of minor chords will add a
beautiful quality to your playing, whatever your
mood. To construct a minor chord, first locate the
root; E for Em, for example. To identify the minor
third count three semitones up from the root; in Em
the minor third is G. To complete the triad count a
further four semitones up from the major third; in
Em the perfect fifth is B. Remember, if a chord does
not begin on its root note it is known as an inversion:
the first inversion begins on the minor third (in Em,
you would play G-E-B); the second inversion begins
on the perfect fifth (in Em, you would play B-E-G).
When playing minor triads, the common fingering is
5-3-1 in the left hand and 1-3-5 in the right.
Minorchords
Minor chords are the mood-swingers of your chord
repertoire, and add depth to your progressions
Now you have perfected these four common minor triads, try combining major and minor chords
Mixing majors and minors
Bars 1 and 2
In bar one F major and G major, both in their first
inversions, are in the right hand. Bar 2 introduces
the first minor chord – A minor in its root position
Bars 3 and 4
The chords in bars 3 and 4 are all major.
Rarely will a piece be comprised of purely
minor chords; variety is important
Bars 7 and 8
Moving from a major chord to its minor triad in
this way is common at the end of a piece. Simply
move your third finger down one semitone
Bars 5 and 6
To move smoothly from D minor to G
major, stabilise your fifth finger on the
bass note. Similarly, when moving from C
Major to E minor, utilise their shared notes
“Mastering the use of minor chords will
add a beautiful quality to your playing,
whatever your mood”
Audio file
Listen to the audio files
and follow along on your
own keyboard
Give it a try
F G Am F G C
Dm G C Em F Fm C
Piano for Beginners 85
Common minor chords
Here we learn four common minor chords – Em, Am, Dm and Gm – and their inversions
E minor (E-G-B)
Play the chord in its root position with the right hand and then the left. Using
the same finger pattern, repeat this step with the first and second inversions.
Practise moving through these three positions until you feel confident.
D minor (D-F-A)
Repeat the exercises you have just completed, but this time try mixing up
the order of the inversions. In particular, practise moving from second to root
position. Practise playing a different inversion in the left hand to that in the right.
A minor (A-C-E)
As before, play the chord in its root position with the right hand and then the
left. Now play the first and second inversions. By now you should feel confident
recognising the melancholy sound of the minor chord.
G minor (G-Bb-D)
Make yourself confident with this chord using the three exercises you have just
completed. To remind yourself of how a minor chord is formed, practise moving
from G major to G minor by lowering the third by one semitone.
86 Piano for Beginners
Playingthepiano
T
he chords that we have examined so
far have all involved the third note in
the corresponding scale. However, the
thing that defines a suspended chord is
that it doesn’t use the third note at all. In the world
of piano compositions, the two most common
suspended chords are sus2 and sus4.
In order to play a sus2 chord, you must replace
the third from a major or minor chord and instead
use the major second – the second note in the
chord’s corresponding major scale. Using C (C-D-E-
F-G-A-B-C) as an example, you would replace the E
(the third) in a C major chord with D (the second).
So, to play a Csus2 chord, you would play C, D and
G at the same time. Note that the root (C) and the
‘perfect’ fifth (G) remain the same.
To play a sus4 chord, you must again replace the
third from a major or minor chord, but this time use
the fourth note in the chord’s corresponding major
scale – this interval between the root note and the
fourth is known as a ‘perfect fourth’. So if you’re
playing Csus4, you would play C (the root), F (perfect
fourth), and G (perfect fifth). Try alternating between
C major, Csus2 and Csus4.
To hear how suspended chords work in pop
music, have a listen to Erasure’s A Little Respect. The
keyboard part shifts from a major/minor chord to a
sus4 to give the progression a little more variation.
Suspendedchords
Shake things up and add some variation to your chord
progressions with suspended chords
See how a suspended song works
Putting it into practice
“In order to play a sus2 chord, you must replace
the third from a major or minor chord and
instead use the major second”
Resolution
Suspended chords aren’t the best chords
to finish with if you want a resolved ending.
We’ve used A minor to end our piece
Simple left hand
While you’re learning
suspended chords, it may be
best to keep the left hand
parts simple – like here
Sus progression
Here we move
from Asus2 to
A to Asus4 back
to A major, and
then repeat it for
the next bar. It’s
quite a common
progression
Key change
Make sure you
don’t miss this key
change. We’ve
moved from
A major (three
sharps) to A minor
(no sharps or flats)
Piano for Beginners 87
Suspended chords and inversions
Subtly altering major chords
01 Dsus2
In a sus2 chord you replace the third of a major or minor chord with a second,
so in D’s case you replace the F# with an E. The second inversion is also the root
position of Asus4.
03 Asus2
Following the same rules we have applied previously, the C# of the A major triad
is replaced with a B natural for the sus2. The second inversion is identical to an
Esus4 chord in root position.
02 Dsus4
To get a sus4 chord we need to change the major or minor chord’s third with a
perfect fourth. So for D we replace the F# with a G to get a sus4 triad of D, G, and
A. You can create a simple melody using E, F# and G while still playing D and A!
04 Fsus4
Proving that suspended chords don’t just have to be on the white keys, Fsus4
needs a B replacing the A of its major triad. Its first inversion (B , C, F) is the
same as B sus2 in root position.
88 Piano for Beginners
Playingthepiano
Using augmented chords
Augmented chords work beautifully as transition chords
A
ugmented chords can liven up a piece
of music, but should be used sparingly.
As with the other triads, an augmented
chord is formed of a root, a third and a fifth
note, but the key difference between an augmented
chord and a simple major/minor chord is that each
note is a major third (four semitones) apart. For
example, where C would be formed of the notes
C, E and G, C augmented (notated as C+) would be
formed of C, E, G#. The interval between the third
and fifth note has been increased (or augmented) by
one semitone, thus technically a minor augmented
chord cannot exist. At first an augmented chord
may sound a little odd, but used as a transition
between two chords they can become powerful
melodic tools. If you play C in its root position, try
moving your fifth finger from G to G# while keeping
your thumb and third finger on C and E. Now move
from C+ to F in its second inversion (C, F, A). Hear
how the dissonance provided by the G# has now
created an interesting transition between C and F?
We will practise this further in the next section. If the
augmented chord does not start on its root note it
is called an inversion. G+ in the first inversion would
begin on the major third (B), while in the second
inversion the chord would begin on the augmented
fifth itself (D#). The common fingering used is 5-3-1
in the left hand and 1-3-5 in the right.
Augmented
chords
Add a bit of spice to your chord progressions with
an augmented chord
“At first an augmented chord may sound a
little odd, but used as a transition between two
chords they can become powerful tools”
G augmented (G-B-D#)
First play the chord in its root position. Remember, an augmented chord is
simply the major triad with a raised perfect fifth. Once you are comfortable with
the chord in both hands try moving through the first and second inversions.
C augmented as a transition (C-E-G#)
Repeat the exercise with C augmented. Once you feel confident, practise
moving between C major and C augmented in the right hand by moving your
fifth finger up one semitone. Now try transitioning to F in its second inversion.
Audio file
Listen to the audio files
and follow along on your
own keyboard
Give it a try
Piano for Beginners 89
A diminished (A-C-E )
To play the chord in its root position first locate the minor triad (A-C-E). Now
lower your fifth finger on the right hand (or your thumb on the left) by one
semitone. When you feel comfortable, practise moving between the inversions.
Using diminished chords
Misusing a diminished chord does not sound pretty, so let’s learn where to play them
D
iminished chords can add a really
interesting sound to your playing but
need to be used in moderation. If your
piece is in a major key, then the diminished
chord that occurs naturally will have its root on the
seventh note of that scale. In the key of G major for
example, the diminished chord would be F#dim. To
form this chord, first locate the root note (F#) and
count up three semitones to locate the minor third
(A). The fifth note lies another minor third up from
this note (C). If, however, your piece is in a minor key,
the naturally-occurring diminished chord will be
built from the second note of that minor scale; in
the key of C minor for example, the diminished triad
is D dim (D, F and A ). You will find that the most
common way composers incorporate diminished
chords into their playing is by using the diminished
7th. This has an identical structure but with a fourth
note added on top – this note lies another minor
third above the fifth note of the triad. Cdim7 would
therefore comprise the notes C, E , G and A. When
playing seventh chords usually the fingering 1-2-3-5
works best in the right hand and 5-3-2-1 in the left;
this is because it is harder to use your fourth finger
independently of the third. Diminished sevenths
are often used as resolution chords; the best way to
understand this is to hear it: Play Cdim7 and practise
resolving to G major – sounds pretty jazzy, right?
Diminished
chords
A diminished chord is formed of a stack
of minor thirds
“If your piece is in a major key, then the
diminished chord that occurs naturally will have
its root on the seventh note of that scale”
C diminished (C-E -G )
Repeat the exercise until you feel confident locating the C diminished chord.
Now add the seventh (A). C7 in its second inversion moves melodically to G
major due to a shared bass and the fall of E /C to D/B.
Audio file
Listen to the audio files
and follow along on your
own keyboard
Give it a try
90 Piano for Beginners
Playingthepiano
A
dominant seventh, sometimes called
the major minor seventh, is a chord
formed of four notes: a root, major third
and perfect fifth (collectively a major
triad) with an added minor seventh (the seventh
tone in the minor scale of the root note). Let us
walk through an example here. To play C dominant
seventh, noted as C7, first form the major triad (C-E-
G). Instead of playing this with the fingering 1-3-5
in the right, or 5-3-1 in the left, you should use 1-2-3
or 5-3-2 respectively. This then leaves your thumb
or fifth finger free to add the minor seventh to
the chord – remember that this note will be three
semitones above the perfect fifth, in this particular
example, B .
As there are four notes a seventh chord will have
a third inversion beginning on the minor 7th itself;
C7 in the third inversion would be B -C-E-G. The
seventh chord is commonly found in jazz and blues
music, as well as traditional rock ‘n’ roll; think Hound
Dog by Elvis Presley or So What by Miles Davis. It is
often used as a resolving chord. This means that
played on its own it may sound unfinished, whereas
followed by a particular major chord it can make an
interesting ending to a bar or piece. The chord that
you have just learnt, C7, resolves to F because C is
the fifth tone of the F major scale. This trick can be
used with any two chords so long as the root note
of the seventh is the perfect fifth of the major chord.
Dominant
seventhchords
Dominant sevenths, sevenths, major minor sevenths, and all that jazz
See how seventh chords work
Playing dominant sevenths
Bars 1 and 2
Here you must shift between G major and G7 both in
their second inversions. Use 5-2-1 to play the former so
you can simply add the seventh with your third finger
Bars 5 and 6
An example of how a dominant seventh is used to
change key. The reason this works is because the
seventh of C major (B ) is the fourth of F major
Bars 7 and 8
Sevenths are commonly used to end a piece.
Maintain the structure of the triad in the left hand and
just shift your thumb to smoothly move from C to C7
Bars 5 and 6
No sevenths appear in this section as we
have just shifted key. Experiment with
what fingers you use – it doesn’t have to
be strictly 1-3-5 for a triad
“On its own it may sound unfinished, but follow
it with a major chord for an interesting ending”
Audio file
Listen to the audio files
and follow along on your
own keyboard
Give it a try
C F G G7 C C7 F
Bb C Dm Bb C C7 F
Piano for Beginners 91
Playing dominant sevenths
Here we will learn four common dominant seventh chords
C7 (C-E-G-B )
Begin in the root position using the fingering 1-2-3-4 in the right hand and 5-3-2-
1 in the left. You only have the notation for the root, second and third inversions.
It’s up to you to identify the first inversion, starting on the major third.
E7 (E-G#-B-D)
By now you should feel confident identifying the missing inversion; in this
example you must work out the third inversion. You may find it easiest to always
locate the major triad first and then identify the seventh.
D7 (D-F#-A-C)
As before, you have only been given three inversions: the root, first and second.
Use your knowledge of the sound and structure of this chord to identify the
third inversion. Now practise moving between the four inversions.
F7 (F-A-C-E )
A silly trick to remember this chord: it has a flat face (F-A-C-E ). Get it? Terrible
joke, but little things like this can really help when you are getting used to a new
chord group.
92 Piano for Beginners
Playingthepiano
T
he major seventh, notated as Maj7 (or
M7), is formed of four notes: a root, major
third, perfect fifth and a major seventh
note. This is why you may also hear it
referred to as the major major seventh. It is the most
dissonant of the seventh chords, meaning it can
sound inharmonious if used out of place. However
many composers favour the major seventh chord for
its dreamy, airy sound – think of the first line of Close
To You by the Carpenters.
Subtle dissimilarities in how this family of chords
are noted can produce very different harmonies. In
particular, be careful to not confuse M7 with m7 (a
minor seventh) as both the third and seventh notes
are altered. Let us work through a simple example
of a Maj7 chord: To play CMaj7 first form the major
triad (C-E-G). As with other seventh chords, instead
of playing this with the fingering 1-3-5 in the right or
5-3-1 in the left, try to use 1-2-3 or 5-3-2 respectively.
This leaves your fifth finger or thumb free to add the
major seventh to the chord – this note will be four
semitones above the perfect fifth, in this example, B.
You can locate the major seventh by counting one
semitone down from the root note. As there are four
notes, a seventh chord will have a third inversion
beginning on the major 7th itself; CMaj7 in the third
inversion would be B-C-E-G. M7 chords are normally
used as transition rather than resolution chords.
Majorseventh
chords
Used correctly these will add a beautiful quality to your playing
“Many composers favour
the major seventh chord for
its dreamy, airy sound”
CMaj7 (C-E-G-B)
Using the fingering 1-2-3-5 in the right hand and 5-3-2-1 in the left, practise
locating the chord in its root position. Keeping the same fingering, move to the
first inversion and then the second before returning to the root.
GMaj7 (G-B-D-F#)
Here you have only been given the notation for the root, first and third
inversions – the third starting on the seventh itself. It’s up to you to identify the
second inversion – remember to start on the perfect fifth.
Top tip
Use both hands
to form the chord
While using four fingers on one
hand to form a seventh chord is the
best way to play one, you can try
playing two notes of the chord with
your left hand, and then another
two with the right hand. They
don’t even have to be of the same
octave. Try playing C and G with
the left hand and then E
and B with the right.
Playing Maj7 chords
Let us work through two simple examples in the right and left hand
Piano for Beginners 93
Playing minor seventh chords
Put what you have learnt into practice
T
he minor seventh, notated as m7, lifts the
mood of a minor triad and stops it from
sounding quite so glum. Unlike a major
seventh chord, a minor seventh enables
you to add the seventh note without clashing with
the overlying melody, allowing you to be more
experimental. However, do be cautious not to
confuse it with a 7 or M7 chord as this produces the
wrong kind of experimental sound!
The minor seventh chord is formed of four notes:
a root, minor third and perfect fifth (collectively a
minor triad) with the addition of a seventh note (the
seventh tone in the minor scale of the root note).
This is why it may sometimes called the minor minor
seventh. Here is a worked through example: to play
Dm7 first find the minor triad (D-F-A). Remember
to leave your fifth finger or thumb free to complete
the chord. The minor seventh will be three
semitones above the perfect fifth, in this example,
C. Alternatively count two semitones down from
the root note to locate the minor seventh. Unlike a
simple minor triad a minor seventh will have a third
inversion beginning on the 7th itself; Dm7 in the
third inversion would be C-D-F-A. When playing the
third inversion in the left hand you may find it easier
to use the fingering 5-4-2-1. Similarly the fingering
1-2-4-5 is often more comfortable when playing the
first inversion in the right hand.
Minorseventh
chords
Minor sevenths can transform a plain minor triad
“Minor seventh lets you
add the seventh note without
clashing with the melody”
Fm7 (F-A -C-E )
Practise locating the chord in its root position using the fingering 1-2-3-5 in
the right hand and 5-3-2-1 in the left. Move to the first inversion and then the
second, repeating until you feel comfortable with the sound and structure.
Dm7 (D-F-A-C)
Here you have only been given the notation for the root, second and third
inversions – the third starting on the seventh itself. It’s up to you to identify the
first inversion – remember to start on the minor third.
Top tip
Minor major
seventh chords
There is one type of chord we haven’t
covered here: the minor major seventh
(mM7). To play an mM7 chord, you
must flatten the third (like a minor
triad) but not the seventh. So, for
CmM7, you play C-Eb-G-B. The latter
three notes are actually an
Eb augmented triad, which
gives the mM7 a
mysterious feel.
94 Piano for Beginners
Playingthepiano
Right and left hand, majors and minors, sevenths, inversions and progressions
Bringing it all together
Bars 1 and 2
Always look ahead when you are playing! Play the
G chord in bar one using the fingering 3-2-1, that
way your fourth finger can add the F# in bar 2
Bars 3 and 4
Your fifth finger in the left should be free to play the E note.
Meanwhile your right hand takes over with the chords:
supposedly the only four needed in popular music
Bars 7 and 8
Here’s another chance to practise the plagal
cadence. As the third note of the triad is also
the bass it puts an emphasis on the switch
between the major and minor chord
Bars 5 and 6
The chords return to the left hand. Note
how the inversions create a smooth
movement in the bass that would not
occur if we only used root position chords
Y
ou may recognise the above as lyrics
from Leonard Cohen’s Hallelujah; what
you may not know is that the words
describe a useful chord progression.
A chord progression describes shifting through a
series of chords within a key signature. Particular
sequences may also be used to move to a new
key. As you know there are seven possible roots
for chords within a major or minor scale, and with
regards to progressions these seven notes are
labelled with Roman numerals; that way you can
apply the method to any key signature. In C major,
for example, chord I would be C, II would be D
and so on. If the chord is not capitalised then it is
a minor chord; for example vi in C major would be
the chord Am. If the chord is a seventh, augmented
or diminished they will be labelled accordingly; V7
in C major would be the chord G7. A cadence is
the name given to the progression between two
chords. Most pieces finish by moving from the fifth
(V) to the tonic chord (I) to give a finale effect. This
is called a perfect cadence. An imperfect cadence is
used where a break is needed, but the piece is not
finished. Common examples include I-V, ii-V and IV-V.
Returning to the Hallelujah example, in C major the
chord progression would be: C, F, G, Am and F.
“Chord progression describes shifting through
chords within a key signature”
Usechord
progessions
“It goes like this, the fourth, the fifth, the minor fall and the major lift”
Top tip
You don’t have to
use the whole chord
Sometimes using all the notes
of a chord may sound too heavy,
particularly if the accompanying
melody is quite busy – you don’t
want to do make your piece sound
‘muddy’and confused. Experiment
with your chords and try using
purely the first and fifth notes
of a triad, or maybe just the
first and third.
Audio file
Listen to the audio files
and follow along on your
own keyboard
Give it a try
G Gmaj7 Em C G D
G Am D G C Cm G
Piano for Beginners 95
Common chord progressions
Here we learn to play through some popular chord progressions
IV-V-I
This is probably the most common use of the perfect cadence. In this example
we are shifting between F-G-C. If the piece were in G major we would be using
the chords C-D-G.
I-V-vi-IV
Have you ever heard the phrase ‘all pop songs contain the same four chords’?
Well these are the chords: the root, fifth, fourth and minor second, in any order.
In this example in C major the chords are therefore C-G-Dm-F.
V-IV-iv-I
This progression sounds beautiful as an ending to a piece. In musical theory
moving from the fourth to the root chord is called a plagal cadence. In this
example, in G major, we move through the chords D-C-Cm-G.
ii-vi-V7-I
This example shows how a progression can be used to switch from a minor to a
major key, and also how a seventh can be used to resolve a cadence. The chords
here are Dm-Am-G7-C.
96 Piano for Beginners
Playingthepiano
Different patterns in practice
Putting it into practice
Alberti bass
A common technique in classical
music, it keeps the piece moving
Walking bass
You can tell which pattern this is
because it’s ‘walking’ up the stave
Traditional ending
Even with a fancy pattern, you don’t
have to alter an ending progression
Chord picking
You don’t have to use each note of a triad.
Here we have two examples: one that does
use the triad and another that doesn’t
W
hen you’re playing piano, your
right hand will likely be playing the
melodies. However, this doesn’t mean
you should neglect your left hand. It
doesn’t matter if your right hand can play incredibly
intricate passages over and over again; if your left
hand can’t back it up with solid accompanying
patterns then you may struggle to master the piano.
It doesn’t just have to accompany, as a left hand
melody can provide vital variety and possibly a
response to the right hand.
Not only are the patterns that we look at in this
tutorial valuable for improving left-hand dexterity,
they can also be used when you only have the
chords of the piece to go by – you may have found
the chords to your favourite pop song and want to
play along with it, for example. Don’t feel restricted
to just these patterns, either. Part of the fun of
music is how easy it is to experiment with different
patterns – rather than just playing root chords, try
using inversions; instead of using an ascending
walking bass, try descending instead. While you’re
practising these patterns, start off with just the
left hand, and then try adding a basic right-hand
melody over the top. As your confidence grows, so
will your co-ordination. Ideally, you will want your
left hand to be able to play whatever your right
hand can.
“It doesn’t matter if your right hand can play
intricate passages; if your left hand can’t back it
up then you may struggle to master the piano”
Left-handpatterns
Discover some of the techniques for using
your left hand to support the melody
Audio file
Listen to the audio files
and follow along on your
own keyboard
Give it a try
Piano for Beginners 97
Different patterns
Get your left hand moving!
01 Octaves
Okay, so they’re a little boring, but it’s good to get your palm stretching across
12 semitones and there’s nothing wrong keeping it simple! Just make sure you
don’t accidentally miss one note by a key.
03 Chord picking
For something a bit different, try chord picking. It’s popular in country and
western music – especially if you use staccato note on beats two and four. Play
the root note then the third and fifth simultaneously after it.
02 Walking bass
If you want a bassline with a bit more feeling, try a walking bassline. Aim to
create a tune that ‘walks’ up and then down. The flattened seventh here (the C
natural) add a bluesy feel to this line.
04 Alberti bass
An ideal way to keep your tune flowing and your fingers nimble, Alberti bass
is commonly found in classical pieces. Try accompanying this pattern with a
simple melody made up of any notes in the D major scale.
98 Piano for Beginners
Playingthepiano
W
e’ve already learnt about the main
chords and progressions you can
use to enhance your music, but it’s
also possible to break chords up to
create arpeggios. Rather than playing three notes at
the same time, you can play them in sequence, one
after the other, often ascending and descending.
You’ll find that arpeggios are useful tools that enable
you to keep your music flowing, no matter which
hand is playing them.
So, for example, if you were to play a C major
chord, the normal route would be to play C (the
root), E (the third note in the C major scale) and
G (the fifth note in the scale) at the same time.
However, if you wanted to play a C major arpeggio
you would play the C, then the E, then the G, then
the C above G (ie the C an octave above your
starting note), then back down to G, E, and finally
the original C.
An arpeggio isn’t just limited to this structure,
however, nor is it limited to just major chords. You
could play a C minor arpeggio by just playing C,
Eb, and G one after another without descending.
To hear how a three-note minor arpeggio like
this sounds in music, listen to the opening of
Beethoven’s Moonlight Sonata. Now imagine how
different it would sound if you were to replace its
arpeggios with chords.
Learnarpeggios
Break up chords to make your music flow better, with the
help of this valuable technique
Finger positions and more
Playing an arpeggio
Positions
When playing a major or minor arpeggio,
use fingers 1, 2 and 3 for the triad, then
extend your little finger for the octave
A major arpeggio
This is the most common form of arpeggio. In
our example we’re playing A major: A-C#-E-A
Wrist movement
To get a smooth motion across the
keys, roll your wrist from left to right
Differences
Normally you would use
your thumb, middle finger,
and little finger to play
A-C#-E, but you need to
free your little finger for an
arpeggio like this
“Arpeggios are useful tools that enable you
to keep your music flowing, no matter which
hand is playing them”
Audio file
Listen to the audio files
and follow along on your
own keyboard
Give it a try
Piano for Beginners 99
Right-hand arpeggios
How to play some common arpeggios
02 D major arpeggio
You’ll need to play D, F# and A in sequence to play a basic D-major arpeggio.
Again, thumb on the root, index finger on the F#, and middle finger on the A.
You shouldn’t need to move your hand too much to reach the top D.
01 C major arpeggio
The notes in the C major arpeggio are C, E and G. Play Middle C with your
thumb, then the E with your index finger and G with your middle finger. This
frees the little finger to stretch to the higher C should you wish to play it.
04 D minor arpeggio
Although the D minor key carries a B flat, you do not need to worry about
playing it when playing a D minor arpeggio. The root, minor third, and fifth
notes in D minor are D, F, and A, so play those one after the other.
03 A minor arpeggio
Like C major, A minor doesn’t have sharps or flats to worry about. Use the same
finger pattern as the previous arpeggios – don’t be afraid to leave the keys if
your hands are struggling to reach the octave.
Give it a try
Lookoutforthislogooneachpage,
asitmeansthatanaudioand/or
videofileisavailableonlinetohelp
youmasteracertaintechnique.
100 Piano for Beginners
102 Gettogripswithrecording
104 Playthroughacomputer
106 RecordonaMac
110 RecordonaPC
114 Improveyour
technique
withapps
Thenextstep
Practise, record and continue to improve with our in-depth
tutorials that will take your playing to the next level
“There’s nothing like putting a song of your
own together to really help you figure out
how to get the most from your instrument”
Piano for Beginners 101
102 Piano for Beginners
Thenextstep
T
here are many reasons why people want
to make recordings of themselves singing
or playing a musical instrument.
Some use recording as a method of
becoming a better musician – they play their
recordings back and hear the mistakes they’re
making – while others want to record songs that
they have written themselves. Whatever your
recording goals or aspirations, we’re here to
show you how to take your first steps into the
world of recording.
The great thing about technological
developments is that there are a number of ways to
record music – from using your Mac to even using
your iPhone. Gone are the days of fumbling around
in your bag for a notepad and pen to scribble down
your musical ideas – just grab your iPhone or iPad
and hit Record. The tutorials that follow this one will
cover the different methods of recording piano with
different devices.
Realistically, you should open up your Mac if you
want to record the next symphony; but if you’re
looking to find your feet, look no further than your
smartphone or tablet.
When it comes to buying equipment, you
should decide whether recording is just a hobby or
a career, and spend less or more money based on
these expectations. Make sure you don’t splash the
cash on high-end equipment when you just want
to record rough ideas. We will take you through
some of the equipment solutions available for all
levels of recording.
Before you even sit down at the piano, read on for
some handy general tips on recording.
Gettogrips
withrecording
Start recording your very first masterpiece
with an Apple Mac, iPhone or iPad
Top tips for
recording
piano
01Be consistent
For the best recording experience, use the
same software. GarageBand is available
on Mac and iOS, meaning that you have
seamless integration of your projects
regardless of where you’re working.
02Make your voice heard
Don’t want to carry around any additional
equipment? Going to record on an acoustic
piano? Don’t panic – GarageBand has a
handy Audio Recorder which utilises your
device’s built-in mic.
03Stay in tune
Make sure your piano is in tune. If you’re
using a digital piano you’ll be fine, but there
aren’t too many things that sound worse
than an out-of-tune acoustic piano.
04Become a team player
Use GarageBand for Mac to play along with
backing tracks. This will not only improve
your technique, but will help you get used
to playing with a band.
05Start with a Mac
If you’re a new pianist, gain confidence with
GarageBand on Mac before recording piano
with your iPhone or iPad – you can’t remove
mistakes from tracks after recording with
GarageBand for iOS.
“You should decide whether recording is
just a hobby or a career”
Piano for Beginners 103
“Recording piano onto your iPhone can take
up a large amount of iPhone storage”
Record piano with a Mac
Record piano with an iPhone
01Stay in time
It’s important to maintain a steady tempo.
Most music-recording software packages for
Mac will have a Metronome feature – use this
to improve your time-keeping.
01Get connected
Make sure your piano-recording hardware
(you’ll need some to connect) has a
headphone connection on it, otherwise you’ll
be playing piano in silence! A great choice of
kit is IK Multimedia’s iRig MIDI adaptor.
02Save some space
Recording piano onto your iPhone can take
up a large amount of iPhone storage – free
up some space before you begin recording,
otherwise you could end up running out
mid-recording.
04Know your limits
Want to create a polished-sounding
recording? Use your iPhone to solely record
your piano then export to software on your
Mac, such as AmpliTube or GarageBand, to
mix your recordings.
05Crank it up to… 7
Don’t be tempted to record at maximum
volume. If your recording input level is too
high, it will result in distortion – not a desired
effect for a pianist.
03Keep it clean
Don’t worry too much
about getting your sound
right before you begin
recording – you can add lots
of authentic effects and
post-recording processing
once you have nailed that
difficult section.
04Select a location
If you’re using your Mac’s on-board mic to
record acoustic piano, choose your location
carefully. Smaller rooms work best for a clean,
interference-free recording, whereas bigger
rooms add natural reverb.
03Keep your distance
When recording acoustic piano with your
iPhone’s built-in mic, enure you are seated at
least 15cm away from the iPhone, otherwise
you will end up with a bass-heavy recording.
05Use as a toolbox
There are plenty of apps out there which
offer handy piano tools in one app, such as
a chord book and metronome, saving you
space in your kit bag.
02Multi-take
Recording software
such as GarageBand
offers you the ability
to record several
takes of your piano
playing on a loop, giving you the power to
pick the best-sounding take!
104 Piano for Beginners
Thenextstep
01Plug into the keyboard
Grab your cable and then hunt down the input on your keyboard – you’ll
probably find that it’s at the back or on the side. Depending on what cable your
keyboard supports, you’re either looking for a single USB B-type port (shown
above) or two MIDI ones.
02 Plug into the computer
Once the cable is plugged into your keyboard, connect the other end into the
computer. You will need to find a spare USB port. Your computer may have
several. If you have a MIDI connection, you will have to connect both MIDI
cables into the USB adapter first.
I
f you have a keyboard or digital piano –
basically any non-acoustic piano – you may
be able to hook your device up to a desktop
computer to record, edit and generally just
mess around. If your only option is an acoustic
piano, then you will still be able to record on your
computer, but you won’t have the same degree of
control over sound.
To hook your keyboard up to a computer you
either need a USB cable (one may have been
supplied when you bought your keyboard) or a USB
cable, two MIDI cables and a MIDI-to-USB adapter.
To find out which you need, check the back of your
keyboard or digital piano. If USB or MIDI inputs are
available they should be clearly labelled on your
device. If you have an older model, you’re probably
going to need the MIDI cables.
The good news is that none of these accessories
are particularly expensive – you can get USB and
MIDI cables for less than £5 and an adapter for
around £10. When you’re ready, plug either the MIDI
or USB cable into your keyboard, and the other end
into your computer.
To start playing piano through your computer,
you will need to use a digital audio workstation
(DAW). If you’re using a Mac, you’ll be pleased to
know that one comes free with it! GarageBand
is part of Apple’s iLife suite and is a surprisingly
sophisticated piece of software. Turn to page 106
for a more in-depth explanation and a tutorial on
its features. If you find GarageBand isn’t high-end
enough for you or you outgrow it, you could try
Logic Pro, which is also exclusive to Macs. It isn’t
cheap, however. A digital copy from the Mac App
Store will set you back £139.99/$199.99.
You have more options if you own a PC, but none
that are built in to the operating system. Check the
internet to find the best DAWs around – you may
even find some fantastic options for free, but many
paid-for alternatives will still offer a free trial.
There are many advantages of playing your piano
through a computer. Although you are unlikely to
beat the sound of an acoustic piano, you can use
different samples to vary your sound. Also, you may
be able to export your compositions as sheet music,
saving a lot of time and effort.
Playthrougha
computer
Hook up to a PC or Mac to access millions of new sounds
Here’s how to hook up
Connect to a computer
“There are many advantages to playing your
piano through a computer; you can use samples
and also export compositions as sheet music”
Piano for Beginners 105
03 Load up the software
With your instrument successfully hooked up, your computer should recognise
it as an external device. Now you’re connected, load up your music software of
choice. We’ve chosen GarageBand. Play a chord on your keyboard/controller. If
your keyboard/controller is hooked up correctly, the software will recognise it.
04 Record!
Now you’re all set up, the only thing left is to make some sweet music! Click on
the Record button and start playing on your keyboard – the software should
recognise the pedals too, so don’t be afraid to incorporate those as much as you
think it necessary.
Hooking up your keyboard
Different connections
Digital audio workstation
You will need a DAW to record and
edit music. This one here is Logic
Pro, only available on Mac
Keyboard connection
Either your two MIDI cables or
single USB cable must go into the
keyboard. The port will probably
be at the back or on the side
Computer connection
Regardless of the method you’re
using, you will likely have to
connect your cable to your PC/
Mac via USB. Make sure you’ve got
an empty port handy!
Top tip
Demos and trials
Many premium digital audio
workstations are extremely
expensive (sometimes
upwards of £400/$500),
so if the one that you’re
interested in offers a free trial
or demo, make sure you
check it out!
106 Piano for Beginners
Thenextstep
W
ant to hear yourself back or record
one of your own creations? Look no
further than your Mac computer.
GarageBand is a music-making
application which comes pre-installed on your
Mac as part of the iLife package. Whether you’re a
seasoned musician or someone who just wants to
have a go at making some noise, GarageBand is the
perfect place to get creative.
Technological developments have come a long
way since the days of recording music to tape.
Thanks to GarageBand, you no longer need a bank
loan to be able to record a song. You don’t even
need any external equipment – computers enable
you to plug your electric piano directly into a USB
port and start recording straight away.
GarageBand has the facilities to record any
instrument, whether that’s via a microphone or
plugged straight in. If you don’t have an electric
instrument, though, GarageBand has a variety of
Software Instruments which sound just like the
real thing, whose notes can be typed in using the
Musical Typing tool or clicked in using the on-
screen piano.
GarageBand is particularly good at recording
piano because you can plug straight into your Mac
as we covered on page 104 – it doesn’t travel via
any other equipment. It records you playing MIDI
signals rather than real audio (although you do have
an option to do so). This means that it’s a lot easier
to edit your tracks and change instrument sample,
although you may lose the humanity of your
recordings somewhat.
RecordonaMac
Learn to record piano concertos from the comfort of your
Mac with a few simple clicks in GarageBand
The main features and tools explained
Navigating GarageBand
“You can plug your piano straight into your Mac”
“Take a deep
breath and click
the Record button
when you’re ready
to record your
piano track”
Go back to the start
Rather than spending a few seconds
pressing the Rewind button to go
back to the beginning of the track, just
click the icon to go straight back to
the beginning of the recording – no
waiting around required
Ready, set, record
Take a deep breath and click the
Record button when you’re ready
to record your piano track. If you’ve
set a metronome, this will ‘click’ for
four beats before GarageBand starts
recording your playing. GarageBand
will continue recording you until you
click the Stop icon or hit the space bar
Add effects
GarageBand’s Inspector feature has a multitude of effects which you can
apply to your recording. These can drastically change the sound of your
recording, whether it’s by adding a touch of reverb (echo), or distortion
which turns a piano into something you might hear on a heavy metal track
Set the tempo
The Tempo tool is often used to control the overall speed of a recording
when using GarageBand’s built-in loops. However, it can also be used
to control the speed of the Metronome. Click the number and drag the
slider upwards to increase the tempo and downwards to decrease it
Top tip
Learn to Play
If you’ve only recently picked
up a piano, GarageBand offers
video piano lessons which
cover the basics of playing.
Head to the‘Learn to Play’
section to find out how to
play hit songs – taught by
the artists who made
them famous.
Piano for Beginners 107
Time signature
This changes the time
signature of a project.
See pages 38-39 for
more on them
Cycle Region
If you’ve already recorded a track
and want to record something
else over the top of a particular
section – for example, the chorus
– use the Cycle Region tool
to select part of the track and
repeat it so you don’t have to
stop and start to get it right
Apple Loops
If you want to add some hard-
hitting beats or a spot of light
accompaniment, make sure you
check out the Apple Loops menu.
Use the tabs at the top to filter
through the thousands of samples,
then click on one to hear how it
sounds. You could make a whole
song using just these!
Keeping time
Having an out-of-time
recording is disastrous!
However, GarageBand
comes with a built-in
Metronome, meaning
you can keep in time,
at all times. Click the
Metronome icon to
turn this feature on
and off – it will glow
blue when it’s turned
on and remain grey
when it’s switched off
108 Piano for Beginners
Thenextstep
GarageBand is a really great recording tool for a
beginner, as it’s a low-cost option that’s incredibly
easy to use. It enables you to bring the recording
studio into your Mac and all you have to do is show
up at your computer with a keyboard and a handful
of songs, and you’re all set to create the next hit
record using Apple’s superlative music software.
GarageBand is built to record music – whether
you want to record just one person with one
instrument or a whole band. The software covers
all areas of the creative recording process, from
initially capturing the recorded sound, to editing it
and applying effects. You are able to take a cleanly
recorded instrument and make it sound just like it
was recorded at Wembley Stadium with just a few
simple clicks.
It isn’t just a hub for live musicians, though. If you
have never picked up an instrument or tinkled a
piano key in your life, GarageBand has something for
you. The software has several thousand loops pre-
installed; loops are small samples of music which
can be pulled together to make a completed song,
and there are loops to suit every single style and
cover every single instrument imaginable.
Even if you have absolutely no prior recording
experience, recording is surprisingly easy with
GarageBand. For digital pianists and keyboardists in
particular, you can just plug in and play. Just connect
via USB and GarageBand is already set for you to
record some music (see page 104 for a tutorial). If
you want to record an acoustic piano, you can set
up a microphone and record in GarageBand with
that. The tutorial below shows you how to record a
live piano on Apple’s fantastic software, including
how to set up your very first project, picking the
right settings and preferences, checking the levels
and, finally, hitting that record button. So sit back,
grab a cup of tea and your favourite tunes, and
let’s learn how to record your first piano track
with GarageBand.
Get started with GarageBand
Record your first track straight onto your Mac
Create live piano recordings
Record your piano
01Get started
Open GarageBand. In the New Project window, select ‘Empty Project’ not
‘Keyboard Collection’. When it has been set up, hit the + button and click
‘Record using a microphone or line input’ to record a live instrument.
02Check your settings
Click GarageBandPreferences. Choose the Audio/MIDI tab. This is where you
control the preferences for any external instruments to be recorded, such as
guitar or vocals. Select Audio Input then your Microphone or Built-in Input..
Piano for Beginners 109
A look at some of the tools in GarageBand
Explaining the interface
Volume and Pan
You can control the volume of your
instrument tracks by moving this slider
up and down. Twist the knob next to it to
alter the panning of the instrument
Go Solo
Only need to hear vocals
when recording piano?
The Solo tool enables you
to hear one track playing
back from a group of
recorded tracks
Zoom
If you’re making time-specific edits
to your recording, the Zoom tool
will come in handy. It increases or
decreases the viewable size of your
track to show more or less
03Sound check
Now your mic should be set up, so play your piano! The level bars next to the
track will flash green; if they glow red at the edge, turn your levels down using
the track volume slider.
04Hit Record
If you’re happy with how your piano is sounding, this is your big moment! It’s
your chance to commit your work to ‘tape’. Click the Record button and play
away. Hit the space bar when you’ve finished playing.
Top tip
Play it safe
Recording your piano as cleanly
as possible is recommended as
GarageBand has lots of effects
that you can play around with
and add after you’ve finished
recording. If there is any
interference, your effect
will be applied
to that too!
Choose your weapon
Use this menu to select your tone from
GarageBand’s vast library of built-in
sounds. When recording piano, try
some of the clean guitar sounds
110 Piano for Beginners
Thenextstep
T
he path from piano zero to piano hero
can be fraught with obstacles, but thanks
to the PC and the right piece of software
it can be a far smoother transition than
expected. There is no need for the expensive
studios or expert producers that come with a
recording contract. All that is needed to record
multilayered music tracks is a computer, a piano or
keyboard and recording software such as Audacity.
There are a host of software recording packages
on the market, ranging from beginner to pro,
costing nothing to thousands of pounds. A great
option for beginners is Audacity, a powerful, free
and open-source audio editor and recorder. The
fact that Audacity is free makes it a great starting
point for anyone who wants to start recording
piano tracks and more. The program can be used to
record live audio; convert tapes and vinyl into digital
recordings; edit Ogg Vorbis, MP3, WAV or AIFF audio
files; and mix sounds/tracks together.
Recording can be as simple as plugging in a
microphone into a sound card and hitting the
Record button. Alternatively, an instrument – like a
digital piano – can be plugged directly into a sound
card and recorded direct to the hard drive. Any
recorded audio can be edited and tweaked until the
desired result is achieved.
Audacity is an ideal package for those just starting
out, but if you’re looking to spend some money
then there are more sophisticated, professional
PC-compatible audio editors on the market. A
leading industry-standard tool is Cubase (www.
steinberg.net) which incorporates enough tools for
professional-standard recording. Other contenders
include Cakewalk Sonar (www.cakewalk.com) and
Avid Pro Tools (www.avid.com).
RecordonaPC
Getting a piano from analogue to digital involves the combination of a computer
and the right software. Audacity is a great free option to start recording with
The main tools and features
Using Audacity
“A great option for beginners is Audacity, a powerful, free and
open-source audio editor and recorder”
“Recording can be as simple as
plugging in a microphone into
a sound card and hitting the
Record button”
Edit
The Edit toolbar offers access to all the typical
components found in a set of edit tools. Cut,
copy and paste are three key components
which can be used to help build tracks. The
zoom in/out tool allows for a closer look at
an audio track or to show up to 200 hours of
audio on a single screen
Audio tracks
As soon as the Record
button is pressed, a
track will appear with a
waveform of the currently
recording audio. Users
can play back the current
track(s). A new track can be
added via the Tracks menu
followed by Add New. Click
the up arrow on the left of
a track to collapse it and
allow for the viewing of
multiple tracks
Take control
The Transport toolbar is used
for controlling playback and
recording. There is the standard
selection with Play, Pause, Stop,
Skip and Record buttons. To loop
a track, hold down the Shift key
when pressing the Play button.
Pressing Record always creates a
new track. To record on the same
track, hold down Shift when
pressing the Record button
Top tip
Hide unwanted
toolbars
By default Audacity displays
all available toolbars. To hide
the toolbars you don’t want,
go to ViewToolbars and click
to hide. Repeat to show a
toolbar again or select
Reset Toolbars to
show all.
Piano for Beginners 111
The Meter toolbar
The Meter toolbar is one of the more important
toolbars in the recording process. The red bars to
the right indicate the recording level. This works
in combination with the Input Volume Slider to
help to define the recording level. The green bars
to the left indicate the playback level
Device toolbar
The Device toolbar defines
the audio host, input
device, output device and
number of input channels.
The audio host is how
Audacity communicates
with a playback and
recording device – this
is MME by default. The
Output device is the
speakers, while the Input
device is the recording
option, eg microphone
Mixer toolbar
The Mixer toolbar helps control the output
and input levels of the audio devices currently
selected in Device toolbar. There are two sliders,
one for the volume for any connected speakers/
headphones and one for any connected
devices such as a piano or microphone. Simply
move left/right to adjust the volume
Arrange toolbars
The toolbars in Audacity
are arranged in a default
arrangement, but can be
moved for a more bespoke
version. To move a selected
toolbar, grab the edge to the
left of the toolbar and drag
into the new position and
drop to place. The toolbars
can be reset to the default
position by going to the
ViewToolbarsReset Toolbars
Effects menu
The Effect menu comes with a set of built-in effects including Amplify, Bass
Boost, Change Pitch, Change Tempo, Compressor, Echo, Leveller, Phaser and
Wah-Wah. To apply an effect, first select the part or all of a track and then
select the desired effect from the Effects menu
Timeline
The Timeline is displayed
above recorded or new
tracks and measures the
length of a track starting
from zero, or the beginning
of a track. The arrow at zero
can be dragged to make a
selection for a close-up view
for more intricate editing
Speed up/slow down
The Transcription toolbar is effectively only one component,
a slider. Moving the slider left and right will adjust the speed
of playback for the selected track. Move the slider left to
slow it down, right to speed up and click the green arrow to
play back the track at its new speed
112 Piano for Beginners
Thenextstep
Whether you’re wanting to record yourself to hear
how your skills are shaping up, or you want to record
a song you’ve thought up, Audacity is a great, free
bit of software to help you record your playing.
Audacity can be used to record audio from a variety
of sources and edit it – you just need a few select
bits of hardware, which you can find more on in our
‘Recording hardware’ section over the page.
An input and output device needs to be
connected to the PC where any recording or editing
is to take place. The output device is the component
that will allow the user to hear any recorded audio;
typically, this comprises headphones or speakers. An
input device is the device with which the recording
is going to be made. When recording a piano in
Audacity there are two common scenarios: direct
input or microphone. Direct input is where an
instrument is plugged into a sound card ready for
recording. The alternative is to use a microphone.
Once an input device has been recognised, the
desired recording device will need to be selected
from the Device toolbar. Alternatively, this can be set
up via the Edit menu and PreferencesDevices. This
will list the Interface option alongside the Playback
and Recording device.
The Meter toolbar will need to be activated
to set up the recording levels. Spend a little time
playing with the Input Volume Slider to get the best
recorded output. Make sure it is not too quiet, and
make sure it is not too loud. With the levels set, it’s
time to record. Users are able to play back a single
track, or hit Record again in order to create multiple
tracks. Then it is time to bring out the producer in
you; trimming tracks, adjusting volumes and adding
effects to create a complete pro-sounding track.
Follow this simple tutorial to take your first steps in
recording, including getting connected and testing
the levels.
“Once an input device has been recognised,
the desired recording device will need to be
selected from the Device toolbar”
Create an audio track
Record your piano
01Create a new project
By default Audacity will open at a project window. Before you start recording,
the project must be saved. Head to the File menu and select ‘Save project as’.
Click the OK button, name the project and click Save.
02Get connected
To record a track, an input device will need to be connected, eg microphone
or direct input. The input device will be listed in the Device toolbar; select the
desired device from the drop-down list.
Top tip
Add oomph
The recording levels of a
piano may not always be
exactly as expected; perhaps
not as powerful as desired. To
give some extra oomph to an
individual track, select the
audio and turn up the
Gain slider under
Mute/Solo.
Get started with Audacity
Record your first track straight onto your PC
Location
courtesy
of
Music
Is
Life,
Bournemouth
Piano for Beginners 113
“The ideal recording
companion”
03Test the levels
Before recording, the levels need to be tested. In the Meter toolbar click the
microphone icon to activate the input meter. Now play the connected piano to
view levels. Adjust the Input Volume Slider accordingly.
04Record track
To start recording, simply hit the red Record button and start playing. When
finished, hit the Stop button. To play back the recording, hit the Play button.
Click on the track to start at a different point.
Cables and jacks
As well as via USB and MIDI you
can record an electric piano by
plugging into the sound card. For
this, the right cable is needed.
There are two options here:
a single cable with a 1/4”
(6.3mm) plug at one end
(for the piano) and a 1/8” (3.5mm)
mini-jack at the other, for the
sound card (eg http://bit.ly/
LynKn1). The alternative is a
jack that converts a
standard audio lead into
a mini-jack.
Preamp/USB audio interface
A preamp is not an essential piece of equipment, but it can add more
finesse and flexibility to a recording. Introducing a preamp/USB audio
interface to the process will allow the user to boost the piano signal
and produce a high output signal. Try M-Audio, Fast Trak or Avid for well-
priced options.
To start recording piano, there are a few possible
hardware combinations to consider
Recording hardware
Microphone
A microphone is the ideal recording
companion, especially for those using an
acoustic instrument. There are plenty of
options here, from budget to pro level. A basic
desktop microphone will do the job, but the
quality will not be as good. For better-quality
recordings, a more expensive microphone,
such as the Blue Snowball with Audio HD, can
be used.
Sound card
A sound card is as essential as a piano
for the recording process. Thankfully, all
computers come with a sound card built
in. The quality of the card depends on the
quality of the computer, but all will allow
recording. A decent budget card – try
Creative, Asus or M-Audio – is a good
investment for better recordings.
114 Piano for Beginners
Thenextstep
S
martphones and tablets are fantastic tools
to aid creativity thanks to their scope and
power. It is now possible to see sheet music
for your favourite musician’s latest album and
get virtual lessons on various instruments from the
App Store. The piano is one such instrument that is
brilliantly catered for, with apps on offer to take you
through everything, from the very first time you sit
at a piano, to the point of writing your own portfolio
of songs.
The beauty of using your own device is that it
takes away some of the daunting nature of having
to sit at a full size piano. Instead you can sit back
in comfort (wherever you may be), iPad in front of
you, and experiment as you wish. Just a few quick
downloads from the App Store and you can have
every variation of piano or keyboard in front of you,
as well as virtual teachers to guide you through
every possible process you could ever wish to learn.
These pages will highlight some of the best apps
for improving your piano skills, regardless of your
experience. We will take you through from the very
beginning, up to getting more creative and writing
and playing your own music.
Improveyour
techniquewithapps
Get started, hone the basics, then get creative on the
piano using these apps for your iPhone and iPad
Virtuoso Piano Free 3
Price: Free
Developer: Peter Nagy
The app in amongst this selection that boasts
the most functionality, Virtuoso responds when
you tap the keys in different ways in order to
give a more realistic sound. It therefore provides
an experience most akin to that of playing a
real piano, making it very valuable as a learning
tool. And if you are taking the learning plunge
with a musical buddy, the app also supports
duet mode on iPad, allowing two people
to play simultaneously. This is a great way of
learning, as you can encourage each other and
learn to harmonise - and the app format makes
the whole experience a little more relaxed
and fun. Virtuoso also comes with support
for AirPlay, so should you want to put on a
performance for friends and family via your TV,
or simply use it to see your finger work on a
bigger screen, this is the app for you.
GarageBand
Price: Free
Developer: Apple
GarageBand is probably the most instantly recognisable of all the apps featured here, coming as part of
Apple’s iLife suite on both desktop and mobile. The piano section of GarageBand not only contains a
bigger variation of keyboards than any other app here, but also includes Smart Keyboard, where users
can select a note and then have a melody created for them. It’s a really nifty way to learn about notes
and keys that work well together. Of course, having the editing power of GarageBand at your disposal
makes it a breeze to mix your piano creations with other music tracks from some other instruments.
Top tip
Choose wisely
If you have both a tablet and a
smartphone, make sure you pick the
best version of the app you want.
For example, it would be better to
use a chord finder on a phone, as it’s
always on you. On the other hand,
there’s not much point in a sheet
music reader on anything but a
tablet. You may have to pay for
an app twice if you want
it on both formats!
Piano for Beginners 115
Piano Tutor
for iPad
Price: £2.29
Developer:
SmileyApps
A great way to measure your
progress when it comes to
sheet music reading skills is by
using the quiz section in this
app. Piano Tutor will highlight
a note on the sheet music
and then ask users to hit the
correct note on the on-screen
keyboard. Your speed of response will be clocked, and with a range of tests (each one containing
24 questions) you can give your knowledge a strenuous workout before getting back to learning by
playing the simple songs that also come in the app.
Magic Piano
Price: Free
Developer: Smule
Magic Piano brings another element to the
learning table in the form of competition. There
is a big gaming aspect to this app, which allows
you to earn points for how well you play along
to popular songs. Magic Piano also contains
a range of different keyboards to play should
you want a change, and the beams of light to
guide you to the correct note are a good way
of perfecting your finger work on the keys.
Magic Piano injects a nice taste of fun into the
learning experience, keeping you interested
and engaged.
Tiny Piano
Price: Free
Developer: Squarepoet, Inc.
A basic app in terms of functions and interface, but
Tiny Piano comes with a host of modern songs for
users to learn. This app actually places you in charge
of the timing, so is very good for developing your
understanding of tempo. For an added confidence
boost, the app allows you to tap anywhere to play
the next note, rather than on the keyboard itself if
you’re stuck. It’s a nice tool should you want to learn
the melody and notes first, before going back and
trying to play it yourself.
“Through competition, Magic Piano injects a
nice taste of fun into the learning experience,
keeping you interested and engaged”
Nota for iPad
Price: £2.29
Developer: All Forces
A brilliantly simple and usable app, Nota is a
combination of reference guide, quiz and solid
learning tool, making it essential to new piano users.
Tap a note on the keyboard to see it shown as a
character of sheet music, giving you the chance to
instantly learn and remember the placement and
look of each note. There is also a complete reference
book full of all the key terms and definitions of every
aspect of sheet music. Then, once you think you
know your stuff, there is the quiz mode to turn to
and test your degree of knowledge.
Steinway Etude
Price: Free
Developer: Steinway Musical
Instruments
One of the most impressive aspects of Etude
is the in-app store, where users can download
songs and access the sheet music. As the song
plays and the coloured indicators move along
the sheet, the notes on the keyboard are also
highlighted below. This means you can firstly
begin to understand how sheet music is formed,
and then begin to play along with it. So not only
can you use the app as a digital play book, but
also as a vital learning tool.
“The piano has played a large part in
popular music for a long time now, from
early hits up to modern greats”
Give it a try
Lookoutforthislogooneachpage,
asitmeansthatanaudioand/or
videofileisavailableonlinetohelp
youmasteracertaintechnique.
116 Piano for Beginners
118 Pop
120 Blues
122 Jazz
124 TheClassicalperiod
126 TheRomanticperiod
128 Contemporarypiano
music
Playin
thestyleof…
Discover how certain genres get that distinct
sound and learn how you can achieve it
Piano for Beginners 117
118 Piano for Beginners
Playinthestyleof…
Pleasant progressions and simple melodies have helped the
piano become part of some of the world’s most-loved songs
Pop
Inspirational works
A Thousand Miles
Artist: Vanessa Carlton
Year: 2002 Label: AM
Love it or loathe it, the exceptionally
catchy piano riff that runs throughout
this song will be stuck in your head
all day. Written as a tribute to Carlton’s
grandfather, the hit single from her
album Be Not Nobody is a great place
to start for some pop inspiration.
Doo-Wops
and Hooligans
Artist: Bruno Mars
Year: 2010 Label: Atlantic/Elektra
This chart-topping album features
some Reggae, RB, Soul and Rock
to name but a few. He is also a
celebrated pop pianist; his skills are
showcased particularly well on the
urban ballad, Just the Way You Are.
Takk…
Artist: Sigur Rós
Year: 2005 Label: Geffen/EMI
The enchanting single Hoppípolla
is a beautiful piece to learn on the
piano, and has been showcased in
countless films and television shows.
Be prepared to be utterly swept away
by this truly epic ethereal album as it
draws on a range of influences.
A Rush of Blood to
the Head
Artist: Coldplay
Year: 2002 Label: Parlophone
Featuring the legendary piano
anthems Clocks and The Scientist, this
album is jam packed full of extremely
beautiful, seemingly effortless
motifs that embrace simplicity in an
extremely clever way.
Top pop albums to sink your teeth into
Audio file
Listen to the audio files
and follow along on your
own keyboard
Give it a try
T
he piano has played a significant role in
popular music for a long time now, from
early hits like The Righteous Brothers’
version of the classic Unchained Melody to
modern greats like Adele’s Set Fire To The Rain. The
piano tends to take one of two roles in a pop song:
as a backing instrument that adds depth to the
accompaniment, which will usually consist of drums,
bass, and guitar; or as the only instrument backing
a powerful singer for a ballad-like song. Either way,
the piano will rarely take centre stage in a pop song.
This means it can tend to be a less demanding
place to start when focusing on a genre of music to
practise on.
As a backing instrument among several others,
the piano will probably only be playing chords on
the right hand and maybe bass notes on the left.
Note that a bass guitar would likely be present, so
a left-hand part isn’t usually essential. These chords
will normally be played on the beat and probably
won’t deviate from the chord progression on which
the song is based. When a piano is duetting with a
vocal performance, the parts will be more elaborate
to add interest when the vocalist isn’t singing. This
means that more demanding songs to try on piano
will likely feature fewer backing instruments.
Pop music relies on mostly simple chord
progressions, so in most instances you’ll be playing
melodies based on major, minor and perhaps
seventh chords. Try to limit your progressions
to around four chords. For a couple of a catchy
progressions, try i-VI-III-VII and I-V-vi-IV. In the key of
C these would be: C minor-Ab major-Eb major-Bb
major, and C major-G major-A minor-F major.
“The piano will rarely
take centre stage in a
pop song”
Piano for Beginners 119
Sarah McLachlan
A Pop-Piano Angel
Sarah McLachlan is renowned for her enchanting mezzo-soprano vocals
and tear-jerking ballads. The Canadian songstress is classically trained on
the piano, which features heavily in much of her music. Her hit single ‘Angel’,
inspired by the fatal overdose of fellow pop-rock pianist, Jonathon Melvoin, is
a truly beautiful piece to listen to and to learn. Many of McLachlan’s songs, like
those of numerous other pop composers, are relatively simple in terms of their
structure; using subtle variations on the classic four chord formula (root, fourth, fifth,
minor second) combined with resolution chords (such as sus2).
Top tip
Keep pedaling
The key to mastering smooth
transitions between chords as
Sarah does so beautifully, is to
learn when to apply the sustain
pedal. In this practice piece,
lifting your foot at the start of
each bar will sustain the
harmonies and create a
deeper sound.
Give it a try
Try the pop style with the music below
120 Piano for Beginners
Playinthestyleof…
A
s a genre, blues music has been around
for a long time (well over a century now)
and the piano has been a huge part of
its sound for the duration. While it has a
lot of sub-genres – some well known, like boogie
woogie and delta blues, others not so well known –
there are a few components that remain consistent
among songs of this genre, appearing time and
time again.
The first of these components is blue notes. These
notes give the blues genre its distinctive sound.
While these notes don’t fit into any major scale, they
are still notes that can be found on the piano or
keyboard. For example, they will usually present as
flattened third, flattened fifth/sharpened fourth and
flattened seventh notes of a scale. So in a C major
scale, the blue notes would be Eb-Gb/F#-Bb. The Eb
and Bb are already flattened on the minor scale. So
it may help you remember a natural minor scale and
only flatten the fifth. On other instruments these
notes may be tuned down even further, and if your
keyboard supports microtonal tuning you may want
to experiment.
The second component that defines the blues
genre – through all its variations – is its form. Many
songs of the blues genre use an I-IV-V progression
across 12 or 16 bars. If you were to play an E blues
(a common blues for a guitarist), it would feature
E-A-B – the first, fourth and fifth degrees of the E
major scale.
Improvisational solos are also a big part of blues
piano playing. However, the good news is that you
can stick to the corresponding blues scale’s notes;
use these and your solos should sound great.
A broad genre with a few defining characteristics,
blues is bound to have something for you
Blues
Inspirational works
The Honeydripper
Artist: Roosevelt Sykes
Year: 1961 Label: Bluesville
Roosevelt Sykes is renowned for his
top-tapping, boogie-woogie piano
as well as his risqué lyrics. This album
remains one of the greats from a true
legend of the genre, who dominated
the blues piano scene for well over
six decades.
Tasty Blues
Artist: Little Brother Montgomery
Year: 1961 Label: Prestige /
Bluesville 1012
One of the most versatile pianists
of the 20th century, and this aptly
named album showcases his
Chicago-style blues to perfection.
He is renowned for keeping the true
heritage of blues music at the heart.
Eagle Rock Rag
Artist: Lead Belly
Year: 2015 Label: Sandrew Metronome
This record is a great example of
raw ragtime blues. Written in 2/4
or 4/4 time, with a characteristic
left hand pattern of bass notes on
odd-numbered beats and chords
on even-numbered beats, with a
syncopated right hand blues melody.
Boogie-woogie trilogy
Artist: Silvan Zingg Trio
Year: 2008 Label: CD Baby
Silvan Zingg loves boogie-woogie
blues so much, he founded an
international festival to celebrate
it. This album sees Zingg’s smooth
blues piano alongside the equally
talented Nuno Alexandre on double
bass and Valerio Felice on drums.
Some of the greatest piano blues records
“Improvisational solos
are a big part of blues
piano playing”
©
Svein
M
Agnalt
Audio file
Listen to the audio files
and follow along on your
own keyboard
Give it a try
Piano for Beginners 121
Kenny Wayne
The Boss of Blues
Kenny “Blues Boss” Wayne is a true maestro of both blues and jazz
piano. He is world-renowned for his raw and edgy style of boogie-
woogie playing. Whilst boogie-woogie piano is melodically similar to
traditional styles of blues music, it is instantly recognisable by the use
of an upbeat bass figure designed to get people dancing. This simple riff
is repeated throughout most of the tune and transposed with each chord
change, making it ideal for beginners to try. Make sure to really stomp out
the bass note at the beginning of each bar!
Give it a try
Embrace the blues with the following piece
Top tip
Get comfortable
The blues scale is at the heart of
this genre. Getting comfortable
with finding it in any key will
give you freedom to improvise.
Learn this six-note pentatonic
scale by memorising its
distinctive sound,
and then practice
transposing it.
122 Piano for Beginners
Playinthestyleof…
Immerse yourself in this passionate and diverse
genre, which demands musical skill
©
Robert
Drózd
Jazz
Inspirational works
Get to grips with some jazz standards
Gouache
Artist: Jacky Terrasson
Year: 2012 Label: Universal Music
This eclectic album by the hugely
talented Jacky Terrasson features
covers of hits by John Lennon, and
Amy Winehouse. Whilst this may not
be the most original album out there,
the fusion of intricate jazz piano and
classic pop hits is too good to miss!
The Girl in the
Other Room
Artist: Diana Krall
Year: 2004 Label: Verve
The extremely distinctive contralto
tones of Krall’s voice, combined with
some seductively smooth melodies,
make this an ideal album to ease you
into the many different forms of
jazz piano.
The Bandwagon
Artist: Jason Moran
Year: 2010 Label: Blue Note Records
This incredible live recording
showcases Moran as the Jazz virtuoso
he truly is. From foot-stomping,
upbeat and hectic melodies, to
smooth urban melodies that bring
you right back to the world of 21st
century jazz.
Twentysomething
Artist: Jamie Cullum
Year: 2003 Label: UCJ, Candid
Records, Verve
Jamie Cullum’s use of piano
percussion adds a whole other
dimension to his sound by tapping
out rhythms on the top of the piano,
underneath the piano, and even on
the hammers and strings.
A
s it’s one of the most complex musical
genres in the world, playing jazz is
often regarded as the ultimate test
of a musician’s ability. Like the genre
in general, jazz pianists rarely stick to any musical
templates or rules – any time signature or chord
structure goes! Relatively simple chords like major
sevenths (maj7) are very common, but other
commonly used chord types of the jazz sound
include augmented sevenths and minor ninths,
which are rarely played in other types of popular
music. The one rule-of-thumb of jazz music is
that there are no rules in jazz music; pretty much
anything goes, and there isn’t much that doesn’t
belong in a jazz number.
Early on in the genre’s development, the piano
often took a leading role. This was mainly thanks
to its ability to play chords (unlike instruments
such as the trumpet) and the fact that it could
carry a bass line in addition to the melody. It is the
piano’s variety that makes it a staple of the jazz
sound. As the genre has progressed over time, so
has the instrumentation. This has led to the piano
taking more of a back seat in an ensemble – but
thanks to jazz’s unorthodox structures, even
backing parts can be slippery beasts.
Improvisation is also a significant part of jazz
piano playing. Skilled jazz pianists may eschew
sheet music in favour of playing unscripted
melodies based on the scales and arpeggios on
the chord progression of the piece. However,
these chord progressions aren’t exactly basic I-IV-
Vs, so an improvisational jazz pianist will need a
vast knowledge of chords, scales and arpeggios in
order to successfully perform.
“Skilled jazz pianists may eschew sheet music in
favour of playing unscripted melodies”
Audio file
Listen to the audio files
and follow along on your
own keyboard
Give it a try
Piano for Beginners 123
William James “Count” Basie ruled the jazz scene for over half a century, as
both an accomplished pianist and bandleader. He was renowned for his
spare and yet exuberant style of playing, that always had a strong element
of swing. In 1935, Basie formed the Count Basie Orchestra, which he led
for almost 50 years. The group maintained their popularity throughout the
decades due to Basie’s constant creative innovations, including the use of two
“split” tenor saxophones, and riffing with a big band. Many famous musicians
came to prominence under his direction, including the singer Joe Williams.
Give it a try
Be bold and try experimenting with jazz
Top tip
Swing like Basie
Notes with equal written time
values are performed with
unequal durations, alternating
long and short. For two quavers,
the first should last slightly
longer than the second, but
the two should still fit
within one beat.
Count Basie
A legendary figure in the jazz piano world
124 Piano for Beginners
Playinthestyleof…
W
estern classical music after 1600 can
be divided into four different eras:
Baroque, Classical, Romantic and
20th Century. While the Baroque
era (around 1600-1740) relied heavily on keyboard
music, the preferred instrument of choice was
usually a harpsichord, an ancestor of the piano and
the organ.
By the mid-18th Century, however, the Classical
period had arrived, and it featured solo music
composed on the fortepiano, which was an early
version of the piano we know and love today. The
Baroque era’s elaborate flourishes and confusing
multiple melodies were gradually replaced by
homophonic texture, where multiple instruments
would play one melody over an accompaniment.
In Classical-era piano music specifically, simple
arpeggios and Alberti bass were used a lot
with the left hand. They were used as repeated
accompaniment patterns to keep the piece flowing
but not lessen the importance of the melody.
The Classical era was home to many of the
world’s most famous composers, many of whom
remain household names today. These include
Joseph Haydn, who wrote many works for piano,
Wolfgang Amadeus Mozart, one of the most
talented composers to have ever lived, and Ludwig
Van Beethoven, a highly influential pianist who
wrote several piano sonatas and concertos and was
a key proponent in the transition from classical to
romantic music.
Rich, obvious melodies and simple patterns define this important musical era
TheClassical
period
Inspirational works
Fantasia No. 3 in
D minor
Artist: Wolfgang Amadeus Mozart
Year: 1782
This enchantingly ominous piece is
one of Mozart’s most popular piano
solos and great to learn. It is said that
the ending was actually written by
August Eberhard Müller, as the piece
was left unfinished at his death.
Piano Sonata No. 52 in
E-flat major
Artist: Joseph Haydn
Year: 1794
This was the last of Haydn’s infamous
piano sonatas, and is considered by
many to be his greatest. The entire
piece is an outstanding display of
technical skill and beautiful, unique
harmonic structure.
Opus 49, No.4
Artist: Johannes Brahms
Year: 1868
This recognisable melody is possibly
the most famous lullaby in the world.
If you can resist drifting off to this
beautiful piece, then listen out for the
intricate use of simple harmonies and
triads that provide a tender contrast
to Brahms’ orchestral compositions.
Lang Lang in Paris
Artist: Lang Lang
Year: 2015 Label: Sony Classical
Records
Lang Lang is one of the most
accomplished pianists of the 21st
century, offering technically solid and
yet expressively innovative renditions
of some of Chopin and Tchaikovsky’s
best-loved pieces.
Great classical piano pieces
“The Classical era was home to many of the
world’s most famous composers”
Audio file
Listen to the audio files
and follow along on your
own keyboard
Give it a try
Piano for Beginners 125
Give it a try
Franz Schubert
A master of solo piano composition
Franz Schubert was considered one of the last composers of the Classical
period and one of the first of the Romantic period, with a clear progression
through these genres visible in his work. In his early years, influences from
Beethoven and Mozart are clearly seen in his use of formal structures and
dramatic harmonies. Throughout the later stages of his career, he developed
a more discursive, experimental sound that was sadly not fully appreciated
until after his death in 1828. During his short life of just 31 years, Schubert had a
tremendous influence over the way in which melodies for solo piano were structured.
Top tip
Amazing arpeggios
As Schubert transitioned
between the Classical and
Romantic periods, arpeggios
featured heavily in his work. In
an arpeggio, the notes of a chord
are played in either ascending or
descending succession. Try holding
the sustain pedal down for
each arpeggio to
create fluidity.
See if the Classical period is for you
126 Piano for Beginners
Playinthestyleof…
T
he Romantic revolution throughout
the 19th Century wasn’t just felt in
music – the desire to express emotion
and creativity swept across the literary
and artistic worlds too – but it may have had its
biggest impact here. The piano was a massive part
of it, thanks to gradual improvements in its form.
Indeed, it could be argued that the piano was the
most important instrument of the Romantic era as it
grew in popularity throughout this period.
While the era’s symphonies grew larger in size
and became more grandiose in scale with more
and more instruments being used, piano solo
pieces started getting shorter and more digestible.
As a result, the piano became a more popular
instrument. These miniatures went by names like
‘Nocturne’ and ‘Etude’, and helped earn the piano
a new audience. Also born out of the Romantic
era was the ‘virtuoso’ movement, of which Franz
Liszt was a big part. A term still used to this day, the
virtuoso would wow the audience with a display of
pure skill on their instrument, which, on the piano,
included scales, trills and arpeggios often played at
break-neck speed.
Musically, the Romantic era focused on longer,
more lyrical melodies, stark contrasts and several
different musical ideas within a movement. It
kept the homophonic sound of the Classical era
but tended to use changes in tempo and time
signatures to hold the listener’s interest.
The next era in classical music ushered in freedom and creativity
TheRomantic
period
Inspirational works
Waltz in D-flat major,
Op. 64 No. 1
Artist: Frédéric Chopin
Year: 1847
One of Chopin’s most famous piano
compositions. His distinct style fuses
the simple harmonies of the Baroque
period with the chromatic dynamism
of the Romantic era, brought
together in true virtuoso style.
Six Duets, Op. 11,
No.4 - Valse
Artist: Sergei Rachmaninoff
Year: 1830
Grab a friend and have a go at
playing this fast and furious duet
from this Romantic legend. This
show-stopping melody provides a
fun and lyrical contrast to the sounds
of many other composers at the time.
Sonata in E-Major,
Op. 6
Artist: Felix Mendelssohn
Year: 1826
Every movement in this piece
showcases Mendelssohn’s talent for
writing wonderfully expressive and
fluid music that made him one of
the most popular composers of the
Romantic era.
Works for Piano
Volume 2
Artist: Hans von Bülow (composer)
Mark Anderson (pianist)
Year: 2013 Label: Nimbus
An early student of the virtuoso
Romantic pianist, Franz Liszt, Büllow
is noted for his numerous renditions.
However, this collection, proves he is
a fantastic composer in his own right.
Top pieces from the Romantic era
“The virtuoso would
wow the audience
with a display of skill”
Audio file
Listen to the audio files
and follow along on your
own keyboard
Give it a try
Piano for Beginners 127
Give it a try
Claude Debussy
This legendary composer certainly makes an impression
The intricate, enchanting melodies of Claude-Achille Debussy (1862-1918) are still the source
of inspiration for many pianists today. In the instantly recognisable piano solo, “Clair de
Lune”, chains of seventh, ninth and eleventh chords sweep dreamily across the keys,
enriched with complex chromatic articulations. Debussy is often considered to
be the founder of impressionism, a sub-genre within the Romantic movement
in which the melody is designed to create images in the listener’s head. He was
also renowned for his use of tempo rubato, which involves slowing down or
speeding up your playing freely to add to the imagery you wish to create.
Enjoy the creativity of the Romantic period
Top tip
Painstakingly
particular pedalling
Debussy was very particular
about the way pedalling should
be used in his compositions. Try
using both of the pedals at once
in order to create the blurry,
bell-like sound that is so
characteristic of
his work.
128 Piano for Beginners
Playinthestyleof…
A
lthough music purists would be loathe
to label it classical, and the genre’s fans
wouldn’t want to hear it be classified
as straight-up pop, contemporary
piano music tends to straddle the line between
both genres and adds a bit of new age and
world music into the mix. Compositions are often
kept simple – especially when compared to the
elaborate pieces performed in the Romantic era –
and are usually based on accessible pop-like chord
progressions, although just chords on their own are
rarely used.
Instead, the right hand can use the pop
influences to craft beautiful and accessible melodies
that will appeal to many. Vocal tracks aren’t often
used in the genre, so the right hand can perform
melodies similar to what a vocalist would sing in a
pop song. The left hand often takes influence from
the Classical period and usually plays arpeggios or
Alberti bass patterns to accompany the melody
rather than overpower it.
Just because the music is more simplistic and
attracts a wide range of listeners doesn’t mean that
the pianists are any less skilled, though. It takes a
great degree of expertise to craft a melody that
will pull at a listener’s heart strings like many of
the genre’s finest composers’ works do. Check out
South Korean pianist Yiruma’s River Flows In You for
an example of the contemporary piano music as its
best – you’ll find that the catchy melody and simple
chord structures that define the genre are both
present and correct.
Fusing classical and pop to create accessible yet beautiful songs
Contemporary
pianomusic
Inspirational works
Amélie
Artist: Yann Tiersen
Year: 2001 Label: Virgin Records
This intricate and diverse soundtrack
album propelled Yann Tiersen to
the level of global recognition he
deserved. The piano solos “La valse
d’Amélie” and “Comptine d’un autre
été” showcase his delicate style of
piano composition.
First Love
Artist: Yiruma
Year: 2001 Label: Stomp Music
Yiruma’s simple and lyrical style
of contemporary piano music
provides the aspiring pianist with a
smorgasbord of songs to learn. One
of the most popular tracks on this hit
album, “River Flows in You”, is a great
place to start.
I Giorni
Artist: Ludivico Einaudi
Year: 2001 Label: Dischi Ricordi S.p.A.
The title track of this album has been
featured in numerous shows and
adverts. Einaudi’s distinctive sound
is formed from incredibly simple,
carefully constructed riffs, with heavy
use of the sustain pedal creating a
dreamy fluency.
Sophomore Jinx
Artist: Rob Costlow
Year: 2002 Label: Tourist Records
A great example of how the simple
harmonic and rhythmic structures
found within contemporary
music, when played with enough
emotion, can form such intricate and
expressive pieces. Rob Costlow’s style
will sweep you off of your feet.
Check out these contemporary classics
“It takes expertise to craft a melody that will
pull at a listener’s heart strings”
Audio file
Listen to the audio files
and follow along on your
own keyboard
Give it a try
Piano for Beginners 129
Fabrizio Paterlini
Heart-breakingly beautiful piano
Paterlini’s delicate and minimalist style is guaranteed to bring out the inner
romantic in anyone. From his earliest works, such as “Viaggi in Aeromobile”,
to his more recent albums such as “Autumn Stories”, Paterlini’s twinkling
melodies and rumbling bass riffs are riddled with artistic intricacy and
expressivity. In many of his recordings, Paterlini places the microphones
very close to the wooden hammers. This creates a subtly deeper sound and
unique tone, which picks up the vibrations of the strings and the percussive
ring of the fingertips hitting the keys.
Give it a try
Mix styles for a contemporary result
Top tip
Express yourself
Bring repetitive melodies to life
by concentrating less on the
instructions in the score, and
more on your own expression.
Try swapping speeds, dabbling
with dynamics and playing
with the pedals to find
your unique sound.
130 Piano for Beginners
132 Helpdesk
t(FUUJOHTUBSUFERVFTUJPOT
t5JQTPOQMBZJOHUIFQJBOP
t
)PXUPTIBSFZPVSNVTJDXJUI
UIFXPSME
142 Glossary
MJTUPGDPNNPONVTJDBMUFSNT
FYQMBJOFEJOQMBJOOHMJTI
144 Essentialscales
t5IFNBKPSTDBMFBOEBMMUIFNJOPST
tWFSZLFZDPWFSFE
152 Chordslist
tMMUIFDIPSETZPVOFFEUPLOPX
t#PUIIBOETJODMVEFE
Reference
4PNFGJOBMQPJOUFSTUPIFMQZPVMFBSOUIFQJBOPZPVSDPNNPORVFTUJPOT
BOTXFSFE
BHMPTTBSZBOEBOFTTFOUJBMDIPSETBOETDBMFTMJTU
Give it a try
-PPLPVUGPSUIJTMPHPPOFBDIQBHF

BTJUNFBOTUIBUBOBVEJPBOEPS
WJEFPGJMFJTBWBJMBCMFPOMJOFUPIFMQ
ZPVNBTUFSBDFSUBJOUFDIOJRVF
“If you’re thinking about learning to play piano then
you probably have loads of questions. Here we try to
answer some of the more common queries”
132 Piano for Beginners
Reference
Yourquestions
answered
If you’re thinking about learning to play piano then you probably have loads of
questions. Here we try to answer some of the more common queries
Timescale
I have no musical background and have recently
considered buying a piano for the first time, so I
was wondering how long it would take me to be
able to play properly?
That all depends on how much time you are
prepared to invest. In most cases you will be looking
at years rather than months, but it also depends
greatly on what you want to play as you can easily
learn how to play a simple one-handed tune in a
day or two. Playing more complex pieces requires
a greater understanding of the instrument and we
would recommend a series of lessons – at least until
you pass through the various grades.
Some people say that the real learning, pleasure
and musical development comes after about Grade
eight. If you want to progress quickly you’re going
to need to practise at least 30 minutes to an hour
a day, the more time you put in the better. It’s also
good to break up your practice times into smaller
Getting started
Your hands may end up in
some tricky positions
Choose your
piano wisely
sessions throughout the day rather than one large
chunk all at once. If you just want to play for yourself
out of fun, you could expect to get to a pretty good
level within two to three years. By that time you
should be able to play things that really satisfy you,
stuff that you can really enjoy. If you want to be a
concert pianist, that will take decades and many
hours of work to accomplish.
Does it hurt?
Will my hands and wrists hurt when I start playing
piano? I’m worried about a repetitive strain injury
and cramp…
Adopting the correct posture is essential when
playing piano and, if done correctly, it’s no more
uncomfortable than using a computer keyboard.
The important thing is to stay relaxed whenever
you’re playing and don’t contort your hands into
strange positions in order to play chords. If it hurts
your hands reaching a particular chord then modify
your position so that you can reach it more easily.
You will also need to know the difference between
long-term and short-term pain. When starting out
your hands and arms will be in alien positions and
some discomfort will inevitably be felt as you adopt
and become used to playing your instrument.
Staying relaxed and playing with a softer touch will
help ensure that the amount of strain on your arms
is reduced. If you do start to suffer discomfort then
consult a doctor for the best course of action.
Keyboard or piano?
Should I learn to play on an acoustic piano, digital
piano or a keyboard?
When starting out, it is far cheaper to go for a
keyboard as, unlike real pianos, these will never
need tuning, take up much less space and be
considerably cheaper than a real piano. If you’re
really serious about learning the piano, have the
money and have the space, then invest in a piano
because the experience will be so much more to
savour. However, there are many good keyboard
and digital piano alternatives to suit any budget
from around £200 upwards so browse the
internet and see what models are around that best
suit your circumstances.
Piano for Beginners 133
If you want a keyboard, there are
several models to choose from!
Early pitfalls
Are there any common problems that new
learners encounter?
The biggest problem is frustration at not moving
ahead as quickly as you would hope and
consequently becoming demotivated and losing
interest. To keep yourself motivated it’s good to
experiment and have fun with the piano away from
having to conform to the rigidity of what’s already
out there on the sheet music. Exploring the keys
and the notes that they play on your own terms
will allow you to get to know the instrument better
and you can then start piecing together your own
songs. Everyone, even the virtuoso players, had
to start somewhere, so just imagine that music
doesn’t exist and that you’re the first person to pick
up – not literally – the instrument! If you do want
to concentrate on playing existing songs then
concentrate on simple ones and then have fun
adding your own little musical embellishments to
the composition – there really are no rules.
Best for learners
What type of piano/keyboard is most suitable
for learners? What should I look out for when
considering which piano to buy?
On a full-size piano there are 88 keys, so look out
for the number of keys on any models you’re
thinking about buying to see if you get the whole
experience. Some keyboards only offer 64 keys.
Obviously it is better to have the full scale of keys,
whether you’re learning or otherwise, and that
they’re also of a decent size so that you don’t hit
the wrong key by mistake. The only other things to
consider are the space it is likely to take up and the
cost – so just scout around, weigh up your options
and go for the one that suits you best.
Keep the beat
I have read about using a metronome while
practising. What is a metronome and how can it
help my playing?
A metronome is a device that holds the perfect beat
by producing regular ticks or beats. This is a useful
tool to have to hand when you need to practise
at a certain tempo or whenever you’re trying to
increase your speed on the keys. The tempo of a
metronome is measured in Beats per Minute (BPM)
and metronomes come in three forms – mechanical,
electrical and software. A traditional metronome is
a triangular device that holds a metal ticker that you
wind up and it boasts a slider through which you
can adjust the speed.
Most modern metronomes are electronic, but
follow the same basic principle and use electronics
and quartz crystal to maintain the beat. Metronomes
are useful for practising scales and increasing your
speed through them. You may only be able to play a
scale at 150bpm at present, but by practising with a
metronome and increasing the tempo at which you
practise every day with, say 5bpm, you will gradually
train your fingers and brain to play quicker and
quicker, which is immensely satisfying. If you have a
keyboard or a modern digital piano, you may have a
metronome built in to the hardware.
Play time
I would like to learn some popular songs. Could
you recommend some easy ones?
Easiest is definitely best when starting out, and the
beauty of simple ditties such as Mary Had A Little
Lamb, Frere Jacques and Jingle Bells is that you
undoubtedly know the songs so well already that
you won’t even need sheet music to play them,
you can just steadily find the right notes by ear
and then keep practising until you are able to play
them seamlessly and at a high tempo. When you
have achieved this then you can start branching out
into more complex pieces and your musical journey
will continue…
“The biggest problem is frustration at not
moving ahead as quickly as you would hope
and consequently becoming demotivated”
Location
courtesy
of
Music
Is
Life,
Bournemouth
134 Piano for Beginners
Reference
Get in tune
I was recently given an old piano as a gift, but
when I play it it sounds out of tune. How
would I go about tuning it? Is it something I can
do myself?
We wouldn’t recommend tuning it yourself – at
least not to begin with. To tune a piano you have
to make minute adjustments to the tensions of
the strings to properly align the intervals between
their tones so that the instrument is in tune. Unlike,
say, tuning a guitar, piano tuning is not simply a
particular fixed set of pitches. Fine tuning a piano
requires an assessment of the interaction among
notes, which is different for every piano and as such
requires slightly different pitches. Pianos are tuned
to a modified version of a system called ‘equal
temperament’, where every pitch may be derived
from its relationship to a chosen fixed pitch. It’s a
complicated process and is best carried out by a
trained technician, but you can acquire the tools
and carry out the process yourself further down the
line as you get to know your instrument more and
are au fait with the tones that it creates. Depending
on use, a piano should be retuned twice a year.
Pedal power
My keyboard only has a sustain pedal. Is this
something that will hamper my progress in
the future?
Not really, because if you’re a serious enough player
to know about the pedals and the various effects
that they afford your sound then you will probably
be ready to buy a proper acoustic piano anyway.
Pianos traditionally have three pedals, which are
(from left to right) soft pedal, the sostenuto pedal
and the sustaining pedal. The soft pedal (una corda)
creates a softer tone by shifting the mechanism to
the right so that the hammers hit one string instead
of two. The middle pedal allows pianists to sustain
selected notes, while others remain unaffected.
The name of this pedal is slightly misleading as
‘sostenuto’ is Italian for ‘sustained’ and would lead
us to think that it performs the same task as the
sustaining pedal. However, the sostenuto was
In order to play piano, you have to get to know your instrument inside and
out to know what makes it tick. Here we introduce you to the intricacies
Your piano
It’s best to leave cleaning
the insides to a professional
“A piano should be kept from exterior walls,
drafty windows and doors, fireplaces and air
vents; and ensure it is sat on a rug or carpet”
Piano for Beginners 135
originally called the ‘tone-sustaining’ pedal, which
better reflects what it does – sustainment of a
single or group of tones. Which leads us onto the
sustaining (or damper) pedal. This right-hand pedal
raises all of the dampers off the strings so that they
keep vibrating after a key has been released, adding
more expression to the notes by allowing them to
resonate and making it possible to string harmonies
and notes together. Having a sustain pedal alone
should in no way hamper or restrict your playing
further down the line.
Sit comfortably
My piano didn’t come with a stool or seat. I have
a variety of chairs around the house, but they’re
all of different heights. How should I be sat
relative to the piano? Does it matter if I’m sat
close to the floor?
Seating is an important factor in good piano playing
and both the height and distance away from the
instrument need to be taken into consideration.
The best height to be seated at will allow the elbow
and upper arm to fall freely from the shoulder and
allows the forearm to be parallel to the floor when
the forearm and hand are in their natural shape (as
they are when they’re hanging by your side). The
optimum distance to be seated at is a distance
that allows our elbows to rest slightly in front of
our central line when our hands are in their neutral
position on the keyboard, with our hands in front
of the elbows (not in front of the body or at strange
angles to the instrument).
“Don’t place any objects
on your piano, at least
not without a soft piece
of felt or cloth placed
between the two”
Cleaning instructions
I’ve recently been given a second-hand piano
that hasn’t been played for a while, and as such
it’s a bit dusty. How do you go about cleaning the
instrument? Are there any products you definitely
shouldn’t use?
If you need to polish your piano, you can use special
piano polish, which can be bought from most
music stores. Ideally, you should remove surface
Regardless of the model,
your piano will sometimes
need a good clean
Make sure you’re
comfortable before playing
dust with a feather duster and never polish the keys
with a dry cloth as you may end up scratching the
surface. If you do dust it with a cloth, avoid rags
or paper towels and use fabric-softened flannel or
chamois. Ensure that the cloth is slightly damp using
filtered water (certain minerals can alter the surface),
use gentle motions and never be tempted to clean
inside the piano – leave that bit to the professionals.
As a general rule, don’t place any objects on top of
your piano, at least not without a soft piece of felt or
cloth placed between the two.
Storage solutions
I’ve bought a second-hand upright piano, but I
don’t know where to put it! Should I keep it away
from sunlight? Does it matter if it’s against an
outside wall?
If you own an acoustic piano then the ideal room
temperature for where it is stationed should be
21-22 degrees C (70-72° F). Going much higher or
lower will affect the tuning, possibly weaken the
internal glue and contribute to long-term damage
to the wood. Also, a piano should be kept from
exterior walls, drafty windows and doors, fireplaces
and air vents; and ensure it is sat on a rug or carpet.
The more expensive the piano, the more care you
have to take, but these guidelines will help ensure
and preserve the wellbeing of any make or model.
136 Piano for Beginners
Reference
Reading music
I’m a complete musical novice who has just picked
up a cheap keyboard. Is there any way I can get by
playing the piano without learning to read music?
Yes, you can learn to play by ear – in fact there
are highly accomplished pianists who can’t read a
note, but by not being able to read music you will
perhaps be doing yourself and your instrument a
disservice. It doesn’t actually take very long to be
able to read music and modern technology can
help you out a great deal by providing various
tuition apps as well as flashcards that you can use to
ram the knowledge home. By learning to read music
you will be able to enjoy playing centuries of great
and popular songs, which in turn will heighten your
understanding of your instrument and what it is
capable of and improve your playing no end.
Music jargon
I’m struggling with some music terminology –
what are chords, scales and arpeggios?
Well, let’s start off with chords. Piano chords – like
chords on a guitar – are groups of notes, usually
three or four, that are played together to create one,
true sound. For example, if you play the C, E and G
keys together on your piano then you will have just
played a C major chord (shortened to the C chord).
Arpeggios are notes that form a chord played
individually in sequence either going up or going
down the scale. Successfully playing an arpeggio
requires the player to play the sounds of a chord
individually to differentiate the notes. An arpeggio
in the key of C major going up two octaves would
be played as C, E, G, C, E, G. Scales are groups of
notes that act as a foundation for a part or full piece
of music. Scales give the composer a structure
from which to build melodies and harmonies and
it actually helps musicians to improvise a piece of
music. The most popular scale is the major scale
(which you may know as ‘Do, Re, Mi, Fa, So, La, Ti’).
Nail it
I like to grow my fingernails quite long – will this
be an issue when playing piano?
Possibly. The optimum length of the fingernails
when playing the piano is a contentious issue that
may depend a great deal on how you are playing –
for example the way your fingers rest on the keys.
You will want your fingers to slide across the keys as
effortlessly as possible and so obviously overtly long
nails may affect this.
Likewise, you don’t want your fingers to sit too flat
on the keys as this may lead to discomfort over time.
You may also find that long nails create an annoying
clicking sound as they hit the keys as you play, so
our advice would be that if you are serious about
learning how to play the piano, you should definitely
consider cutting them so that they lie in line with
the tips of your fingers.
Now that you know your instrument and the basics of playing, it’s time
to get more technical and start exploring the meaning of music…
Playing the piano
“By learning to read music you’ll be able to
enjoy playing popular songs, which will heighten
your understanding of your instrument”
Learning to read music is
a worthwhile challenge
Location
courtesy
of
Music
Is
Life,
Bournemouth
Piano for Beginners 137
Grace notes
I have heard of the term ‘grace notes’. What are
they and how do they show up on sheet music?
Grace notes are notations used in writing music
that appear much smaller than regular notes and
denote sounds that are shorter than full notes.
Think of grace notes as ornaments that have no
significant value of their own, but when placed in a
line of music they give it more depth by acting as
embellishments that are there to make the piece
of music sound fuller and more accomplished. A
grace note is indicated by a smaller-than-normal
note that sometimes has a slash going through
the note stem. If no slash is present then this is
an appoggiatura (where the principle note is
suspended and the grace note doesn’t have to
conform to the rigid timing of the piece) and if
a slash is present then we can interpret it as an
acciaccatura (which is a shortened version of the
appoggiatura), where the grace note sounds for a
shorter length of time.
Improvisation time
I’m growing a bit bored of playing sheet
music, and would love to play something a bit
more spontaneous. Do you have any tips for
beginner improvisation?
Yes, although we must stress that having the
knowledge of a variety of sheet music will
undoubtedly make the act of improvisation much
easier. However, if you are determined to take a
tinkle, freestyle, then make sure that you know
about scales. Start with one that doesn’t have too
many sharps or flats, like D major, and practise it
using your dominant hand and then switch to the
other hand to build confidence. Next, learn about
chords – especially the triad chords as these consist
of only three notes. Now you can sit down and
practise hitting notes of the same key. Have your
left hand play the accompaniment (slow block
or broken chords) in the same key and have your
right hand play the melody. Switch keys once you
become better at it to give the piece a broader,
deeper feel. Another method is to play a slow 4/4
piece with each measure getting one chord on
the left hand. With the right hand, improvise the
melody within that chord and then switch to a
different chord and continue the melody in the next
chord. Keep doing this and see where it takes you.
Piano tabs
I’ve seen note names written with both the letter
and a number, like C5. What does this mean?
It exists as a way of differentiating between notes of
the same name. By giving each key on the keyboard
a name and a number, there can be no confusion
over which key someone means. The first key on a
full-size keyboard is A0, while Middle C – the fourth
C from left to right – is called C4. If you were to read
‘Play C-D-G’, this could mean any C, D, and G on the
keyboard. However, ‘Play C4-D4-G3’ refers to specific
notes, so using letters and numbers makes it easier
to get your point across.
Note names
Are there any other names for the different
musical notes than crotchet, minim, etc? I
keep seeing whole notes and half notes being
referenced – what do they mean?
“Whole notes, half notes, quarter notes and
eighth notes are the American counterparts to
semibreves, minims, crotchets and quavers”
You don’t need to worry – they aren’t a brand
new set of notes you need to learn! Whole notes,
half notes, quarter notes and eighth notes are the
American counterparts to semibreves, minims,
crotchets, and quavers respectively. Aside from the
names, there aren’t any other differences between
the way they work, so if you’re confused you just
need to substitute the names you know for the
ones you don’t.
If you’re struggling, a friend
can be an incredible help
138 Piano for Beginners
Reference
Professional studio recording will be out of reach for most beginners,
but you can get great results by recording at home
Recording
Digital acoustic recording
I love playing my upright piano, and I want to
record some tracks with it. However, I want to
edit them using a computer and obviously I can’t
plug the piano into my machine directly because
there are no inputs. How can I record acoustically
on the computer?
It really depends on your budget. The cheapest
option would be to buy a USB desktop mic and
plug it into your computer. Make sure you stick
the mic near to the piano (but not so close that
you get a horrible bassy sound) and record what
the mic hears into your favourite digital audio
workstation, like GarageBand, Logic or Audacity. A
decent desktop mic can be picked up for around
£25/$39, or your computer may have one built in
(but keep in mind you won’t have much flexibility of
movement in this case).
Another option is to use a USB audio interface
with a built-in mic. If you use a Mac, the Apogee
ONE can be bought for around £120/$180 second
hand and comes recommended. The method of
recording your upright or grand piano is the same,
but you will notice a great difference in the quality.
Mix it up
What is mixing, and is it important?
After you’ve finished recording all your piano and
backing tracks, you will need to mix them together
to make it sound good, usually into a two-channel
stereo. The bad news is that entire books have been
written on this topic, so it’s not an easy matter to
get to grips with. To start with, you should edit the
volume of each individual track until you’re happy
with the sound they all make. Once you’ve got that,
you can start to pan your tracks to the left or right
speaker if you feel it adds to the mix.
Tablet recording
Is recording using an iPad really a viable option
for a decent result?
It certainly is, but you will need your fair share of
apps and accessories for it to work, like the iRig MIDI
that we covered earlier in this book. Many popular
artists are using iOS’s diverse range of music apps
to create great sounds for their albums, but few are
recording their entire record on the tablet.
The iPad does have a few things going in its
favour, though. One is its portability, which means
it can be taken anywhere with your music still on
it. If you want to lay down a track on the move
then there’s no better way of doing so, and iCloud
support means you can carry on where you left off
when you get home.
Backing tracks
My playing is improving, and I feel I’m ready
to join a band and record for a bigger sound.
However, I’m struggling to join one, and I’m
living in a small apartment (even smaller with
my digital piano), so I have no room for other
instruments. Can I make a backing track for my
piano using a computer?
Most definitely! In fact, these days, it’s far easier and
cheaper to record synthesised instruments on a
“A decent desktop mic
can be picked up for
around £25/$39, or your
computer may even have
one built in”
On-screen keyboards
are useful features!
Piano for Beginners 139
You don’t want
your recordings
to look like this
computer. All you need are some instrument plug-
ins, many of which can be freely downloaded from
the internet. If you’re on Windows, you will probably
want a VST; if you’re on Mac, you’ll want a VST or AU
(audio unit). How you install these plug-ins depends
on your audio editor, so search the program’s help
files for assistance.
When your plug-in is installed, you can use a
MIDI keyboard to play what you’re looking for. If
you don’t have a MIDI keyboard, then don’t worry,
as many editors enable you to control the VST with
your computer keyboard. It must be said, however,
that digital instruments are in no way a substitute
for the real deal, but they do help those of us with
limited resources.
Sounding different
I just nailed the perfect take on my piano, but it
sounds dreadful when I play it back – what am I
doing wrong?
The solution is usually a lot simpler than you may
think. If you’re recording through a microphone,
make sure it’s not too close to the piano or
keyboard, or you may get an unwanted distortion
effect. Also, be sure to check the volume of the track
on the computer – if it’s +10dB it probably won’t
sound right.
In many recording programs, you can opt to
monitor your instrument through headphones as
you go. This way you can hear what your recording
will sound like. Also, this will mean you can listen
to a backing track without the mic picking it up. If
you don’t wear headphones yet still monitor your
piano, you run the risk of creating cacophonous
feedback, which will definitely be captured by
the microphone!
Virtual effects wizard
I don’t want to spend lots of money on a high-
end keyboard, but I still want to record my digital
piano with some funky effects. Is this possible?
We’ve already mentioned how VST instruments
can enhance your sound, but now here’s where
VST effects come in handy. Whether you just
want to add a subtle reverb effect or a crazy synth
sound, these plug-ins have got you covered. Like
the instruments, VST installing methods will vary
depending on your audio editor, but it will likely
be a similar process. Many VSTs will have multiple
settings, but it is down to you to select the best
ones, as there are several variables that affect the
sound. Make sure you save once you’ve found the
perfect settings.
However, just because you can use these effects
on your computer doesn’t mean that you should.
For instance, if you ever plan on playing live, it is a far
better idea to invest in a keyboard as it’s not exactly
easy to change effects halfway through a song if
you’ve got to run to your computer and click a few
buttons! They are, however, perfect if you want to
sit down and record some tracks on your computer
using interesting sounds.
GarageBand is useful for
creating backing tracks
“If you’re recording through a microphone,
make sure it’s not too close to the piano or
keyboard, or you may get unwanted distortion”
140 Piano for Beginners
Reference
Feedback needed
I’ve recorded a few basic passages and played
them to my friends. They’re really into them, but
I want to get more feedback on them before I
develop the pieces into a full song. What’s the
best way to do this?
The internet makes it relatively easy to obtain
feedback on your work. You could upload the riff to
a forum that specialises in the genre of music you
play, but these are often frequented by advanced
amateurs and professionals, so their advice may
not be too helpful if you’re a beginner. A better bet
would be to find beginner-focused websites and
forums, as these will contain many like-minded
individuals willing to help out and provide feedback.
They’ll also be able to offer feedback on your
recording methods as well as your playing, so you
can improve in several key areas. If you receive
constructive negative feedback, make sure you use
it to improve your recordings.
Upload a song
Are there any good websites to upload a song
to? I want the world to hear, but I don’t want to
spend anything in the process.
You’re in luck, as there are several! The one that
we would recommend is SoundCloud, which is
a fantastic website to share your music on and it
continues to grow. Although it has many premium
pricing options (from €29 to €500 a year), the free
service gives you two hours of music to upload, so
unless you’re a songwriting maniac, you probably
won’t run out any time soon!
You can either share your track to every social
networking service under the sun, or you can opt to
share it to a SoundCloud group. If you share it to a
group, make sure you pick one with interests similar
to your genre, as you’ll get far more listens that way.
Listeners can also favourite and comment on your
track. As well as uploading your songs, you can also
networking with fellow musicians, picking up tips
As you create music, you may wish to share it with others –
but how do you go about doing so?
Sharing
and tricks along the way. It’s a very useful website to
build contacts and initiate collaborations.
A slightly more surprising option to get your
songs on the web for free is YouTube, the video
sharing website. You can just upload audio to the
site. Once your track is uploaded, add it as a video
response to a popular track that’s similar to yours.
This will ensure you get some listens and likes, and
hopefully some extra fans!
Up for sale
How can I get my work up for sale on the big
digital distribution services like iTunes and
Spotify? I’m working on writing an album and
I want to know that when I’m done I can make
some money from it!
You’re best off looking at services like CD Baby
and TuneCore, which will upload your music to all
the major players in digital distribution, like iTunes,
Amazon MP3 and Spotify, as well as selling it on
Piano for Beginners 141
Facebook fans
How can I get my band and music on Facebook? I want fans not friends!
Sign in to your Facebook account at www.
facebook.com, or sign up with the green button.
Go to the Create Page link on the left and choose
Artist, Band or Public Figure from the options.
Add your information and a profile picture to create
your band’s page! You can then edit it.
their own site. Some services will charge a one-off
fee and take a cut off each sale, while others will
charge a yearly fee and let you keep all the profits.
It’s worth gauging how many copies you think your
work will sell before making this decision – make
sure you have arrive at a conservative estimate!
However, once your music is on these services,
the real work begins. Because of their insane
popularity, it’s highly unlikely that people will just
stumble upon your music. You’ll need to consider
using social networking services like Twitter and
Facebook to get the news out there.
Getting heard
I know internet radio is incredibly popular, so how
can I get my music on a station? I know I won’t
be able to get on national radio, but there are so
many stations out there and I’d love to be played
on one.
Instead of sending your demo on tape into DJs
like in the old days, there are a few websites that
enable to you upload your music for the chance
to be on their radio. One such site is http://
amazingtunes.com. By uploading your music, you
stand the chance of being played on their very own
Amazing Radio, which is on digital radio. It doesn’t
matter what genre you play either, as they have DJs
that specialise in indie, ambient, folk and loads more
in between.
If you get selected to be played, you’ll receive
an email from the DJ telling you what show you’ll
be on – so be sure to tell everyone you know and
everyone they know to listen in! Besides those
people that you do tell, you’ll never know who else
might be listening.
Internet radio hosts are always looking for new
music, so don’t be afraid to send your tunes into
them. In the digital age, all it takes is a quick email
with a song attached. To maximise your chances of
gaining radio exposure, make sure you pick a station
that is similar to your style. If you just throw your
work at any station, you’d not only be wasting your
time, but the listeners’ time too!
“Find beginner-focused websites and forums, as
these will contain many like-minded individuals
willing to help out and provide feedback”
Make sure you check out
music-sharing apps
142 Piano for Beginners
Reference
Glossary
A
Accidental
These are small symbols within the music that alert
the player that they need to alter a note into a sharp
or a flat or a natural.
Arpeggio
A collection of notes in a chord, played one by one
up or down the keyboard, instead of at the same
time as you would play a full chord.
Articulations
Articulations tell you to play each note in a particular
style, expressed by little symbols near the note.
Some of these include:
t4UBDDBUP
To play in a clipped, short fashion, shown by a small
dot either above or below a note.
t-FHBUP
To smoothly slur the notes together, shown by
curved lines which link notes.
tDDFOU
Tells you to add some extra oomph to a note,
shown with a right-facing ‘open-wedge’ shape.
B
Bar
Divide the stave into measured sections. Each
measure ties in with the time signature, for example
in 4/4 time, each bar will contain four crotchet/
quarter note beats.
Beat
A measured unit of time in a piece of music. The
time signature organises the number of beats per
bar and also dictates the length of a beat. The
speed of the beat is dictated by the song’s tempo.
C
Chord
A chord is a group of notes, usually three or four,
played all at the same time.
Clef
The symbol right at the start of each stave. It tells
you which pitch to allocate to the notes of the stave.
D
Dynamics
Instructions within the music relating to its volume.
They will be in the form of symbols (such as a
crescendo) or Italian words such as piano (quiet) or
forte (loud).
t.F[[PGPSUF
Mezzo means ‘medium’ and it’s often added before
a word for a moderate effect, for example mezzo
forte means ‘medium loud’ and mezzo piano
‘medium quiet’.
t1JBOJTTJNP
It is not uncommon to see a fair number of ‘iss’
added to a word, which exaggerate its effect. Eg,
fortississimo means very, very loud and pianissimo
means very quiet.
E
F
Flat
An accidental that looks like a squashed b, which
alters a note by decreasing its pitch by a semitone.
G
H
I
J
K
,FZTJHOBUVSF
A collection of sharps or flats expressing the key
of the song, found at the beginning of the stave.
Symbols are on the line or in the space that the note
occupies. If a flat symbol is placed on the centre line
on the treble clef, every B note that you play will be
a B flat, unless its cancelled out by an accidental.
L
-FEHFSMJOFT
When notes are higher or lower than the reach of
the stave lines, they are placed with ledger lines that
extend the stave.
M
.BKPS
Jolly, happy-sounding notes characterise a major
scale or key.
.JEEMF$
The middle-most C key on your keyboard, it sits in
the middle of the grand stave in notation and it’s
also generally the divide between the notes played
by your right and left hands.
iSUJDVMBUJPOTUFMMZPVUPQMBZFBDIOPUFJO
BQBSUJDVMBSTUZMF
FYQSFTTFECZMJUUMF
TZNCPMTOFBSUIFOPUFw
5IJTJTB(NBKPSDIPSE
GJSTUJOWFSTJPO
Piano for Beginners 143
Minor
Gloomy, sad-sounding notes characterise a minor
scale or key.
N
Natural
An accidental on a note that cancels out any
previous sharps or flats.
Notes
These are the building blocks of music, showing
you which note to play, at what pitch and for how
long. Each type of note has a specific duration, for
example a semibreve/whole note has the same
duration as two minims/half notes or four crotchets/
quarter notes.
O
Octave
The name given to the interval between two of
the same notes. Look at Middle C, then the next C
above it. The distance between those two Cs makes
up an octave.
Ornaments
Symbols on notes to decorate the melody. An
example is a trill, which tells the musician to flutter
between two notes to embellish the tune.
P
Pitch
Put simply, pitch refers to the highness or lowness
of a note. It is actually about the note’s frequency,
which you will learn more about as you piano
playing progresses.
Q
R
Repeats
Instructions in the notation to go back and re-play
specific phrases. Repeats include repeat barlines and
also the coda symbol (circle with a cross through it)
accompanied by the phrase al coda and other terms
such as D.C and D.S.
Rests
Indicate a period of time that the musician must
not play any notes. The rests come under the same
duration classification as notes, for example a minim
rest has the same duration as a minim/half note.
S
Scales
A group of notes with different pitches, usually from
one octave, that are played in order one by one up
or down a keyboard.
Sharp
An accidental that looks like a hash symbol (#),
which alters a note by slightly increasing the pitch.
Stave
The five horizontal lines that notes are drawn on,
both on the lines and in the spaces.
T
Tempo
Italian for ‘time’, the tempo dictates how slow or
fast a song should be played. It is shown at the
beginning of the notation, and can either be in
super-precise Beats Per Minute (BPM) or indicated
using one of many Italian terms that are more
interpretive. These include:
tOEBOUF
means ‘at a walking pace’
t7JWBDF
this means ‘lively’
t(SBWF
which means ‘slowly’
5JNFTJHOBUVSF
The time signature of a piece of music looks like
a big fraction at the beginning of the stave, after
the clef and key signature. It dictates the rhythm
of the tune. The top number tells a musician how
many beats there are in one bar of the music. The
bottom number indicated the length of the beat.
For example, in 4/4 time, there are four crotchets/
quarter notes in each bar. In 6/8 time, there are six
quavers/eighth notes in each bar.
U
V
X
Y
Z
i5IFUFNQPEJDUBUFTIPXTMPXPSGBTUBTPOH
TIPVMECFQMBZFEBOEDBOFJUIFSCFJO#1.PS
JOEJDBUFEVTJOHBO*UBMJBOUFSNw
Type of rest Note Length of rest
CFBUT
CFBUT
CFBU
BCFBU
144 Piano for Beginners
Chordsandscales
Get a happy sound with these scales
Major scales
Major scales are the first scales that many people
learn to play as they’re harmonically pleasing and
relatively simple – there are no accidentals to
contend with. To play a major scale with looking at
music, play the root note then follow these intervals:
tone, tone, semitone, tone, tone, tone, semitone
(TTSTTTS). The easiest to play is C, as it uses all the
white keys in order. Finger patterns are exceptionally
important when learning scales, and major scales
are a good place to get used to the best way to play.
For many of the simplest major scales – ie not too
many sharps and flats – you will need to tuck under
your thumb on the right hand and cross over your
middle finger on the left hand.
“Harmonically pleasing and simple – there
are no accidentals to contend with”
Db
A
Bb
B
C
Piano for Beginners 145
E
D
Eb
F
F#
G
Ab
146 Piano for Beginners
Chordsandscales
C#
A
Bb
B
C
The first of three minor scales
Natural minor scales
In a way, natural minor scales aren’t too far removed
from major scales. Take a natural minor scale – we’ll
use ‘A’ – then find its relative major by counting
three semitones higher – in this case it’s C. The
relative major’s key signature will be same for the
minor (so no sharps or flats), but you will start on
the root note of the natural minor. So A natural
minor would comprise A, B, C, D, E, F, and G – the
notes of C major but starting on A. B major is a scale
that uses all the black keys and get a bit confusing;
however, B minor is pretty simple. This is because its
relative major is D, which only has two sharps. So B
natural minor comprises B, C#, D, E, F#, G,and A –the
same notes as D major, although it starts on B.
“Take a natural minor scale then find its relative
major by counting three semitones higher”
Piano for Beginners 147
E
D
Eb
F
F#
G
G#
148 Piano for Beginners
Chordsandscales
C#
A
Bb
B
C
Try out these spooky-sounding scales
Harmonic minor scales
Harmonic minor scales are the same as natural
minor scales apart from one rather large difference.
The seventh note is raised by a semitone resulting
in an unusual interval of three semitones between
the sixth and seventh notes. This gives the scale
a distinctive, ‘spooky’ sound that will be easily
recognisable once you’ve played through the
scales a few times. Since it’s still a minor scale, the
key signatures follow the same rules as the natural
minor, ie the same as its relative major. So, if we take
D harmonic minor as an example (it has one flat in
its key signature as its relative major is F), its seventh
note, C, is raised by a semitone to C#, resulting in a
Bb to C# interval of three semitones.
“The seventh note is raised, resulting in an
unusual interval of three semitones”
Piano for Beginners 149
E
D
Eb
F
F#
G
G#
150 Piano for Beginners
Chordsandscales
Db
A
Bb
B
C
These are almost like two scales in one
Melodic minor scales
Melodic minor scales are interesting in that their
ascending form is different to their descending
form. On the way up, they are similar to harmonic
minors, except the sixth note is also raised by a
semitone along with the seventh. On the way down
it is the same as a natural minor scale. Remember
accidentals don’t need to be added after a bar line,
so make sure you check the scale’s key signature. C
minor has three flats – Bb, Eb, and Ab. The Eb is used
throughout the scale but because the sixth and
seventh notes are raised by a semitone, the Ab and
Bb are both raised to naturals. On the way down
they are flats, but the notation need not reflect
these notes as accidentals as the key signature rules.
“Remember that accidentals don’t need
to be added after a bar line”
Piano for Beginners 151
E
D
Eb
F
F#
G
Ab
152 Piano for Beginners
Chordsandscales
Simple and popular for a reason
Major chords
Basic major chords are incredibly popular in Western pop music, probably because many of them are easy to play and they give your songs a happy feel. These
chords contain the first, third, and fifth notes in the corresponding major scale. It’s worth noting that the ‘major’ isn’t often referred to when you see these chords
written down – just the letter.
A B B
F# G A
E E F
C D D
Piano for Beginners 153
The best way to get a sad sound
Minor chords
A basic minor chord will always give you a much sadder sound than a major chord. This happens because the third note in the major scale is ‘flattened’ in pitch by
one semitone. For example, ‘E’ is the third note in the C major scale (CDEFGAB), and this is flattened by a semitone to Eb, which ends up giving a C minor chord its
distinctive melancholy sound.
A B B
F# G G#
E E F
C C# D
154 Piano for Beginners
Chordsandscales
Improve your progressions with seventh chords
Dominant seventh chords
The chords that we have seen so far consist of the first, third and fifth notes of a scale, so naturally the next step is the seventh. A dominant seventh chord (shown
simply as ‘7’) is formed with the first, third, fifth, and flattened seventh notes of a scale. ‘B’ is the seventh note in the C major scale (CDEFGAB), so a C7 chord can
contain C, E, G, and Bb.
A7 B 7 B7
F#7 G7 A 7
E 7 E7 F7
C7 D 7 D7
Piano for Beginners 155
The perfect way to give your pieces a warm sound
Major seventh chords
Major seventh chords (maj7), are similar to dominant seventh chords, but they include the natural seventh note in the major scale, rather than a flattened one. For
example, Cmaj7 would feature C, E, G, and B, rather than the Bb from the dominant, as B is the seventh note in the C major scale. Using a major seventh chord will
give your tunes a warm, happy feel.
Amaj7 B maj7 Bmaj7
F#maj7 Gmaj7 A maj7
E maj7 Emaj7 Fmaj7
Cmaj7 D maj7 Dmaj7
156 Piano for Beginners
Chordsandscales
Jazz your songs up with some m7 chords
Minor seventh chords
Minor seventh chords (m7) use the flattened seventh note that we have seen in dominant seventh chords in addition to a flattened third note found in basic minor
chords. So Cm7 would contain C, Eb, G, and Bb. E and B are the third and seventh notes respectively of the C major scale, and they are both flattened here in order to
create the m7 chord.
Am7 B m7 Bm7
F#m7 Gm7 G#m7
E m7 Em7 Fm7
Cm7 C#m7 Dm7
Piano for Beginners 157
Add subtle variations with suspended patterns
Suspended chords
So far, all of the chords that we’ve looked at have featured the third note of their corresponding major or minor scale. Suspended chords (sus) don’t, replacing it
instead with either a second (sus2) or a fourth (sus4). So Csus4 would feature an F (the fourth note in the C major scale) instead of the E found in a major chord. Here
is a list of sus4 chords.
Asus2/4 B sus2/4 Bsus2/4
F#sus2/4 Gsus2/4 A sus2/4
E sus2/4 Esus2/4 Fsus2/4
Csus2/4 D sus2/4 Dsus2/4
Try
3 issues
for just
£5*
* This offer entitles new UK Direct Debit subscribers to receive their first 3 issues for £5.After these issues, subscribers will then pay
£25.20 every 6 issues. Subscribers can cancel this subscription at any time. New subscriptions will start from the next available issue.
Offer code‘ZGGZINE’must be quoted to receive this special subscription price. Direct Debit Guarantee available on request.This offer will
expire 31st August 2017.
** This is a US subscription offer.The USA issue rate is based on an annual subscription price of £65 for 13 issues which is equivalent to
$102 at the time of writing compared with the newsstand price of $15.50 for 13 issues being $201.50.Your subscription will start from the
next available issue.This offer expires 31st August 2017.
S
p
e
c
i
a
l
t
r
i
a
l
o
f
f
e
r
Exclusiveofferfornew
Enjoyed
thisbook?
For amazing offers please visit
www.imaginesubs.co.uk/icr
Quote code ZGGZINE
Try 3 issues for £5 in the UK*
or just $7.85 per issue in the USA**
(saving 49% off the newsstand price)
The ultimate
magazine for lovers
of everything Apple
Expert tutorials
Guides to GarageBand,OSX,and the pro apps,
as well as iPhone,iPad and third-party software
Inspirational features
In-depth creative and practical features on all
aspects ofApple products
Plus free downloads
Or telephone: UK0844 848 8401+ Overseas +44 (0) 1795 592 865
subscribersto…
About
the
mag
+ Calls will cost 7p per minute plus your telephone company’s access charge
YOURFREERESOURCES
Log in to filesilo.co.uk/bks-A15/ and download your tutorial resources NOW!
EVERYTHING
YOUNEED
TOFOLLOWTHE
TUTORIALS AND
CREATEGREAT
PROJECTS
OVER60TUTORIALFILESTODOWNLOAD
YOURBONUS
RESOURCES
ONFILESILOWE’VEPROVIDED
FREE,EXCLUSIVECONTENTFOR
PIANOFORBEGINNERSREADERS,
INCLUDING…
•Audiofilestoplayalongwith,helpingyou
tocompareyournewskillswiththe
original composition
•Learnleft-andright-handparts
separatelythentogether
•Sheetmusictohelpyoupractisespecific
chordsandscales
•Learnto playinthestyleofyourfavourite
musicalgenrewithourexamples
•Followthesetutorialsto quicklydevelop
yourpiano playing skills
PACKEDWITHFREE
PREMIUMCONTENT
Goto:http://www.filesilo.co.uk/bks-A15/
Helpfulaudiofiles
Sheetmusicforfree
160 Piano for Beginners
Playdifferentgenrestyles
FILESILO–THEHOMEOFPRORESOURCES
Arapidlygrowinglibrary
Updatedcontinuallywithcoolresources
Letsyoukeepyourdownloadsorganised
Browseandaccessyourcontentfromanywhere
Nomoretorndiscpagestoruinyourbookazines
Nomorebrokendiscs
Printsubscribersgetallthecontent
Digitalmagazineownersgetallthecontenttoo!
Eachissue’scontentisfreewithyourmagazine
Secureonlineaccesstoyourfreeresources
Discoveryourfreeonlineassets
Themostpopulardownloadsareshownin
thecarouselhere,socheckoutwhatyour
fellowreadersareenjoying.
Whetherit’stutorials,Photoshopactions,or
videoworkshops,categoriesmakeiteasy
toidentifywhatcontentyou’relookingfor
Findoutmoreaboutouronlinestores,and
usefulFAQs,suchasourcookieand
privacypoliciesandcontactdetails.
Ifyou’relookingforaparticulartypeof
content,likesoftwareorvideotutorials,use
thefiltersheretorefineyoursearch
Seekeydetailsforeachresourceincluding
numberofviewsanddownloads,andthe
communityrating
Discoverourfantasticsistermagazines
andthewealthofcontentandinformation
thattheyprovide.
ThefirsttimeyouuseFileSilo,you’llneedto
register.Afterthat,youcanuseyouremail
addressandpasswordtologin.
ThisisthenewFileSilositethatreplaces
yourdisc.You’llfinditbyvisitingthelinkon
thefollowingpage.
Piano for Beginners 161
HOWTOUSE
EVERYTHINGYOUNEEDTOKNOW ABOUT
ACCESSINGYOURNEWDIGITALREPOSITORY
Havingtroublewithanyofthetechniquesinthisissue’stutorials?Don’tknowhowtomakethebest
useofyourfreeresources?Wanttohaveyourworkcritiquedbythoseintheknow?Thenwhynot
visittheBookazinespageforallyourquestions,concernsandqualms.Thereisafriendlycommunity
ofexpertstohelpyouout,aswellasregularpostsandupdatesfromthebookazineteam.Likeus
todayandstartchatting!
facebook.com/ImagineBookazines
twitter.com/books_imagine
NEEDHELPWITH
THETUTORIALS?
ToaccessFileSilo,pleasevisithttp://www.filesilo.co.uk/bks-869/
01Followtheon-screen
instructionstocreate
anaccountwithoursecure
FileSilosystem,orloginand
unlocktheissueby
answeringasimplequestion
abouttheedition
you’vejustread.
Youcanaccess
thecontentfor
freewitheach
editionreleased.
02Onceyouhavelogged
in,youare freeto
explorethewealthofcontent
madeavailableforfreeon
FileSilo,fromgreatvideo
tutorialsandonlineguidesto
superbdownloadable
resources.Andthemore
bookazinesyoupurchase,
themoreyourinstantly
accessiblecollectionofdigital
content willgrow.
03Youcanaccess
FileSiloonany
desktop,tabletor
smartphonedeviceusing
anypopularbrowser(such
asSafari,FirefoxorGoogle
Chrome).However,we
recommendthatyouusea
desktoptodownload
content,asyoumaynotbe
abletodownloadfilestoyour
phoneortablet.
04Ifyouhaveany
problemswith
accessingcontentonFileSilo,
orwiththeregistration
process,takealookatthe
FAQsonlineoremail
filesilohelp@
imagine-publishing.co.uk.
162 Piano for Beginners
FREEDOWNLOAD
Everythingyouneedtoknow
tostartplayingthepiano
Piano
t0WFSUVUPSJBMGJMFT
t1MBZLFZTDBMFTBOEBSQFHHJPT
t.BTUFSUIFFTTFOUJBMDIPSET
t-FBSOUPQMBZJOEJGGFSFOUTUZMFT
t1MBZBMPOHXJUIUIFNVTJDBMOPUBUJPO
Onlineresources
MMQJBOPBOELFZCPBSEFTTFOUJBMTDPWFSFE
Understandingtheory
.BTUFSNVTJDUIFPSZBOEHFUUPHSJQT
XJUINVTJDBMOPUBUJPO
Helpdesk
'JOEUIFBOTXFSTUPGSFRVFOUMZBTLFE
RVFTUJPOTUPEFWFMPQZPVSTLJMMT
Playingthepiano
'PMMPXPVSHVJEFTUPHPGSPNSFBEJOH
NVTJDUPQMBZJOHDPNQMFUFTPOHT
Chordsandscales
5BLFBMPPLBUPVSDPNQSFIFOTJWF
DBUBMPHVFPGDIPSETBOETDBMFT
Gettingstarted
4FMFDUUIFSJHIUQJBOPBOEQFSGFDUUIF
CBTJDTXJUIPVSFTTFOUJBMHVJEF
Playinthestyleof…
3FQMJDBUFUIFTPVOEPGZPVSGBWPVSJUF
HFOSF
GSPNDMBTTJDBMUPCMVFT

Piano for Beginners 6th Edition.pdf

  • 1.
  • 3.
    Welcometo Making the decisionto learn a new instrument can be a whim or a long-standing ambition. Either way, picking up an instrument for the first time is a daunting feeling, as the scale of the task sinks in. This is particularly true if you have never learnt to play an instrument before, with all those technical terms, scales and notation marks to decipher before you have even played a single note.This new edition of Piano for Beginners is therefore an essential guide for piano and keyboard first-timers. Simplifying the process through step-by-step tutorials, this bookazine will help you lay solid foundations for years of enjoyment. From the correct way to sit at the piano to reading notation, we start with the basics before expanding your musical horizons with easy home recording and genre-specific tutorials.With a glossary of essential terminology, a list of chords and even access to free online resources such as audio files, Piano for Beginners really is your go-to guide as you get acclimatised to the musical landscape and hone your piano-playing skills. Piano
  • 5.
    Imagine Publishing Ltd RichmondHouse 33 Richmond Hill Bournemouth Dorset BH2 6EZ +44 (0) 1202 586200 Website: www.imagine-publishing.co.uk Twitter: @Books_Imagine Facebook: www.facebook.com/ImagineBookazines Publishing Director Aaron Asadi Head of Design Ross Andrews Editor in Chief Jon White Production Editor Jasmin Snook Senior Art Editor Greg Whitaker Art Editor Ali Innes Photographer James Sheppard Printed by William Gibbons, 26 Planetary Road, Willenhall, West Midlands, WV13 3XT Distributed in the UK, Eire the Rest of the World by: Marketforce, 5 Churchill Place, Canary Wharf, London, E14 5HU  Tel 0203 148 3300 www.marketforce.co.uk Distributed in Australia by Gordon Gotch Australia Pty Ltd, 26 Rodborough Road, Frenchs Forest, NSW, 2086 Australia Tel: +61 2 9972 8800 Web: www.gordongotch.com.au Disclaimer The publisher cannot accept responsibility for any unsolicited material lost or damaged in the post. All text and layout is the copyright of Imagine Publishing Ltd. Nothing in this bookazine may be reproduced in whole or part without the written permission of the publisher. All copyrights are recognised and used specifically for the purpose of criticism and review. Although the bookazine has endeavoured to ensure all information is correct at time of print, prices and availability may change. This bookazine is fully independent and not affiliated in any way with the companies mentioned herein. Piano for Beginners Sixth Edition © 2016 Imagine Publishing Ltd ISBN 978 1785 463 839 Piano
  • 6.
    Contents Guiding you everystep of the way and providing you with everything you need to start learning to read music and play the piano Gettingstarted 10 Theultimateguideto thepiano Unleash your musical talent 20 Howtositcorrectlyat thepiano Perfect posture is an essential task to master 22 Learnthewhitekeys Understand the natural keys on your piano 24 Learntheblackkeys Getacquaintedwiththeworldofflatsandsharps 26 Usingthepiano’spedals Advance your playing style Understanding theory 30 Whatismusicalnotation? The symbols that affect the way we play a piece 32 Introducingthestaves Thefivehorizontallinesthatenableustoreadmusic 33 Notesandtheirvalues Some of the different types of notes you’ll find 34 Howtoreadmusicalnotation Learn which notes go where 38 Understandtimesignatures Explaining beats and bars 40 Interpretkeysignatures Why they are needed and how to read them 42 Learnaboutledgerlines Gettogripswiththeseessentialpartsofnotation 44 Changenotelengths Learnhowthedurationofnotescanbemodified 46 Alteranote’spitch withaccidentals Learn what these quirky symbols mean 48 Navigatemusicnotation Time to get score savvy and stay on track 6 Piano for Beginners Give it a try Lookoutforthislogooneachpage, asitmeansthatanaudiofileis availableonlinetohelpyoumastera certaintutorial.
  • 7.
    110 RecordonaPC Learn aboutAudacity 114 Improveyourtechnique withapps Get creative with an iPhone or iPad Playinthestyleof We outline the various musical genres and sounds that can be achieved on your piano 118 Pop Pleasant progressions and simple melodies 120 Blues Abroadgenrewithafewdefiningcharacteristics 122 Jazz A passionate and diverse genre 124 TheClassicalperiod Rich, obvious melodies and simple patterns 126 TheRomanticperiod Expressing freedom and creativity 128 Contemporarypianomusic Fusing classical and pop Reference 132 Helpdesk Answering common queries 142 Glossary Musical terms explained 144 Essentialscales All the scales you need to know 152 Chordslist All the chords that matter 74 Learnaboutintervals Playing two notes at the same time 78 Understandingchords How to construct and play common chords 80 Usinginversions Achieve a different take on chords 82 Majorchords An essential tool for budding pianists 84 Minorchords The mood-swingers of your chord repertoire 86 Suspendedchords Shake things up and add some variation 88 Augmentedchords Add a bit of spice to your chords 89 Diminishedchords How to use them properly 90 Dominantseventhchords Introducing four-note chords 92 Majorseventhchords A warm, jazzy-sounding chord type 93 Minorseventhchords How to transform a plain minor triad 94 Usechordprogressions The first step towards writing a song 96 Left-handpatterns Use your left hand to support a melody 98 Learnarpeggios Break up chords to make your music flow Thenextstep 102 Gettogripswithrecording Start recording your very first masterpiece 104 Playthroughacomputer HookuptoaPCorMactoaccessnewsounds 106 RecordonaMac RecordconcertosfromthecomfortofyourMac 50 Controlthevolume withdynamics Inject more personality into your music 52 Setandchangethetempo Ensureyourjigsarejollyandyourballadsareslow 54 Addarticulationstonotes Play notes with character and style 55 Usemusicalornaments Learn about these extra decorations Playingthepiano 58 Warmupyourhands Limber up before you practise 60 Introducingmusicalscales Understand how scales are formed 62 TheCmajorscale A great first step for beginners 66 TheFmajorscale A scale that contains a black key 68 TheGmajorscale The major scale that has one sharp 69 TheDmajorscale Discover the scale with two sharps 70 TheAminorscales The scale with three formats 72 Dminorscales A minor scale with a flat Piano for Beginners 7 Throughout this book, you will see top-down images of a keyboard with the keys highlighted. The darker highlights show the keys played in the image, while the lighter highlights show the keys that need to be played in the step Notes and keys Middle C Darker highlights Lighter highlights Location courtesy of Music Is Life, Bournemouth “Deciding to take the first step towards discovering your musical talents is worthwhile at any age”
  • 8.
    “Learning to playan instrument is a rewarding journey and the piano is a great place to start” 8 Piano for Beginners
  • 9.
    Give it atry Lookoutforthislogooneachpage, asitmeansthatanaudioand/or videofileisavailableonlinetohelp youmasteracertaintechnique. Piano for Beginners 9 10 Theultimateguide tothepiano tChoosing the right piano tDifferent ways to play tTaking care of your piano 20 Howtositcorrectlyatthepiano 22 Learnthewhitekeys 24 Learntheblackkeys 26 Usingthepiano’spedals Gettingstarted Our ultimate guide and step-by-step tutorials will teach you all the basics, from choosing the right piano and sitting correctly to playing your first melody
  • 10.
    10 Piano forBeginners Gettingstarted D eciding to take the first step towards discovering your musical talents is worthwhile at any age. Learning to play an instrument is a rewarding journey and the piano really is a great one to start with. Although you’ll need plenty of time, practice and patience, the piano is a relatively easy instrument to master, which is why it’s a popular one to try to learn first. Many musicians find that after conquering it, the idea of learning other instruments isn’t as daunting. The piano has come a long way since it was invented, and alongside the traditional acoustic varieties, there are now digital pianos and portable keyboards. Learning to play the piano is the same on all three, but you’ll find some may offer more or fewer features than others, although this won’t have a dramatic effect on how you play while you’re still developing your skills. Regardless of which instrument you’re using, you can still pick up the basics in this beginner’s guide. So whether you want to be able to play the odd tune, learn a particular song or compose your own musical masterpiece, you’re in the right place. Join us and discover what the piano has to offer. In the following pages we’ll introduce you to the different types of pianos that are out there and help you get started in front of the keys. You’ll also discover how to read music and play with Theultimateguide tothepiano Unleash your musical talents and learn how to play scales, songs and masterpieces on the piano Throughout this book, you will see top-down images of a keyboard with the keys highlighted. The darker highlights show the keys played in the image, while the lighter highlights show the keys that need to be played in the step. The star shows where Middle C is. Notes and keys Middle C Darker highlights Lighter highlights
  • 11.
  • 12.
    12 Piano forBeginners Gettingstarted Acoustic pianos produce a naturally rich sound and are favoured by more accomplished pianists Acoustic pianos Acoustic pianos are considered a percussion instrument as felted hammers strike steel strings inside once you press down on a key to produce a note. The vibrations in the string then travel to a soundboard, which amplifies the music. Generally, the harder you press a key, the louder the sound. Professional pianists generally favour acoustic pianos as they feature up to eight octaves and create a more natural, fuller sound. Due to the way they are built, acoustic pianos do require some level of maintenance, which means you’ll need to have them tuned at least once every six months. This process involves tightening the strings to improve pitch. Although acoustic pianos are generally larger in size, there are different styles available, which vary in dimension. Acoustic pianos come in different shapes and sizes but largely fall under two main styles: upright and grand. Upright pianos are the smaller of the two as the interior strings are housed vertically, meaning it doesn’t require a large back like a grand piano, where the strings lay vertically. Although you can get slightly smaller varieties of upright acoustic pianos, they don’t differ too dramatically in size. Grand pianos on the other hand, although large, do come in varying sizes including small baby grand, slightly larger parlour grand and concert grand. The larger the back of the grand piano, the longer the strings, and so the richer the sound is that is produced. Of the two acoustic varieties, grand pianos tend to be the more expensive. Their beautiful build and design also makes them popular as centrepieces in large rooms. When compared to digital pianos, acoustic varieties seem to offer you a lot less for your money; however, the natural piano tones that are produced surpass those of an electronic model, which is why they are favoured by professional and traditional pianists. Different acoustic pianos What style of acoustic piano suits your style and needs? Pros Cons Richer and more natural sound quality Requires more space Up to eight octaves available Needs regular tuning and maintenance Beautifully designed Is not portable Is acoustic right for you? Pedals You can use the pedals on your piano to adjust tone. The left pedal (una corda) will soften the sound, and right pedal (sustain) lifts all the felt dampers inside while you play, which are usually used to stop sound Keyboard The keyboard on your acoustic piano features a total of 88 keys, 52 of which are white and 36 black. Traditionally white keys were made of ivory and black keys wood. Once you press a key, a hammer inside will strike the string to produce sound Piano lid Nearly all acoustic pianos will have a lid of some description. Make sure this is closed when you’re not playing as it’ll prevent dust getting in
  • 13.
    Piano for Beginners13 others. There are plenty of beginner-friendly tips and advice along the way as well that’ll help you improve and build upon your piano playing skills. So rest your hands on the keys and let’s get started! Buying your piano Before you make your first piano purchase it’s important you get a good understanding of what’s on offer and which style of instrument best suits your skills and needs. Pianos vary dramatically in size, style and price. Most beginners opt for straightforward electronic keyboards, which are cheaper in price, portable and don’t require as much space or maintenance. Electronic keyboards also include creative features such as sound effects and the ability to replicate other instrument tones. A step up from the electronic keyboard is a digital piano, which offers similar features but comes with weighted keys, which you’ll also find in the classic acoustic variety of piano. Like a keyboard you can create sound effects and most modern varieties of electronic piano even enable you to record the music you create. When it comes to the acoustic variety of piano, there are two main types: an upright and grand. Acoustic pianos use strings to make sound and don’t come with any electronic functions or features. They are also slightly larger in size and are generally more expensive. You can keep costs down by buying a second- hand piano but always give it a thorough check through before parting with your money. Ensure acoustic pianos are tuned and electronic features on the digital variety are working well; you should also run through the keys to check sound. If you’re thinking of buying online, visit your local music shop first to test out the different varieties of piano, which will help you make a better decision when it comes to committing to your purchase. Getting started Once you’ve set up your piano and you’re ready to play, you’ll need to ensure you’re in the correct position before you begin. Place your sheet music on the music rack and sit with an upright posture on the stool, at the middle point of the keyboard, in front of the Middle C key. If you’re sitting too low, you’ll need to extend the height of your stool or place a cushion on top so that you’re more comfortable and closer to the keyboard. Your feet should also be facing forward on the floor, more advanced piano players will use the pedals in this position to adjust tones and change sound quality while playing. Always ensure your hands can rest comfortably on the keys, without having to stretch your arms too far forward. All ten fingers should be rested on the white keys with your right thumb positioned on Middle C. This means that your right hand should be positioned as follows; thumb – Middle C, index finger - D, middle finger - E, ring finger - F Soundboard The string vibrations produce some level of sound initially but it’s the built- in soundboard that amplifies it so that it’s then audible to the audience and pianist playing. The soundboard will vibrate at the same frequency as the strings to do this Insides Acoustic upright and grand pianos have extremely complex insides – if something goes wrong with your piano, it’s best to get a trained professional to look at it Steel strings The strings inside a piano are made from steel; they vibrate once they are hit by the felt hammers, which are controlled by the piano keys that you press to play. Once you release a key, a felt damper will drop onto the string to stop the sound ©Thi nksto ck
  • 14.
    14 Piano forBeginners Gettingstarted Digital pianos come with some fantastic extra features that make playing and composing music easy Digital pianos Digital pianos share a lot of similar features to electronic keyboards. They are capable of creating sound effects and can also imitate other instruments. It’s even possible to record the music you play on them. Unlike keyboards, however, digital pianos come with weighted keys, replicating the feel of playing an acoustic piano. Larger digital pianos can also offer a full eight octaves like an acoustic and you may find that playing on one isn’t that different to using an upright or grand piano. The harder you press the keys, for example, the louder the sound that’s produced. However, the lack of strings in a digital piano means that the sound results won’t be as natural or rich, as they use sound chips and speakers to replicate a traditional piano tone. One of the great things about digital pianos, however, is their low maintenance, as they don’t require regular tuning and there are fewer things to go wrong with their insides. “You may find that playing on a digital piano isn’t that different to using an upright or grand piano” Input/Output Many digital pianos include a headphone jack for private practising and some even enable you to connect a mic. It’s also possible to directly record the music you play via USB Interface The user interface on most digital pianos is relatively easy to navigate. Through this you can control the piano’s volume, select different playing modes and experiment with available creative sound effects settings Keyboard All digital pianos come with weighted keys, which mimic the feeling of playing on an acoustic; the harder you strike a key the louder the sound. Larger and slightly more expensive models can also offer a full eight octaves Build and size The build and size of digital pianos can vary greatly – there are even some that are sized similarly to a baby grand piano. Most are shaped like the upright one shown here
  • 15.
    Piano for Beginners15 and little finger – G. Your left hand will need to be positioned an octave lower with your fingers positioned as follows: little finger – C, ring finger – D, middle finger – E, index finger – F and thumb on G. You’ll notice that there are two white keys between your left and right thumb, which are A and B. Don’t worry if you’re struggling with the key names – we have in-depth tutorials on them later in the book. If you’re a complete beginner, you can add removable stickers to the white keys. You’ll find it will help you locate the notes much easier while practising as most beginner-level sheet music uses these keys specifically. Simply use them as a guide while learning, then once you’ve got to grips with reading music and the correct hand positions you can remove them. Different ways to play The piano is a versatile instrument. With an extensive number of keys, 88 to be exact, there are endless sound possibilities. Using the right technique, and with plenty of practice, it’s possible to play any genre or style of music. Traditionally used for classical music, the piano can produce soft, soothing tones but is also capable of much louder and harder notes that are great for adding drama to a rock song or movie score. The piano is also widely associated with jazz genre where it’s often played as a solo instrument alongside the singer. At beginner level you’re likely to focus on playing scales and simple melodies but once you’re more confident in front of the keys, you can explore the music genres and begin learning songs that suit your musical style and taste. Fortunately there are some fantastic beginner-level music books out there that feature classic and more current sheet music. A lot have been simplified too, so you can learn the basic melody of a song without having to move too far up and down the keys. It’s a great idea to listen to the music that you’re learning to play too, as you’ll get a much better idea about how the song should flow and the timings you need. Reading music You can play 12 notes on the piano overall, seven of which belong to the white keys – C, D, E, F, G, A, B, and five to the black – C sharp/D flat, D sharp/E flat, F sharp/G flat, G sharp/A flat and A sharp/B flat. These notes repeat up and down the keyboard. If you have a full-size keyboard the first note on the left-hand side will be A. On the right-hand side of the keyboard the notes will sound higher in tone and on the left they’ll sound lower. Familiarise yourself with the keys and learn which notes they represent by playing simple scales. Practise scales regularly and eventually they will become a easy warm-up exercise before you play. Being able to read sheet music and really understand it is an important part of learning to play the piano, or any instrument for that matter. This Is digital right for you? Pros Cons Possible to record music you play Sound quality is not as impressive as an acoustic Low maintenance doesn’t need regular tuning Requires space Has weighted keys Is not cheap Speakers Unlike an acoustic piano that utilises strings and a sound board to produce music, a digital piano uses sound chips and speakers. When you press a key the sound chip determines the note, which is then played out through the speakers Pedals Despite their usually cheaper price, digital pianos will still come with a full array of pedal. However, even if yours doesn’t, there will still be space to connect an external sustain Maintenance As its inner workings are electrical, your digital piano is less likely to break. This also means it’s much easier to maintain, and you won’t need to open it up ©Thinkstock
  • 16.
    16 Piano forBeginners Gettingstarted does require patience but by taking a practical approach to learning, you’ll be able to pick it up in no time. You’ll notice that notes on sheet music appear along five horizontal lines, which have four spaces in between. This is called a stave or staff. On sheet music where two hands are required to play, two staves will be present. The top stave features a treble clef, which looks like a very ornate G. This represents the high keys, to be played with your right hand. The bottom stave features a bass clef, which appears almost like a backwards C; this represents the low keys that are played with your left hand. Every space and line on the stave represents a note on the keyboard. Get to grips with reading the top stave first as you’ll find most beginner-level sheet music primarily uses your right hand. Notes appear along the top stave in succession with Middle C and D positioned below the bottom line. The notes that sit on top of the five lines are as follows, E, G, B, D, F, which can be remembered as Every Good Boy Deserves Food. The notes in between the lines spell out ‘face’: F, A, C, E. The bottom stave, however, is different, with the notes on top of the lines, G, B, D, F, A – Good Boys Deserve Food Always and those in between, A, C, E, G can be remembered as All Cows Eat Grass. Run through them regularly and over time they will become second nature. You’ll soon find that you no longer need sheet music that has the letter markings on the notes. Practice and playing Practice is key to mastering any musical instrument and so it’s important to dedicate a set amount of time a week to doing so. Be firm with yourself and don’t get disheartened if progress is a little slow at first. Taking at least a couple of hours out a week to practise your scales and a particular song will help you improve dramatically. Consider playing the piano with others too; it will give you more of an incentive to get better. Once you begin to feel more confident in your piano-playing abilities, look into joining a band or playing music with a small group of friends. Having others around who are musically minded will inspire and encourage you to focus on developing your own skills. Learning a song with a group of people means you’ll also get more support, advice and help when it comes to reading the music, timings and getting a good rhythm. As the piano has an abundance of keys it can also be played by two people simultaneously, known as a piano duet. To do this, one person will need to be positioned on the left-hand side of the keyboard to play the low notes; they are known as the Secondo (second). The other person should be positioned to the right-hand side of the keyboard to play the high notes, known as the Primo (first). Specially printed sheet music can be purchased so that both the Primo and Secondo can play together. It’s a fantastic way to practise, have fun and develop your skills. Electronic keyboards are affordable, portable and offer some great digital features that are beginner friendly Keyboards Most budding pianists will learn the basics of piano playing on a keyboard. They’re not only the most affordable option if you’re looking to buy new, but they’re also much smaller than an acoustic or digital piano so don’t require as much space. They’re designed to be lightweight and portable, so you can also set them up easily if you’re practising on the go or going round a friend’s house. You’ll also find they offer some fantastic electronic features, including demo modes, sound effects and the ability to replicate other instruments. In addition to this, most keyboards come with a headphone jack, which is great if you want to practise in private. They differ to acoustic and digital pianos as they don’t offer as many octaves or weighted keys and sound quality is not as impressive. Volume control Unlike an acoustic piano whereby the harder you press the key, the louder the sound, on a keyboard you need to adjust volume manually on the interface. You can, however, purchase specialist volume pedals that enable you to adjust volume with your feet while you play Speakers Like a digital piano, a keyboard has speakers; however, these aren’t likely to be of the same quality. If you don’t like the sound out of the speakers, you should be able to connect your headphones up to your keyboard
  • 17.
    Piano for Beginners17 Pros Cons Lightweight and portable Doesn’t have weighted keys Reasonably priced Won’t have as many octaves Great electronic features Requires extra accessories Is a keyboard right for you? Pitch bend wheel Many modern keyboards feature a pitch bend wheel, which is sometimes located to the left of the keys. It can be used to adjust the pitch of the note you’re playing up or down. Practise using the wheel while you’re playing the keys with your right hand Digital features Electronic keyboards offer a fantastic range of digital features. You can select and create sound effects with the keys and even imitate other instruments, including percussion, brass and string instruments Keyboard The keys on your keyboard are made from plastic and are not weighted so only a light touch is needed to create sound. Although smaller keyboards offer a limited number of octaves, there are larger varieties that offer more Backing tracks If you’re getting bored of playing your keyboard, try playing along to some of the many backing tracks available on most keyboards. They will represent many different musical genres, from bossa nova to rock and roll Portability Keyboards normally have fewer keys than a digital piano and are made of plastic, so they’re lighter and therefore more portable. They’re great if you need to carry your instrument around Record Like digital pianos, keyboards offer you the opportunity to record what you play. They may also have a metronome so you can stay in time while recording ©Thinkstock
  • 18.
    There’s a fantasticrange of accessories available for your acoustic piano, digital piano or keyboard that will help maintain its performance and improve playing. Here’s a look at a few essentials Essential accessories Like most instruments you can purchase a range of useful accessories for your piano. Some will help maintain your instrument’s appearance and preserve the sound quality that’s produced, while others will help improve playing when you’re next practising or learning a new song. We’ve rounded up the top ten accessories out there for your acoustic piano, digital piano or keyboard. Take a look and see what you might need before you begin to play. Headphones Recommended buy: Gear4music – Roland RH-5 closed stereo headphones Price: £29/approx $45 URL: www.gear4music.com Most digital pianos and keyboards come with a built-in headphone jack. Use it to practise playing in private. Good quality headphones are essential for sound quality. Padded varieties are also more comfortable if they’re being used over long periods of time and will help muffle out background sounds around you. Piano stool Recommended buy: Quiklok – Keyboard stool BX-8 Price: £26.99/approx $49.99 URL: www.quiklok.it A good quality stool is essential if you’re practising or playing over long periods of time. One that comes with extra padding and the option to adjust its height is a bonus. Some varieties even double up as storage so you can keep sheet music and your Piano for Beginners book in one place. They are also able in a range of finishes. Piano cover Recommended buy: Gator Cases GKC-1648 Price: £19.99/$39.99 URL: gatorcases.com Preventing dust from settling on your piano will help to maintain its performance and reduce the amount of cleaning needed. You can purchase covers in a range of different sizes, fabrics and shapes to suit the style and size of your instrument. Some keyboard covers even double up as a carry case so you can take it with you on the road. Keyboard stand Recommended buy: Quiklok – Keyboard stand T/10 Price: £16.99/approx $39.99 URL: www.quiklok.it Not all keyboards come with a stand. Some stands come at a fixed height while others are adjustable, which is fantastic if you’re playing as part of a band and need to stand during a performance. They are also available in different colours, sizes and shapes depending on what suits your needs. 18 Piano for Beginners Gettingstarted
  • 19.
    Portable MIDI controller Recommendedbuy: KORG MicroKey 37 Price: £69/$99.99 URL: www.korg.co.uk If you have a laptop and you like to make music on the go, then you may want to check out a MIDI controller. Chances are your main keyboard won’t be too portable, so a small option like the KORG MicroKey is worth looking at. The keys are obviously a lot smaller, but you can hook it up to a laptop to keep the music flowing on the go. Piano polish Recommended buy: Gear4music – Piano polish 200ml Price: £2.99 (RRP £4.99) URL: www.gear4music.com Keeping your piano clean is an important part of caring for your instrument. After you’ve dusted it and wiped it down with a damp cloth, use a specialist piano polish to maintain the piano’s finish and appearance. Always remember to apply the polish to a clean soft cloth first and not directly into the piano itself. Sustain pedal Recommended buy: Gear4music – Casio SP-20 Sustain Pedal Price: £26.99 (RRP £34.99) URL: www.gear4music.com Some varieties of digital pianos and most keyboards don’t come with pedals but you can purchase them separately. A sustain pedal has the same effect as the right pedal on an acoustic piano, which lifts the dampers off the strings as you play to sustain the notes. Although digital pianos and keyboards don’t have strings, the sustain pedal can still have the same effect. Microphone Recommended buy: Blue Microphones Snowball Price: £49/$99 URL: bluemic.com/snowball/ Regardless of the model of your keyboard/piano, you can use a microphone to record your favourite tunes – originals or covers. Although prices for microphones can go well into the thousands, you can get a good desktop USB microphone for around £70. You can plug it into your computer and record directly onto there. Piano for Beginners 19 “They’ll help improve playing when you’re next practising or learning a new song” Metronome Recommended buy: Wittner Piccolo metronome Price: £39.99/approx $55 URL: www.wittner-gmbh.de Metronomes are used to help you keep tempo while playing. Many digital ones make a clicking or bleeping sound to do this and traditional varieties feature a swinging pendulum. You can also purchase them in various shapes, sizes and finishes so you can purchase one that matches the style of your instrument. MIDI to USB adaptor Recommended buy: USB MIDI Adaptor kit Price: £20.99/approx $30 URL: www.thecablestore.net If you want to connect your keyboard or digital piano up to your computer, then you will need to do so via USB. However, if you have an older keyboard, it may not have a USB connection. It should have two MIDI inputs, though. With two MIDI cables and this adaptor, you will be able to hook up your keyboard with ease.
  • 20.
    20 Piano forBeginners Gettingstarted B efore you start learning how to play the piano, the first thing you need to do is ensure you have the correct sitting position. Posture is very important for piano players, as it ensures you have the maximum level of flexibility to reach all the keys, and it also helps you learn the proper technique for striking the keys. On the path to perfect posture, one of the major things you’ll need is a proper seat. If you’re slumped down below the piano you’ll struggle to learn the basics, while if you’re propped high in the air you won’t be able to hit the keys properly. You don’t need anything really expensive; the best thing to have is an adjustable seat, but you can also just use pillows and cushions to alter your height. But don’t be fooled into thinking that you’ll have to keep a rigid position as you play the piano. The guide to perfect posture is to have a position that is not only comfortable and effective, but one that allows a degree of flexibility while playing. A good piano player doesn’t just use their hands, they swivel their hips and move their body to make sure their playing style is at its optimum. Here we’ll talk you through the steps to achieving the perfect posture so that, when you eventually come to sit down in front of a piano, you’ll be ready to learn the basics. Howtositcorrectly atthepiano Perfect posture is an essential task to master on the road to becoming a good piano player The path to perfect posture Here we’ll show you how to get the optimum position while sitting at the piano 01The correct height When sitting at the piano you want your elbow and arm to fall freely from your shoulder. Your forearm should be parallel to the floor, and your arm should be at an angle slightly more than a right angle. Adjust your seat to get the right height. 03Arc your hands Your hands should be forming an arc at the keys. Your fingers need to be almost pointing down and not striking the keys flatly, while your wrists should be in line with the rest of your arm. Adjust your seat if you need to. 02Sit forward Make sure you’re sitting far enough forward on your seat so that you can move your torso, but back enough to feel stable. Your elbows should be slightly in front of your torso when your hands are on the keys. 04Place your hands If you’ve followed the previous steps, you should now be in the right position. It may feel a bit odd but you will get used to it. Place your thumbs on the same note (we chose Middle C) and make sure you feel natural. Location courtesy of Music Is Life, Bournemouth
  • 21.
    Piano for Beginners21 At the piano Here we’ll show you the correct way to sit at the piano Top tip Don’t slump A tendency of beginners is to immediately slump at the piano as it feels more comfortable. While you might prefer this at first, in the long run it will hinder your piano playing. Try your best to keep yourself in the correct position. Choosing or adjusting a seat is key when playing the piano Different seats Stool A major benefit of a stool or bench is that you can’t lean back. Use pillows or cushions to raise yourself if you are too low. Adjustable stool An adjustable stool is perfect for playing the piano. You can alter the height and you’ll also be able to keep your back straight and your hips flexible. Hands As in the picture, ensure that your hands form an arc over the piano. This will enable your fingers to be precise when striking the keys Arms The arms should almost be forming a right angle. Your upper arm should fall freely from your shoulder, while your forearm should be parallel to the floor Wrist Beginners often like to flatten their wrists as it feels more comfortable. Try not to do this; your wrists should be in line with your arm Seat Sit far enough forward on your seat that you can move your hips, but not so far forward that you’re falling off. Be both flexible and stable Chair Make sure your chair is stationary. If it is too low, use hard cushions and pillows to prop yourself up. Sit forward to keep your back straight. ©Think stock Location courtesy of Music Is Life, Bournemouth
  • 22.
    22 Piano forBeginners Gettingstarted 01 Find Middle C on the right hand With your right hand, locate three white keys in the middle of the piano surrounding two black keys. Place your thumb on the leftmost of these keys; this is Middle C. To the right are D, E, F and G. If you have a full-sized 88-key keyboard, Middle C is the 24th white key you’ll count from left to right (the fourth C). 02 Play a right-hand melody Once you’ve found where Middle C is, you can have a go at your first basic melody. Try the following tune, which is the first line of Mary Had A Little Lamb, and see how you get on: E-D-C-D-E-E-E-D-D-D-E-E-E. Once you’ve mastered that, see if you can work out the rest. O nce you’ve perfected your posture in our previous tutorial, you’re almost ready to start playing the piano. The next step is to learn the names of the white keys, where the different keys are located, and how to remember them. The white piano keys are known as the natural keys, because they sound a natural note as opposed to the sharps and flats of the black notes, which we’ll explain in the next section. The first thing you’ll want to do is find Middle C. In the centre of the piano you should see three white keys surrounding two black keys. The furthest left of these three keys is Middle C. As a starting point for beginners put the index finger of your right hand on this key. From here you should find it comfortable to press the keys above Middle C. Now do the same with your left hand, this time pressing the keys below Middle C. There are seven natural notes on a piano: C, D, E, F, G, A, B. You’ll notice that the pattern of two black keys surrounded by three white keys then three black keys surrounded by four white keys repeats itself several times up the keyboard. The keys run in alphabetical order from A to G. The three white notes surrounding the two black keys are C, D, and E, and the four white notes surrounding the three black keys are F, G, A and B. So, if you count eight keys right from Middle C (or, indeed, eight keys left) you’ll be back at C. The musical distance between these two notes is what’s known as an octave. Learnthe whitekeys Understand the natural keys on your piano or keyboard before you start Learn to play two basic melodies with these steps Your first melodies “The white keys are known as the natural keys, because they sound a natural note as opposed to the sharps and flats of the black notes”
  • 23.
    Piano for Beginners23 03 Find Middle C with the left hand Again find Middle C, but this time place your left thumb on it. To the left of this key the notes are B, A, G and then F. If you keep going left, you’ll arrive at C an octave lower – you won’t have enough fingers to go that far though, so you’ll have to move your wrist. 04 Play a left-hand melody Let’s try the last line of Mary Had A Little Lamb with the left hand. Put your left little finger on Middle C (so you’re essentially in the same position as step 2) and have a go at the following: E-D-C-D-E-E-E-E-D-D-E-D-C. Make sure only your little, ring and middle fingers move as they’re the only ones that need to. Let’s take a look at how the white keys work on a keyboard The white key names Middle C From Middle C the keys move up and down alphabetically. So, to the right it’s D, E, F, G, A, B and then C again. To the left it’s B, A, G, F, E, D and then C an octave lower One octave up If you go eight notes (including Middle C) to the right you’ll be an octave higher. You’ve actually just done your first scale; C to C is known as C major, but more on that later One octave down Go eight notes (including Middle C) to the left and you’ll be an octave lower. The three white keys around the two black keys are C, D and E, while the four white keys around three black keys are F, G, A and B Top tip Repeating note names Once you’ve learnt one set of eight white keys, you’ve learnt them all! The pattern repeats all way up and down the keyboard. The white key to the left of two black keys will always be C, no matter where you are on the keyboard. Between C and C Play the white keys between these two C notes (C, D, E, F, G, A, B, and C again) and you’ll have played the C major scale. Play these notes in any order and it should sound good Middle C C C D D E E F G G A A B B F
  • 24.
    24 Piano forBeginners Gettingstarted 01 Black key technique The first thing to get right is your technique. You don’t really want to use your thumb on the black keys. Instead, try to only use your middle three fingers. This makes it easier to transition between white and black. There will be times when this is unavoidable, but until this is the case, try to keep your thumb away. 02 Play with the right hand When playing the black keys you might need to tuck your thumb under your fingers to hit a white key. Try this now – play Middle C with your right index finger, C# with your middle finger and then D with your thumb. Later on, you will find this technique useful when performing scales. T he black keys on the piano are known as the flat and sharp keys. In technical terms this means they make a note half a step (or a semitone) lower and higher respectively in pitch from their corresponding white key. You will notice that the black notes are grouped in twos and threes, and taking the time to remember which is which is also a useful way to remember the white keys’ names. Each black key acts as both a sharp and a flat. A sharp is a note that’s half a step higher than the corresponding white key, and the flats are half a step lower. First, let’s focus on moving to the right from Middle C. The black key immediately to the right is C sharp (C#). This is half a step up from C. Take another half step and you’ll be at D. Working in order from Middle C to the right the sharps are C#, D#, F#, G# and A#. B# and E# are C and F respectively, although they are rarely referred to in the former manner. Always remember that sharps are to the right of a note. Now find Middle C again and this time go left. The first black key is B flat (B ). Working down in order from Middle C the flats are B , A , G , E and D . C and F are B and E respectively, although again they are not usually denoted this way. Flats are always to the left of a note. Take some time learning what the names of the black keys are and see if you can recognise the difference in pitch with their corresponding white key. Learnthe blackkeys Get acquainted with the world of flats and sharps right here Let’s learn the names of the black keys and try a short melody Playing the black keys “A sharp is a note that’s half a step higher than the corresponding white key” Top tip Tones and semitones Tones and semitones (or steps and half steps) are common terms to define distance between notes. A semitone is the distance between each key on the keyboard. Each sharp or flat will be a semitone away from its corresponding white key. The distance between E F and B C is also a semitone as there are no black keys between them.
  • 25.
    Piano for Beginners25 03 Play with the left hand Let’s try the same technique with the left hand. Place your left thumb on Middle C. Now play B with your index finger, B with your middle finger and then A with your thumb. Practise until it feels natural. Now your thumb is on A, it frees up the rest of your fingers to play lower notes, both black and white. 04 A quick scale Let’s attempt a scale. Starting with your index finger on your right hand and, working from C to F, see if you can play the white and black keys in a fluid motion. Use your thumb for D, and end with your fourth finger on F. Once you’ve mastered that, go back down again using the same fingers. Let’s make sure we know what the black keys are called Learn the names “Black keys to the left of white keys are flats” White keys If you need help, remember the three white keys around the two black keys are C, D and E, while the other four are F, G, A and B Sharps Any black key to the right of a white key is a sharp. From Middle C up an octave these are C#, D#, F#, G# and A# Flats Black keys to the left of white keys are flats. From C down an octave these are B , A , G , E and D C# D C# D D# E D# E F# G F# G G# A G# A A# B A# B
  • 26.
    26 Piano forBeginners Gettingstarted P edals on a piano are used to create sounds that you could not otherwise achieve with your hands alone. There are two standard foot pedals on a piano. On the left is una corda, and on the right is sustain. Some pianos have an additional middle pedal called the sostenuto. However, this is not used very often. The una corda pedal is played with your left foot and is known as the soft pedal. It is used to enhance softly played notes and is designed for notes that are required to be played quietly. It will not be as effective in softening louder notes. The right pedal is the sustaining pedal, also known as the damper pedal, which is used by your right foot. It is used to elongate the sound of a note so that it continues to resonate even when you have let go of the key. The resonance will continue until you lift off from the pedal. This effect is very useful when you need notes to overlap in harmonies or otherwise. The final middle pedal, if your piano has one, is the sostenuto. It is controlled with your right foot and works similarly to the sustain pedal, but it only sustains certain notes. Hit the notes you want to sustain and depress the pedal; any other note will sound the same. This allows sustained notes to be played alongside regular notes. Usingthe piano’spedals Advance your playing style by getting to grips with the pedals on the piano How to use the pedals Learn when to depress and when to lift from the pedals 01Get your feet in position You’ll need both your feet to use the pedals. You may need to adjust your posture slightly in order to reach all the pedals, but try to retain the perfect posture we outlined earlier. 03Be gentle When you release from a pedal, do so gently. This not only makes the notes sound better, but it also prevents an audible knocking noise created by the pedal suddenly lifting upwards. 02Keep your heel on the ground When a pedal is played your heel should remain on the ground while the pedal is depressed with the ball of the foot. Don’t leave the floor with your heel in a ‘stomping’ manner. 04Make sure you practise Even if your piece of music does not require it, practise with the pedals. Try to transition smoothly between depressions and lifting, and learn how each pedal can be best utilised.
  • 27.
    Piano for Beginners27 What the pedals do Find out when and how to use the pedals A great option if you play a keyboard Separate pedals Many modern electronic keyboards are able to replicate the sound of a pedal on a regular piano. To do this the pedal is usually supplied externally. It plugs into the keyboard and simply flicks a switch on the MIDI keyboard. A pedal of this sort is known as a footswitch. Keyboards can have multiple footswitch jacks to enable you to use multiple pedals to produce the same sounds as the three pedals we’ve outlined above. If you’re using a pedal with a keyboard, try to stick to the same techniques we’ve discussed elsewhere. As before, keep your heel on the floor (if possible with your pedal) and depress and release the pedal in a gentle manner. This will ensure that, even when using an electronic keyboard, you can retain the same soft or deep sound of a pedal on a regular piano and make your music sound all the better. Sustain The sustain pedal continues the sound of a note after you have released the key, which makes the note sound deeper, warmer and more intense Sostenuto This pedal allows you to add staccato-like effects to your playing while sustained notes resonate in the background ©Thinkstock “Keep your heel on the floor and depress and release the pedal in a gentle manner” Una corda This soft pedal allows you to make sounds softer and alters the timbre of notes so that they sound more distant When to use them? When the sustain pedal needs using, you may see an ornate ‘Ped’ mark underneath the music. An asterisk-like symbol is used when you need to stop sustaining. Alternatively, there may be a direction at the start of the music to use the pedal throughout
  • 28.
    “Notation is away of composers expressing to musicians how to play a piece of music through both pitch and rhythm” 28 Piano for Beginners Understanding theoryLearn how to read musical notation and find out about the different symbols and notes you’ll see in sheet music 30 Whatismusicalnotation? 32 Introducingthestaves 33 Notesandtheirvalues 34 Howtoreadmusical notation 38 Understandtime signatures 40 Interpretkeysignatures 42 Learnaboutledgerlines 44 Changenotelengths 46 Alteranote’spitchwith accidentals 48 Navigatemusicnotation 50 Controlthevolumewith dynamics 52 Setandchangethetempo 54 Addarticulationstonotes 55 Usemusicalornaments
  • 29.
    Piano for Beginners29 Give it a try Lookoutforthislogooneachpage, asitmeansthatanaudioand/or videofileisavailableonlinetohelp youmasteracertaintechnique.
  • 30.
    30 Piano forBeginners Understandingtheory Whatismusical notation? Throughout this section we will begin to look at what musical notation is, how to read it and symbols that affect the way we play a piece M usical notation is a way composers express to musicians how to play a piece of music through both pitch and rhythm. Music is written on a stave which consists of five lines. Notes can be placed either in the spaces or on the lines themselves and represent one of the seven natural notes in music. Musical notes are separated by vertical lines called bar lines. Preceding the musical notes, you will usually find a clef and time signature, and sometimes you may see either a sharp or flat representing a key signature within a particular piece. Above the stave you will almost always find a tempo marking either through a number or an expressive term which will indicate the speed of the piece. Underneath, a composer could add dynamic markings. These show the volume at which they want a particular section of music played. “Musical notation… how to play a piece of music through both pitch and rhythm” Our guide to the most common notation Understanding musical symbols 4 4 # # # 01Clef There are various types of clef that you can use in a piece of music. This one is called the treble clef. It tells us the pitch of the notes that have been written. See page 32 for more information. 02Key signature This will always appear at the beginning of the piece of music. By placing the symbols either in the spaces or lines, it tells us the notes that we should play as flats or sharps. See page 40. 03Time signature At the start of a piece of music you will see two numbers, one on top of the other. The top number tells you how many beats in a bar there are; the bottom tells you what type of beat it is. See page 38. =130 04Tempo marking There are several ways of indicating the tempo at the beginning of a piece of music. The two most common are via a written word (usually in Italian) or in this case by how many crotchet beats per minute there are. See page 52. 05Dynamics These tell you what volume to play the particular phrase of music at. The two most common are f (forte) which is loud and p (piano) which means quiet. Adding an m (mezzo) before either of the two symbols means moderately. See page 50. 06Notes The notes in a strip of music are the symbols that tell you both the rhythm and pitch of the piece of music you are playing. See page 33. Top tip Practise and repeat Learning to read music can be quite challenging at first, but the most important thing is practice and repetition. Through these two basic principles, in time you will be able to play through music without having to think about where the notes are first. 4 4 # # # . . . . . . =130 01 03 06 06 07 02 04 05 08 09 . . .
  • 31.
    Piano for Beginners31 10Tenuto A single horizontal bold line above or below a type of musical note is a tenuto marking. This explains to us that we should be playing that note to its fullest value. 11Crescendo/ Decrescendo Similar in look to an accent, but larger and placed under a piece of music, this is a dynamic marking that tells us either to get louder (as in the example) or quieter (the opposite of the example). These could be replaced by the words cresc. or decresc. 12Accidentals These symbols are placed in front of the note and will indicate a pitch that is not already shown in the key . . . 07Staccato A dot above a note is a staccato marking. This tells us to play the note slightly shorter than we would normally be directed to. 08Accent When you see a horizontal arrow above a note, this is known as an accent. Through this symbol we need to emphasise a note slightly more, making the sound slightly louder. Not to be confused with a decrescendo, which is below a note. 09Bar line The bar line divides the notes in to the correct number of beats as indicated by the time signature. There are several different types, including repeats and double barlines, which are used at the end of a piece of music. . . . . . . 1. signature. The three most common types are flats , sharps , and naturals . 131st and 2nd time lines These will appear above certain bars during a repeated section where, during a repeat, the piece indicates a different ending. 14Repeat bars A double barline with two dots means you should repeat the music between the two sets of repeat signs. When it’s only a left-facing sign, repeat from the beginning. 15Tie Two notes of the same pitch can be tied together with this symbol. The second note should not be played again, but must remain heard. # . . . . . . . . . . . . # 1. 2. 13 14 15 12 05 10 11 . . . . . . Learning to read music with a friend is a great way to speed up your development
  • 32.
    32 Piano forBeginners Understandingtheory The different staves The clef dictates which stave is which S taves (or staffs) are some of the most important parts of musical notation – without them we wouldn’t have anywhere on which to put the notes we need to play! Staves consist of five horizontal lines with four spaces, with a clef on the left-hand side. Although there are several different clefs throughout the world of music, as pianists we only need to concentrate on the treble clef and bass clef. Usually, the treble clef and the stave that it sits on dictate the notes that will need to be played by the right hand, while the bass clef tells you the notes that the left hand should play. However, pianists need to play both right and left-hand parts at the same time, so both treble and bass are joined together by a brace (the curly bracket to the left of the beginning of the staves) to create a grand (or great) stave – the treble stave on top, the bass stave on the bottom. Although many exercises will feature just the single stave, actual piano music will nearly always be written on the grand stave. While the top stave will almost always have its notes played by the right hand and the bottom stave the left, it is not uncommon for both staves in a grand stave to carry the same clef. If a composer wants a passage of music with both hands playing high up the keyboard then it’s a lot easier to write the music for two treble staves. Introducing thestaves The five horizontal lines that enable us to read music “Although there are several different clefs, as pianists we only need to concentrate on the treble clef and bass clef” The bass clef stave This clef marks the lower of the two staves on the grand stave, and its notes will often be played by the left hand. It’s also known as the F-clef, as the two dots next to the curve are bisected by the note F on the bass stave. Popular instruments whose notation is commonly written on this stave include the cello, double bass and trombone. Note that it’s possible for a right-hand stave to carry the bass clef should the music dictate it. The treble stave The treble clef stave will usually be the upper of the two staves in a grand stave, and the notes on the treble stave will likely need to be played by the right hand. The treble clef is also known as a G-clef as the curl of the clef passes through the note G on the treble stave – if you’re drawing one, this curl is the best place to start from! The clef is also used by several other popular instruments, including the violin, flute and recorder. The grand stave Both the treble stave and bass stave combine to create the grand or great stave – the stave used for almost all Western piano notation. You can tell if the two staves are a grand stave by the curly braces to the left of the stave. This signifies both parts must be played simultaneously. The piano isn’t the only instrument that uses a grand stave. Although many aren’t diverse enough to necessitate both staves, instruments such as the harp, marimba and celesta use it.
  • 33.
    Piano for Beginners33 Introducing the notes Notes and their lengths in simple time N otes are the foundation on which Western musical notation is based – without them we wouldn’t know what to play or how long to play it for. We know what note to play by its position on the stave, which we’ll address in the next tutorial, and we know how long to play it for by the type of note it is. Most notes consist of the note head (the oval- shaped dot) and a stem either pointing up from the right of the head, or pointing down from the left. The only note you’re likely to see at this stage that doesn’t have a stem is the semibreve/whole note, which is just the note head (see below for more). Quavers/eighth notes and shorter (ie semiquavers/ sixteenth notes) also have a ‘flag’ attached to them, which will always be attached to the right of the note, regardless of its stem direction. As a rule of thumb, single note heads below the middle line of the stave should have an upward-pointing stem, and any above should point down. Stems on single note heads on the middle line can go either way. So what do these note types tell us? Well, they dictate how long the pianist should play the note for. For example, if a piece of music has a minim/half note on the middle line of the treble clef stave, the pianist should play a B for two beats. Here we run through some of the most common notes that you will find throughout this book. Notesand theirvalues Some of the different types of notes you’ll find on the staves “We know what note to play by its position on the stave and we know how long to play it for by the type of note it is” 03Crotchet/quarter note A crotchet or quarter note lasts for one beat, so four would make up a whole bar in 4/4 time. If you are having trouble getting to grips with how long notes last for, it may be best to start with crotchets. 04Quaver/eighthnotesemiquaver/sixteenthnote A quaver/eighth note is half the time value of crotchet/quarter note, and a semiquaver/sixteenth note is half of a quaver. More than one of these in a row can be ‘beamed’ together so the score doesn’t get littered with stems. 01Semibreve/whole note These notes last for four beats which, in a piece of music in 4/4 or common time, is the whole bar. They don’t have a stem; rather, they are just a note head resting on the stave. 02Minim/half note Minims/half notes last for two beats, so two minims in a piece of music in 4/4 time would take up the whole bar. They can be distinguished from other stemmed notes thanks to the ‘empty’ note head.
  • 34.
    34 Piano forBeginners Understandingtheory I f you want to become a successful pianist, you should be able to read musical notation. You should be able to transcribe those dots and squiggles on the stave into beautiful music that flows from your fingertips. Fortunately, once you have got the basics of notation down, it’s not too hard to get to grips with. The ultimate goal is to be able to sight read – just take one look at the sheet music and transfer those notes immediately. We’ve been through what the different types of staves are and what sort of notes you’ll find on them, now we need to discover how their positioning on the stave affects what notes you should play. Every white key on your keyboard corresponds to a dot on either a line or a space of one of the staves. For example, if you see a minim/half note on the first line up of the treble clef stave, you should play the E note after Middle C for two beats. If the next note is on the line above it, then you should play a G. If it’s in the space between these two lines, then you should play an F. However, the same notes do not transfer to the bass stave. If you see a minim on the first line up for the bass stave, you should play a G rather than an E. You have to learn two different systems, which can certainly be tricky at first. But with the help of some handy mnemonics and learning tools which we will run through in this tutorial – not to mention a fair amount of practice – you will be reading music in no time. Howtoread musicalnotation Learn which notes go where and use simple mnemonics to remember their positions on the staves What the staves correspond to The piano’s keyboard Middle C The most important note on the keyboard doesn’t rest on either stave, it occupies a ledger line The next C This note is also named C, but it is not Middle C. Every 12 semitones the A-G pattern recycles – there are eight different Cs on a full-size keyboard Bass stave white keys Each of these white keys has a line or space on the bass stave. The G rests on the bottom line, and the A rests on the top line Treble stave white keys Each of these white keys has a different place on the treble stave, whether it is on a line or a space. The E rests on the bottom line, and the F on the top. Notes higher or lower will rest on ledger lines outside of the stave
  • 35.
    Piano for Beginners35 Usually, notes written on the treble clef stave will be played by your right hand, and they often (but not always) carry the main tune of the piece. Strangely, the most important note on the keyboard, Middle C, doesn’t actually belong on either the treble or bass clef – it rests on a ledger line on both, which we will talk more about in the future. The first line up carries the E note, which is two white keys to the right of Middle C. The following eight white keys each occupy either a space of a line on the treble clef stave – up to the F note on the following octave. The notes don’t stop there, however. Each subsequent note will either rest in or above ledger lines that, in theory, can go as high as the sheet music will allow. Ledger lines can also go below the stave – like Middle C – but any below the A note to the left of Middle C will probably be played on the left hand, or the stave’s clef will change to the bass clef. The treble stave notes What your right hand will be playing The lines The notes on the lines of the treble clef stave are, from bottom to top: E, G, B, D, F. There are many ways to remember this, but most use a simple mnemonic like Every Good Boy Deserves Fruit. You may find it easier to remember if you make up your own – especially if your name begins with one of those letters. If that fails, remember that the B note is ‘Bang’ in the middle. All together The white notes all have their special place on the stave, so how do we know to play black notes? Well, they’re either preceded by a symbol or they’re dictated by a key signature, which we’ll go through later. Some of the black notes have different names, but are in fact the same note. F sharp (F#, the black note immediately following the F in FACE) is the same as G flat (Gb), for example. Also included here are the D and G notes, either side of the treble clef stave. The spaces Although you could think of one, there’s no need for a mnemonic to help you remember the notes for the spaces of the treble clef stave. From bottom to top, they spell out the word ‘FACE’, which even rhymes with ‘space’! Note that the C in FACE is not Middle C – it is the C note one octave above it. The F in E, G, B, D, F (ie the top line of the stave) is one octave above the F in FACE (the first space from the bottom). E G B D F F A C E D E F G A B C D E F G
  • 36.
    36 Piano forBeginners Understandingtheory It might not be the star of the show, but if composers ignored the left-hand parts of piano music it would be very boring indeed! The bass clef tends to carry all notes to the left of Middle C (although ledger lines enable higher notes to belong on the bass clef stave too). But, like the treble clef, Middle C actually rests on a line outside of the stave, on a ledger line. On this occasion it rests on the first ledger line above the bass stave. The first line up on the bass clef stave is G, ten white notes to the left of Middle C. It goes all the way to A, which is only two notes below Middle C. Of course, ledger lines enable notes to go below the bass stave too. Left-hand parts might not always be as intricate as right-hand parts, but it’s still important that you learn which notes are which so you’ll be able to provide vital accompaniment to your melodies. The bass stave notes Don’t forget the left hand The lines The lines on the bass stave read G, B, D, F, A. As a mnemonic, you could continue the theme we used for the line notes on the treble stave, with Good Boys Deserve Fruit Always. If you think you may get confused between the two, then thinking up your own will help you remember. Middle C is a ‘line’ above this stave, two white notes to the right of the A on the top line. All together There’s no mnemonic for all the notes together on the bass stave but if you remember that the first space up on the stave is A, then you can use alphabetic order to work out the notes going up the stave – just remember to return to A after reaching G! Although theoretically you can use ledger lines to play any note on the bass stave, you’re unlikely to see anything past the G after Middle C (a note that’s three ledger lines high). The spaces Unfortunately, the four notes in the spaces on the bass stave don’t spell out any body parts this time – ACEG. You can, however, remember them with All Cows Eat Grass, or something less animal-based if you would prefer! If remembering them from bottom to top isn’t doing it for you, there’s nothing wrong with trying top to bottom – it’s whatever works. The C in ACEG is the C an octave below Middle C. G B D F A A C E G F G A B C D E F G A B
  • 37.
    Piano for Beginners37 As with musical notes, sometimes in music we need times of silence. These are represented by different symbols called rests Rests in action… Introducing rests How to use rests in music There are several different types of rests. Each rest relates to its note equivalent. This chart shows the most common types. Type of rest Note Length of rest 4 beats 2 beats 1 beat 1/2 a beat “There are several different types of rests. Each rest relates to its note equivalent” 01 4 4 02 03 04 01Crotchet/ quarter rest Crotchet/quarter rest for one beat. 02Quaver/eighth rest Quaver/eighth rest for half a beat. 03Minim/half rest Minim/half rest for two beats (note it sits above the line). 04Semibreve/ whole rest Semibreve/whole rest for one beat (note this rests underneath the line). In music where the time signature is the rests can be used in this way: 4 4 An example of music How it looks in practice Rests This squiggly symbol is crotchet/quarter note rest. This means that no music is to be played for a beat. See below for more Stacked notes More than one note sharing the same stem means that they are to be played at the same time Beamed quavers/eighth notes These four notes are quavers/eighth notes. They’re worth half a beat each, so the four together make up two beats The notes These notes are both As, one octave apart. The treble stave note is the A five white keys to the right of Middle C; the bass stave note is the A two white notes to Middle C’s left. Remember FACE and All Cows Eat Grass!
  • 38.
    38 Piano forBeginners Understandingtheory A time signature will always be found at the beginning of a piece of music directly after the key signature. It is very important as it tells us exactly how to divide the beats of the bar, in turn making it so much easier to read a piece of music. There are two main types of time signature: simple time and compound time. Here’s a bit more about them. Simple time Simple time is a signature where the main beat is divided into two equal beats. For instance, in 4 4 time, the main beat is a crotchet/ quarter note, and this can be divided in two quavers/eighth notes. The most common forms of simple time signature are 4 4, 3 4 (most often used in waltzes) and 2 4 (considered a march beat). Compound time Compound time, much like simple time, is where the main beat can be divided into three beats. The lowest number is most commonly an 8. For example, in 6 8, where the main beat is a dotted crotchet/quarter note, this can be split into three quavers/ eighth notes. You’re likely to see one of these signatures in a ballad or jig. Understand timesignatures There are many different ways of changing the beats of the bar through time signatures, and each has its own distinct feel and style “There are two main types: simple time and compound time” What do the numbers mean and why are they important? Explaining time signatures Time signatures comprise two numbers, one on top of the other. The top number (also known as the numerator) will indicate how many beats are in a bar, the bottom number (the denominator) will tell you what type of beat it is. The most common numbers found at the bottom of a time signature are 4 (crotchet), 8 (quavers), and 16 (semiquavers). The numbers in time can also be replaced by a symbol that looks like a C. This is called common time, but also tells us that there are 4 crotchet beats to a bar. 4 4 4 4 4 4 6 8 12 8 9 8 2 4 3 4 4 4 2 4 3 4 6 8 . Type of beat Number of beats in the bar Simple time Compound time is mainly used for marches and polka music. are most commonly found in various types of folk music. where the pulse is 3 crotchet beats to a bar is essentially used for waltzes. or common time (C), is the most widely used of the time signatures and is used in a variety of music including pop and rock. is quite common in slower blues music and, again, also used in folk music. Understand exactly what is meant by dots and ties Dots and ties A dot tells you that you add half the value of the note to its original value. For example, the dotted crotchet ( . ) is 1 + ½ =1½ beats. A tie tells you to add two note values together. For example, a crotchet plus another crotchet would be two beats and look like this: . You would most likely use a tie when you need a note to carry over into the next bar. If a minim doesn’t fit in a bar, then you can tie two crotchets on either side of the bar line. Top tip Stress the beat In all time signatures, the first beat of the bar is usually a stressed note. In time signatures, using four beats in a bar ( , ), the third can also be stressed, although these notes are not always louder or more important. 4 4 12 8
  • 39.
    Piano for Beginners39 “We have used a combination of both crotchets/quarter notes and minims/half notes to total the four beats required” Beats in a bar 01First bar In the first bar we have used four crotchets/quarter notes, each worth one beat, to complete the four beats needed. 02Second bar The second bar uses two minims/ half notes, each worth two beats, which will once again total the four we are after. 03Third bar In the third bar, we have used a combination of both crotchets/quarter notes and minims/half notes to total the four beats required. 04Fourth bar Alternatively, we can fill an entire four-beat bar with a semibreve/whole note to get exactly the same effect, as shown below in the fourth bar. If we take as an example, there are several ways in which notes can be used in each bar 4 4 01 02 03 04 1 2 3 4 4 4 Time signature examples Common time signatures seen throughout the book 3/4 time This time signature dictates that there are to be 3 crotchets/quarter notes to a bar. A dotted minim/half note will take up the whole bar as it lasts for 3 beats: 2 beats of the minim/half note and 1 beat for its dot, which adds half of the note’s original length. 4/4 time The most common time signature, 4/4 time consists of four crotchet/quarter note beats. As long as the number of beats in a bar totals 4, you can have whatever combination of notes you please – a semibreve/whole note will take up a bar on its own. 6/8 time 6/8 time comprises six quaver/eighth note beats in a bar, which we have done here in the second bar of our example. Emphasis is placed on the first and fourth beats, which means it’s perfect for upbeat jigs and, with a slower tempo, ballads.
  • 40.
    40 Piano forBeginners Understandingtheory K ey signatures are shown at the beginning of a piece of music and are either a series of sharps or flats. You will see a key signature immediately after the clef in a piece of music, and this saves the composer from having to add them after each required note. They explain two things; firstly, the key the piece is in and secondly, which of the notes you play as either sharps or flats. The order that sharps and flats are placed in a key signature will always remain the same. There are two mnemonics that we can use to help us remember these orders on a treble clef stave. For sharps we can use: Interpretkeysignatures Explore the role of key signatures in music, learn why they are needed and how to read them “Key signatures are shown at the beginning of a piece of music” ## # # ## # F C A B G D E Father Charles Goes Down And Ends Battles Battle Ends And Down Goes Charles’ Father For flats we can use: So, how do we work out a major key from the key signature? If there are no sharps or flats, it’s C major. For sharps, you must look at the last one in the signature. If you move it one semitone up it will be the first note and the name of the major key. The example below is D major. For flats, you have to remember that F major has one flat (Bb). For all other key signatures using two or more flats, the penultimate flat will tell you the name of the major key. The penultimate flat in this example is a B. This key signature is Bb major. ## Last sharp It’s all relative Changing to minor The sound of the piece of music will tell you if it is a major (happy) of minor (sad) key. You can work out the name of the relative minor key to a major key by looking at the sixth note of the scale. A relative minor will have the same key signature as its major key. This example of C major shows A as the sixth note, so C major’s relative minor is A minor. 1st 6th B A G F E D C Penultimate flat Top tip Accidentals Don’t think that just because you’re playing or composing in a specific key signature that you need to use those sharps and flats. You can use accidentals to play notes that don’t belong in the signature. An accidental is a little symbol – either of a sharp, flat or natural – that overrules what the key signature dictates for the duration of that bar.
  • 41.
    Piano for Beginners41 “Some musical notes may contain either a sharp, flat or natural sign in front of them that may be different from the key signature” Identifying key signatures Here is a recap on what we have learned so far Keys Key signatures in action 01Key signatures using sharps Sometimes you might see a sharp (#) in the key signature. It will be either placed on a line or on a space of the stave. This tells you to raise the note by one semitone. This signature has one sharp (F), so the piece is in G major or E minor. 02Key signatures using flats Alternatively there may be a flat sign at the beginning of the music. Again, this can either be in a line or space, but this time you lower the note by a semitone. This key signature has one flat, so the piece is either in F major or D minor 04Using accidentals in a piece of music Some musical notes may contain either a sharp, flat or natural sign in front of them that may be different from the key signature. This tells you to change that note according to the sign. 03Adding naturals into key signatures You may see a natural sign ( ) in a key signature. This happens most often when a piece of music changes key. This sign cancels either the sharp or flat used in the previous key signature. #4 4 #4 4 4 4 #4 4 Key signature A key signature will be found at the beginning of a piece of music or can also be changed half-way through A flat A flat can again be found in both the key signature or a note and lowers it by a semitone Naturals A natural sign will cancel either a sharp or flat on a note within a piece A sharp A sharp can be found either in a key signature or on its own, and raises a note by a semitone # # # #4 4
  • 42.
    42 Piano forBeginners Understandingtheory W hen you’re looking at a piece of music to play on the piano, you’ll notice that the treble clef and the bass clef are joined together with a bracket on the left-hand side. This is called the grand stave and makes it possible for you to read the music to play on the keyboard with both your left and right hands simultaneously. However, as there are more notes on the piano that can fit on the treble, bass or even grand stave, we need ledger lines to help. These are lines that work to extend either the treble stave or bass stave’s five lines in order to represent notes that appear either above or below the stave. For example, Middle C appears below the five main lines of the treble clef, yet it appears above the five main lines of the bass clef. So, to help you recognise the note, a ledger line is placed through the notehead, spaced equally relative to the lines in the main stave. Middle C is then placed on the ‘imaginary’ line above or below the stave. Many other notes will appear in your sheet music with ledger lines. Much higher notes will appear above the treble stave, notes in the middle of the range will appear on ledger lines in the middle of the grand stave and very low notes you’ll see drop down below the bass stave. Learnabout ledgerlines Get to grips with these essential parts of music notation with our simple step-by-step guide Line it up How to recognise, play and use ledger lines 01Middle C The best place to start is to find Middle C. This is the first note to be placed on a ledger line below the treble stave or above the bass stave. On our example, you can see that Middle C can appear in two locations, but it’s the same note. 03On the bass clef If you take a look at the bass clef, you’ll see that ledger lines will be present below the stave after the note F, which rests beneath the last line of the bass clef’s five. These notes can go rather low. 02On the treble clef Ledger lines on the treble clef begin to crop up after G, which rests above the top line of the stave. Work out which note to play by checking its position on the ledger line and lines below it. 04On the piano Think about the notes on the bass clef (plus ledger lines) as keys on the left of the piano keyboard, the ledger lines in the middle as notes in the centre, and notes on the treble clef as notes on the right of the keyboard. G A B C D E F G F E D C B A G F
  • 43.
    Piano for Beginners43 On the keyboard See how notes on ledger lines translate to notes on your piano Signs you’ll see to keep things simple Octave clefs Too many ledger lines can get confusing, so if the music calls for notes that are very high or very low in pitch, the composer can use different clefs to help. If you see the number 8 above a treble clef or below a bass clef, this means that the notes must be played an octave higher or lower respectively. If the notes need to be really high or low, a ‘15’ can be used above or below the clefs. Our two examples actually tell the pianist to play the same notes, despite the different places on the staves. On the ‘15’ example, the C notes are in Middle C’s position on the stave, but is actually the C two octaves higher and lower. Down low This note with two ledger lines is in fact C. Going from left to right along the keyboard, it’s the second C you’ll see – two octaves below Middle C Middle C – bass clef The most important note on the keyboard can be notated on both staves. On the bass stave Middle C is positioned one ledger line above the stave Middle C – treble clef One ledger line below the treble stave is where Middle C can be found too. When it appears here it is usually played by the right hand Up high You will often see ledger lines above the treble clef stave. This note is A (the second A above Middle C) and it rests on the first ledger line above the stave Top tip Which hand to use? If you see Middle C on a ledger line below the treble stave, play it on the piano with your right hand. If it has a ledger line above the bass stave, play with your left hand.
  • 44.
    44 Piano forBeginners Understandingtheory T o properly understand what notes that use dots and ties mean, you first need to brush up on signatures and note duration. The pace of a piece of music is governed by its time signature. You can see this symbol at the start of any stave, right next to the treble or bass clef. It is usually two numbers such as 4/4 placed on top of one another, but it can differ. The stave is divided up into bars, and so the time signature defines the type and amount of notes (so how many beats) that each bar contains. Different notes have different durations. A 4/4 time signature means that a bar needs to contain note values in each bar that combine to equal 4 beats, for example four crotchets/quarter notes. This is where dots and ties come in. Both work to alter the length of a specific type of note. An ‘augmentation dot’ is, rather neatly, a small dot that appears next to a note and instructs you to increase that note’s duration by half. For example, if you saw a dotted crotchet/quarter note, you would need to play the length of the crotchet/quarter note plus half of that duration again (so a half of a crotchet/ quarter note would be an eighth of a semibreve/ whole note). Ties, on the other hand, work to merge notes of the same pitch. They appear as curved lines which link notes together and can let the duration of notes travel across barriers, such as bars. Changenotelengths Learn how the duration of notes can be modified with dots and ties, and how they fit within multiple time signatures Dots and ties examples A more in-depth look at duration, dots and ties 01Remember note duration First is a semibreve/whole note. Two minims/half notes make a semibreve/ whole note, so two crotchets/quarter notes make a minim/half note. Notes smaller than crotchets/quarter notes have flags, and each flag halves the value. 03Tied notes You can see how the tie joins the two notes over a bar. You play tied notes as one long note instead of separately. This example features two crotchets/quarter notes tied together – this enables notes to carry on across bars.   02Dotted notes Here is a dotted minim/half note, which lasts three beats, as the dot extends a minim’s value by half. Another crotchet/quarter note is added in to complete the bar’s four beats for the 4/4 time signature. 04Different time signatures This example shows dots and ties in 4/4 and 6/8 time signatures. Notice how the dots and ties extend a note’s length and then the note durations add up in the bars according to the specific signature. “Dots and ties work to alter the length of a specific type of note”
  • 45.
    Piano for Beginners45 Dots and ties in action Discover how these little music markings make a difference Adding extra dots means extra time Double-dotted notes Once you understand dotted notes, double-dotted notes are easy. The second dot simply extends the note by a further half of the first dot. If a minim/ half note is worth two beats, then a dotted minim/half note would be extended to three beats; a double-dotted minim/ half note would be worth three and a half beats. Look at our examples to see how different note durations could fit into bars of 4/4 time. Triple-dotted notes are also used in notation, which makes a note 1 7/8 of its duration. You probably won’t come across it too much! Top tip All tied up As well as the duration of notes, ties can also be used to carry over accidentals. These are symbols that appear next to notes that tell the reader to play a note sharp, flat or natural. See the next page for more. Dotted minim/half note This is probably the most common dotted note, as it lasts for three beats in simple time. In 6/8 time such as this piece, it takes up the whole bar Tied up This minim/half note is tied up to a quaver/eighth note, making this D last a total of five beats in compound time, or 2.5 beats in simple time 6/8 time In this example of a popular nursery rhyme, a 6/8 time signature is used. This means that there are six beats of quavers/ eighth notes per bar Dotted crotchet/quarter note The dot on this crotchet/quarter note extends the note’s duration by half, meaning that it is now extended by a further beat in 6/8 time
  • 46.
    46 Piano forBeginners Understandingtheory T he term ‘accidentals’ is given to little symbols that turn a note into a sharp or flat, or back to a natural. Essentially, the symbols tell you how to modify the pitch of the note. Flat lowers the pitch by one half step/ semitone and sharp raises the pitch by a half step/ semitone. You’ll see these symbols to the left of note in question, and you will also notice them clinging on to the treble and bass staves between the clef and the time signature. This is what is known as the key signature. Key signatures tell musicians which key the tune is played in, and refer to the sharps and flats that are to be used throughout the piece – you’ll need to memorise the ones to play from the signature. If you’ve learnt the different scales, you will be able to recognise key signatures much faster. For example, if the music tells you that the key is G major, you will know to use all of the notes from the scale of G major, including F sharp. All key signatures except for C major/A minor have sharps and flats in them. The signature itself will have the little sharp or flat signs on the corresponding line of the stave for that note. Another accidental is the natural. When this is next to a note it cancels out the sharp or the flat instructed by the key signature or prior accidentals, so you should play the natural note, ie the white key. Alteranote’spitch withaccidentals Learn what these quirky symbols mean and whip your sharps and flats into shape Sharps, flats and naturals Master using accidentals in just a few very simple steps 01Simple symbols Here are the basic symbols for sharp, which looks like a hash symbol (#), flat, which looks like a ‘b’, and natural, which looks like a box with a stick at alternate corners. These appear next to notes and in key signatures. 03Playing with flats In this example the symbols are on the B line and the E space on both clefs, instructing you to play a B flat and an E flat every time you see a B or an E in the music. G flat is not in the key signature, so an accidental must be used. 02Key it in Notice the key signature next to the clefs. The symbols are on the F and C lines to tell you that these notes are sharps. G sharp is not in the key signature, so an accidental must be used if you want to notate it. 04Natural symbols Here, F and C are played as sharps. However when you see the natural symbol, you play the white key. You should play C natural for the duration of the bar, so there are two C naturals in the second bar, even though there’s only one symbol.
  • 47.
    Piano for Beginners47 Accidentals in action See accidentals on the page as they help the music come alive What do you get when you double your sharps and flats? Doubling up A double flat is signified by using two flat symbols (‘bb’), and the double sharp symbol looks like an x. Whereas a flat or sharp alters a note’s pitch by one half-step/semitone, you’ll find that a double flat or double sharp alters the note by a full step/tone. In our examples, Gbb is the same as F natural because it’s two semitones (a tone) lower, while Gx is the same as A natural as it’s two semitones higher. Top tip Enharmonic equivalents On a piano, look at the black key between C and D. This is C#, as it’s a half step above C. But it’s also a half step below D, so it can also be called Db. This is an enharmonic equivalent. C naturals These notes would be C sharps, but the natural sign means you must play C naturals. Unless dictated otherwise, the rest of the Cs in the bar – such as the following note – are naturals. This resets after the bar line, though A tricky bar The first note here is a C sharp, as a bar has passed since the C natural before it. However, the second note is C natural as it a carries a natural accidental. If the next note had no accidental it would be C natural, but the sharp sign means it’s C sharp D major/B minor Here you can see the key signature of D major/B minor. It tells you to play two sharps throughout the music, which are F# and C# “A double flat or double sharp alters the note by a full step (two half steps)” Back to sharps Although we had a C natural in the previous bar, since the bar has finished we’re back to obeying the key signature. This note is C sharp C D E F G A B C D E F G A B
  • 48.
    48 Piano forBeginners Understandingtheory L earning to read music is like learning a different language. There are so many different directions, most of them in Italian, and it can get confusing when you’re faced with a page of music peppered with markings and symbols. It can get especially sticky when certain tunes require you to double-back on yourself and repeat sections over and over. Where do you start from and how do you know what to repeat? The good news for beginners is that once you understand the theory behind all this melodious jiggery-pokery, you’ll realise that all it takes is the memorising of a few key attributes to keep you flowing through the bars. The first aspect to grasp is bar lines and what different ones mean. Then codas and segno signs step in. These symbols, alongside some Italian directions that we will cover in more detail soon, will give you a clear idea of what notes and bars to repeat and when. The last things that you’ll need to recognise when navigating your way around a piece of sheet music are first and second time lines. These bars show you when there are alternate endings to a tune or part of a tune. In time and with a bit of practice, you’ll know exactly what you need to play and where. It’s best to think about these symbols as more like road signs on a stave. They’ll point you in the right direction and then you’ll be playing beautifully in no time. Navigatemusic notation Time to get score savvy and stay on track through notation with repeats and endings Repeats and endings Get to grips with the bare essentials of what to play, when and where 01Repeat bar lines These types of bar line instruct you to repeat parts of the music. Start-repeat bars have dots on the right and end-repeat have dots on the left. Play bars 1–3, repeat bars 2-3, then simply carry on. 03DS and DC Complementing the symbols are the Italian phrasings dal segno (DS) which means ‘from the sign’ (which is the Segno symbol), and da capo (DC) which means ‘from the beginning’. These can be accompanied by other phrases. 02Coda and segno These symbols are markers, used alongside Italian terms to show you where in the music to play from or jump to. The coda symbol looks like a cross through a circle and the segno symbol looks like a crossed S with two dots. 04Further instructions D.C. al Fine means you should go back to the start until you reach the word ‘Fine’ (pronouned feen-ay). Once you get to Fine the piece will then end. If the D.C. al Fine instruction is not accompanied by Fine then just play until the end.
  • 49.
    Piano for Beginners49 Skipping about the stave The key elements to recognise for musical repeats Playing musical repetition and alternate endings is easy Time bars Another form of repetition comes in the form of first and second time bars. These are numbered brackets that appear above the notes and change the ending of a repeated passage. The first time the passage is played you play the notation under the first time bar. Then when the passage is repeated, you skip the notes in the first time bar and only play the notes in the second time bar. They don’t just come in 1. and 2. form either. For example, you would use 1. 2. 3. and 4. to play something through four times yet only use a different ending the fourth time. Top tip Keeping it simple The Italian abbreviations are simpler to use than English, eg the phrase‘DC al coda’ essentially means‘repeat from the beginning, until you reach a coda symbol (or phrase al coda) then jump forward to the next coda symbol to continue playing’. Repeat bars When you see this style of bar line, repeat all of the music either from the beginning or that you can see sandwiched between the two start- and end-repeat bars Double repeat bars This is simply a start-repeat and end-repeat bar sitting back-to-back on the stave. It signifies the end of one repeat phrase but also the beginning of another Time bars These first and second time bar lines indicate alternate endings. When you see these, you play the music as normal and then play the notes under the first time bar “First and second time bars change the ending of a repeated passage” Alternate endings See the repeat bar? Once you’ve played the notes under the first time bar, you play the repeated phrases, skip the first time bar and finish with the second time bar
  • 50.
    50 Piano forBeginners Understandingtheory W hen you start to read music, all those dots and symbols on the page can look confusing. But as you get more confident, you can then start to put more ‘oomph’ into your music when you come across dynamics. Essentially, musical dynamics control the volume of a piece. They are Italian words that are abbreviated or symbolised alongside the notes on the stave and are just one way that the composer is telling you to inject more feeling and personality into a song, rather than just routinely playing the notes off a page. The basic dynamics are forte (f) and piano (p). These mean loud and quiet respectively. However there are plenty more variations, for example pianissimo (pp) means very quiet and fortissimo (ff) means very loud. The word ‘mezzo’ is often added on to these, which means moderate, so mezzo-forte (mf) means moderately loud. Symbols are also used. A crescendo is symbolised with a and means ‘getting louder’. Similarly, a diminuendo () means getting quieter. Check out our table of the most common musical dynamics to learn. As musical instruments have a limit to just how loud or quiet they can sound, you don’t want to play your loudest when seeing a forte symbol, only to turn the page and realise that the piece escalates to fortissimo and you cannot play any louder. Controlthevolume withdynamics Inject more personality into your music by learning to read and play using dynamics Master dynamics Get to grips with dynamics for soft, soothing melodies or clanging compositions 01Static instructions For directions such as piano (p) and forte (f), all notes should be played at that volume until further instruction. Here, the instructions get louder each bar, from mezzo forte (mf), to forte (f) and then fortissimo (ff). 03All change Quick changes in volume are marked with instructions like sforzando (sfz), which is used for a sudden burst with an accent. In this example, the first notes are played softly (pianissimo) and the sforzando note bursts out at the end. 02Dynamic transitions Instructions such as crescendo and diminuendo mean that the music should gradually begin to change. The example above is a more gradual example than in Step 1. The right hand should get louder as the piece goes on. 04It’s all relative You need to interpret the dynamics of the music and look at the piece’s context, mood and style to gauge how loudly or softly you play. Remember it’s about volume and not to be confused with ‘articulation’, which deals with expression.
  • 51.
    Piano for Beginners51 A dynamic sound Take a look at musical dynamics doing what they do best There are plenty more dynamic directions to get your head around Different types of dynamics We have covered the most basic and widely used dynamic instructions but there are plenty of other ones that you’ll come across. Some of these are real tongue-twisters. If you see pppppp on the stave, this means pianissississississimo, or ‘as softly as possible’. There are also combined markings such as pianoforte (pf) which means ‘soft and then immediately loud’, or mezzoforte (mfp) meaning ‘start moderately loudly then instantly drop to a softer volume’. There are also symbols that will affect dynamics, such as accents, and sometimes the dynamic direction will just be written out in plain English. Top tip Where on the stave? On musical scores for instrumental parts, you will see all of the Italian dynamics symbols placed below the staves. However if you look at the score for a vocal part you’ll notice that the dynamics are noted above the stave. Diminuendo The diminuendo () instructs the musician to play the notes gradually quieter until another instruction is given. Along with a crescendo, these symbols are sometimes referred to as ‘hairpins’ Fortissimo This piece needs to be played very loudly to start, thanks to the fortissimo (ff) direction. However, this is followed by a diminuendo transition, so it should get quieter Crescendo These diverging lines denote a crescendo, so the piece needs to get louder until the lines stop. You may also see a crescendo direction written as ‘cresc.’ Sforzando After the crescendo builds the volume, it ends with a sudden burst of loudness as instructed by this sforzando mark Symbol Name Description Crescendo Getting louder Diminuendo Getting quieter ppp Pianississimo Extremely quiet pp Pianissimo Very quiet p Piano Quiet f Forte Loud ff Fortissimo Very loud fff Fortississimo Extremely loud mf Mezzo forte Medium loud mp Mezzo piano Medium quiet fz Forzando Begin note loudly with strong accent sfz Sforzando Loud and accented
  • 52.
    52 Piano forBeginners Understandingtheory A nother aspect of music that helps bring the notes to life is tempo. The word comes from the Latin word ‘tempus’ meaning ‘time’, and indicates to the musician how fast or slow the music should be played. It can also direct the mood or feel. You’ll see the tempo marked at the top of the first stave, and it’s effective throughout the piece unless the composer states otherwise. There are two ways that tempo can be expressed. The first is in beats per minute (or BPM). This is a rather precise measurement, and you can use a metronome to help you keep in perfect time. As a time signature tells you the number of beats in each bar, the tempo tells you the speed at which to play these beats. At the top of the stave, you will see a particular type of note (eg a crotchet/quarter note) with the BPM value next to it. This means that the crotchet/quarter note is specified as the beat, and the number (eg 120) is the number of beats that must be played per minute. The other way of directing tempo is by a series of Italian phrases which are much more interpretive. Just like the Italian phrases that deal with a music’s dynamics, you will come across many phrases that indicate the pace or mood for the music. Check out the table below-right for the most common terms. Setandchange thetempo Ensure your jigs are jolly and your ballads are slow and beautiful by learning the essentials of musical tempo Speed it up or slow it down Some key tempo phrases and symbols that you should know 01Beats per minute To determine which type of note signifies one beat, you can generally look at the bottom number of the time signature. Here, in 6/8 time signature, one quaver/eighth note equals one beat, so there needs to be 140 of these a minute. 03Back to the start As well as instructions, there are also tempo phrases to direct you. In this example you can see the words ‘a tempo’. This means that from that point you should continue to play the music at the original speed. 02Written directions Here you can see the directions ‘rit.’ and ‘accel.’ which are abbreviations of the Italian words ritardando (getting slower) and accelerando (getting faster). These give an approximate flavour of the intended speed at which to play. 04Tempo symbols There are some symbols that are tempo directions. This eye-like example is a fermata. It appears above a particular note and instructs the player to hold the note for as long as the interpretations of the musician or conductor allows.
  • 53.
    Piano for Beginners53 Keep the beat A snippet of tempo directions doing what they do best Learn these and set yourself up for the future Common tempo directions In addition to some of the more flamboyant Italian tempo directions, there are a select few that you will come across time and time again. Concentrate on these to begin with, and you will be off to a good start. There are also phrases that can link tempo instructions together, for example molto means ‘very’, so you may spot molto vivace which means very lively. You may also come across moderato, which as you may guess means ‘moderately’, for example moderato vivace. “There are phrases that can link tempo instructions together” Top tip Set the mood As well as general directions, there are plenty of Italian terms that indicate both the mood and the tempo of a musical arrangement. Some good examples are appassionato (passionately), misterioso (mysteriously) or tenerezza (tenderly). Accelerando In our example, you should get faster throughout bar 2; however, you’re likely to see this instruction for several more bars Back to normal An accelerando or ritardando instruction will often be accompanied by an ‘a tempo’ one. This means to return the original tempo of the piece Define the style You can also gain a very good idea of the composer’s intention for the style or mood of the piece simply by looking at the tempo directions Fermata There are symbols that can dictate tempo. Here the power is in the player’s hands with a fermata, so these notes can be extended for as long as desired Word Meaning Adagio Leisurely Allegro Fast and lively Andante Moderate, walking pace Grave The slowest pace Lento Slow Poco a poco Gradually Presto Very fast Sostenuto Sustained
  • 54.
    54 Piano forBeginners Understandingtheory W hen you’re reading music, alongside being given general direction for the whole piece and technical instructions on what notes to play at what time, you will also come across markings which tell you how to play individual notes in terms of style. No matter what it is, you still need to know what kind of emphasis to put on it. This is where articulations come in. These small symbols are found either above or below an individual note, depending on the position on the stave. Articulations can alter the way you play each note as well as create relationships between the notes themselves. Instructions such as staccato (shown by a small dot, but be careful not to confuse this with a ‘dotted note’) can tell you to play the notes in a detached and ‘clipped’ manner. Conversely, when you see the markings for legato (lines which tie notes of different pitches together – but different to ‘ties’ which connect notes of the same pitch) you know to slur the notes, with no audible spaces. Some symbols direct you to add accents to a note, and there are some articulations (such as sforzando, or ‘sfz’) that deal with volume and are considered as dynamics. There are also articulations that cross the border into tempo territory, such as a fermata. Addarticulations tonotes Play notes with character and style by familiarising yourself with articulations Time to articulate Play each note perfectly as you master the use of these musical characters 01Staccato A dot beneath (or directly above) a note instructs you to play it staccato, which means in a detached manner. This is then taken further with stacatissimo, which is symbolised by a small triangle beneath (or above) the note. 03Accents When you spot these little guys, they’re telling you to put some extra force on that one note. A normal accent (bar 1) has the triangle pointing right, but for a stronger accent (bar 2), you’ll see it reaching upwards. . 02Legato Here the notes are all joined with a curved line. This signifies legato, or ‘slurring’. When you see notes written like this, play the notes together in a long, lazy drag, with no gaps between notes until the end of the slur. 04Tenuto A simple line above or below the note instructs you to play the note for its full length. The note is to be separated from surrounding notes, which could mean that it’s emphasised or played louder.
  • 55.
    Piano for Beginners55 I n the same way that dynamics, tempo and articulations all layer up to create marvellous music, ornaments simply add to this with little quirks and fiddly bits that enhance the tune. They’re easy to recognise and you might find that the hardest part is getting your fingers around them on the piano keys! Ornaments are noted as small symbols above specific notes. There are four kinds that you need to know. Start with a trill, which is really simple – play the note and the note above it alternately in quick succession. Next is a turn, which is also easy. It’s four notes: the note above, the main note, the note below and the main note again. Then there’s a mordent, which has three notes. There are two kinds of mordent – upper and lower. For upper mordents you play the main note, then the note above it, then the main note once more. Lower notes have the same principle; you play the note below the main note in the middle. The last ones are grace notes. These are single-note ornaments that appear on the stave as ‘mini notes’ next to a main note. There are two categories: acciaccatura and appoggiatura. All ornaments must be played to the duration of the note they’re assigned to. For example, a trill on a quaver/eighth note must last no longer than the quaver/eighth note’s beat. Usemusical ornaments Learn about these extra pieces of musical goodness used to decorate a tune Beautify the notes Know your symbols to create intricate and flamboyant melodies 01Acciaccatura This type of grace note is symbolised by a mini quaver/eighth note with a slash through the tail. It is sometimes referred to as a ‘crushed note’ as it is played as quickly as possible before the note in front of it. 03Trills and turns To play a trill (left), alternate quickly between the main note and a whole or half-step above. To play a turn, quickly play the note above, then the main note, then the note below and then the main note again. 02Appoggiatura These grace-note ornaments are similar to acciaccaturas, however they fall on the beat of the note, not before it. An appoggiatura can consist of one or more notes and their symbol is the same but without a slash. 04Mordents These are upper (bar 1) and lower (bar 2) mordents. An upper mordent consists of two main notes sandwiched around a note that’s a whole step lower. A lower mordent is the same, but with a note higher in the middle.
  • 56.
    56 Piano forBeginners
  • 57.
    “Start playing thenotes very slowly and smoothly. Once you have done a few slow repetitions, you can build up speed” Piano for Beginners 57 Playingthe pianoWith your new knowledge of music theory, you can now master the building blocks of piano music: chords, scales and arpeggios 58 Warmupyourhands 60 Introducingmusicalscales 62 TheCmajorscale 66 TheFmajorscale 68 TheGmajorscale 69 TheDmajorscale 70 TheAminorscales 72 Dminorscales 74 Learnaboutintervals 78 Understandingchords 80 Usinginversions 82 Majorchords 84 Minorchords 86 Suspendedchords 88 Augmentedchords 89 Diminishedchords 90 Dominantseventhchords 92 Majorseventhchords 93 Minorseventhchords 94 Usechordprogressions 96 Left-handpatterns 98 Learnarpeggios
  • 58.
    58 Piano forBeginners Playingthepiano I n the same way that an athlete must warm their body up before running a race, a pianist must warm up before they play music. Although not as physically taxing as running the 100m, going through a few short piano exercises before you begin is a sure way to enhance the way you play. Relaxing your shoulders, arms, wrists and hands will enable you to flow through the music. Your finger dexterity will be improved, enabling you to both find and reach keys quickly and easily, putting no obstacle between you and the notes on the page. You’ll also enjoy practising piano more too, because if you’ve warmed up properly you won’t get achy fingers, wrists or back. Warming up also avoids getting cramp in your hands, which can be quite painful. If you’ve limbered up, and your physical posture is correct, you’ll be able to comfortably play for as long as you like. You can also use regular hand exercises to strengthen your fingers and even stretch your reach to enhance the notes you’re able to play and the way you play them. Physical tension can translate into music. If you’re uncomfortable, your music might sound uncomfortable. It’s important to prepare yourself properly before you develop any bad habits that can be difficult to combat. Here we’ll show you some very simple exercises to start with, which you can then build upon for a top-notch warm-up repertoire to kick off your practice sessions and eventually your concerts with. Warmup yourhands Limbering up before you practise and play is an essential part of learning piano Get your hands ready before you start playing Two-handed warm-up Begin slowly Start playing the notes very slowly and smoothly. Once you have done a few slow repetitions, you can build up speed as your hands begin to feel loose and relaxed Step it up Play a few repetitions with your right hand, then switch to your left hand and repeat. Then you can step up to playing with both hands as you build up speed and confidence Even it out Listen to yourself and be sure to play an even volume across all fingers. This exercise will help to strengthen your 4th and 5th fingers on each hand, which are usually the weakest Breathe it out It may seem obvious, but remember to keep breathing calmly and deeply as you exercise, practise and play to stay relaxed and comfortable at your piano “Relaxing your shoulders, arms wrists and hands will enable you to flow through the music” Top tip Learn your finger patterns To help you learn which fingers should hit which keys, you will often see the fingering written beneath notes. A 5 refers to your little finger, 4 to your ring finger, 3 to your middle finger, 2 to your index finger and 1 to your thumb. 1 2 3 4 1 2 3 4 1 2 3 4 1 2 3 4 5 4 3 2 5 4 3 2 5 4 3 2 5 4 3 2 1 1 2 3 4 1 2 3 4 1 2 3 4 1 2 3 4 5 4 3 2 5 4 3 2 5 4 3 2 5 4 3 2 1
  • 59.
    Piano for Beginners59 Get set before you go Pre-practice tips for budding pianists 02Right-hand workout Your right hand is often the stronger of the two. Warm it up by playing simple keys up and down the keyboard, starting with your thumb (1) on Middle C. Start slow and then repeat to build up speed. 01Physical stretches Gently stretch your arms and relax your shoulders. Move your hands and wrists in gentle circular motions clockwise and anti-clockwise, then press your hands together and tilt smoothly and gently towards and away from your body. 04Strengthening up Complementary exercises can strengthen your fingers. Try holding down five keys at once, then as you hold them, play the note over and over again with your fourth finger. Then switch to your fifth. This will strengthen those fingers. 03Left-hand exercises Follow the notation, starting with your little finger (5). Then repeat the tune, but start on the next note higher than the previous starting note. Repeat this a few times to get your left hand ready to go.
  • 60.
    60 Piano forBeginners Playingthepiano Knowing which fingers play which notes is vital Your piano hands The circle of fifths A visual and easy way of remembering the key of a scale is to use the circle of fifths. This circle shows the relationship between the 12 tones of the musical scale. To work out how many sharps ( # ) or flats ( Ь ) a key signature should have, follow the circle clockwise; major on the outside, minor on the inside. For example, if we look at A major, the key signature would have three sharps (these being F, C and G). The inside part of the circle shows us the relative minor (orange letters), and in this case it would be F# minor. When you’re looking at the scales played in this book, you will notice tiny numbers next to the notes. These are the fingers with which you should play the notes. Playing scales using these finger patterns minimises effort and enables you to concentrate on building up speed. “Playing scales using these finger patterns minimises effort” Major Minor A E B F C G D E G D A E B B F C G D C F G D A E B F 1 1 # 3 3 # # # # # # 6 6 # 5 5 # 4 4 # 2 2 # Ь Ь Ь Ь Ь Ь Ь Ь Ь Ь Ь Ь Ь # ## ## # # # # # # # # ## # ## ### Ь Ь Ь Ь Ь Ь Ь Ь Ь Ь Ь Ь Ь Ь Ь Ь Ь Ь Ь Ь Ь S cales in music are series of notes that are arranged into a specific sequence which can be either ascending or descending. They usually start and end on the same musically named note (ie C) separated by an octave (the distance between eight musical notes). The scales will normally follow a set pattern of either semitones (half steps) or tones (whole steps). The three most common forms of scales are major, a happy-sounding scale; minor, a sad- sounding scale; and chromatic, a scale whose sound is ambiguous and is made up of semitones. There are, however, different types of minor scale with subtle differences in their make-up. Learning scales on piano is important for a number of reasons. It will enable you to learn your keyboard quickly, which will become very important when performing music in various keys. They will also help to strengthen your fingers and increase their agility, which will improve your ability to be able to play tricky passages. Introducing musicalscales Understand how scales are formed and how important they are 5 5 4 4 3 3 2 2 1 1
  • 61.
    Piano for Beginners61 Scales are a great way to learn your way around a keyboard, but the way you play them will also help you build up speed and accuracy. Okay, so you can’t argue that they are the most exciting things to play in the world, but thanks to their strict patterns you can play a scale on any key without even being able to read music! Their patterns relate to the distance between the notes in the scale and can be measured in semitones, which is the gap between each note on the keyboard. An interval of two semitones is known as a tone. So, the interval between C and C# is a semitone, but the interval between C and D is a tone. But be warned; you shouldn’t make the mistake of thinking that the distance between all white notes is a tone, though. In actual fact, the interval between B and C, as well as E and F is only a mere semitone because there are no black keys between them. Learning the patterns The theory behind some of the main types of scales Major scale The major scale’s pattern goes like so: Tone, Tone, Semitone, Tone, Tone, Tone, Semitone. If we take the C major scale as an example, you can see that the two semitone intervals fall where there are adjacent white keys: between E and F, and between B and C. Any major scale you care to name uses this formula – as long as you know where the first note is you can easily work out the rest of the scale. Melodic minor scale The melodic minor is a strange one – it’s almost like two different scales. Ascending the pattern is Tone, Semitone, Tone, Tone, Tone, Tone, Semitone, but descending it’s Tone, Tone, Semitone, Tone, Tone, Semitone, Tone. The descending pattern is the same as a natural minor scale. It’s a little tricky to remember two patterns on the same scale, but once you’ve learned it you’ll soon be able to see the value in its flexibility. Harmonic minor scale The harmonic minor scale is a little different, although it still uses a pattern – albeit one with a slight twist. The interval between the sixth and seventh notes is three semitones – a tone and a half. So, the pattern goes: Tone, Semitone, Tone, Tone, Semitone, Tone and a half, Semitone. Far from the happy sound of the major scale, it has a kind of spooky sound that distinguishes it from the other minor scales. Tone Tone Tone Tone Tone Semitone Semitone Tone Semitone Tone Tone Tone Tone Semitone Tone Semitone Tone Semitone Tone half Tone Semitone
  • 62.
    62 Piano forBeginners 62 Piano for Beginners Playingthepiano S cales are an important part of learning to play piano both in terms of understanding written music and for technical improvement. Reading musical notation is often referred to as music theory, which is like learning the language of music. Scales are a vital part of music theory, just as grammar is necessary for speaking. As you learn to play scales you will start to understand many aspects of musical theory. Practising scales regularly will improve the fluidity of your playing and help your fingers to become more adept to this new activity. Scales are great for developing co-ordination between the hands and are also ideal for introducing a variety of what pianists refer to as fingering patterns. Fingerings are marked as little numbers above the notes in piano music and are there to guide you as to which finger to use for the given note. The C major scale is the perfect place to start as it contains only the white keys of the piano and forms the basis for all other scales. Major scales have a happy or cheerful sound, unlike minor scales which sound distinctly sad. The C major scale begins on the note C, ascends up the keyboard eight notes to the next C, then descends back down to the C you started on. As you will discover, all scales are essentially a pattern of notes that ascend the keyboard, then descend back down again. TheCmajorscale This is a great first step for beginners because it forms the foundation for learning scales Commit these to memory as they will appear often Fingering patterns Scale fingerings You only have five fingers, so you will run out pretty quickly when playing an 8-note scale! Fingering patterns show you which fingers to use when playing your scales Finishing off Once you have tucked your thumb, you will have all your fingers at your disposal again which means you can now ascend uninterrupted to the top Tricky tucks For the fourth note of the scale you will need to tuck your thumb underneath your middle finger so that you have enough fingers left to finish the scale The right hand A common pattern for a right-hand scale is to start with the thumb, follow on with the next note played by the index finger and then a third note with the middle finger “Practising scales regularly will improve the fluidity of your playing and help your fingers become more adept” Top tip Learn your finger numbers In piano theory the thumbs are labelled as number 1, index finger is 2, middle finger is 3, ring finger is 4 and your little finger is number 5. Learn this to ease your progress! The correct finger patterns are essential if you want to play scales quickly. Audio file Listen to the audio files and follow along on your own keyboard Give it a try
  • 63.
    Piano for Beginners63 Piano for Beginners 63 Playing the C major scale Let’s start with the right hand 01 Starting position Start with your thumb on Middle C. This is the white key directly left of the group of two black keys. Middle C is the fourth C from the lowest end of a standard piano, and the closest one to the middle of the keyboard. 03 Completing the ascending scale Next you will need to play the notes G-A-B with your index (2), middle (3) and ring finger (4) in succession and finally finish the ascending or upwards part of the scale with your little finger (5) on C. 02 The first four notes Play Middle C with your thumb (1) then play the notes D and E in succession with the index (2) and middle (3) finger. For the fourth note F, you will need to tuck your thumb (1) underneath your middle finger. 04 Descending Go back down the scale, or descend by following the top C (5) with B (4), then A (3), G (2) and F (1). Your middle finger (3) then crosses over your thumb to play E followed by D (2) and finally C (1). 1 2 3 4 1 2 3 1 2 3 4 5 5 4 3 2 1 3 2 1
  • 64.
    64 Piano forBeginners Playingthepiano Switch to the left hand You can play C major with your right hand, now try the left 01 Where to start C major for the left hand begins with your little finger (5) and is played lower down the piano. Place your little finger on the C that is one octave below, or seven white keys to the left of Middle C (not including Middle C). 03 Finishing the ascending scale Next you will need to bring your middle finger (3) over the top of your thumb to play A. Finish the ascension by playing B with your index finger (2) and the top C with your thumb (1). 02 The first five notes Play the beginning C with your little finger (5), then follow that with the notes D-E-F-G in succession with your ring finger (4), middle finger (3), index finger (2) and then your thumb (1). 04 Descending After playing your top C, go directly back down the scale playing B (2) then A (3). Next, bring your thumb underneath your middle finger and complete the scale by playing the following: G (1), F (2), E (3), D (4), C (5). 1 2 3 4 5 4 3 2 1 3 2 1 1 2 3 1 2 3 4 5
  • 65.
    Piano for Beginners65 1 2 3 4 5 4 3 2 1 3 2 1 1 2 3 1 2 3 4 5 1 2 3 1 2 3 4 5 5 4 3 2 1 3 2 1 03 Tricky tucks and turns It will feel rather clumsy at first doing the thumb tucks and finger-over parts to the scale, as these are not done simultaneously between the right and left hand. Remember that right hand tucks first, the left hand turns over! 04 Perfecting the scale Practise your ascension a few times slowly and when you are happy, try descending. The same rules apply here, just follow the patterns, become more and more used to the pattern and your co-ordination will improve. 01 The starting position Next you can learn to play the C major scale ascending and descending with both hands together. Place your hands on their starting notes of C, with the right-hand thumb on Middle C and the left-hand little finger an octave below. 02 Going up It may take a bit of practice to get used to the hands moving together. Follow the finger pattern you have learnt for each hand to ascend up the scale. The only difference is that both hands are playing together instead of individually. C major with both hands See how the right and left hand sound together
  • 66.
    66 Piano forBeginners Playingthepiano M usical notes are named after the first seven letters of the alphabet: A, B, C, D, E, F and G. On a piano, these notes are represented by the white keys. When you play your C major scale you start with a C and then ascend up through the successive letters to G after which the pattern returns back to A and carries on from there. This is the same for the entire length of the keyboard. The white keys simply repeat A through to G over and over again. Any set of eight notes together is referred to as an octave and the scales you learn as a beginner will tend to be of a single octave. In addition to the white keys of the piano there are black keys, although there are fewer of them. You will notice that the black keys are grouped together in alternate sets of two, then three. The C major scale is a great one to start with because it does not contain any black keys. All the other major scales, however, do use one or more of the black keys. In musical terms, these are referred to as either sharps or flats. The musical symbol for a sharp is # and the symbol for flat is b. Don’t worry if it all seems a little confusing; things will become much clearer as you progress. The F major is a good scale to try next as it only contains one black key, a Bb (B flat). The Bb key is located between the A and B white keys. So let’s get going and start taming this scale. TheFmajorscale Follow on from C major with this new scale, which contains a black key This scale contains a black key: B flat (Bb) Tips for playing F major Tuck after finger 4 For logic and ease, the Bb is played with finger 4 and the thumb is tucked under this finger to play the next note of the scale, C Different fingerings The location of the Bb key means a new fingering pattern applies in the right hand of F major. Not every scale has a unique pattern though. Many share the same patterns The right-hand pattern Attempting to tuck your thumb after finger 3 as you do in C major would be very awkward. Because Bb follows the A (3) this would not be easy to play with your thumb Playing Bb Remember that you will be replacing the white key of B with the black Bb key for this scale. This replacement rule applies to any scale that calls for sharps or flats Audio file Listen to the audio files and follow along on your own keyboard Give it a try “Any set of eight notes together is referred to as an octave and the scales you learn as a beginner will tend to be of a single octave” Top tip Don’t forget the flat! You’ll need to play B flat in this scale. There’s no flat accidental in our notation for the scale because the key signature dictates that all B notes must be flattened. If you do play B natural, you’ll be able to hear that something is wrong!
  • 67.
    Piano for Beginners67 03 Your left hand Find the F that is situated two octaves below the F used as your starting note for the right hand. With finger 5 of your left hand, begin the scale moving through the notes G (4) and A (3). 04 Finish the ascent, and then descend Play Bb with finger 2, then play C (1). Finish the ascent by bringing finger 3 over your thumb to play D followed by E (2) and F (1). Descend using the same pattern in reverse, tucking your thumb under finger 3. 01 Ascending from the starting position Place your thumb (1) on the F key located four keys above Middle C. Follow on with the notes G (2) and A (3), then use finger 4 to play Bb. Finally, tuck your thumb underneath to play C and finish with the notes D (2), E (3) and F (4). 02 Descending Your small finger gets a break in F major as the pattern does not require finger 5. To descend, simply follow the pattern outlined in Step 1 in the reverse order, bringing finger 4 over the thumb to play the Bb. F major on both hands Master this one-flat scale 1 2 3 4 1 2 3 4 1 2 3 4 4 3 2 1 4 3 2 1 5 4 3 2 1 3 2 1 1 2 3 1 2 3 4 5
  • 68.
    68 Piano forBeginners Playingthepiano A s we have observed, there are seven different white keys (notes): A, B, C, D, E, F and G. For each set of seven white keys however, there are only five black keys. Each of the black keys can be known by either its sharp name, or its flat name. Remember, the ‘flat’ of a white key is always below the note, and the ‘sharp’ is always above. The black key used in the F major scale is the note Bb which replaces B for that scale. In other scales, the same black note might be referred to as an A#. In this way, some scales use the flat names for the black notes used, and some use the sharp names, but they will never use both. Adding together the seven white keys or notes, with the five black keys gives us the sum total of 12 notes each with its own unique pitch or sound frequency. There are 12 different major scales in all, one beginning on each of the 12 notes. You have already seen how to play C major, the scale with no sharps or flats and F major, having one flat. The next scale to learn is G major. This scale also contains a single black key, but this time it is referred to as a sharp. The sharp note in G major is F#, located between the F and G keys. TheGmajorscale The major scale that’s a fifth after C has just one sharp: F sharp “Some scales use the flat names for the black notes used and some use the sharp names, but they will never use both” 01 The right hand Start with your thumb on G (four notes above middle C) and follow the pattern: G (1), A (2), B (3), C (1) (tuck), D (2), E (3), F# (4), G (5). Notice that the fingering pattern is the same as C major. Descend in reverse order. 02 The left hand Begin with your small finger on the G situated two octaves below the right hand starting G, and follow the same fingering pattern that you learned for C major: G (5), A (4), B (3), C (2), D (1), E (3) (bring over thumb), F# (2), G (1). Now descend. 1 2 3 1 2 3 4 5 5 4 3 2 1 3 2 1 5 4 3 2 1 3 2 1 1 2 3 1 2 3 4 5 Audio file Listen to the audio files and follow along on your own keyboard Give it a try
  • 69.
    Piano for Beginners69 E very one of the 12 major scales has its own unique set of sharps or flats. The collection of sharps or flats found in a scale is known as the key signature, which in written music is situated right next to the clef at the beginning of each line of music. So far you have learnt to play three different major scales: C major (no sharps or flats), F major (one flat) and G major (one sharp). F major, containing one flat, is followed by a scale containing two flats. Likewise, the scale that follows G major has two sharps. This scale is D major. You may begin to notice a pattern emerging here concerning the scales that contain sharps. First you learned C major, the scale without sharps (or flats). Then came G major containing one sharp (F#). Next you will learn the scale with two sharps, D major. The pattern surfacing is that there are exactly five notes between each of the scales. Start with C (no sharps or flats), count up five notes (C-D- E-F-G) and you arrive at G (one sharp = F#). Count up another five notes (G-A-B-C-D) and you arrive at D (two sharps = F# and C#). This pattern continues, adding a sharp each time and is what is known as the circle (or cycle) of fifths – see page 60 for more information on it. The F# in the D major scale replaces the F, with the C# played instead of C. Just remember to locate the sharps on the piano before you begin to play the scale. TheDmajorscale Discover the scale with two sharps and begin to understand the pattern of the major scales “Remember to locate the sharps on the piano before you begin to play the scale” 01 The right hand Begin with your thumb on the D just above middle C. Play the following notes to ascend up the scale: D (1), E (2), F# (3), G (1) (tucked), A (2), B (3), C# (4) and D (5). You’ll notice the pattern is identical to C major. Descend in the reverse order. 02 The left hand Starting on the D key two octaves below the one used for right hand, play the following notes: D (5), E (4), F# (3), G (2), A (1), B (3), C# (2) and D (1). Again, the pattern is the same as that of C major. Descend in reverse. 5 4 3 2 1 3 2 1 1 2 3 1 2 3 4 5 1 2 3 1 2 3 4 5 5 4 3 2 1 3 2 1 Audio file Listen to the audio files and follow along on your own keyboard Give it a try
  • 70.
    70 Piano forBeginners Playingthepiano 1 2 3 1 2 3 4 5 5 4 3 2 1 3 2 1 5 4 3 2 1 3 2 1 1 2 3 1 2 3 4 5 01 The right hand Place your thumb on the A key located six keys above middle C. Follow the same fingering pattern used for C major, playing the notes A-B-C-D-E-F-G and A. You will discover that this scale sounds very different to a major. 02 Left hand and hands together After ascending and descending with your right hand, do the same with the left. Start on the A key situated an octave lower down and follow the C major fingering pattern with the A minor notes. Now try hands together! The A natural minor scale T he most important type of scale to learn next is the minor scale. Unlike the major scale, the minor scale comes in three different formats: the natural minor, the harmonic minor and the melodic minor. This means that for any given minor scale, there is not one pattern to master, but three. Don’t worry if this sounds daunting as the three different formats are all centred on the same series of notes; they just have slight variations which are useful to learn and understand. With a little bit of practice you will soon be adept at playing all three types of minor scale. The A minor scale is the equivalent to the C major scale because it has no sharps or flats. In musical terms, this is referred to as the relative scale (eg A is the relative minor to C, or C is the relative major to A). Therefore, A minor is the obvious choice as an introduction. You can find a major key’s relative minor by counting three semitones lower (A is three semitones lower than C). As already noted, there are three different kinds of minor scale. The natural minor is the foundation scale, sharing the exact same set of notes as its relative major (C), but starting and ending on A rather than C (A-B-C-D-E-F-G-A). The harmonic minor has only one alteration: the seventh note (in this case, a G) is raised a semitone higher and is replaced with G#. In the melodic minor, both the sixth and the seventh note are raised but then lowered again during the descent. Introducing minorscales Time to tackle this new type of scale Audio file Listen to the audio files and follow along on your own keyboard Give it a try
  • 71.
    Piano for Beginners71 05 Raising notes in the ascending scale A melodic minor has the same fingering pattern as A natural minor. The change is to raise the sixth and the seventh notes, giving us: A, B, C, D, E, F#, G#, A. 03 Raising the seventh note Follow the steps for the natural minor. The only change is to raise the seventh note, replacing the G with a G#. You will notice an increased intensity. 06 Lowering the notes on descent When descending, the two notes that were raised are now lowered back to their naturals or white keys, making the descent the same as A natural minor. 04 Practising the scale Play the A natural minor and A harmonic minor with the right hand to understand the difference. Do the same with the left hand and hands together. The A melodic minor scale The A harmonic minor scale 1 2 3 1 2 3 4 5 5 4 3 2 1 3 2 1 5 4 3 2 1 3 2 1 1 2 3 1 2 3 4 5 1 2 3 1 2 3 4 5 5 4 3 2 1 3 2 1 5 4 3 2 1 3 2 1 1 2 3 1 2 3 4 5
  • 72.
    72 Piano forBeginners Playingthepiano 1 2 3 1 2 3 4 5 5 4 3 2 1 3 2 1 5 4 3 2 1 3 2 1 1 2 3 1 2 3 4 5 J ust like major scales, the minor scales follow a cycle, adding either a sharp or a flat with each new scale. The next minor scale to learn is D minor which has one flat; B . The relative major scale to D minor is F major, as it also contains the same single flat note. As with A minor, you will learn three formats: the natural minor, the harmonic minor and the melodic minor. These contain only a slight change but each sounds very unique. It is important to understand the three types of minor scale, as their sequences will appear in the music you will go on to learn. The D natural minor scale uses the same notes found in the F major scale, beginning and ending on D: D-E-F-G-A-B -C-D. In the D harmonic minor, the seventh note needs to be raised one semitone. A semitone refers to the smallest possible distance between two notes, basically the distance between two notes directly next to each other. In most cases, the note directly next to a white key on either side is a black key. For example, to raise a G one semitone, you simply go to the black note above of G#. With a B however, the next key is a white one – C. So for B, a semitone above is actually C. Dminorscales D minor follows from A minor, spicing things up by adding a flat to its key signature “It is important to understand the three types of minor scale, as their sequences will appear in the music you will go on to learn” 01 The right hand For D natural minor, the fingering pattern used in C major is again employed. For the right hand, the sequence is: D (1), E (2), F (3), G (1) (tucked), A (2), B (3), C (4), D (5). Begin on the D one note above Middle C. 02 Your left hand Once you have ascended and descended a few times with your right hand, try the left hand beginning two octaves lower. The notes are the same as for Step 1, and the fingering pattern is again the same as C major. D natural minor Audio file Listen to the audio files and follow along on your own keyboard Give it a try
  • 73.
    Piano for Beginners73 05 Raising B flat to B natural For D melodic minor both the sixth and the seventh note need to be raised during the ascent. This means B rises to B natural and C rises to C#. 03 A flat and a sharp in the same scale Even though D minor has a B in the key signature, the raised 7th will still be labelled as a sharp. Play with your right hand: D-E-F-G-A-B -C#-D. 06 The notes to play On the descent you need to lower the sixth and seventh back to the notes of the D natural minor scale: D-C-B -A-G-F-E-D. 04 The left hand Follow the same notes as for the right hand, starting two octaves lower. Practise the scale with hands separately, then together. D melodic minor D harmonic minor 1 2 3 1 2 3 4 5 5 4 3 2 1 3 2 1 5 4 3 2 1 3 2 1 1 2 3 1 2 3 4 5 1 2 3 1 2 3 4 5 5 4 3 2 1 3 2 1 5 4 3 2 1 3 2 1 1 2 3 1 2 3 4 5
  • 74.
    74 Piano forBeginners Playingthepiano S o far, we have only played one note per hand, but the polyphonic nature of the piano means that we can play up ten notes at the same time. This is very rare, however, and most of the time you will be playing two, three or sometimes four notes with the same hand. We’ll be talking about playing three and four notes at the same time in the chord walkthroughs, but for now let’s look at playing two notes together and how the intervals between them will affect your sound. In music theory terms, an interval is the difference between two notes (not necessarily played at the same time), and they are often measured in semitones. A semitone is the interval between two adjacent keys on the keyboard, and two of these semitones make up a tone. So, there is a semitone between C and C#, but a tone between C and D. But rather than just naming intervals after the number of semitones between the notes, they are all called different names, which you can see in the table to the right. In this tutorial we will take a basic melody and slowly add a harmony to it, identifying different intervals in the process. Learnabout intervals Take the next step and play more than one note at the same time on the same hand Interval Distance Minor third 3 semitones Major third 4 semitones Perfect fourth 5 semitones Tritone 6 semitones Perfect fifth 7 semitones Minor sixth 8 semitones Major sixth 9 semitones Perfect octave 12 semitones Create a tune with intervals See how different intervals affect a right-hand melody 02 Add a harmony Now you’ve got a melody sorted, add a harmony to it. All our additional notes are three or four semitones below the original melody, but you can experiment with other intervals. We’d advise sticking to only the white keys at this point. 01 Make your melody First of all, write a short but catchy melody of no more than two bars. We recommend sticking with C major as it’s easier to experiment as you can play around with only the white keys. Audio file Listen to the audio files and follow along on your own keyboard Give it a try
  • 75.
    Piano for Beginners75 A developed right-hand melody with harmony Put it into practice 04 Mixing it up Now you know what your tune sounds like with a harmony at a constant interval, mix it up a bit. Keep your original melody, but harmonise it with different intervals. As long as you stick to the white notes, it should sound good. 03 A sixth below We’re keeping our melody from Step 1, but changing up the harmony. This time we’re keeping a harmony with a constant interval but now it’s a sixth below. You may find this easier as you can keep your hands in the same position. The beginning Straight away, you can see that the intervals between notes can vary. Here are thirds, fourths and sixes Run down This passage is a mix of major and minor thirds. Minor thirds have a distance of three semitones between them, while major thirds have four Ending Our piece is in C major (no sharps or flats), so it makes sense to end on an interval that includes two members of the C major triad Octaves An under-used interval – especially in the right hand – is the octave. It may be the same note, but you can still get a really good sound
  • 76.
    76 Piano forBeginners Playingthepiano Left-hand intervals Building an accompaniment 01 Basic note progression To start with, put four notes together. We’re playing in F major to vary things, but there’s no harm in sticking in C major if you don’t feel confident, or indeed if you want to add more to your right-hand melody. 03 Development Just because you’re playing two notes together in intervals, you don’t need to harmonise every note. Take this opportunity to develop your bass line, perhaps by adding in some notes on their own, while keeping your notes from Step 2. 02 Add a harmony Like we did with the right-hand tune, you can now add a harmony to your four notes. As well as varying the intervals, try changing up whether they’re intervals above or below. You can completely change the sound of your tune. 04 Use your whole hand Of course, you can just play two or more notes at every opportunity! In fact, doing so is a great way to get every finger on your hand moving. Try playing the passage above with the same two fingers every time and it’ll be a struggle.
  • 77.
    Piano for Beginners77 Don’t forget about this convenient interval Octaves With all these minor thirds and perfect fifths, it’s easy to forget about the octave. An octave is spread across 12 semitones and eight notes. Whatever the root note of your two-note chord, its octave will always have the same name: the octave of Middle C will be another C note. Octaves have many uses too. For example, in the right hand you can double a melody in octaves to give it another dimension. If you want a delicate melody high up the keyboard but you think it sounds too weak, add in the octave below and hear the sound get stronger. It’s best to keep this melody simple to start with, as moving between the octaves is hard work. Octaves can also be used with the left hand as a simple accompaniment pattern. It won’t work quite as well as a melody option, but it’s a great way to support the tune. Thirds on both hands Don’t be afraid to play the same interval on both hands, although if your left hand is playing lower down it might be best to just play single notes F major The tune is in F major – as you can tell by the key signature. We’ve ended it on a straight F major chord with all three notes represented Run down This is similar to the run down in our right-hand- only piece, except there’s a perfect fourth on the first beat of both bars Minor seventh These two minor thirds are on different staves, but together they form Am7 – A minor seventh. It adds a jazzy sound to the ending of our piece
  • 78.
    78 Piano forBeginners Playingthepiano Understanding chords How to construct and play common chords Chord type Formula Major 1-3-5 Minor 1-b3-5 Diminished 1-b3-b5 Augmented 1-3-#5 Dominant 7th 1-3-5-b7 Major seventh 1-3-5-7 Minor seventh 1-b3-5-b7 Sus2/Sus4 1-2-5/1-4-5 Playing three or more notes with one hand Right-hand chords Finger patterns There’s not really set finger patterns for every chord – but most use 1-3-5 for a normal triad chord Formulas All chords can be constructed using the same formula for each type. If you know what notes are in a scale, you can use these to work out a chord Minor seventh chord This is D minor seventh, which uses four fingers – as all seventh chords do. Its formula is 1-b3-5-b7 – D-F-A-C Free fingers Unless you’re playing a five-note chord, which is quite rare, you will have a free finger or two. Make sure these are ready to play notes after the chord A chord is a set of three or more notes played at the same time, and they are an integral part of music. When they are played in sequence it is known as a chord progression, and a well thought-out progression can transform an average song into a great one. Fortunately, we can use music theory and knowledge of the scales we’ve already covered to construct and experiment with different chords. To play a three-note major chord (also known as a triad), you must play the first, third, and fifth note of its corresponding major scale. For example, if you want to play a C major chord, you would need to play the first, third and fifth note of the C major scale (C-D-E-F-G-A-B-C) together – so that would be C-E-G. The major chord isn’t the only kind to have a formula like this. The table to the right lists many of the most common kinds of chords and how they are constructed. When looking at the sheet music, you may see letters above a stave – these are chords that the melody is based on. If you find the right or left-hand part too challenging, then playing the correct chord instead will still sound great. Audio file Listen to the audio files and follow along on your own keyboard Give it a try
  • 79.
    Piano for Beginners79 Different chord types A guide to some common chords Minor chords Minor chords carry a sad sound, which is created by flattening the third by a semitone (one key). Rather than play C-E-G to play C major, you play C-Eb-G for C minor. A lower-case ‘m’ will be above the stave for a minor chord. Major chords Major triads are happy-sounding chords that are made by taking the first, third and fifth note from the chord’s corresponding major scale. If a letter is written above the stave on its own, ie just ‘D’, then this means it’s a major chord. Left-hand chords Don’t think that chords are exclusive to the treble clef. Although we wouldn’t recommend playing triads low down the keyboard, left-hand chords are useful when working out progressions, such as the one above. Dominant seventh chords Seventh chords have four notes, and feature the first, third, fifth and flattened seventh notes of the corresponding major scale. C7 comprises C, E, G and Bb. The first three notes are the same as a major triad. C G D F C7 G7 D7 F7 Cm Gm Dm Fm C G Dm F7
  • 80.
    80 Piano forBeginners Playingthepiano P laying chords, no matter what kind, would be pretty boring if all you could do was play them the same way all the time. No matter how you changed the way you used them rhythmically, the notes would always sound the same. Luckily, you can use handy inversions to play the chords you think sound best but in different ways. Rather than just playing C (the root), the E (the third) above it, and the G (the fifth) above that to play C major, you can start on E, then play the G above it, and then the C above the G (so you’re playing the C that’s an octave higher than the one play in the first chord). This is what’s known as the first inversion of C major. It’s still C major as it contains the three notes that make up the chord, they’re just played in a different order. To play a second inversion on C major, the bass note must be G, the second note C (the same one that’s played in the first inversion), and the third note the E after that. Although the chords are technically the same in name, the different sound you get can help add interest to a piece. Inversions aren’t just handy for varying sounds, though – they also help transition between chords. Let’s imagine that you want to play C major then A minor. Rather than moving your whole hand down the keyboard to play both chords in the root position, you just need to move your little finger from the G to the A. Thanks to inversions, you can play completely different chords with the minimum of effort. Usinginversions Achieve a different take on many basic chords by employing inversions Inversions in music Putting it into practice Root chord Even with all these inversions, there’s still no reason not to put in a chord in root position, like this C major F major Middle C is the bass note here, but it’s not C major – this is the second inversion of F major, as it features C, A, and F “Inversions aren’t just handy for varying sounds, they also help transition between chords” Audio file Listen to the audio files and follow along on your own keyboard Give it a try C major We start off with C major, but perhaps not as you know it. As E is the bass note, this is what’s known as the first inversion Both hands Not an inversion as such, but you can spread chords over both hands. We’ve used G as a bass note, with D and B on the right hand
  • 81.
    Piano for Beginners81 Inversion examples See how inversions affect a chord’s structure First inversion We’ve used the same chords – C, G, D, and F major – but now their respective major thirds are the bass note rather than the root. The root note is still played, but it is an octave higher than in Step 1. Root chords All four of these major triads are in root position – the root of the chord (the note which shares its name with the chord) is the bass note. To play this progression, you have to move your right hand a lot. Mix them up The previous examples have all required a bit of jumping up and down the keyboard, but by using the second inversions of G and F, it’s a lot easier to navigate our progression. Try it for yourself! Second inversion Now we’re using the fifth as the bass note of our familiar four chords. Note that even though the G and F now have bass notes lower than the original root chord, they are still considered second inversions. C G D F C G D F C G D F C G D F
  • 82.
    82 Piano forBeginners Playingthepiano A major chord comprises three notes played simultaneously: a root, a major third and a perfect fifth. The terms ‘major third’ and ‘perfect fifth’ arise as in the major scale of the root note these intervals are the third and fifth tones respectively. Some major chords are more commonly used than others, and as your repertoire increases you may notice how particular sequences of major chords form the basis of many popular and classical compositions. The root is the note that the chord is named after; C for C major, for example. To identify the major third count four semitones up from the root (four black or white keys); in C major (simply noted in music as C), the major third is E. To complete the triad count a further three semitones up from the major third; in C, the perfect fifth is G. Once you have mastered this formation you can use it to calculate any major chord. With practice you will find you can hear the ‘happy’ ambience that this structure creates in order to identify it. If a chord does not begin on its root note it is known as an inversion: the first inversion begins on the major third (in C major, this would produce the structure E-G-C); the second inversion begins on the perfect fifth (in C major, this would produce the structure G-C-E). Generally when playing major chords the common fingering is 5-3-1 in the left hand and 1-3-5 in the right. Majorchords Major chords are an essential tool for budding pianists, as an accompaniment or as part of a melody Now you have perfected these major chords, use them! Put it into practice Bars 1 and 2 To switch between D major and A major in its first inversion, simply move your left third and fifth fingers together by two semitones each while keeping your thumb on the A Bars 3 and 4 Here G major is in its second inversion and D is in its first. A major is not completed as leaving out the E creates a rising bass of B-C#-D Bars 7 and 8 To move from A major in the second inversion to D major in the first inversion use your third finger on A as a pivot Bars 5 and 6 The chords are now in the right hand. To move to G major keep your thumb on the D and move your third and fifth fingers up together by two semitones “As your repertoire increases you may notice how particular sequences form the basis of many popular compositions” Audio file Listen to the audio files and follow along on your own keyboard Give it a try D A D G A D D G A D
  • 83.
    Piano for Beginners83 Common major chords Here we learn four common major chords – G, C, D and A – along with their inversions G major (G-B-D) Play the chord in its root position with the right hand and then the left. Repeat with the first and second inversions, keeping the same fingering throughout. Inversions add an interesting twist without clashing with an overlying melody. D major (D-F#-A) By now you are probably getting the hang of inversions, so see if you can practise moving not only from root to first and first to second, but back down from second to root. Try skipping from second to root directly. C major (C-E-G) Repeat the exercise you have just learnt in G major, but this time try playing a few notes in the other hand whilst switching between inversions – there are no accidentals in C major so any white note will fit. A major (A-C#-E) Once you have practised A major in its three inversions, see if you can switch between A major in its root position and D major in its second inversion by simply moving your third and fifth fingers up two semitones.
  • 84.
    84 Piano forBeginners Playingthepiano M inor chords (m) have a near-identical structure to that of their respective major; the only difference being the major third is lowered by one semitone – producing a minor third. Minor chords are renowned for their solemn, melancholy tone – think Losing My Religion by REM, or Mendelssohn’s Symphony No. 3. However, most Western music that is written in a major key will include some minor chords to add to the richness of the melody. As we will cover later in ‘Chord Progressions’, using combinations such as G-D-Em-C is the formula for an overwhelming majority of popular music – take most Beatles hits. Mastering the use of minor chords will add a beautiful quality to your playing, whatever your mood. To construct a minor chord, first locate the root; E for Em, for example. To identify the minor third count three semitones up from the root; in Em the minor third is G. To complete the triad count a further four semitones up from the major third; in Em the perfect fifth is B. Remember, if a chord does not begin on its root note it is known as an inversion: the first inversion begins on the minor third (in Em, you would play G-E-B); the second inversion begins on the perfect fifth (in Em, you would play B-E-G). When playing minor triads, the common fingering is 5-3-1 in the left hand and 1-3-5 in the right. Minorchords Minor chords are the mood-swingers of your chord repertoire, and add depth to your progressions Now you have perfected these four common minor triads, try combining major and minor chords Mixing majors and minors Bars 1 and 2 In bar one F major and G major, both in their first inversions, are in the right hand. Bar 2 introduces the first minor chord – A minor in its root position Bars 3 and 4 The chords in bars 3 and 4 are all major. Rarely will a piece be comprised of purely minor chords; variety is important Bars 7 and 8 Moving from a major chord to its minor triad in this way is common at the end of a piece. Simply move your third finger down one semitone Bars 5 and 6 To move smoothly from D minor to G major, stabilise your fifth finger on the bass note. Similarly, when moving from C Major to E minor, utilise their shared notes “Mastering the use of minor chords will add a beautiful quality to your playing, whatever your mood” Audio file Listen to the audio files and follow along on your own keyboard Give it a try F G Am F G C Dm G C Em F Fm C
  • 85.
    Piano for Beginners85 Common minor chords Here we learn four common minor chords – Em, Am, Dm and Gm – and their inversions E minor (E-G-B) Play the chord in its root position with the right hand and then the left. Using the same finger pattern, repeat this step with the first and second inversions. Practise moving through these three positions until you feel confident. D minor (D-F-A) Repeat the exercises you have just completed, but this time try mixing up the order of the inversions. In particular, practise moving from second to root position. Practise playing a different inversion in the left hand to that in the right. A minor (A-C-E) As before, play the chord in its root position with the right hand and then the left. Now play the first and second inversions. By now you should feel confident recognising the melancholy sound of the minor chord. G minor (G-Bb-D) Make yourself confident with this chord using the three exercises you have just completed. To remind yourself of how a minor chord is formed, practise moving from G major to G minor by lowering the third by one semitone.
  • 86.
    86 Piano forBeginners Playingthepiano T he chords that we have examined so far have all involved the third note in the corresponding scale. However, the thing that defines a suspended chord is that it doesn’t use the third note at all. In the world of piano compositions, the two most common suspended chords are sus2 and sus4. In order to play a sus2 chord, you must replace the third from a major or minor chord and instead use the major second – the second note in the chord’s corresponding major scale. Using C (C-D-E- F-G-A-B-C) as an example, you would replace the E (the third) in a C major chord with D (the second). So, to play a Csus2 chord, you would play C, D and G at the same time. Note that the root (C) and the ‘perfect’ fifth (G) remain the same. To play a sus4 chord, you must again replace the third from a major or minor chord, but this time use the fourth note in the chord’s corresponding major scale – this interval between the root note and the fourth is known as a ‘perfect fourth’. So if you’re playing Csus4, you would play C (the root), F (perfect fourth), and G (perfect fifth). Try alternating between C major, Csus2 and Csus4. To hear how suspended chords work in pop music, have a listen to Erasure’s A Little Respect. The keyboard part shifts from a major/minor chord to a sus4 to give the progression a little more variation. Suspendedchords Shake things up and add some variation to your chord progressions with suspended chords See how a suspended song works Putting it into practice “In order to play a sus2 chord, you must replace the third from a major or minor chord and instead use the major second” Resolution Suspended chords aren’t the best chords to finish with if you want a resolved ending. We’ve used A minor to end our piece Simple left hand While you’re learning suspended chords, it may be best to keep the left hand parts simple – like here Sus progression Here we move from Asus2 to A to Asus4 back to A major, and then repeat it for the next bar. It’s quite a common progression Key change Make sure you don’t miss this key change. We’ve moved from A major (three sharps) to A minor (no sharps or flats)
  • 87.
    Piano for Beginners87 Suspended chords and inversions Subtly altering major chords 01 Dsus2 In a sus2 chord you replace the third of a major or minor chord with a second, so in D’s case you replace the F# with an E. The second inversion is also the root position of Asus4. 03 Asus2 Following the same rules we have applied previously, the C# of the A major triad is replaced with a B natural for the sus2. The second inversion is identical to an Esus4 chord in root position. 02 Dsus4 To get a sus4 chord we need to change the major or minor chord’s third with a perfect fourth. So for D we replace the F# with a G to get a sus4 triad of D, G, and A. You can create a simple melody using E, F# and G while still playing D and A! 04 Fsus4 Proving that suspended chords don’t just have to be on the white keys, Fsus4 needs a B replacing the A of its major triad. Its first inversion (B , C, F) is the same as B sus2 in root position.
  • 88.
    88 Piano forBeginners Playingthepiano Using augmented chords Augmented chords work beautifully as transition chords A ugmented chords can liven up a piece of music, but should be used sparingly. As with the other triads, an augmented chord is formed of a root, a third and a fifth note, but the key difference between an augmented chord and a simple major/minor chord is that each note is a major third (four semitones) apart. For example, where C would be formed of the notes C, E and G, C augmented (notated as C+) would be formed of C, E, G#. The interval between the third and fifth note has been increased (or augmented) by one semitone, thus technically a minor augmented chord cannot exist. At first an augmented chord may sound a little odd, but used as a transition between two chords they can become powerful melodic tools. If you play C in its root position, try moving your fifth finger from G to G# while keeping your thumb and third finger on C and E. Now move from C+ to F in its second inversion (C, F, A). Hear how the dissonance provided by the G# has now created an interesting transition between C and F? We will practise this further in the next section. If the augmented chord does not start on its root note it is called an inversion. G+ in the first inversion would begin on the major third (B), while in the second inversion the chord would begin on the augmented fifth itself (D#). The common fingering used is 5-3-1 in the left hand and 1-3-5 in the right. Augmented chords Add a bit of spice to your chord progressions with an augmented chord “At first an augmented chord may sound a little odd, but used as a transition between two chords they can become powerful tools” G augmented (G-B-D#) First play the chord in its root position. Remember, an augmented chord is simply the major triad with a raised perfect fifth. Once you are comfortable with the chord in both hands try moving through the first and second inversions. C augmented as a transition (C-E-G#) Repeat the exercise with C augmented. Once you feel confident, practise moving between C major and C augmented in the right hand by moving your fifth finger up one semitone. Now try transitioning to F in its second inversion. Audio file Listen to the audio files and follow along on your own keyboard Give it a try
  • 89.
    Piano for Beginners89 A diminished (A-C-E ) To play the chord in its root position first locate the minor triad (A-C-E). Now lower your fifth finger on the right hand (or your thumb on the left) by one semitone. When you feel comfortable, practise moving between the inversions. Using diminished chords Misusing a diminished chord does not sound pretty, so let’s learn where to play them D iminished chords can add a really interesting sound to your playing but need to be used in moderation. If your piece is in a major key, then the diminished chord that occurs naturally will have its root on the seventh note of that scale. In the key of G major for example, the diminished chord would be F#dim. To form this chord, first locate the root note (F#) and count up three semitones to locate the minor third (A). The fifth note lies another minor third up from this note (C). If, however, your piece is in a minor key, the naturally-occurring diminished chord will be built from the second note of that minor scale; in the key of C minor for example, the diminished triad is D dim (D, F and A ). You will find that the most common way composers incorporate diminished chords into their playing is by using the diminished 7th. This has an identical structure but with a fourth note added on top – this note lies another minor third above the fifth note of the triad. Cdim7 would therefore comprise the notes C, E , G and A. When playing seventh chords usually the fingering 1-2-3-5 works best in the right hand and 5-3-2-1 in the left; this is because it is harder to use your fourth finger independently of the third. Diminished sevenths are often used as resolution chords; the best way to understand this is to hear it: Play Cdim7 and practise resolving to G major – sounds pretty jazzy, right? Diminished chords A diminished chord is formed of a stack of minor thirds “If your piece is in a major key, then the diminished chord that occurs naturally will have its root on the seventh note of that scale” C diminished (C-E -G ) Repeat the exercise until you feel confident locating the C diminished chord. Now add the seventh (A). C7 in its second inversion moves melodically to G major due to a shared bass and the fall of E /C to D/B. Audio file Listen to the audio files and follow along on your own keyboard Give it a try
  • 90.
    90 Piano forBeginners Playingthepiano A dominant seventh, sometimes called the major minor seventh, is a chord formed of four notes: a root, major third and perfect fifth (collectively a major triad) with an added minor seventh (the seventh tone in the minor scale of the root note). Let us walk through an example here. To play C dominant seventh, noted as C7, first form the major triad (C-E- G). Instead of playing this with the fingering 1-3-5 in the right, or 5-3-1 in the left, you should use 1-2-3 or 5-3-2 respectively. This then leaves your thumb or fifth finger free to add the minor seventh to the chord – remember that this note will be three semitones above the perfect fifth, in this particular example, B . As there are four notes a seventh chord will have a third inversion beginning on the minor 7th itself; C7 in the third inversion would be B -C-E-G. The seventh chord is commonly found in jazz and blues music, as well as traditional rock ‘n’ roll; think Hound Dog by Elvis Presley or So What by Miles Davis. It is often used as a resolving chord. This means that played on its own it may sound unfinished, whereas followed by a particular major chord it can make an interesting ending to a bar or piece. The chord that you have just learnt, C7, resolves to F because C is the fifth tone of the F major scale. This trick can be used with any two chords so long as the root note of the seventh is the perfect fifth of the major chord. Dominant seventhchords Dominant sevenths, sevenths, major minor sevenths, and all that jazz See how seventh chords work Playing dominant sevenths Bars 1 and 2 Here you must shift between G major and G7 both in their second inversions. Use 5-2-1 to play the former so you can simply add the seventh with your third finger Bars 5 and 6 An example of how a dominant seventh is used to change key. The reason this works is because the seventh of C major (B ) is the fourth of F major Bars 7 and 8 Sevenths are commonly used to end a piece. Maintain the structure of the triad in the left hand and just shift your thumb to smoothly move from C to C7 Bars 5 and 6 No sevenths appear in this section as we have just shifted key. Experiment with what fingers you use – it doesn’t have to be strictly 1-3-5 for a triad “On its own it may sound unfinished, but follow it with a major chord for an interesting ending” Audio file Listen to the audio files and follow along on your own keyboard Give it a try C F G G7 C C7 F Bb C Dm Bb C C7 F
  • 91.
    Piano for Beginners91 Playing dominant sevenths Here we will learn four common dominant seventh chords C7 (C-E-G-B ) Begin in the root position using the fingering 1-2-3-4 in the right hand and 5-3-2- 1 in the left. You only have the notation for the root, second and third inversions. It’s up to you to identify the first inversion, starting on the major third. E7 (E-G#-B-D) By now you should feel confident identifying the missing inversion; in this example you must work out the third inversion. You may find it easiest to always locate the major triad first and then identify the seventh. D7 (D-F#-A-C) As before, you have only been given three inversions: the root, first and second. Use your knowledge of the sound and structure of this chord to identify the third inversion. Now practise moving between the four inversions. F7 (F-A-C-E ) A silly trick to remember this chord: it has a flat face (F-A-C-E ). Get it? Terrible joke, but little things like this can really help when you are getting used to a new chord group.
  • 92.
    92 Piano forBeginners Playingthepiano T he major seventh, notated as Maj7 (or M7), is formed of four notes: a root, major third, perfect fifth and a major seventh note. This is why you may also hear it referred to as the major major seventh. It is the most dissonant of the seventh chords, meaning it can sound inharmonious if used out of place. However many composers favour the major seventh chord for its dreamy, airy sound – think of the first line of Close To You by the Carpenters. Subtle dissimilarities in how this family of chords are noted can produce very different harmonies. In particular, be careful to not confuse M7 with m7 (a minor seventh) as both the third and seventh notes are altered. Let us work through a simple example of a Maj7 chord: To play CMaj7 first form the major triad (C-E-G). As with other seventh chords, instead of playing this with the fingering 1-3-5 in the right or 5-3-1 in the left, try to use 1-2-3 or 5-3-2 respectively. This leaves your fifth finger or thumb free to add the major seventh to the chord – this note will be four semitones above the perfect fifth, in this example, B. You can locate the major seventh by counting one semitone down from the root note. As there are four notes, a seventh chord will have a third inversion beginning on the major 7th itself; CMaj7 in the third inversion would be B-C-E-G. M7 chords are normally used as transition rather than resolution chords. Majorseventh chords Used correctly these will add a beautiful quality to your playing “Many composers favour the major seventh chord for its dreamy, airy sound” CMaj7 (C-E-G-B) Using the fingering 1-2-3-5 in the right hand and 5-3-2-1 in the left, practise locating the chord in its root position. Keeping the same fingering, move to the first inversion and then the second before returning to the root. GMaj7 (G-B-D-F#) Here you have only been given the notation for the root, first and third inversions – the third starting on the seventh itself. It’s up to you to identify the second inversion – remember to start on the perfect fifth. Top tip Use both hands to form the chord While using four fingers on one hand to form a seventh chord is the best way to play one, you can try playing two notes of the chord with your left hand, and then another two with the right hand. They don’t even have to be of the same octave. Try playing C and G with the left hand and then E and B with the right. Playing Maj7 chords Let us work through two simple examples in the right and left hand
  • 93.
    Piano for Beginners93 Playing minor seventh chords Put what you have learnt into practice T he minor seventh, notated as m7, lifts the mood of a minor triad and stops it from sounding quite so glum. Unlike a major seventh chord, a minor seventh enables you to add the seventh note without clashing with the overlying melody, allowing you to be more experimental. However, do be cautious not to confuse it with a 7 or M7 chord as this produces the wrong kind of experimental sound! The minor seventh chord is formed of four notes: a root, minor third and perfect fifth (collectively a minor triad) with the addition of a seventh note (the seventh tone in the minor scale of the root note). This is why it may sometimes called the minor minor seventh. Here is a worked through example: to play Dm7 first find the minor triad (D-F-A). Remember to leave your fifth finger or thumb free to complete the chord. The minor seventh will be three semitones above the perfect fifth, in this example, C. Alternatively count two semitones down from the root note to locate the minor seventh. Unlike a simple minor triad a minor seventh will have a third inversion beginning on the 7th itself; Dm7 in the third inversion would be C-D-F-A. When playing the third inversion in the left hand you may find it easier to use the fingering 5-4-2-1. Similarly the fingering 1-2-4-5 is often more comfortable when playing the first inversion in the right hand. Minorseventh chords Minor sevenths can transform a plain minor triad “Minor seventh lets you add the seventh note without clashing with the melody” Fm7 (F-A -C-E ) Practise locating the chord in its root position using the fingering 1-2-3-5 in the right hand and 5-3-2-1 in the left. Move to the first inversion and then the second, repeating until you feel comfortable with the sound and structure. Dm7 (D-F-A-C) Here you have only been given the notation for the root, second and third inversions – the third starting on the seventh itself. It’s up to you to identify the first inversion – remember to start on the minor third. Top tip Minor major seventh chords There is one type of chord we haven’t covered here: the minor major seventh (mM7). To play an mM7 chord, you must flatten the third (like a minor triad) but not the seventh. So, for CmM7, you play C-Eb-G-B. The latter three notes are actually an Eb augmented triad, which gives the mM7 a mysterious feel.
  • 94.
    94 Piano forBeginners Playingthepiano Right and left hand, majors and minors, sevenths, inversions and progressions Bringing it all together Bars 1 and 2 Always look ahead when you are playing! Play the G chord in bar one using the fingering 3-2-1, that way your fourth finger can add the F# in bar 2 Bars 3 and 4 Your fifth finger in the left should be free to play the E note. Meanwhile your right hand takes over with the chords: supposedly the only four needed in popular music Bars 7 and 8 Here’s another chance to practise the plagal cadence. As the third note of the triad is also the bass it puts an emphasis on the switch between the major and minor chord Bars 5 and 6 The chords return to the left hand. Note how the inversions create a smooth movement in the bass that would not occur if we only used root position chords Y ou may recognise the above as lyrics from Leonard Cohen’s Hallelujah; what you may not know is that the words describe a useful chord progression. A chord progression describes shifting through a series of chords within a key signature. Particular sequences may also be used to move to a new key. As you know there are seven possible roots for chords within a major or minor scale, and with regards to progressions these seven notes are labelled with Roman numerals; that way you can apply the method to any key signature. In C major, for example, chord I would be C, II would be D and so on. If the chord is not capitalised then it is a minor chord; for example vi in C major would be the chord Am. If the chord is a seventh, augmented or diminished they will be labelled accordingly; V7 in C major would be the chord G7. A cadence is the name given to the progression between two chords. Most pieces finish by moving from the fifth (V) to the tonic chord (I) to give a finale effect. This is called a perfect cadence. An imperfect cadence is used where a break is needed, but the piece is not finished. Common examples include I-V, ii-V and IV-V. Returning to the Hallelujah example, in C major the chord progression would be: C, F, G, Am and F. “Chord progression describes shifting through chords within a key signature” Usechord progessions “It goes like this, the fourth, the fifth, the minor fall and the major lift” Top tip You don’t have to use the whole chord Sometimes using all the notes of a chord may sound too heavy, particularly if the accompanying melody is quite busy – you don’t want to do make your piece sound ‘muddy’and confused. Experiment with your chords and try using purely the first and fifth notes of a triad, or maybe just the first and third. Audio file Listen to the audio files and follow along on your own keyboard Give it a try G Gmaj7 Em C G D G Am D G C Cm G
  • 95.
    Piano for Beginners95 Common chord progressions Here we learn to play through some popular chord progressions IV-V-I This is probably the most common use of the perfect cadence. In this example we are shifting between F-G-C. If the piece were in G major we would be using the chords C-D-G. I-V-vi-IV Have you ever heard the phrase ‘all pop songs contain the same four chords’? Well these are the chords: the root, fifth, fourth and minor second, in any order. In this example in C major the chords are therefore C-G-Dm-F. V-IV-iv-I This progression sounds beautiful as an ending to a piece. In musical theory moving from the fourth to the root chord is called a plagal cadence. In this example, in G major, we move through the chords D-C-Cm-G. ii-vi-V7-I This example shows how a progression can be used to switch from a minor to a major key, and also how a seventh can be used to resolve a cadence. The chords here are Dm-Am-G7-C.
  • 96.
    96 Piano forBeginners Playingthepiano Different patterns in practice Putting it into practice Alberti bass A common technique in classical music, it keeps the piece moving Walking bass You can tell which pattern this is because it’s ‘walking’ up the stave Traditional ending Even with a fancy pattern, you don’t have to alter an ending progression Chord picking You don’t have to use each note of a triad. Here we have two examples: one that does use the triad and another that doesn’t W hen you’re playing piano, your right hand will likely be playing the melodies. However, this doesn’t mean you should neglect your left hand. It doesn’t matter if your right hand can play incredibly intricate passages over and over again; if your left hand can’t back it up with solid accompanying patterns then you may struggle to master the piano. It doesn’t just have to accompany, as a left hand melody can provide vital variety and possibly a response to the right hand. Not only are the patterns that we look at in this tutorial valuable for improving left-hand dexterity, they can also be used when you only have the chords of the piece to go by – you may have found the chords to your favourite pop song and want to play along with it, for example. Don’t feel restricted to just these patterns, either. Part of the fun of music is how easy it is to experiment with different patterns – rather than just playing root chords, try using inversions; instead of using an ascending walking bass, try descending instead. While you’re practising these patterns, start off with just the left hand, and then try adding a basic right-hand melody over the top. As your confidence grows, so will your co-ordination. Ideally, you will want your left hand to be able to play whatever your right hand can. “It doesn’t matter if your right hand can play intricate passages; if your left hand can’t back it up then you may struggle to master the piano” Left-handpatterns Discover some of the techniques for using your left hand to support the melody Audio file Listen to the audio files and follow along on your own keyboard Give it a try
  • 97.
    Piano for Beginners97 Different patterns Get your left hand moving! 01 Octaves Okay, so they’re a little boring, but it’s good to get your palm stretching across 12 semitones and there’s nothing wrong keeping it simple! Just make sure you don’t accidentally miss one note by a key. 03 Chord picking For something a bit different, try chord picking. It’s popular in country and western music – especially if you use staccato note on beats two and four. Play the root note then the third and fifth simultaneously after it. 02 Walking bass If you want a bassline with a bit more feeling, try a walking bassline. Aim to create a tune that ‘walks’ up and then down. The flattened seventh here (the C natural) add a bluesy feel to this line. 04 Alberti bass An ideal way to keep your tune flowing and your fingers nimble, Alberti bass is commonly found in classical pieces. Try accompanying this pattern with a simple melody made up of any notes in the D major scale.
  • 98.
    98 Piano forBeginners Playingthepiano W e’ve already learnt about the main chords and progressions you can use to enhance your music, but it’s also possible to break chords up to create arpeggios. Rather than playing three notes at the same time, you can play them in sequence, one after the other, often ascending and descending. You’ll find that arpeggios are useful tools that enable you to keep your music flowing, no matter which hand is playing them. So, for example, if you were to play a C major chord, the normal route would be to play C (the root), E (the third note in the C major scale) and G (the fifth note in the scale) at the same time. However, if you wanted to play a C major arpeggio you would play the C, then the E, then the G, then the C above G (ie the C an octave above your starting note), then back down to G, E, and finally the original C. An arpeggio isn’t just limited to this structure, however, nor is it limited to just major chords. You could play a C minor arpeggio by just playing C, Eb, and G one after another without descending. To hear how a three-note minor arpeggio like this sounds in music, listen to the opening of Beethoven’s Moonlight Sonata. Now imagine how different it would sound if you were to replace its arpeggios with chords. Learnarpeggios Break up chords to make your music flow better, with the help of this valuable technique Finger positions and more Playing an arpeggio Positions When playing a major or minor arpeggio, use fingers 1, 2 and 3 for the triad, then extend your little finger for the octave A major arpeggio This is the most common form of arpeggio. In our example we’re playing A major: A-C#-E-A Wrist movement To get a smooth motion across the keys, roll your wrist from left to right Differences Normally you would use your thumb, middle finger, and little finger to play A-C#-E, but you need to free your little finger for an arpeggio like this “Arpeggios are useful tools that enable you to keep your music flowing, no matter which hand is playing them” Audio file Listen to the audio files and follow along on your own keyboard Give it a try
  • 99.
    Piano for Beginners99 Right-hand arpeggios How to play some common arpeggios 02 D major arpeggio You’ll need to play D, F# and A in sequence to play a basic D-major arpeggio. Again, thumb on the root, index finger on the F#, and middle finger on the A. You shouldn’t need to move your hand too much to reach the top D. 01 C major arpeggio The notes in the C major arpeggio are C, E and G. Play Middle C with your thumb, then the E with your index finger and G with your middle finger. This frees the little finger to stretch to the higher C should you wish to play it. 04 D minor arpeggio Although the D minor key carries a B flat, you do not need to worry about playing it when playing a D minor arpeggio. The root, minor third, and fifth notes in D minor are D, F, and A, so play those one after the other. 03 A minor arpeggio Like C major, A minor doesn’t have sharps or flats to worry about. Use the same finger pattern as the previous arpeggios – don’t be afraid to leave the keys if your hands are struggling to reach the octave.
  • 100.
    Give it atry Lookoutforthislogooneachpage, asitmeansthatanaudioand/or videofileisavailableonlinetohelp youmasteracertaintechnique. 100 Piano for Beginners 102 Gettogripswithrecording 104 Playthroughacomputer 106 RecordonaMac 110 RecordonaPC 114 Improveyour technique withapps Thenextstep Practise, record and continue to improve with our in-depth tutorials that will take your playing to the next level
  • 101.
    “There’s nothing likeputting a song of your own together to really help you figure out how to get the most from your instrument” Piano for Beginners 101
  • 102.
    102 Piano forBeginners Thenextstep T here are many reasons why people want to make recordings of themselves singing or playing a musical instrument. Some use recording as a method of becoming a better musician – they play their recordings back and hear the mistakes they’re making – while others want to record songs that they have written themselves. Whatever your recording goals or aspirations, we’re here to show you how to take your first steps into the world of recording. The great thing about technological developments is that there are a number of ways to record music – from using your Mac to even using your iPhone. Gone are the days of fumbling around in your bag for a notepad and pen to scribble down your musical ideas – just grab your iPhone or iPad and hit Record. The tutorials that follow this one will cover the different methods of recording piano with different devices. Realistically, you should open up your Mac if you want to record the next symphony; but if you’re looking to find your feet, look no further than your smartphone or tablet. When it comes to buying equipment, you should decide whether recording is just a hobby or a career, and spend less or more money based on these expectations. Make sure you don’t splash the cash on high-end equipment when you just want to record rough ideas. We will take you through some of the equipment solutions available for all levels of recording. Before you even sit down at the piano, read on for some handy general tips on recording. Gettogrips withrecording Start recording your very first masterpiece with an Apple Mac, iPhone or iPad Top tips for recording piano 01Be consistent For the best recording experience, use the same software. GarageBand is available on Mac and iOS, meaning that you have seamless integration of your projects regardless of where you’re working. 02Make your voice heard Don’t want to carry around any additional equipment? Going to record on an acoustic piano? Don’t panic – GarageBand has a handy Audio Recorder which utilises your device’s built-in mic. 03Stay in tune Make sure your piano is in tune. If you’re using a digital piano you’ll be fine, but there aren’t too many things that sound worse than an out-of-tune acoustic piano. 04Become a team player Use GarageBand for Mac to play along with backing tracks. This will not only improve your technique, but will help you get used to playing with a band. 05Start with a Mac If you’re a new pianist, gain confidence with GarageBand on Mac before recording piano with your iPhone or iPad – you can’t remove mistakes from tracks after recording with GarageBand for iOS. “You should decide whether recording is just a hobby or a career”
  • 103.
    Piano for Beginners103 “Recording piano onto your iPhone can take up a large amount of iPhone storage” Record piano with a Mac Record piano with an iPhone 01Stay in time It’s important to maintain a steady tempo. Most music-recording software packages for Mac will have a Metronome feature – use this to improve your time-keeping. 01Get connected Make sure your piano-recording hardware (you’ll need some to connect) has a headphone connection on it, otherwise you’ll be playing piano in silence! A great choice of kit is IK Multimedia’s iRig MIDI adaptor. 02Save some space Recording piano onto your iPhone can take up a large amount of iPhone storage – free up some space before you begin recording, otherwise you could end up running out mid-recording. 04Know your limits Want to create a polished-sounding recording? Use your iPhone to solely record your piano then export to software on your Mac, such as AmpliTube or GarageBand, to mix your recordings. 05Crank it up to… 7 Don’t be tempted to record at maximum volume. If your recording input level is too high, it will result in distortion – not a desired effect for a pianist. 03Keep it clean Don’t worry too much about getting your sound right before you begin recording – you can add lots of authentic effects and post-recording processing once you have nailed that difficult section. 04Select a location If you’re using your Mac’s on-board mic to record acoustic piano, choose your location carefully. Smaller rooms work best for a clean, interference-free recording, whereas bigger rooms add natural reverb. 03Keep your distance When recording acoustic piano with your iPhone’s built-in mic, enure you are seated at least 15cm away from the iPhone, otherwise you will end up with a bass-heavy recording. 05Use as a toolbox There are plenty of apps out there which offer handy piano tools in one app, such as a chord book and metronome, saving you space in your kit bag. 02Multi-take Recording software such as GarageBand offers you the ability to record several takes of your piano playing on a loop, giving you the power to pick the best-sounding take!
  • 104.
    104 Piano forBeginners Thenextstep 01Plug into the keyboard Grab your cable and then hunt down the input on your keyboard – you’ll probably find that it’s at the back or on the side. Depending on what cable your keyboard supports, you’re either looking for a single USB B-type port (shown above) or two MIDI ones. 02 Plug into the computer Once the cable is plugged into your keyboard, connect the other end into the computer. You will need to find a spare USB port. Your computer may have several. If you have a MIDI connection, you will have to connect both MIDI cables into the USB adapter first. I f you have a keyboard or digital piano – basically any non-acoustic piano – you may be able to hook your device up to a desktop computer to record, edit and generally just mess around. If your only option is an acoustic piano, then you will still be able to record on your computer, but you won’t have the same degree of control over sound. To hook your keyboard up to a computer you either need a USB cable (one may have been supplied when you bought your keyboard) or a USB cable, two MIDI cables and a MIDI-to-USB adapter. To find out which you need, check the back of your keyboard or digital piano. If USB or MIDI inputs are available they should be clearly labelled on your device. If you have an older model, you’re probably going to need the MIDI cables. The good news is that none of these accessories are particularly expensive – you can get USB and MIDI cables for less than £5 and an adapter for around £10. When you’re ready, plug either the MIDI or USB cable into your keyboard, and the other end into your computer. To start playing piano through your computer, you will need to use a digital audio workstation (DAW). If you’re using a Mac, you’ll be pleased to know that one comes free with it! GarageBand is part of Apple’s iLife suite and is a surprisingly sophisticated piece of software. Turn to page 106 for a more in-depth explanation and a tutorial on its features. If you find GarageBand isn’t high-end enough for you or you outgrow it, you could try Logic Pro, which is also exclusive to Macs. It isn’t cheap, however. A digital copy from the Mac App Store will set you back £139.99/$199.99. You have more options if you own a PC, but none that are built in to the operating system. Check the internet to find the best DAWs around – you may even find some fantastic options for free, but many paid-for alternatives will still offer a free trial. There are many advantages of playing your piano through a computer. Although you are unlikely to beat the sound of an acoustic piano, you can use different samples to vary your sound. Also, you may be able to export your compositions as sheet music, saving a lot of time and effort. Playthrougha computer Hook up to a PC or Mac to access millions of new sounds Here’s how to hook up Connect to a computer “There are many advantages to playing your piano through a computer; you can use samples and also export compositions as sheet music”
  • 105.
    Piano for Beginners105 03 Load up the software With your instrument successfully hooked up, your computer should recognise it as an external device. Now you’re connected, load up your music software of choice. We’ve chosen GarageBand. Play a chord on your keyboard/controller. If your keyboard/controller is hooked up correctly, the software will recognise it. 04 Record! Now you’re all set up, the only thing left is to make some sweet music! Click on the Record button and start playing on your keyboard – the software should recognise the pedals too, so don’t be afraid to incorporate those as much as you think it necessary. Hooking up your keyboard Different connections Digital audio workstation You will need a DAW to record and edit music. This one here is Logic Pro, only available on Mac Keyboard connection Either your two MIDI cables or single USB cable must go into the keyboard. The port will probably be at the back or on the side Computer connection Regardless of the method you’re using, you will likely have to connect your cable to your PC/ Mac via USB. Make sure you’ve got an empty port handy! Top tip Demos and trials Many premium digital audio workstations are extremely expensive (sometimes upwards of £400/$500), so if the one that you’re interested in offers a free trial or demo, make sure you check it out!
  • 106.
    106 Piano forBeginners Thenextstep W ant to hear yourself back or record one of your own creations? Look no further than your Mac computer. GarageBand is a music-making application which comes pre-installed on your Mac as part of the iLife package. Whether you’re a seasoned musician or someone who just wants to have a go at making some noise, GarageBand is the perfect place to get creative. Technological developments have come a long way since the days of recording music to tape. Thanks to GarageBand, you no longer need a bank loan to be able to record a song. You don’t even need any external equipment – computers enable you to plug your electric piano directly into a USB port and start recording straight away. GarageBand has the facilities to record any instrument, whether that’s via a microphone or plugged straight in. If you don’t have an electric instrument, though, GarageBand has a variety of Software Instruments which sound just like the real thing, whose notes can be typed in using the Musical Typing tool or clicked in using the on- screen piano. GarageBand is particularly good at recording piano because you can plug straight into your Mac as we covered on page 104 – it doesn’t travel via any other equipment. It records you playing MIDI signals rather than real audio (although you do have an option to do so). This means that it’s a lot easier to edit your tracks and change instrument sample, although you may lose the humanity of your recordings somewhat. RecordonaMac Learn to record piano concertos from the comfort of your Mac with a few simple clicks in GarageBand The main features and tools explained Navigating GarageBand “You can plug your piano straight into your Mac” “Take a deep breath and click the Record button when you’re ready to record your piano track” Go back to the start Rather than spending a few seconds pressing the Rewind button to go back to the beginning of the track, just click the icon to go straight back to the beginning of the recording – no waiting around required Ready, set, record Take a deep breath and click the Record button when you’re ready to record your piano track. If you’ve set a metronome, this will ‘click’ for four beats before GarageBand starts recording your playing. GarageBand will continue recording you until you click the Stop icon or hit the space bar Add effects GarageBand’s Inspector feature has a multitude of effects which you can apply to your recording. These can drastically change the sound of your recording, whether it’s by adding a touch of reverb (echo), or distortion which turns a piano into something you might hear on a heavy metal track Set the tempo The Tempo tool is often used to control the overall speed of a recording when using GarageBand’s built-in loops. However, it can also be used to control the speed of the Metronome. Click the number and drag the slider upwards to increase the tempo and downwards to decrease it Top tip Learn to Play If you’ve only recently picked up a piano, GarageBand offers video piano lessons which cover the basics of playing. Head to the‘Learn to Play’ section to find out how to play hit songs – taught by the artists who made them famous.
  • 107.
    Piano for Beginners107 Time signature This changes the time signature of a project. See pages 38-39 for more on them Cycle Region If you’ve already recorded a track and want to record something else over the top of a particular section – for example, the chorus – use the Cycle Region tool to select part of the track and repeat it so you don’t have to stop and start to get it right Apple Loops If you want to add some hard- hitting beats or a spot of light accompaniment, make sure you check out the Apple Loops menu. Use the tabs at the top to filter through the thousands of samples, then click on one to hear how it sounds. You could make a whole song using just these! Keeping time Having an out-of-time recording is disastrous! However, GarageBand comes with a built-in Metronome, meaning you can keep in time, at all times. Click the Metronome icon to turn this feature on and off – it will glow blue when it’s turned on and remain grey when it’s switched off
  • 108.
    108 Piano forBeginners Thenextstep GarageBand is a really great recording tool for a beginner, as it’s a low-cost option that’s incredibly easy to use. It enables you to bring the recording studio into your Mac and all you have to do is show up at your computer with a keyboard and a handful of songs, and you’re all set to create the next hit record using Apple’s superlative music software. GarageBand is built to record music – whether you want to record just one person with one instrument or a whole band. The software covers all areas of the creative recording process, from initially capturing the recorded sound, to editing it and applying effects. You are able to take a cleanly recorded instrument and make it sound just like it was recorded at Wembley Stadium with just a few simple clicks. It isn’t just a hub for live musicians, though. If you have never picked up an instrument or tinkled a piano key in your life, GarageBand has something for you. The software has several thousand loops pre- installed; loops are small samples of music which can be pulled together to make a completed song, and there are loops to suit every single style and cover every single instrument imaginable. Even if you have absolutely no prior recording experience, recording is surprisingly easy with GarageBand. For digital pianists and keyboardists in particular, you can just plug in and play. Just connect via USB and GarageBand is already set for you to record some music (see page 104 for a tutorial). If you want to record an acoustic piano, you can set up a microphone and record in GarageBand with that. The tutorial below shows you how to record a live piano on Apple’s fantastic software, including how to set up your very first project, picking the right settings and preferences, checking the levels and, finally, hitting that record button. So sit back, grab a cup of tea and your favourite tunes, and let’s learn how to record your first piano track with GarageBand. Get started with GarageBand Record your first track straight onto your Mac Create live piano recordings Record your piano 01Get started Open GarageBand. In the New Project window, select ‘Empty Project’ not ‘Keyboard Collection’. When it has been set up, hit the + button and click ‘Record using a microphone or line input’ to record a live instrument. 02Check your settings Click GarageBandPreferences. Choose the Audio/MIDI tab. This is where you control the preferences for any external instruments to be recorded, such as guitar or vocals. Select Audio Input then your Microphone or Built-in Input..
  • 109.
    Piano for Beginners109 A look at some of the tools in GarageBand Explaining the interface Volume and Pan You can control the volume of your instrument tracks by moving this slider up and down. Twist the knob next to it to alter the panning of the instrument Go Solo Only need to hear vocals when recording piano? The Solo tool enables you to hear one track playing back from a group of recorded tracks Zoom If you’re making time-specific edits to your recording, the Zoom tool will come in handy. It increases or decreases the viewable size of your track to show more or less 03Sound check Now your mic should be set up, so play your piano! The level bars next to the track will flash green; if they glow red at the edge, turn your levels down using the track volume slider. 04Hit Record If you’re happy with how your piano is sounding, this is your big moment! It’s your chance to commit your work to ‘tape’. Click the Record button and play away. Hit the space bar when you’ve finished playing. Top tip Play it safe Recording your piano as cleanly as possible is recommended as GarageBand has lots of effects that you can play around with and add after you’ve finished recording. If there is any interference, your effect will be applied to that too! Choose your weapon Use this menu to select your tone from GarageBand’s vast library of built-in sounds. When recording piano, try some of the clean guitar sounds
  • 110.
    110 Piano forBeginners Thenextstep T he path from piano zero to piano hero can be fraught with obstacles, but thanks to the PC and the right piece of software it can be a far smoother transition than expected. There is no need for the expensive studios or expert producers that come with a recording contract. All that is needed to record multilayered music tracks is a computer, a piano or keyboard and recording software such as Audacity. There are a host of software recording packages on the market, ranging from beginner to pro, costing nothing to thousands of pounds. A great option for beginners is Audacity, a powerful, free and open-source audio editor and recorder. The fact that Audacity is free makes it a great starting point for anyone who wants to start recording piano tracks and more. The program can be used to record live audio; convert tapes and vinyl into digital recordings; edit Ogg Vorbis, MP3, WAV or AIFF audio files; and mix sounds/tracks together. Recording can be as simple as plugging in a microphone into a sound card and hitting the Record button. Alternatively, an instrument – like a digital piano – can be plugged directly into a sound card and recorded direct to the hard drive. Any recorded audio can be edited and tweaked until the desired result is achieved. Audacity is an ideal package for those just starting out, but if you’re looking to spend some money then there are more sophisticated, professional PC-compatible audio editors on the market. A leading industry-standard tool is Cubase (www. steinberg.net) which incorporates enough tools for professional-standard recording. Other contenders include Cakewalk Sonar (www.cakewalk.com) and Avid Pro Tools (www.avid.com). RecordonaPC Getting a piano from analogue to digital involves the combination of a computer and the right software. Audacity is a great free option to start recording with The main tools and features Using Audacity “A great option for beginners is Audacity, a powerful, free and open-source audio editor and recorder” “Recording can be as simple as plugging in a microphone into a sound card and hitting the Record button” Edit The Edit toolbar offers access to all the typical components found in a set of edit tools. Cut, copy and paste are three key components which can be used to help build tracks. The zoom in/out tool allows for a closer look at an audio track or to show up to 200 hours of audio on a single screen Audio tracks As soon as the Record button is pressed, a track will appear with a waveform of the currently recording audio. Users can play back the current track(s). A new track can be added via the Tracks menu followed by Add New. Click the up arrow on the left of a track to collapse it and allow for the viewing of multiple tracks Take control The Transport toolbar is used for controlling playback and recording. There is the standard selection with Play, Pause, Stop, Skip and Record buttons. To loop a track, hold down the Shift key when pressing the Play button. Pressing Record always creates a new track. To record on the same track, hold down Shift when pressing the Record button Top tip Hide unwanted toolbars By default Audacity displays all available toolbars. To hide the toolbars you don’t want, go to ViewToolbars and click to hide. Repeat to show a toolbar again or select Reset Toolbars to show all.
  • 111.
    Piano for Beginners111 The Meter toolbar The Meter toolbar is one of the more important toolbars in the recording process. The red bars to the right indicate the recording level. This works in combination with the Input Volume Slider to help to define the recording level. The green bars to the left indicate the playback level Device toolbar The Device toolbar defines the audio host, input device, output device and number of input channels. The audio host is how Audacity communicates with a playback and recording device – this is MME by default. The Output device is the speakers, while the Input device is the recording option, eg microphone Mixer toolbar The Mixer toolbar helps control the output and input levels of the audio devices currently selected in Device toolbar. There are two sliders, one for the volume for any connected speakers/ headphones and one for any connected devices such as a piano or microphone. Simply move left/right to adjust the volume Arrange toolbars The toolbars in Audacity are arranged in a default arrangement, but can be moved for a more bespoke version. To move a selected toolbar, grab the edge to the left of the toolbar and drag into the new position and drop to place. The toolbars can be reset to the default position by going to the ViewToolbarsReset Toolbars Effects menu The Effect menu comes with a set of built-in effects including Amplify, Bass Boost, Change Pitch, Change Tempo, Compressor, Echo, Leveller, Phaser and Wah-Wah. To apply an effect, first select the part or all of a track and then select the desired effect from the Effects menu Timeline The Timeline is displayed above recorded or new tracks and measures the length of a track starting from zero, or the beginning of a track. The arrow at zero can be dragged to make a selection for a close-up view for more intricate editing Speed up/slow down The Transcription toolbar is effectively only one component, a slider. Moving the slider left and right will adjust the speed of playback for the selected track. Move the slider left to slow it down, right to speed up and click the green arrow to play back the track at its new speed
  • 112.
    112 Piano forBeginners Thenextstep Whether you’re wanting to record yourself to hear how your skills are shaping up, or you want to record a song you’ve thought up, Audacity is a great, free bit of software to help you record your playing. Audacity can be used to record audio from a variety of sources and edit it – you just need a few select bits of hardware, which you can find more on in our ‘Recording hardware’ section over the page. An input and output device needs to be connected to the PC where any recording or editing is to take place. The output device is the component that will allow the user to hear any recorded audio; typically, this comprises headphones or speakers. An input device is the device with which the recording is going to be made. When recording a piano in Audacity there are two common scenarios: direct input or microphone. Direct input is where an instrument is plugged into a sound card ready for recording. The alternative is to use a microphone. Once an input device has been recognised, the desired recording device will need to be selected from the Device toolbar. Alternatively, this can be set up via the Edit menu and PreferencesDevices. This will list the Interface option alongside the Playback and Recording device. The Meter toolbar will need to be activated to set up the recording levels. Spend a little time playing with the Input Volume Slider to get the best recorded output. Make sure it is not too quiet, and make sure it is not too loud. With the levels set, it’s time to record. Users are able to play back a single track, or hit Record again in order to create multiple tracks. Then it is time to bring out the producer in you; trimming tracks, adjusting volumes and adding effects to create a complete pro-sounding track. Follow this simple tutorial to take your first steps in recording, including getting connected and testing the levels. “Once an input device has been recognised, the desired recording device will need to be selected from the Device toolbar” Create an audio track Record your piano 01Create a new project By default Audacity will open at a project window. Before you start recording, the project must be saved. Head to the File menu and select ‘Save project as’. Click the OK button, name the project and click Save. 02Get connected To record a track, an input device will need to be connected, eg microphone or direct input. The input device will be listed in the Device toolbar; select the desired device from the drop-down list. Top tip Add oomph The recording levels of a piano may not always be exactly as expected; perhaps not as powerful as desired. To give some extra oomph to an individual track, select the audio and turn up the Gain slider under Mute/Solo. Get started with Audacity Record your first track straight onto your PC Location courtesy of Music Is Life, Bournemouth
  • 113.
    Piano for Beginners113 “The ideal recording companion” 03Test the levels Before recording, the levels need to be tested. In the Meter toolbar click the microphone icon to activate the input meter. Now play the connected piano to view levels. Adjust the Input Volume Slider accordingly. 04Record track To start recording, simply hit the red Record button and start playing. When finished, hit the Stop button. To play back the recording, hit the Play button. Click on the track to start at a different point. Cables and jacks As well as via USB and MIDI you can record an electric piano by plugging into the sound card. For this, the right cable is needed. There are two options here: a single cable with a 1/4” (6.3mm) plug at one end (for the piano) and a 1/8” (3.5mm) mini-jack at the other, for the sound card (eg http://bit.ly/ LynKn1). The alternative is a jack that converts a standard audio lead into a mini-jack. Preamp/USB audio interface A preamp is not an essential piece of equipment, but it can add more finesse and flexibility to a recording. Introducing a preamp/USB audio interface to the process will allow the user to boost the piano signal and produce a high output signal. Try M-Audio, Fast Trak or Avid for well- priced options. To start recording piano, there are a few possible hardware combinations to consider Recording hardware Microphone A microphone is the ideal recording companion, especially for those using an acoustic instrument. There are plenty of options here, from budget to pro level. A basic desktop microphone will do the job, but the quality will not be as good. For better-quality recordings, a more expensive microphone, such as the Blue Snowball with Audio HD, can be used. Sound card A sound card is as essential as a piano for the recording process. Thankfully, all computers come with a sound card built in. The quality of the card depends on the quality of the computer, but all will allow recording. A decent budget card – try Creative, Asus or M-Audio – is a good investment for better recordings.
  • 114.
    114 Piano forBeginners Thenextstep S martphones and tablets are fantastic tools to aid creativity thanks to their scope and power. It is now possible to see sheet music for your favourite musician’s latest album and get virtual lessons on various instruments from the App Store. The piano is one such instrument that is brilliantly catered for, with apps on offer to take you through everything, from the very first time you sit at a piano, to the point of writing your own portfolio of songs. The beauty of using your own device is that it takes away some of the daunting nature of having to sit at a full size piano. Instead you can sit back in comfort (wherever you may be), iPad in front of you, and experiment as you wish. Just a few quick downloads from the App Store and you can have every variation of piano or keyboard in front of you, as well as virtual teachers to guide you through every possible process you could ever wish to learn. These pages will highlight some of the best apps for improving your piano skills, regardless of your experience. We will take you through from the very beginning, up to getting more creative and writing and playing your own music. Improveyour techniquewithapps Get started, hone the basics, then get creative on the piano using these apps for your iPhone and iPad Virtuoso Piano Free 3 Price: Free Developer: Peter Nagy The app in amongst this selection that boasts the most functionality, Virtuoso responds when you tap the keys in different ways in order to give a more realistic sound. It therefore provides an experience most akin to that of playing a real piano, making it very valuable as a learning tool. And if you are taking the learning plunge with a musical buddy, the app also supports duet mode on iPad, allowing two people to play simultaneously. This is a great way of learning, as you can encourage each other and learn to harmonise - and the app format makes the whole experience a little more relaxed and fun. Virtuoso also comes with support for AirPlay, so should you want to put on a performance for friends and family via your TV, or simply use it to see your finger work on a bigger screen, this is the app for you. GarageBand Price: Free Developer: Apple GarageBand is probably the most instantly recognisable of all the apps featured here, coming as part of Apple’s iLife suite on both desktop and mobile. The piano section of GarageBand not only contains a bigger variation of keyboards than any other app here, but also includes Smart Keyboard, where users can select a note and then have a melody created for them. It’s a really nifty way to learn about notes and keys that work well together. Of course, having the editing power of GarageBand at your disposal makes it a breeze to mix your piano creations with other music tracks from some other instruments. Top tip Choose wisely If you have both a tablet and a smartphone, make sure you pick the best version of the app you want. For example, it would be better to use a chord finder on a phone, as it’s always on you. On the other hand, there’s not much point in a sheet music reader on anything but a tablet. You may have to pay for an app twice if you want it on both formats!
  • 115.
    Piano for Beginners115 Piano Tutor for iPad Price: £2.29 Developer: SmileyApps A great way to measure your progress when it comes to sheet music reading skills is by using the quiz section in this app. Piano Tutor will highlight a note on the sheet music and then ask users to hit the correct note on the on-screen keyboard. Your speed of response will be clocked, and with a range of tests (each one containing 24 questions) you can give your knowledge a strenuous workout before getting back to learning by playing the simple songs that also come in the app. Magic Piano Price: Free Developer: Smule Magic Piano brings another element to the learning table in the form of competition. There is a big gaming aspect to this app, which allows you to earn points for how well you play along to popular songs. Magic Piano also contains a range of different keyboards to play should you want a change, and the beams of light to guide you to the correct note are a good way of perfecting your finger work on the keys. Magic Piano injects a nice taste of fun into the learning experience, keeping you interested and engaged. Tiny Piano Price: Free Developer: Squarepoet, Inc. A basic app in terms of functions and interface, but Tiny Piano comes with a host of modern songs for users to learn. This app actually places you in charge of the timing, so is very good for developing your understanding of tempo. For an added confidence boost, the app allows you to tap anywhere to play the next note, rather than on the keyboard itself if you’re stuck. It’s a nice tool should you want to learn the melody and notes first, before going back and trying to play it yourself. “Through competition, Magic Piano injects a nice taste of fun into the learning experience, keeping you interested and engaged” Nota for iPad Price: £2.29 Developer: All Forces A brilliantly simple and usable app, Nota is a combination of reference guide, quiz and solid learning tool, making it essential to new piano users. Tap a note on the keyboard to see it shown as a character of sheet music, giving you the chance to instantly learn and remember the placement and look of each note. There is also a complete reference book full of all the key terms and definitions of every aspect of sheet music. Then, once you think you know your stuff, there is the quiz mode to turn to and test your degree of knowledge. Steinway Etude Price: Free Developer: Steinway Musical Instruments One of the most impressive aspects of Etude is the in-app store, where users can download songs and access the sheet music. As the song plays and the coloured indicators move along the sheet, the notes on the keyboard are also highlighted below. This means you can firstly begin to understand how sheet music is formed, and then begin to play along with it. So not only can you use the app as a digital play book, but also as a vital learning tool.
  • 116.
    “The piano hasplayed a large part in popular music for a long time now, from early hits up to modern greats” Give it a try Lookoutforthislogooneachpage, asitmeansthatanaudioand/or videofileisavailableonlinetohelp youmasteracertaintechnique. 116 Piano for Beginners 118 Pop 120 Blues 122 Jazz 124 TheClassicalperiod 126 TheRomanticperiod 128 Contemporarypiano music Playin thestyleof… Discover how certain genres get that distinct sound and learn how you can achieve it
  • 117.
  • 118.
    118 Piano forBeginners Playinthestyleof… Pleasant progressions and simple melodies have helped the piano become part of some of the world’s most-loved songs Pop Inspirational works A Thousand Miles Artist: Vanessa Carlton Year: 2002 Label: AM Love it or loathe it, the exceptionally catchy piano riff that runs throughout this song will be stuck in your head all day. Written as a tribute to Carlton’s grandfather, the hit single from her album Be Not Nobody is a great place to start for some pop inspiration. Doo-Wops and Hooligans Artist: Bruno Mars Year: 2010 Label: Atlantic/Elektra This chart-topping album features some Reggae, RB, Soul and Rock to name but a few. He is also a celebrated pop pianist; his skills are showcased particularly well on the urban ballad, Just the Way You Are. Takk… Artist: Sigur Rós Year: 2005 Label: Geffen/EMI The enchanting single Hoppípolla is a beautiful piece to learn on the piano, and has been showcased in countless films and television shows. Be prepared to be utterly swept away by this truly epic ethereal album as it draws on a range of influences. A Rush of Blood to the Head Artist: Coldplay Year: 2002 Label: Parlophone Featuring the legendary piano anthems Clocks and The Scientist, this album is jam packed full of extremely beautiful, seemingly effortless motifs that embrace simplicity in an extremely clever way. Top pop albums to sink your teeth into Audio file Listen to the audio files and follow along on your own keyboard Give it a try T he piano has played a significant role in popular music for a long time now, from early hits like The Righteous Brothers’ version of the classic Unchained Melody to modern greats like Adele’s Set Fire To The Rain. The piano tends to take one of two roles in a pop song: as a backing instrument that adds depth to the accompaniment, which will usually consist of drums, bass, and guitar; or as the only instrument backing a powerful singer for a ballad-like song. Either way, the piano will rarely take centre stage in a pop song. This means it can tend to be a less demanding place to start when focusing on a genre of music to practise on. As a backing instrument among several others, the piano will probably only be playing chords on the right hand and maybe bass notes on the left. Note that a bass guitar would likely be present, so a left-hand part isn’t usually essential. These chords will normally be played on the beat and probably won’t deviate from the chord progression on which the song is based. When a piano is duetting with a vocal performance, the parts will be more elaborate to add interest when the vocalist isn’t singing. This means that more demanding songs to try on piano will likely feature fewer backing instruments. Pop music relies on mostly simple chord progressions, so in most instances you’ll be playing melodies based on major, minor and perhaps seventh chords. Try to limit your progressions to around four chords. For a couple of a catchy progressions, try i-VI-III-VII and I-V-vi-IV. In the key of C these would be: C minor-Ab major-Eb major-Bb major, and C major-G major-A minor-F major. “The piano will rarely take centre stage in a pop song”
  • 119.
    Piano for Beginners119 Sarah McLachlan A Pop-Piano Angel Sarah McLachlan is renowned for her enchanting mezzo-soprano vocals and tear-jerking ballads. The Canadian songstress is classically trained on the piano, which features heavily in much of her music. Her hit single ‘Angel’, inspired by the fatal overdose of fellow pop-rock pianist, Jonathon Melvoin, is a truly beautiful piece to listen to and to learn. Many of McLachlan’s songs, like those of numerous other pop composers, are relatively simple in terms of their structure; using subtle variations on the classic four chord formula (root, fourth, fifth, minor second) combined with resolution chords (such as sus2). Top tip Keep pedaling The key to mastering smooth transitions between chords as Sarah does so beautifully, is to learn when to apply the sustain pedal. In this practice piece, lifting your foot at the start of each bar will sustain the harmonies and create a deeper sound. Give it a try Try the pop style with the music below
  • 120.
    120 Piano forBeginners Playinthestyleof… A s a genre, blues music has been around for a long time (well over a century now) and the piano has been a huge part of its sound for the duration. While it has a lot of sub-genres – some well known, like boogie woogie and delta blues, others not so well known – there are a few components that remain consistent among songs of this genre, appearing time and time again. The first of these components is blue notes. These notes give the blues genre its distinctive sound. While these notes don’t fit into any major scale, they are still notes that can be found on the piano or keyboard. For example, they will usually present as flattened third, flattened fifth/sharpened fourth and flattened seventh notes of a scale. So in a C major scale, the blue notes would be Eb-Gb/F#-Bb. The Eb and Bb are already flattened on the minor scale. So it may help you remember a natural minor scale and only flatten the fifth. On other instruments these notes may be tuned down even further, and if your keyboard supports microtonal tuning you may want to experiment. The second component that defines the blues genre – through all its variations – is its form. Many songs of the blues genre use an I-IV-V progression across 12 or 16 bars. If you were to play an E blues (a common blues for a guitarist), it would feature E-A-B – the first, fourth and fifth degrees of the E major scale. Improvisational solos are also a big part of blues piano playing. However, the good news is that you can stick to the corresponding blues scale’s notes; use these and your solos should sound great. A broad genre with a few defining characteristics, blues is bound to have something for you Blues Inspirational works The Honeydripper Artist: Roosevelt Sykes Year: 1961 Label: Bluesville Roosevelt Sykes is renowned for his top-tapping, boogie-woogie piano as well as his risqué lyrics. This album remains one of the greats from a true legend of the genre, who dominated the blues piano scene for well over six decades. Tasty Blues Artist: Little Brother Montgomery Year: 1961 Label: Prestige / Bluesville 1012 One of the most versatile pianists of the 20th century, and this aptly named album showcases his Chicago-style blues to perfection. He is renowned for keeping the true heritage of blues music at the heart. Eagle Rock Rag Artist: Lead Belly Year: 2015 Label: Sandrew Metronome This record is a great example of raw ragtime blues. Written in 2/4 or 4/4 time, with a characteristic left hand pattern of bass notes on odd-numbered beats and chords on even-numbered beats, with a syncopated right hand blues melody. Boogie-woogie trilogy Artist: Silvan Zingg Trio Year: 2008 Label: CD Baby Silvan Zingg loves boogie-woogie blues so much, he founded an international festival to celebrate it. This album sees Zingg’s smooth blues piano alongside the equally talented Nuno Alexandre on double bass and Valerio Felice on drums. Some of the greatest piano blues records “Improvisational solos are a big part of blues piano playing” © Svein M Agnalt Audio file Listen to the audio files and follow along on your own keyboard Give it a try
  • 121.
    Piano for Beginners121 Kenny Wayne The Boss of Blues Kenny “Blues Boss” Wayne is a true maestro of both blues and jazz piano. He is world-renowned for his raw and edgy style of boogie- woogie playing. Whilst boogie-woogie piano is melodically similar to traditional styles of blues music, it is instantly recognisable by the use of an upbeat bass figure designed to get people dancing. This simple riff is repeated throughout most of the tune and transposed with each chord change, making it ideal for beginners to try. Make sure to really stomp out the bass note at the beginning of each bar! Give it a try Embrace the blues with the following piece Top tip Get comfortable The blues scale is at the heart of this genre. Getting comfortable with finding it in any key will give you freedom to improvise. Learn this six-note pentatonic scale by memorising its distinctive sound, and then practice transposing it.
  • 122.
    122 Piano forBeginners Playinthestyleof… Immerse yourself in this passionate and diverse genre, which demands musical skill © Robert Drózd Jazz Inspirational works Get to grips with some jazz standards Gouache Artist: Jacky Terrasson Year: 2012 Label: Universal Music This eclectic album by the hugely talented Jacky Terrasson features covers of hits by John Lennon, and Amy Winehouse. Whilst this may not be the most original album out there, the fusion of intricate jazz piano and classic pop hits is too good to miss! The Girl in the Other Room Artist: Diana Krall Year: 2004 Label: Verve The extremely distinctive contralto tones of Krall’s voice, combined with some seductively smooth melodies, make this an ideal album to ease you into the many different forms of jazz piano. The Bandwagon Artist: Jason Moran Year: 2010 Label: Blue Note Records This incredible live recording showcases Moran as the Jazz virtuoso he truly is. From foot-stomping, upbeat and hectic melodies, to smooth urban melodies that bring you right back to the world of 21st century jazz. Twentysomething Artist: Jamie Cullum Year: 2003 Label: UCJ, Candid Records, Verve Jamie Cullum’s use of piano percussion adds a whole other dimension to his sound by tapping out rhythms on the top of the piano, underneath the piano, and even on the hammers and strings. A s it’s one of the most complex musical genres in the world, playing jazz is often regarded as the ultimate test of a musician’s ability. Like the genre in general, jazz pianists rarely stick to any musical templates or rules – any time signature or chord structure goes! Relatively simple chords like major sevenths (maj7) are very common, but other commonly used chord types of the jazz sound include augmented sevenths and minor ninths, which are rarely played in other types of popular music. The one rule-of-thumb of jazz music is that there are no rules in jazz music; pretty much anything goes, and there isn’t much that doesn’t belong in a jazz number. Early on in the genre’s development, the piano often took a leading role. This was mainly thanks to its ability to play chords (unlike instruments such as the trumpet) and the fact that it could carry a bass line in addition to the melody. It is the piano’s variety that makes it a staple of the jazz sound. As the genre has progressed over time, so has the instrumentation. This has led to the piano taking more of a back seat in an ensemble – but thanks to jazz’s unorthodox structures, even backing parts can be slippery beasts. Improvisation is also a significant part of jazz piano playing. Skilled jazz pianists may eschew sheet music in favour of playing unscripted melodies based on the scales and arpeggios on the chord progression of the piece. However, these chord progressions aren’t exactly basic I-IV- Vs, so an improvisational jazz pianist will need a vast knowledge of chords, scales and arpeggios in order to successfully perform. “Skilled jazz pianists may eschew sheet music in favour of playing unscripted melodies” Audio file Listen to the audio files and follow along on your own keyboard Give it a try
  • 123.
    Piano for Beginners123 William James “Count” Basie ruled the jazz scene for over half a century, as both an accomplished pianist and bandleader. He was renowned for his spare and yet exuberant style of playing, that always had a strong element of swing. In 1935, Basie formed the Count Basie Orchestra, which he led for almost 50 years. The group maintained their popularity throughout the decades due to Basie’s constant creative innovations, including the use of two “split” tenor saxophones, and riffing with a big band. Many famous musicians came to prominence under his direction, including the singer Joe Williams. Give it a try Be bold and try experimenting with jazz Top tip Swing like Basie Notes with equal written time values are performed with unequal durations, alternating long and short. For two quavers, the first should last slightly longer than the second, but the two should still fit within one beat. Count Basie A legendary figure in the jazz piano world
  • 124.
    124 Piano forBeginners Playinthestyleof… W estern classical music after 1600 can be divided into four different eras: Baroque, Classical, Romantic and 20th Century. While the Baroque era (around 1600-1740) relied heavily on keyboard music, the preferred instrument of choice was usually a harpsichord, an ancestor of the piano and the organ. By the mid-18th Century, however, the Classical period had arrived, and it featured solo music composed on the fortepiano, which was an early version of the piano we know and love today. The Baroque era’s elaborate flourishes and confusing multiple melodies were gradually replaced by homophonic texture, where multiple instruments would play one melody over an accompaniment. In Classical-era piano music specifically, simple arpeggios and Alberti bass were used a lot with the left hand. They were used as repeated accompaniment patterns to keep the piece flowing but not lessen the importance of the melody. The Classical era was home to many of the world’s most famous composers, many of whom remain household names today. These include Joseph Haydn, who wrote many works for piano, Wolfgang Amadeus Mozart, one of the most talented composers to have ever lived, and Ludwig Van Beethoven, a highly influential pianist who wrote several piano sonatas and concertos and was a key proponent in the transition from classical to romantic music. Rich, obvious melodies and simple patterns define this important musical era TheClassical period Inspirational works Fantasia No. 3 in D minor Artist: Wolfgang Amadeus Mozart Year: 1782 This enchantingly ominous piece is one of Mozart’s most popular piano solos and great to learn. It is said that the ending was actually written by August Eberhard Müller, as the piece was left unfinished at his death. Piano Sonata No. 52 in E-flat major Artist: Joseph Haydn Year: 1794 This was the last of Haydn’s infamous piano sonatas, and is considered by many to be his greatest. The entire piece is an outstanding display of technical skill and beautiful, unique harmonic structure. Opus 49, No.4 Artist: Johannes Brahms Year: 1868 This recognisable melody is possibly the most famous lullaby in the world. If you can resist drifting off to this beautiful piece, then listen out for the intricate use of simple harmonies and triads that provide a tender contrast to Brahms’ orchestral compositions. Lang Lang in Paris Artist: Lang Lang Year: 2015 Label: Sony Classical Records Lang Lang is one of the most accomplished pianists of the 21st century, offering technically solid and yet expressively innovative renditions of some of Chopin and Tchaikovsky’s best-loved pieces. Great classical piano pieces “The Classical era was home to many of the world’s most famous composers” Audio file Listen to the audio files and follow along on your own keyboard Give it a try
  • 125.
    Piano for Beginners125 Give it a try Franz Schubert A master of solo piano composition Franz Schubert was considered one of the last composers of the Classical period and one of the first of the Romantic period, with a clear progression through these genres visible in his work. In his early years, influences from Beethoven and Mozart are clearly seen in his use of formal structures and dramatic harmonies. Throughout the later stages of his career, he developed a more discursive, experimental sound that was sadly not fully appreciated until after his death in 1828. During his short life of just 31 years, Schubert had a tremendous influence over the way in which melodies for solo piano were structured. Top tip Amazing arpeggios As Schubert transitioned between the Classical and Romantic periods, arpeggios featured heavily in his work. In an arpeggio, the notes of a chord are played in either ascending or descending succession. Try holding the sustain pedal down for each arpeggio to create fluidity. See if the Classical period is for you
  • 126.
    126 Piano forBeginners Playinthestyleof… T he Romantic revolution throughout the 19th Century wasn’t just felt in music – the desire to express emotion and creativity swept across the literary and artistic worlds too – but it may have had its biggest impact here. The piano was a massive part of it, thanks to gradual improvements in its form. Indeed, it could be argued that the piano was the most important instrument of the Romantic era as it grew in popularity throughout this period. While the era’s symphonies grew larger in size and became more grandiose in scale with more and more instruments being used, piano solo pieces started getting shorter and more digestible. As a result, the piano became a more popular instrument. These miniatures went by names like ‘Nocturne’ and ‘Etude’, and helped earn the piano a new audience. Also born out of the Romantic era was the ‘virtuoso’ movement, of which Franz Liszt was a big part. A term still used to this day, the virtuoso would wow the audience with a display of pure skill on their instrument, which, on the piano, included scales, trills and arpeggios often played at break-neck speed. Musically, the Romantic era focused on longer, more lyrical melodies, stark contrasts and several different musical ideas within a movement. It kept the homophonic sound of the Classical era but tended to use changes in tempo and time signatures to hold the listener’s interest. The next era in classical music ushered in freedom and creativity TheRomantic period Inspirational works Waltz in D-flat major, Op. 64 No. 1 Artist: Frédéric Chopin Year: 1847 One of Chopin’s most famous piano compositions. His distinct style fuses the simple harmonies of the Baroque period with the chromatic dynamism of the Romantic era, brought together in true virtuoso style. Six Duets, Op. 11, No.4 - Valse Artist: Sergei Rachmaninoff Year: 1830 Grab a friend and have a go at playing this fast and furious duet from this Romantic legend. This show-stopping melody provides a fun and lyrical contrast to the sounds of many other composers at the time. Sonata in E-Major, Op. 6 Artist: Felix Mendelssohn Year: 1826 Every movement in this piece showcases Mendelssohn’s talent for writing wonderfully expressive and fluid music that made him one of the most popular composers of the Romantic era. Works for Piano Volume 2 Artist: Hans von Bülow (composer) Mark Anderson (pianist) Year: 2013 Label: Nimbus An early student of the virtuoso Romantic pianist, Franz Liszt, Büllow is noted for his numerous renditions. However, this collection, proves he is a fantastic composer in his own right. Top pieces from the Romantic era “The virtuoso would wow the audience with a display of skill” Audio file Listen to the audio files and follow along on your own keyboard Give it a try
  • 127.
    Piano for Beginners127 Give it a try Claude Debussy This legendary composer certainly makes an impression The intricate, enchanting melodies of Claude-Achille Debussy (1862-1918) are still the source of inspiration for many pianists today. In the instantly recognisable piano solo, “Clair de Lune”, chains of seventh, ninth and eleventh chords sweep dreamily across the keys, enriched with complex chromatic articulations. Debussy is often considered to be the founder of impressionism, a sub-genre within the Romantic movement in which the melody is designed to create images in the listener’s head. He was also renowned for his use of tempo rubato, which involves slowing down or speeding up your playing freely to add to the imagery you wish to create. Enjoy the creativity of the Romantic period Top tip Painstakingly particular pedalling Debussy was very particular about the way pedalling should be used in his compositions. Try using both of the pedals at once in order to create the blurry, bell-like sound that is so characteristic of his work.
  • 128.
    128 Piano forBeginners Playinthestyleof… A lthough music purists would be loathe to label it classical, and the genre’s fans wouldn’t want to hear it be classified as straight-up pop, contemporary piano music tends to straddle the line between both genres and adds a bit of new age and world music into the mix. Compositions are often kept simple – especially when compared to the elaborate pieces performed in the Romantic era – and are usually based on accessible pop-like chord progressions, although just chords on their own are rarely used. Instead, the right hand can use the pop influences to craft beautiful and accessible melodies that will appeal to many. Vocal tracks aren’t often used in the genre, so the right hand can perform melodies similar to what a vocalist would sing in a pop song. The left hand often takes influence from the Classical period and usually plays arpeggios or Alberti bass patterns to accompany the melody rather than overpower it. Just because the music is more simplistic and attracts a wide range of listeners doesn’t mean that the pianists are any less skilled, though. It takes a great degree of expertise to craft a melody that will pull at a listener’s heart strings like many of the genre’s finest composers’ works do. Check out South Korean pianist Yiruma’s River Flows In You for an example of the contemporary piano music as its best – you’ll find that the catchy melody and simple chord structures that define the genre are both present and correct. Fusing classical and pop to create accessible yet beautiful songs Contemporary pianomusic Inspirational works Amélie Artist: Yann Tiersen Year: 2001 Label: Virgin Records This intricate and diverse soundtrack album propelled Yann Tiersen to the level of global recognition he deserved. The piano solos “La valse d’Amélie” and “Comptine d’un autre été” showcase his delicate style of piano composition. First Love Artist: Yiruma Year: 2001 Label: Stomp Music Yiruma’s simple and lyrical style of contemporary piano music provides the aspiring pianist with a smorgasbord of songs to learn. One of the most popular tracks on this hit album, “River Flows in You”, is a great place to start. I Giorni Artist: Ludivico Einaudi Year: 2001 Label: Dischi Ricordi S.p.A. The title track of this album has been featured in numerous shows and adverts. Einaudi’s distinctive sound is formed from incredibly simple, carefully constructed riffs, with heavy use of the sustain pedal creating a dreamy fluency. Sophomore Jinx Artist: Rob Costlow Year: 2002 Label: Tourist Records A great example of how the simple harmonic and rhythmic structures found within contemporary music, when played with enough emotion, can form such intricate and expressive pieces. Rob Costlow’s style will sweep you off of your feet. Check out these contemporary classics “It takes expertise to craft a melody that will pull at a listener’s heart strings” Audio file Listen to the audio files and follow along on your own keyboard Give it a try
  • 129.
    Piano for Beginners129 Fabrizio Paterlini Heart-breakingly beautiful piano Paterlini’s delicate and minimalist style is guaranteed to bring out the inner romantic in anyone. From his earliest works, such as “Viaggi in Aeromobile”, to his more recent albums such as “Autumn Stories”, Paterlini’s twinkling melodies and rumbling bass riffs are riddled with artistic intricacy and expressivity. In many of his recordings, Paterlini places the microphones very close to the wooden hammers. This creates a subtly deeper sound and unique tone, which picks up the vibrations of the strings and the percussive ring of the fingertips hitting the keys. Give it a try Mix styles for a contemporary result Top tip Express yourself Bring repetitive melodies to life by concentrating less on the instructions in the score, and more on your own expression. Try swapping speeds, dabbling with dynamics and playing with the pedals to find your unique sound.
  • 130.
    130 Piano forBeginners 132 Helpdesk t(FUUJOHTUBSUFERVFTUJPOT t5JQTPOQMBZJOHUIFQJBOP t )PXUPTIBSFZPVSNVTJDXJUI UIFXPSME 142 Glossary MJTUPGDPNNPONVTJDBMUFSNT FYQMBJOFEJOQMBJOOHMJTI 144 Essentialscales t5IFNBKPSTDBMFBOEBMMUIFNJOPST tWFSZLFZDPWFSFE 152 Chordslist tMMUIFDIPSETZPVOFFEUPLOPX t#PUIIBOETJODMVEFE Reference 4PNFGJOBMQPJOUFSTUPIFMQZPVMFBSOUIFQJBOPZPVSDPNNPORVFTUJPOT BOTXFSFE BHMPTTBSZBOEBOFTTFOUJBMDIPSETBOETDBMFTMJTU Give it a try -PPLPVUGPSUIJTMPHPPOFBDIQBHF BTJUNFBOTUIBUBOBVEJPBOEPS WJEFPGJMFJTBWBJMBCMFPOMJOFUPIFMQ ZPVNBTUFSBDFSUBJOUFDIOJRVF
  • 131.
    “If you’re thinkingabout learning to play piano then you probably have loads of questions. Here we try to answer some of the more common queries”
  • 132.
    132 Piano forBeginners Reference Yourquestions answered If you’re thinking about learning to play piano then you probably have loads of questions. Here we try to answer some of the more common queries Timescale I have no musical background and have recently considered buying a piano for the first time, so I was wondering how long it would take me to be able to play properly? That all depends on how much time you are prepared to invest. In most cases you will be looking at years rather than months, but it also depends greatly on what you want to play as you can easily learn how to play a simple one-handed tune in a day or two. Playing more complex pieces requires a greater understanding of the instrument and we would recommend a series of lessons – at least until you pass through the various grades. Some people say that the real learning, pleasure and musical development comes after about Grade eight. If you want to progress quickly you’re going to need to practise at least 30 minutes to an hour a day, the more time you put in the better. It’s also good to break up your practice times into smaller Getting started Your hands may end up in some tricky positions Choose your piano wisely sessions throughout the day rather than one large chunk all at once. If you just want to play for yourself out of fun, you could expect to get to a pretty good level within two to three years. By that time you should be able to play things that really satisfy you, stuff that you can really enjoy. If you want to be a concert pianist, that will take decades and many hours of work to accomplish. Does it hurt? Will my hands and wrists hurt when I start playing piano? I’m worried about a repetitive strain injury and cramp… Adopting the correct posture is essential when playing piano and, if done correctly, it’s no more uncomfortable than using a computer keyboard. The important thing is to stay relaxed whenever you’re playing and don’t contort your hands into strange positions in order to play chords. If it hurts your hands reaching a particular chord then modify your position so that you can reach it more easily. You will also need to know the difference between long-term and short-term pain. When starting out your hands and arms will be in alien positions and some discomfort will inevitably be felt as you adopt and become used to playing your instrument. Staying relaxed and playing with a softer touch will help ensure that the amount of strain on your arms is reduced. If you do start to suffer discomfort then consult a doctor for the best course of action. Keyboard or piano? Should I learn to play on an acoustic piano, digital piano or a keyboard? When starting out, it is far cheaper to go for a keyboard as, unlike real pianos, these will never need tuning, take up much less space and be considerably cheaper than a real piano. If you’re really serious about learning the piano, have the money and have the space, then invest in a piano because the experience will be so much more to savour. However, there are many good keyboard and digital piano alternatives to suit any budget from around £200 upwards so browse the internet and see what models are around that best suit your circumstances.
  • 133.
    Piano for Beginners133 If you want a keyboard, there are several models to choose from! Early pitfalls Are there any common problems that new learners encounter? The biggest problem is frustration at not moving ahead as quickly as you would hope and consequently becoming demotivated and losing interest. To keep yourself motivated it’s good to experiment and have fun with the piano away from having to conform to the rigidity of what’s already out there on the sheet music. Exploring the keys and the notes that they play on your own terms will allow you to get to know the instrument better and you can then start piecing together your own songs. Everyone, even the virtuoso players, had to start somewhere, so just imagine that music doesn’t exist and that you’re the first person to pick up – not literally – the instrument! If you do want to concentrate on playing existing songs then concentrate on simple ones and then have fun adding your own little musical embellishments to the composition – there really are no rules. Best for learners What type of piano/keyboard is most suitable for learners? What should I look out for when considering which piano to buy? On a full-size piano there are 88 keys, so look out for the number of keys on any models you’re thinking about buying to see if you get the whole experience. Some keyboards only offer 64 keys. Obviously it is better to have the full scale of keys, whether you’re learning or otherwise, and that they’re also of a decent size so that you don’t hit the wrong key by mistake. The only other things to consider are the space it is likely to take up and the cost – so just scout around, weigh up your options and go for the one that suits you best. Keep the beat I have read about using a metronome while practising. What is a metronome and how can it help my playing? A metronome is a device that holds the perfect beat by producing regular ticks or beats. This is a useful tool to have to hand when you need to practise at a certain tempo or whenever you’re trying to increase your speed on the keys. The tempo of a metronome is measured in Beats per Minute (BPM) and metronomes come in three forms – mechanical, electrical and software. A traditional metronome is a triangular device that holds a metal ticker that you wind up and it boasts a slider through which you can adjust the speed. Most modern metronomes are electronic, but follow the same basic principle and use electronics and quartz crystal to maintain the beat. Metronomes are useful for practising scales and increasing your speed through them. You may only be able to play a scale at 150bpm at present, but by practising with a metronome and increasing the tempo at which you practise every day with, say 5bpm, you will gradually train your fingers and brain to play quicker and quicker, which is immensely satisfying. If you have a keyboard or a modern digital piano, you may have a metronome built in to the hardware. Play time I would like to learn some popular songs. Could you recommend some easy ones? Easiest is definitely best when starting out, and the beauty of simple ditties such as Mary Had A Little Lamb, Frere Jacques and Jingle Bells is that you undoubtedly know the songs so well already that you won’t even need sheet music to play them, you can just steadily find the right notes by ear and then keep practising until you are able to play them seamlessly and at a high tempo. When you have achieved this then you can start branching out into more complex pieces and your musical journey will continue… “The biggest problem is frustration at not moving ahead as quickly as you would hope and consequently becoming demotivated” Location courtesy of Music Is Life, Bournemouth
  • 134.
    134 Piano forBeginners Reference Get in tune I was recently given an old piano as a gift, but when I play it it sounds out of tune. How would I go about tuning it? Is it something I can do myself? We wouldn’t recommend tuning it yourself – at least not to begin with. To tune a piano you have to make minute adjustments to the tensions of the strings to properly align the intervals between their tones so that the instrument is in tune. Unlike, say, tuning a guitar, piano tuning is not simply a particular fixed set of pitches. Fine tuning a piano requires an assessment of the interaction among notes, which is different for every piano and as such requires slightly different pitches. Pianos are tuned to a modified version of a system called ‘equal temperament’, where every pitch may be derived from its relationship to a chosen fixed pitch. It’s a complicated process and is best carried out by a trained technician, but you can acquire the tools and carry out the process yourself further down the line as you get to know your instrument more and are au fait with the tones that it creates. Depending on use, a piano should be retuned twice a year. Pedal power My keyboard only has a sustain pedal. Is this something that will hamper my progress in the future? Not really, because if you’re a serious enough player to know about the pedals and the various effects that they afford your sound then you will probably be ready to buy a proper acoustic piano anyway. Pianos traditionally have three pedals, which are (from left to right) soft pedal, the sostenuto pedal and the sustaining pedal. The soft pedal (una corda) creates a softer tone by shifting the mechanism to the right so that the hammers hit one string instead of two. The middle pedal allows pianists to sustain selected notes, while others remain unaffected. The name of this pedal is slightly misleading as ‘sostenuto’ is Italian for ‘sustained’ and would lead us to think that it performs the same task as the sustaining pedal. However, the sostenuto was In order to play piano, you have to get to know your instrument inside and out to know what makes it tick. Here we introduce you to the intricacies Your piano It’s best to leave cleaning the insides to a professional “A piano should be kept from exterior walls, drafty windows and doors, fireplaces and air vents; and ensure it is sat on a rug or carpet”
  • 135.
    Piano for Beginners135 originally called the ‘tone-sustaining’ pedal, which better reflects what it does – sustainment of a single or group of tones. Which leads us onto the sustaining (or damper) pedal. This right-hand pedal raises all of the dampers off the strings so that they keep vibrating after a key has been released, adding more expression to the notes by allowing them to resonate and making it possible to string harmonies and notes together. Having a sustain pedal alone should in no way hamper or restrict your playing further down the line. Sit comfortably My piano didn’t come with a stool or seat. I have a variety of chairs around the house, but they’re all of different heights. How should I be sat relative to the piano? Does it matter if I’m sat close to the floor? Seating is an important factor in good piano playing and both the height and distance away from the instrument need to be taken into consideration. The best height to be seated at will allow the elbow and upper arm to fall freely from the shoulder and allows the forearm to be parallel to the floor when the forearm and hand are in their natural shape (as they are when they’re hanging by your side). The optimum distance to be seated at is a distance that allows our elbows to rest slightly in front of our central line when our hands are in their neutral position on the keyboard, with our hands in front of the elbows (not in front of the body or at strange angles to the instrument). “Don’t place any objects on your piano, at least not without a soft piece of felt or cloth placed between the two” Cleaning instructions I’ve recently been given a second-hand piano that hasn’t been played for a while, and as such it’s a bit dusty. How do you go about cleaning the instrument? Are there any products you definitely shouldn’t use? If you need to polish your piano, you can use special piano polish, which can be bought from most music stores. Ideally, you should remove surface Regardless of the model, your piano will sometimes need a good clean Make sure you’re comfortable before playing dust with a feather duster and never polish the keys with a dry cloth as you may end up scratching the surface. If you do dust it with a cloth, avoid rags or paper towels and use fabric-softened flannel or chamois. Ensure that the cloth is slightly damp using filtered water (certain minerals can alter the surface), use gentle motions and never be tempted to clean inside the piano – leave that bit to the professionals. As a general rule, don’t place any objects on top of your piano, at least not without a soft piece of felt or cloth placed between the two. Storage solutions I’ve bought a second-hand upright piano, but I don’t know where to put it! Should I keep it away from sunlight? Does it matter if it’s against an outside wall? If you own an acoustic piano then the ideal room temperature for where it is stationed should be 21-22 degrees C (70-72° F). Going much higher or lower will affect the tuning, possibly weaken the internal glue and contribute to long-term damage to the wood. Also, a piano should be kept from exterior walls, drafty windows and doors, fireplaces and air vents; and ensure it is sat on a rug or carpet. The more expensive the piano, the more care you have to take, but these guidelines will help ensure and preserve the wellbeing of any make or model.
  • 136.
    136 Piano forBeginners Reference Reading music I’m a complete musical novice who has just picked up a cheap keyboard. Is there any way I can get by playing the piano without learning to read music? Yes, you can learn to play by ear – in fact there are highly accomplished pianists who can’t read a note, but by not being able to read music you will perhaps be doing yourself and your instrument a disservice. It doesn’t actually take very long to be able to read music and modern technology can help you out a great deal by providing various tuition apps as well as flashcards that you can use to ram the knowledge home. By learning to read music you will be able to enjoy playing centuries of great and popular songs, which in turn will heighten your understanding of your instrument and what it is capable of and improve your playing no end. Music jargon I’m struggling with some music terminology – what are chords, scales and arpeggios? Well, let’s start off with chords. Piano chords – like chords on a guitar – are groups of notes, usually three or four, that are played together to create one, true sound. For example, if you play the C, E and G keys together on your piano then you will have just played a C major chord (shortened to the C chord). Arpeggios are notes that form a chord played individually in sequence either going up or going down the scale. Successfully playing an arpeggio requires the player to play the sounds of a chord individually to differentiate the notes. An arpeggio in the key of C major going up two octaves would be played as C, E, G, C, E, G. Scales are groups of notes that act as a foundation for a part or full piece of music. Scales give the composer a structure from which to build melodies and harmonies and it actually helps musicians to improvise a piece of music. The most popular scale is the major scale (which you may know as ‘Do, Re, Mi, Fa, So, La, Ti’). Nail it I like to grow my fingernails quite long – will this be an issue when playing piano? Possibly. The optimum length of the fingernails when playing the piano is a contentious issue that may depend a great deal on how you are playing – for example the way your fingers rest on the keys. You will want your fingers to slide across the keys as effortlessly as possible and so obviously overtly long nails may affect this. Likewise, you don’t want your fingers to sit too flat on the keys as this may lead to discomfort over time. You may also find that long nails create an annoying clicking sound as they hit the keys as you play, so our advice would be that if you are serious about learning how to play the piano, you should definitely consider cutting them so that they lie in line with the tips of your fingers. Now that you know your instrument and the basics of playing, it’s time to get more technical and start exploring the meaning of music… Playing the piano “By learning to read music you’ll be able to enjoy playing popular songs, which will heighten your understanding of your instrument” Learning to read music is a worthwhile challenge Location courtesy of Music Is Life, Bournemouth
  • 137.
    Piano for Beginners137 Grace notes I have heard of the term ‘grace notes’. What are they and how do they show up on sheet music? Grace notes are notations used in writing music that appear much smaller than regular notes and denote sounds that are shorter than full notes. Think of grace notes as ornaments that have no significant value of their own, but when placed in a line of music they give it more depth by acting as embellishments that are there to make the piece of music sound fuller and more accomplished. A grace note is indicated by a smaller-than-normal note that sometimes has a slash going through the note stem. If no slash is present then this is an appoggiatura (where the principle note is suspended and the grace note doesn’t have to conform to the rigid timing of the piece) and if a slash is present then we can interpret it as an acciaccatura (which is a shortened version of the appoggiatura), where the grace note sounds for a shorter length of time. Improvisation time I’m growing a bit bored of playing sheet music, and would love to play something a bit more spontaneous. Do you have any tips for beginner improvisation? Yes, although we must stress that having the knowledge of a variety of sheet music will undoubtedly make the act of improvisation much easier. However, if you are determined to take a tinkle, freestyle, then make sure that you know about scales. Start with one that doesn’t have too many sharps or flats, like D major, and practise it using your dominant hand and then switch to the other hand to build confidence. Next, learn about chords – especially the triad chords as these consist of only three notes. Now you can sit down and practise hitting notes of the same key. Have your left hand play the accompaniment (slow block or broken chords) in the same key and have your right hand play the melody. Switch keys once you become better at it to give the piece a broader, deeper feel. Another method is to play a slow 4/4 piece with each measure getting one chord on the left hand. With the right hand, improvise the melody within that chord and then switch to a different chord and continue the melody in the next chord. Keep doing this and see where it takes you. Piano tabs I’ve seen note names written with both the letter and a number, like C5. What does this mean? It exists as a way of differentiating between notes of the same name. By giving each key on the keyboard a name and a number, there can be no confusion over which key someone means. The first key on a full-size keyboard is A0, while Middle C – the fourth C from left to right – is called C4. If you were to read ‘Play C-D-G’, this could mean any C, D, and G on the keyboard. However, ‘Play C4-D4-G3’ refers to specific notes, so using letters and numbers makes it easier to get your point across. Note names Are there any other names for the different musical notes than crotchet, minim, etc? I keep seeing whole notes and half notes being referenced – what do they mean? “Whole notes, half notes, quarter notes and eighth notes are the American counterparts to semibreves, minims, crotchets and quavers” You don’t need to worry – they aren’t a brand new set of notes you need to learn! Whole notes, half notes, quarter notes and eighth notes are the American counterparts to semibreves, minims, crotchets, and quavers respectively. Aside from the names, there aren’t any other differences between the way they work, so if you’re confused you just need to substitute the names you know for the ones you don’t. If you’re struggling, a friend can be an incredible help
  • 138.
    138 Piano forBeginners Reference Professional studio recording will be out of reach for most beginners, but you can get great results by recording at home Recording Digital acoustic recording I love playing my upright piano, and I want to record some tracks with it. However, I want to edit them using a computer and obviously I can’t plug the piano into my machine directly because there are no inputs. How can I record acoustically on the computer? It really depends on your budget. The cheapest option would be to buy a USB desktop mic and plug it into your computer. Make sure you stick the mic near to the piano (but not so close that you get a horrible bassy sound) and record what the mic hears into your favourite digital audio workstation, like GarageBand, Logic or Audacity. A decent desktop mic can be picked up for around £25/$39, or your computer may have one built in (but keep in mind you won’t have much flexibility of movement in this case). Another option is to use a USB audio interface with a built-in mic. If you use a Mac, the Apogee ONE can be bought for around £120/$180 second hand and comes recommended. The method of recording your upright or grand piano is the same, but you will notice a great difference in the quality. Mix it up What is mixing, and is it important? After you’ve finished recording all your piano and backing tracks, you will need to mix them together to make it sound good, usually into a two-channel stereo. The bad news is that entire books have been written on this topic, so it’s not an easy matter to get to grips with. To start with, you should edit the volume of each individual track until you’re happy with the sound they all make. Once you’ve got that, you can start to pan your tracks to the left or right speaker if you feel it adds to the mix. Tablet recording Is recording using an iPad really a viable option for a decent result? It certainly is, but you will need your fair share of apps and accessories for it to work, like the iRig MIDI that we covered earlier in this book. Many popular artists are using iOS’s diverse range of music apps to create great sounds for their albums, but few are recording their entire record on the tablet. The iPad does have a few things going in its favour, though. One is its portability, which means it can be taken anywhere with your music still on it. If you want to lay down a track on the move then there’s no better way of doing so, and iCloud support means you can carry on where you left off when you get home. Backing tracks My playing is improving, and I feel I’m ready to join a band and record for a bigger sound. However, I’m struggling to join one, and I’m living in a small apartment (even smaller with my digital piano), so I have no room for other instruments. Can I make a backing track for my piano using a computer? Most definitely! In fact, these days, it’s far easier and cheaper to record synthesised instruments on a “A decent desktop mic can be picked up for around £25/$39, or your computer may even have one built in” On-screen keyboards are useful features!
  • 139.
    Piano for Beginners139 You don’t want your recordings to look like this computer. All you need are some instrument plug- ins, many of which can be freely downloaded from the internet. If you’re on Windows, you will probably want a VST; if you’re on Mac, you’ll want a VST or AU (audio unit). How you install these plug-ins depends on your audio editor, so search the program’s help files for assistance. When your plug-in is installed, you can use a MIDI keyboard to play what you’re looking for. If you don’t have a MIDI keyboard, then don’t worry, as many editors enable you to control the VST with your computer keyboard. It must be said, however, that digital instruments are in no way a substitute for the real deal, but they do help those of us with limited resources. Sounding different I just nailed the perfect take on my piano, but it sounds dreadful when I play it back – what am I doing wrong? The solution is usually a lot simpler than you may think. If you’re recording through a microphone, make sure it’s not too close to the piano or keyboard, or you may get an unwanted distortion effect. Also, be sure to check the volume of the track on the computer – if it’s +10dB it probably won’t sound right. In many recording programs, you can opt to monitor your instrument through headphones as you go. This way you can hear what your recording will sound like. Also, this will mean you can listen to a backing track without the mic picking it up. If you don’t wear headphones yet still monitor your piano, you run the risk of creating cacophonous feedback, which will definitely be captured by the microphone! Virtual effects wizard I don’t want to spend lots of money on a high- end keyboard, but I still want to record my digital piano with some funky effects. Is this possible? We’ve already mentioned how VST instruments can enhance your sound, but now here’s where VST effects come in handy. Whether you just want to add a subtle reverb effect or a crazy synth sound, these plug-ins have got you covered. Like the instruments, VST installing methods will vary depending on your audio editor, but it will likely be a similar process. Many VSTs will have multiple settings, but it is down to you to select the best ones, as there are several variables that affect the sound. Make sure you save once you’ve found the perfect settings. However, just because you can use these effects on your computer doesn’t mean that you should. For instance, if you ever plan on playing live, it is a far better idea to invest in a keyboard as it’s not exactly easy to change effects halfway through a song if you’ve got to run to your computer and click a few buttons! They are, however, perfect if you want to sit down and record some tracks on your computer using interesting sounds. GarageBand is useful for creating backing tracks “If you’re recording through a microphone, make sure it’s not too close to the piano or keyboard, or you may get unwanted distortion”
  • 140.
    140 Piano forBeginners Reference Feedback needed I’ve recorded a few basic passages and played them to my friends. They’re really into them, but I want to get more feedback on them before I develop the pieces into a full song. What’s the best way to do this? The internet makes it relatively easy to obtain feedback on your work. You could upload the riff to a forum that specialises in the genre of music you play, but these are often frequented by advanced amateurs and professionals, so their advice may not be too helpful if you’re a beginner. A better bet would be to find beginner-focused websites and forums, as these will contain many like-minded individuals willing to help out and provide feedback. They’ll also be able to offer feedback on your recording methods as well as your playing, so you can improve in several key areas. If you receive constructive negative feedback, make sure you use it to improve your recordings. Upload a song Are there any good websites to upload a song to? I want the world to hear, but I don’t want to spend anything in the process. You’re in luck, as there are several! The one that we would recommend is SoundCloud, which is a fantastic website to share your music on and it continues to grow. Although it has many premium pricing options (from €29 to €500 a year), the free service gives you two hours of music to upload, so unless you’re a songwriting maniac, you probably won’t run out any time soon! You can either share your track to every social networking service under the sun, or you can opt to share it to a SoundCloud group. If you share it to a group, make sure you pick one with interests similar to your genre, as you’ll get far more listens that way. Listeners can also favourite and comment on your track. As well as uploading your songs, you can also networking with fellow musicians, picking up tips As you create music, you may wish to share it with others – but how do you go about doing so? Sharing and tricks along the way. It’s a very useful website to build contacts and initiate collaborations. A slightly more surprising option to get your songs on the web for free is YouTube, the video sharing website. You can just upload audio to the site. Once your track is uploaded, add it as a video response to a popular track that’s similar to yours. This will ensure you get some listens and likes, and hopefully some extra fans! Up for sale How can I get my work up for sale on the big digital distribution services like iTunes and Spotify? I’m working on writing an album and I want to know that when I’m done I can make some money from it! You’re best off looking at services like CD Baby and TuneCore, which will upload your music to all the major players in digital distribution, like iTunes, Amazon MP3 and Spotify, as well as selling it on
  • 141.
    Piano for Beginners141 Facebook fans How can I get my band and music on Facebook? I want fans not friends! Sign in to your Facebook account at www. facebook.com, or sign up with the green button. Go to the Create Page link on the left and choose Artist, Band or Public Figure from the options. Add your information and a profile picture to create your band’s page! You can then edit it. their own site. Some services will charge a one-off fee and take a cut off each sale, while others will charge a yearly fee and let you keep all the profits. It’s worth gauging how many copies you think your work will sell before making this decision – make sure you have arrive at a conservative estimate! However, once your music is on these services, the real work begins. Because of their insane popularity, it’s highly unlikely that people will just stumble upon your music. You’ll need to consider using social networking services like Twitter and Facebook to get the news out there. Getting heard I know internet radio is incredibly popular, so how can I get my music on a station? I know I won’t be able to get on national radio, but there are so many stations out there and I’d love to be played on one. Instead of sending your demo on tape into DJs like in the old days, there are a few websites that enable to you upload your music for the chance to be on their radio. One such site is http:// amazingtunes.com. By uploading your music, you stand the chance of being played on their very own Amazing Radio, which is on digital radio. It doesn’t matter what genre you play either, as they have DJs that specialise in indie, ambient, folk and loads more in between. If you get selected to be played, you’ll receive an email from the DJ telling you what show you’ll be on – so be sure to tell everyone you know and everyone they know to listen in! Besides those people that you do tell, you’ll never know who else might be listening. Internet radio hosts are always looking for new music, so don’t be afraid to send your tunes into them. In the digital age, all it takes is a quick email with a song attached. To maximise your chances of gaining radio exposure, make sure you pick a station that is similar to your style. If you just throw your work at any station, you’d not only be wasting your time, but the listeners’ time too! “Find beginner-focused websites and forums, as these will contain many like-minded individuals willing to help out and provide feedback” Make sure you check out music-sharing apps
  • 142.
    142 Piano forBeginners Reference Glossary A Accidental These are small symbols within the music that alert the player that they need to alter a note into a sharp or a flat or a natural. Arpeggio A collection of notes in a chord, played one by one up or down the keyboard, instead of at the same time as you would play a full chord. Articulations Articulations tell you to play each note in a particular style, expressed by little symbols near the note. Some of these include: t4UBDDBUP To play in a clipped, short fashion, shown by a small dot either above or below a note. t-FHBUP To smoothly slur the notes together, shown by curved lines which link notes. tDDFOU Tells you to add some extra oomph to a note, shown with a right-facing ‘open-wedge’ shape. B Bar Divide the stave into measured sections. Each measure ties in with the time signature, for example in 4/4 time, each bar will contain four crotchet/ quarter note beats. Beat A measured unit of time in a piece of music. The time signature organises the number of beats per bar and also dictates the length of a beat. The speed of the beat is dictated by the song’s tempo. C Chord A chord is a group of notes, usually three or four, played all at the same time. Clef The symbol right at the start of each stave. It tells you which pitch to allocate to the notes of the stave. D Dynamics Instructions within the music relating to its volume. They will be in the form of symbols (such as a crescendo) or Italian words such as piano (quiet) or forte (loud). t.F[[PGPSUF Mezzo means ‘medium’ and it’s often added before a word for a moderate effect, for example mezzo forte means ‘medium loud’ and mezzo piano ‘medium quiet’. t1JBOJTTJNP It is not uncommon to see a fair number of ‘iss’ added to a word, which exaggerate its effect. Eg, fortississimo means very, very loud and pianissimo means very quiet. E F Flat An accidental that looks like a squashed b, which alters a note by decreasing its pitch by a semitone. G H I J K ,FZTJHOBUVSF A collection of sharps or flats expressing the key of the song, found at the beginning of the stave. Symbols are on the line or in the space that the note occupies. If a flat symbol is placed on the centre line on the treble clef, every B note that you play will be a B flat, unless its cancelled out by an accidental. L -FEHFSMJOFT When notes are higher or lower than the reach of the stave lines, they are placed with ledger lines that extend the stave. M .BKPS Jolly, happy-sounding notes characterise a major scale or key. .JEEMF$ The middle-most C key on your keyboard, it sits in the middle of the grand stave in notation and it’s also generally the divide between the notes played by your right and left hands. iSUJDVMBUJPOTUFMMZPVUPQMBZFBDIOPUFJO BQBSUJDVMBSTUZMF FYQSFTTFECZMJUUMF TZNCPMTOFBSUIFOPUFw 5IJTJTB(NBKPSDIPSE GJSTUJOWFSTJPO
  • 143.
    Piano for Beginners143 Minor Gloomy, sad-sounding notes characterise a minor scale or key. N Natural An accidental on a note that cancels out any previous sharps or flats. Notes These are the building blocks of music, showing you which note to play, at what pitch and for how long. Each type of note has a specific duration, for example a semibreve/whole note has the same duration as two minims/half notes or four crotchets/ quarter notes. O Octave The name given to the interval between two of the same notes. Look at Middle C, then the next C above it. The distance between those two Cs makes up an octave. Ornaments Symbols on notes to decorate the melody. An example is a trill, which tells the musician to flutter between two notes to embellish the tune. P Pitch Put simply, pitch refers to the highness or lowness of a note. It is actually about the note’s frequency, which you will learn more about as you piano playing progresses. Q R Repeats Instructions in the notation to go back and re-play specific phrases. Repeats include repeat barlines and also the coda symbol (circle with a cross through it) accompanied by the phrase al coda and other terms such as D.C and D.S. Rests Indicate a period of time that the musician must not play any notes. The rests come under the same duration classification as notes, for example a minim rest has the same duration as a minim/half note. S Scales A group of notes with different pitches, usually from one octave, that are played in order one by one up or down a keyboard. Sharp An accidental that looks like a hash symbol (#), which alters a note by slightly increasing the pitch. Stave The five horizontal lines that notes are drawn on, both on the lines and in the spaces. T Tempo Italian for ‘time’, the tempo dictates how slow or fast a song should be played. It is shown at the beginning of the notation, and can either be in super-precise Beats Per Minute (BPM) or indicated using one of many Italian terms that are more interpretive. These include: tOEBOUF means ‘at a walking pace’ t7JWBDF this means ‘lively’ t(SBWF which means ‘slowly’ 5JNFTJHOBUVSF The time signature of a piece of music looks like a big fraction at the beginning of the stave, after the clef and key signature. It dictates the rhythm of the tune. The top number tells a musician how many beats there are in one bar of the music. The bottom number indicated the length of the beat. For example, in 4/4 time, there are four crotchets/ quarter notes in each bar. In 6/8 time, there are six quavers/eighth notes in each bar. U V X Y Z i5IFUFNQPEJDUBUFTIPXTMPXPSGBTUBTPOH TIPVMECFQMBZFEBOEDBOFJUIFSCFJO#1.PS JOEJDBUFEVTJOHBO*UBMJBOUFSNw Type of rest Note Length of rest CFBUT CFBUT CFBU BCFBU
  • 144.
    144 Piano forBeginners Chordsandscales Get a happy sound with these scales Major scales Major scales are the first scales that many people learn to play as they’re harmonically pleasing and relatively simple – there are no accidentals to contend with. To play a major scale with looking at music, play the root note then follow these intervals: tone, tone, semitone, tone, tone, tone, semitone (TTSTTTS). The easiest to play is C, as it uses all the white keys in order. Finger patterns are exceptionally important when learning scales, and major scales are a good place to get used to the best way to play. For many of the simplest major scales – ie not too many sharps and flats – you will need to tuck under your thumb on the right hand and cross over your middle finger on the left hand. “Harmonically pleasing and simple – there are no accidentals to contend with” Db A Bb B C
  • 145.
    Piano for Beginners145 E D Eb F F# G Ab
  • 146.
    146 Piano forBeginners Chordsandscales C# A Bb B C The first of three minor scales Natural minor scales In a way, natural minor scales aren’t too far removed from major scales. Take a natural minor scale – we’ll use ‘A’ – then find its relative major by counting three semitones higher – in this case it’s C. The relative major’s key signature will be same for the minor (so no sharps or flats), but you will start on the root note of the natural minor. So A natural minor would comprise A, B, C, D, E, F, and G – the notes of C major but starting on A. B major is a scale that uses all the black keys and get a bit confusing; however, B minor is pretty simple. This is because its relative major is D, which only has two sharps. So B natural minor comprises B, C#, D, E, F#, G,and A –the same notes as D major, although it starts on B. “Take a natural minor scale then find its relative major by counting three semitones higher”
  • 147.
    Piano for Beginners147 E D Eb F F# G G#
  • 148.
    148 Piano forBeginners Chordsandscales C# A Bb B C Try out these spooky-sounding scales Harmonic minor scales Harmonic minor scales are the same as natural minor scales apart from one rather large difference. The seventh note is raised by a semitone resulting in an unusual interval of three semitones between the sixth and seventh notes. This gives the scale a distinctive, ‘spooky’ sound that will be easily recognisable once you’ve played through the scales a few times. Since it’s still a minor scale, the key signatures follow the same rules as the natural minor, ie the same as its relative major. So, if we take D harmonic minor as an example (it has one flat in its key signature as its relative major is F), its seventh note, C, is raised by a semitone to C#, resulting in a Bb to C# interval of three semitones. “The seventh note is raised, resulting in an unusual interval of three semitones”
  • 149.
    Piano for Beginners149 E D Eb F F# G G#
  • 150.
    150 Piano forBeginners Chordsandscales Db A Bb B C These are almost like two scales in one Melodic minor scales Melodic minor scales are interesting in that their ascending form is different to their descending form. On the way up, they are similar to harmonic minors, except the sixth note is also raised by a semitone along with the seventh. On the way down it is the same as a natural minor scale. Remember accidentals don’t need to be added after a bar line, so make sure you check the scale’s key signature. C minor has three flats – Bb, Eb, and Ab. The Eb is used throughout the scale but because the sixth and seventh notes are raised by a semitone, the Ab and Bb are both raised to naturals. On the way down they are flats, but the notation need not reflect these notes as accidentals as the key signature rules. “Remember that accidentals don’t need to be added after a bar line”
  • 151.
    Piano for Beginners151 E D Eb F F# G Ab
  • 152.
    152 Piano forBeginners Chordsandscales Simple and popular for a reason Major chords Basic major chords are incredibly popular in Western pop music, probably because many of them are easy to play and they give your songs a happy feel. These chords contain the first, third, and fifth notes in the corresponding major scale. It’s worth noting that the ‘major’ isn’t often referred to when you see these chords written down – just the letter. A B B F# G A E E F C D D
  • 153.
    Piano for Beginners153 The best way to get a sad sound Minor chords A basic minor chord will always give you a much sadder sound than a major chord. This happens because the third note in the major scale is ‘flattened’ in pitch by one semitone. For example, ‘E’ is the third note in the C major scale (CDEFGAB), and this is flattened by a semitone to Eb, which ends up giving a C minor chord its distinctive melancholy sound. A B B F# G G# E E F C C# D
  • 154.
    154 Piano forBeginners Chordsandscales Improve your progressions with seventh chords Dominant seventh chords The chords that we have seen so far consist of the first, third and fifth notes of a scale, so naturally the next step is the seventh. A dominant seventh chord (shown simply as ‘7’) is formed with the first, third, fifth, and flattened seventh notes of a scale. ‘B’ is the seventh note in the C major scale (CDEFGAB), so a C7 chord can contain C, E, G, and Bb. A7 B 7 B7 F#7 G7 A 7 E 7 E7 F7 C7 D 7 D7
  • 155.
    Piano for Beginners155 The perfect way to give your pieces a warm sound Major seventh chords Major seventh chords (maj7), are similar to dominant seventh chords, but they include the natural seventh note in the major scale, rather than a flattened one. For example, Cmaj7 would feature C, E, G, and B, rather than the Bb from the dominant, as B is the seventh note in the C major scale. Using a major seventh chord will give your tunes a warm, happy feel. Amaj7 B maj7 Bmaj7 F#maj7 Gmaj7 A maj7 E maj7 Emaj7 Fmaj7 Cmaj7 D maj7 Dmaj7
  • 156.
    156 Piano forBeginners Chordsandscales Jazz your songs up with some m7 chords Minor seventh chords Minor seventh chords (m7) use the flattened seventh note that we have seen in dominant seventh chords in addition to a flattened third note found in basic minor chords. So Cm7 would contain C, Eb, G, and Bb. E and B are the third and seventh notes respectively of the C major scale, and they are both flattened here in order to create the m7 chord. Am7 B m7 Bm7 F#m7 Gm7 G#m7 E m7 Em7 Fm7 Cm7 C#m7 Dm7
  • 157.
    Piano for Beginners157 Add subtle variations with suspended patterns Suspended chords So far, all of the chords that we’ve looked at have featured the third note of their corresponding major or minor scale. Suspended chords (sus) don’t, replacing it instead with either a second (sus2) or a fourth (sus4). So Csus4 would feature an F (the fourth note in the C major scale) instead of the E found in a major chord. Here is a list of sus4 chords. Asus2/4 B sus2/4 Bsus2/4 F#sus2/4 Gsus2/4 A sus2/4 E sus2/4 Esus2/4 Fsus2/4 Csus2/4 D sus2/4 Dsus2/4
  • 158.
    Try 3 issues for just £5* *This offer entitles new UK Direct Debit subscribers to receive their first 3 issues for £5.After these issues, subscribers will then pay £25.20 every 6 issues. Subscribers can cancel this subscription at any time. New subscriptions will start from the next available issue. Offer code‘ZGGZINE’must be quoted to receive this special subscription price. Direct Debit Guarantee available on request.This offer will expire 31st August 2017. ** This is a US subscription offer.The USA issue rate is based on an annual subscription price of £65 for 13 issues which is equivalent to $102 at the time of writing compared with the newsstand price of $15.50 for 13 issues being $201.50.Your subscription will start from the next available issue.This offer expires 31st August 2017. S p e c i a l t r i a l o f f e r Exclusiveofferfornew Enjoyed thisbook?
  • 159.
    For amazing offersplease visit www.imaginesubs.co.uk/icr Quote code ZGGZINE Try 3 issues for £5 in the UK* or just $7.85 per issue in the USA** (saving 49% off the newsstand price) The ultimate magazine for lovers of everything Apple Expert tutorials Guides to GarageBand,OSX,and the pro apps, as well as iPhone,iPad and third-party software Inspirational features In-depth creative and practical features on all aspects ofApple products Plus free downloads Or telephone: UK0844 848 8401+ Overseas +44 (0) 1795 592 865 subscribersto… About the mag + Calls will cost 7p per minute plus your telephone company’s access charge
  • 160.
    YOURFREERESOURCES Log in tofilesilo.co.uk/bks-A15/ and download your tutorial resources NOW! EVERYTHING YOUNEED TOFOLLOWTHE TUTORIALS AND CREATEGREAT PROJECTS OVER60TUTORIALFILESTODOWNLOAD YOURBONUS RESOURCES ONFILESILOWE’VEPROVIDED FREE,EXCLUSIVECONTENTFOR PIANOFORBEGINNERSREADERS, INCLUDING… •Audiofilestoplayalongwith,helpingyou tocompareyournewskillswiththe original composition •Learnleft-andright-handparts separatelythentogether •Sheetmusictohelpyoupractisespecific chordsandscales •Learnto playinthestyleofyourfavourite musicalgenrewithourexamples •Followthesetutorialsto quicklydevelop yourpiano playing skills PACKEDWITHFREE PREMIUMCONTENT Goto:http://www.filesilo.co.uk/bks-A15/ Helpfulaudiofiles Sheetmusicforfree 160 Piano for Beginners Playdifferentgenrestyles
  • 161.
    FILESILO–THEHOMEOFPRORESOURCES Arapidlygrowinglibrary Updatedcontinuallywithcoolresources Letsyoukeepyourdownloadsorganised Browseandaccessyourcontentfromanywhere Nomoretorndiscpagestoruinyourbookazines Nomorebrokendiscs Printsubscribersgetallthecontent Digitalmagazineownersgetallthecontenttoo! Eachissue’scontentisfreewithyourmagazine Secureonlineaccesstoyourfreeresources Discoveryourfreeonlineassets Themostpopulardownloadsareshownin thecarouselhere,socheckoutwhatyour fellowreadersareenjoying. Whetherit’stutorials,Photoshopactions,or videoworkshops,categoriesmakeiteasy toidentifywhatcontentyou’relookingfor Findoutmoreaboutouronlinestores,and usefulFAQs,suchasourcookieand privacypoliciesandcontactdetails. Ifyou’relookingforaparticulartypeof content,likesoftwareorvideotutorials,use thefiltersheretorefineyoursearch Seekeydetailsforeachresourceincluding numberofviewsanddownloads,andthe communityrating Discoverourfantasticsistermagazines andthewealthofcontentandinformation thattheyprovide. ThefirsttimeyouuseFileSilo,you’llneedto register.Afterthat,youcanuseyouremail addressandpasswordtologin. ThisisthenewFileSilositethatreplaces yourdisc.You’llfinditbyvisitingthelinkon thefollowingpage. Piano for Beginners161
  • 162.
    HOWTOUSE EVERYTHINGYOUNEEDTOKNOW ABOUT ACCESSINGYOURNEWDIGITALREPOSITORY Havingtroublewithanyofthetechniquesinthisissue’stutorials?Don’tknowhowtomakethebest useofyourfreeresources?Wanttohaveyourworkcritiquedbythoseintheknow?Thenwhynot visittheBookazinespageforallyourquestions,concernsandqualms.Thereisafriendlycommunity ofexpertstohelpyouout,aswellasregularpostsandupdatesfromthebookazineteam.Likeus todayandstartchatting! facebook.com/ImagineBookazines twitter.com/books_imagine NEEDHELPWITH THETUTORIALS? ToaccessFileSilo,pleasevisithttp://www.filesilo.co.uk/bks-869/ 01Followtheon-screen instructionstocreate anaccountwithoursecure FileSilosystem,orloginand unlocktheissueby answeringasimplequestion abouttheedition you’vejustread. Youcanaccess thecontentfor freewitheach editionreleased. 02Onceyouhavelogged in,youare freeto explorethewealthofcontent madeavailableforfreeon FileSilo,fromgreatvideo tutorialsandonlineguidesto superbdownloadable resources.Andthemore bookazinesyoupurchase, themoreyourinstantly accessiblecollectionofdigital contentwillgrow. 03Youcanaccess FileSiloonany desktop,tabletor smartphonedeviceusing anypopularbrowser(such asSafari,FirefoxorGoogle Chrome).However,we recommendthatyouusea desktoptodownload content,asyoumaynotbe abletodownloadfilestoyour phoneortablet. 04Ifyouhaveany problemswith accessingcontentonFileSilo, orwiththeregistration process,takealookatthe FAQsonlineoremail filesilohelp@ imagine-publishing.co.uk. 162 Piano for Beginners
  • 164.