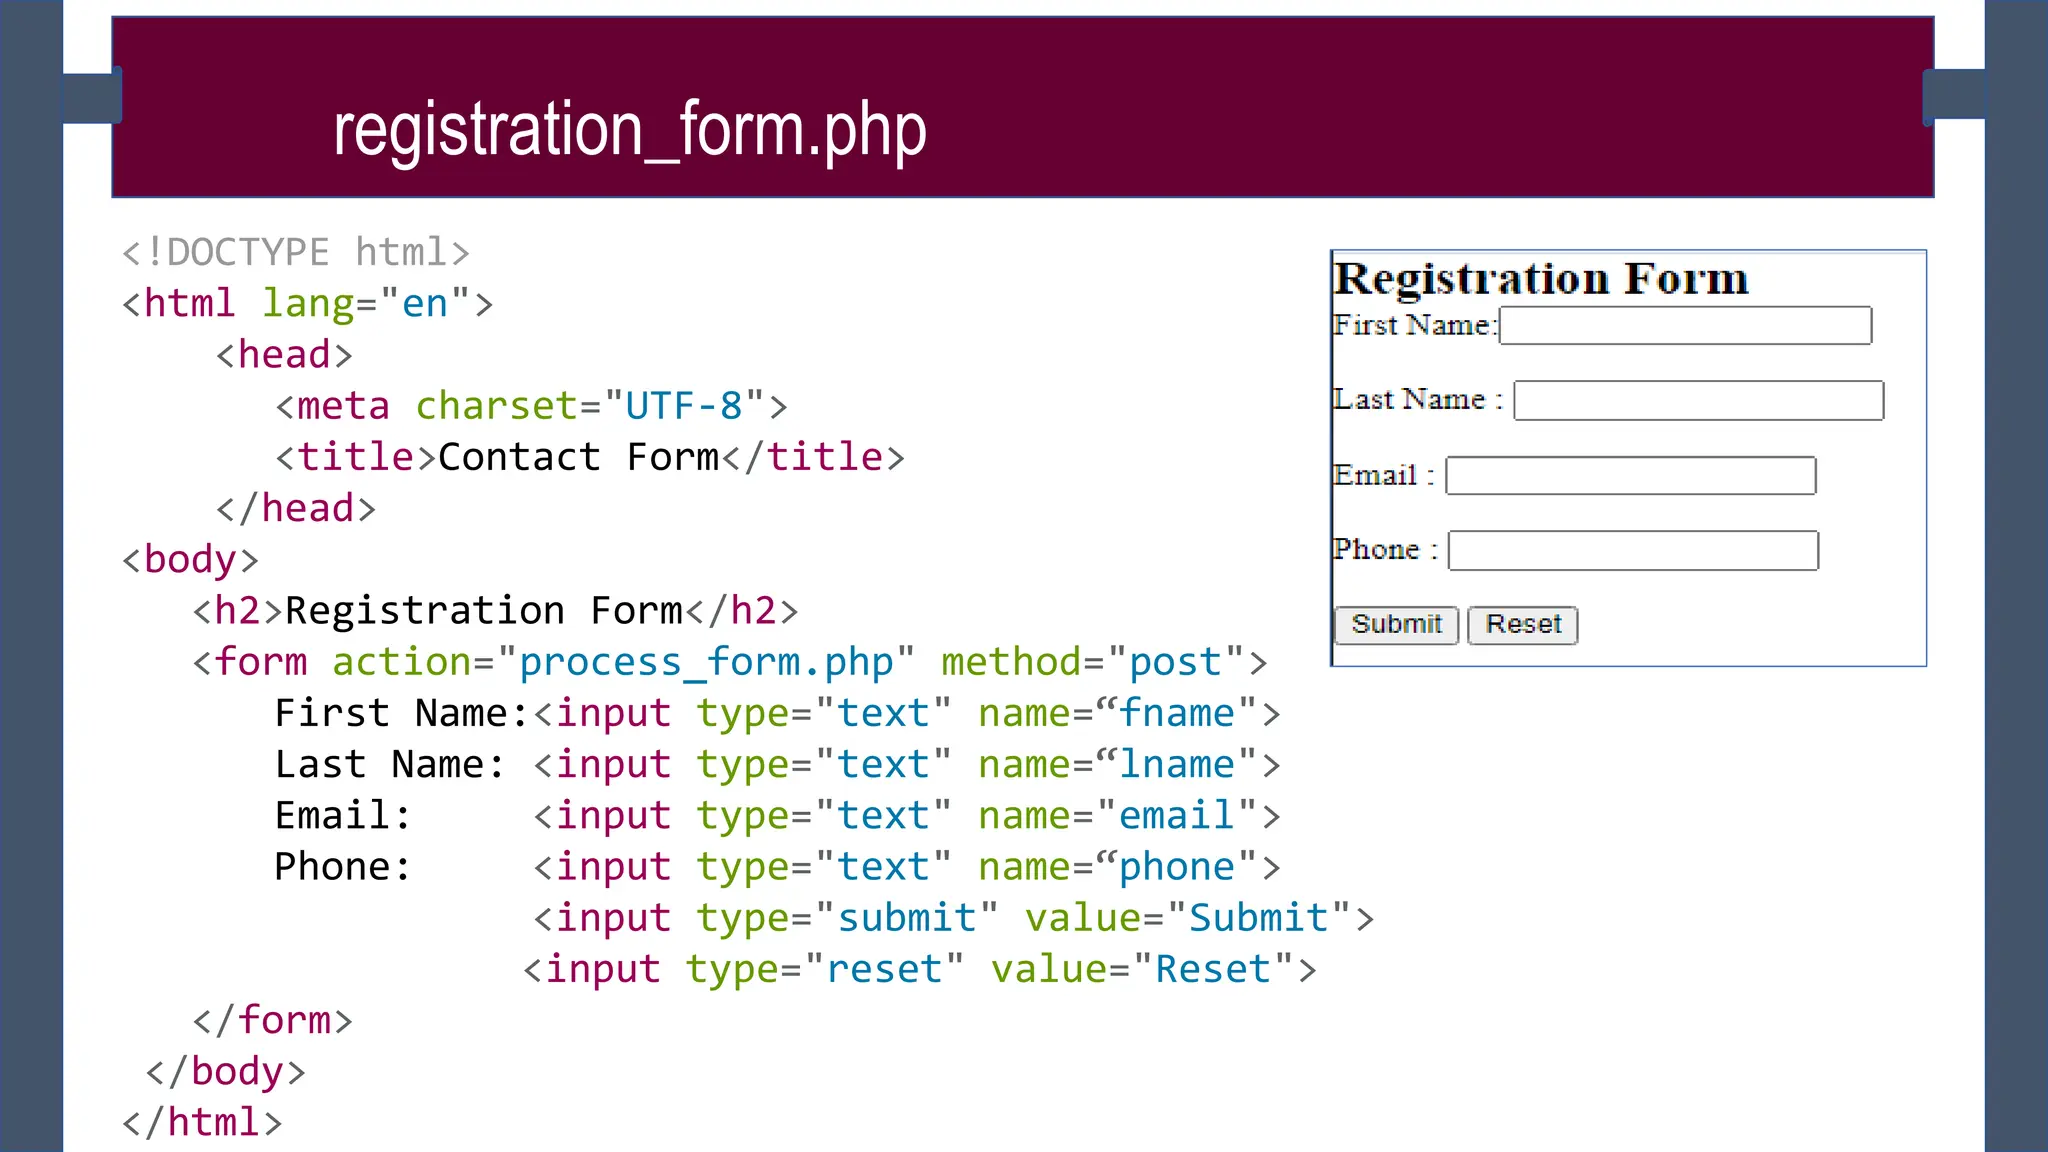
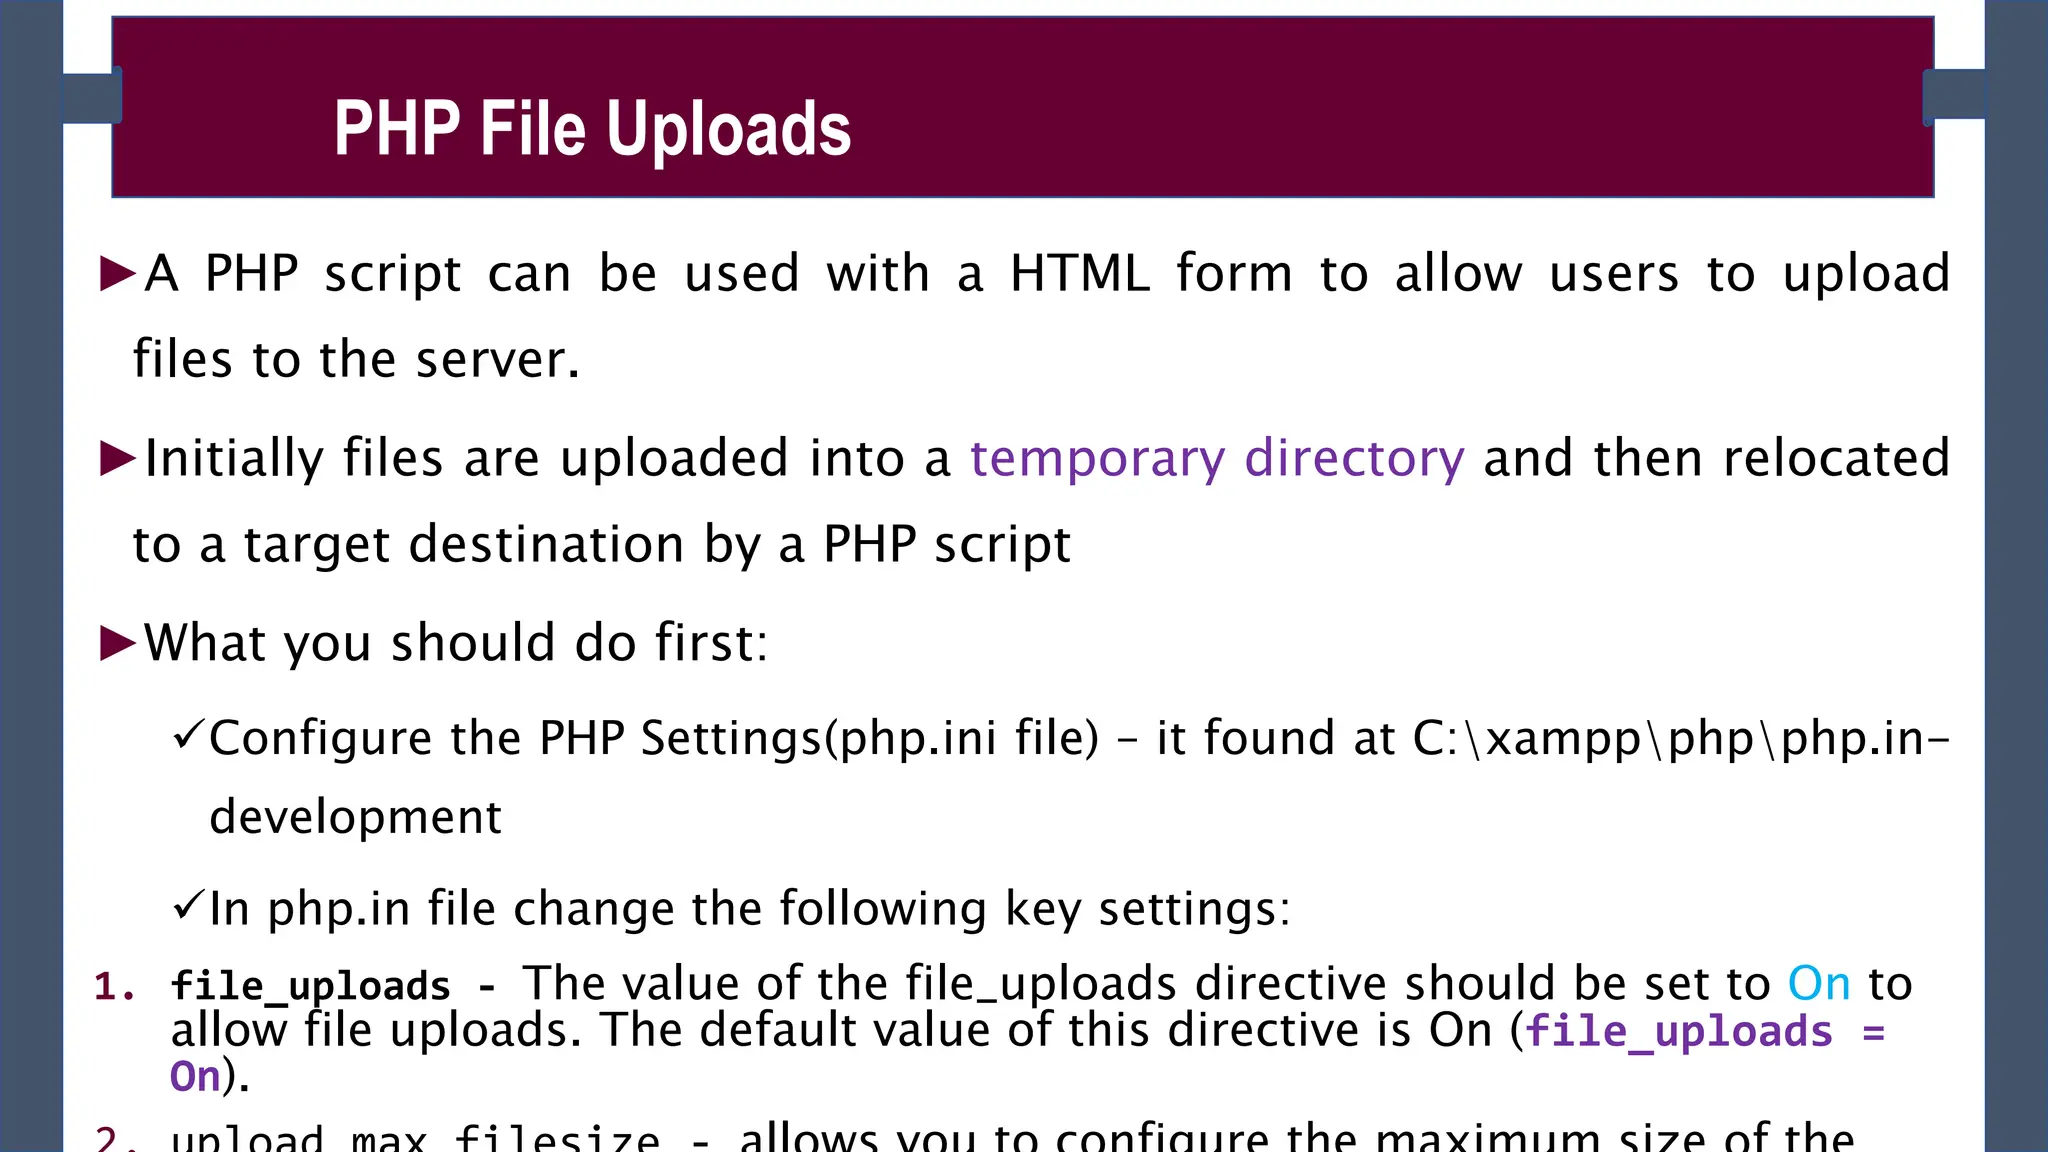
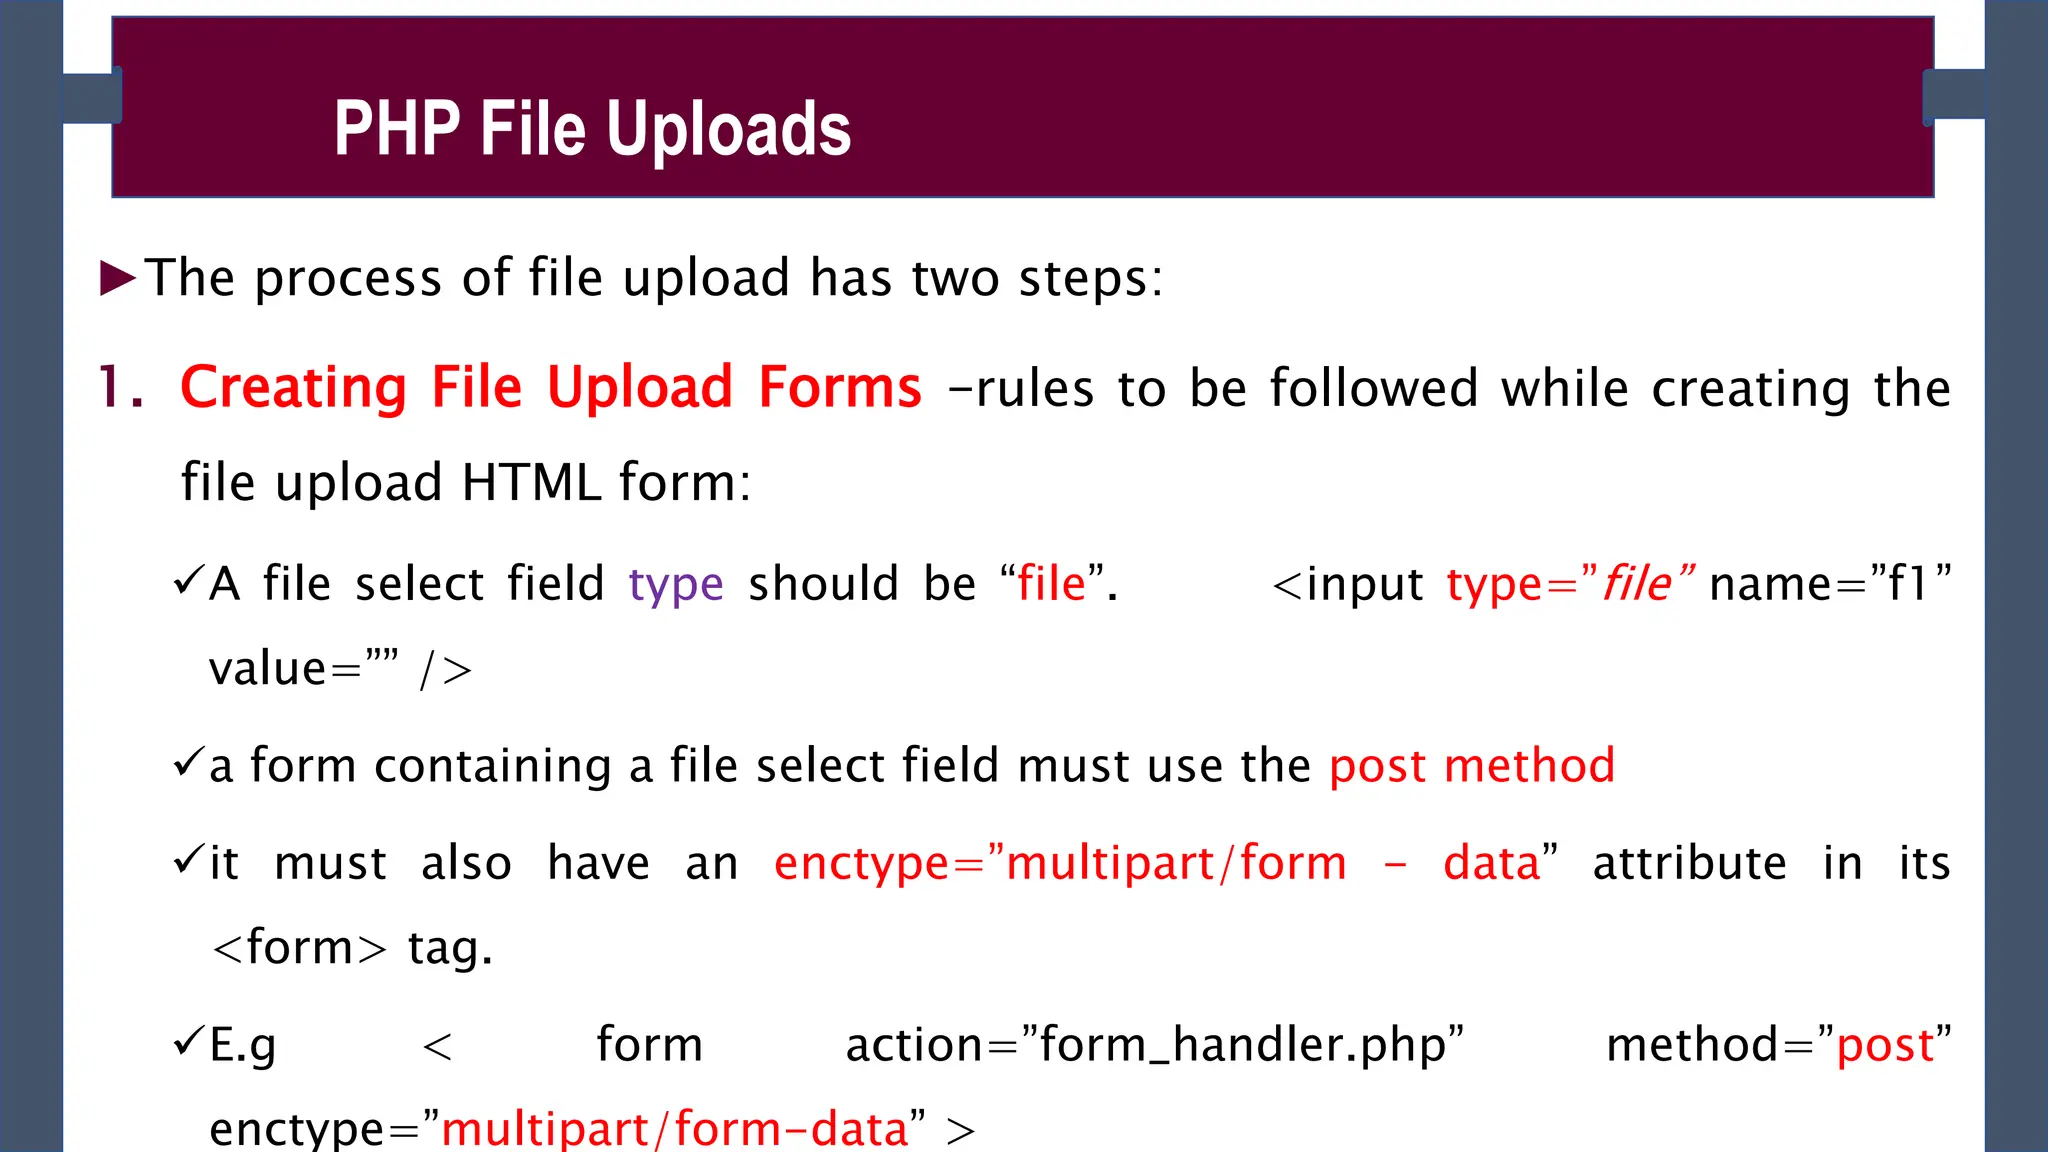
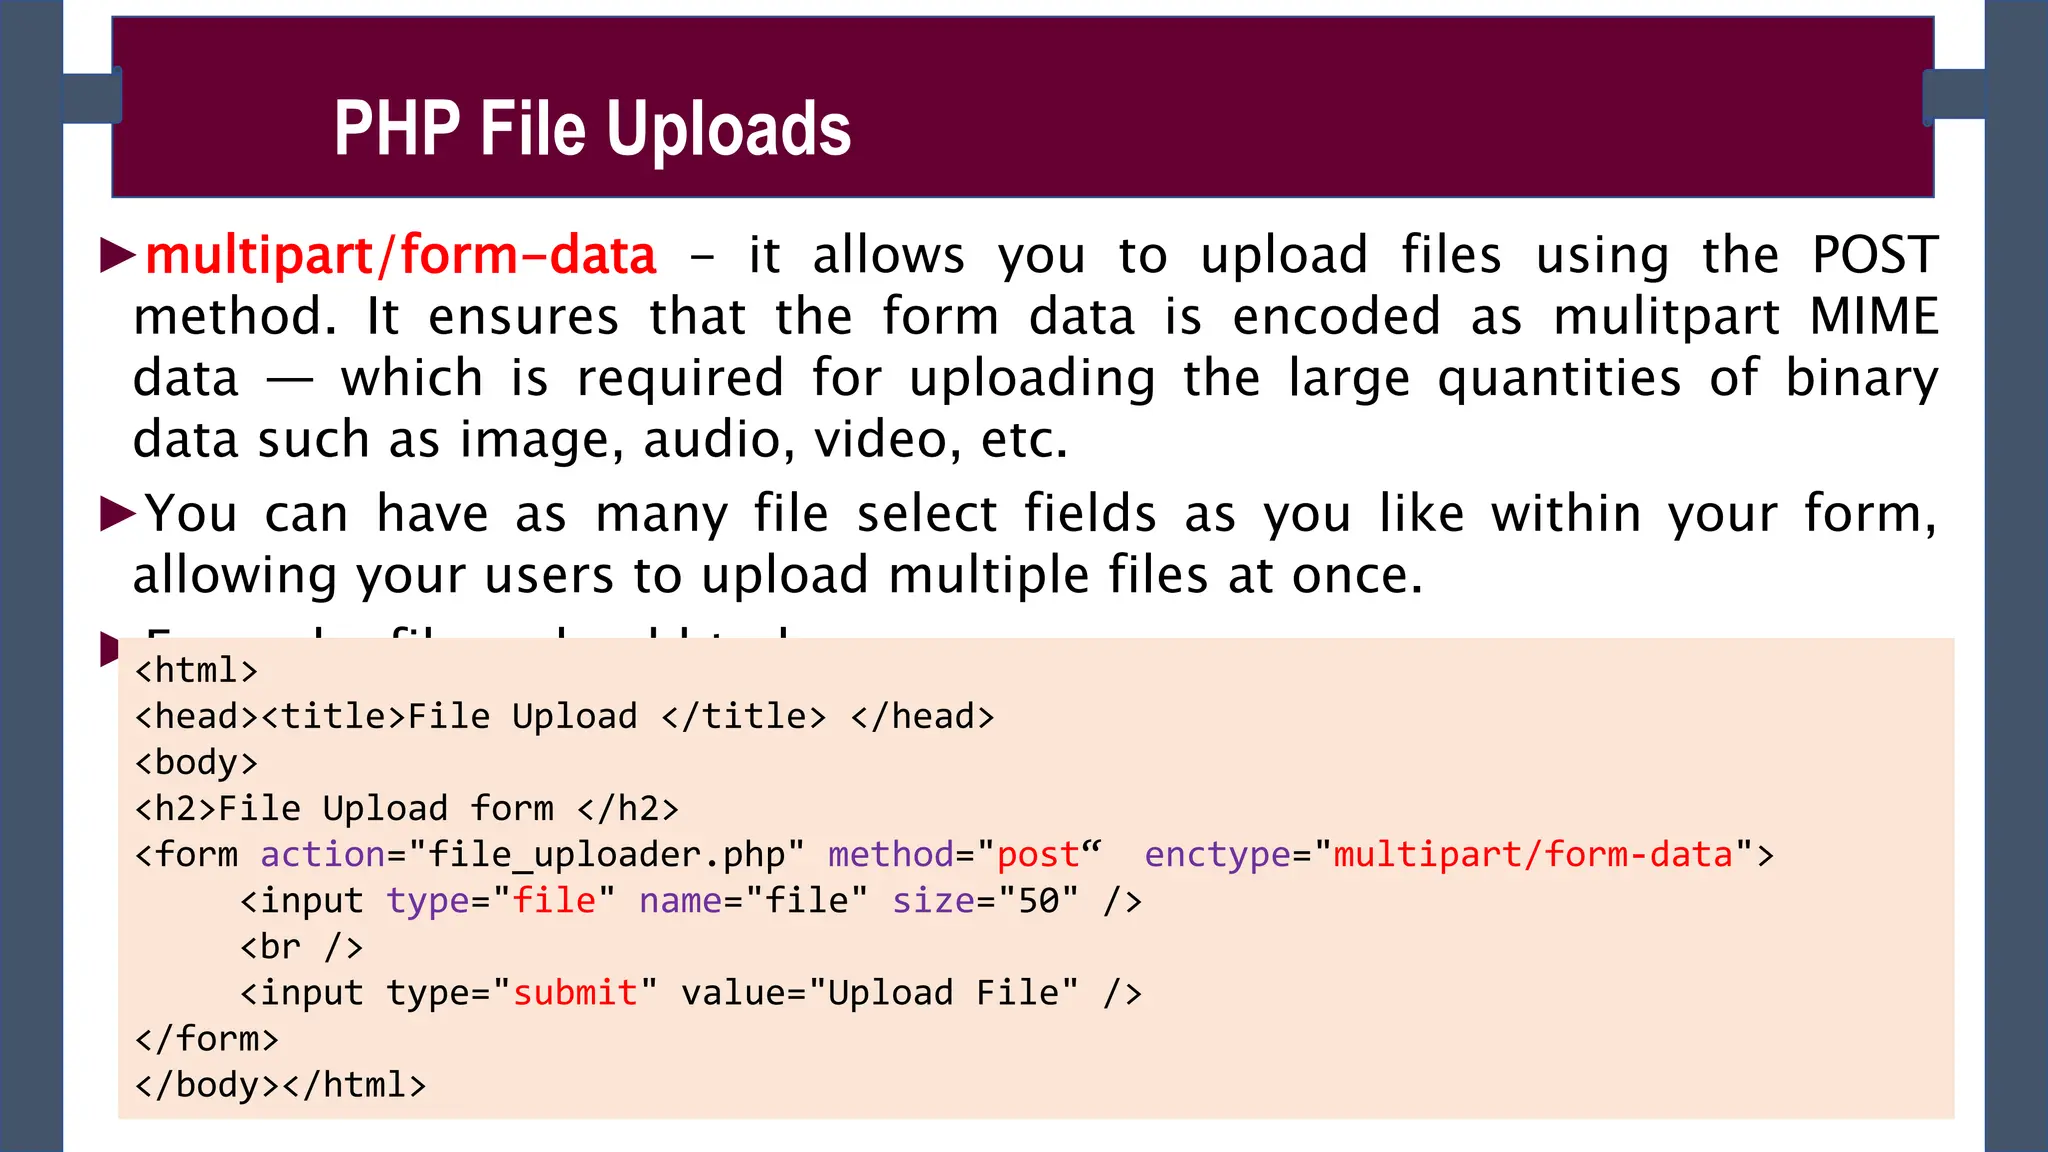
This document discusses form handling in PHP. It explains that PHP can capture form data submitted by users through HTML forms using superglobal variables like $_GET and $_POST. It describes how to create HTML forms, access submitted data in PHP scripts, and validate user-submitted form data to ensure it is in the proper format. File uploads are also covered, including how to move uploaded files and limit maximum file sizes. Form validation techniques like checking for empty fields, validating string, number and email formats are presented.

![►For example, to access the value of an input field named ‘first_name’ in
a form whose method is POST, we’d write: $_POST[ ‘first_name’ ];
►If the form method is GET, $_GET[ ‘first_name’ ];
Capturing Form Data with PHP
Superglob
al
Description
$_GET Contains a list of all the field names and values sent by a
form using the get method (i.e. via the URL parameters).
$_POST Contains a list of all the field names and values sent by a
form using the post method (data will not visible in the
URL).
$_REQUES Contains the values of both the $_GET and $_POST variables](https://image.slidesharecdn.com/phpch-02-240215190221-9fe953b0/75/PHP-fundamnetal-in-information-technology-CHapter-02-pptx-3-2048.jpg)
![process_form.php
<!DOCTYPE html>
<html lang="en">
<head>
<title>Contact Form</title>
</head>
<body>
<h2>You Registered Successfully!</h2>
<h2>You Submitted the following data:</h2>
<?php
$fname =$_POST[“fname"];
$lname =$_POST[“lname"];
$email =$_POST[“email"];
$phone =$_POST[“phone"];
echo “Your First Name:”. $fname;
echo “Your Last Name:”. $lname;
echo “Your Email:”. $email;
echo “Your Phone:”. $phone; ?>
</body> </html>
This assigns the data from a f
orm field to a new variable
The PHP code blends variables in
to HTML code that’s output to t
he browser](https://image.slidesharecdn.com/phpch-02-240215190221-9fe953b0/75/PHP-fundamnetal-in-information-technology-CHapter-02-pptx-6-2048.jpg)

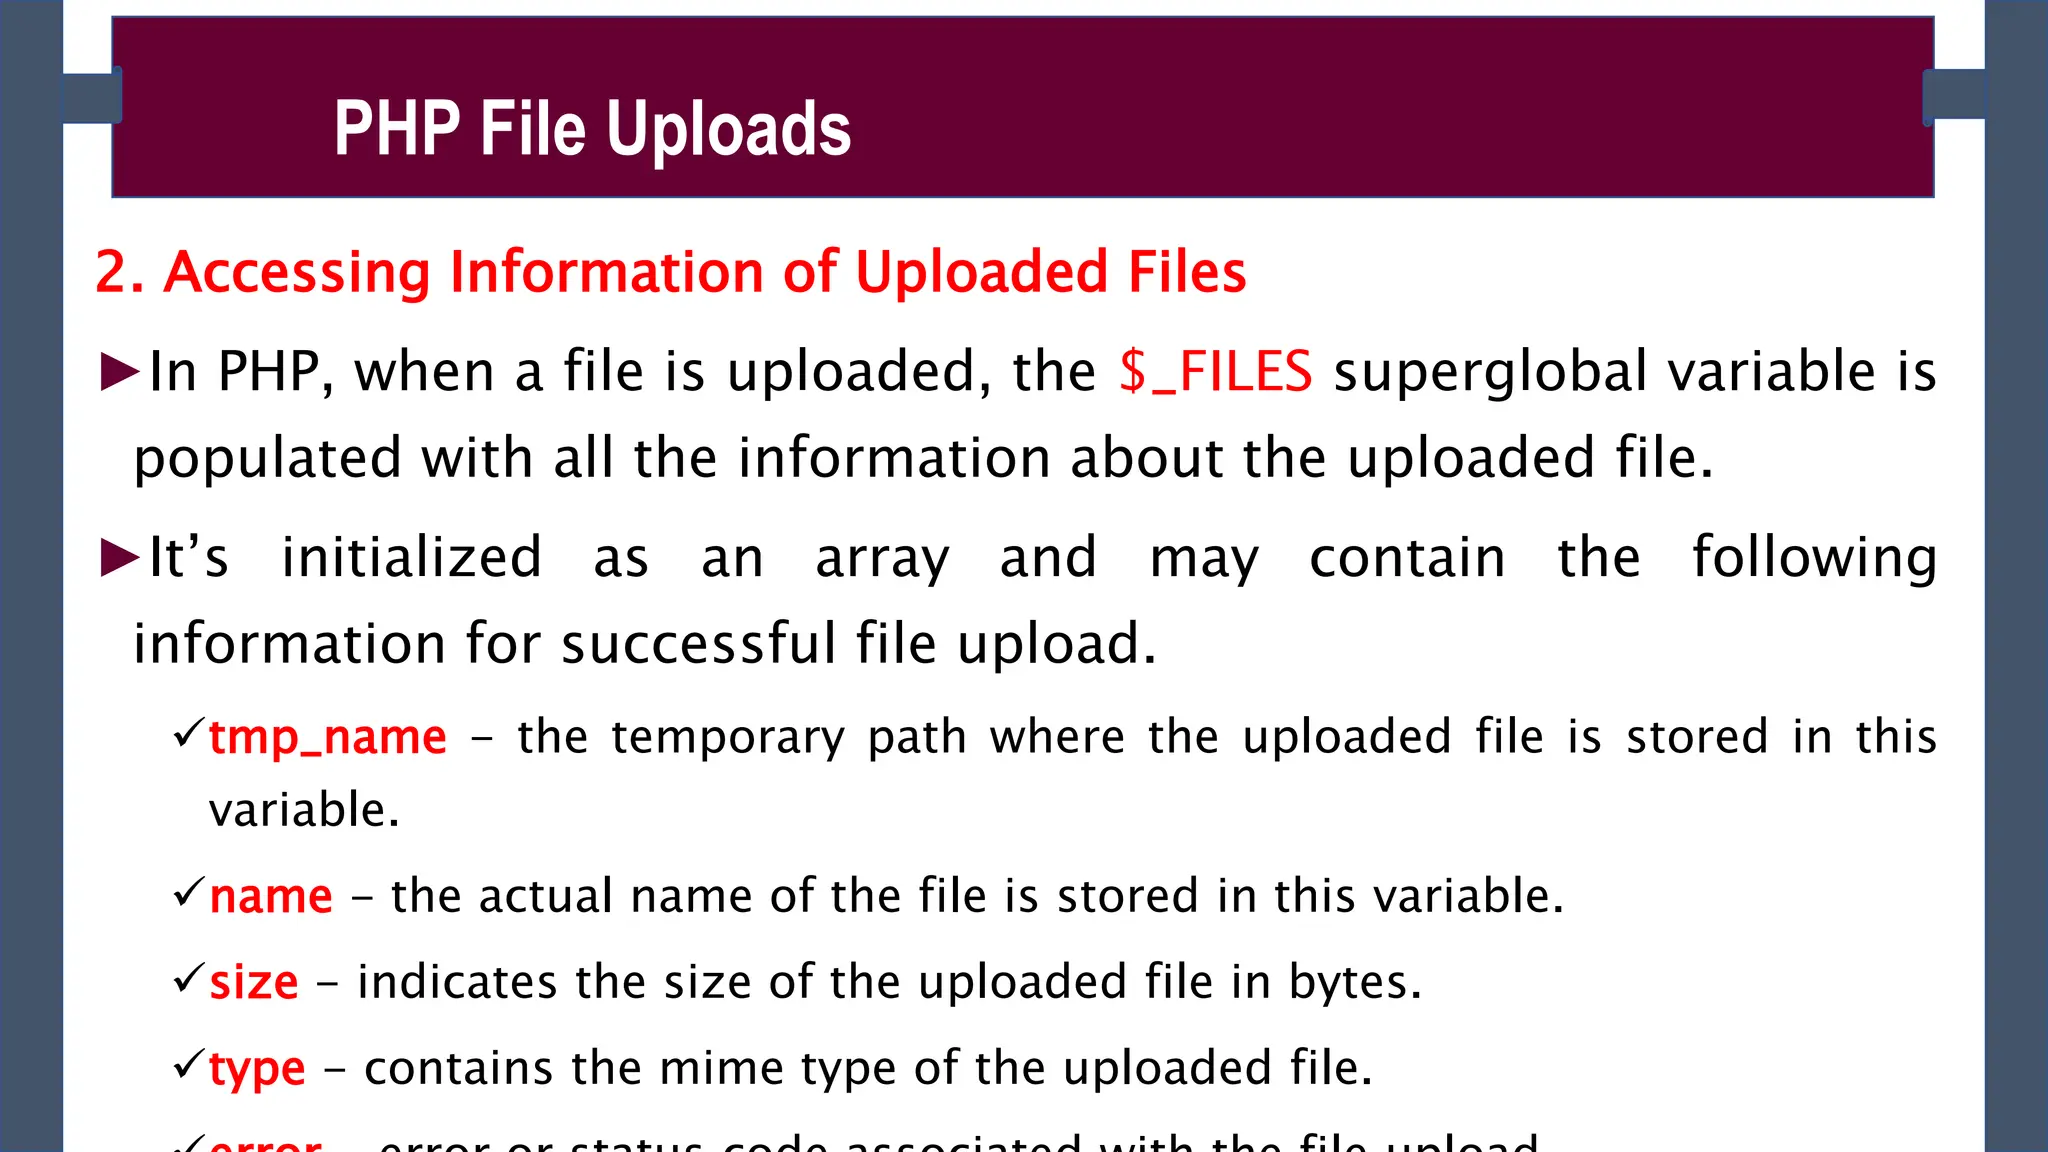
![►Accessing the uploaded file and its information using $_FILES
superglobal array as follows for the above given file upload form:
$_FILES['file']['tmp_name’] – returns the uploaded file in the temporary directory on
the web server.
$_FILES['file']['name'] – returns the actual name of the uploaded file.
$_FILES['file']['size'] – returns the size in bytes of the uploaded file.
$_FILES['file']['type'] – returns the MIME type of the uploaded file.
$_FILES['file']['error'] – returns the error code associated with this file upload.
PHP File Uploads](https://image.slidesharecdn.com/phpch-02-240215190221-9fe953b0/75/PHP-fundamnetal-in-information-technology-CHapter-02-pptx-13-2048.jpg)
![►Once a file has been successfully uploaded, it is automatically stored in
a temporary folder on the server.
►To use the file, or store it on a more permanent basis, you need to
move it out of the temporary folder. To do this use
move_uploaded_file()
►move_uploaded_file() - moves the uploaded file to a new location.
It takes two arguments: the path of the file to move, and the path to move
it to.
You can determine the existing path of the file using the tmp_name array
element of the nested array inside the $_FILES array.
It returns true if the file was moved successfully, or false if there was an
error (such as the path to the file being incorrect).
Syntax: move_uploaded_file ($from , $to )
Storing and Using an Uploaded File
if ( move_uploaded_file( $_FILES[“photo”][“tmp_name”], “/desktop/photos/photo.jpg” ) ) {
echo “Your file was successfully uploaded.”;
} else {
echo “There was a problem uploading your file - please try again.”; }](https://image.slidesharecdn.com/phpch-02-240215190221-9fe953b0/75/PHP-fundamnetal-in-information-technology-CHapter-02-pptx-16-2048.jpg)
![<?php
$target_path = "e:/";
$target_path = $target_path.basename( $_FILES['file']['name']);
if(move_uploaded_file($_FILES['file']['tmp_name'], $target_path)) {
echo "File uploaded successfully! Your file information are: <br>";
echo “File name is: ”. $_FILES['file']['name’]. “<br>” ;
echo “File size is: ”. $_FILES['file’][size’]. “<br>” ;
echo “File type is: ”. $_FILES['file’][type’]. “<br>” ;
echo “File temporary directory is: ”. $_FILES['file'][‘tmp_name’]. “<br>” ;
} else{
echo "Sorry, file not uploaded, please try again!";
}
?>
file_uploader.php](https://image.slidesharecdn.com/phpch-02-240215190221-9fe953b0/75/PHP-fundamnetal-in-information-technology-CHapter-02-pptx-17-2048.jpg)
![Empty String
►The code below checks that the field is not empty. If the user leaves the
required field empty, it will show an error message. Put these lines of code to
validate the required field.
if (empty ($_POST["name"])) {
echo "Error! You didn't enter the Name.";
} else {
$name = $_POST["name"];
}
Validate String
►The code below checks that the field will contain only alphabets and
whitespace, for example - name. If the name field does not receive valid input
from the user, then it will show an error message:
$name = $_POST ["Name"];
if (!preg_match ("/^[a-zA-z]*$/", $name) ) {
echo "Only alphabets and whitespace are allowed.";
Form Validation in PHP](https://image.slidesharecdn.com/phpch-02-240215190221-9fe953b0/75/PHP-fundamnetal-in-information-technology-CHapter-02-pptx-19-2048.jpg)
![Validate Number
►The below code validates that the field will only contain a numeric value. For
example - Mobile no. If the Mobile no field does not receive numeric data from
the user, the code will display an error message:
$mobileno = $_POST ["Mobile_no"];
if (!preg_match ("/^[0-9]*$/", $mobileno) ){
echo "Only numeric value is allowed.";
} else { echo $mobileno; }
Validate Email
►A valid email must contain @ and . symbols. PHP provides various methods to
validate the email address. Here, we will use regular expressions to validate
the email address.
$email = $_POST ["Email"];
$pattern = "^[_a-z0-9-]+(.[_a-z0-9-]+)*@[a-z0-9-]+(.[a-z0-9-]+)*(.[a-z]{2,3})$^";
if (!preg_match ($pattern, $email) ){
echo "Email is not valid.";
Form Validation in PHP](https://image.slidesharecdn.com/phpch-02-240215190221-9fe953b0/75/PHP-fundamnetal-in-information-technology-CHapter-02-pptx-20-2048.jpg)
![Input Length Validation
►The input length validation restricts the user to provide the value between the
specified range, for Example - Mobile Number. A valid mobile number must
have 10 digits.
$mobileno = $_POST ["Mobile"];
$length = strlen ($mobileno);
if ( $length < 10 && $length > 10) {
echo "Mobile must have 10 digits.";
} else { echo "Your Mobile number is: " .$mobileno; }
Button Click Validate
►The below code validates that the user click on submit button and send the
form data to the server in one of the following method - get or post.
if (isset ($_POST['submit']) {
echo "Submit button is clicked.";
if ($_SERVER["REQUEST_METHOD"] == "POST") {
echo "Data is sent using POST method ";
}
Form Validation in PHP](https://image.slidesharecdn.com/phpch-02-240215190221-9fe953b0/75/PHP-fundamnetal-in-information-technology-CHapter-02-pptx-21-2048.jpg)


![Vibe Coding vs. Spec-Driven Development [Free Meetup]](https://cdn.slidesharecdn.com/ss_thumbnails/vibecodingvsspecdrivendevelopment-251209105622-43f455e7-thumbnail.jpg?width=640&height=640&fit=bounds)


