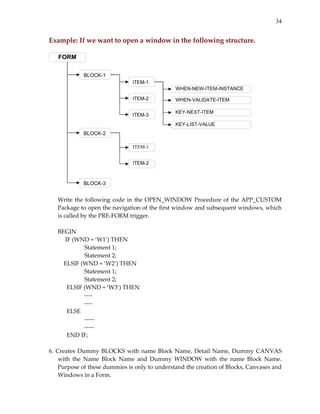
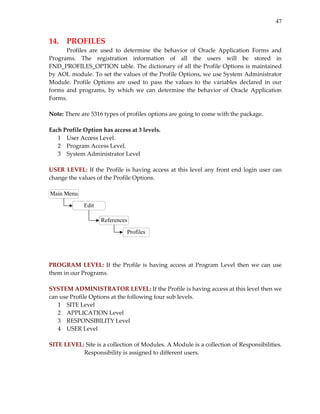
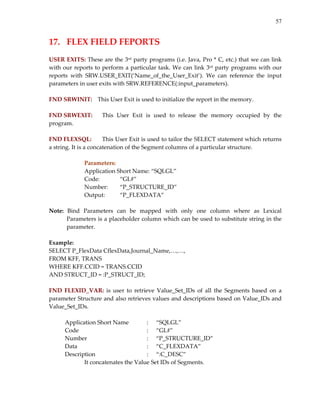
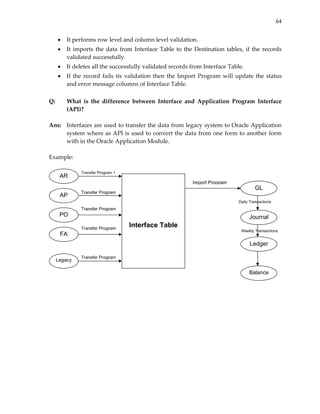
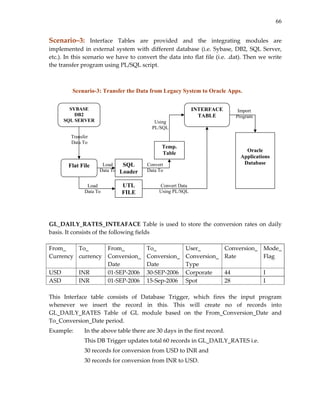
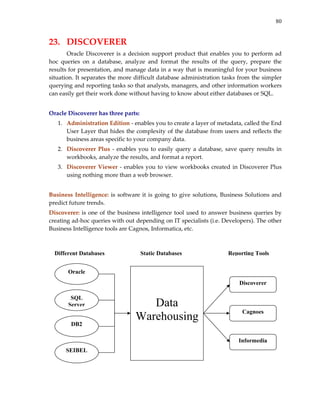
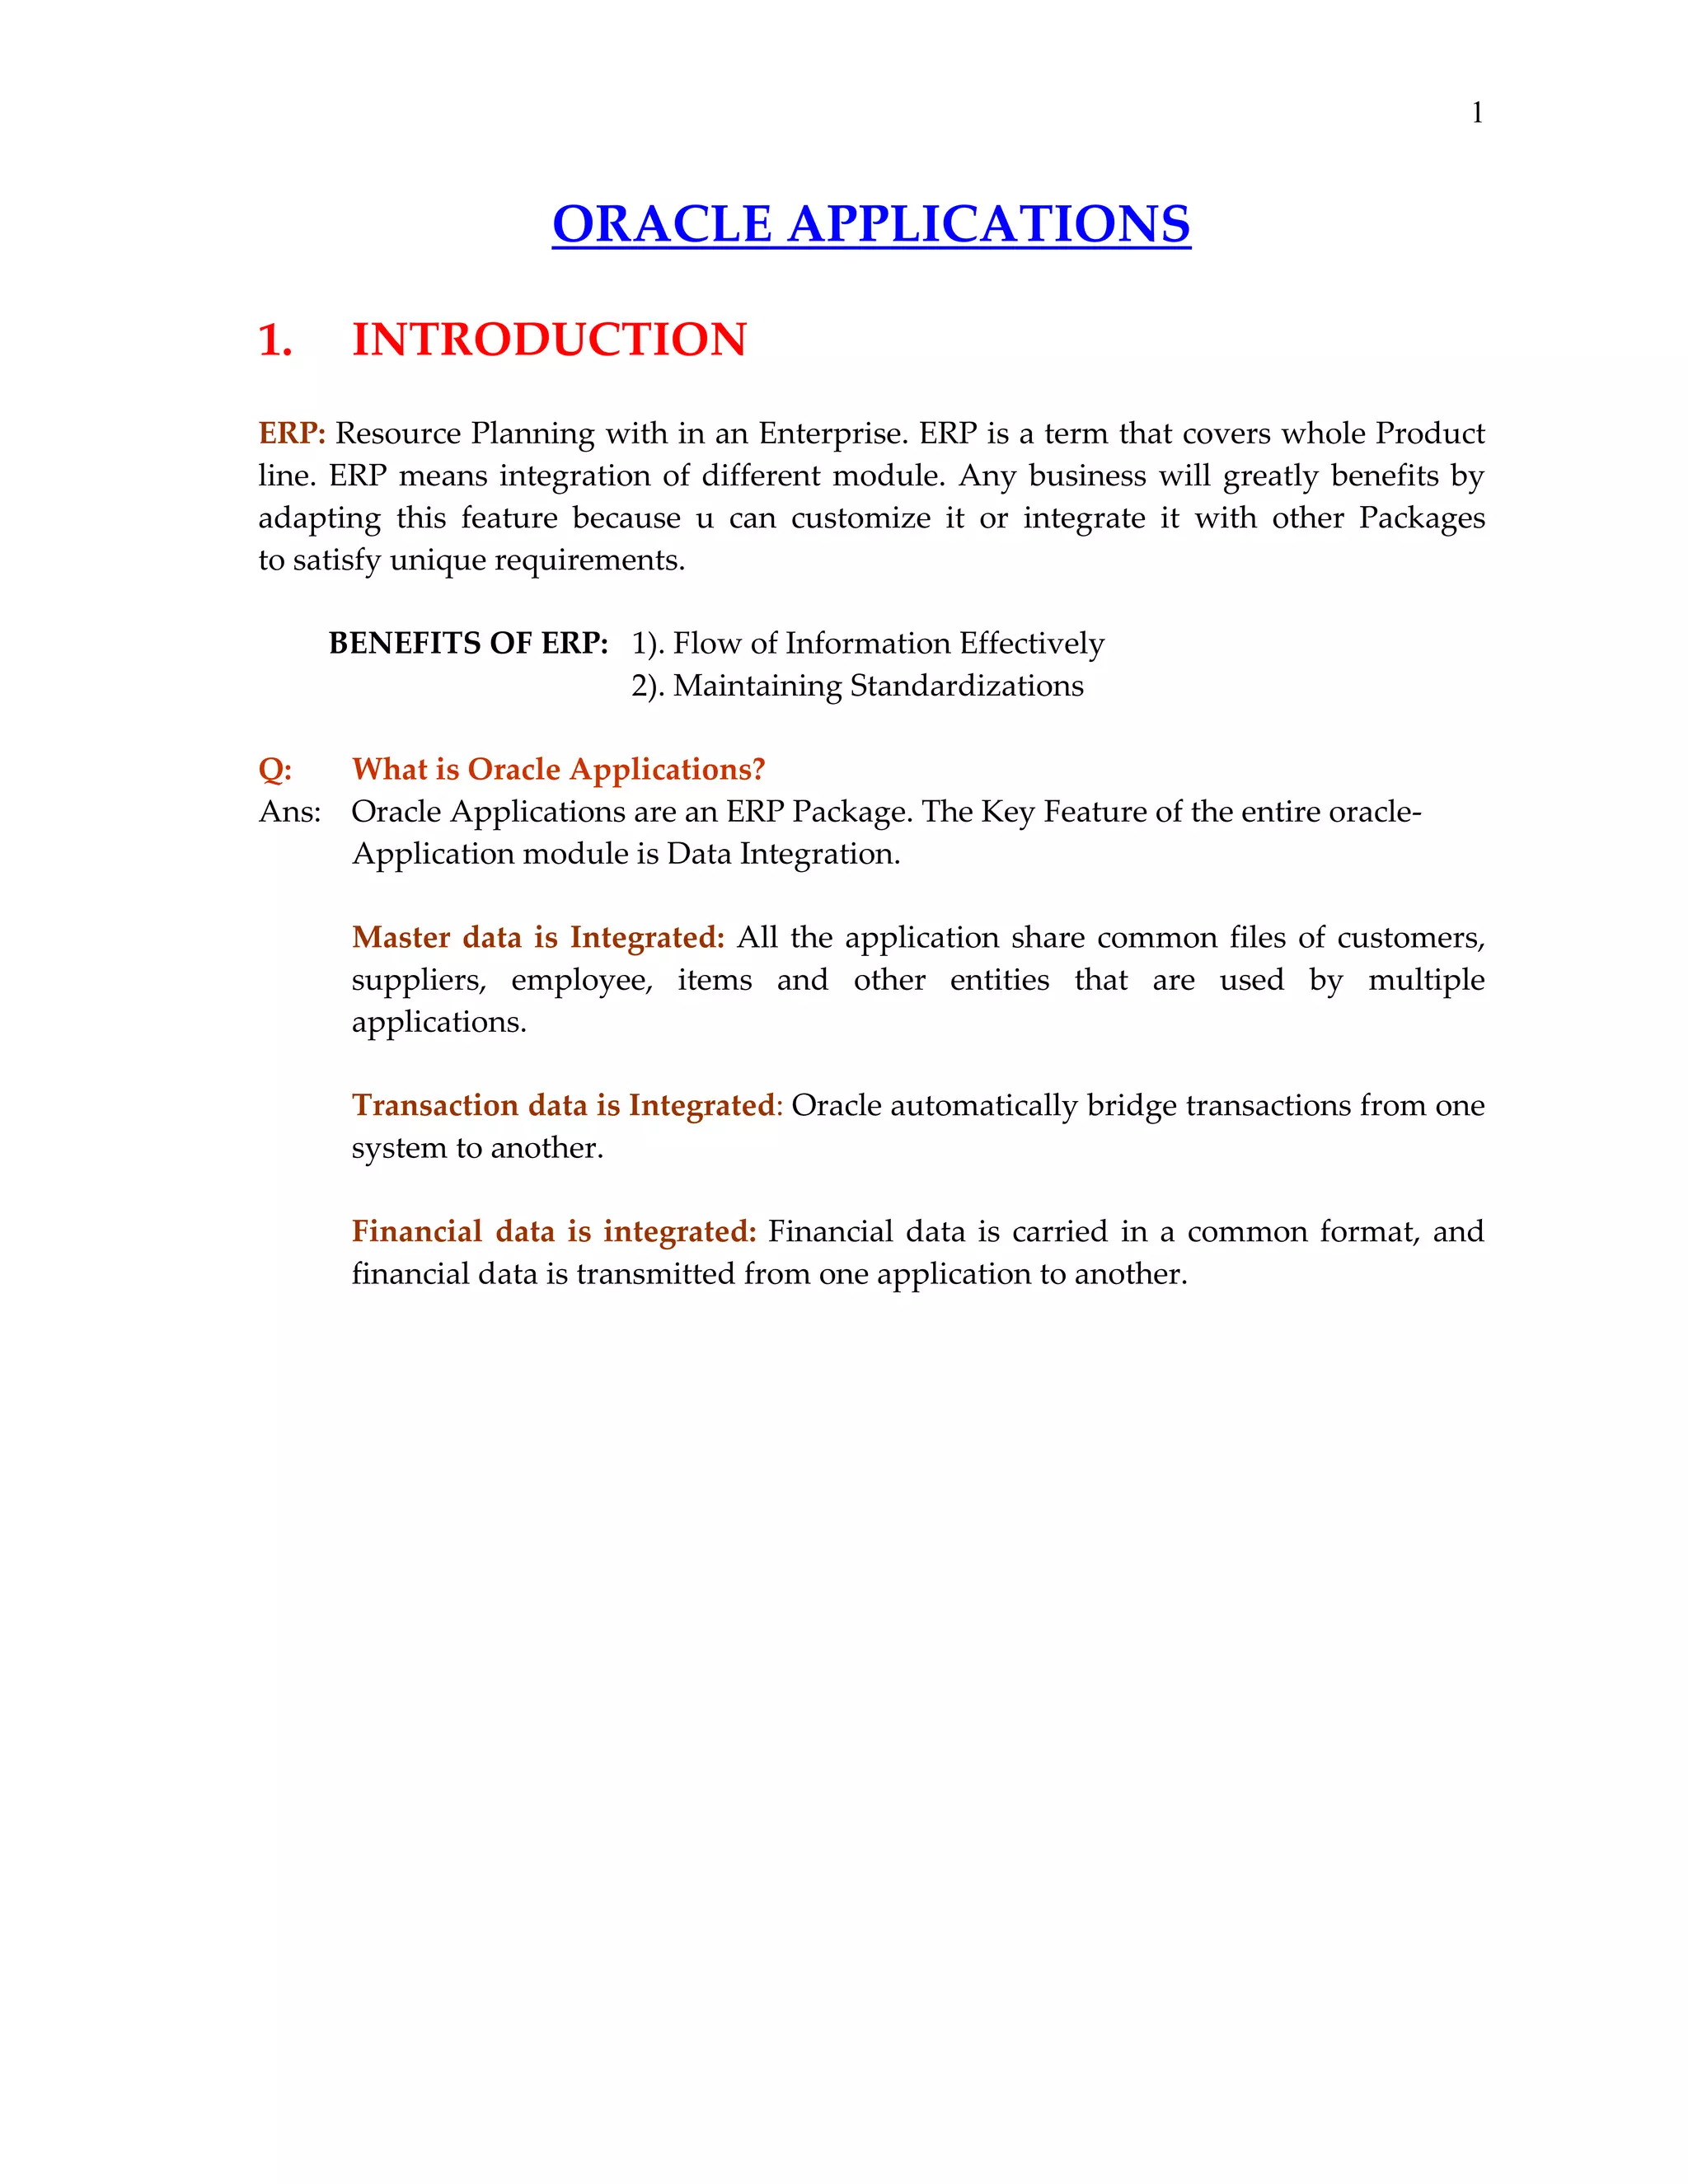
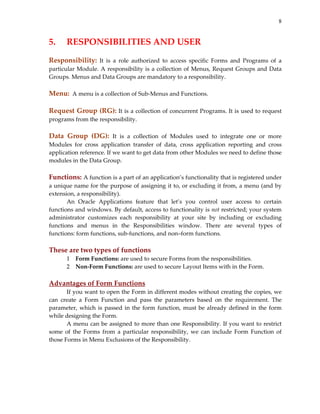
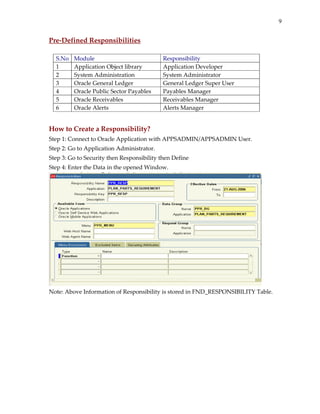
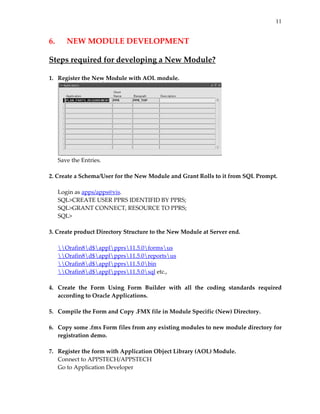
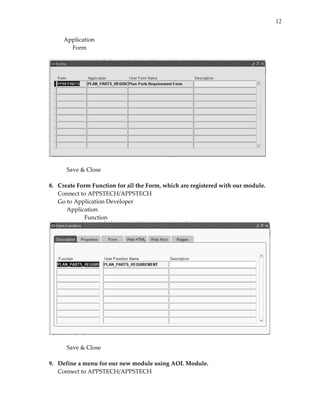
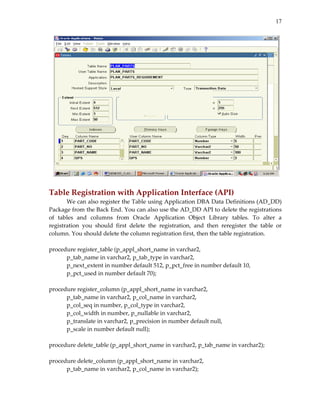
Oracle Applications is an Enterprise Resource Planning software package developed by Oracle Corporation. It uses a three-tier architecture with various modules, forms, reports and libraries integrated on a common database. The key features of Oracle Applications include integrated master data, transaction data and financial data across different modules. It uses responsibilities to control user access and permissions to specific functions within each module. Developing a new module involves registering it with the Application Object Library and creating a dedicated schema for it in the database.

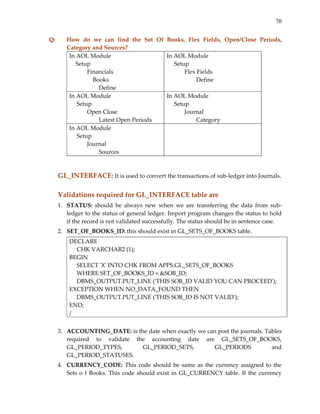
![20
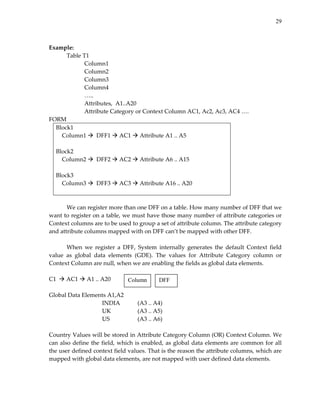
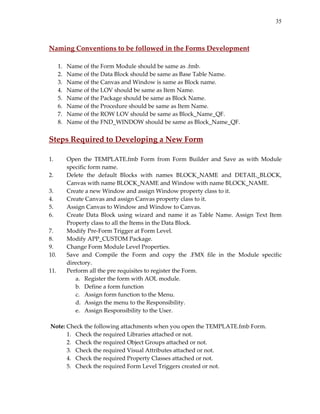
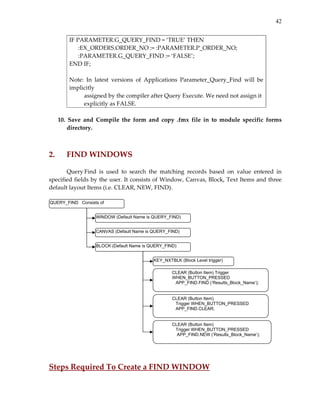
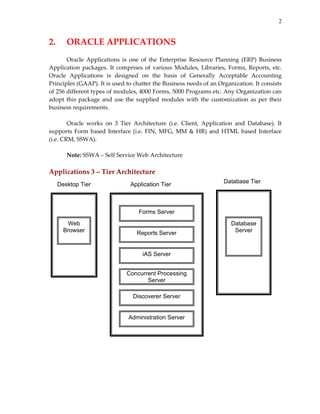
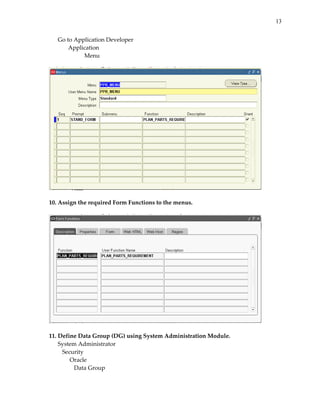
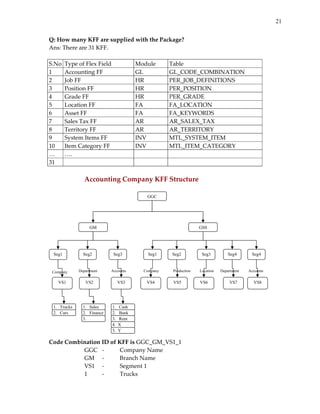
8. FLEXFIELDS
A flexfield is a field made up of sub–fields, or segments. There are two types of
flexfields: key flexfields and descriptive flexfields. A key flexfield appears on your form
as a normal text field with an appropriate prompt. A descriptive flexfield appears on
your form as a two–character–wide text field with square brackets [ ] as its prompt.
Flex Fields are used to capture the Business Information of the Organization. The
organization can use the Flex Fields based on their Business Structure.
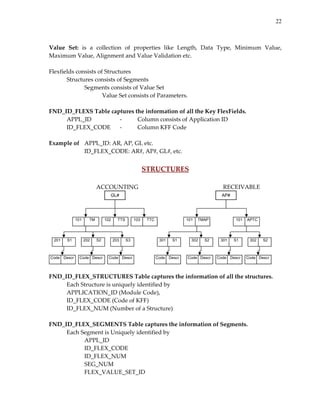
KEY FLEX FIELDS (KFF)
KFF are used to capture mandatory or Key Business information of the
Organization. Each Key Flex Field is having its won base Table.](https://image.slidesharecdn.com/oracleappstechnicalmanual-12943523786633-phpapp01/85/Oracle-Apps-Technical-Manual-20-320.jpg)


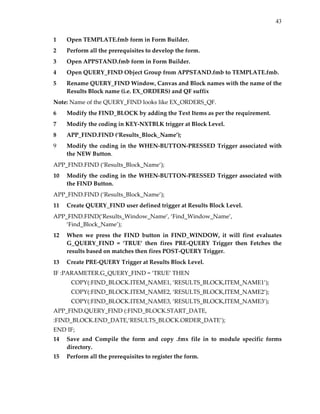
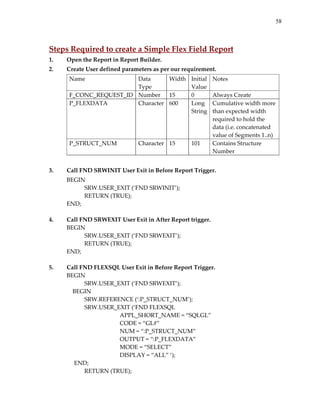
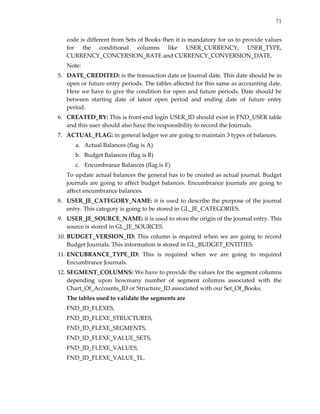
![28
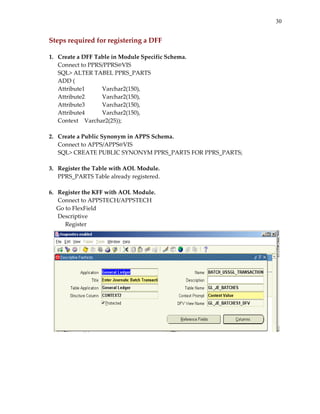
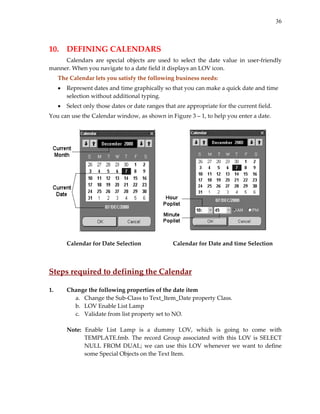
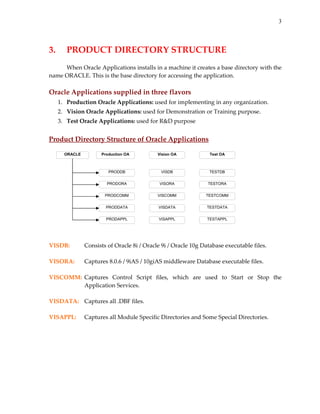
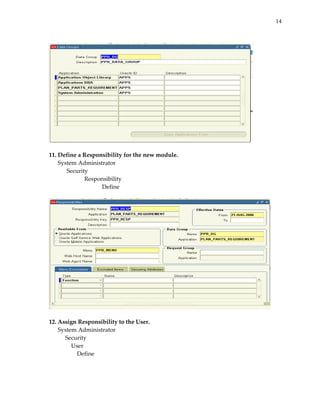
DESCRIPTIVE FLEX FIELDS (DFF)
DFF are used to capture the additional or extra Business information of the
organization. DFF are used to add extra accounts, these are varry from one business to
another business. All DFF columns are defined as Attribute Columns. All these columns
are defined in the transaction table itself. There are around 5000+ DFF available with the
package.
DFF have two different types of Segments
1. Global DFF
2. Context Sensitive DFF
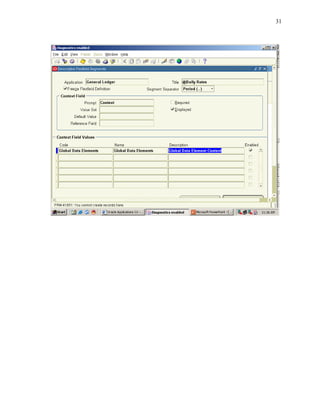
Q: How to know that a form is having DFF?
Ans: Go to Help in Menu Bar
Diagnostic
Examine
Enter Oracle Password : APPS
Block Name: $Descriptive Flexfields (Change the field like this))
Field: PPRS FLEX
If the Form having the button with square brackets [ ] then we can say that the
form is having DFF. A form can have multiple DFF but a Block can have only one
DFF. To reference a DFF use Block_Name.DFF_Name.
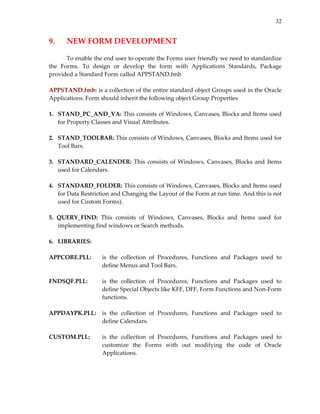
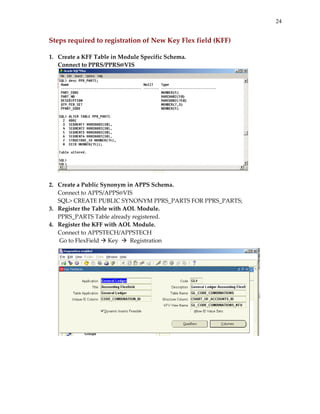
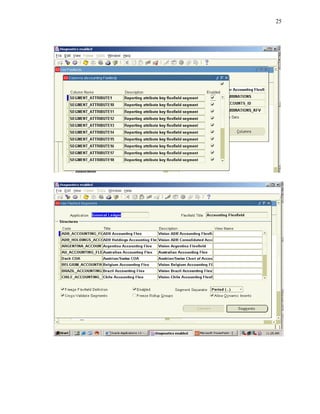
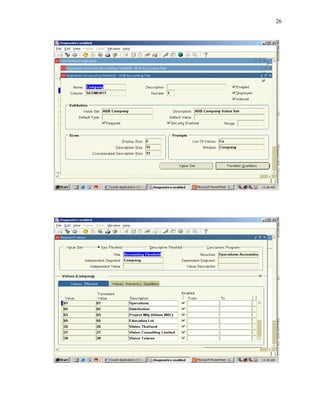
Q: How to enable a DFF?
To enable DFF switch responsibility to
Application Developer
FlexField
Descriptive
Segments
Enter Totle: PPRS DFF
Click on Segment Button at the bottom of the Pop‐Up Window.](https://image.slidesharecdn.com/oracleappstechnicalmanual-12943523786633-phpapp01/85/Oracle-Apps-Technical-Manual-28-320.jpg)