2. I
The Ogura Clutch Company was founded in 1938. Since that time, it has
grown to be the largest manufacturer of electromagnetic clutches in the world.
Ogura has technical and manufacturing representation worldwide.
Ogura’s numerous quality awards reflect a desire for continuous improvement
which we apply not only to our products; but, also to our personnel. We
believe the cornerstone of quality begins with people. This is why our
personnel are continually trained on the latest manufacturing techniques and
design principles. Our plants currently conform to ISO9001 and some to
QS9000 guidelines.
We welcome the opportunity to put our manufacturing and engineering skills
to work for you. If for some reason, your requirement does not fit within the
product lines shown in this catalog, please contact us directly. We may have
other products available to meet your requirements.
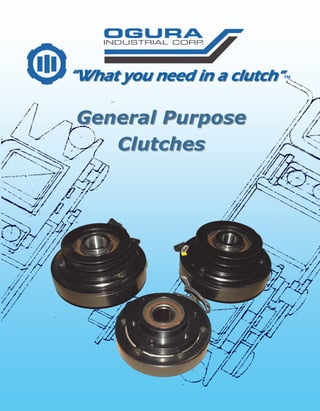
General Purpose
IntroductionIntroduction
General Purpose
ClutchesClutches
1
3. General Purpose Clutches:
These are typically bearing mounted
clutches, which can be used in a variety
of mobile, agricultural, marine or lawn
and garden applications. They can
be mounted on either the driving or
driven shaft.
There are tw o basic models of clutches described in this catalog.II Products In This CatalogProducts In This Catalog
Information contained in this catalog is as accurate as possible; however,
we cannot be held responsible for errors and omissions.
2
4. IIIGeneral Purpose ClutchesGeneral Purpose Clutches
Principle Of OperationPrinciple Of Operation
General purpose clutches are primarily
made up of two major sub-assemblies.
They are:
Field/rotor assembly: This is the coil
and backing plate. The coil provides
the magnetic flux that allows the clutch
to pull in. The rotor provides the input
rotation as it is normally connected to
an input shaft.
Pulley/armature assembly: This
includes the armature disk, springs,
hub and pulley. This is normally the
output of the clutch. In some
instances, a mounting flange is used
instead of a pulley.
In a general purpose clutch, either the
pulley/hub or the bore (rotor) of the clutch
can be the input. In most cases, the bore
(rotor) is the input. This input is normally
mounted directly on an engine shaft.
All general purpose clutches are bearing
mounted. This means that the field is
supported by a bearing on the shaft and
does not have to be mounted separately.
Some mobile clutches are one piece
designs and some are two piece (the
field/rotor is one part and armature/pulley
is the other).
Engagement of the armature to the rotor
is caused by the magnetic attraction
between the rotor and the armature. The
magnetic flux is transferred from the field
into the rotor and then into the armature.
The slots in the rotor and the armature are
called banana slots. These slots allow the
flux to contact the rotor and the armature
in more than just two places. (A normal
magnet only has a north and a south
point of attraction.) By making multiple
points of flux connection, the torque can
be increased in this type of clutch.
The picture shows a standard clutch. It
has three flux paths. This is called a triple
flux or a six-pole design.
To disengage the clutch, the voltage going
to the coil is simply turned off. Once the
voltage is released, the springs between
the armature and the hub pull the armature
away from the rotor, creating an air gap
so no contact is made when the clutch is
turned off.
1.
2.
Magnetic Flux Path
Pulley
Rotor
Field
Armature
3
5. Reasons For Using
An Electromechanical Clutch For Agricultural,
Construction, Mobile And General Applications
Remote actuation:
The clutch can be engaged or disengaged from a remote location such as
the cab in a truck or a control panel.
Safety:
In cases where the clutch is driving applications such as a stump grinder
or a trencher, many times these can be fitted with an operator presence
control so if the operator lets go of the handle, the clutch automatically
disengages. Since electric clutches are not speed dependent, they can
be engaged and disengaged at any point in their speed range.
Reduced power consumption from the engine:
Since the clutch is only engaged when it is required to run, engine
horsepower can be utilized for other functions when the clutch is not
driving. This is particularly important if horsepower is required to perform
an independent driving function or in applications such as fans or blowers
that consume a lot of horsepower and do not need to run all the time the
engine is running.
Simple installation:
Since the clutch runs directly off the battery, all that is required is a basic
switch to engage and disengage the clutch.
Operator convenience:
Rather than a mechanical linkage which can cause an additional force
required by an operator to engage a clutch, an electric clutch is engaged
by a simple flip of a switch. Because the clutch is engaged electrically, this
switch can be incorporated into a control panel so the operator does not
have to be in the same location as the clutch when it engages.
Cold weather starting:
By using a clutch, the load is not engaged at start up. This allows the
engine to come up to full efficiency before engaging the clutch. This helps
to prevent engine stalling.
1.
2.
3.
4.
5.
6.
4
6. Ogura
General Purpose Clutch Design Advantages
Solid forged rotor:
A one piece solid forged rotor means no chance of internal parts
separation. Our rotors also have an even wall thickness around the
coil which gives optimum flux distribution, maximizing torque.
Different coil voltages available:
Although 12 volt is the most common, 24 volts can also be made
available. Depending upon the quantity, other specialty voltages
can be made.
High temperature, longer life grease:
All models include our special long life grease which has shown a
significant improvement in life over other standard high temp greases.
E-coating:
Where possible, all parts in the clutch are e-coated to give maximum
corrosion protection.
High temperature epoxy coil:
To help prevent failure from both vibration and outside contaminants,
all coils are sealed in the coil shell with a high temperature epoxy coating.
Forged machined pulley:
All models in this section use a heavy duty machined pulley or flange.
A stronger pulley resists damage due to abusive environments.
Reduced burnishing time:
Ogura is using a coating on the clutch faces that significantly reduces
burnishing time. This is standard on all units.
1.
2.
3.
4.
5.
6.
7.
5
7. Typical
Applications For General Purpose Clutches
General purpose clutches are used to
remotely engage a number of different
types of applications. The simple design
function and installation of these clutches
help to enhance machine value to the
end user because of the added safety
and convenience they add over other
styles of clutching.
AGRICULTURAL
(Used on blowers, augers and choppers)
FAN CLUTCH
(Automatically turns on or off fan when needed;
this provides fuel and power savings)
SALT AND SAND SPREADERS
(A simple flip of the switch engages spreader)
TRENCHERS AND STUMP GRINDERS
(Operator convenience and safety)
6
10. Installation
Procedure For General Purpose Clutches
Things to check before installation begins:
Engine shaft size: Most of the time,
general purpose clutches are mounted
directly on the engine shaft. If the installa-
tion is not on an engine shaft, please make
sure that the tolerances are close enough to
provide a snug fit between the bore of our
clutch and the shaft. (All engine manufac-
turers should produce shafts within the
required tolerances.) Also, a standard rule
of thumb is that the minimum diameter of
the shaft for one piece designs is also the
minimum amount of shaft engagement.
(Two-piece designs would require shaft
engagement in both pieces.) The engine
shaft step radius needs to be smaller than
the chamfer on the clutch or the clutch will
not seat properly. If interference occurs, a
spacer with a proper chamfer is required.
Direction of rotation: We manufacture
our units to operate either clockwise or
counter-clockwise. They can be mounted
with the pulley toward the engine or they
can be mounted with the pulley away from
the engine. This mounting is critical
because this determines which direction
the leaf springs are orientated. If springs
are not run in tension, they could suffer
premature failure because they will be
running in compression. If the torque
required from the clutch is low enough,
(less than 75%) and vibration and inertia are
low, it is not as critical that the springs be
mounted in the correct configuration.
Torque tab restraint: Prior to installa-
tion, it is critical to determine the torque tab
placement. The function of the torque tab
is to keep the lead wires from pulling out of
the clutch due to the bearing drag. This
torque tab should have a freedom of
movement both axially and radially of
about 1/16 of an inch. The simplest type
of torque tab restraint is some type of "u"
bracket that captures the torque tab, but
does not grab it firmly. In heavy vibration
applications, a larger surface area is
required to prevent notching of the torque
tab and the restraining pin or bracket.
Key length and height: In many of
the clutches, the key does not go all the
way through the clutch. Therefore, the key
length can only be as long as the keyway
length within the rotor. Please check this
before installation. In some clutches, the
bearing inner race may be exposed on the
top of the keyway. In this case, the key
needs to be slightly undersized in this area
so it does not force itself against the bear-
ing inner race.
9
11. Step 1: Slide the clutch onto the shaft, (for
a two-piece clutch, slide both pieces on one
at a time). Please make sure that the key is
in the proper location. Do not force the
clutch onto the shaft because, if the key is
off slightly, damage could occur to the key
or to the bore of the clutch. The shaft should
extend into the clutch enough to support
each component. A standard rule of thumb
is the penetration should be at least equal to
the diameter of the shaft. The clutch should
be slid onto the shaft until the bearing inner
race on the clutch contacts a step, washer
or other drive pulley. In all cases, the
mounting surfaces of these components
need to be parallel to each other within
.003". If these surfaces are not parallel, the
clutch could become cocked on the shaft.
(This would show up as a wobbling pulley.)
The contact of these components, to the
bearing inner race, can extend beyond the
inner race because the seal is recessed. (If
you are using a washer, make sure it is not
cupped; otherwise, this cupping could dig
into the bearing seal.) Please be sure to
check the chamfer on the ground drive pul-
ley, washer or clutch so they do not interfere
with the radius on the step in the engine
crankshaft. On some of our clutches, the
bearing is kept on the inner sleeve via a
snap ring, (pulley side). With this design,
the rotor would then contact the appropriate
step on the shaft. (See example below.)
Step 2: A center bolt and washer,
(customer supplied) is then placed into the
end of the tapped shaft and then tightened
down. The washer should be .250" in
thickness. Bolt tightening torque will vary
depending upon the bolt used in the
application. This can be anywhere from 20
-50 ft. lbs. of tightening torque, depending
upon the bolt. If vibration is heavy an
adhesive may be required to prevent the
bolt from becoming loose. The washer
should contact the inner race of the bearing.
It can extend beyond the inner race as long
as it does not contact the outer race.
Step 3: At this point, the torque tab should
be held in the appropriate position. Please
make sure that there is freedom of move-
ment both axially and radially of the torque
tab of about 1/16". Double check the instal-
lation after it is tightened down, you should
be able to push against the back of the field
and move it slightly from side to side.
Under no circumstances should the torque
tab be tightened down firmly. This will
cause failure of the field bearings.
Installation
Of General Purpose Clutches
Pulley
Assembly
(Engine)
Engine Shaft
Torque Tab Rotor
Field
Washer
Center
Bolt
Armature
10
12. V
Potential Problem Possible Reasons Fix
Replace switch.
If rotor and armature connot be
separated, replace the clutch. If
they do separate, follow
burnishing procedure.
Replace clutch.
Loosen brake nuts and
reset air gap according to
recommendations. If clutch is
destroyed, replace clutch.
Faulty switch.
The clutch has been severely
galled and has locked up.
(Galling is the condition whereby
a piece of metal is trapped
between the armature and the
rotor and melts due to high
pressure and heat, spot welding
the surfaces together.)
Bearing lost grease due to seal
problem, temperature or water
contamination.
If the brake nuts are screwed
down too tight, the armature will
be pressed against the rotor all
the time. This should be evident
by discoloration of the brake
plate. If the unit ran long
enough, the brake plate and the
clutch would be destroyed.
Voltage not releasing.
Rotor and armature locked
together.
Pulley bearing locked.
Brake plate clamped
down too tightly.
Potential Problem Possible Reasons Fix
Pull apart and re-seat connector.
Check with voltmeter, battery
should be 8-16 volts. (Assuming
12 volt battery.)
Fix charging system.
Fix or replace lead wire.
If destroyed, replace clutch.
Replace fuse.
Replace the switch.
Wiring connector not seated
properly.
No voltage or low voltage coming
from the battery.
Defective charging system.
Lead wire cut or broken internally.
Fuse blown.
Defective switch operating clutch.
No voltage going to the
clutch.
CLUTCH WILL NOT ENGAGE
CLUTCH WILL NOT DISENGAGE
PTO Clutch/Brakes Only
Technical InformationTechnical Information
Troubleshooting Guide
11
13. Potential Problem Possible Reasons Fix
Check coil with ohmmeter. A
range close to 3 to 4 ohms
should be present at an ambient
coil temperature of 70ϒF. Replace
coil.
Change battery or coil to meet
your requirement.
Replace coil.
If straight bore, air gap can be
readjusted. If unit has set
screws, bottom out armature
hub against field then back off to
.1” and retighten set screws. If
spacer on straight bore, reduce
width of the spacer. If taper bore
clutch, tap on armature cover to
close gap.
Re-adjust according to air gap
adjustment procedure.
Replace clutch.
Put in key.
Replace clutch and determine
why it slipped.
Coil open or shorted.
Check coil voltage to make sure
it is compatible with the voltage
coming in. (If voltage is too high,
this could cause the coil to burn
out.)
Burnt out coil caused by frictional
contact (flange mounted
clutches, rotor strike). If so, coil
will be discolored, can be
cracked, burnt or epoxy can be
melted.
Rotor/armature air gap too
large.
Rotor/armature air gap too
large.
Rivets or springs broken.
Key missing.
Armature could be warped
because of heat due to slippage.
This means it will pull in, but will
slip when a load is supplied.
Clutch should show signs of
heat.
If voltage is going to the
clutch, but the clutch will
still not engage.
Clutch engages, but load
will not engage.
CLUTCH WILL NOT ENGAGE (continued)
PTO Clutch/Brakes Only
Mobile Clutches Only
Troubleshooting Guide
12
14. Potential Problem Possible Reasons Fix
Replace battery
Fix or replace lead wire.
Fix or replace lead wire.
Clean off surfaces with solvent
and reburnish. Replace the
clutch if damage is severe
enough.
Size clutch correctly for the
application. Replace clutch.
Replace clutch.
Try to reburnish clutch. If
slipping is to severe, clutch will
have to be replaced.
Defective battery.
Lead wire cut which could be
intermittently grounding out the
lead wire causing the clutch to
turn on and off or not to give full
voltage.
If lead wire is kinked or pinched
and the break is internal, the
clutch operation may show up
as being erratic engagement.
Oil or other lubricant has been
sprayed on the clutch surface.
Sometimes this shows up after
the clutch is disassembled.
Physical evidence is either burnt
oil or a greasy metallic surface
showing oil still present.
Output torque required is greater
than what the clutch can handle.
If input torque going into clutch is
greater than the output torque
required, the clutch will slip. If it
slips too long, the clutch surfaces
will be galled.
If output is stalled, clutch could
slip to the point where it will burn
up and destroy either bearings or
the field.
If full torque is required
immediately and clutch is not
burnished, it will slip and could
become galled.
Low voltage going into the
clutch.
Erratic engagement.
Clutch is contaminated.
Clutch overloaded.
Output stalled.
Clutch not burnished.
CLUTCH SLIPS
Potential Problem Possible Reasons Fix
Retighten center bolt or change
spacer or shaft length
Check center bolt and washer to
make sure it is tight. If it is tight,
make sure that the shaft is not
too long. Clutch shaft should
end before the end of the clutch
to allow some deflection in the
center bolt and washer to keep
clutch on tightly.
If clutch is able to move on
the shaft:
NOISY CLUTCH
Troubleshooting Guide
13
15. Potential Problem Possible Reasons Fix
Reduce belt load.
Reduce the heat or eliminate
slippage.
Increase air gap.
Re-burnish the clutch.
Tighten bolts.
Remove rotor assembly and
reseat keyway.
Loosen the bolts, remove wire
and retighten field mounting
bolts.
Loosen set screw, push together,
then back off .1”, and retighten
setscrew.
Re-machine mounting holes or
switch mounting face (by
switching you will be able to
verify if mounting holes on the
clutch are the problem or the
mounting holes on the face are
the problem.)
Replace the clutch.
Check if bearing feels rough.
Check belt load to make sure
pulley and bearings are not over
loaded.
High temperature can be caused
by either operating environment
or due to slippage. If slippage,
clutch should be discolored.
Refer to slippage section for
potential reasons.
Air gap too close.
Surface is heavily galled.
Possible causes are bolts in field
not tightened down properly.
Key in keyway not seated
properly. This could cause it to
cock to one side.
Lead wire pinched between
mounting face and field bracket
cocking field assembly.
If set screw version, this could
be because of improper air gap
between pulley/armature and
field.
Mounting face not concentric
with the shaft.
Check to see if projection welds
are broken. If they are, check to
see if rotor strike has occurred.
Possible misalignment in
combination of belt side load has
broken projection welds.
Noise from pulley bearing.
Pinging or scraping noise
noticed when clutch is
disengaged
Noise is evident when
the clutch is first installed
and rotated by hand.
Mounting bracket has
come loose from back of
field assembly.
NOISY CLUTCH (continued)
Mobile Clutches Only
Troubleshooting Guide
14
16. Potential Problem Possible Reasons Fix
Refer to slippage section.
Replace clutch.
Reduce reason for the high
temperature overloading on the
engine.
Loosen torque tab to make sure
it has freedom of movement
both axially and radially.
Back off the air gap to the higher
end of the air gap range.
Change the method of securing
the clutch to allow for a greater
surface area of contact so force
is more spread out and less
wear takes place.
Check to see if the clutch is
discolored to see if it shows
signs of slippage.
Check for damage to both the
outer race and inner race of the
bearing. Make sure key is not
too tight forcing pressure on the
inner race. In the outer race
area, check for marks or damage
that could have caused the
clearances to close up.
Check temperature if shaft clutch
is mounted on to make sure it is
under 300ϒF.
Check torque tab or backing
plate to make sure that there is
freedom of movement of 1/16
of an inch axially and radially.
Check to see if any marks are
evident that would indicate axial
forces applied.
Brake shroud and air gap set too
close. This means that the
armature is contacting the brake
while the clutch is engaged.
In a heavy vibration application,
the pin holding the backing plate
can become worn because of
vibration opening up clearance.
This can then generate noise
because of the additional
movement in the braking plate.
Noise from field bearing
(Noisy field bearing has
failed or is about to fail.)
In general purpose and
PTO brakes
Pinging or scraping
noise noticed when clutch
is engaged.
Brake plate rattles.
NOISY CLUTCH (continued)
PTO Clutch/Brakes Only
Troubleshooting Guide
15
17. 1) How to calculate torque when horsepower and speed are known
5252 x horsepower x service factor 5252 x hp x k
speed n
2) Inertia - How to determine inertia when material and shape are known.
(Total system inertia is total inertia of all the components. If the components are not simple
shafts or flanges, break down each of the components into its basic shape and calculate
inertia of that individual component. When inertia is being calculated in relation to the clutch
or brake, remember to adjust for reflected inertia amounts which may have a significant
increase or decrease on the inertia that the clutch has to handle based upon a speed
differential.
T=torque ft lb =
Formula to determine inertia of a solid shaft
wk2
= .000681 x p x Length x Diameter4
wk2
= .000681 x p x L x D4
Formula to determine inertia of a hollow shaft
wk2
= .000681 x p x length x (outer diameter4
- inner diameter4
)
wk2
= .000681 x P x L x (DO
4
-DI
4
)
Reflected inertia via gears, chain or belt
reflected inertia = load inertia divided by the square of the speed ratio
wk2
L
r2
wk2
R
=
(Inertia constants lb. in.3
)
∞ (aluminum) = 0.924
∞ (bronze) = 0.321
∞ (cast iron) = 0.26
∞ (steel) = 0.282
Values
wk2
= lb. ft.2
D, D0
, D1
, L = in.
3) How to calculate the amount of torque required to accelerate or decel-
erate a load when inertia value is known (t = time to speed or time to stop
depending if you are using a clutch or a brake.)
(inertia x the change in rpm) wk2
x ∅rpm
308 x the time required 308t
torque ft lb = T =
Formulas to Determine Selection
The following formulas will help you arrive at the required torque for your application. Most mobile
clutches accelerate in .2 seconds. Please use this as the time required in section #3.
16
18. TO:
Ogura Industrial Corp.
100 Randolph Road
P.O. Box 5790
Somerset, NJ 08875-5790
Phone: (732) 271-7361
Fax: (732) 271-7580
E-mail: info@ogura-clutch.com
Web: http://ogura-clutch.com
FROM:
Date:
Garden Tractor Application Data Fax Sheet
The answers to the following questions will help us suggest a clutch for your application using our
standard products customized to fit your exact needs.
This application is for: Cost estimating only
Current production requirement
New product requirement
Application Type: Pump (hydraulic or water/vacuum) PTO clutch/brake for mower
Other
Application Description:
Clutch Mounted On: Pump shaft Engine shaft Other
Torque required from clutch Clutch to handle horsepower
Shaft Diameter: Taper Straight
Engagement speed of the clutch Running speed of the clutch
Clutch pulley rotation (from the pulley side): Clockwise Counterclockwise
Inertia required for clutch to accelerate:
If you do not know iner tia, please refer to web site: http://ogura-clutch.com
Life: Target cycle life Target hours of life
Pulley required: Number of grooves , pitch diameter belt type
What is the estimated annual quantity , cost target ?
(This is impor tant to determine if a “special” is possible based upon your quantity).
When do you require your first prototype ? How many do you require ?
When does production begin ?
17
19. OGURA WARRANTY
Products are warranted against defects in material and workmanship for a period of 12
months from date of shipment, when applied in proper applications within specified ratings.
This warranty covers repair or replacement, F.O.B. Somerset, New Jersey. There is no further
warranty or implied representation as to any product. The company shall not be liable for
any consequential damage caused by improper application or installation of its product.
General Purpose
ClutchesClutches
General Purpose
20. Ogura Industrial Corp.
100 Randolph Road • Somerset, NJ 08873
tel: 732-271-7361 • fax: 732-271-7580
e-mail: info@ogura-clutch.com
web: http://www.ogura-clutch.com
Other Products AvailableOther Products Available
From OguraFrom Ogura
Ogura Supercharger: For increased gas and diesel horsepower
and performance and decreased engine emissions.
Spring Applied Brakes: Used to stop or to hold an
electric motor from rotating when there is no electrical
power applied.
Tooth Clutches: Deliver high torque in a small diameter.
Multi Disk: Deliver a high torque in a small diameter and can
engage and disengage while rotating (used in multispeed
gearboxes).
Marine: Heavy duty, compact marine clutches require minimal
space while providing high torque.
Industrial: Ogura manufactures a wide variety of friction,
magnetic particle and hysteresis clutches for a variety of
industrial and office automation applications.
1
2
3
4 5
6
1
2
3
4
5
6