Download to read offline

![On “Connection Type” page switch the Protocol to Bridging and click “Next”;
Now finally click Next one more time and on the “Summary” page click Apply.
You are all done on the modem part. Simply Switch off the Modem and Switch on it again to
apply the new settings and then move to the next step…
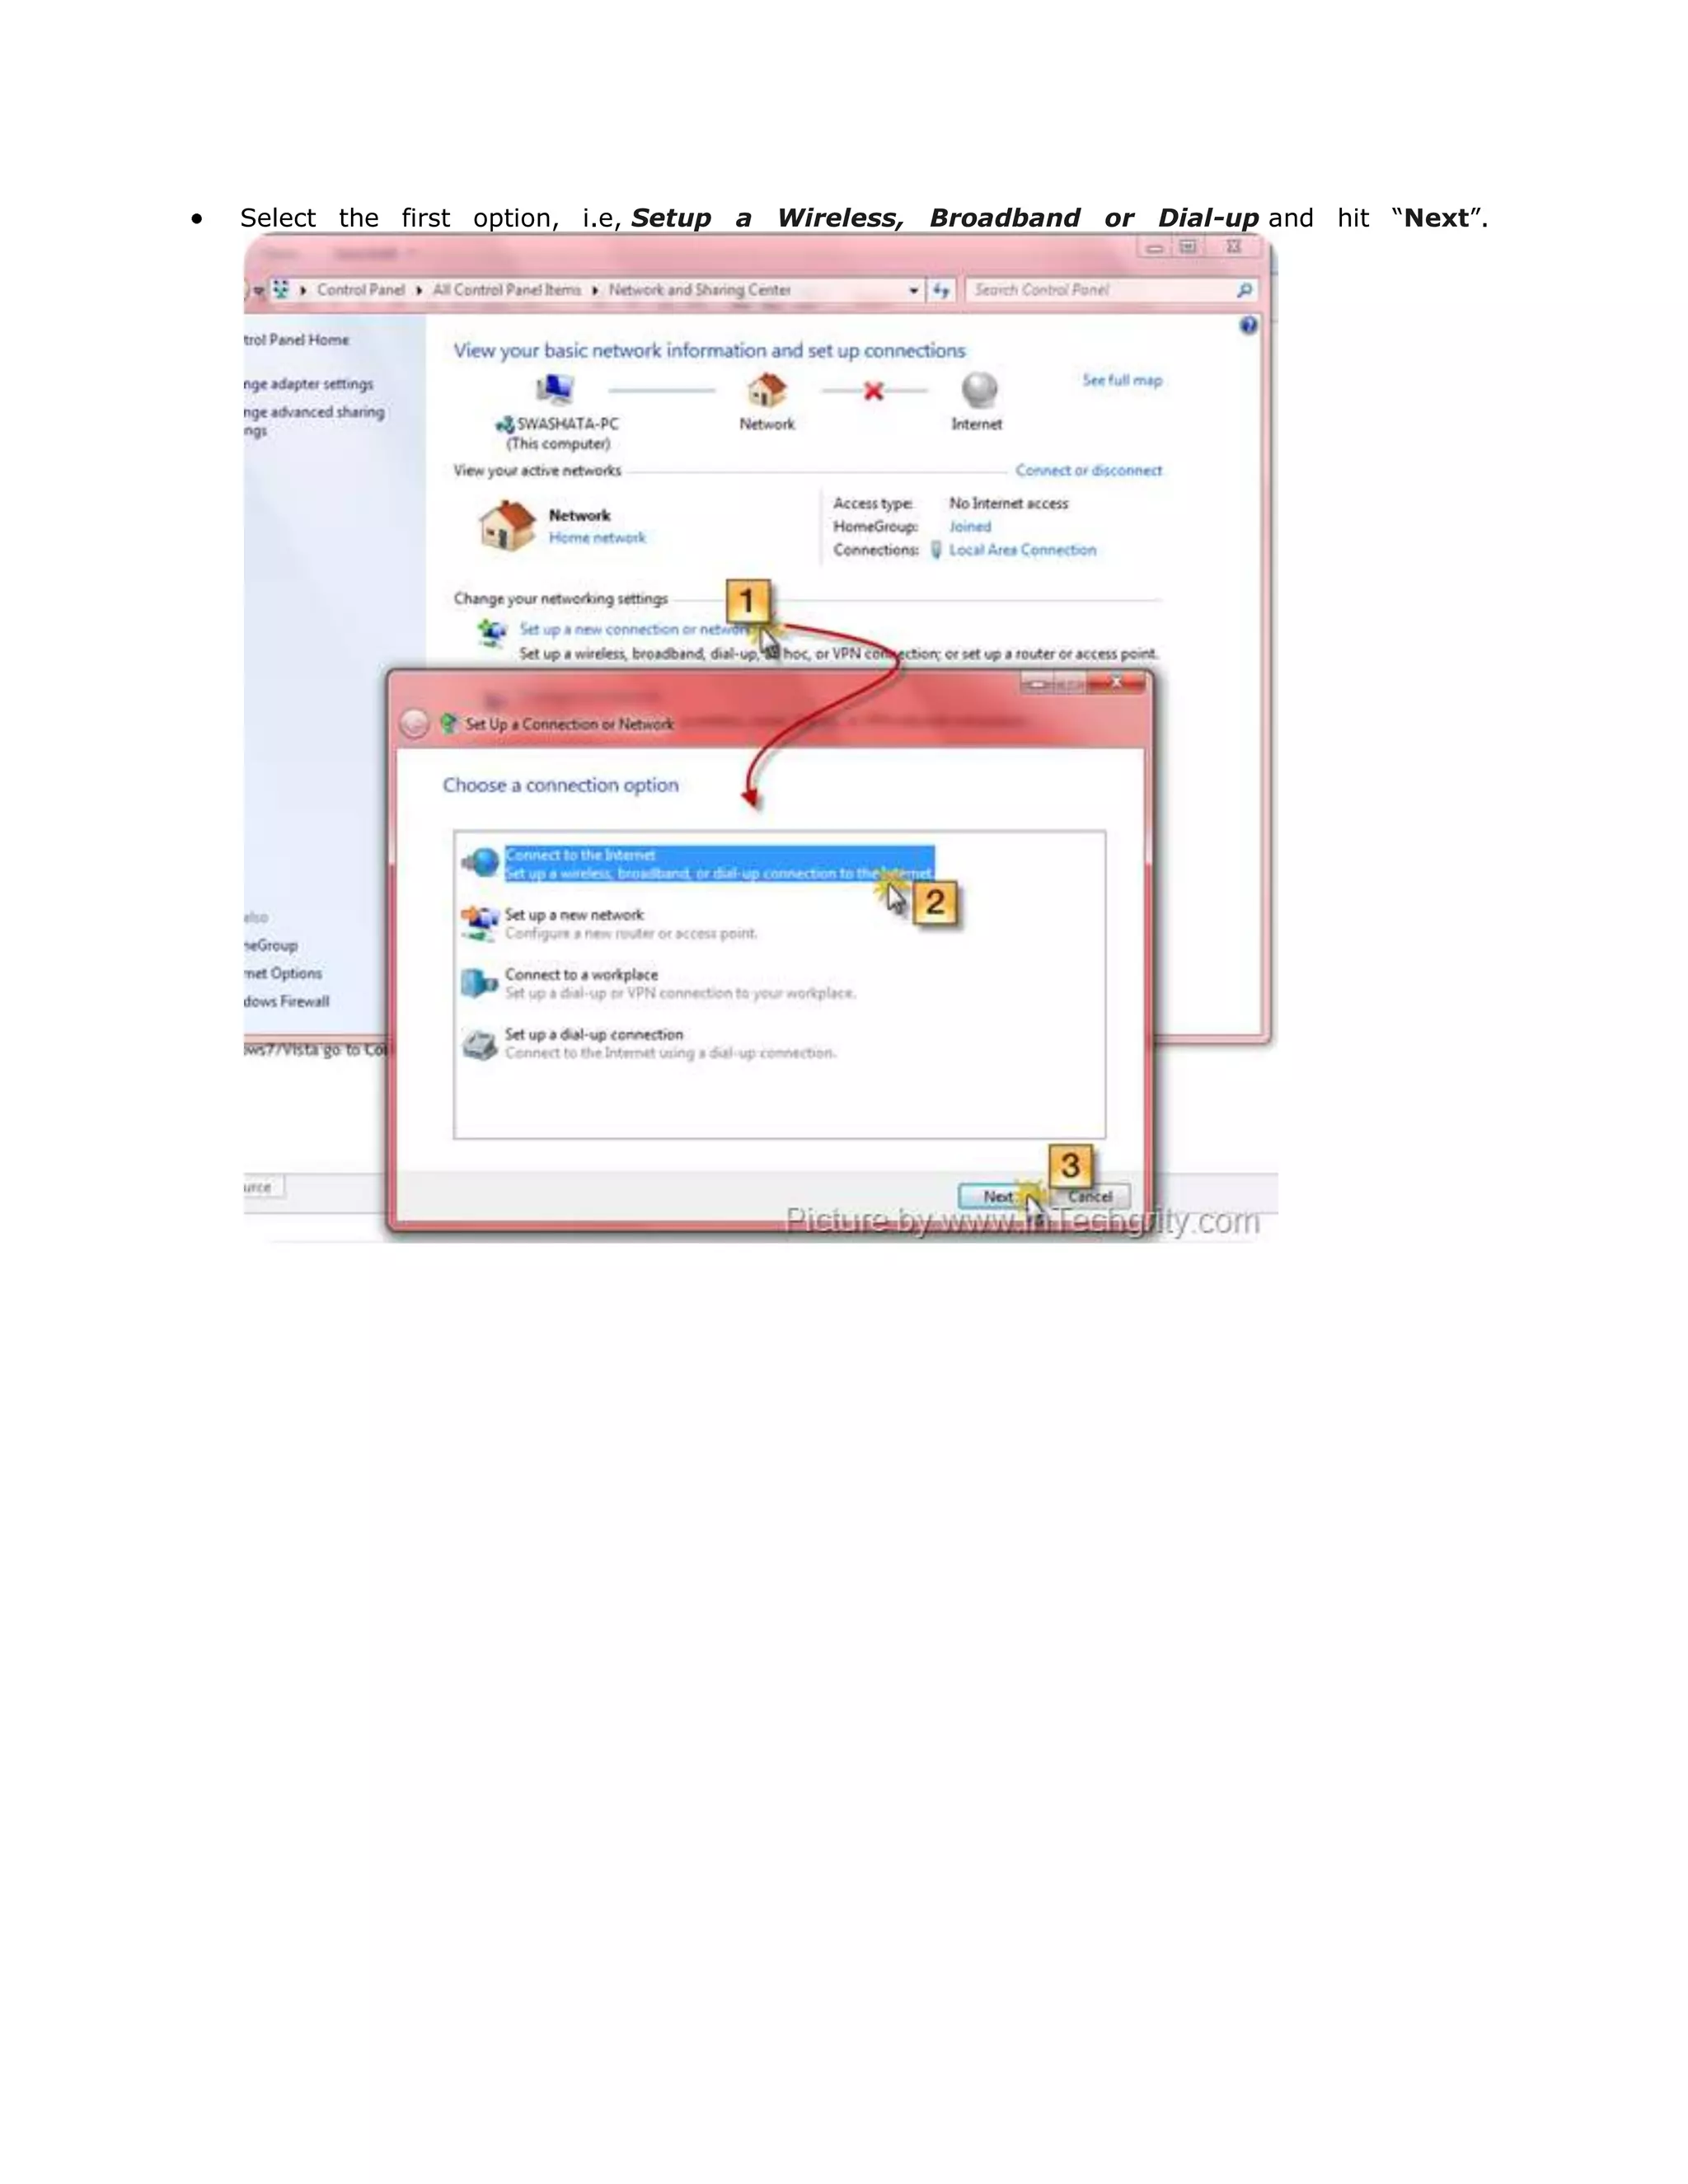
I will give both Windows XP and Windows 7 /Vista method. But the screenshot will be of only of
Win7.
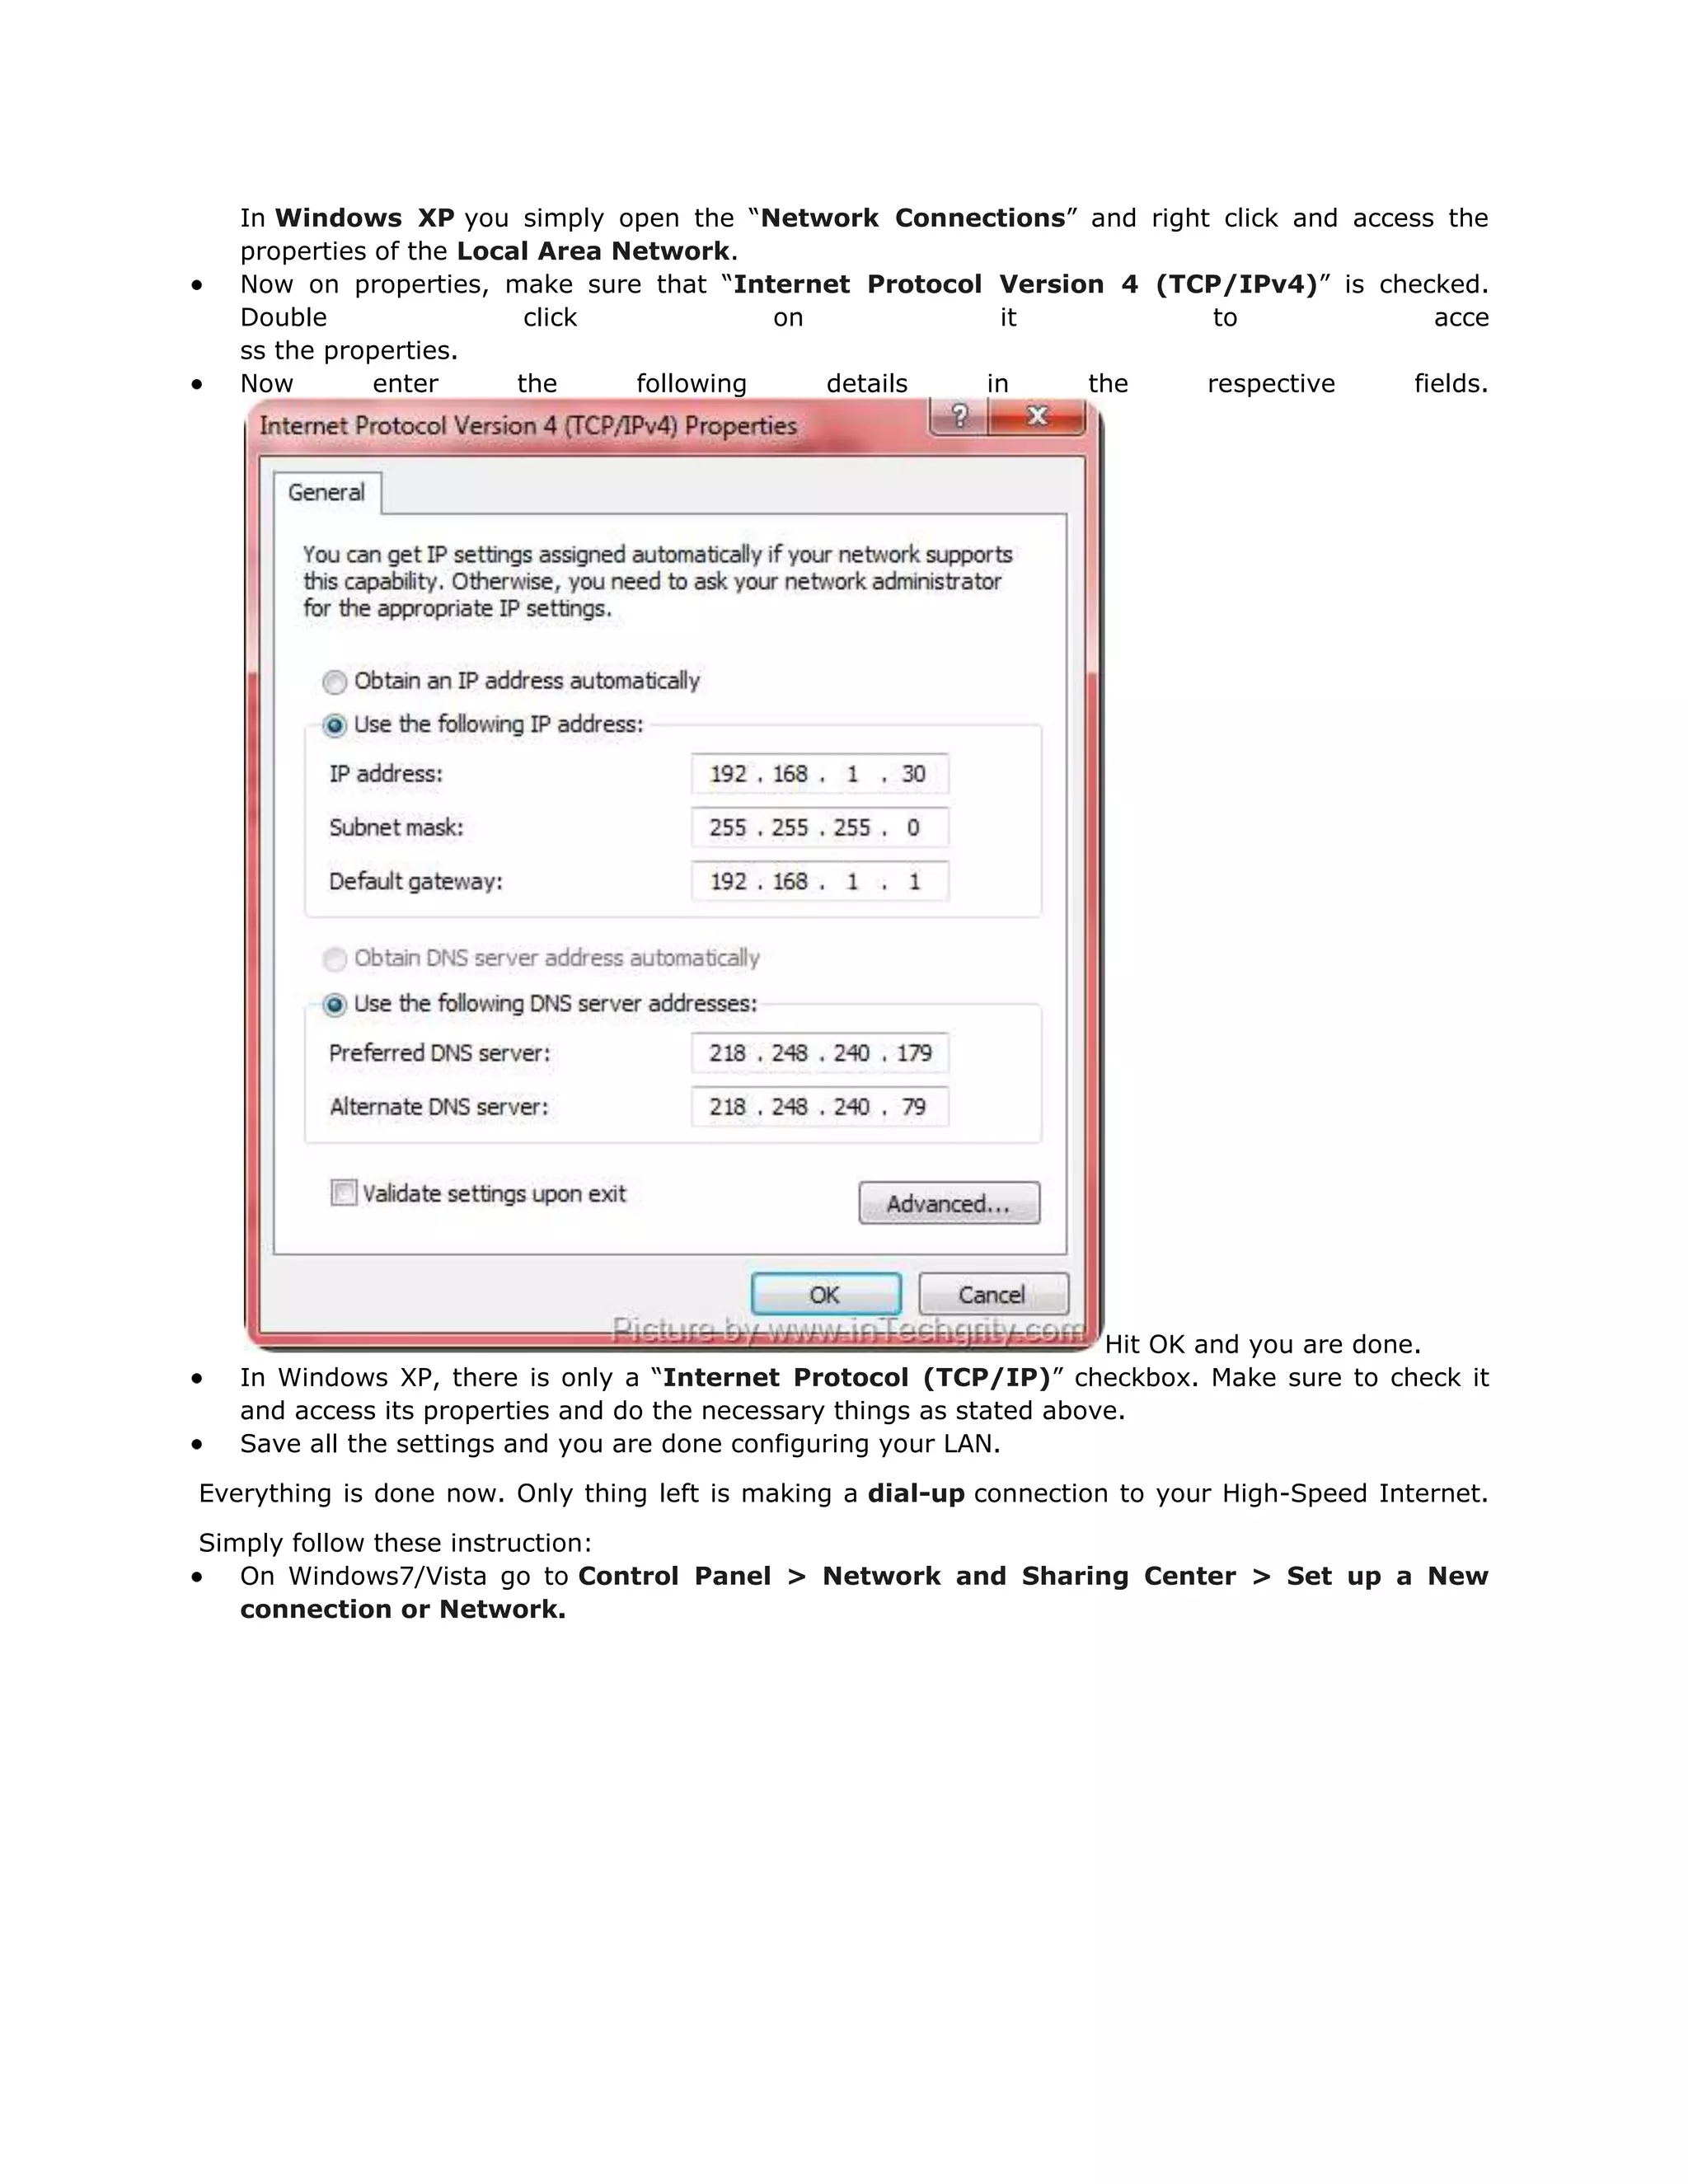
Go to Control Panel > Network and Sharing center > Change Adapter Settings[From the
left sidebar of the control panel window in windows7] and Right Click yourLocal Area
Network and select Properties.](https://image.slidesharecdn.com/newmicrosoftofficeworddocument-130311015523-phpapp02/75/New-microsoft-office-word-document-3-2048.jpg)


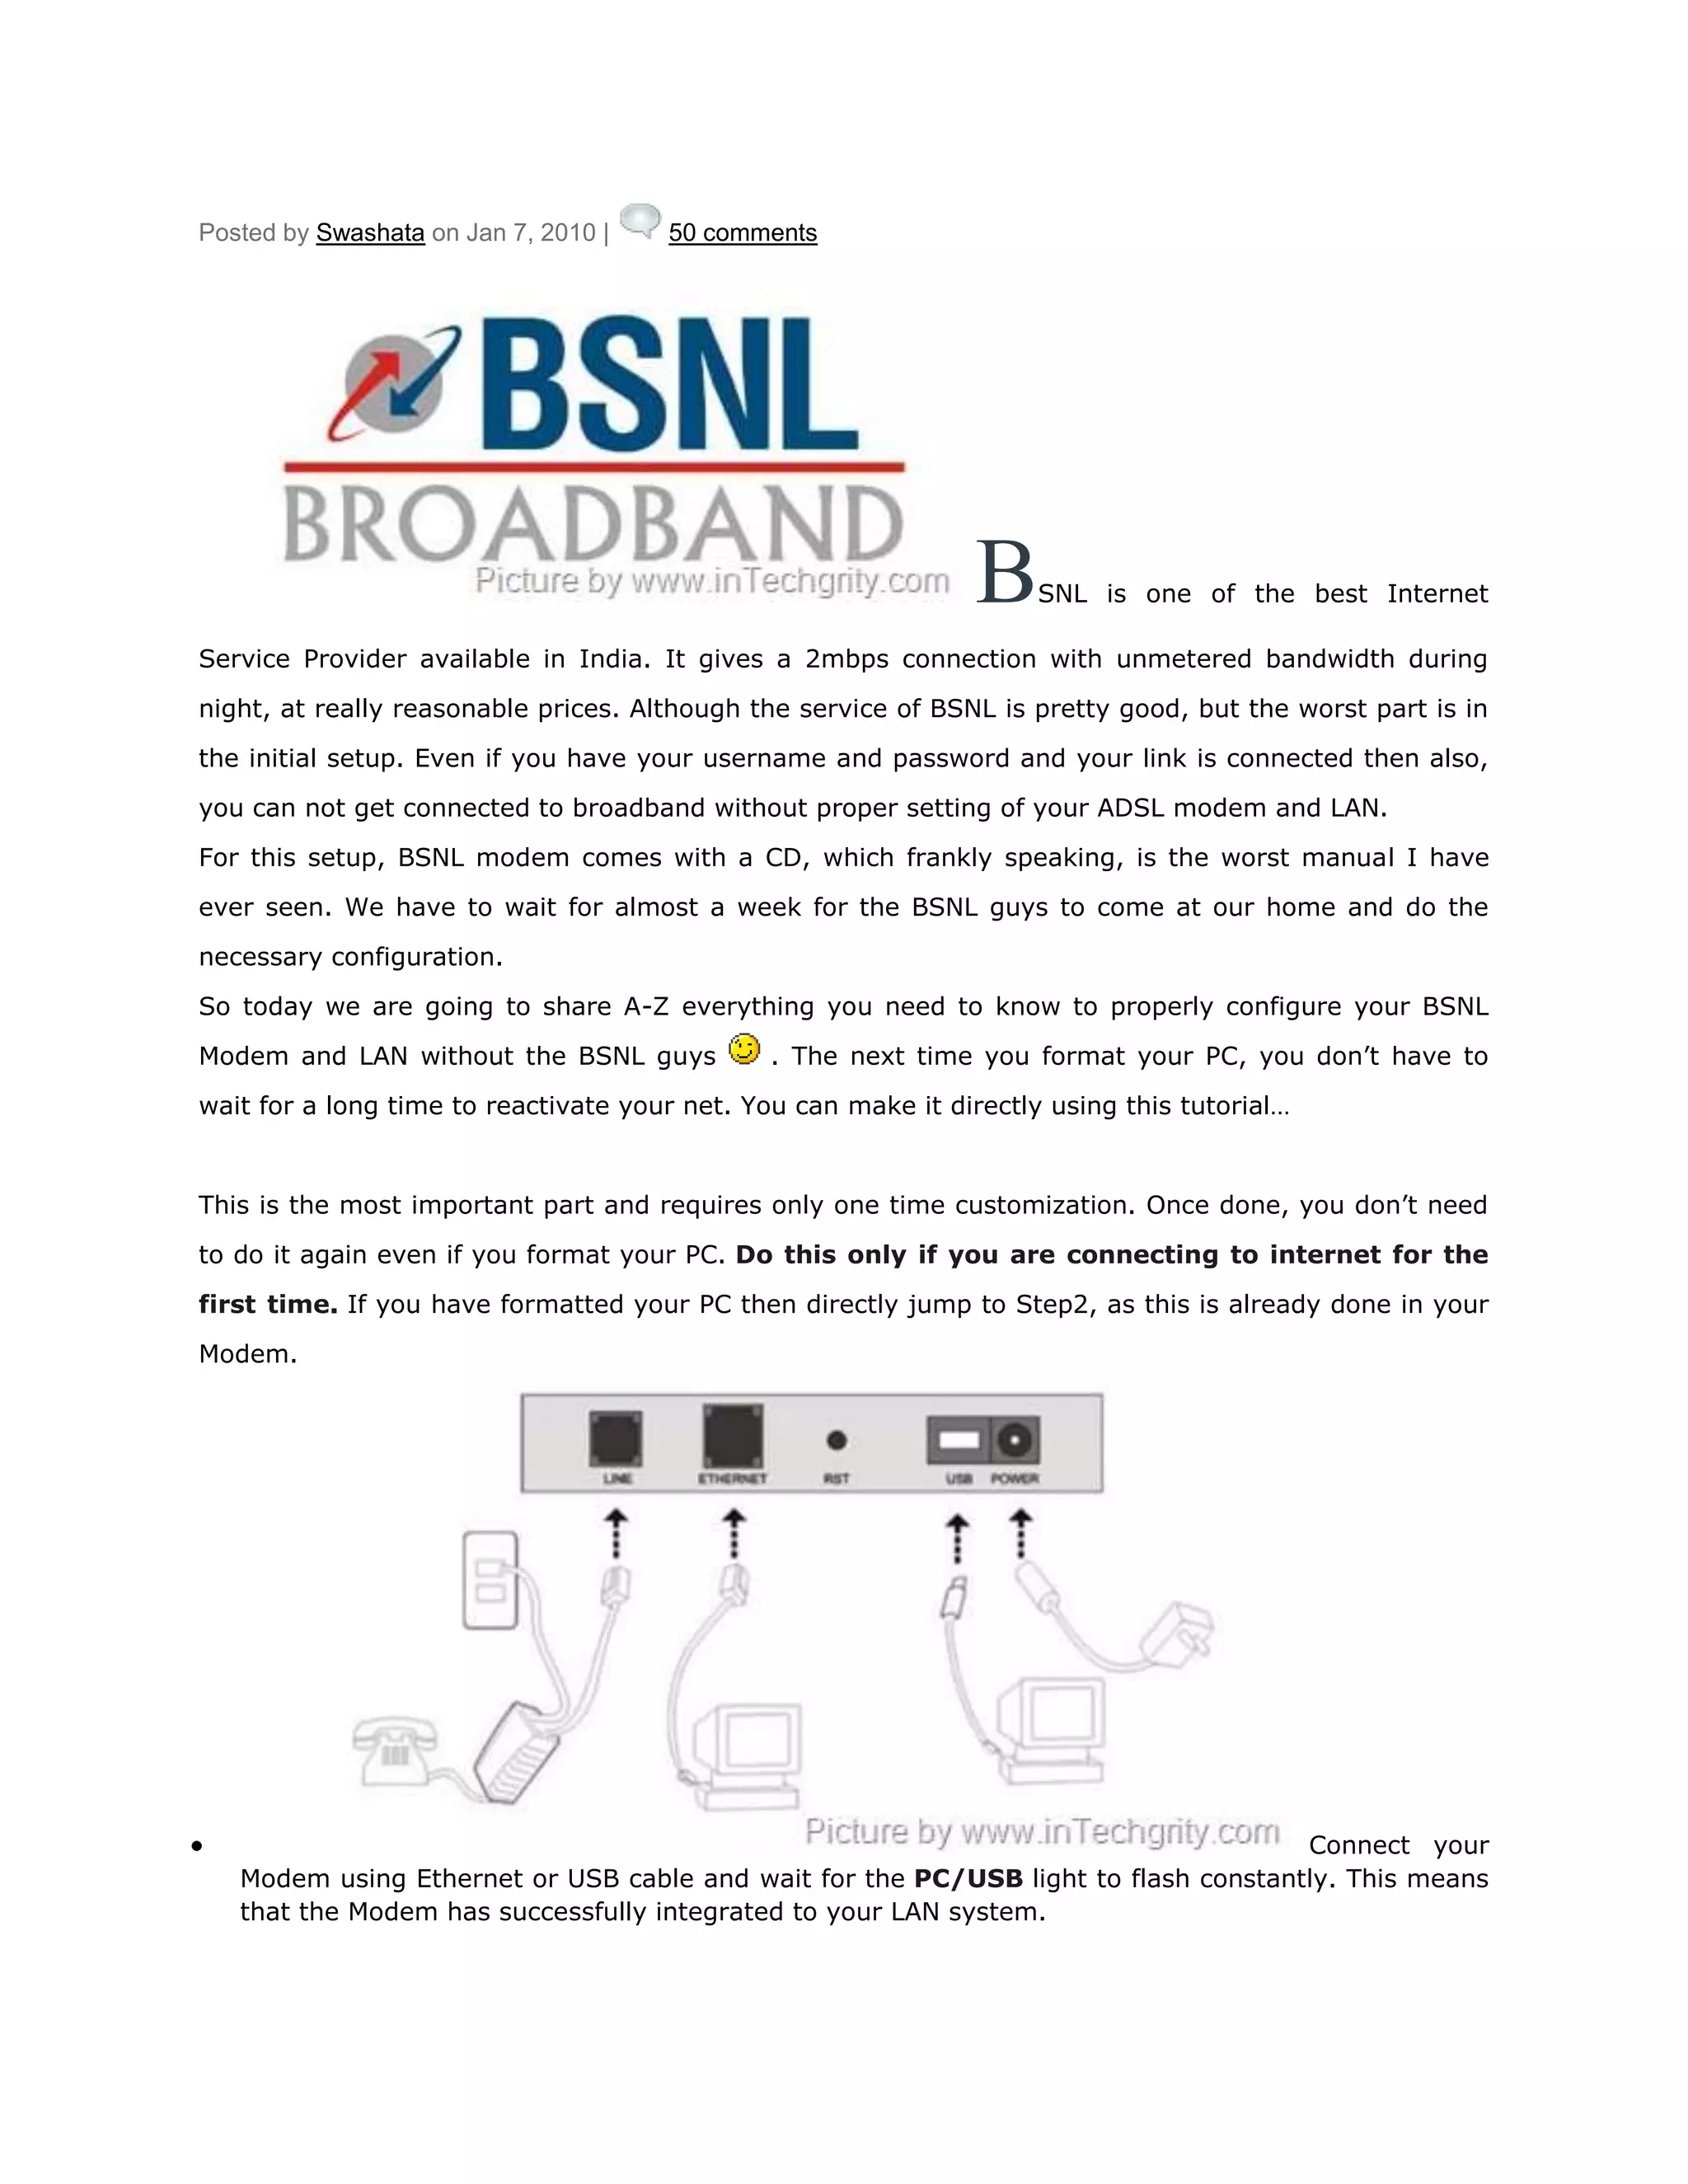
BSNL is one of the major internet service providers in India, providing broadband connections at reasonable prices. However, initially configuring the BSNL modem and setting up the local area network (LAN) can be challenging without assistance from BSNL technicians. This document provides step-by-step instructions for configuring a BSNL modem and establishing a network connection without technical support. It details how to set the modem's settings through a web browser, configure the computer's network adapter, and create a broadband connection to access the internet. Following these steps allows users to independently set up their BSNL broadband without waiting for a technician.


