Mini Dental Implants
•Download as PPT, PDF•
11 likes•2,984 views

An Overview of Mini Dental Implants The MDI Sendax System

Recommended
Recommended
More Related Content
What's hot
What's hot (20)
Viewers also liked
Viewers also liked (20)
Similar to Mini Dental Implants
Similar to Mini Dental Implants (20)
More from Ninian Peckitt
Recently uploaded
Recently uploaded (20)
Mini Dental Implants
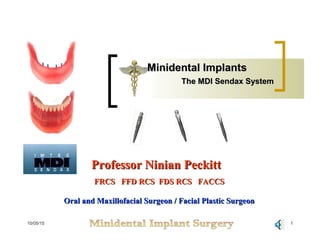
- 1. 10/05/15 1 Minidental ImplantsMinidental Implants The MDI Sendax SystemThe MDI Sendax System Professor Ninian PeckittProfessor Ninian Peckitt FRCS FFD RCS FDS RCS FACCSFRCS FFD RCS FDS RCS FACCS Oral and Maxillofacial Surgeon / Facial Plastic SurgeonOral and Maxillofacial Surgeon / Facial Plastic Surgeon
- 2. 10/05/15 2 Clinical AreasClinical Areas Denture StabilisationDenture Stabilisation andand ConversionConversion
- 3. 10/05/15 3 Dental StatusDental Status 13% Edentulous 5.2 million 12% 17% 18% 12% Market Summary
- 4. 10/05/15 4 Dental StatusDental Status 21 teeth = functional dentition21 teeth = functional dentition 17%17% 6.8 million6.8 million Market Summary
- 5. 10/05/15 5 Missing Anterior TeethMissing Anterior Teeth 96% anterior upper96% anterior upper 21 teeth21 teeth 87% lower anterior87% lower anterior Market Summary
- 6. 10/05/15 6 DenturesDentures 16% of dentate adults16% of dentate adults wear dentureswear dentures 8 million8 million U.K. Denture MarketU.K. Denture Market (6.8 million Adults 17%)(6.8 million Adults 17%) 20% Market Share20% Market Share @ £1500 /unit@ £1500 /unit Market Summary
- 7. 10/05/15 7 Patient AffectPatient Affect 61%61% 27%27% Market Summary
- 8. 10/05/15 8 Denture ProblemsDenture Problems 41% denture problems41% denture problems 26% eating difficulties26% eating difficulties Market Summary
- 9. 10/05/15 9 Attitude to CostAttitude to Cost Market Summary
- 10. 10/05/15 10 Value PerceptionValue Perception Market Summary
- 11. 10/05/15 11 Private PracticePrivate Practice Market Summary
- 12. 10/05/15 12 Mini Dental ImplantsMini Dental Implants Maxilla Mandible Crown and Bridge
- 13. 10/05/15 13 Mini Dental ImplantsMini Dental Implants Implant – titanium alloy or other implantable material Implant Dimensions (<2.5mm diameter) Fused Abutment (for additional strength) Atraumatic Placement (minimal surgery) Crestal anaesthesia (no regional block) Transmucosal placement (no flaps) Implant placement with (a single pilot hole of defined size) e.g. <1.5mm Immediate Loading Demonstrable cost benefit analysis Specifications Specifications
- 14. IndicationsIndications 1. Immediate stabilisation of a fixed or removable prosthesis 2. Transitional stabilisation of prosthesis (during conventional implant “no-load” healing period) 3. Immediate support for compromised natural teeth (Periodontal Disease / Endodontic Problems)
- 15. 4. Interim abutment for failing fixed or removable prosthesis 5. Orthodontic anchorage applications 6. Compatible with all existing implant systems 7. Provisional repair of a broken prosthesis IndicationsIndications
- 16. System ComponentsSystem Components MDI Max Square Head TransitionalLaboratory Analogue Housing Shims
- 17. Implant EngineeringImplant Engineering MDI 1.8mm diameter MDI Max 2.2 mm diameter Available in 10, 13, 15, 18mm lengths. Implant and abutment are a single unit. O-Ball and Flat Head abutment designs. High-Strength Titanium Alloy construction.
- 18. Implant EngineeringImplant Engineering Unique self-tapping thread design. Anti-rotational flat on implant thread surface. Implants are surface etched. Implant packaged for efficient delivery. Metal Housing and O-Ring packaged separately
- 19. Titanium AlloyTitanium Alloy (Titanium, 6 Aluminum, 4 Vanadium)(Titanium, 6 Aluminum, 4 Vanadium) 62.5% Higher tensile strength than the strongest commercially pure, Grade IV CP titanium.
- 20. Tensile StrengthTensile Strength Titanium AlloyTitanium Alloy vs.vs. Pure TitaniumPure Titanium 75 70 65 60 55 50 45 40 35 30 25
- 21. Patient GroupsPatient Groups Medical: Minimal Surgery in nearly all groups Financial: Low cost Anatomical: Atrophic ridges Bruising with Flap Surgery conventional implant placement
- 22. ContraindicationsContraindications Medical Psychiatric Disease Chronic Facial Pain Syndromes History of Infected Endocarditis Rheumatic Fever – not necessarily Surgical Severe Jaw Atrophy Grade 4 Bone Density – not necessarily Heavy Occlusion Gross Dental Sepsis Immediate Tooth replacement
- 23. Anaesthesia – Crestal Infiltration No surgical flap required No osteotomy site created Only one drill required Self-tapping mini-implants Immediate loading Multiple restorative options Surgical PrinciplesSurgical Principles
- 24. Implant PlacementImplant Placement Create Pilot Hole Insert Implant (Finger Driver) Tighten with Thumb Wrench Seat with Ratchet Wrench Impression or Reline
- 25. Peel off labels lot, size, and catalog number. Add to a patient’s chart for tracking The Implant PackageThe Implant Package
- 26. The MDI Implant suspended from a plastic cap in the glass vial. Once the pouch is opened the vial can be placed in a surgical tray awaiting implant insertion. The Implant PackageThe Implant Package
- 27. The MDI Implant can be carried to the mouth utilizing this cap. Implant Delivery SystemImplant Delivery System
- 29. Pilot DrillPilot Drill This is the only drill necessary Hole depth is usually one third to one half the length of the chosen implant
- 30. Step 1Step 1 Pilot DrillPilot Drill
- 31. Step 2Step 2 Implant Insertion ProcedureImplant Insertion Procedure Use plastic cap and housing to deliver implant Implant may also be delivered by the finger driver Insert implant into pilot opening Rotate clockwise with downward pressure Rotate until firm bony resistance is felt.
- 32. Implant Removed from VialImplant Removed from Vial
- 33. Plastic Cap with ImplantPlastic Cap with Implant
- 34. Plastic Cap with ImplantPlastic Cap with Implant
- 35. Finger Driver MethodFinger Driver Method
- 36. Finger Driver MethodFinger Driver Method
- 37. Finger Driver MethodFinger Driver Method
- 39. Step 3Step 3 Winged Thumb WrenchWinged Thumb Wrench
- 40. Winged Thumb WrenchWinged Thumb Wrench
- 41. Winged Thumb WrenchWinged Thumb Wrench Thread the implant until it becomes difficult to turn. If no significant resistance is met prognosis is poor the site lacks the required density for predictable success.
- 42. Step 4Step 4 Ratchet WrenchRatchet Wrench The Extension may be useful when the clinician is attempting to access an MDI implant between two natural teeth.
- 43. Use of Ratchet WrenchUse of Ratchet Wrench Use in small, carefully controlled increments. If great resistance is encountered pause momentarily between turns. This will allow the bone to adjust to the implant.
- 44. The finger on the top of the ratchet wrench ensures control of the ratchet and ensures correct seating of the implant Use of Ratchet WrenchUse of Ratchet Wrench
- 45. Seated ImplantsSeated Implants Ideal length of final seating should allow abutment head to protrude from tissue. No threads should be visible.
- 48. Transferring Abutment PositionTransferring Abutment Position Indelible Pencil Wash Wax (Chrome Cobalt Wax Pattern best) Soft Liner Custom Putty Jig (Peckitt)
- 49. A soft liner impression within the denture of the MDI O-Ball abutments. Transferring Abutment PositionTransferring Abutment Position
- 50. Four Abutment ImpressionsFour Abutment Impressions
- 51. Abutment Location on DentureAbutment Location on Denture Pencil marks on the denture reveal exact locations for Housings
- 54. Customised Putty StentCustomised Putty Stent PeckittPeckitt Aids positioningAids positioning • Implants • housings • duration 33%
- 55. Block Out ShimsBlock Out Shims Block Out Shims 9mm in length. Prevent the acrylic locking to abutment Cut to a length so that only O-Ball is exposed.
- 56. Block Out Shim PositioningBlock Out Shim Positioning
- 57. Each abutment is lubricated to prevent any acrylic lock on. Block Out Shim PositioningBlock Out Shim Positioning
- 58. O Ring HousingsO Ring Housings
- 59. O Ring HousingsO Ring Housings O Ring Housings are placed over ball abutments
- 60. O Ring HousingsO Ring Housings
- 61. Chairside relineChairside reline Clean denture Mix cold-cure acrylic Fill abutment holes Wait - until acrylic does not run Seat denture Close lightly in occlusion Allow acrylic to polymerize
- 62. Chairside relineChairside reline The cleaned and dry denture is filled with cold-cure acrylic and allowed to polymerise until it is not runny. The denture is then seated and the patient is instructed to close lightly in centric occlusion
- 63. Finishing ProceduresFinishing Procedures Remove elastomeric shims Trim flash Fill any minor voids or discrepancies Finish denture borders and polish Perform final occlusal equilibration. It is important that the shims are always removed. The denture is relieved of flash and any voids are filled. A reline procedure and occlusal equilibration completes the process. The patient is then instructed in denture placement, removal, and oral hygiene.
- 64. Removing Block Out ShimsRemoving Block Out Shims
- 65. Dentures with O-Rings in PlaceDentures with O-Rings in Place
- 66. OutcomeOutcome
- 67. Recall and MaintenanceRecall and Maintenance ACCESS™ Toothbrush Plaque removal procedures Cleaning denture housings Modification of retention (New O-Rings) Review placement and removal Time for a new denture??
- 70. 10/05/15 70 0 100 200 300 400 500 Outcome MDI Implants (Sendax) Mini Dental Implant Center New York Outcome @ 4 years Presented to FDA 1996 - 2000 166 406 11 Patients Implants Failed Implants 2.7%2.7%Crestal Bone Loss < 1% / yrCrestal Bone Loss < 1% / yr 79,000 Implants79,000 Implants 1999-20021999-2002 Failure 1%Failure 1% Data sourceData source IMETC Quality AssuranceIMETC Quality Assurance
- 71. 10/05/15 71 • History:History: Medical – Dental • ExaminationExamination - Sepsis / Perio Status / Occlusion • InvestigationsInvestigations - OPT / Lat Chin / P/A’s Bone Density - I.D. Nerve / Sinus Status - Implant Sites / Selection / Templates - Study Models / Crown Bridge - Putty Jig / Suck Down Splint • Prosthetic EvaluationProsthetic Evaluation - Existing / Conversion - New Prosthesis Case PlanningCase Planning
- 72. 10/05/15 72 Case PlanningCase Planning InvestigationsInvestigations OPT / Lat Chin / P/A’s Bone Density I.D. Nerve / Sinus Status Implant Sites / Selection Templates Computer Planning
- 73. 10/05/15 73 Case PlanningCase Planning NoNo engagementengagement
- 74. 10/05/15 74 Conventional Dental Implant GuidelinesConventional Dental Implant Guidelines Fixed Full Arch ProsthesesFixed Full Arch Prostheses Minimum implants Maxilla Minimum implants Mandible
- 75. 10/05/15 75 Conventional Dental Implant GuidelinesConventional Dental Implant Guidelines Fo/Fo OverdenturesFo/Fo Overdentures Minimum implants Maxilla Minimum implants Mandible
- 76. 10/05/15 76 MDI Sendax GuidelinesMDI Sendax Guidelines Fo/Fo OverdenturesFo/Fo Overdentures Minimum implants Maxilla Minimum implants Palateless Option Minimum implants Mandible Peckitt 2003Peckitt 2003
- 77. 10/05/15 77 Dental Implants and Nerve InjuryDental Implants and Nerve Injury Conventional Dental ImplantsConventional Dental Implants Nerve Injury thought to mirror that of wisdom tooth removalNerve Injury thought to mirror that of wisdom tooth removal 1.5%1.5% Flap Surgery Implant Placement
- 78. 10/05/15 78 Dental Implants: 2 Stage Placement Neurology Status Ellis: J. Prosthetic Dent 1992 Persistant Parasthesia 13% Normal Neurology, 87% Normal Persistant Parasthesia Total Nerve InjuryNerve Injury 266 patients266 patients Stage 1 60% 17% Stage 2
- 79. 10/05/15 79 Dental Implants: 2 Stage Placement Neurology Status: Site of Parasthesia Ellis: J. Prosthetic Dent 1992 Lip 41% Chin 29% Gingiva 21% Tongue 9% Lip Chin Gingiva Tongue 266 patients266 patients Normal Routine 88% Disadvantageous 5% Nerve InjuryNerve Injury
- 80. 10/05/15 80 Mini-Implants and Nerve InjuryMini-Implants and Nerve Injury Zone 1Zone 1 Mini Implant Technique - less likely unlikely to injure nerve - No Flap - Single Stage technique Zone 2Zone 2 Mini-Implant Flapless Technique – less likely to injure - lingual nerve - Nerve to mylohyoid
- 81. 10/05/15 81 Mini-Implants and Nerve InjuryMini-Implants and Nerve Injury Zone 2Zone 2 Mini-Implant Flapless Technique – inferior alveolar nerve injuryMini-Implant Flapless Technique – inferior alveolar nerve injury - calibrate magnification of OPT settings - template selection of implant length - Simplant 8 Computer Planning - crestal anaesthesia - angulation of implant
- 82. 10/05/15 82 Criteria for SuccessCriteria for Success Albrektsson et alAlbrektsson et al implant - immobile when tested clinically radiograph – no evidence of peri-implant radiolucency vertical bone loss <0.2 mm annually after 1year of service an absence of : pain Infection neuropathies / parasthesia / violation of the mandibular canal successful abutment systemsuccessful abutment system Peckitt 2003Peckitt 2003 successful superstructuresuccessful superstructure
- 83. 10/05/15 83 OutcomesOutcomes Crown & Bridge Outcome 10 years 15 years Bridge Survival 87% 69% Meta-Analysis of fixed partial denture (bridges) survival: Prostheses and abutments Scurria M et al - Journal of Prosthetic Dentistry 1998 79;.4, 459-464 Failure after 15 years – Dental Caries abutments Crown & Bridge
- 84. 10/05/15 84 Dental ImplantsDental Implants Implant Abutment Loosening / Fracture 5 to 45% of cases highest during the first year of function Reduced by preloading abutment / prosthetic screws Still a fairly common problem Nonlinear contact analysis of preload in dental implant screws Sakaguchi R.L. - Borgersen S.E.June 1995 Int. Journal of Oral and Maxillofacial Implants - Vol. 10 No. 3 pp 295-302 MDI Sendax MTI Monorail Bicon Q-Implants
- 85. 10/05/15 85 Informed ConsentInformed Consent Treatment Contract Existing Condition Treatment Options / Choice Success Rates / Complications Terms of Postoperative Care Funding Arrangements Complication Management No Absolute Guarantees
- 86. 10/05/15 86 Informed ConsentInformed Consent Treatment Contract ComplicationsComplications Poor Bone Density Knife Edge Ridge Pain Infection Chrome Cobalt Dentures Fractured Implant Denture Fenestration New Denture Provision Nerve Injury Implant Loss A strategy should be agreed with respect to lost implantsA strategy should be agreed with respect to lost implants
- 87. 10/05/15 87 Case ProtocolCase Protocol Case Selection andCase Selection and Contract Local Anaesthesia techniqueLocal Anaesthesia technique MDI TechniqueMDI Technique Antibiotic CoverAntibiotic Cover AnalgesiaAnalgesia Oral HygieneOral Hygiene Keep Prosthesis in 3 daysKeep Prosthesis in 3 days Review at 1 weekReview at 1 week Mandatory AuditMandatory Audit
- 88. 10/05/15 88 Case StudiesCase Studies MDI Sendax Implants Ninian Peckitt FRCS FFD RCS FDS RCS
- 89. 10/05/15 89 The Palateless Upper DentureThe Palateless Upper Denture 6 MDI Max Implants Courtesy: http:// www.imtec.com
- 90. 10/05/15 90 Fo/Fo Bimaxillary Case – 2 hoursFo/Fo Bimaxillary Case – 2 hours Courtesy: Dr Anthony Coyne BDS F/F Palateless
- 91. 10/05/15 91 Immediate Hybrid OverdenturesImmediate Hybrid Overdentures Courtesy: Dr Norman Andrews BDS MGDS RCS Fo/-
- 92. 10/05/15 92 Immediate StabilityImmediate Stability Courtesy: Dr Anthony Coyne BDS Lower Overdenture F/FoLower Overdenture F/Fo
- 93. 10/05/15 93 Excellent RetentionExcellent Retention Courtesy: Dr Anthony Coyne BDS Lower Overdenture F/FoLower Overdenture F/Fo
- 94. 10/05/15 94 Courtesy: Dr Norman Andrews BDS MGDS RCS
- 95. 10/05/15 95
- 96. 10/05/15 96
- 97. 10/05/15 97
- 98. 10/05/15 98
- 99. 10/05/15 99
- 100. 10/05/15 100 Patient Comment @ 1 monthPatient Comment @ 1 month Patient SatisfactionPatient Satisfaction • Like he has his own teethLike he has his own teeth • Retention ExceptionalRetention Exceptional • Post op Pain – Mild toothachePost op Pain – Mild toothache • Analgesia – 24 hoursAnalgesia – 24 hours • Eating improvedEating improved • Taste food “as it really is”Taste food “as it really is” • Appearance is very goodAppearance is very good
- 101. 10/05/15 101 Hybrid SystemsHybrid Systems Dental Clearance Immediate bicon 13 11 21 23 Immediate MDI 45 43 42 46 Loss bicon 13 23; MDI 36
- 102. 10/05/15 102 Hybrid SystemsHybrid Systems
- 103. 10/05/15 103 Hybrid SystemsHybrid Systems
- 104. 10/05/15 104 Hybrid SystemsHybrid Systems
- 105. 10/05/15 105 Hybrid SystemsHybrid Systems
- 106. 10/05/15 106 Best Practice in ProstheticsBest Practice in Prosthetics Mini-Implant Retained Overdentures Audit – unacceptable prosthetic morbidity in NHS Few Contraindications Good acceptance / Low Trauma – no flaps – 1 visit Excellent Retention / Superior Cosmesis Normal Mastication Implant stability over 90% Low Cost – Interest Free Loans Mobile visiting surgeons / backup
- 107. 10/05/15 107 Crown and Bridge SalvageCrown and Bridge Salvage Suck down splint Courtesy: http:// www.imtec.com
- 108. 10/05/15 108 Crown and Bridge SalvageCrown and Bridge Salvage Courtesy: Dr Norman Andrews BDS MGDS RCS
- 109. 10/05/15 109 Crown and Bridge SalvageCrown and Bridge Salvage Outcome
- 110. 10/05/15 110 Crown and Bridge SalvageCrown and Bridge Salvage Courtesy: Dr Norman Andrews BDS MGDS RCS
- 111. 10/05/15 111 Crown and Bridge SalvageCrown and Bridge Salvage Outcome Courtesy: Dr Norman Andrews BDS MGDS RCS
- 112. 10/05/15 112 Crown and Bridge SalvageCrown and Bridge Salvage
- 113. 10/05/15 113 Crown and BridgeCrown and Bridge Courtesy: http:// www.imtec.com
- 114. 10/05/15 114 Telescopic CrownsTelescopic Crowns Courtesy: Dr Anthony Coyne BDS
- 115. 10/05/15 115 Telescopic CrownsTelescopic Crowns Courtesy: Dr Anthony Coyne BDS
- 116. 10/05/15 116 Courtesy: Dr Norman Andrews BDS MGDS RCS Telescopic CrownsTelescopic Crowns
- 117. 10/05/15 117 Maxillary AtrophyMaxillary Atrophy Computer PlanningComputer Planning Defensive Incisions Sinus Lift Nasal Floor Lift Anterior Alveolar Augmentation Transitional Stabilisation Delayed Mini-Implant Placement
- 118. 10/05/15 118 Maxillary AtrophyMaxillary Atrophy Courtesy: Dr Javid Khan BDS
- 119. 10/05/15 119 Maxillary AtrophyMaxillary Atrophy 3 weeks3 weeks
- 120. 10/05/15 120 Maxillary AtrophyMaxillary Atrophy Transitional Stabilisation @ 3 weeksTransitional Stabilisation @ 3 weeks
- 121. 10/05/15 121 Maxillofacial ApplicationsMaxillofacial Applications Gunshot Wound Engineering Assisted SurgeryEngineering Assisted Surgery™™
- 122. 10/05/15 122 Customised Cutting JigCustomised Cutting Jig Engineering Assisted SurgeryEngineering Assisted Surgery™™
- 123. 10/05/15 123 Mandibular OsteotomyMandibular Osteotomy Engineering Assisted SurgeryEngineering Assisted Surgery™™
- 124. 10/05/15 124 OutcomeOutcome Engineering Assisted SurgeryEngineering Assisted Surgery™™
- 125. 10/05/15 125 Lower OverdentureLower Overdenture Courtesy: Dr Norman Andrews BDS MGDS RCS Engineering Assisted SurgeryEngineering Assisted Surgery™™
- 126. 10/05/15 126 Lower OverdentureLower Overdenture Registration Engineering Assisted SurgeryEngineering Assisted Surgery™™
- 127. 10/05/15 127 F.I.R.S.T.F.I.R.S.T.™ System™ System Fabricated Implant Restorations and Surgical TechniqueFabricated Implant Restorations and Surgical Technique Immediate tooth replacement MDI Implant and fabricated Restoration Model Surgery from Dental Cast Surgical Template 100 F.I.R.S.T. restorations to date No failures – Todd Shatkin (personal communication) 1048 MDI Implants1048 MDI Implants 3.5 year outcomes3.5 year outcomes (1 third cases Crown & Bridge) 97.65% Success Single tooth 98% Multiple teeth
- 128. ReferencesReferences 10/05/15 128 Mini Dental Implants: Principles and Practice, by Victor Sendax Chapter 7: An Oral and Maxillofacial Surgeon’s Role in Advanced MDI Therapeutics: Engineering Assisted Surgery™, MDIs in Functional Reconstructive Surgery within Great Britain and New Zealand Venues. Publisher: Mosby © 2013. ISBN-10: 1455743860 ISBN-13: 978-1455743865
- 129. 10/05/15 129 Thank you for your attentionThank you for your attention
Editor's Notes
- The following two title slides highlight the applications of the total system.
- Applications of the MDI system (continued).
- Applications of the MDI system (continued).
- The following two title slides list the features of note of the MDI system.
- Additional MDI system features (continued).
- One of the most important features of the MDI Implant is its construction of titanium alloy. This gives it a tensile strength 62.5 percent higher than the strongest commercially pure, grade four CP titanium.
- This graph demonstrates the increased tensile strength of alloy vs. pure titanium.
- Patients may be compromised medically, financially, or anatomically and cannot benefit from conventional implant therapy.
- The following group of slides outline, demonstrate, and display MDI system overdenture prosthetics and placement techniques.
- This title slide lists the seven most important features of the MDI surgical and prosthetic protocols.
- These are the five basic steps required to accomplish an MDI procedure. MDI has a five step technique compared to customary 30 step procedures required for conventional implant placements.
- This is the front of the MDI package. Note the peel off labels containing lot, size, and catalog number. They are designed to be added to a patient’s chart in order to be able to track vital information and aid in reordering procedures.
- This is a close-up photo of the package showing the MDI Implant suspended from a plastic cap in the glass vial. Once the pouch is opened the vial can be placed in a surgical tray awaiting implant insertion.
- The MDI Implant can be seen here suspended from the cap, metal housing and O-Ring. It can be carried to the mouth utilizing this cap.
- This is a photo of the MDI 1.1 mm surgical drill. An MDI drill is also shown in a latch- type hand piece.
- The pilot drill shown on a demonstration model penetrating the cortical plate. This is the only drill necessary in the placement procedures for an MDI Implant.
- Another close-up view of the initial penetration of tissue and cortical plate.
- Once the initial pilot hole depth is obtained the implant insertion procedure is the next step. The plastic cap and housing, as mentioned before, may be used to deliver the implant to the site. The implant may also be delivered by used of the Finger Driver. It has a friction grip and is designed as an implant carrier as well as a beginning driver. If you have used the plastic cap to deliver the implant to the site remove it now by squeezing the neck of the cap to separate it from the head of the implant.. The Titanium Locking Pliers can act as an aid in holding the implant firmly in place during this procedure. Next, attach the Finger Driver to the head of the implant. After inserting the implant into the pilot opening, through the attached gingiva, rotate clockwise while exerting downward pressure. This procedure initiates the self- tapping process and is used until noticeable bony resistance is encountered.
- This photograph illustrates an MDI Implant being removed from the glass vial. As mentioned before, the implant is suspended from the O-Ring and Metal Housing which is attached to the plastic cap of the vial.
- The plastic cap and O-Ring housing delivers the implant to the site (model).
- The plastic cap is used here to deliver the MDI Implant to its site in the mouth.
- This is a photograph of the Finger Driver. Note the O-Ring on the end of the driver. It gives the driver the ability to act as an implant carrier as well as the initial driver in the MDI insertion procedure.
- The Finger Driver is rotated clockwise while exerting downward pressure(model).
- The Finger Driver continues the initial insertion.
- This is a clinical photograph of an MDI implant in a starter site awaiting the use of the Finger Driver to initiate the self- tapping process.
- This is a close-up photograph of the MDI Winged Thumb Wrench.
- This is a photograph of the MDI Winged Thumb Wrench on a display model.
- A clinical photograph of the MDI Winged Thumb Wrench in use.
- A quarter-inch squareRatchet Wrench is used in the final stage of MDI Implant placement. The MDI Ratchet Wrench Adapter and Extension are seen in this photograph. The Extension may be useful when the clinician is attempting to access an MDI implant between two natural teeth.
- This photograph demonstrates use of the Ratchet Wrench on a display model during the final stage of seating the MDI implant.
- Note the clinician’s finger on the top of the ratchet wrench. It insures that the implant is seated properly in position without any excess movement of the instrument.
- This is a clinical photograph of two seated MDI Implants. Notice that the thread portions of the implants are not visible.
- The following group of slides demonstrate the intra-oral retrofitting of a denture using the 0- Ball abutment of the MDI Implant with the O-Ring and Metal Housing of the MDI system.
- This display model photograph showing four seated MDI Implants illustrates the ideal positioning in a mandibular case; five to eight millimeters from each other.
- The first stage in retrofitting a denture is to transfer the position of the O-Ball abutments to the tissue bearing surface of the denture. This can be accomplished with a number of similar techniques. The heads the abutments can be tipped with an indelible pencil to mark their positions , or a soft wash, wax, or Triad can be used. The following groups of slides demonstrate the use of a Triad material to accurately locate the position of the abutments.
- A soft Triad liner has been placed inside the denture. The denture has been seated in the mouth. In this photograph you can see the impressions left by the MDI O-Ball Abutments.
- This is a photograph of all four MDI O-Ball Abutment impression marks in the Triad. The pencil marks are clearly visible through the impression material.
- Pencil marks are clearly visible on the tissue bearing surface of the denture after the Triad is removed. They reveal the exact locations where the O-Rings and Metal Housings will reside.
- This is a photograph of the acrylic bur beginning to enlarge an opening around the locations on the denture where the abutment heads will reside.
- Four evacuated holes in the denture are waiting to receive the acrylic resin.
- Four evacuated holes in the denture are waiting to receive the acrylic resin.
- This is a close-up of a group of Block Out Shims.
- The Block Out Shims are cut to length and seated on the abutments (model).
- In this clinical photograph four Block Out Shims are seen cut and in place over each implant abutment. Each abutment is lubricated to prevent any acrylic lock on.
- This is a photograph of a display model with four Metal Housings seated on abutments.
- This is a photograph of a display model with four Metal Housings seated on abutments.
- A clinical view of the assembly awaiting the denture.
- The cleaned and dried recesses of the denture are then filled with cold-cure acrylic and allowed to polymerize until it is not runny. The denture is then seated and the patient is instructed to close lightly in maximum intercuspation.
- Timer is set for three minutes.
- It is important that the shims are always removed. They are only used during the retrofitting process. Upon setting, the denture is relieved of flash and any voids are filled. A reline procedure and occlusal equilibration completes the process. The patient is then instructed in denture placement, removal, and oral hygiene.
- Remember, always removed the Shims after the denture it is retrofitted.
- This is a view of a completed denture with the O-Rings and Metal Housings in place..
- A completed case; smile. When considering the and the mandibular overdenture as a treatment option, you are in effect changing the functional status and classification of your patient .The MDI system can offer a new option to your patient population who previously might not have been able to benefit from recent advances in implant technology. .
- MDI patients will now become members of your routine recall and hygiene program. Modifications in the amount of retention and cleansing of the female element of the MDI system can be accomplished during these recall visits. Patient instructions in placement, removal and care of their denture is also essential and recommended. The ACCESS Toothbrush is an excellent device aiding in your patients home care hygiene program. In some cases, this might be an appropriate time to discuss a new denture with the patient!
- The ACCESS Toothbrush is specifically designed and engineered for effective MDI Implant home care. Unique curved bristles with built in memory provide the optimum position for aggressively cleaning abutment surfaces at the gum line. They have the required integrity to remove plaque and debris from implant prosthetics while gently stimulating the surrounding soft tissue. This photograph demonstrates the ability of ACCESS to wrap itself around the entire abutment and thoroughly clean all surface areas.
- This is a photographic display of the Standard MDI Surgical Cassette, MDI Implants and system instrumentation. All parts have been previously discussed and displayed in this presentation.
- low frequency of sensory alteration cf third molar surgery 1.5% implants posterior to the mental foramen (zone 2) any increase figure 60% stage 1 17% stage 2 lip (64%), the chin (46%), gingiva (32%) and the tongue (14%) 88% patients normal routine 5% felt that implant treatment was disadvantageous
- low frequency of sensory alteration cf third molar surgery 1.5% implants posterior to the mental foramen (zone 2) any increase figure 60% stage 1 17% stage 2 lip (64%), the chin (46%), gingiva (32%) and the tongue (14%) 88% patients normal routine 5% felt that implant treatment was disadvantageous
- low frequency of sensory alteration cf third molar surgery 1.5% implants posterior to the mental foramen (zone 2) any increase figure 60% stage 1 17% stage 2 lip (64%), the chin (46%), gingiva (32%) and the tongue (14%) 88% patients normal routine 5% felt that implant treatment was disadvantageous
- low frequency of sensory alteration cf third molar surgery 1.5% implants posterior to the mental foramen (zone 2) any increase figure 60% stage 1 17% stage 2 lip (64%), the chin (46%), gingiva (32%) and the tongue (14%) 88% patients normal routine 5% felt that implant treatment was disadvantageous