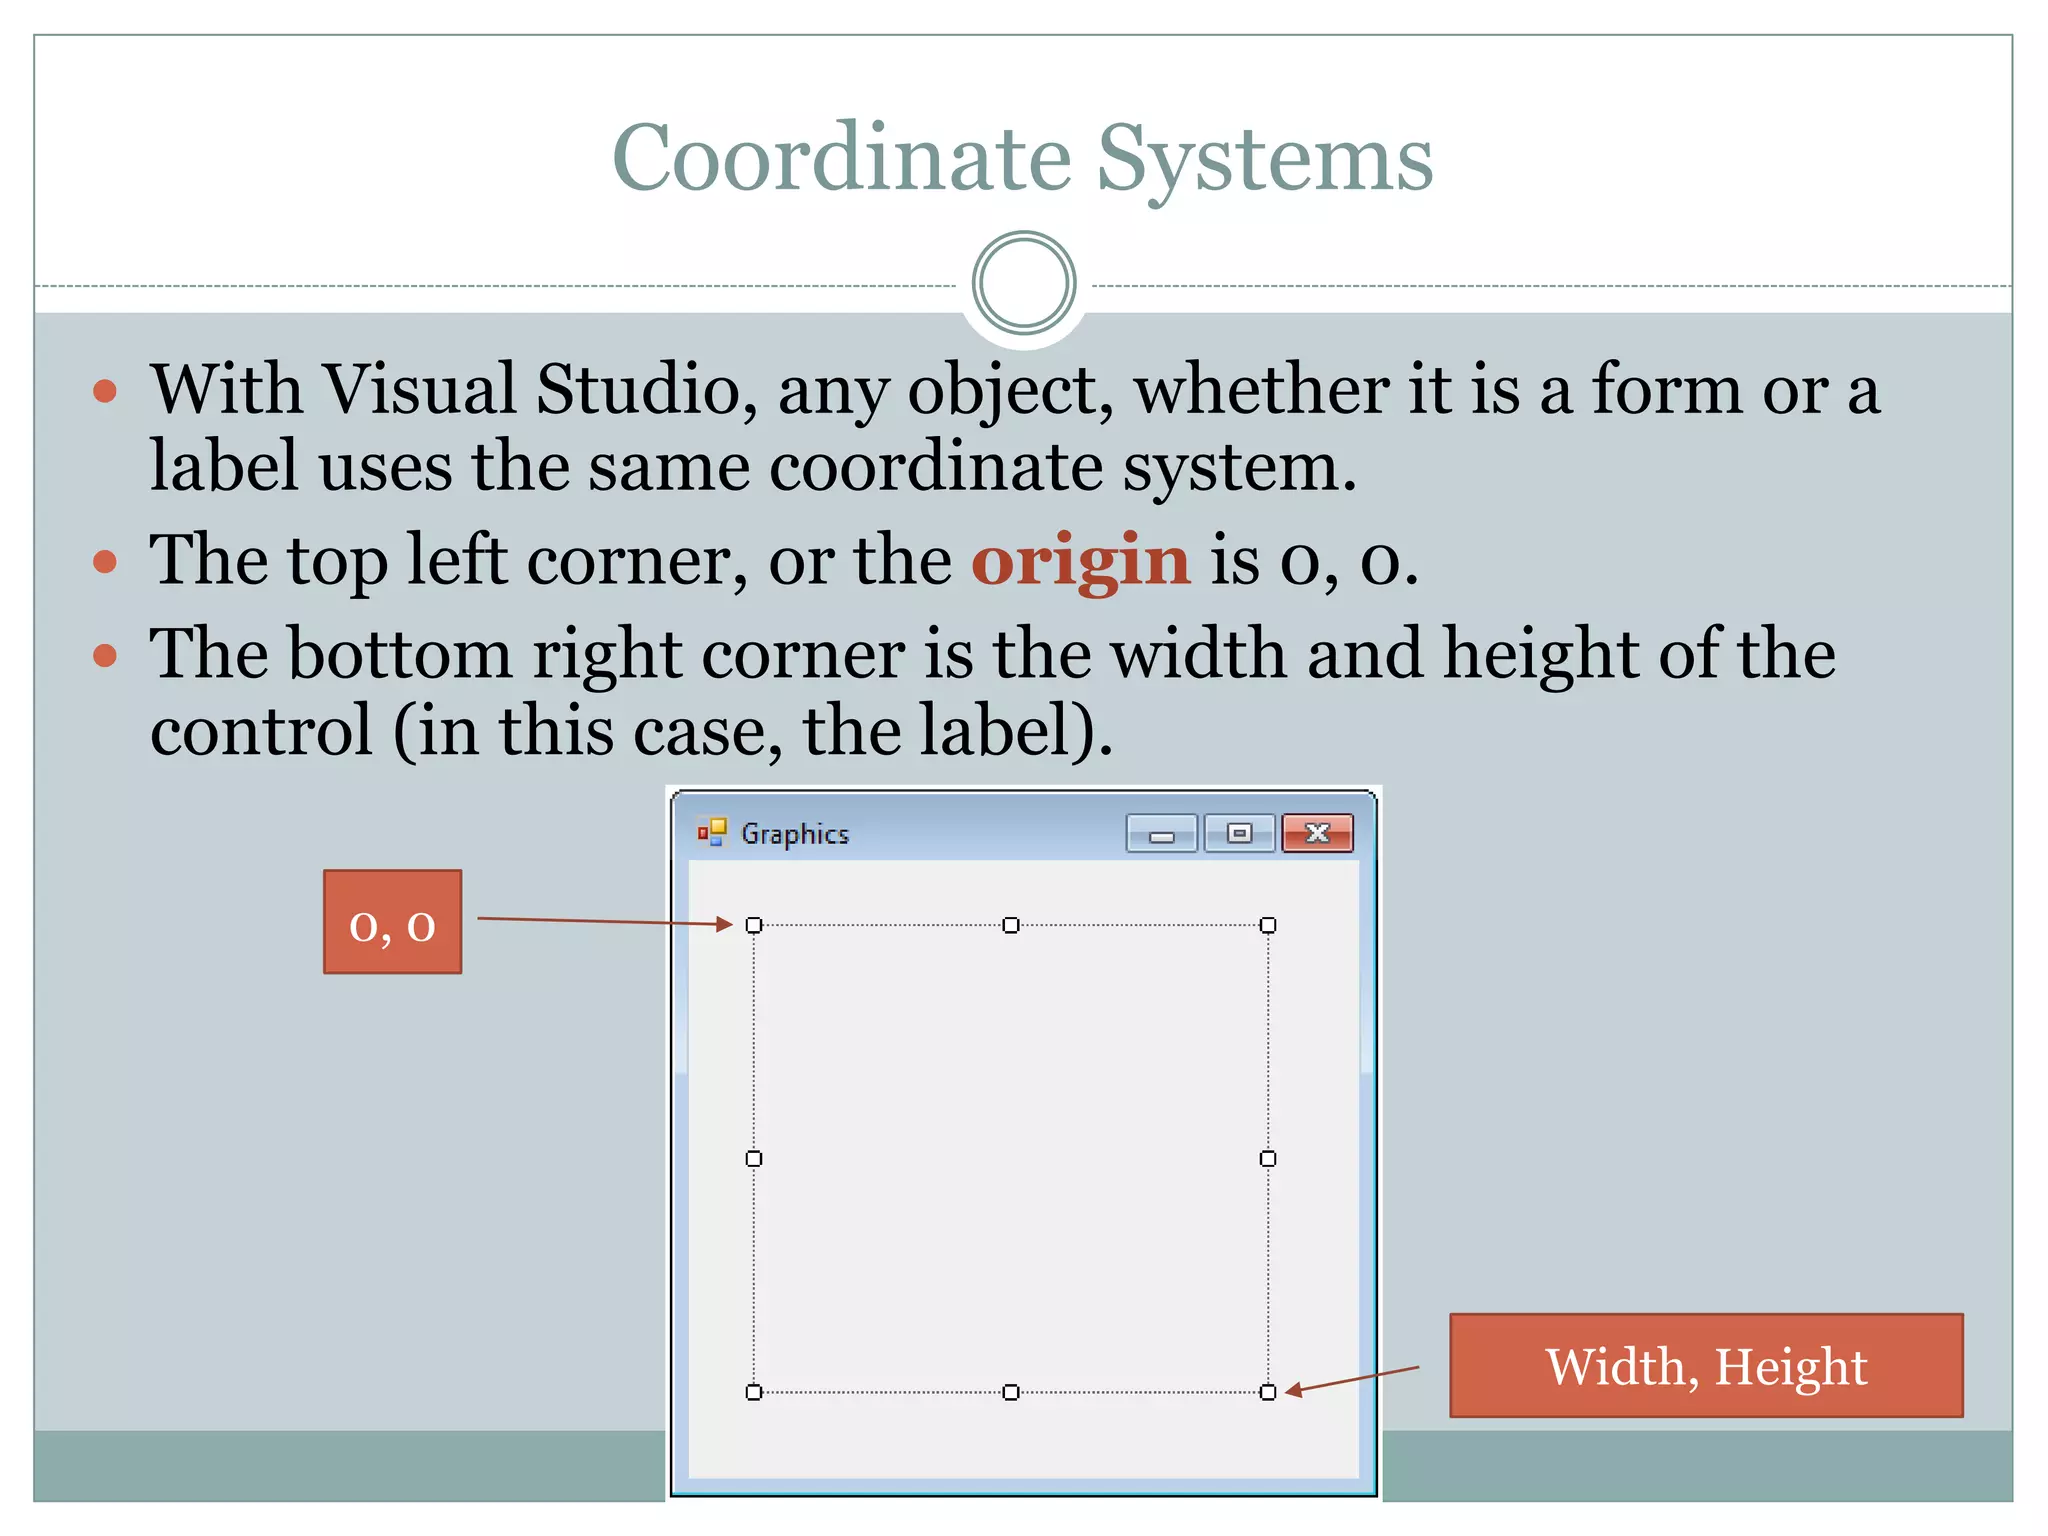
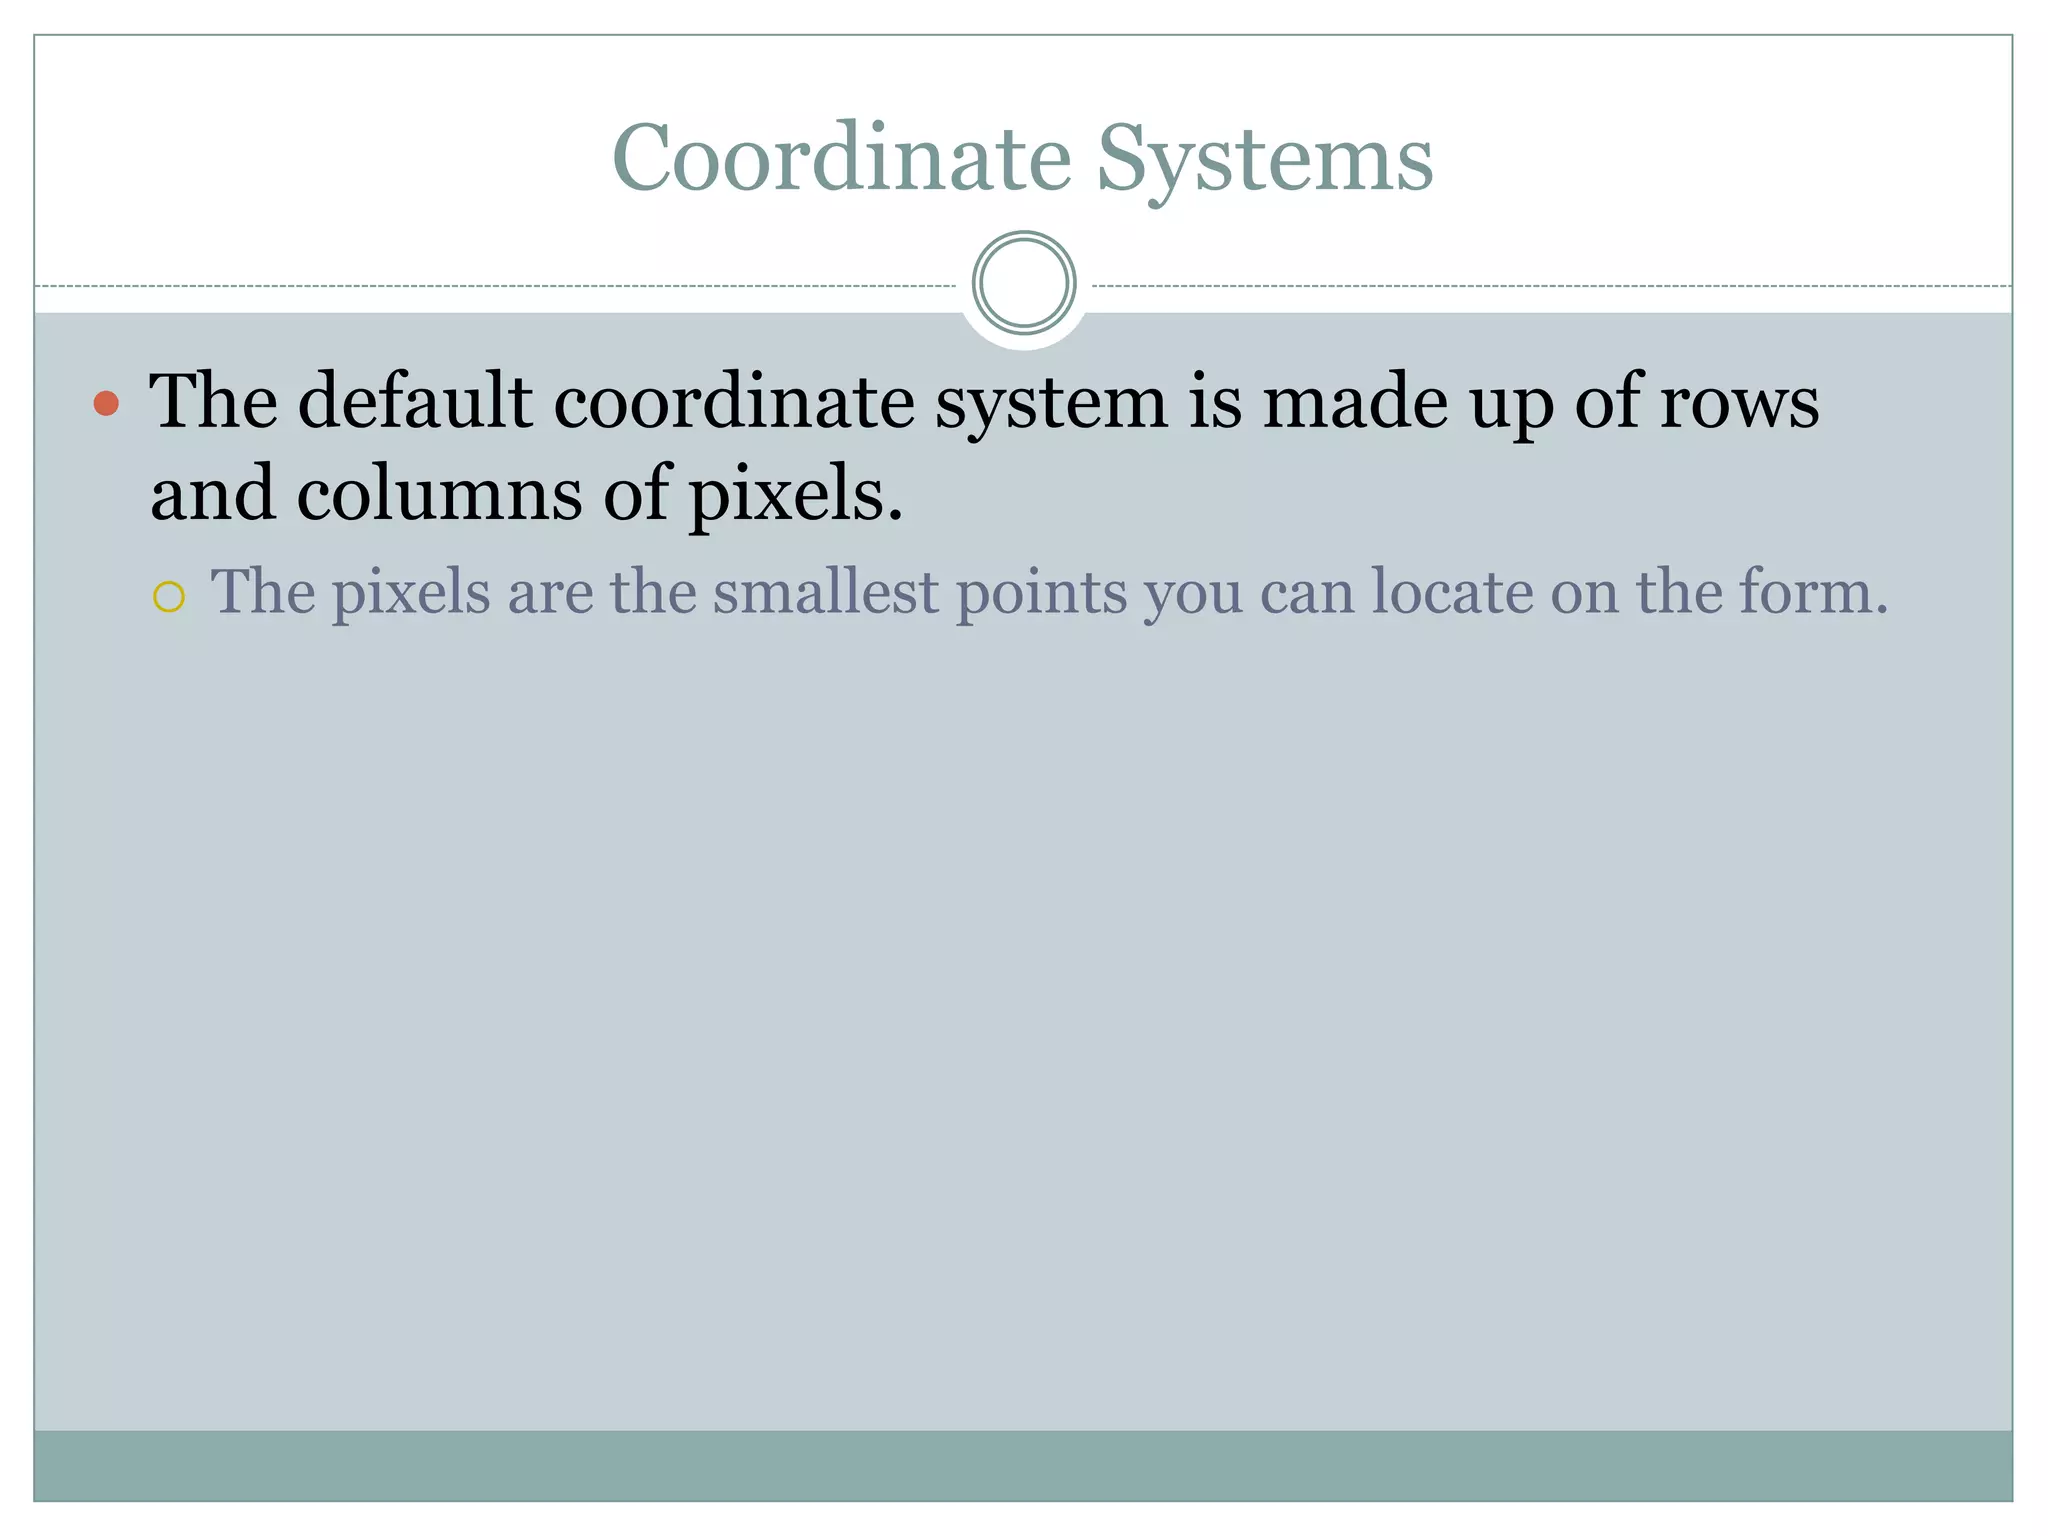
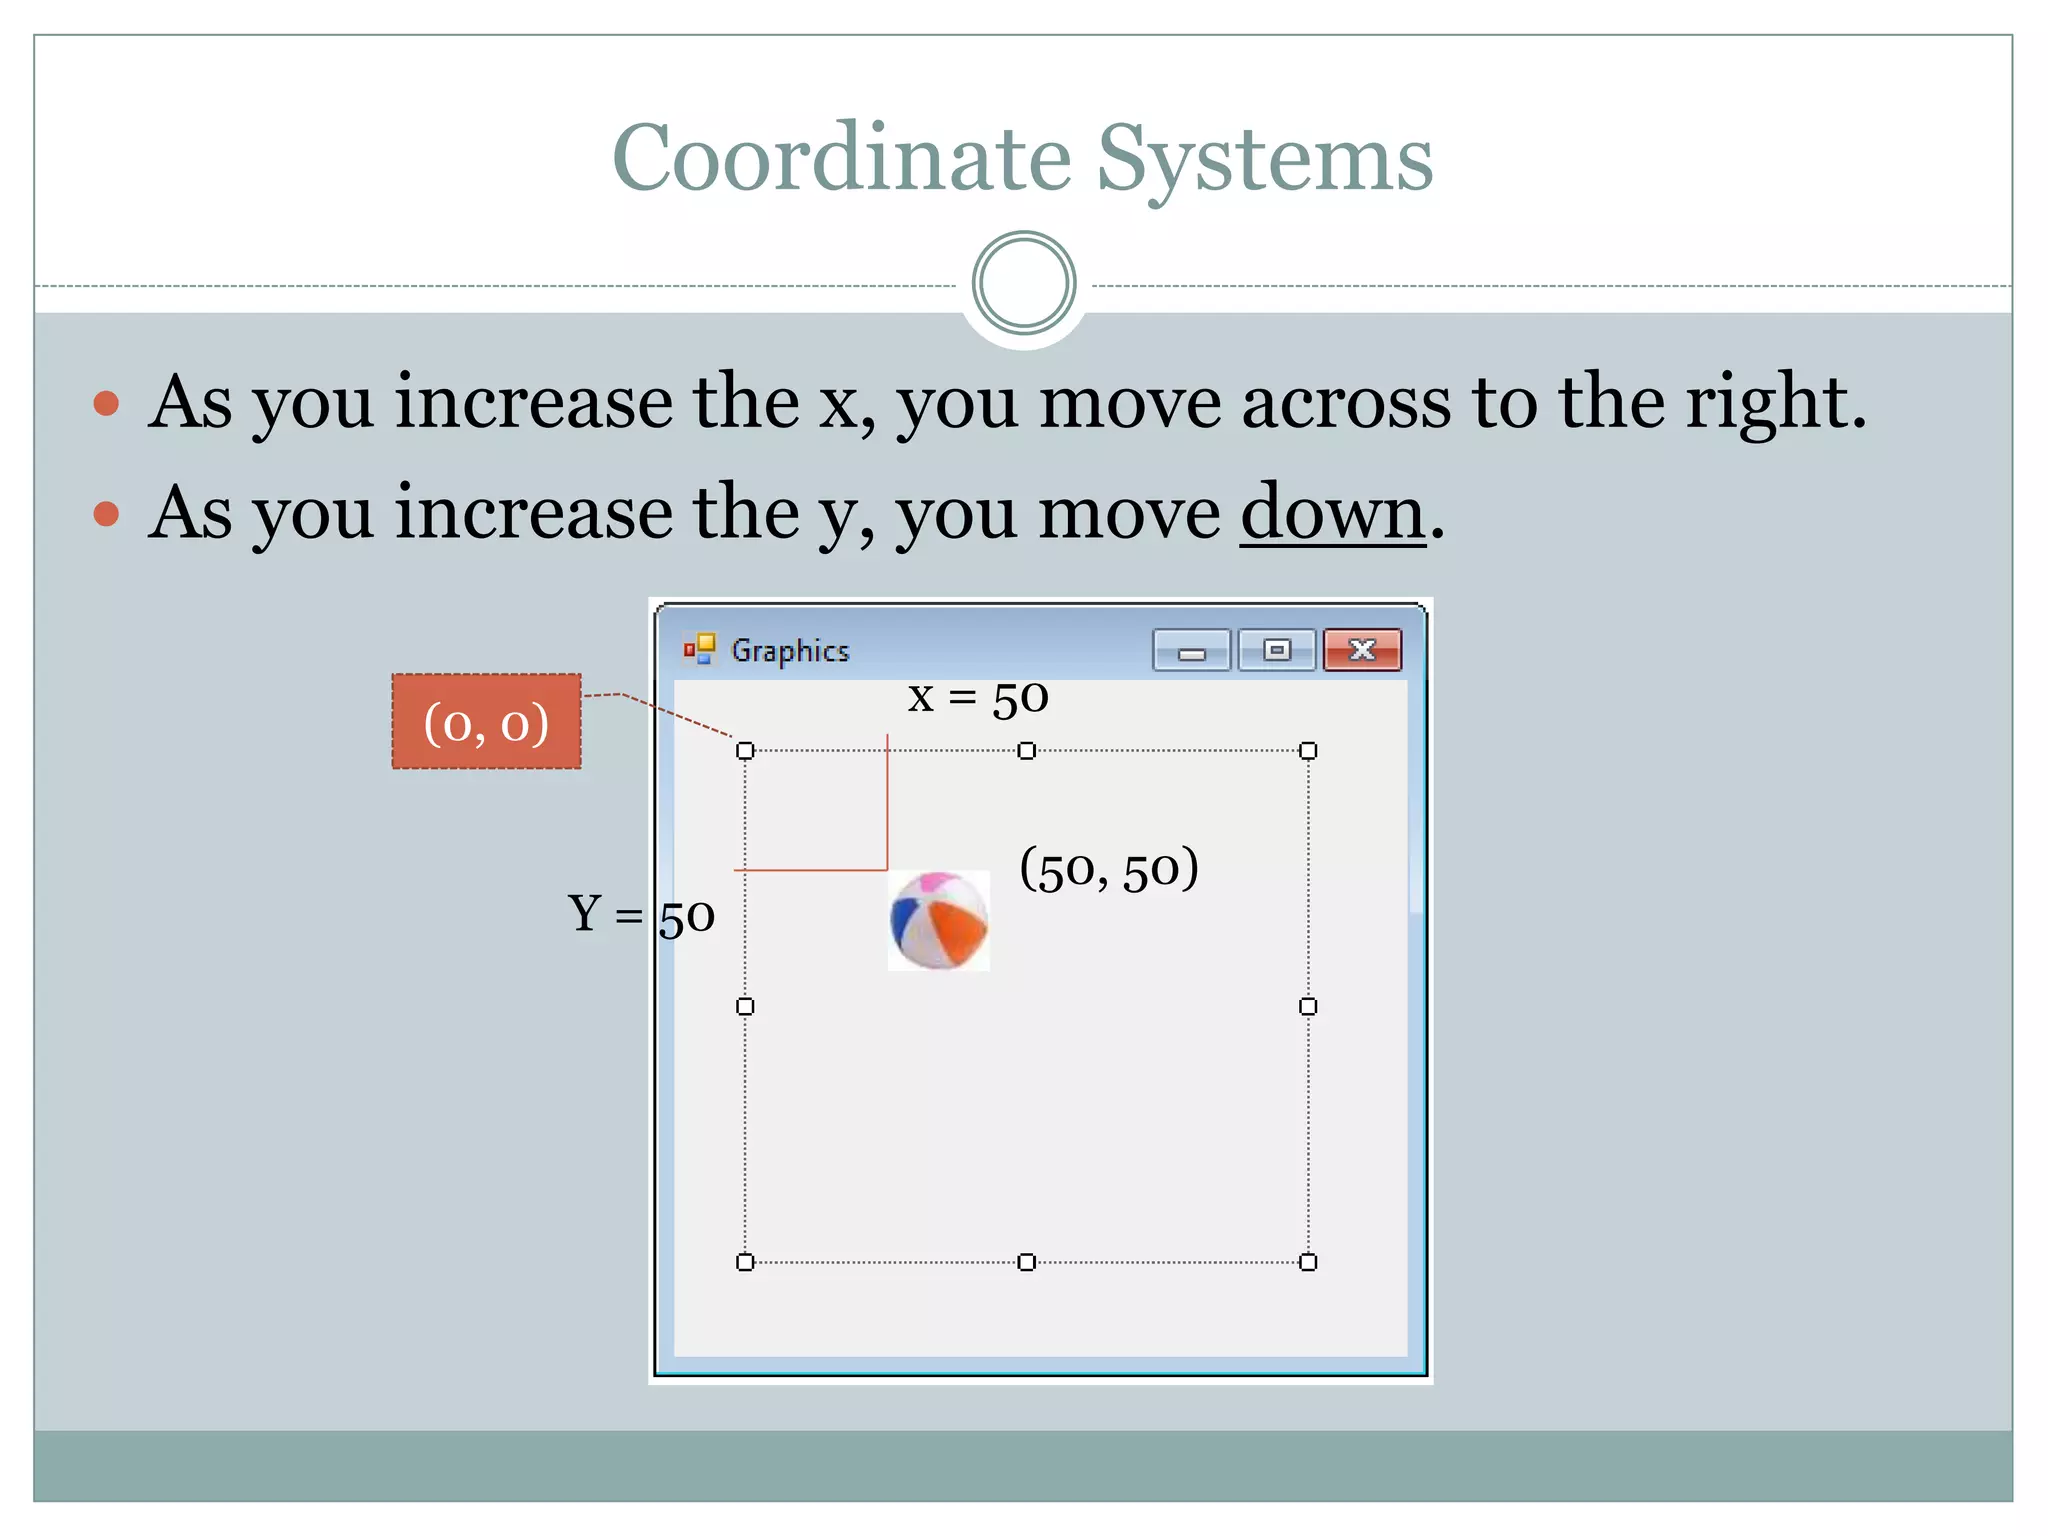
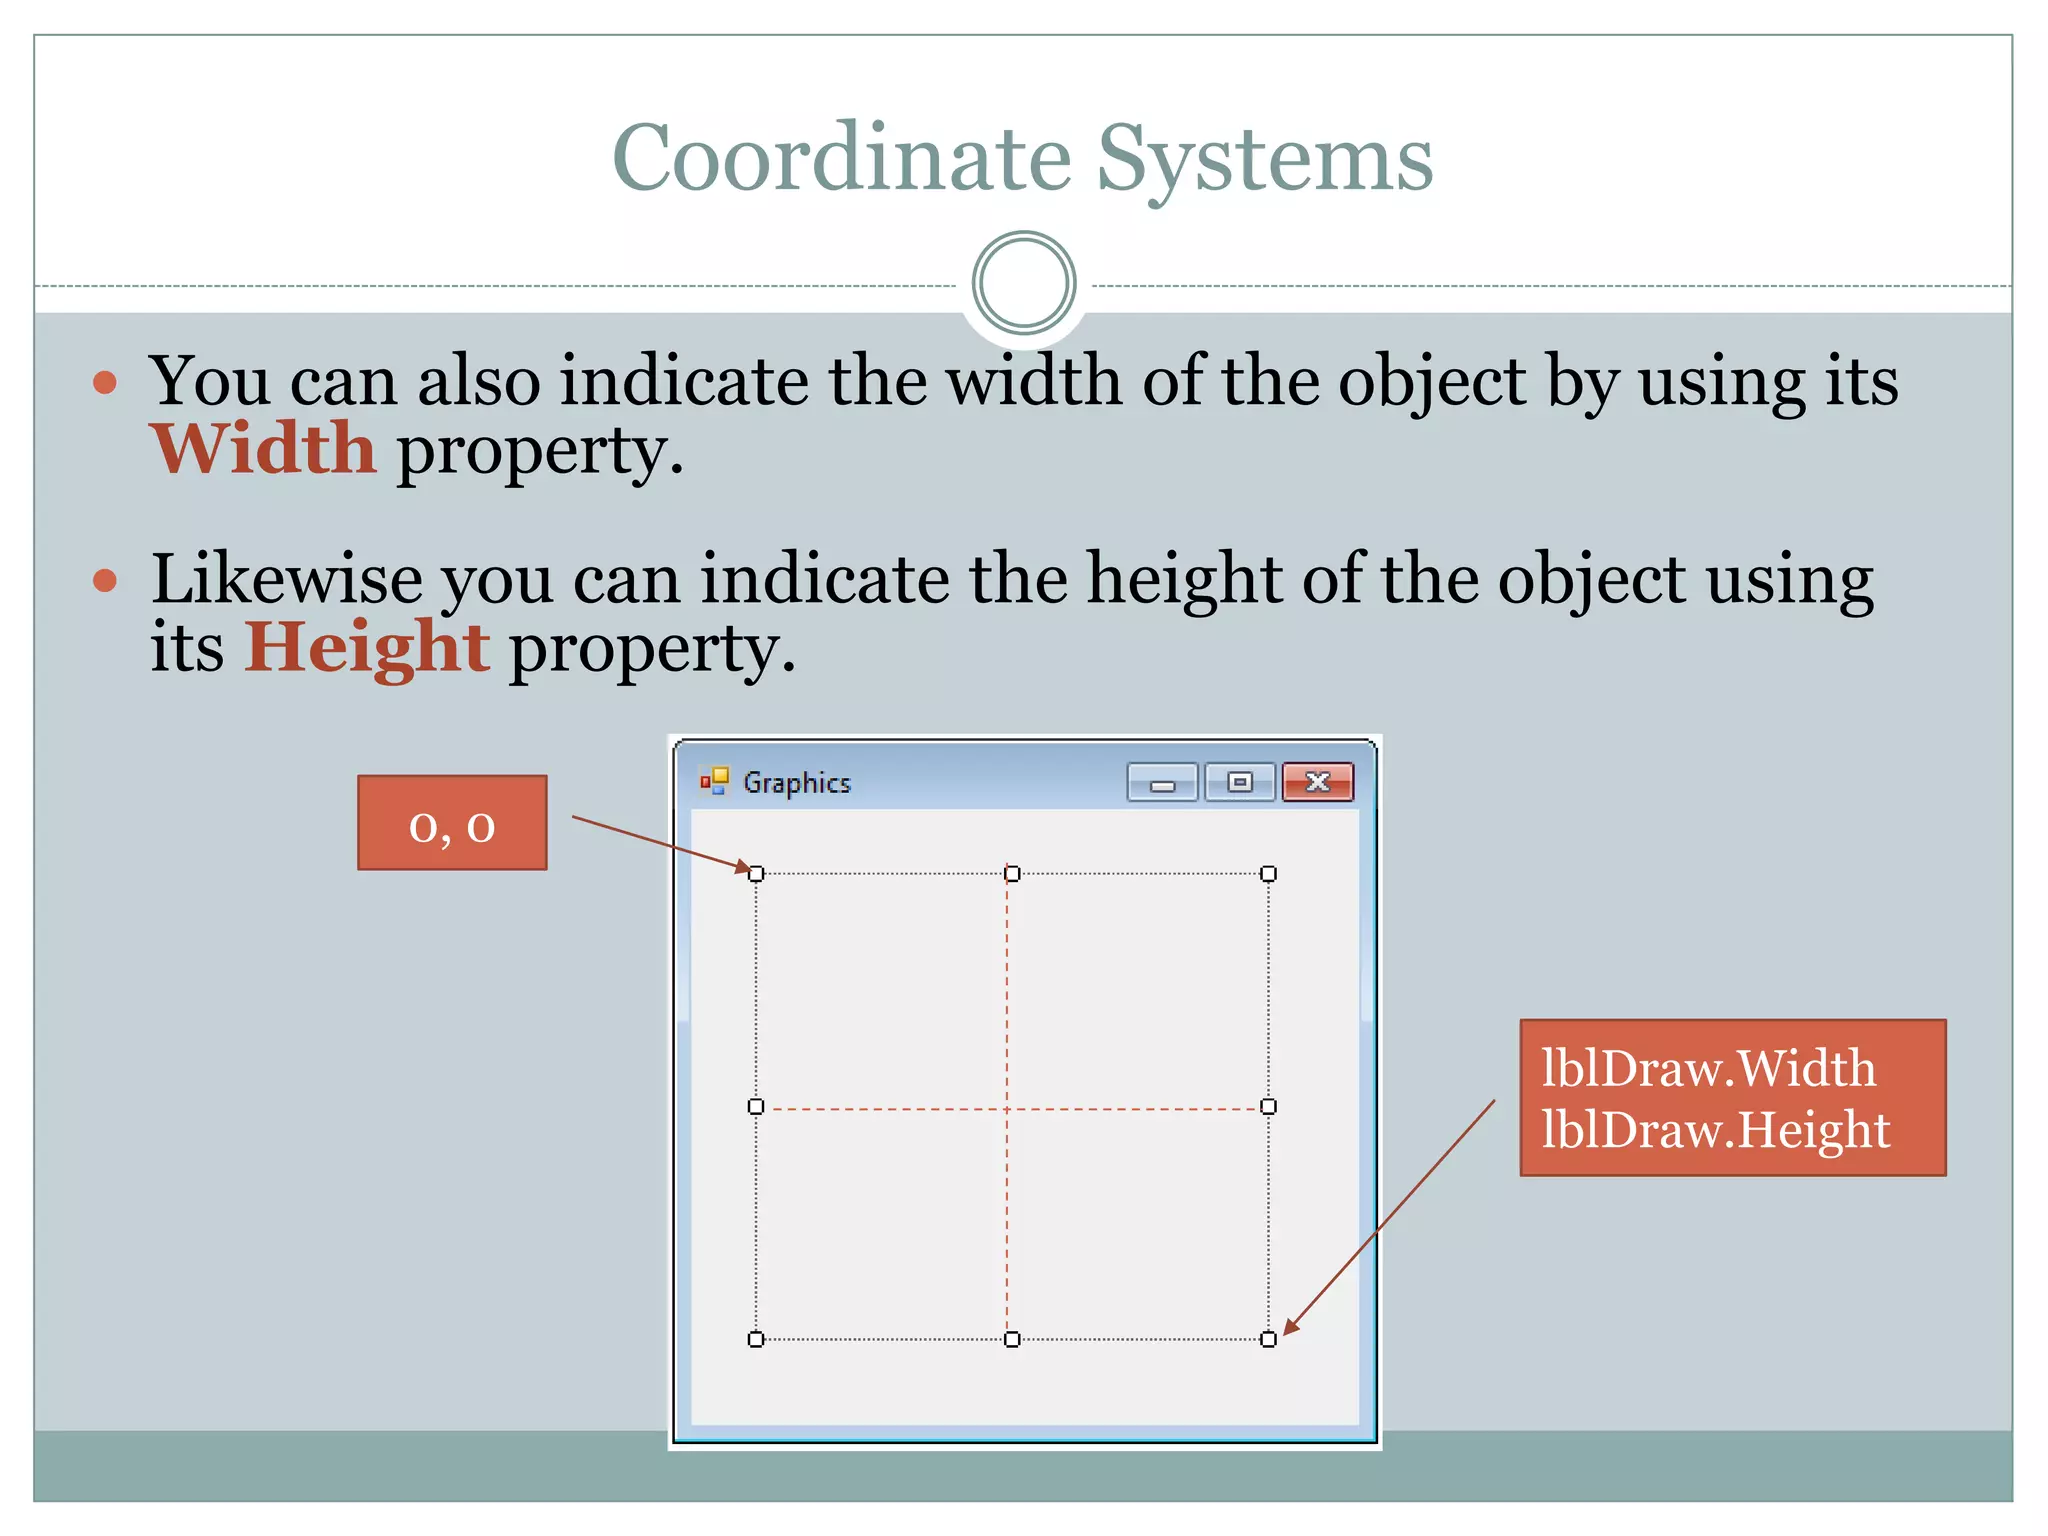
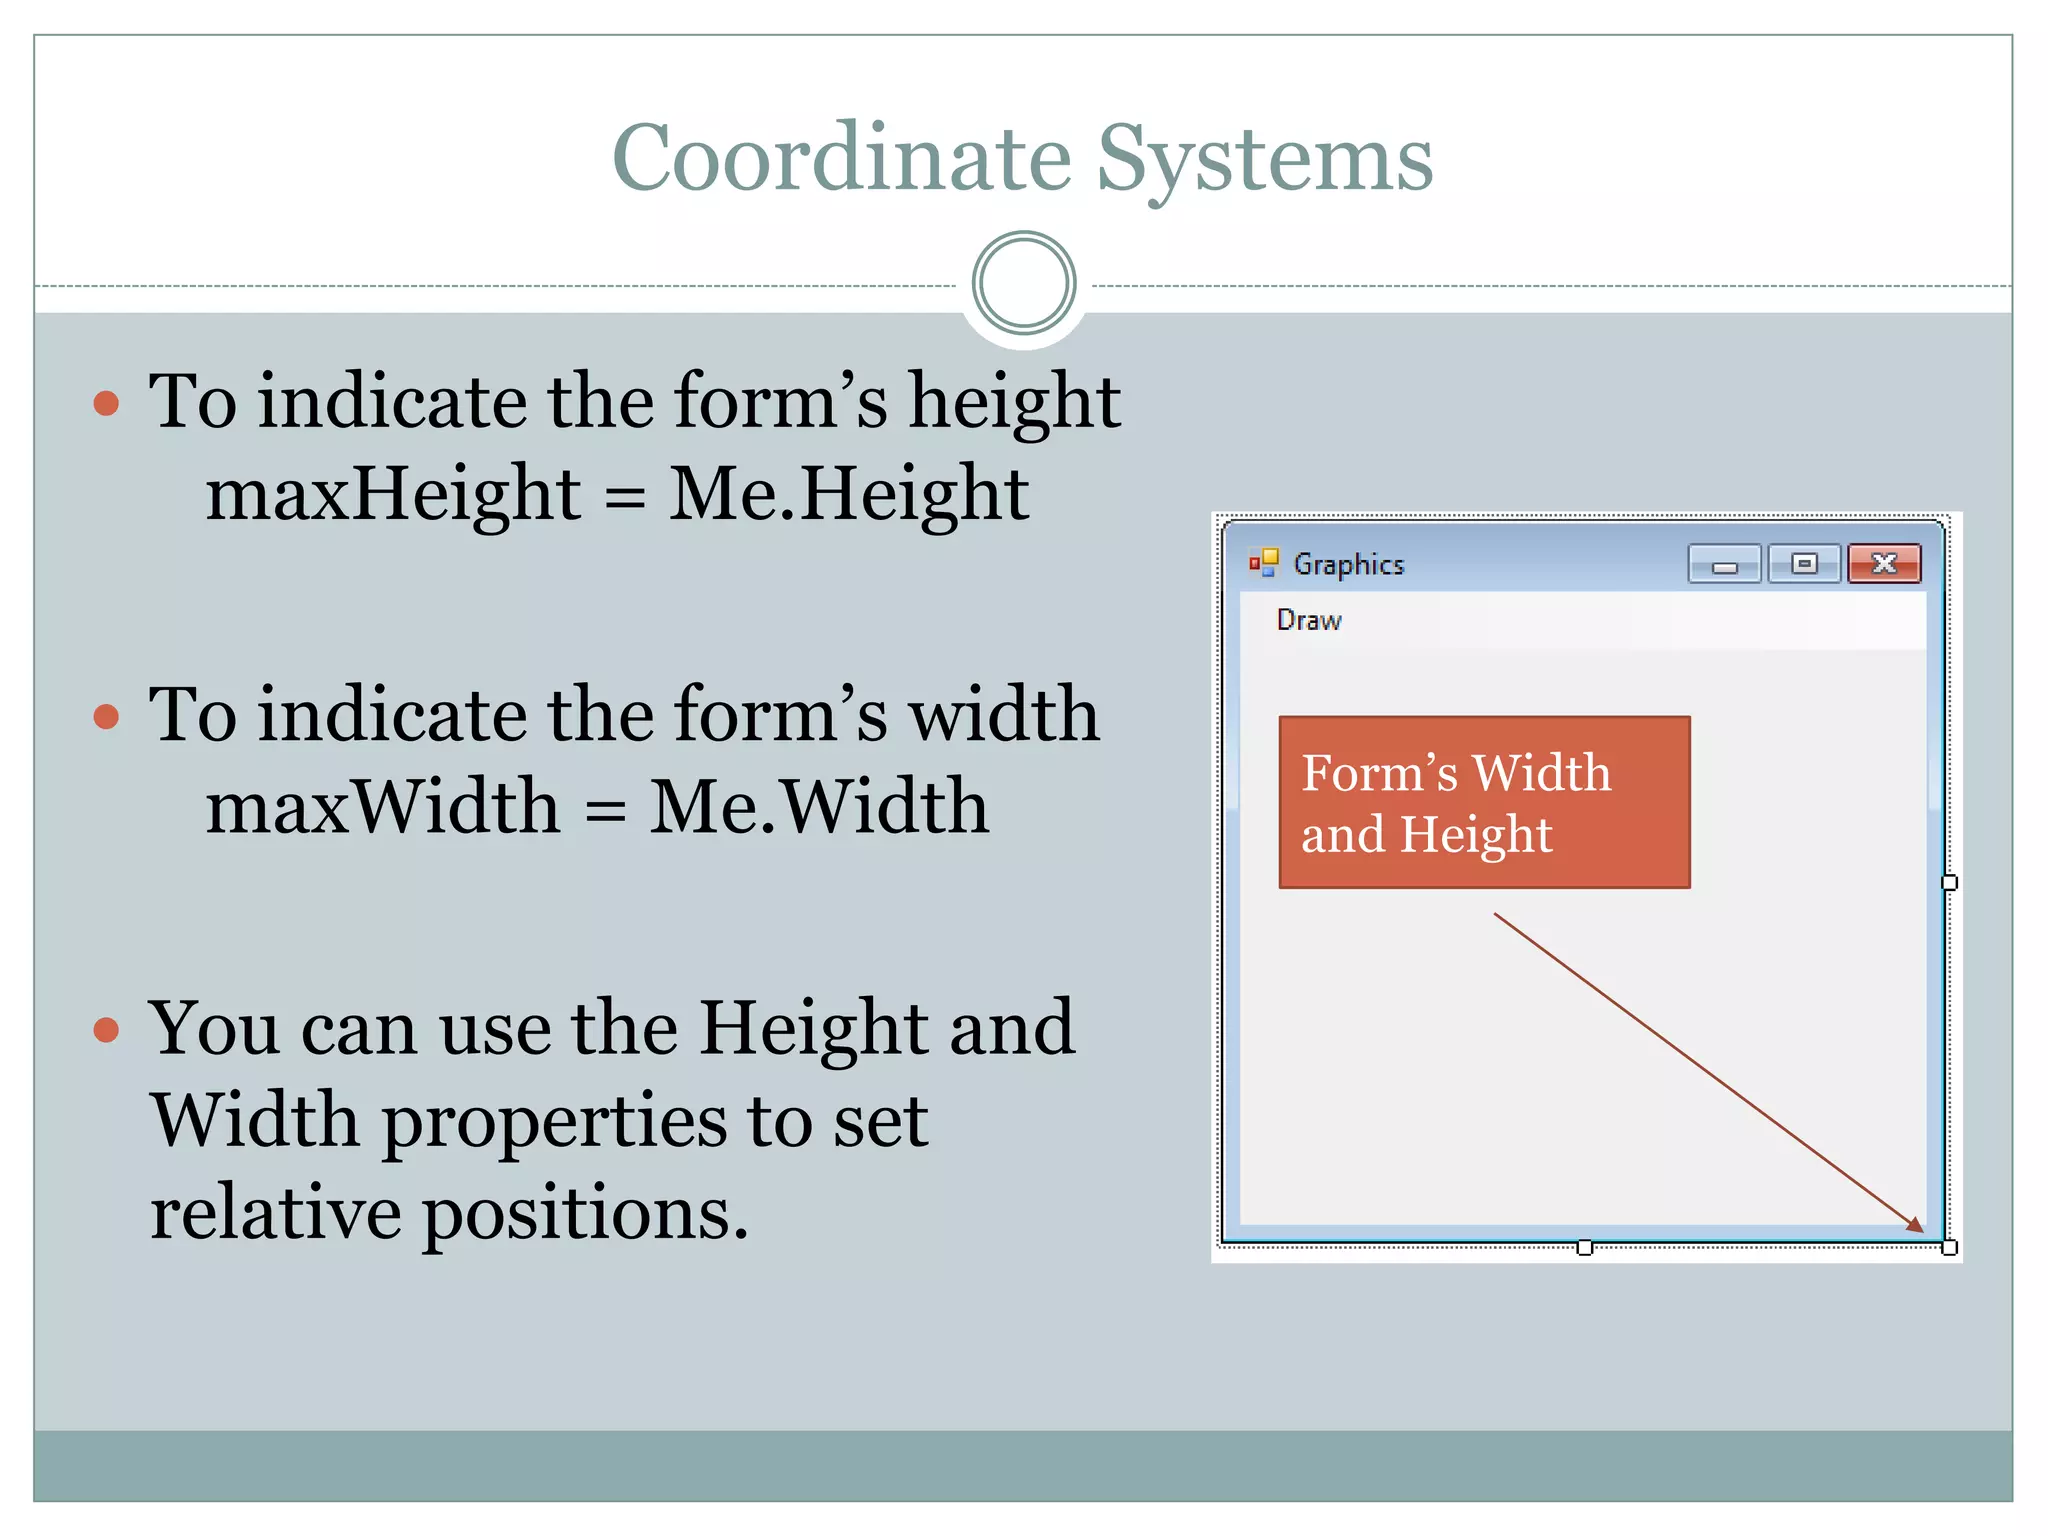
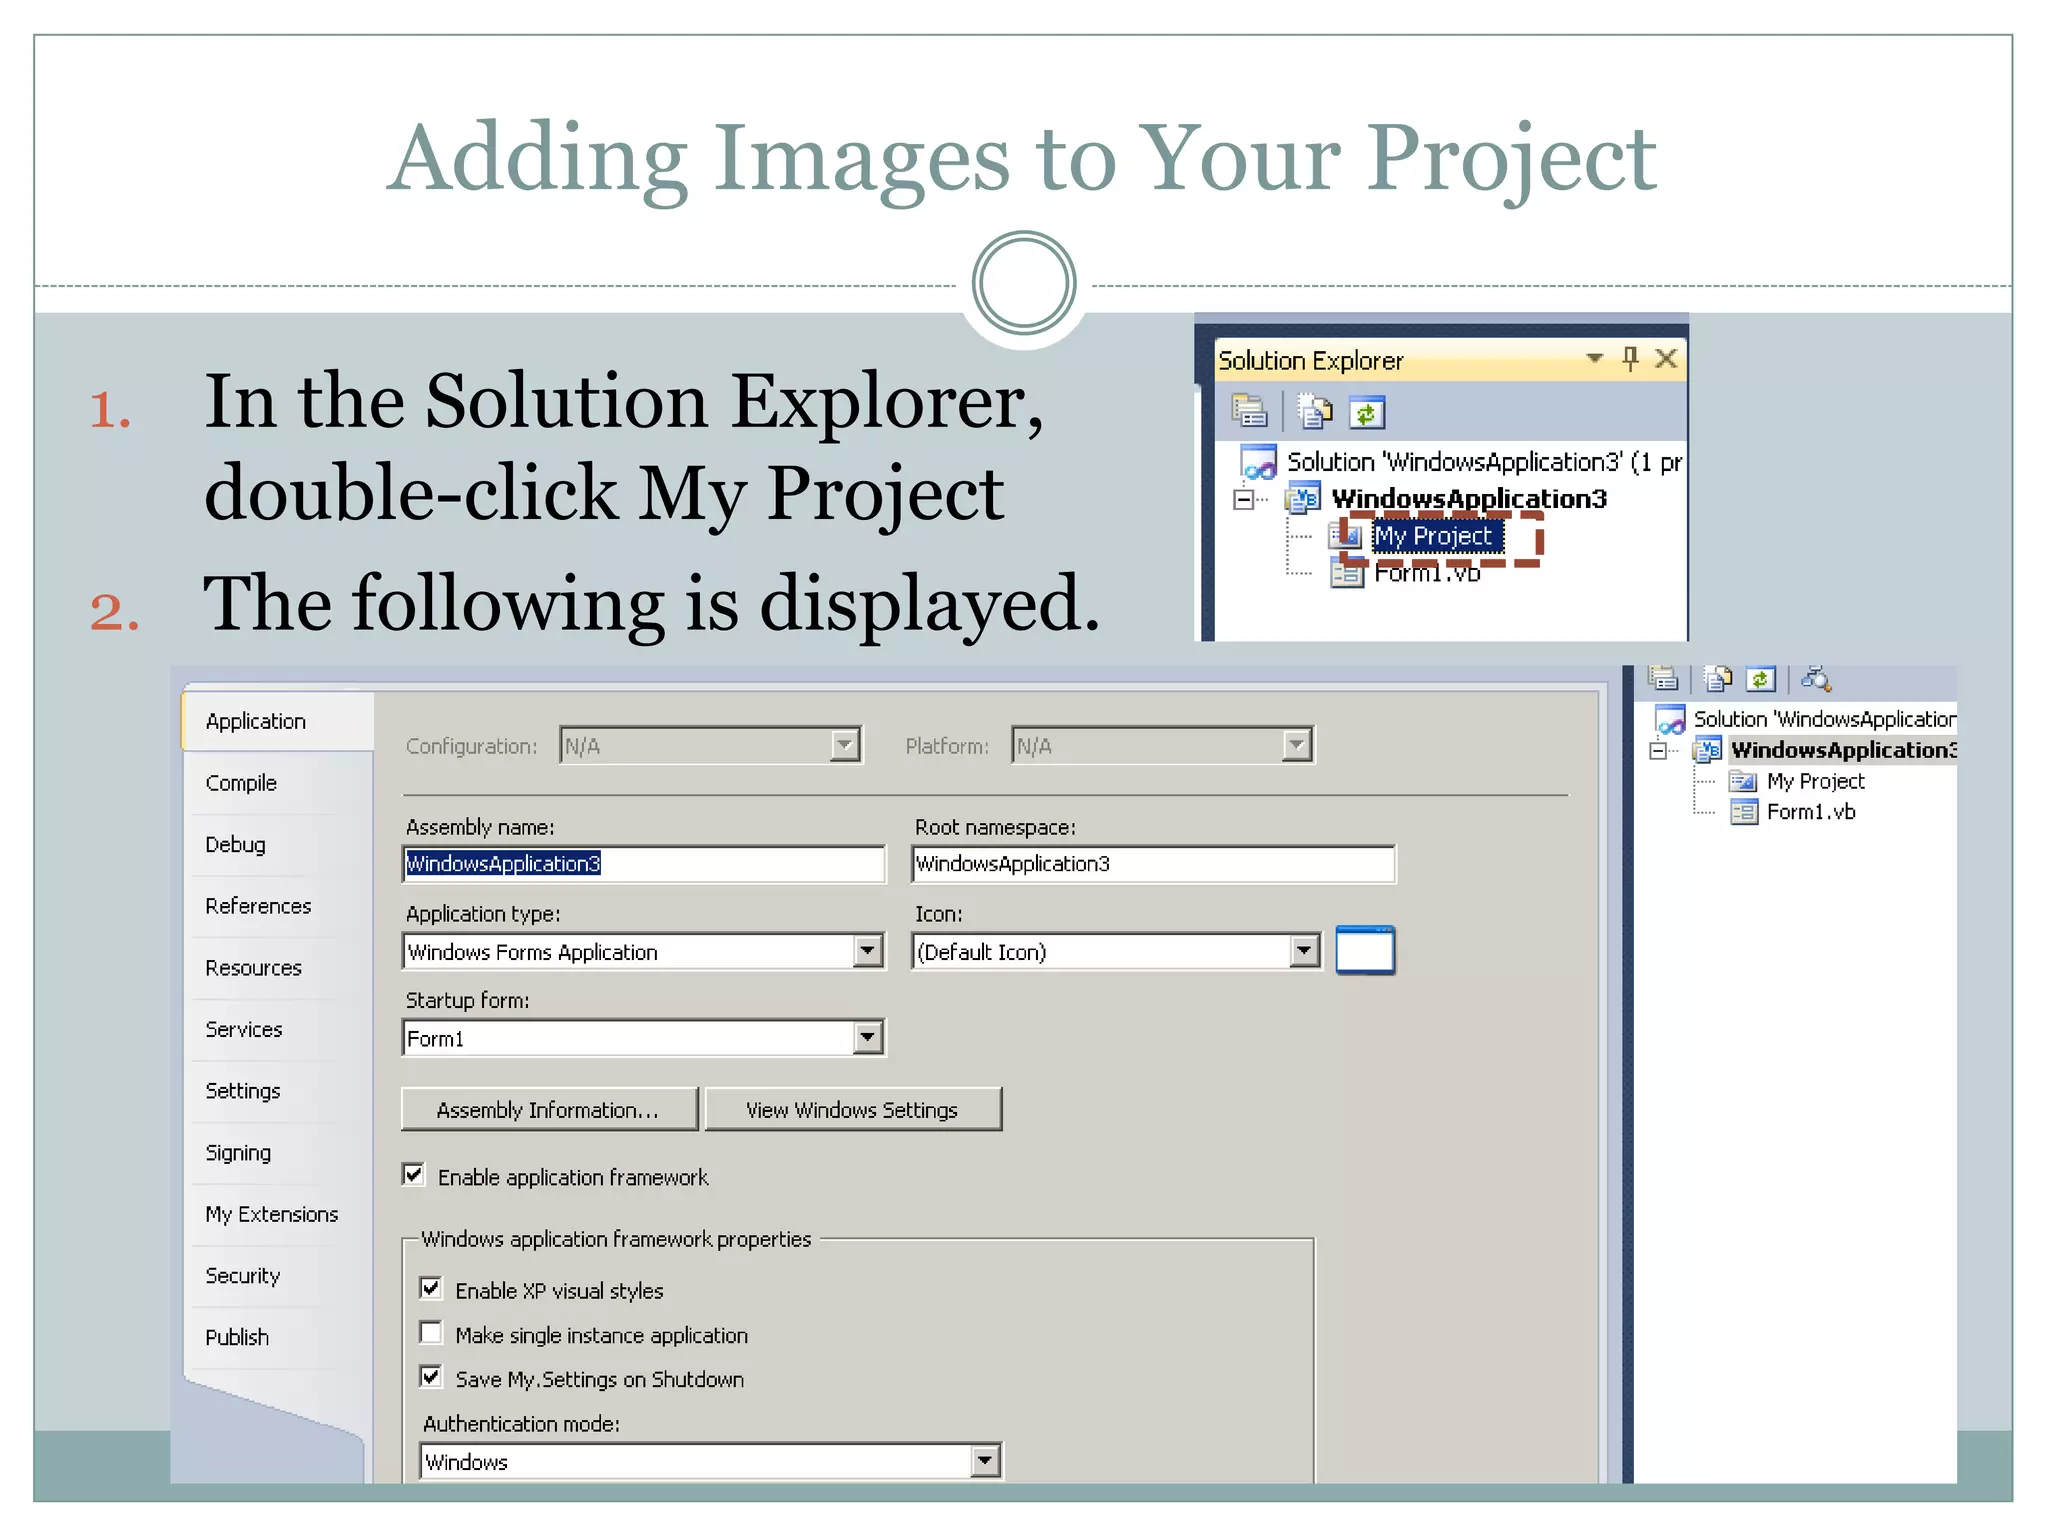
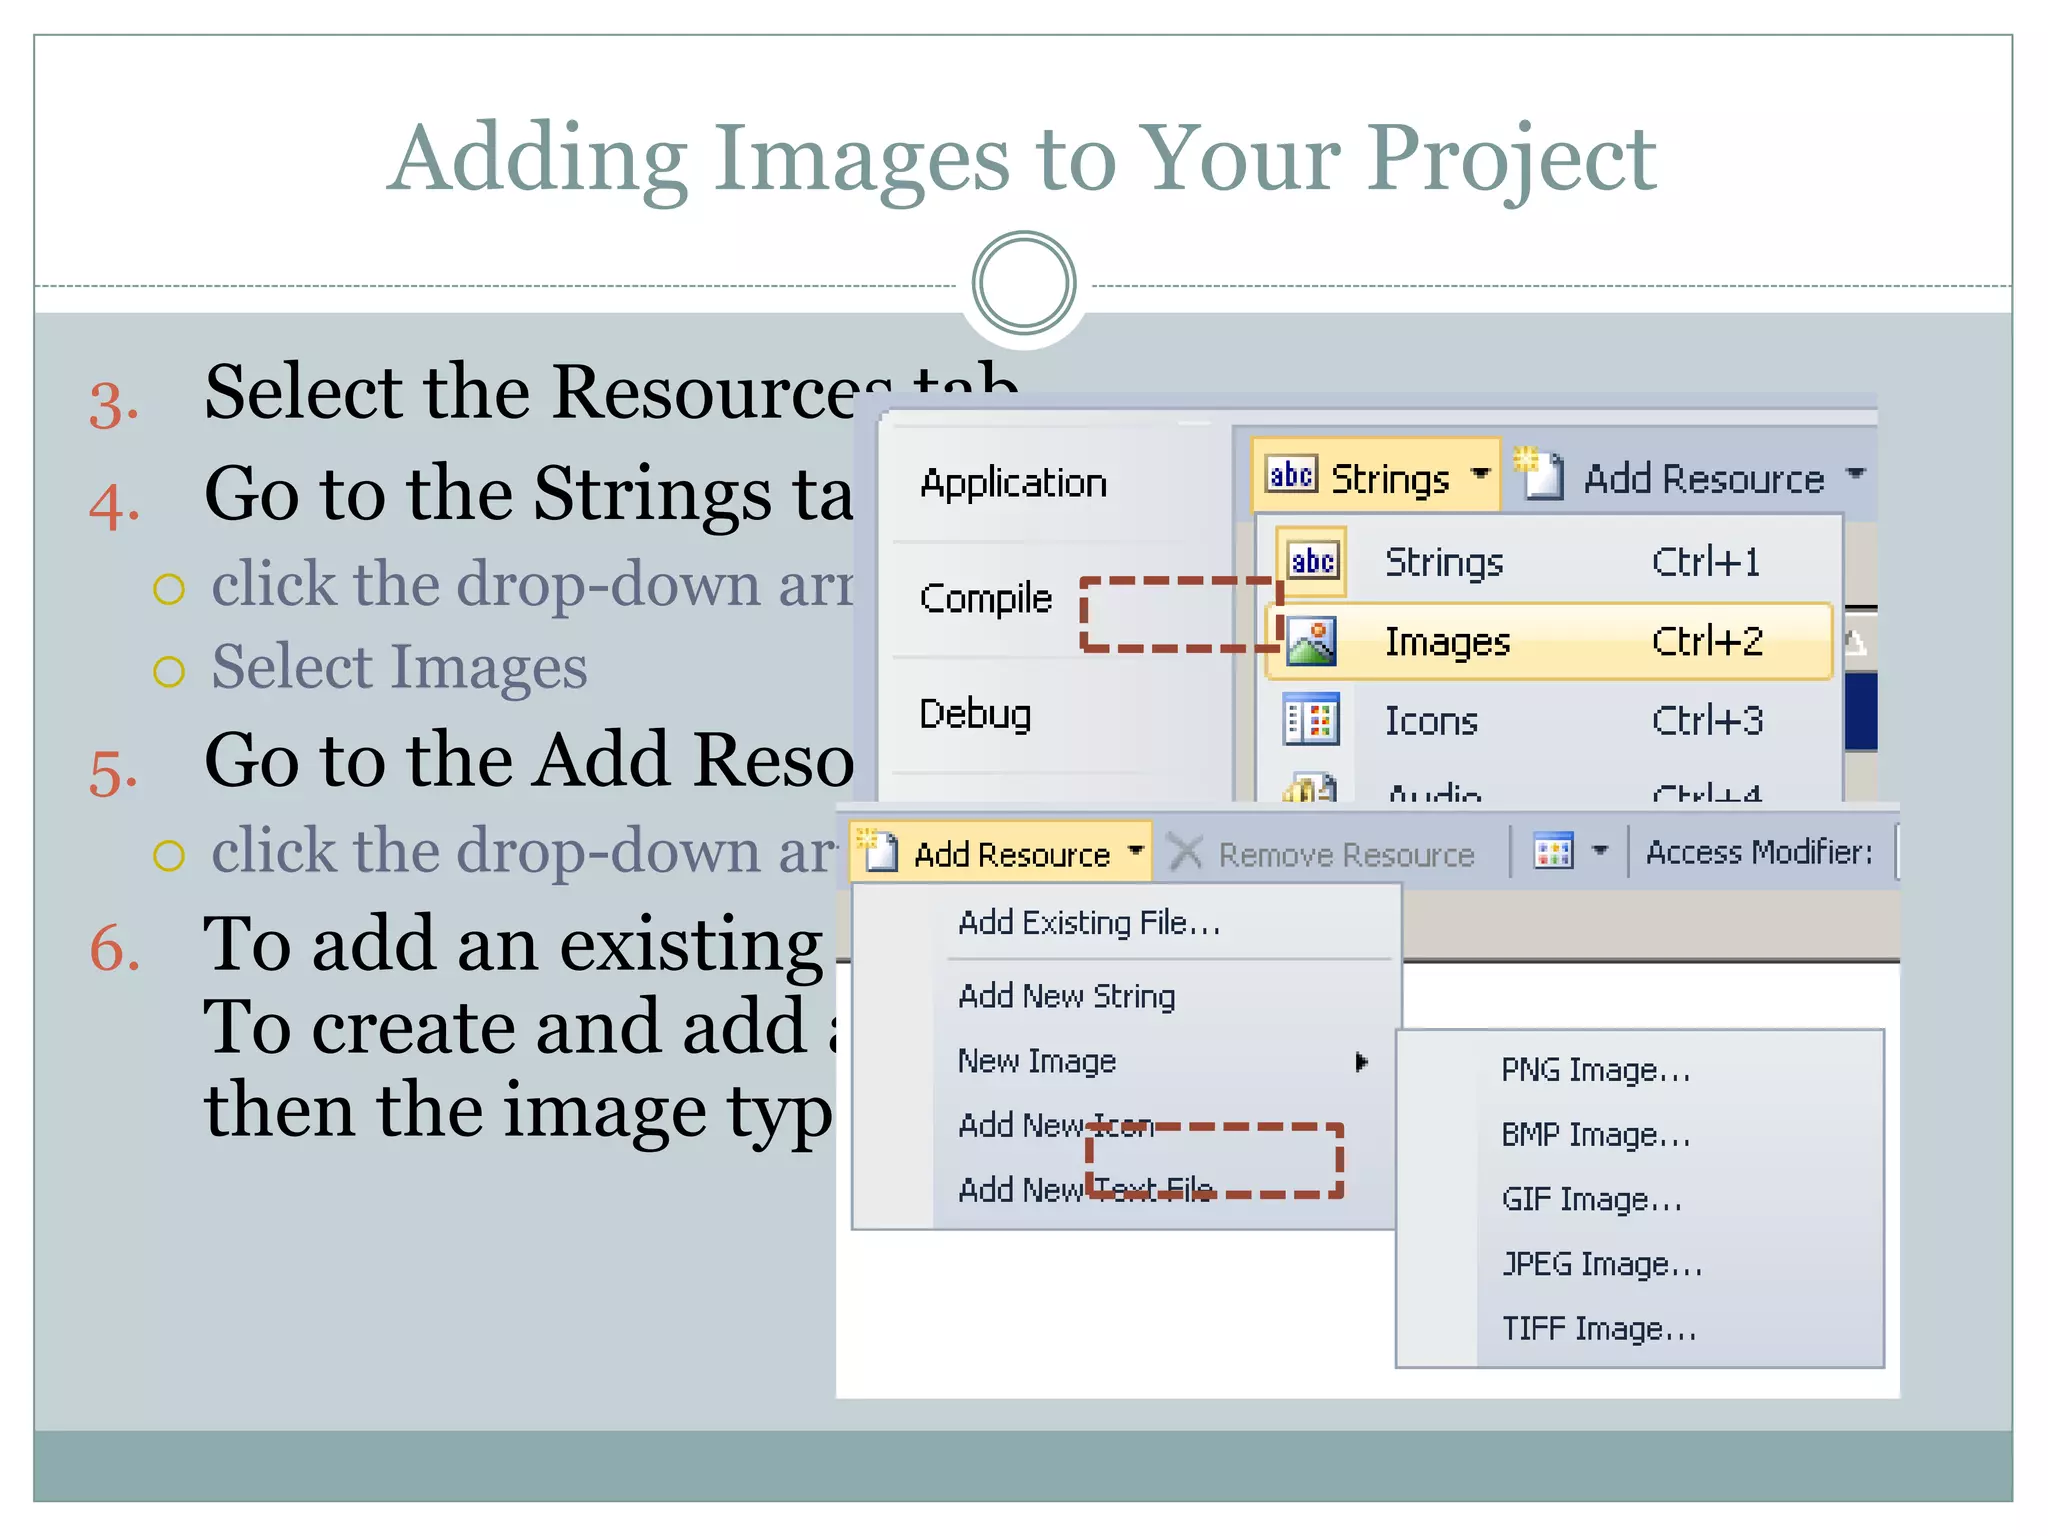
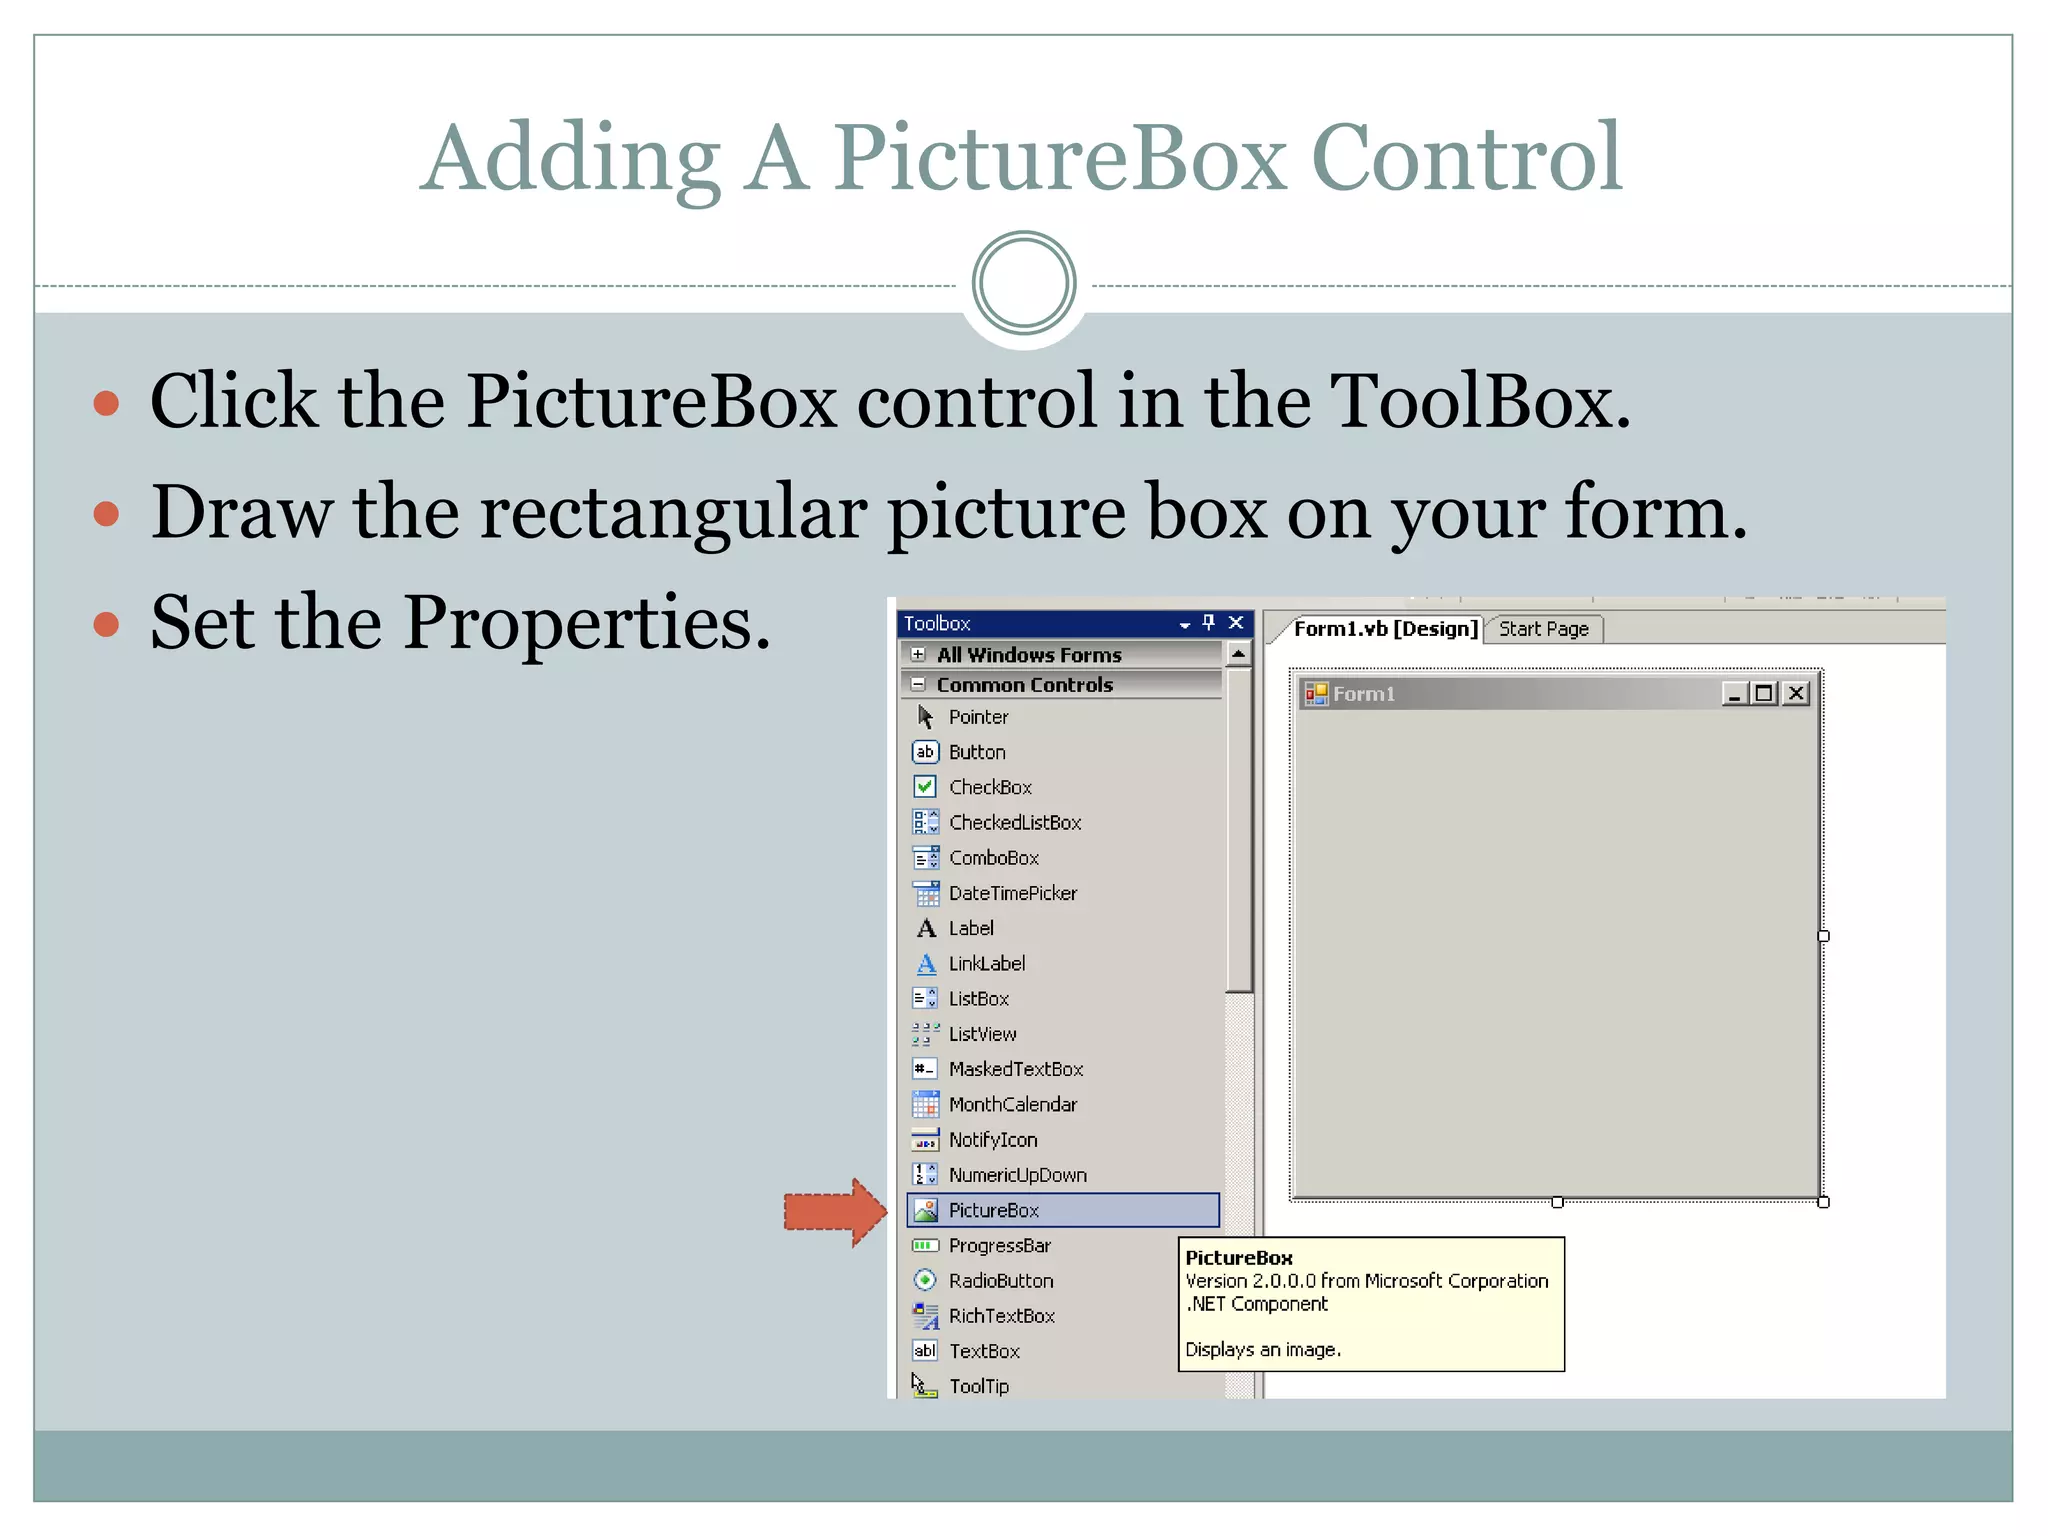
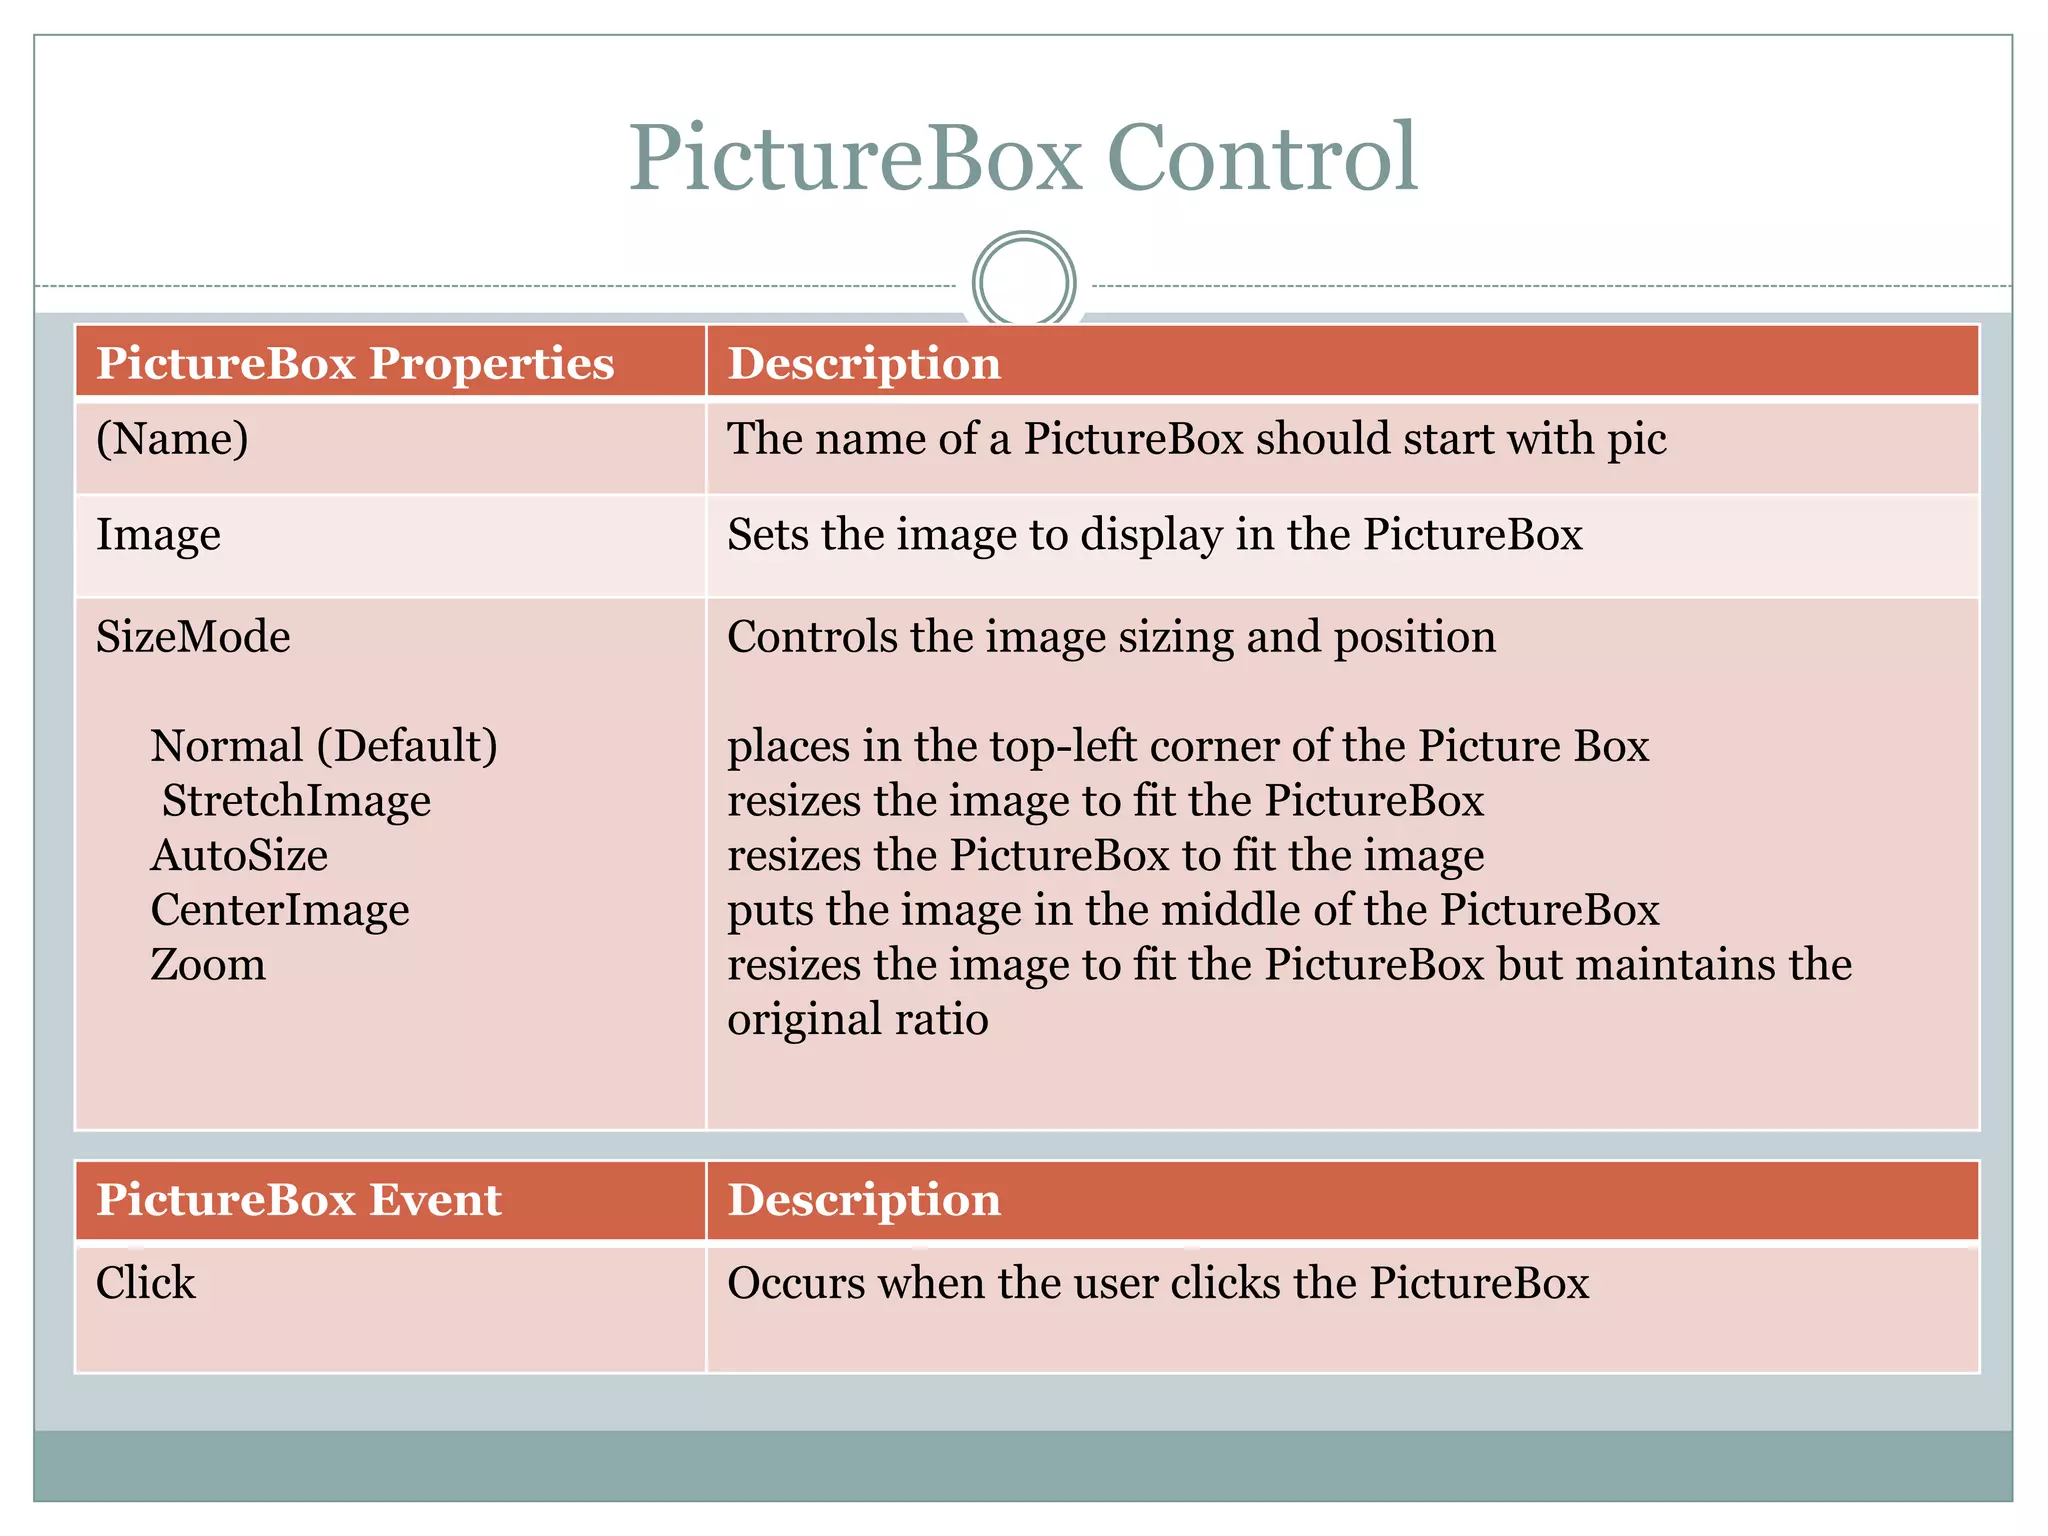
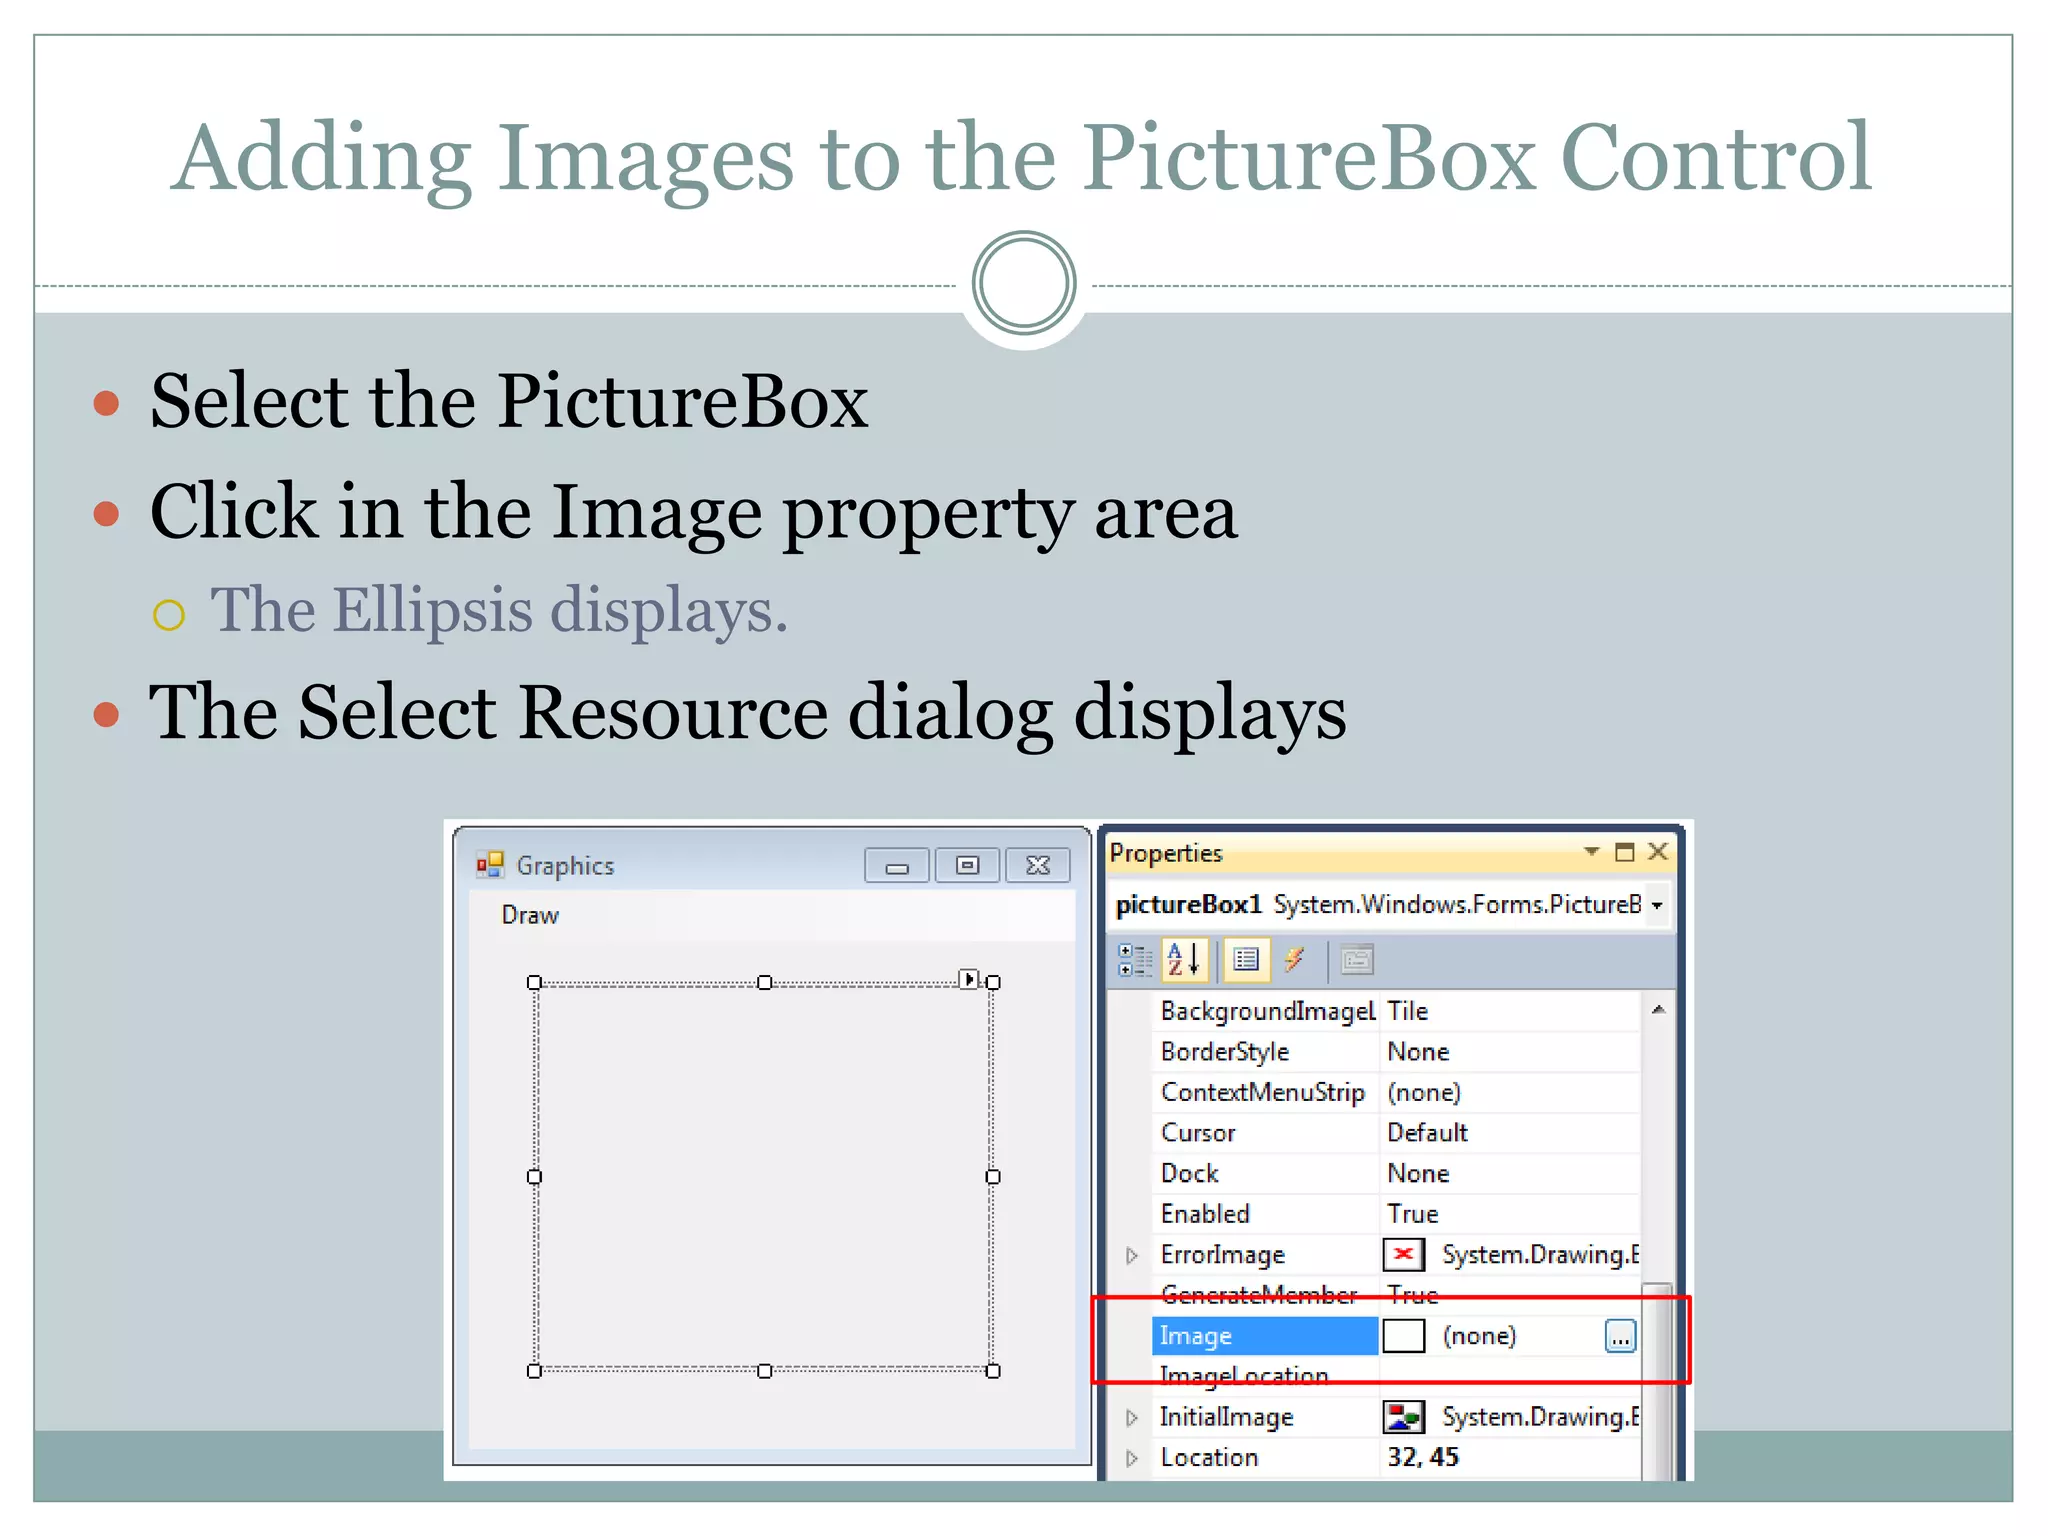
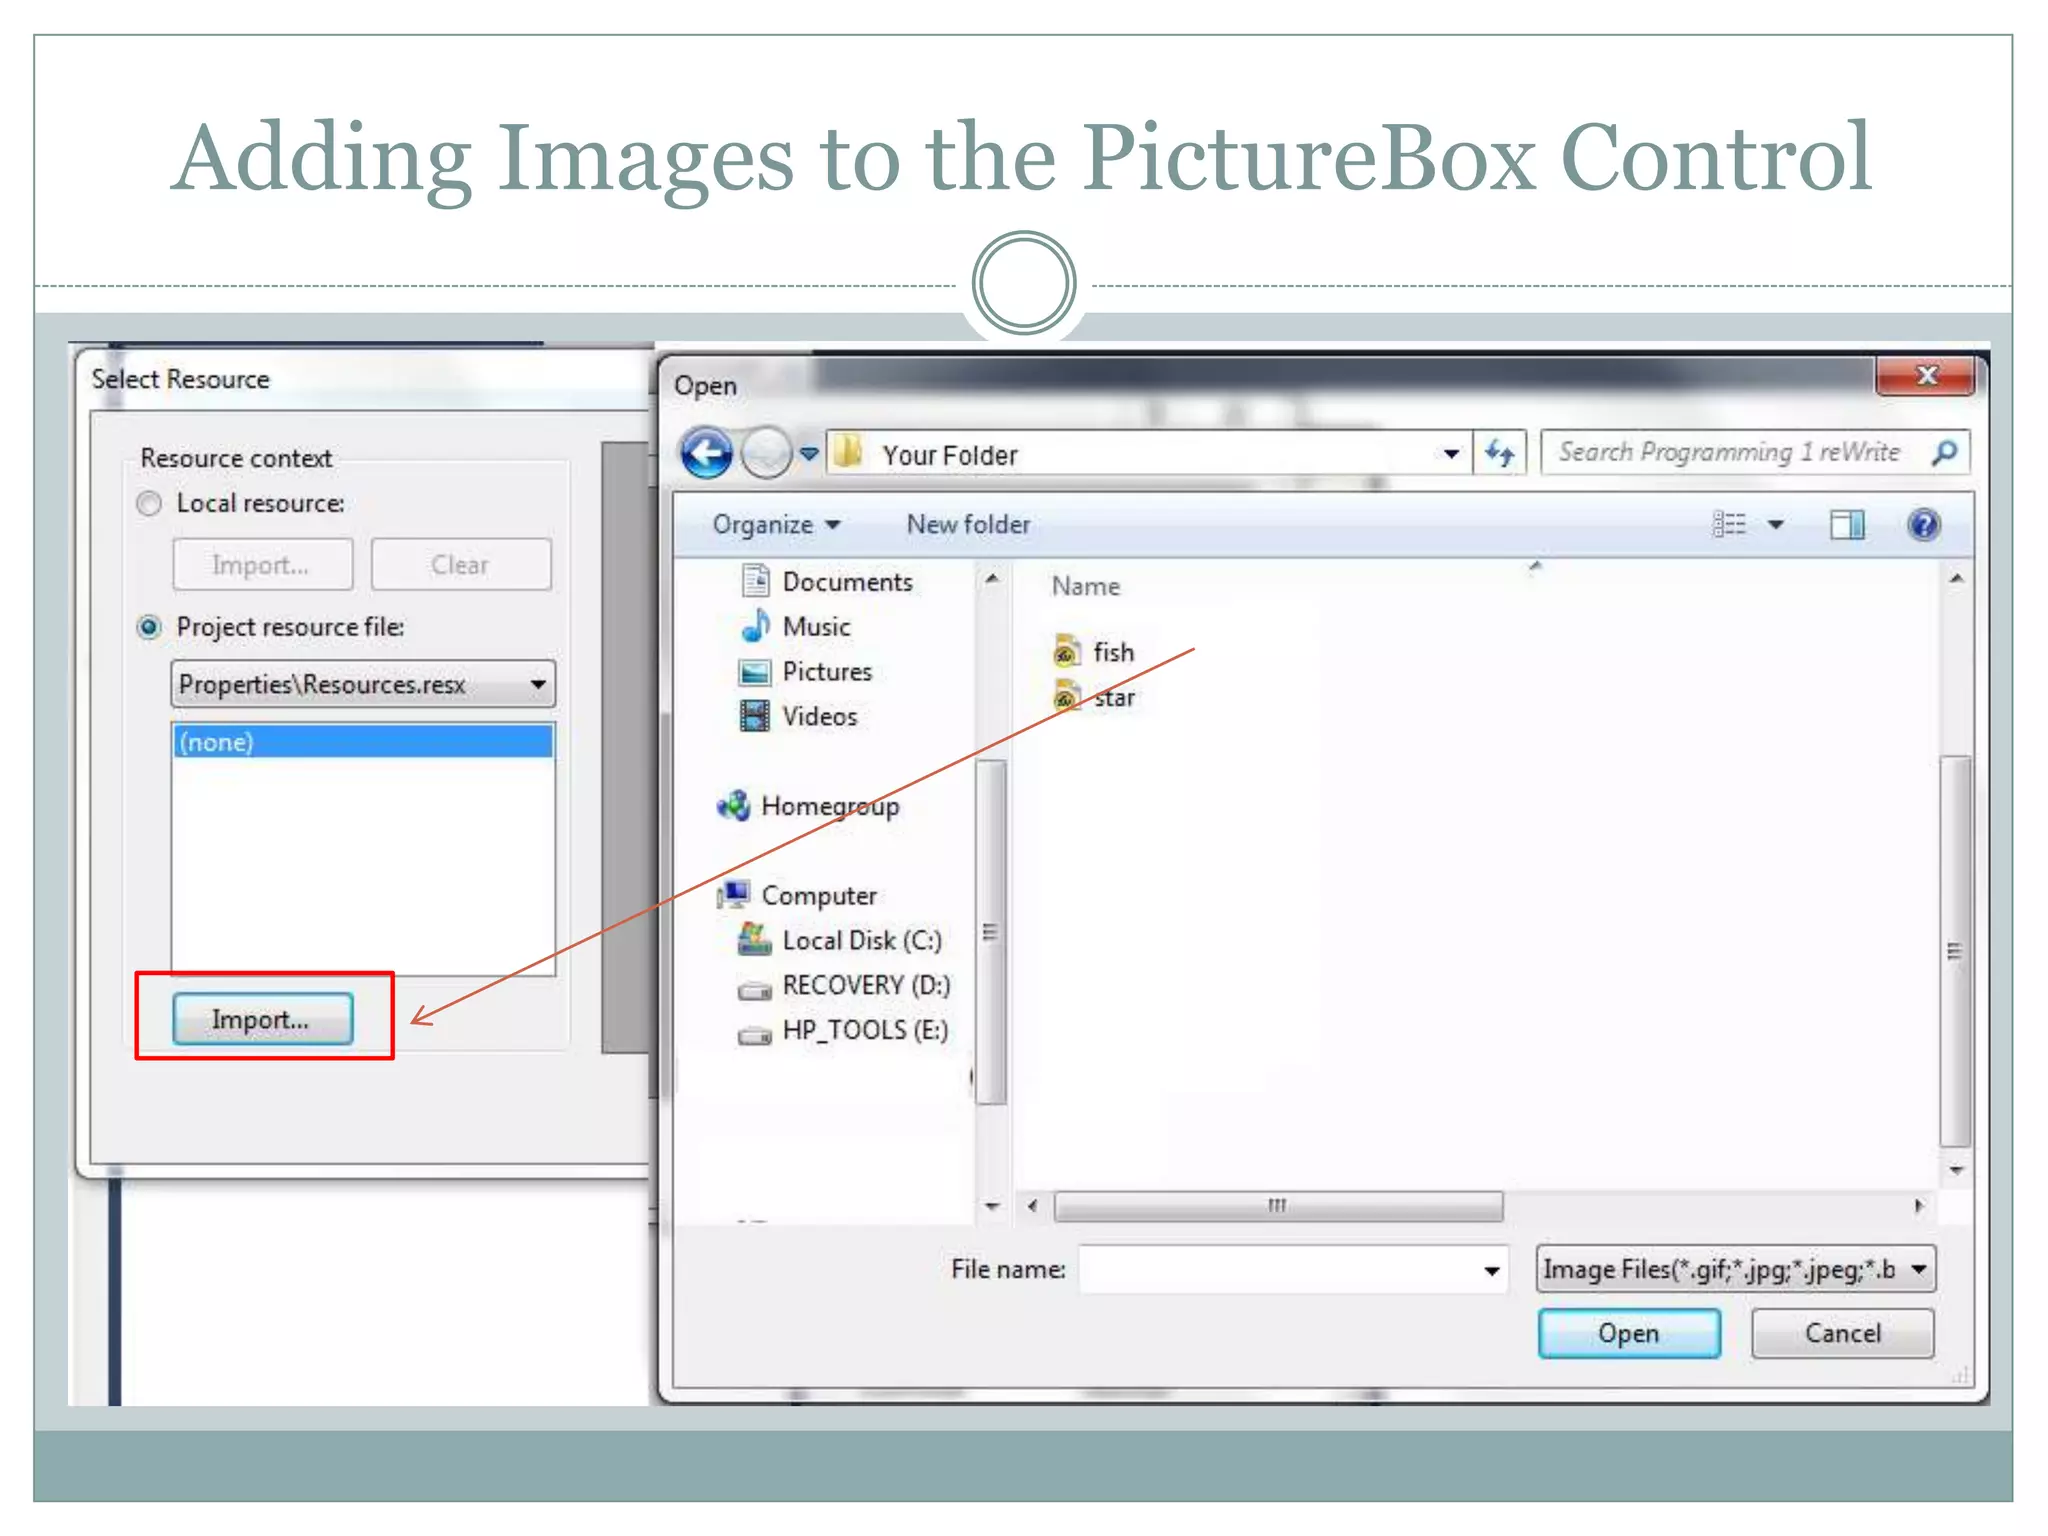
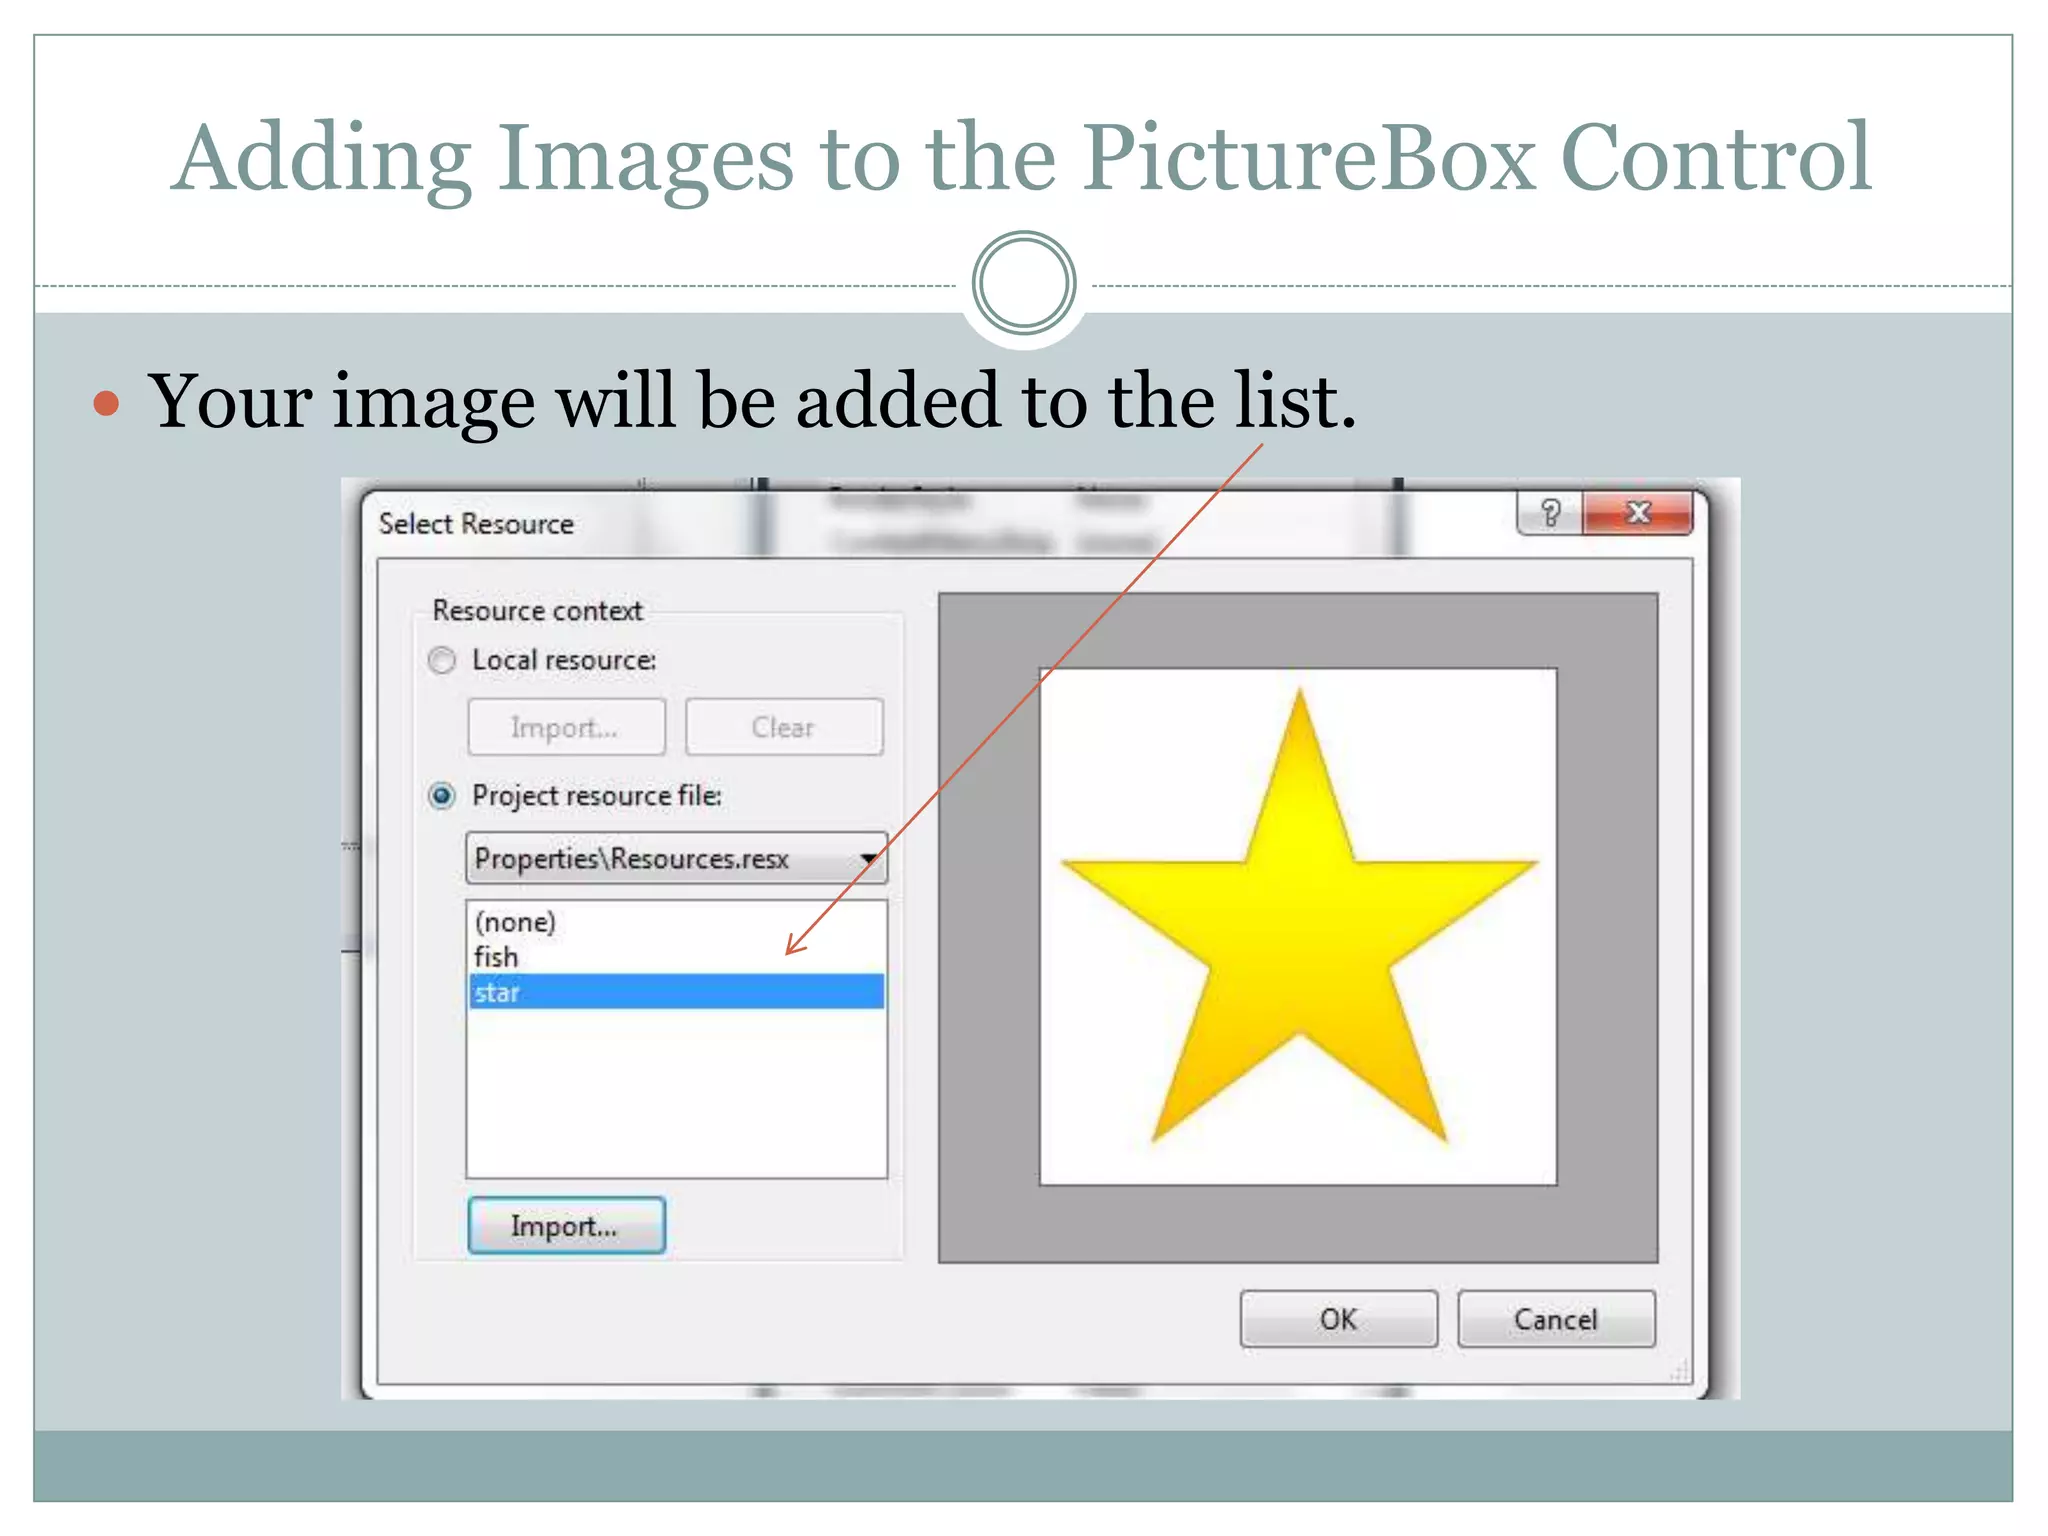
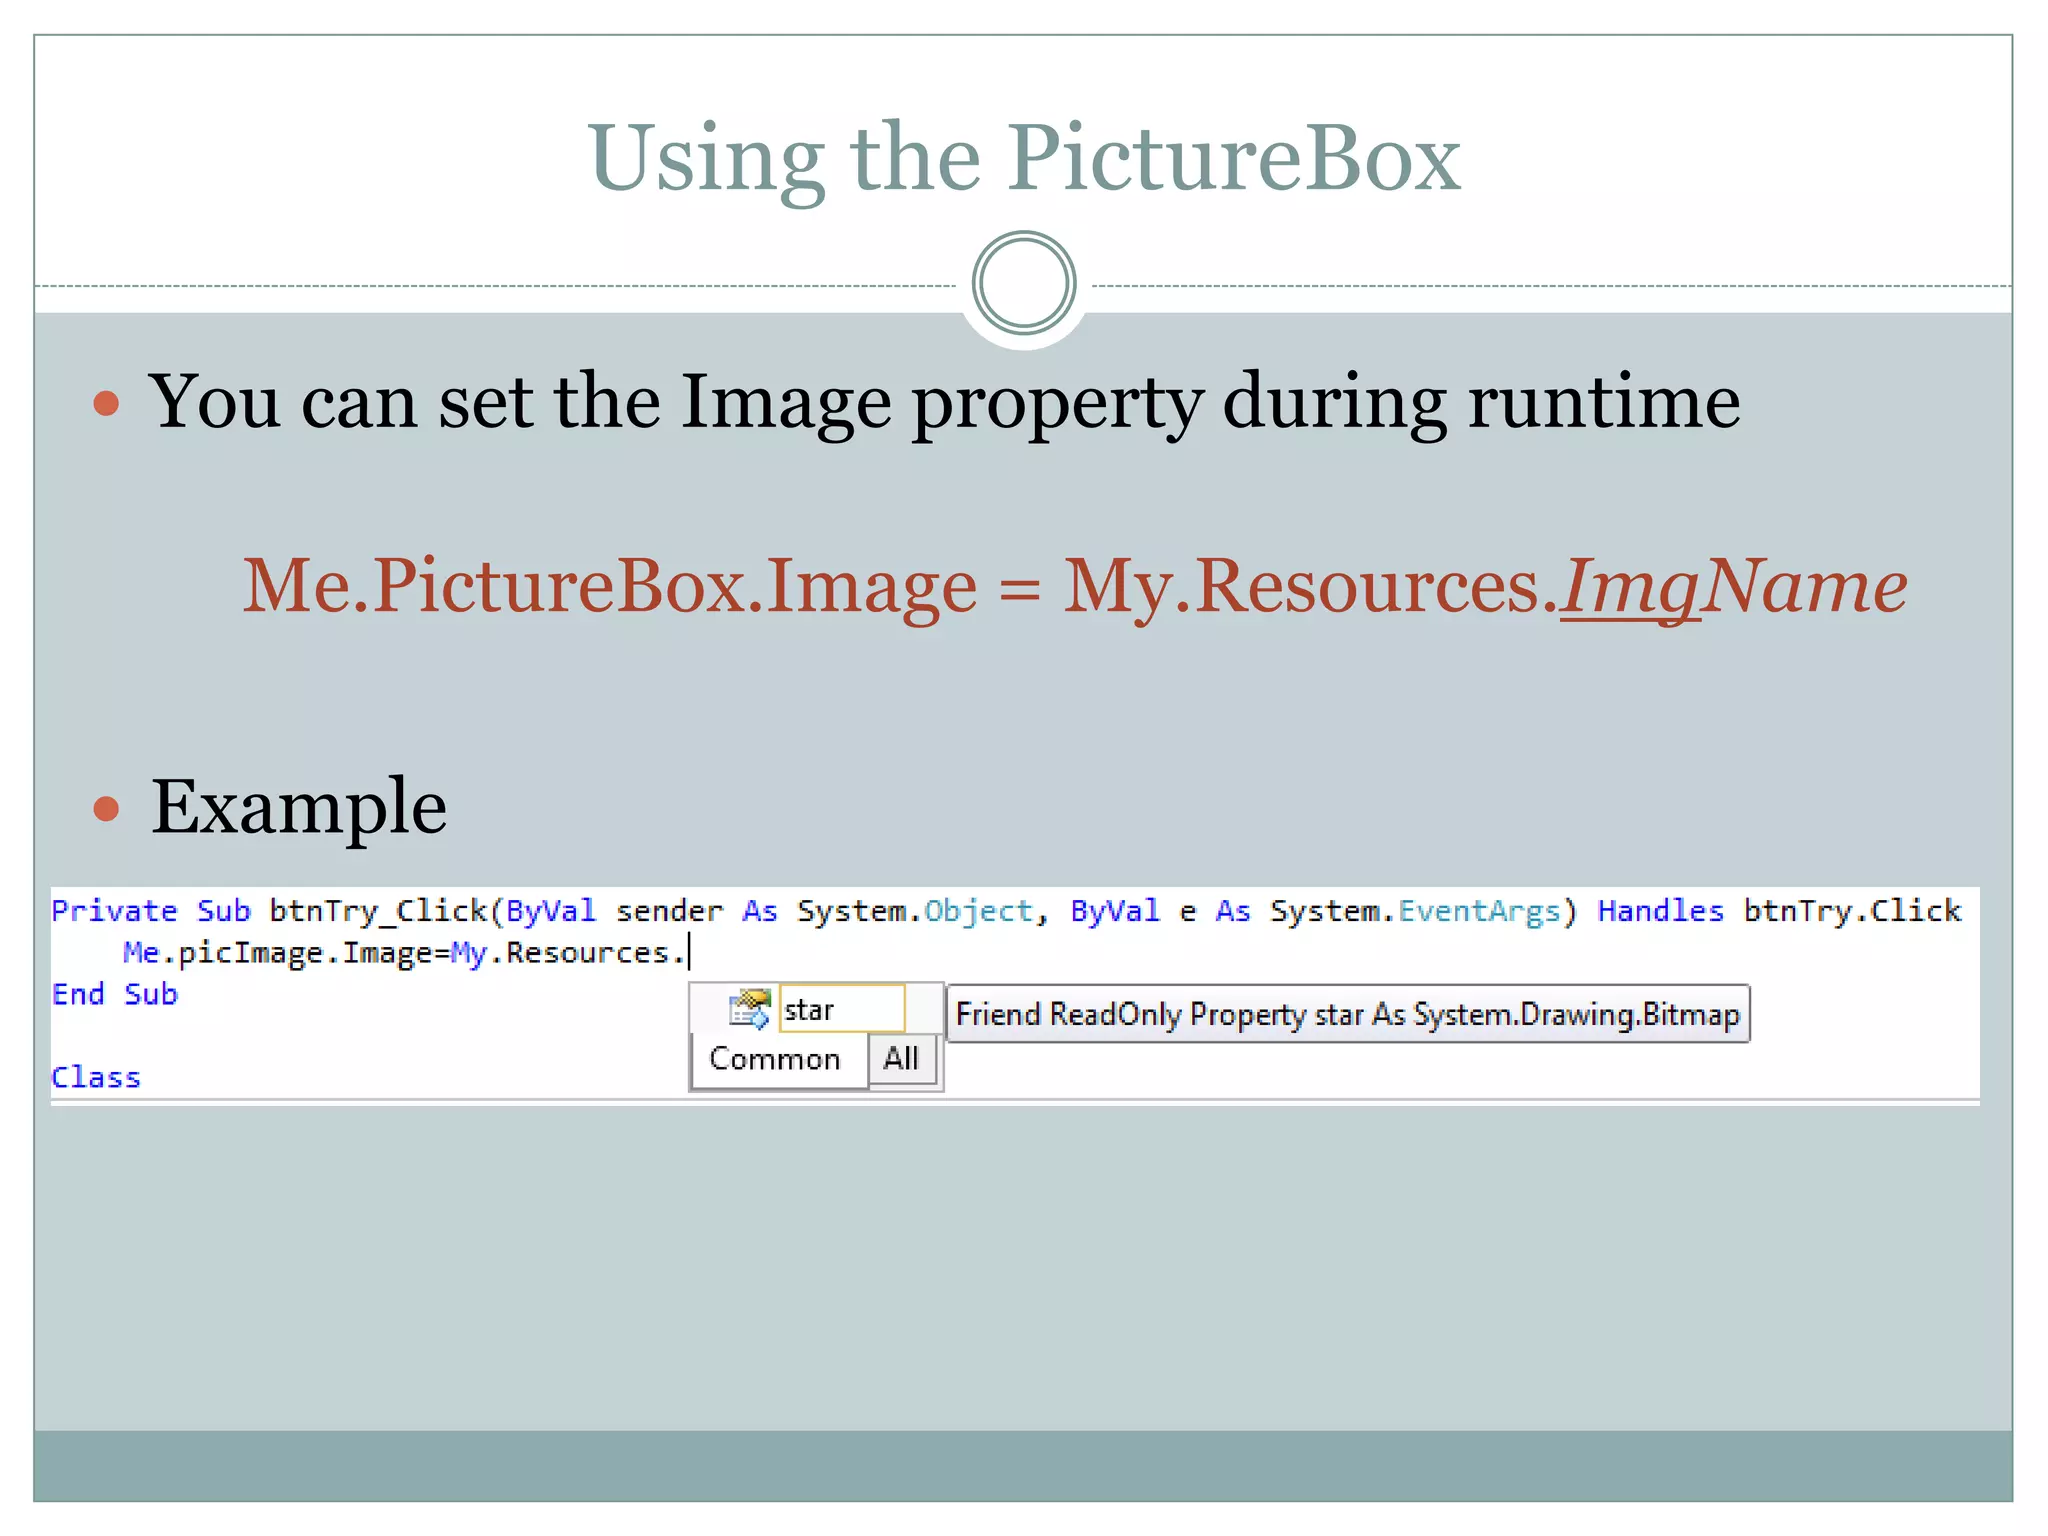
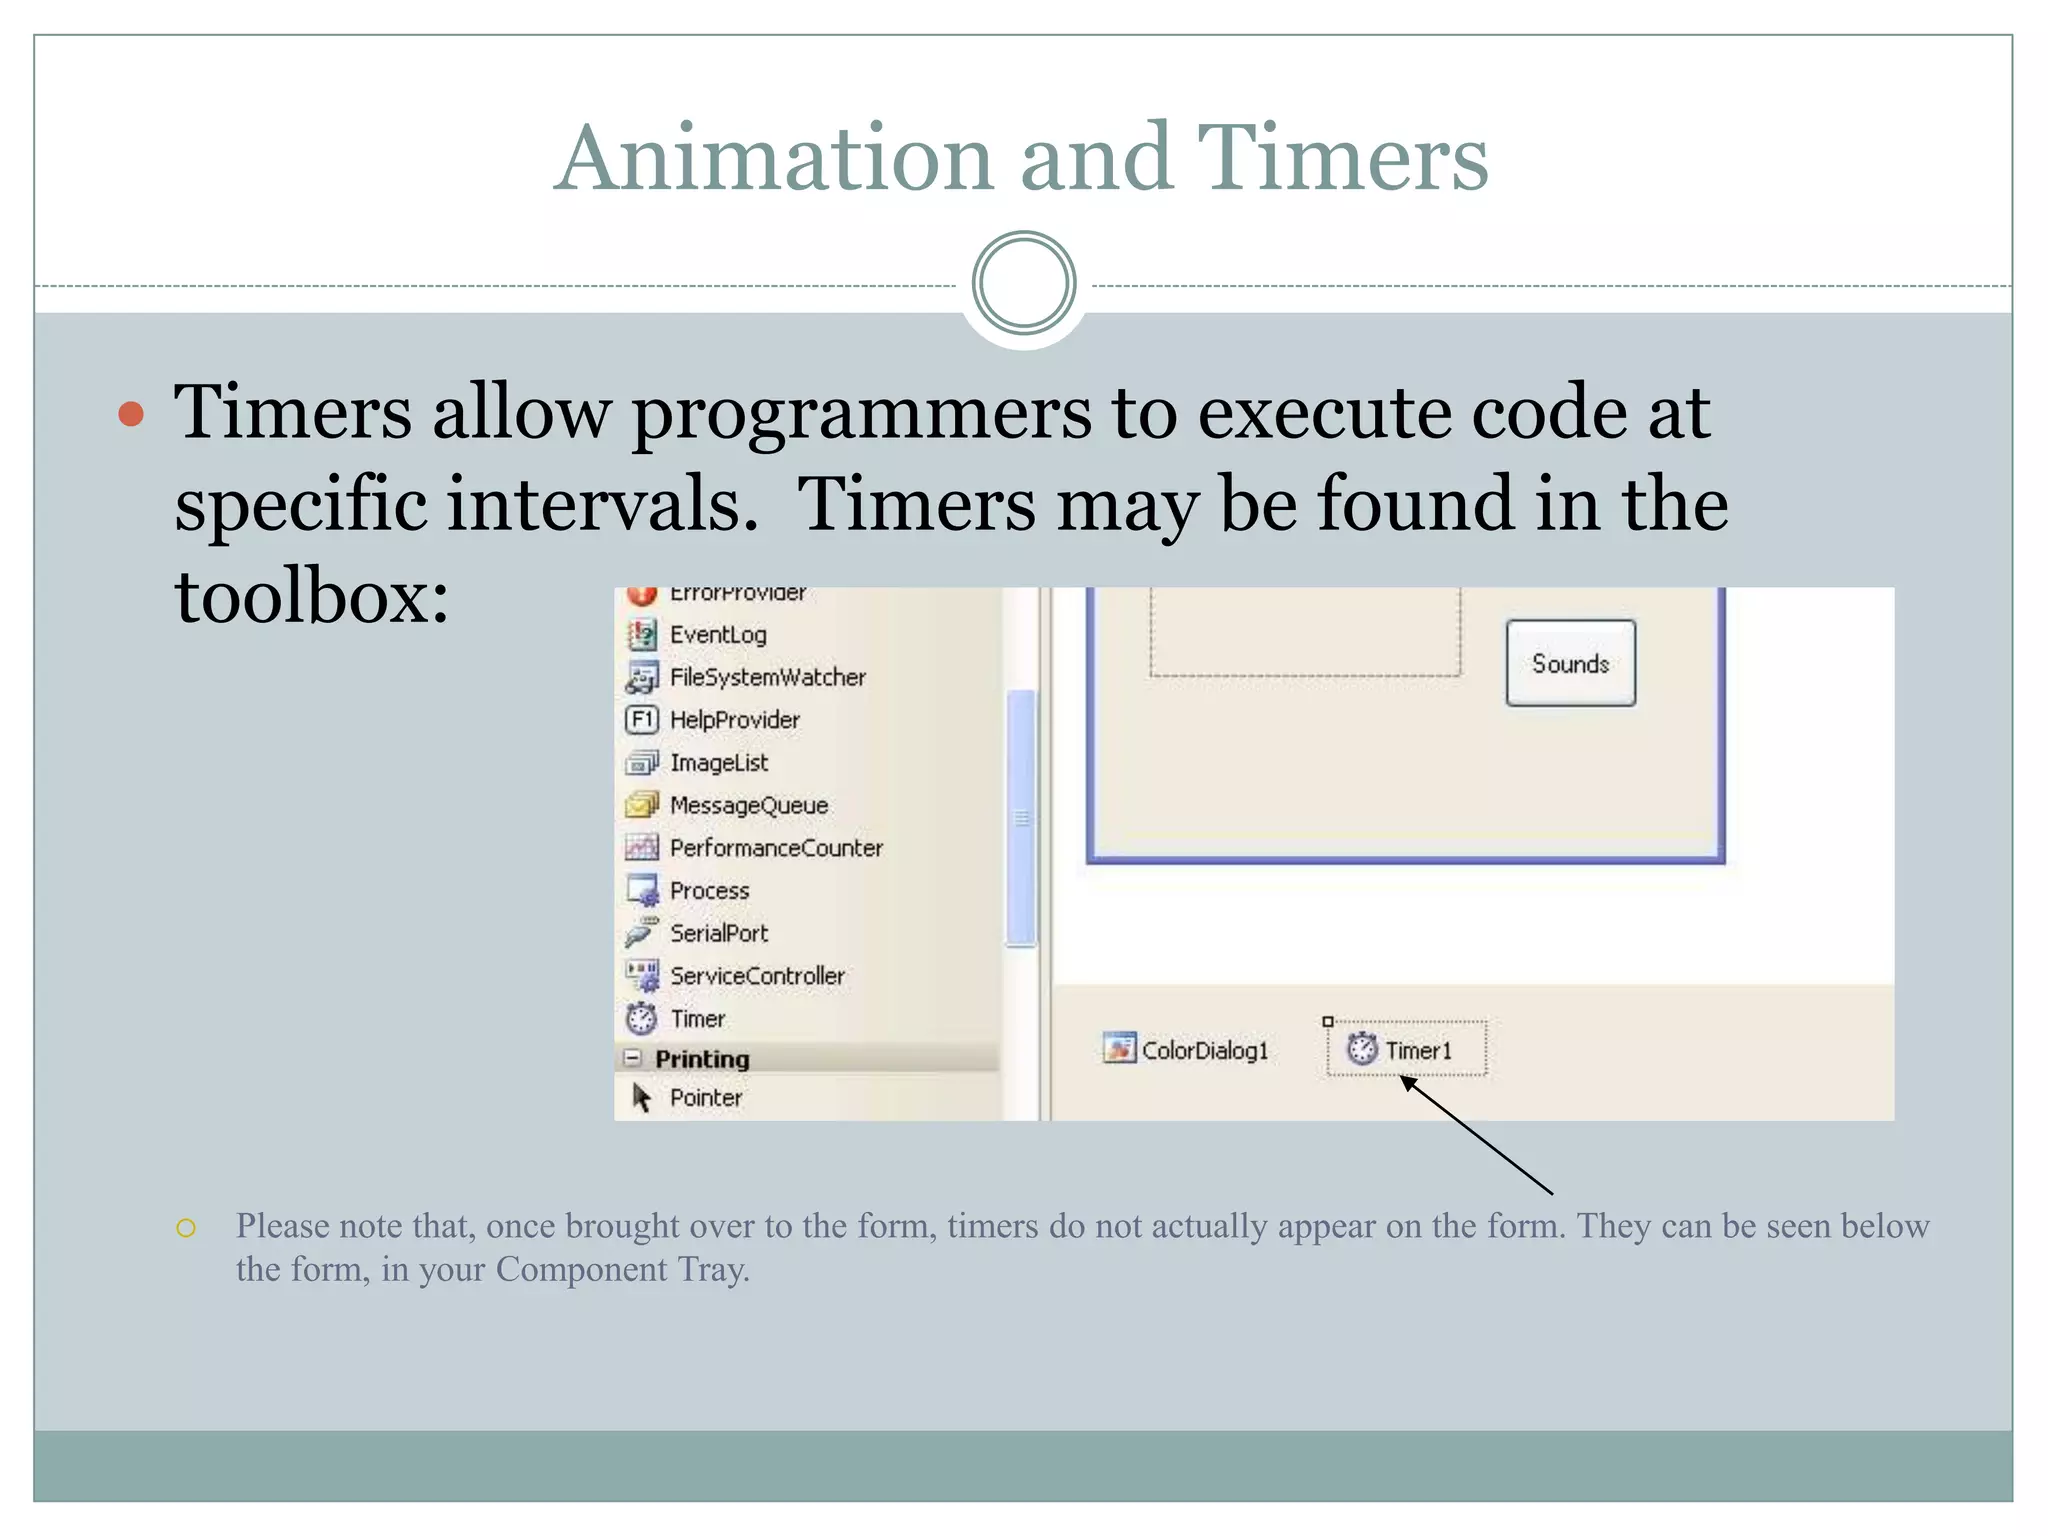
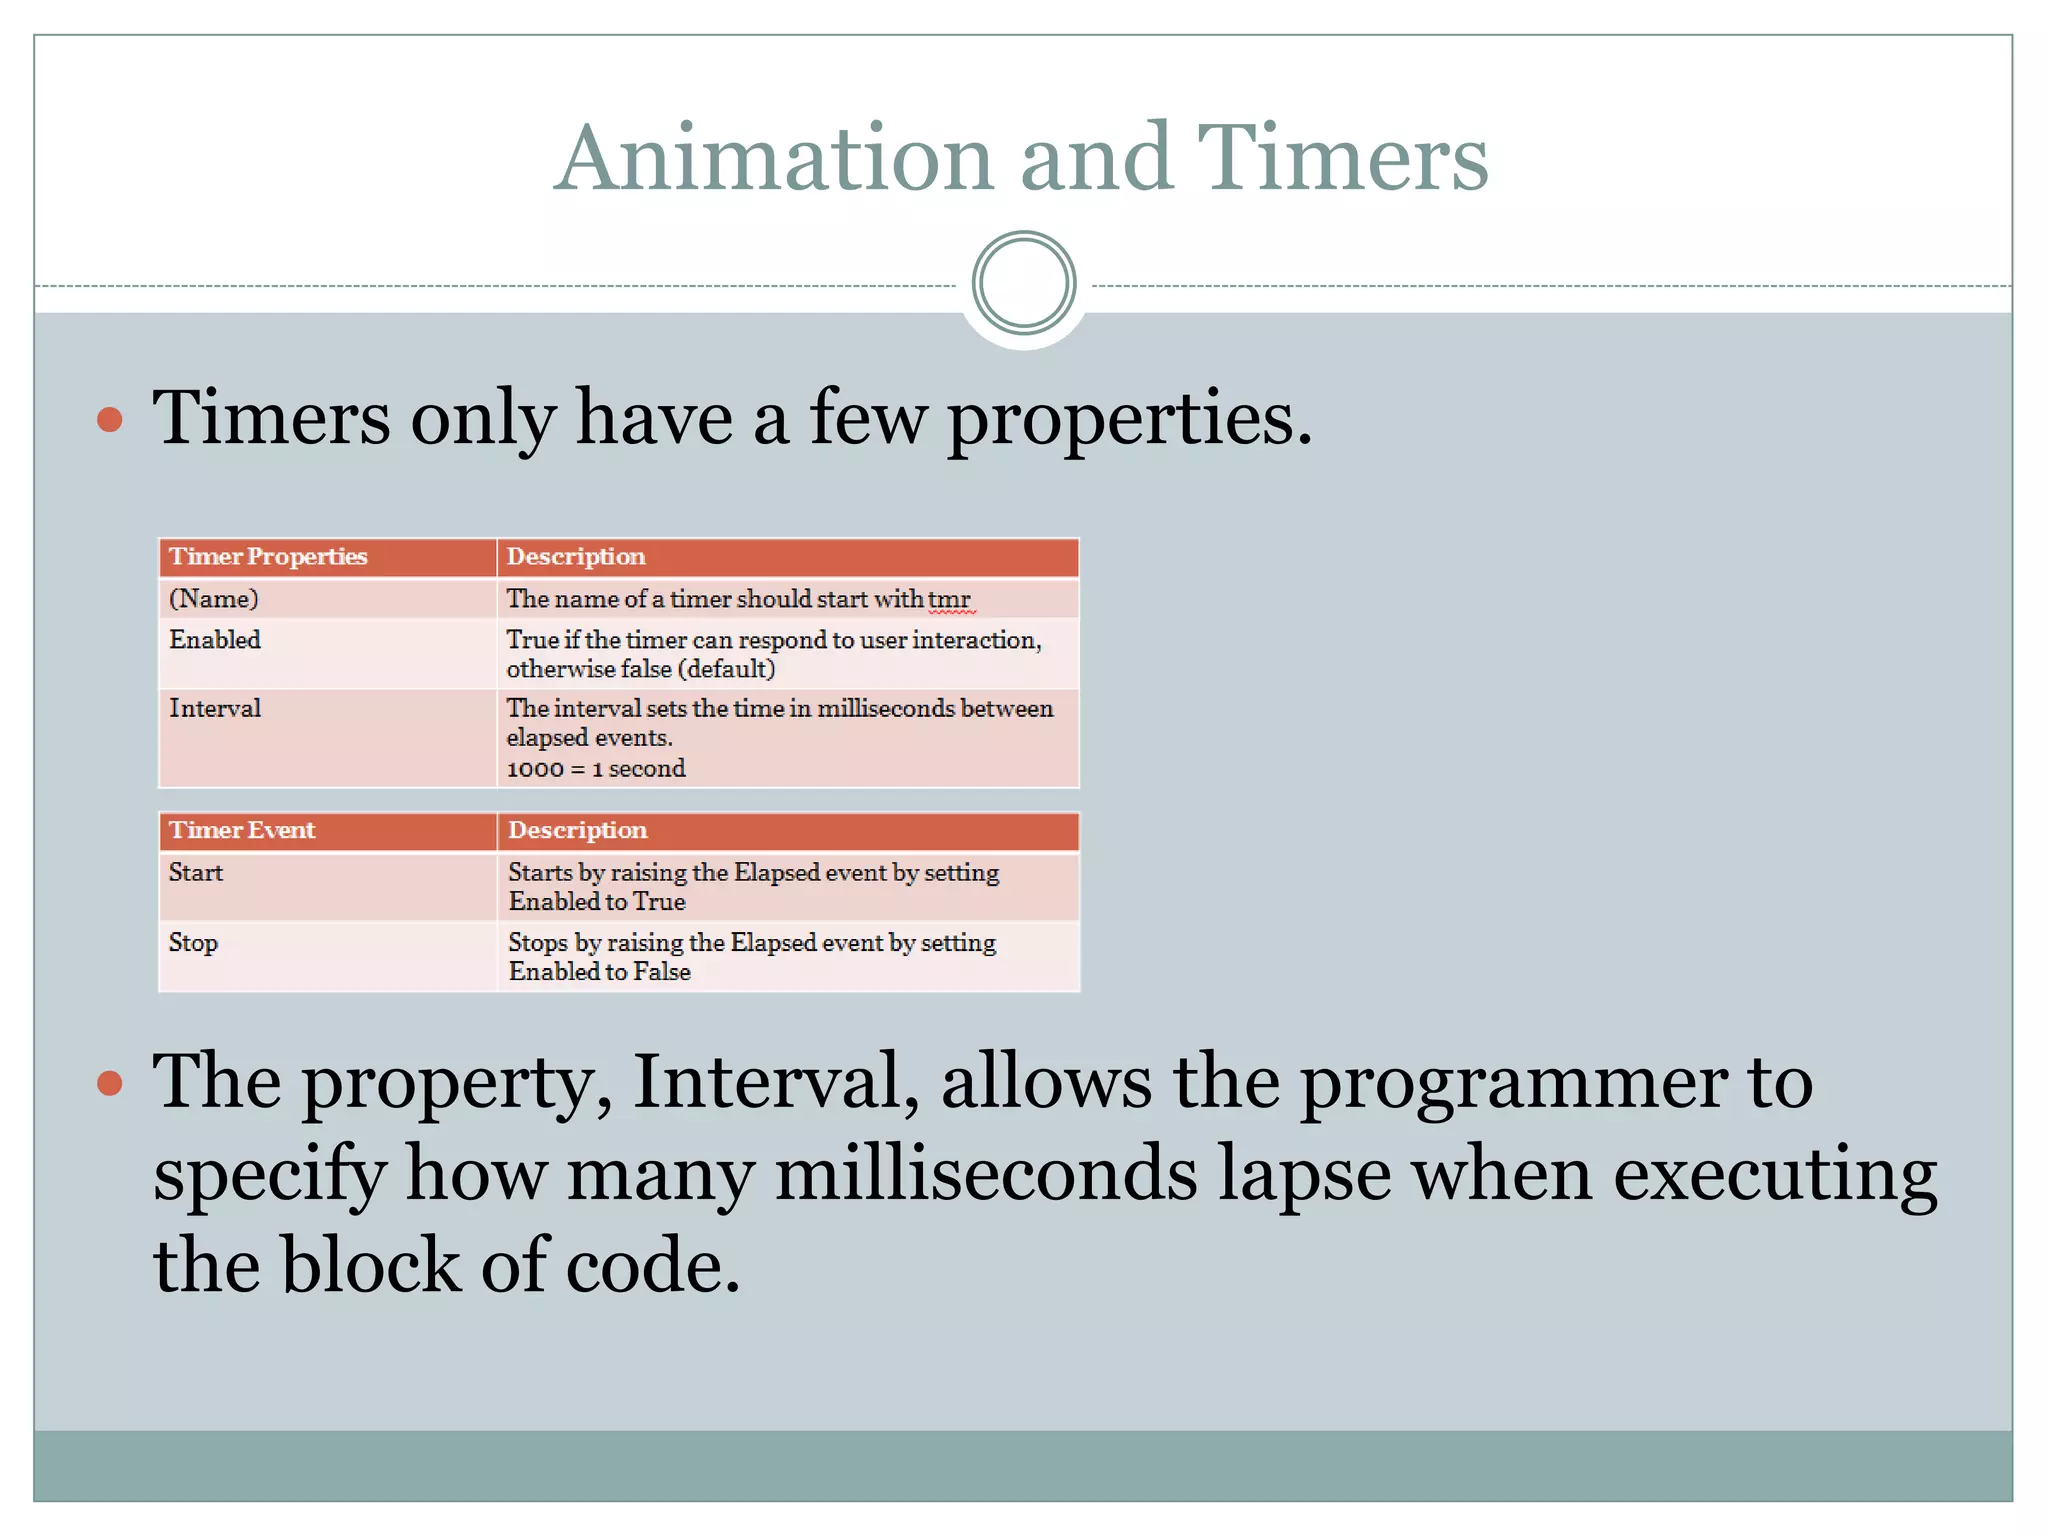
H O N O R S C O M P U T E R P R O G R A M M I N G I
Module 14
Objective/Essential Standard
 Essential Standard
 8.00 Apply procedures to develop graphics applications
 Indicator
 8.01 Understand coordinate systems. (3%)
 8.02 Apply Procedures to Create Picture Boxes Using Images.
(5%)
Coordinate Systems
 With Visual Studio, any object, whether it is a form or a
label uses the same coordinate system.
 The top left corner, or the origin is 0, 0.
 The bottom right corner is the width and height of the
control (in this case, the label).
0, 0
Width, Height
Coordinate Systems
 The default coordinate system is made up of rows
and columns of pixels.
 The pixels are the smallest points you can locate on the form.
Coordinate Systems
 As you increase the x, you move across to the right.
 As you increase the y, you move down.
(0, 0)
x = 50
Y = 50
(50, 50)
Coordinate Systems
 You can also indicate the width of the object by using its
Width property.
 Likewise you can indicate the height of the object using
its Height property.
0, 0
lblDraw.Width
lblDraw.Height
Coordinate Systems
 To indicate the form’s height
maxHeight = Me.Height
 To indicate the form’s width
maxWidth = Me.Width
 You can use the Height and
Width properties to set
relative positions.
Form’s Width
and Height
Adding Images to Your Project
1. In the Solution Explorer,
double-click My Project
2. The following is displayed.
Adding Images to Your Project
3. Select the Resources tab.
4. Go to the Strings tab
 click the drop-down arrow.
 Select Images
5. Go to the Add Resource tab
 click the drop-down arrow.
6. To add an existing image, select Add Existing.
To create and add an image, select New Image,
then the image type.
PictureBox Control
 The PictureBox control displays an image.
 The image can be one of the following formats.
 Bitmap
 GIF
 JPEG
 Best use
 Enhanced Metafile
 Icon
Adding A PictureBox Control
 Click the PictureBox control in the ToolBox.
 Draw the rectangular picture box on your form.
 Set the Properties.
PictureBox Control
PictureBox Properties Description
(Name) The name of a PictureBox should start with pic
Image Sets the image to display in the PictureBox
SizeMode
Normal (Default)
StretchImage
AutoSize
CenterImage
Zoom
Controls the image sizing and position
places in the top-left corner of the Picture Box
resizes the image to fit the PictureBox
resizes the PictureBox to fit the image
puts the image in the middle of the PictureBox
resizes the image to fit the PictureBox but maintains the
original ratio
PictureBox Event Description
Click Occurs when the user clicks the PictureBox
Adding Images to the PictureBox Control
 Select the PictureBox
 Click in the Image property area
 The Ellipsis displays.
 The Select Resource dialog displays
Adding Images to the PictureBox Control
 Your image will be added to the list.
Using the PictureBox
 You can set the Image property during runtime
Me.PictureBox.Image = My.Resources.ImgName
 Example
Changing How the Image Displays
 Remember the SizeMode property of the PictureBox
will change how the image is displayed.
 To change how the image is displayed at runtime,
you can change the SizeMode property.
Me.PictureBox.SizeMode = PictureBoxSizeMode.SizeModeValue
 Where the SizeModeValue is one of the choices given: Normal
(Default), StretchImage , AutoSize, CenterImage, Zoom
Animation and Timers
 What if a programmer wanted to load multiple
images to simulate animation?
 This requires VB to lay one image on top of another
to create the illusion of animation.
 This may be done using a new object from the
components area of your toolbox called a timer.
 A timer generates recurring events. Code inside the
timer event will recur until the timer is stopped.
Animation and Timers
 Timers allow programmers to execute code at
specific intervals. Timers may be found in the
toolbox:
 Please note that, once brought over to the form, timers do not actually appear on the form. They can be seen below
the form, in your Component Tray.
Animation and Timers
 Timers only have a few properties.
 The property, Interval, allows the programmer to
specify how many milliseconds lapse when executing
the block of code.

M14 overview

  • 1.
    H O NO R S C O M P U T E R P R O G R A M M I N G I Module 14
  • 2.
    Objective/Essential Standard  EssentialStandard  8.00 Apply procedures to develop graphics applications  Indicator  8.01 Understand coordinate systems. (3%)  8.02 Apply Procedures to Create Picture Boxes Using Images. (5%)
  • 3.
    Coordinate Systems  WithVisual Studio, any object, whether it is a form or a label uses the same coordinate system.  The top left corner, or the origin is 0, 0.  The bottom right corner is the width and height of the control (in this case, the label). 0, 0 Width, Height
  • 4.
    Coordinate Systems  Thedefault coordinate system is made up of rows and columns of pixels.  The pixels are the smallest points you can locate on the form.
  • 5.
    Coordinate Systems  Asyou increase the x, you move across to the right.  As you increase the y, you move down. (0, 0) x = 50 Y = 50 (50, 50)
  • 6.
    Coordinate Systems  Youcan also indicate the width of the object by using its Width property.  Likewise you can indicate the height of the object using its Height property. 0, 0 lblDraw.Width lblDraw.Height
  • 7.
    Coordinate Systems  Toindicate the form’s height maxHeight = Me.Height  To indicate the form’s width maxWidth = Me.Width  You can use the Height and Width properties to set relative positions. Form’s Width and Height
  • 8.
    Adding Images toYour Project 1. In the Solution Explorer, double-click My Project 2. The following is displayed.
  • 9.
    Adding Images toYour Project 3. Select the Resources tab. 4. Go to the Strings tab  click the drop-down arrow.  Select Images 5. Go to the Add Resource tab  click the drop-down arrow. 6. To add an existing image, select Add Existing. To create and add an image, select New Image, then the image type.
  • 10.
    PictureBox Control  ThePictureBox control displays an image.  The image can be one of the following formats.  Bitmap  GIF  JPEG  Best use  Enhanced Metafile  Icon
  • 11.
    Adding A PictureBoxControl  Click the PictureBox control in the ToolBox.  Draw the rectangular picture box on your form.  Set the Properties.
  • 12.
    PictureBox Control PictureBox PropertiesDescription (Name) The name of a PictureBox should start with pic Image Sets the image to display in the PictureBox SizeMode Normal (Default) StretchImage AutoSize CenterImage Zoom Controls the image sizing and position places in the top-left corner of the Picture Box resizes the image to fit the PictureBox resizes the PictureBox to fit the image puts the image in the middle of the PictureBox resizes the image to fit the PictureBox but maintains the original ratio PictureBox Event Description Click Occurs when the user clicks the PictureBox
  • 13.
    Adding Images tothe PictureBox Control  Select the PictureBox  Click in the Image property area  The Ellipsis displays.  The Select Resource dialog displays
  • 14.
    Adding Images tothe PictureBox Control
  • 15.
    Adding Images tothe PictureBox Control  Your image will be added to the list.
  • 16.
    Using the PictureBox You can set the Image property during runtime Me.PictureBox.Image = My.Resources.ImgName  Example
  • 17.
    Changing How theImage Displays  Remember the SizeMode property of the PictureBox will change how the image is displayed.  To change how the image is displayed at runtime, you can change the SizeMode property. Me.PictureBox.SizeMode = PictureBoxSizeMode.SizeModeValue  Where the SizeModeValue is one of the choices given: Normal (Default), StretchImage , AutoSize, CenterImage, Zoom
  • 18.
    Animation and Timers What if a programmer wanted to load multiple images to simulate animation?  This requires VB to lay one image on top of another to create the illusion of animation.  This may be done using a new object from the components area of your toolbox called a timer.  A timer generates recurring events. Code inside the timer event will recur until the timer is stopped.
  • 19.
    Animation and Timers Timers allow programmers to execute code at specific intervals. Timers may be found in the toolbox:  Please note that, once brought over to the form, timers do not actually appear on the form. They can be seen below the form, in your Component Tray.
  • 20.
    Animation and Timers Timers only have a few properties.  The property, Interval, allows the programmer to specify how many milliseconds lapse when executing the block of code.