Agenda
● Introduction tolibrary
● Microcontrollers Basics
● ESP32 Board
● Why ESP32
● Esp32 features
● What we can do with this board
● Peripherals
● ESP-IDF
● ESP-IDF Libraries
● Environment Setup
● Development Tools
● Visual Studio Code
● Serial Monitor
● Problem you can face
3.
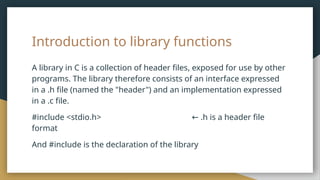
Introduction to libraryfunctions
A library in C is a collection of header files, exposed for use by other
programs. The library therefore consists of an interface expressed
in a .h file (named the "header") and an implementation expressed
in a .c file.
#include <stdio.h> .h is a header file
←
format
And #include is the declaration of the library
4.
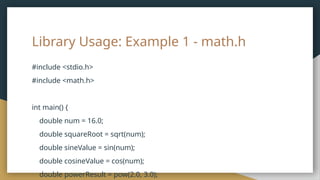
math.h
Math.h is aone of the library you need on a day to day basic
Declaration:
#include <math.h>
Include this library if you want any math related functions like
cos,sin,power,root ect.
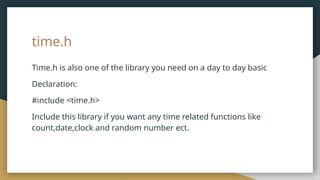
time.h
Time.h is alsoone of the library you need on a day to day basic
Declaration:
#include <time.h>
Include this library if you want any time related functions like
count,date,clock and random number ect.
7.
Library Usage: Example2- time.h
Printing current time and date using library functions
#include <stdio.h>
#include <time.h>
int main() {
// Get the current time
time_t currentTime = time(NULL);
// Convert the current time to local time
struct tm *localTime = localtime(¤tTime);
// Format the local time as a string
char dateTime[100];
strftime(dateTime, sizeof(dateTime), "%Y-%m-%d %H:%M:%S", localTime);
// Print the current date and time
printf("Current Date and Time: %sn", dateTime);
return 0;
}
8.
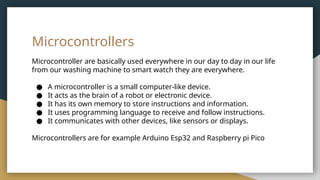
Microcontrollers
Microcontroller are basicallyused everywhere in our day to day in our life
from our washing machine to smart watch they are everywhere.
● A microcontroller is a small computer-like device.
● It acts as the brain of a robot or electronic device.
● It has its own memory to store instructions and information.
● It uses programming language to receive and follow instructions.
● It communicates with other devices, like sensors or displays.
Microcontrollers are for example Arduino Esp32 and Raspberry pi Pico
9.
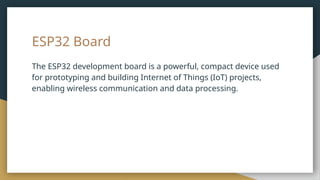
ESP32 Board
The ESP32development board is a powerful, compact device used
for prototyping and building Internet of Things (IoT) projects,
enabling wireless communication and data processing.
10.
Why ESP32?
Why arewe using ESP32, well it's because of its built-in wifi and bluetooth.
Which is all we need for IoT and with its price tag it's even more favourable
to use it.
It's easy to set up and is beginner friendly
11.
Esp32 features
Features ofESP32 are :
● Dual-core processor for efficient multitasking
● Wi-Fi and Bluetooth connectivity for wireless communication
● Abundant GPIO pins for connecting various sensors and peripherals
● Built-in support for ADC, DAC, I2C, SPI, UART, and other interfaces
● Integrated low-power modes for energy efficiency
● Support for secure communication protocols such as SSL/TLS
● Programmable using various development environments, including
Arduino IDE and ESP-IDF
● Libraries, Documentation, and community support readily available
12.
While the optionis limitless we can make something along these
lines with this course.
● Image Processing
● Robotics
● Alexa
What we can do with this board
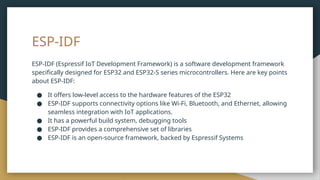
ESP-IDF
ESP-IDF (Espressif IoTDevelopment Framework) is a software development framework
specifically designed for ESP32 and ESP32-S series microcontrollers. Here are key points
about ESP-IDF:
● It offers low-level access to the hardware features of the ESP32
● ESP-IDF supports connectivity options like Wi-Fi, Bluetooth, and Ethernet, allowing
seamless integration with IoT applications.
● It has a powerful build system, debugging tools
● ESP-IDF provides a comprehensive set of libraries
● ESP-IDF is an open-source framework, backed by Espressif Systems
15.
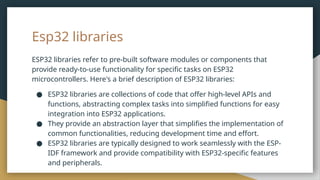
Esp32 libraries
ESP32 librariesrefer to pre-built software modules or components that
provide ready-to-use functionality for specific tasks on ESP32
microcontrollers. Here's a brief description of ESP32 libraries:
● ESP32 libraries are collections of code that offer high-level APIs and
functions, abstracting complex tasks into simplified functions for easy
integration into ESP32 applications.
● They provide an abstraction layer that simplifies the implementation of
common functionalities, reducing development time and effort.
● ESP32 libraries are typically designed to work seamlessly with the ESP-
IDF framework and provide compatibility with ESP32-specific features
and peripherals.
16.
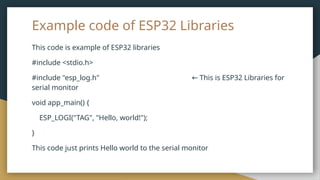
Example code ofESP32 Libraries
This code is example of ESP32 libraries
#include <stdio.h>
#include "esp_log.h" This is ESP32 Libraries for
←
serial monitor
void app_main() {
ESP_LOGI("TAG", "Hello, world!");
}
This code just prints Hello world to the serial monitor
17.
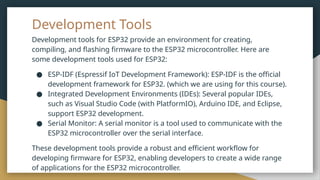
Development Tools
Development toolsfor ESP32 provide an environment for creating,
compiling, and flashing firmware to the ESP32 microcontroller. Here are
some development tools used for ESP32:
● ESP-IDF (Espressif IoT Development Framework): ESP-IDF is the official
development framework for ESP32. (which we are using for this course).
● Integrated Development Environments (IDEs): Several popular IDEs,
such as Visual Studio Code (with PlatformIO), Arduino IDE, and Eclipse,
support ESP32 development.
● Serial Monitor: A serial monitor is a tool used to communicate with the
ESP32 microcontroller over the serial interface.
These development tools provide a robust and efficient workflow for
developing firmware for ESP32, enabling developers to create a wide range
of applications for the ESP32 microcontroller.
18.
Environment Setup
To setup the environment for ESP-IDF (Espressif IoT Development Framework) development, follow these steps:
● Install Prerequisites:
○ Install Python: ESP-IDF requires Python 3.7 or newer. Download and install Python from the official website
(https://www.python.org/) and make sure it's added to the system's PATH.
● Install VSCode and Extensions:
○ Download and install Visual Studio Code (VSCode) from the official website (https://code.visualstudio.com/)
and follow the installation instructions.
○ Open VSCode and install the following extensions:
○ ESP-IDF: Provides a platform for embedded development.
○ C/C++: Adds C/C++ language support for code editing and IntelliSense.
● Configure ESP-IDF:
○ Run idf.py set-target <target>: Replace <target> with the target hardware you're using (e.g., esp32 or
esp32s2). This sets the target hardware for the ESP-IDF.
○ Run idf.py menuconfig: This opens the configuration menu where you can set various options specific to
your project, such as WiFi settings, GPIO configurations, etc.
19.
● Build andFlash:
○ Create a new project: Use the idf.py create-project command to create a new project
based on the ESP-IDF template.
○ Build the project: Run idf.py build to compile the project and generate the firmware
image.
○ Flash the firmware: Connect your ESP32 device to the computer, and run idf.py -p <port>
flash to flash the firmware onto the device. Replace <port> with the appropriate serial
port. Such as COM4,COM3.
● Develop and Debug:
○ Write your application code: Open the project in your preferred text editor or IDE and
start developing your application using the ESP-IDF APIs.
○ Debug your application: ESP-IDF provides tools for debugging, such as breakpoints, step-
by-step execution, and real-time logging. Use idf.py monitor to view the logs and debug
output from the device.
These are the basic steps to set up the environment for ESP-IDF development. Refer to the ESP-IDF
documentation for more details and advanced usage.
20.
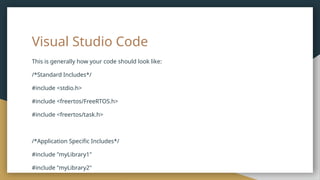
Visual Studio Code
Thisis generally how your code should look like:
/*Standard Includes*/
#include <stdio.h>
#include <freertos/FreeRTOS.h>
#include <freertos/task.h>
/*Application Specific Includes*/
#include "myLibrary1"
#include "myLibrary2"
21.
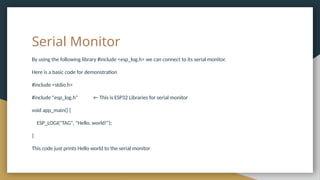
Serial Monitor
By usingthe following library #include <esp_log.h> we can connect to its serial monitor.
Here is a basic code for demonstration
#include <stdio.h>
#include "esp_log.h" ← This is ESP32 Libraries for serial monitor
void app_main() {
ESP_LOGI("TAG", "Hello, world!");
}
This code just prints Hello world to the serial monitor
22.
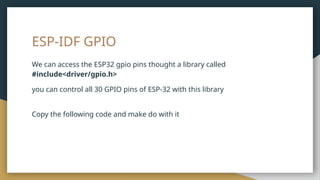
ESP-IDF GPIO
We canaccess the ESP32 gpio pins thought a library called
#include<driver/gpio.h>
you can control all 30 GPIO pins of ESP-32 with this library
Copy the following code and make do with it
23.
Blinking Code
Using #include<driver/gpio.h>you can control GPIO pins of ESP-32 This Code will blink
esp-32 in-built led every second. Feel free to copy it can run it on your end.
#include <stdio.h>
#include <freertos/FreeRTOS.h>
#include <freertos/task.h>
#include <driver/gpio.h>
#define BLINK_GPIO GPIO_NUM_2
24.
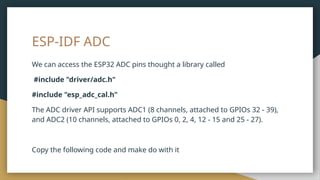
ESP-IDF ADC
We canaccess the ESP32 ADC pins thought a library called
#include "driver/adc.h"
#include "esp_adc_cal.h"
The ADC driver API supports ADC1 (8 channels, attached to GPIOs 32 - 39),
and ADC2 (10 channels, attached to GPIOs 0, 2, 4, 12 - 15 and 25 - 27).
Copy the following code and make do with it
25.
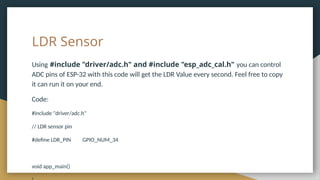
LDR Sensor
Using #include"driver/adc.h" and #include "esp_adc_cal.h" you can control
ADC pins of ESP-32 with this code will get the LDR Value every second. Feel free to copy
it can run it on your end.
Code:
#include "driver/adc.h"
// LDR sensor pin
#define LDR_PIN GPIO_NUM_34
void app_main()
26.
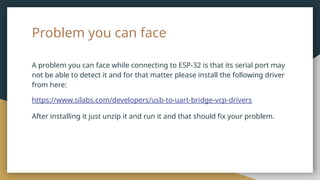
Problem you canface
A problem you can face while connecting to ESP-32 is that its serial port may
not be able to detect it and for that matter please install the following driver
from here:
https://www.silabs.com/developers/usb-to-uart-bridge-vcp-drivers
After installing it just unzip it and run it and that should fix your problem.


![Library Usage: Example 2- time.h
Printing current time and date using library functions
#include <stdio.h>
#include <time.h>
int main() {
// Get the current time
time_t currentTime = time(NULL);
// Convert the current time to local time
struct tm *localTime = localtime(¤tTime);
// Format the local time as a string
char dateTime[100];
strftime(dateTime, sizeof(dateTime), "%Y-%m-%d %H:%M:%S", localTime);
// Print the current date and time
printf("Current Date and Time: %sn", dateTime);
return 0;
}](https://image.slidesharecdn.com/lecture3bclibraryesp32-250810085153-4a6b43f0/85/Lecture-3b-C-Library-_-ESP32-pptxjfjfjffkkfkfk-7-320.jpg)


![Introduction to ESP32 Programming [Road to RIoT 2017]](https://cdn.slidesharecdn.com/ss_thumbnails/roadtoriotsurabayagettingstartedesp32-170726155154-thumbnail.jpg?width=640&height=640&fit=bounds)


![Introduction to RIoT Hardware Kits & ESP32 Programming [Road to RIoT 2017]](https://cdn.slidesharecdn.com/ss_thumbnails/roadtoriotjakartariothardwarekitsesp32programming-170806090914-thumbnail.jpg?width=640&height=640&fit=bounds)