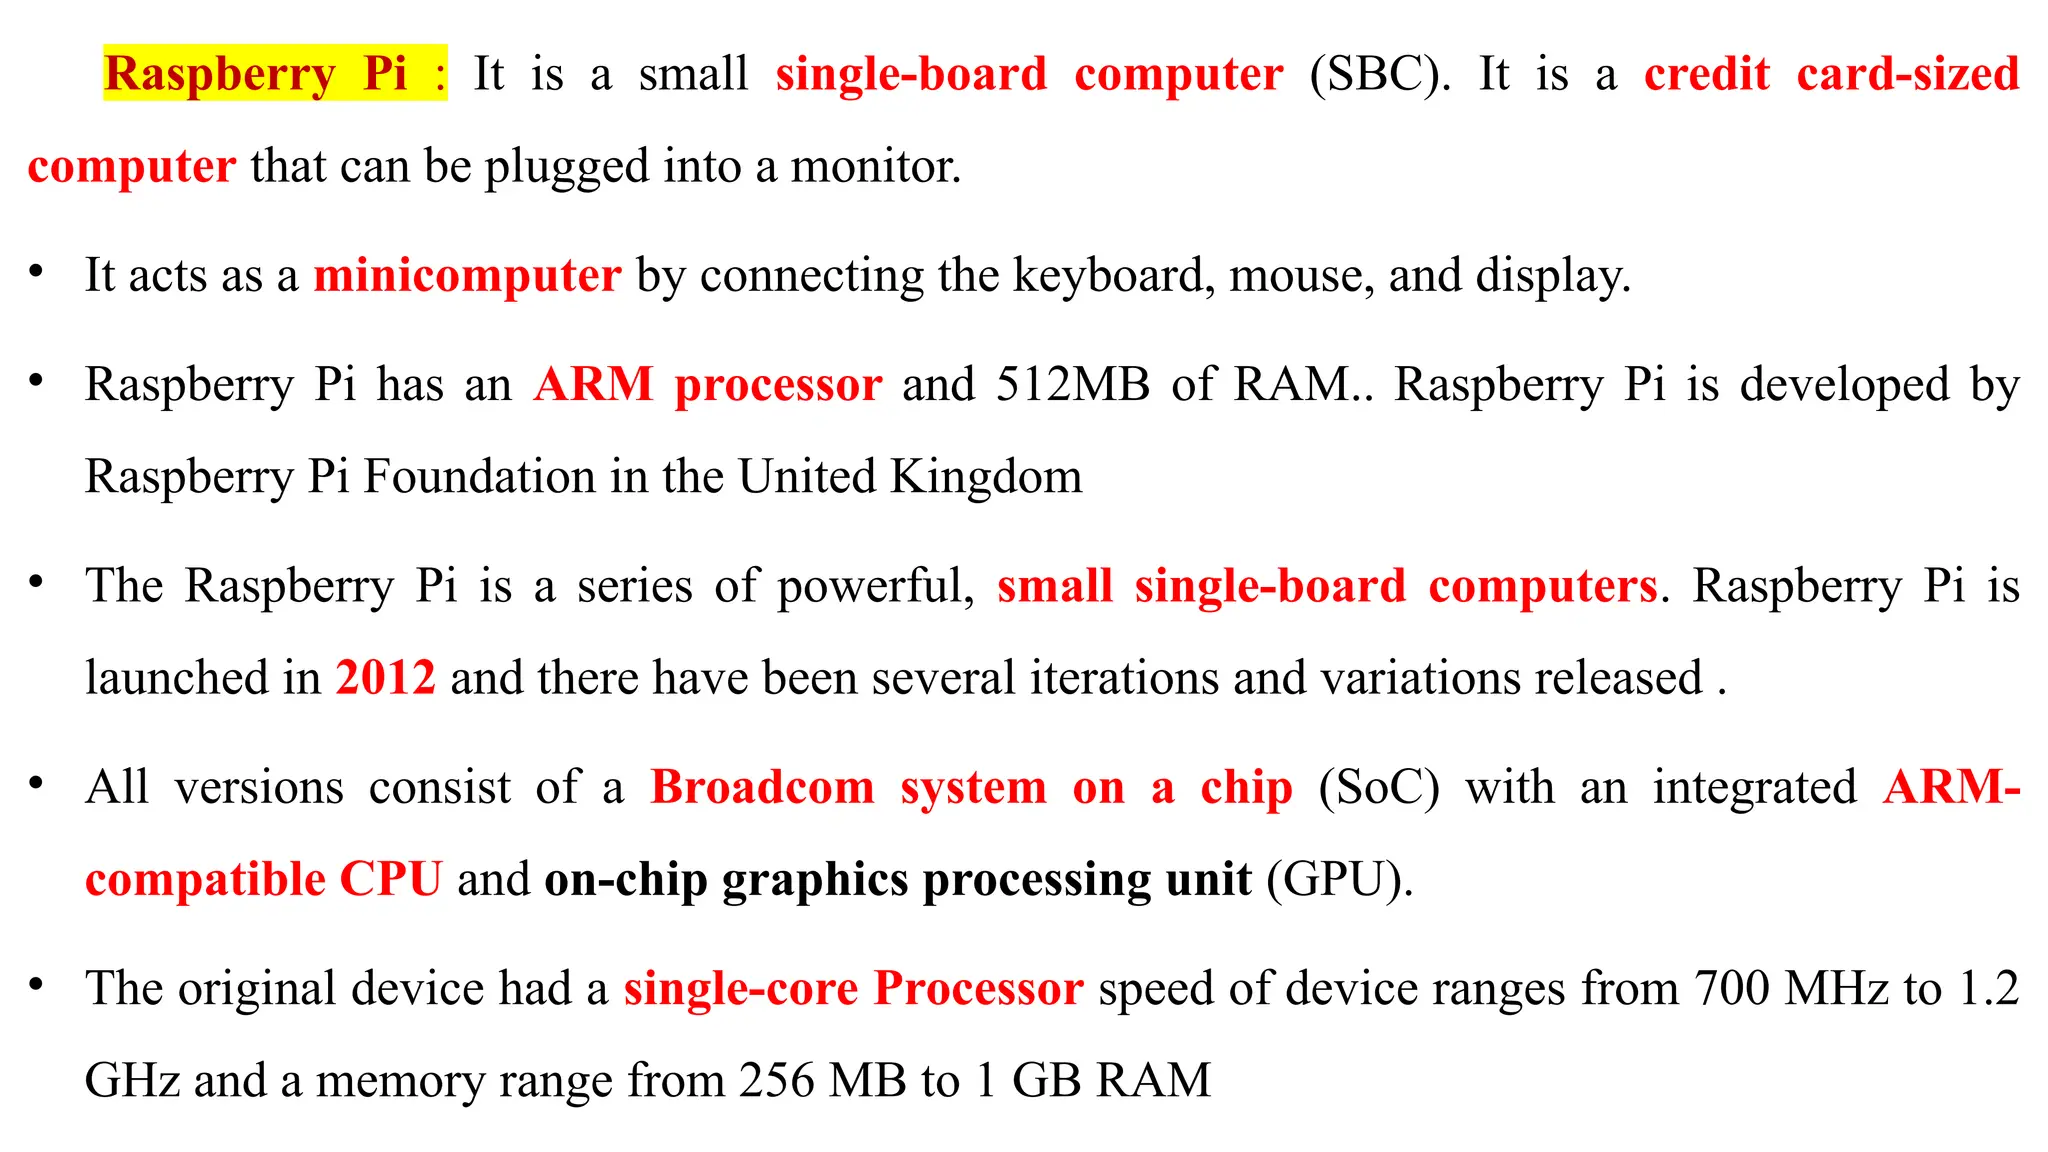
Raspberry Pi :It is a small single-board computer (SBC). It is a credit card-sized
computer that can be plugged into a monitor.
• It acts as a minicomputer by connecting the keyboard, mouse, and display.
• Raspberry Pi has an ARM processor and 512MB of RAM.. Raspberry Pi is developed by
Raspberry Pi Foundation in the United Kingdom
• The Raspberry Pi is a series of powerful, small single-board computers. Raspberry Pi is
launched in 2012 and there have been several iterations and variations released .
• All versions consist of a Broadcom system on a chip (SoC) with an integrated ARM-
compatible CPU and on-chip graphics processing unit (GPU).
• The original device had a single-core Processor speed of device ranges from 700 MHz to 1.2
GHz and a memory range from 256 MB to 1 GB RAM
Requirements: To useyour Raspberry Pi board, you need to buy a few other bits and pieces.
1. Monitor: The Raspberry Pi uses a high-definition multimedia interface (HDMI) connection
for video feed, and we can connect our monitor directly with this interface connection, if your
monitor has an HDMI socket.
2. Television: In the similar way, if we have High-Definition Television (HD TV), we can also
connect it to your Raspberry Pi using an HDMI socket. It will give you a crisper picture.
3. USB hub: Depending on the model, Raspberry Pi has 1, 2, or 4 Universal Serial Bus (USB)
sockets. we should consider using powered USB to connect other devices to your Raspberry Pi
at the same time. Keyboard and Mouse. Raspberry Pi only supports the USB keyboards and
mouse.
6.
4. SD orMicroSD card: As we know that the Raspberry Pi does not have a hard drive, so we
need to use SD cards or MicroSD cards (depending on the model) for storage.
5. USB Wi-Fi adapter: If we are going to use model A and A+ then, we need to buy a USB Wi-
Fi adapter for connecting to the internet because these Raspberry models do not have an Ethernet
socket.
6. External hard drive: If we want to share our collection of music and movies, we need to use
an external hard drive with our Raspberry Pi model. we can connect the same by using a powered
USB cable.
7. Raspberry Pi Camera Module: The Raspberry Pi camera module originated at Raspberry Pi
foundation. It is an 8MP (megapixel) fixed focus camera that can be used to shoot high-definition
video and take still photos. For wildlife photography at night.
7.
8. Speakers: TheRaspberry Pi has a standard audio out socket. This socket is compatible with
headphones and speakers that use a 3.5mm audio jack. We can plug headphones directly to it.
9.Power supply: For power supply, it uses a Micro USB connector. Hence theoretically, it is
compatible with a mobile phone and tablet charger.
Following are some of the cables, which you need for the connections to the Raspberry Pi
computer −
1. HDMI cable
2. HDMI-to-DVI adapter, if you are using a Digital Visual Interface (DVI) monitor.
3. RCA cable, if you want to connect to an older television.
4. Audio cable
5. Ethernet cable
8.
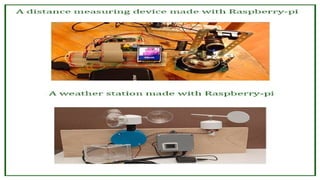
Examples of Raspberrypi projects: –
• It can be turned into a weather station by connecting some instruments to it for check the
temperature, wind speed, humidity etc…
• It can be turned into a home surveillance system due to its small size; by adding some
cameras to it the security network .
• If you love reading books it can also become a storage device for storing thousands of eBooks
10.
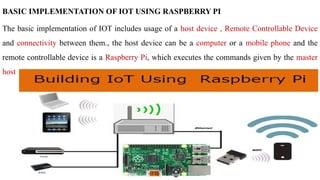
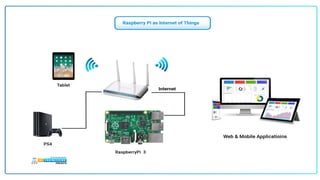
BASIC IMPLEMENTATION OFIOT USING RASPBERRY PI
The basic implementation of IOT includes usage of a host device , Remote Controllable Device
and connectivity between them., the host device can be a computer or a mobile phone and the
remote controllable device is a Raspberry Pi, which executes the commands given by the master
host
11.
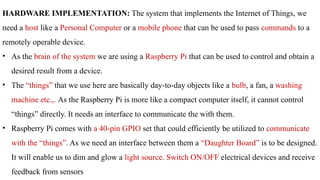
HARDWARE IMPLEMENTATION: Thesystem that implements the Internet of Things, we
need a host like a Personal Computer or a mobile phone that can be used to pass commands to a
remotely operable device.
• As the brain of the system we are using a Raspberry Pi that can be used to control and obtain a
desired result from a device.
• The “things” that we use here are basically day-to-day objects like a bulb, a fan, a washing
machine etc.,. As the Raspberry Pi is more like a compact computer itself, it cannot control
“things” directly. It needs an interface to communicate the with them.
• Raspberry Pi comes with a 40-pin GPIO set that could efficiently be utilized to communicate
with the “things”. As we need an interface between them a “Daughter Board” is to be designed.
It will enable us to dim and glow a light source. Switch ON/OFF electrical devices and receive
feedback from sensors
12.
SOFTWARE IMPLEMENTATION:
• Whenit comes to Raspberry Pi, an OS must be installed to control and configure it.
• In the case of the Daughter Board, python scripts are to be coded to work with the “things”.
• We have, a communications platform for IOT devices that enables device setup and user
interaction from mobile devices and the web,
• It can be used to accomplish communication between Host device and the Raspberry Pi.
OPERATIONS TO DEMOSTRATE
· Remotely dim and glow a light source (an LED).
· Switch electrical devices ON/OFF based upon their state remotely (Staircase Control).
Receive feedback from sensing elements connected to the daughter board
13.
Linux on Raspberrypi
1. Choosing a Linux Distribution for Raspberry Pi
•Raspberry Pi OS (official, Debian-based, best for general use)
•Ubuntu (more feature-rich, great for development)
•DietPi (lightweight, optimized for performance)
•Arch Linux ARM (minimalist and rolling-release)
2. Installing Linux on Raspberry Pi
we can install Linux on a Raspberry Pi using these steps:
1.Download an OS image from the official website of your chosen distribution.
2.Flash the image onto a microSD card using tools like:
•Raspberry Pi Imager (recommended)
•Balena Etcher
14.
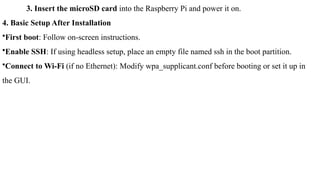
3. Insert themicroSD card into the Raspberry Pi and power it on.
4. Basic Setup After Installation
•First boot: Follow on-screen instructions.
•Enable SSH: If using headless setup, place an empty file named ssh in the boot partition.
•Connect to Wi-Fi (if no Ethernet): Modify wpa_supplicant.conf before booting or set it up in
the GUI.
15.
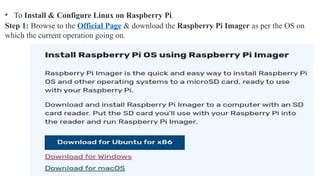
• To Install& Configure Linux on Raspberry Pi.
Step 1: Browse to the Official Page & download the Raspberry Pi Imager as per the OS on
which the current operation going on.
16.
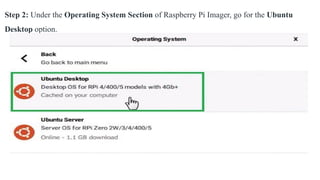
Step 2: Underthe Operating System Section of Raspberry Pi Imager, go for the Ubuntu
Desktop option.
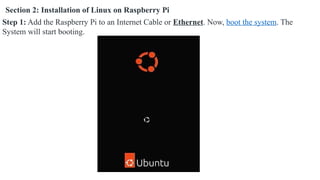
Section 2: Installationof Linux on Raspberry Pi
Step 1: Add the Raspberry Pi to an Internet Cable or Ethernet. Now, boot the system. The
System will start booting.
19.
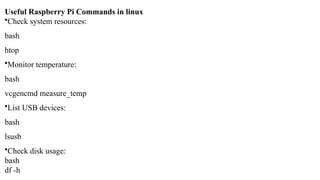
Useful Raspberry PiCommands in linux
•Check system resources:
bash
htop
•Monitor temperature:
bash
vcgencmd measure_temp
•List USB devices:
bash
lsusb
•Check disk usage:
bash
df -h
21.
These interfaces allowyou to build custom IoT solutions.
Interfaces
1.GPIO (General Purpose Input/Output) pins: Connect to sensors, actuators, and other
devices. We can use GPIO pins to control LEDs, motors, and more.
2.USB ports: Connect to other devices external hard disk
3.HDMI port: Connect to displays to see the display.
4.Ethernet port: Connect to the internet.
5.Wi-Fi and Bluetooth: Connect to the internet by wifi connection.
6.Camera Serial Interface (CSI): Connect to cameras for capturing images.
7.Display Serial Interface (DSI): Connect to displays.
8.Audio jack: Connect to audio devices.
9.Serial interface: Connect to serial peripherals.
10.Serial Peripheral Interface (SPI): Communicate with one or more peripheral devices.
22.
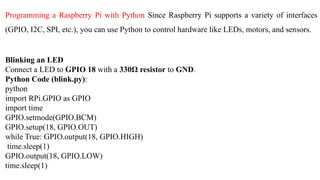
Programming a RaspberryPi with Python Since Raspberry Pi supports a variety of interfaces
(GPIO, I2C, SPI, etc.), you can use Python to control hardware like LEDs, motors, and sensors.
Blinking an LED
Connect a LED to GPIO 18 with a 330Ω resistor to GND.
Python Code (blink.py):
python
import RPi.GPIO as GPIO
import time
GPIO.setmode(GPIO.BCM)
GPIO.setup(18, GPIO.OUT)
while True: GPIO.output(18, GPIO.HIGH)
time.sleep(1)
GPIO.output(18, GPIO.LOW)
time.sleep(1)
23.
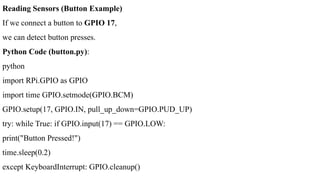
Reading Sensors (ButtonExample)
If we connect a button to GPIO 17,
we can detect button presses.
Python Code (button.py):
python
import RPi.GPIO as GPIO
import time GPIO.setmode(GPIO.BCM)
GPIO.setup(17, GPIO.IN, pull_up_down=GPIO.PUD_UP)
try: while True: if GPIO.input(17) == GPIO.LOW:
print("Button Pressed!")
time.sleep(0.2)
except KeyboardInterrupt: GPIO.cleanup()
24.
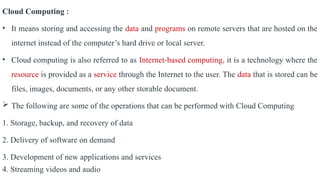
Cloud Computing :
•It means storing and accessing the data and programs on remote servers that are hosted on the
internet instead of the computer’s hard drive or local server.
• Cloud computing is also referred to as Internet-based computing, it is a technology where the
resource is provided as a service through the Internet to the user. The data that is stored can be
files, images, documents, or any other storable document.
The following are some of the operations that can be performed with Cloud Computing
1. Storage, backup, and recovery of data
2. Delivery of software on demand
3. Development of new applications and services
4. Streaming videos and audio
25.
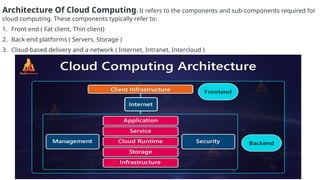
Architecture Of CloudComputing: It refers to the components and sub-components required for
cloud computing. These components typically refer to:
1. Front end ( Fat client, Thin client)
2. Back-end platforms ( Servers, Storage )
3. Cloud-based delivery and a network ( Internet, Intranet, Intercloud )
26.
1. Front End( User Interaction Enhancement )
The User Interface of Cloud Computing consists of two sections of clients.
• The Thin clients are the ones that use web browsers facilitating portable and lightweight
accessibilities
• Fat Clients that use many functionalities for offering a strong user experience.
2. Back-end Platforms ( Cloud Computing Engine )
• The core of cloud computing is made at back-end platforms with several servers for storage
and processing computing.
• Management of Applications logic is managed through servers and effective data handling is
provided by storage.
3.Cloud based Delivery: Sending data to users those who want to develop new Applications by
internet
27.
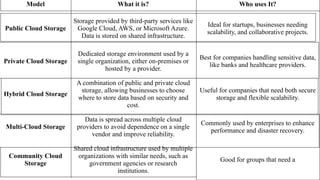
Model What itis? Who uses It?
Public Cloud Storage
Storage provided by third-party services like
Google Cloud, AWS, or Microsoft Azure.
Data is stored on shared infrastructure.
Ideal for startups, businesses needing
scalability, and collaborative projects.
Private Cloud Storage
Dedicated storage environment used by a
single organization, either on-premises or
hosted by a provider.
Best for companies handling sensitive data,
like banks and healthcare providers.
Hybrid Cloud Storage
A combination of public and private cloud
storage, allowing businesses to choose
where to store data based on security and
cost.
Useful for companies that need both secure
storage and flexible scalability.
Multi-Cloud Storage
Data is spread across multiple cloud
providers to avoid dependence on a single
vendor and improve reliability.
Commonly used by enterprises to enhance
performance and disaster recovery.
Community Cloud
Storage
Shared cloud infrastructure used by multiple
organizations with similar needs, such as
government agencies or research
institutions.
Good for groups that need a
28.
Three basic typesof APIs of Cloud
1. Local APIs: These are the original form, from which the name came. They offer OS or
middleware services to application programs. Microsoft's .NET APIs, the TAPI (Telephony
API) for voice applications, and database access APIs are examples of the local API form.
2. Web APIs are designed to represent widely used resources like HTML pages and are
accessed using a simple HTTP protocol. Any web URL activates a web API. Web APIs are often
called REST (representational state transfer) or RESTful because the publisher of REST
interfaces doesn't save any data internally between requests. As such, requests from many users
can be intermingled as they would be on the internet.
3. Program APIs are based on remote procedure call (RPC) technology that makes a remote
program component appear to be local to the rest of the software. Service oriented architecture
(SOA) APIs, such as Microsoft's WS-series of APIs, are program APIs.
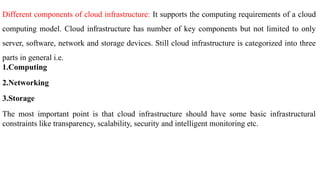
Different components ofcloud infrastructure: It supports the computing requirements of a cloud
computing model. Cloud infrastructure has number of key components but not limited to only
server, software, network and storage devices. Still cloud infrastructure is categorized into three
parts in general i.e.
1.Computing
2.Networking
3.Storage
The most important point is that cloud infrastructure should have some basic infrastructural
constraints like transparency, scalability, security and intelligent monitoring etc.
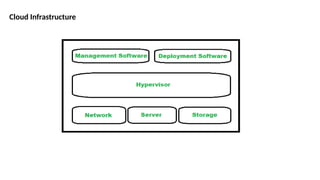
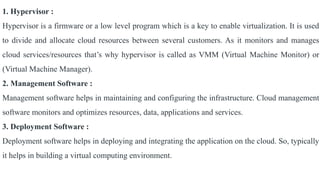
31.
1. Hypervisor :
Hypervisoris a firmware or a low level program which is a key to enable virtualization. It is used
to divide and allocate cloud resources between several customers. As it monitors and manages
cloud services/resources that’s why hypervisor is called as VMM (Virtual Machine Monitor) or
(Virtual Machine Manager).
2. Management Software :
Management software helps in maintaining and configuring the infrastructure. Cloud management
software monitors and optimizes resources, data, applications and services.
3. Deployment Software :
Deployment software helps in deploying and integrating the application on the cloud. So, typically
it helps in building a virtual computing environment.
32.
4. Network :Itis one of the key component of cloud infrastructure which is responsible for
connecting cloud services over the internet. For the transmission of data and resources externally
and internally network is must required.
5. Server :
Server which represents the computing portion of the cloud infrastructure is responsible for
managing and delivering cloud services for various services and partners, maintaining security
etc.
6. Storage :
Storage represents the storage facility which is provided to different organizations for storing and
managing data. It provides a facility of extracting another resource if one of the resource fails as
it keeps many copies of storage.
33.
WAMP (Web ApplicationMessaging Protocol) with Autobahn is a powerful option for IoT
(Internet of Things) applications that require real-time communication, event-driven messaging,
and remote procedure calls (RPC).
WAMP provides two key communication patterns essential for IoT:
1.Remote Procedure Calls (RPC) – Devices can call methods on other devices or services.
2.Publish-Subscribe (Pub-Sub) – Devices can publish sensor data, and other devices can
subscribe to receive updates in real time.
Autobahn is an open-source implementation of WAMP that supports multiple programming
languages, including Python, JavaScript, C++, and Java, making it suitable for IoT applications
across different platforms.
34.
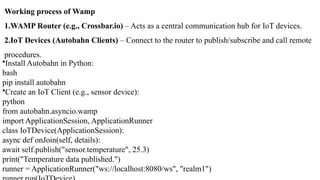
Working process ofWamp
1.WAMP Router (e.g., Crossbar.io) – Acts as a central communication hub for IoT devices.
2.IoT Devices (Autobahn Clients) – Connect to the router to publish/subscribe and call remote
procedures.
•Install Autobahn in Python:
bash
pip install autobahn
•Create an IoT Client (e.g., sensor device):
python
from autobahn.asyncio.wamp
import ApplicationSession, ApplicationRunner
class IoTDevice(ApplicationSession):
async def onJoin(self, details):
await self.publish("sensor.temperature", 25.3)
print("Temperature data published.")
runner = ApplicationRunner("ws://localhost:8080/ws", "realm1")
35.
Xively Cloud forIoT,
• which is now part of Google Cloud, It offers a comprehensive suite of tools and services for
developing and managing Internet of Things (IoT) applications.
• This platform provides a secure and scalable foundation for connecting and managing devices,
gathering data, and integrating with other services and systems.
• It’s designed to simplify the challenges of IoT development and operation, making it more
accessible for businesses and developers to create and deploy IoT solutions.
• It offers functionalities like device management, real-time data streaming, and integration with
other cloud services, which are essential for robust IoT ecosystems.
36.
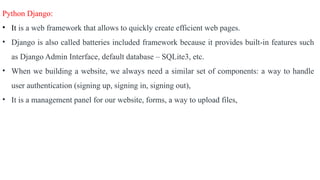
Python Django:
• Itis a web framework that allows to quickly create efficient web pages.
• Django is also called batteries included framework because it provides built-in features such
as Django Admin Interface, default database – SQLite3, etc.
• When we building a website, we always need a similar set of components: a way to handle
user authentication (signing up, signing in, signing out),
• It is a management panel for our website, forms, a way to upload files,
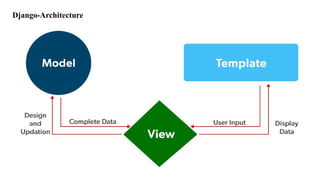
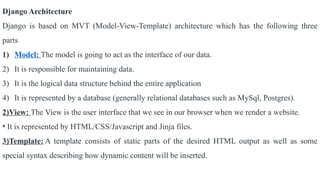
Django Architecture
Django isbased on MVT (Model-View-Template) architecture which has the following three
parts
1) Model: The model is going to act as the interface of our data.
2) It is responsible for maintaining data.
3) It is the logical data structure behind the entire application
4) It is represented by a database (generally relational databases such as MySql, Postgres).
2)View: The View is the user interface that we see in our browser when we render a website.
• It is represented by HTML/CSS/Javascript and Jinja files.
3)Template: A template consists of static parts of the desired HTML output as well as some
special syntax describing how dynamic content will be inserted.
39.
python3 -m venv./name
• Here the name suggests the name of the virtual environment.
• Let’s create our virtual environment with the name as venv only.
• So the command to create it will be
python3 -m venv ./venv
After running the above command we will see a folder named venv with the following sub-
directories.
source ./venv/bin/activate
Installation of Django in python:
40.
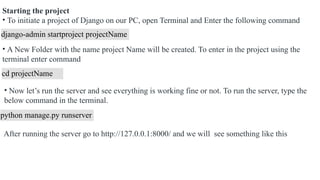
Starting the project
•To initiate a project of Django on our PC, open Terminal and Enter the following command
django-admin startproject projectName
• A New Folder with the name project Name will be created. To enter in the project using the
terminal enter command
cd projectName
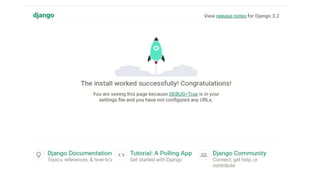
• Now let’s run the server and see everything is working fine or not. To run the server, type the
below command in the terminal.
python manage.py runserver
After running the server go to http://127.0.0.1:8000/ and we will see something like this
42.
Creating an appusing Django
• Django is famous for its unique and fully managed app structure.
• For every functionality, an app can be created like a completely independent module.
• For example, if we are creating a Blog, Separate modules should be created for Comments,
Posts, Login/Logout
• Django apps are reusable and Django app can be used with multiple projects.
• We have loosely coupled almost independent components
• Multiple developers can work on different components
• Debugging and code organization are easy.
• Django has an excellent debugger tool.
INSTALLED_APPS =
[ 'django.contrib.admin',
'django.contrib.auth',
'django.contrib.contenttypes',
'django.contrib.sessions',
'django.contrib.messages',
'django.contrib.staticfiles', ]
43.
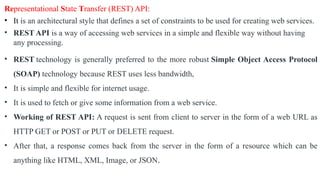
Representational State Transfer(REST) API:
• It is an architectural style that defines a set of constraints to be used for creating web services.
• REST API is a way of accessing web services in a simple and flexible way without having
any processing.
• REST technology is generally preferred to the more robust Simple Object Access Protocol
(SOAP) technology because REST uses less bandwidth,
• It is simple and flexible for internet usage.
• It is used to fetch or give some information from a web service.
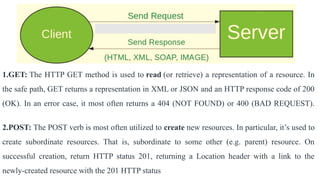
• Working of REST API: A request is sent from client to server in the form of a web URL as
HTTP GET or POST or PUT or DELETE request.
• After that, a response comes back from the server in the form of a resource which can be
anything like HTML, XML, Image, or JSON.
44.
1.GET: The HTTPGET method is used to read (or retrieve) a representation of a resource. In
the safe path, GET returns a representation in XML or JSON and an HTTP response code of 200
(OK). In an error case, it most often returns a 404 (NOT FOUND) or 400 (BAD REQUEST).
2.POST: The POST verb is most often utilized to create new resources. In particular, it’s used to
create subordinate resources. That is, subordinate to some other (e.g. parent) resource. On
successful creation, return HTTP status 201, returning a Location header with a link to the
newly-created resource with the 201 HTTP status
45.
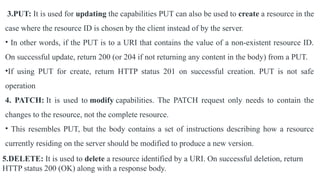
3.PUT: It isused for updating the capabilities PUT can also be used to create a resource in the
case where the resource ID is chosen by the client instead of by the server.
• In other words, if the PUT is to a URI that contains the value of a non-existent resource ID.
On successful update, return 200 (or 204 if not returning any content in the body) from a PUT.
•If using PUT for create, return HTTP status 201 on successful creation. PUT is not safe
operation
4. PATCH: It is used to modify capabilities. The PATCH request only needs to contain the
changes to the resource, not the complete resource.
• This resembles PUT, but the body contains a set of instructions describing how a resource
currently residing on the server should be modified to produce a new version.
5.DELETE: It is used to delete a resource identified by a URI. On successful deletion, return
HTTP status 200 (OK) along with a response body.


![Creating an app using Django
• Django is famous for its unique and fully managed app structure.
• For every functionality, an app can be created like a completely independent module.
• For example, if we are creating a Blog, Separate modules should be created for Comments,
Posts, Login/Logout
• Django apps are reusable and Django app can be used with multiple projects.
• We have loosely coupled almost independent components
• Multiple developers can work on different components
• Debugging and code organization are easy.
• Django has an excellent debugger tool.
INSTALLED_APPS =
[ 'django.contrib.admin',
'django.contrib.auth',
'django.contrib.contenttypes',
'django.contrib.sessions',
'django.contrib.messages',
'django.contrib.staticfiles', ]](https://image.slidesharecdn.com/iotunit-4-250615174812-8f66aaaa/85/IOT-notes-42-320.jpg)