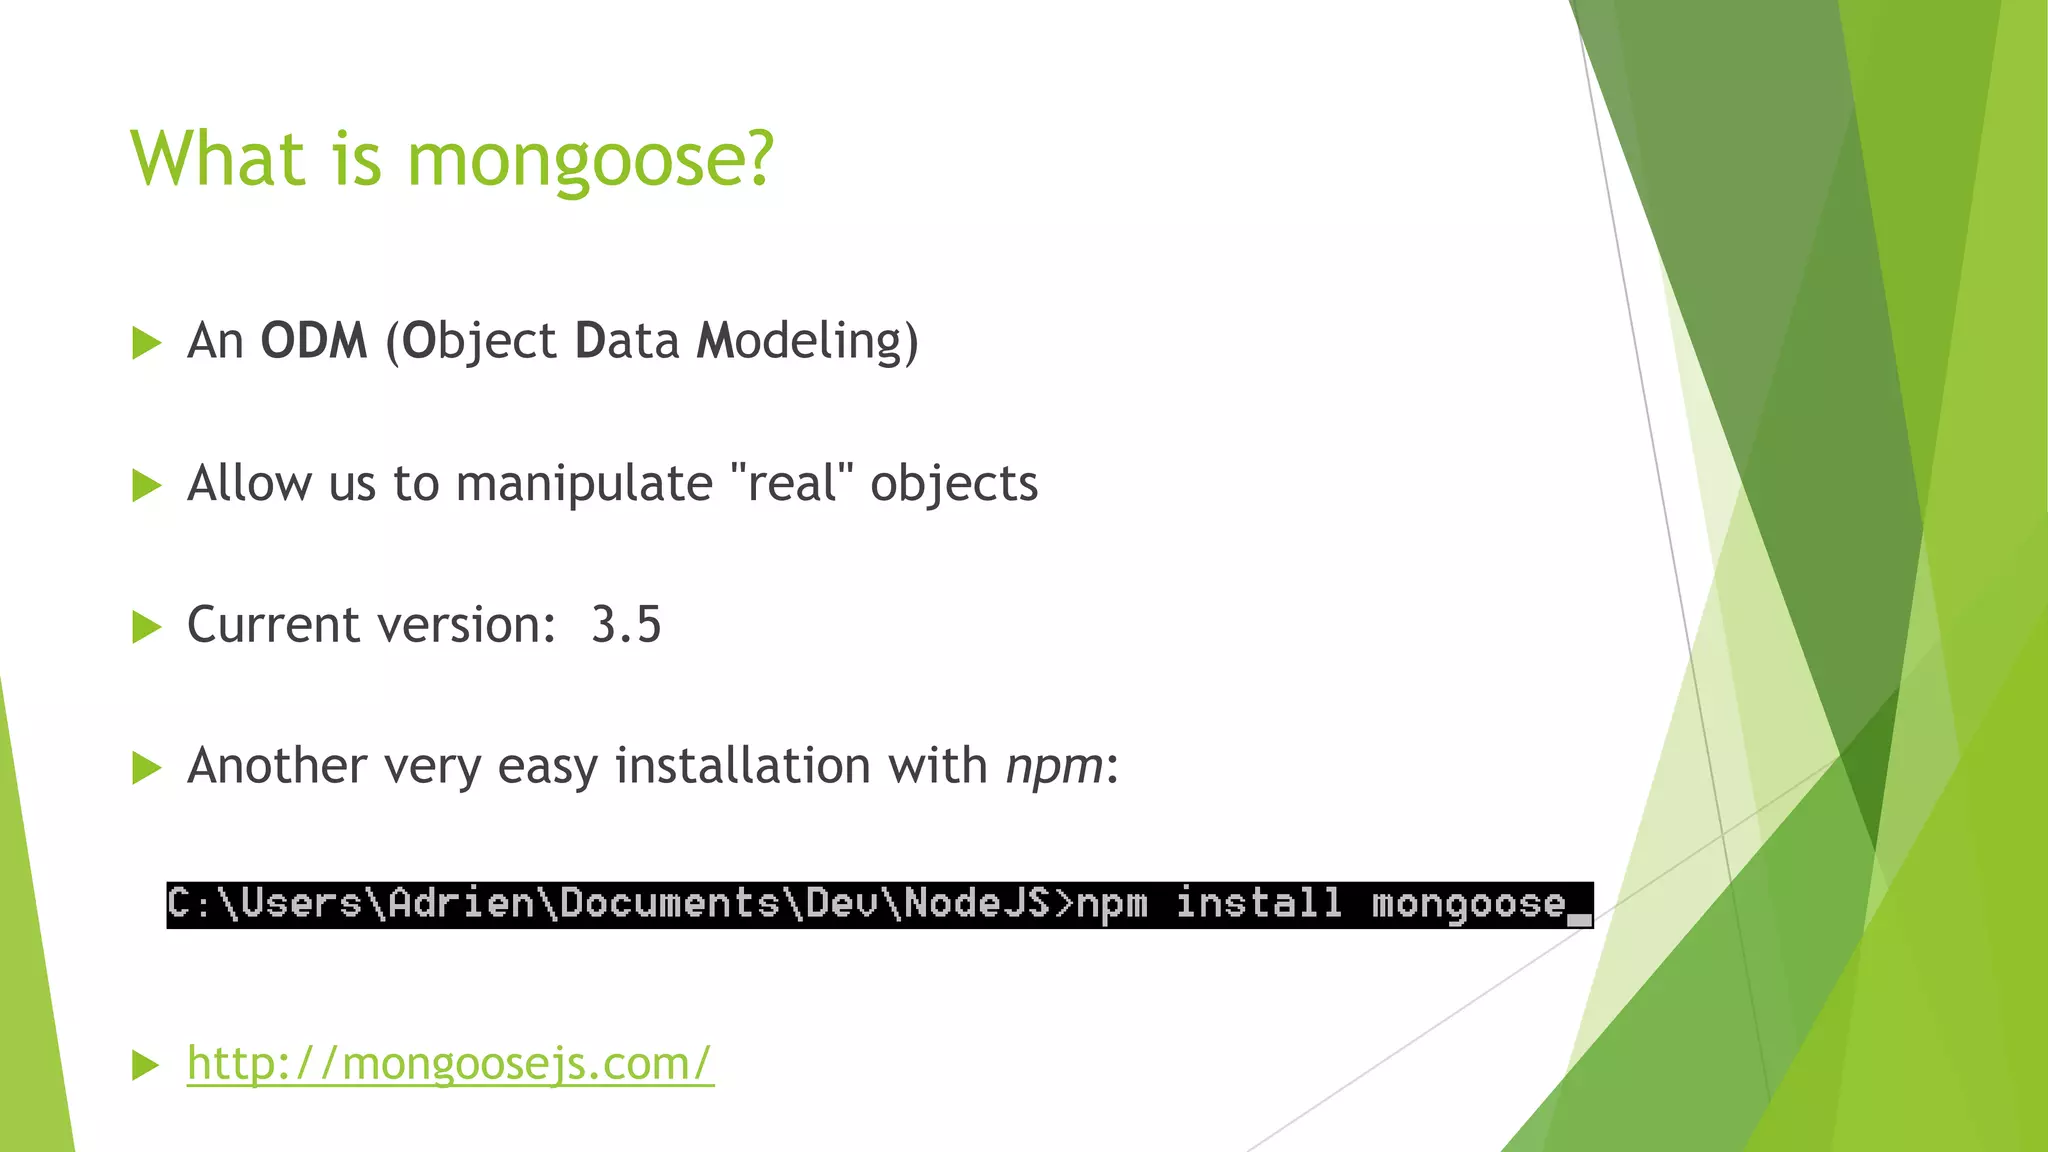
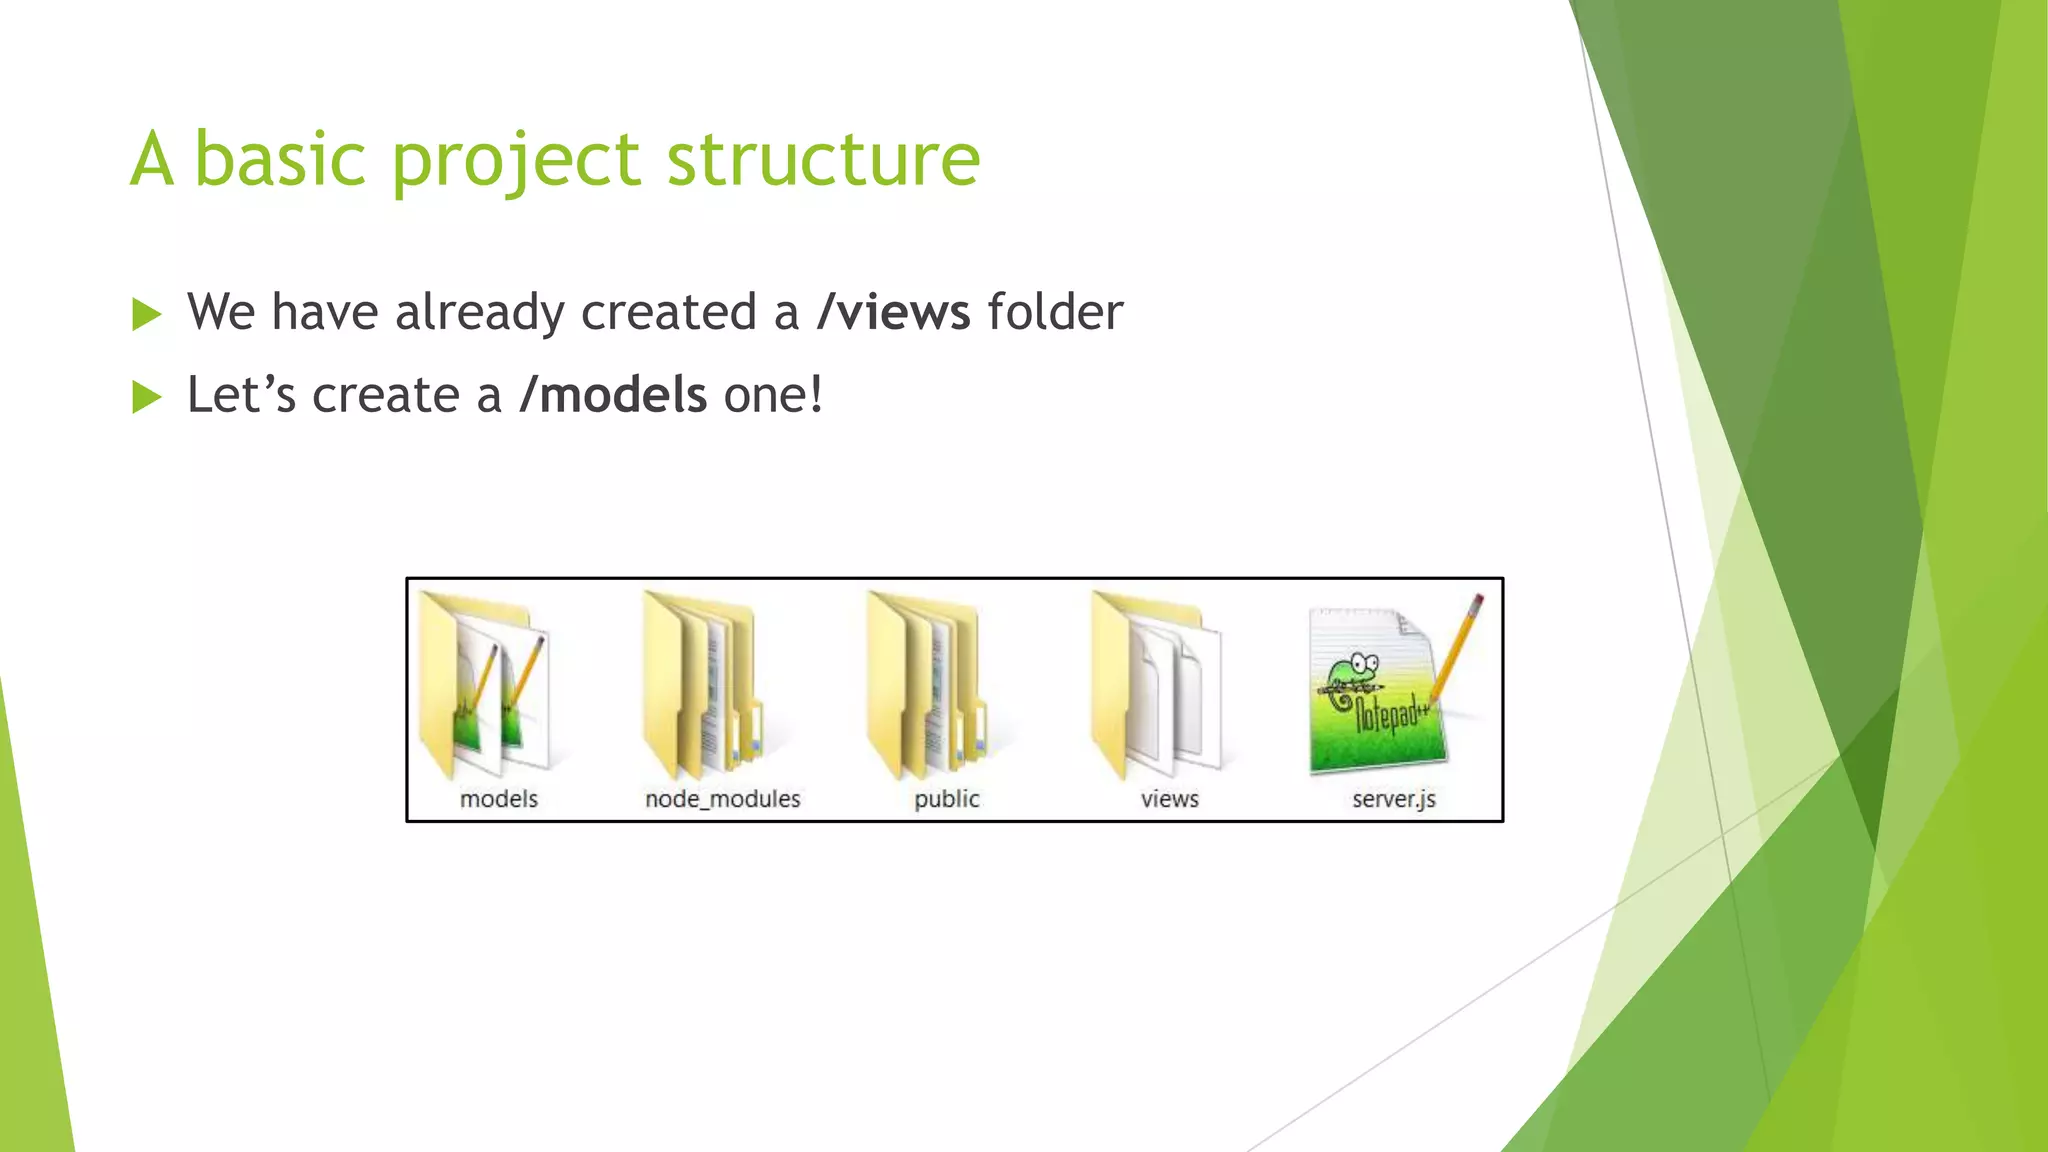
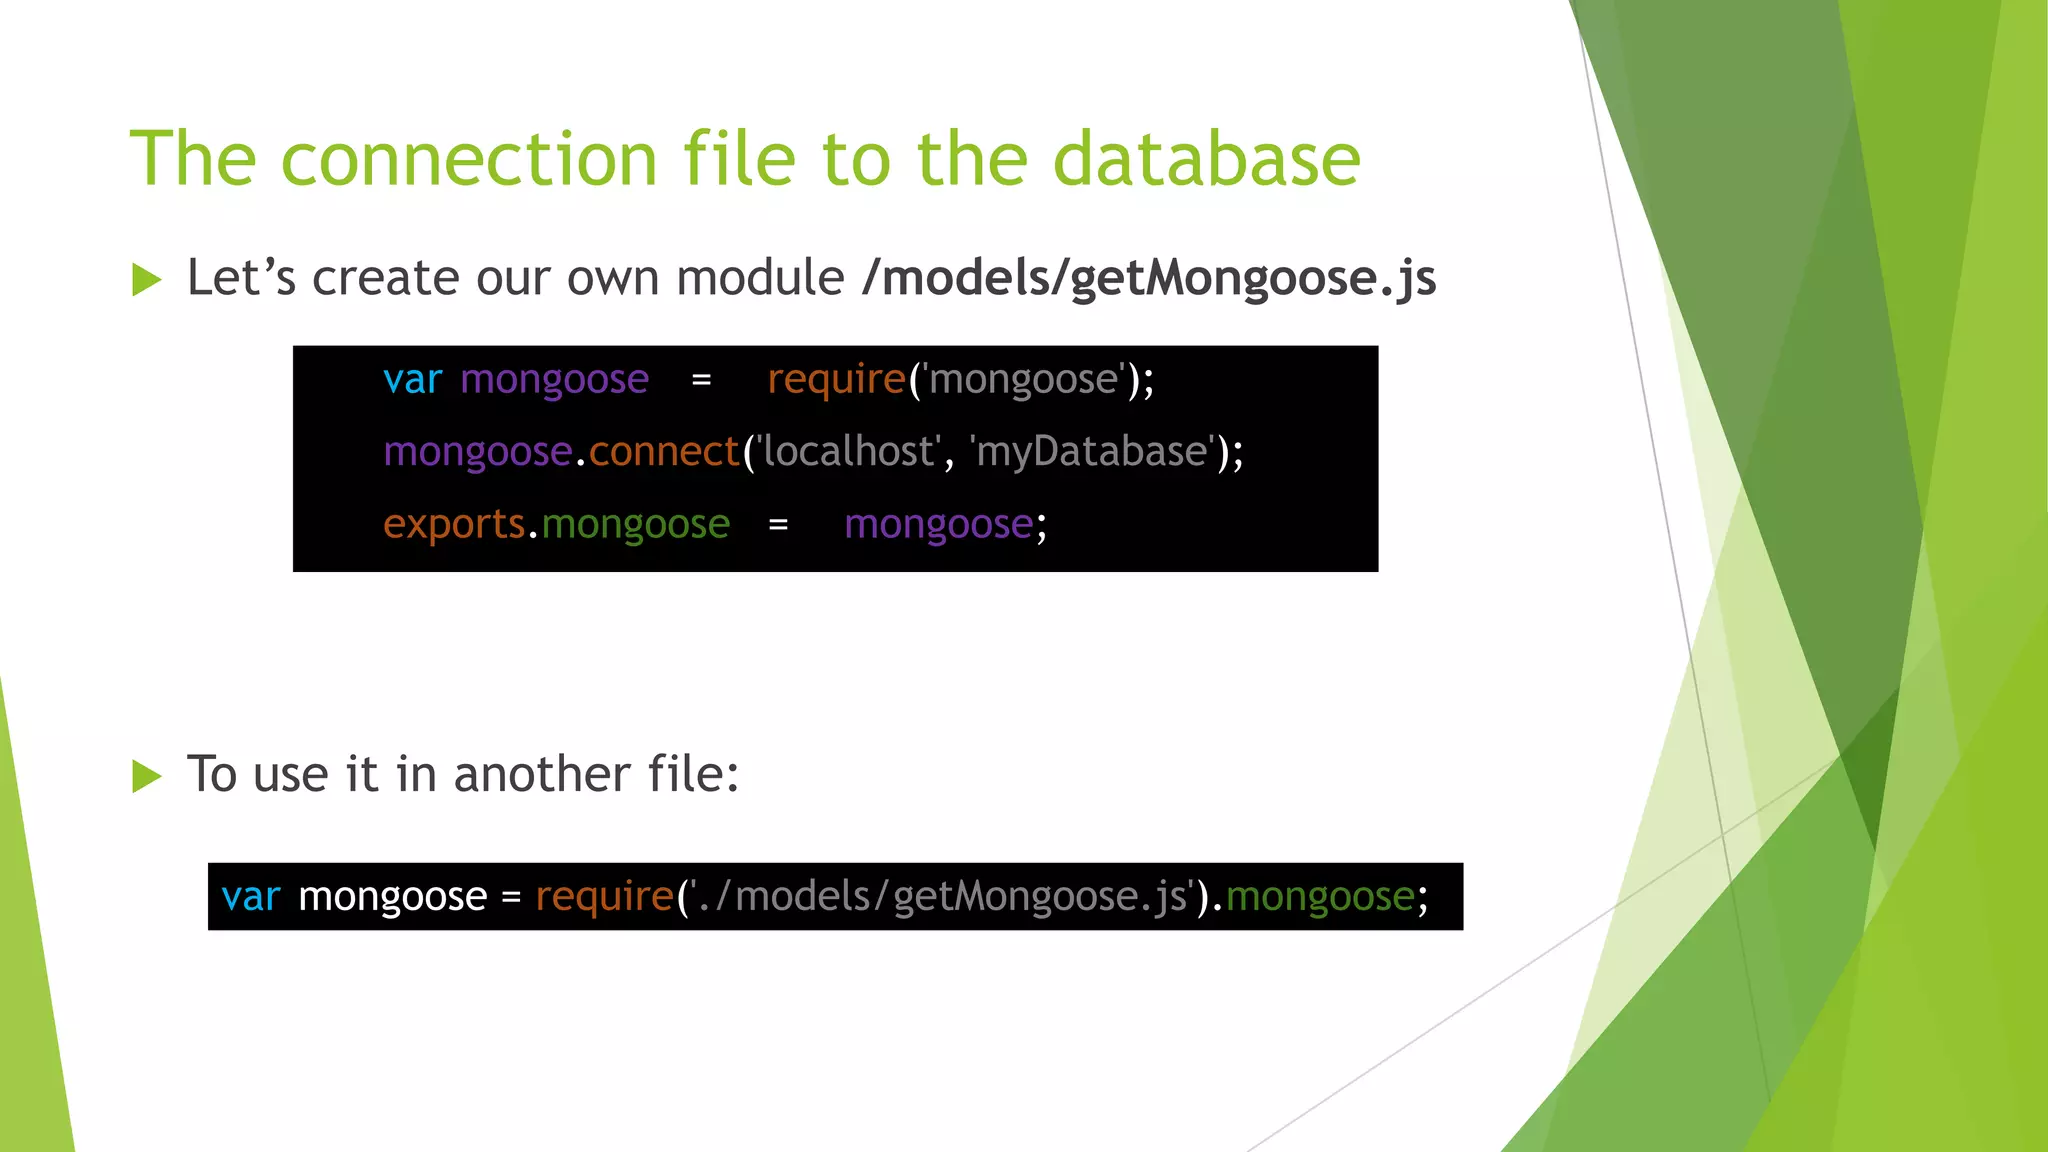
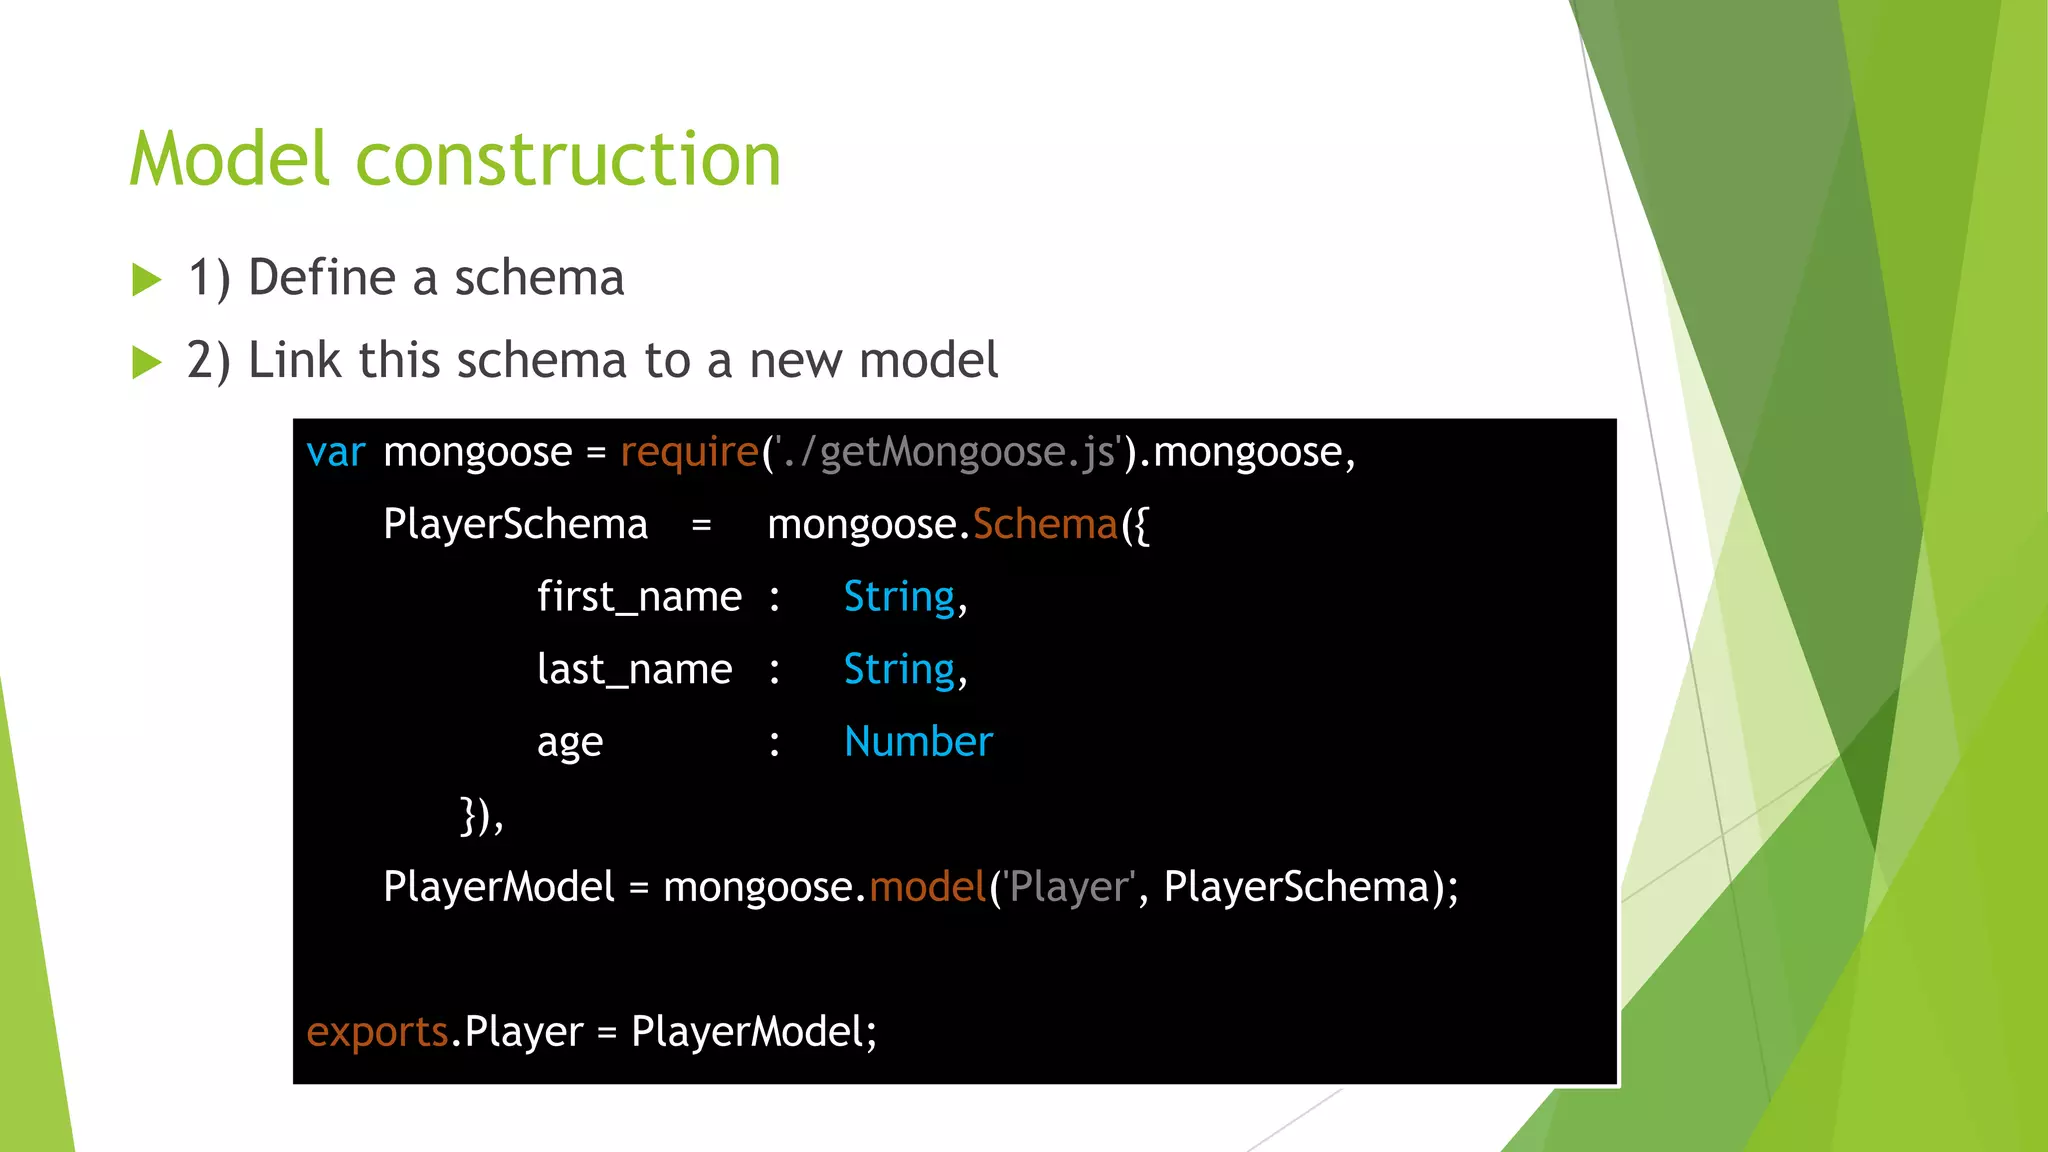
Downloaded 121 times


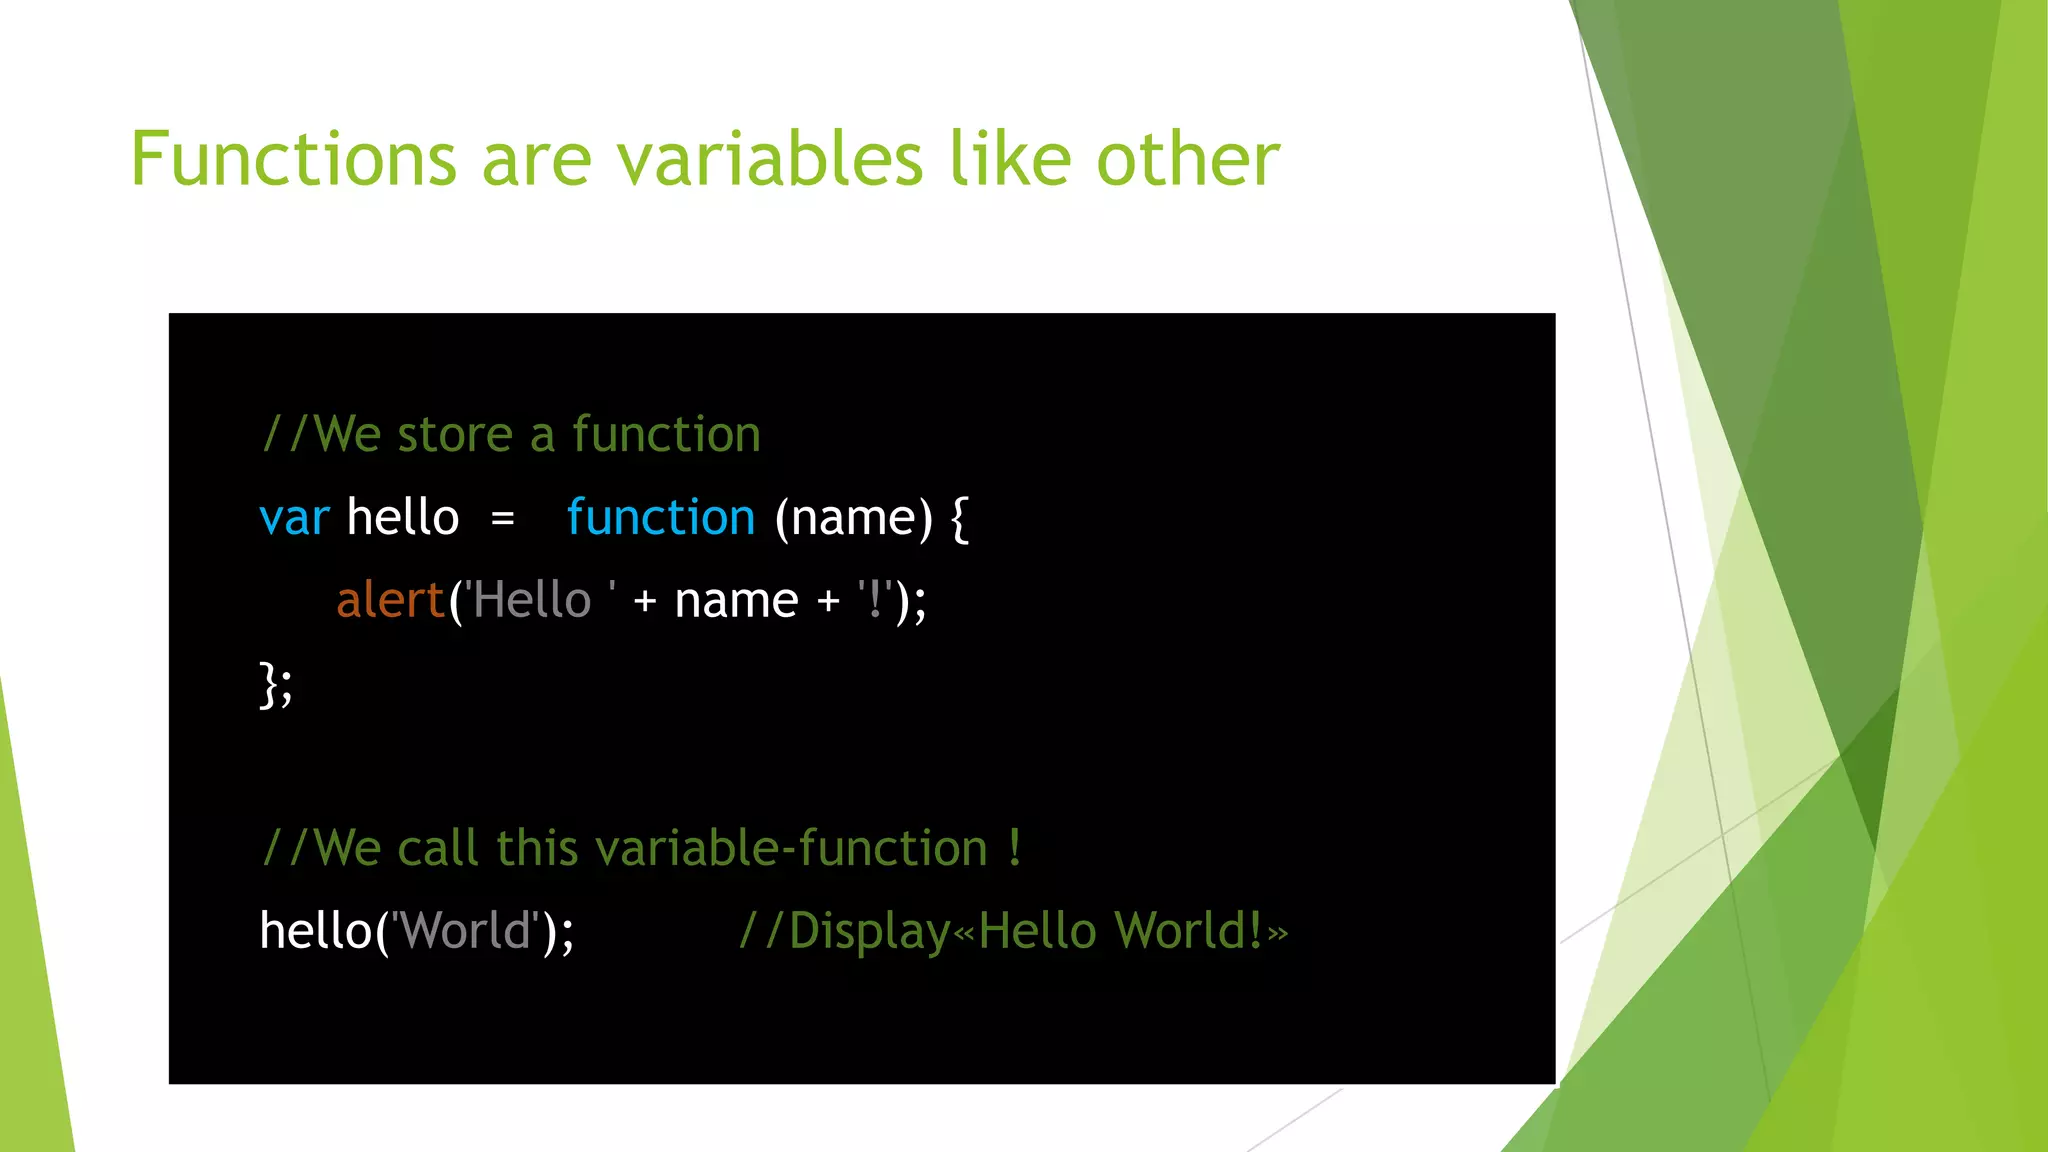

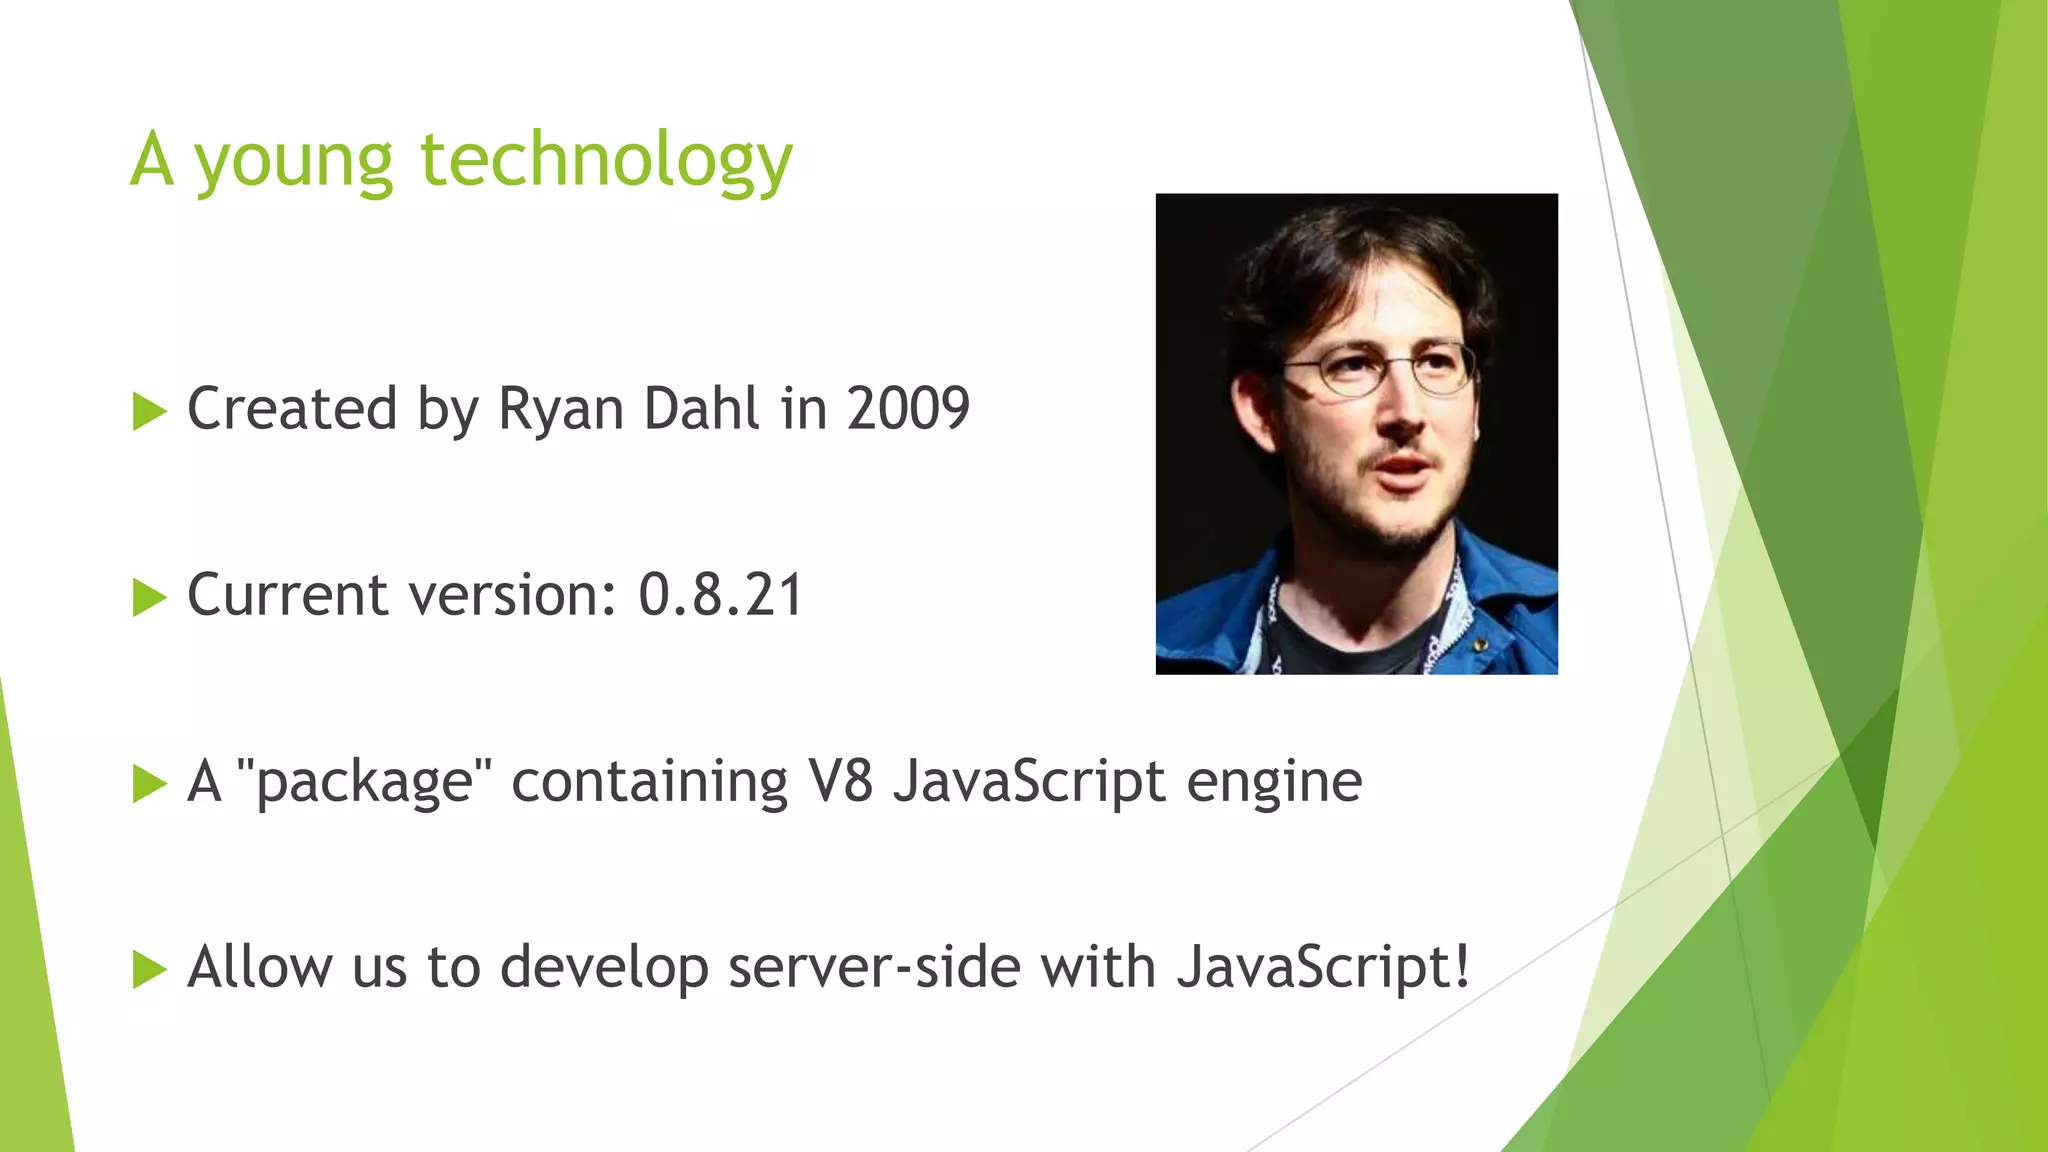


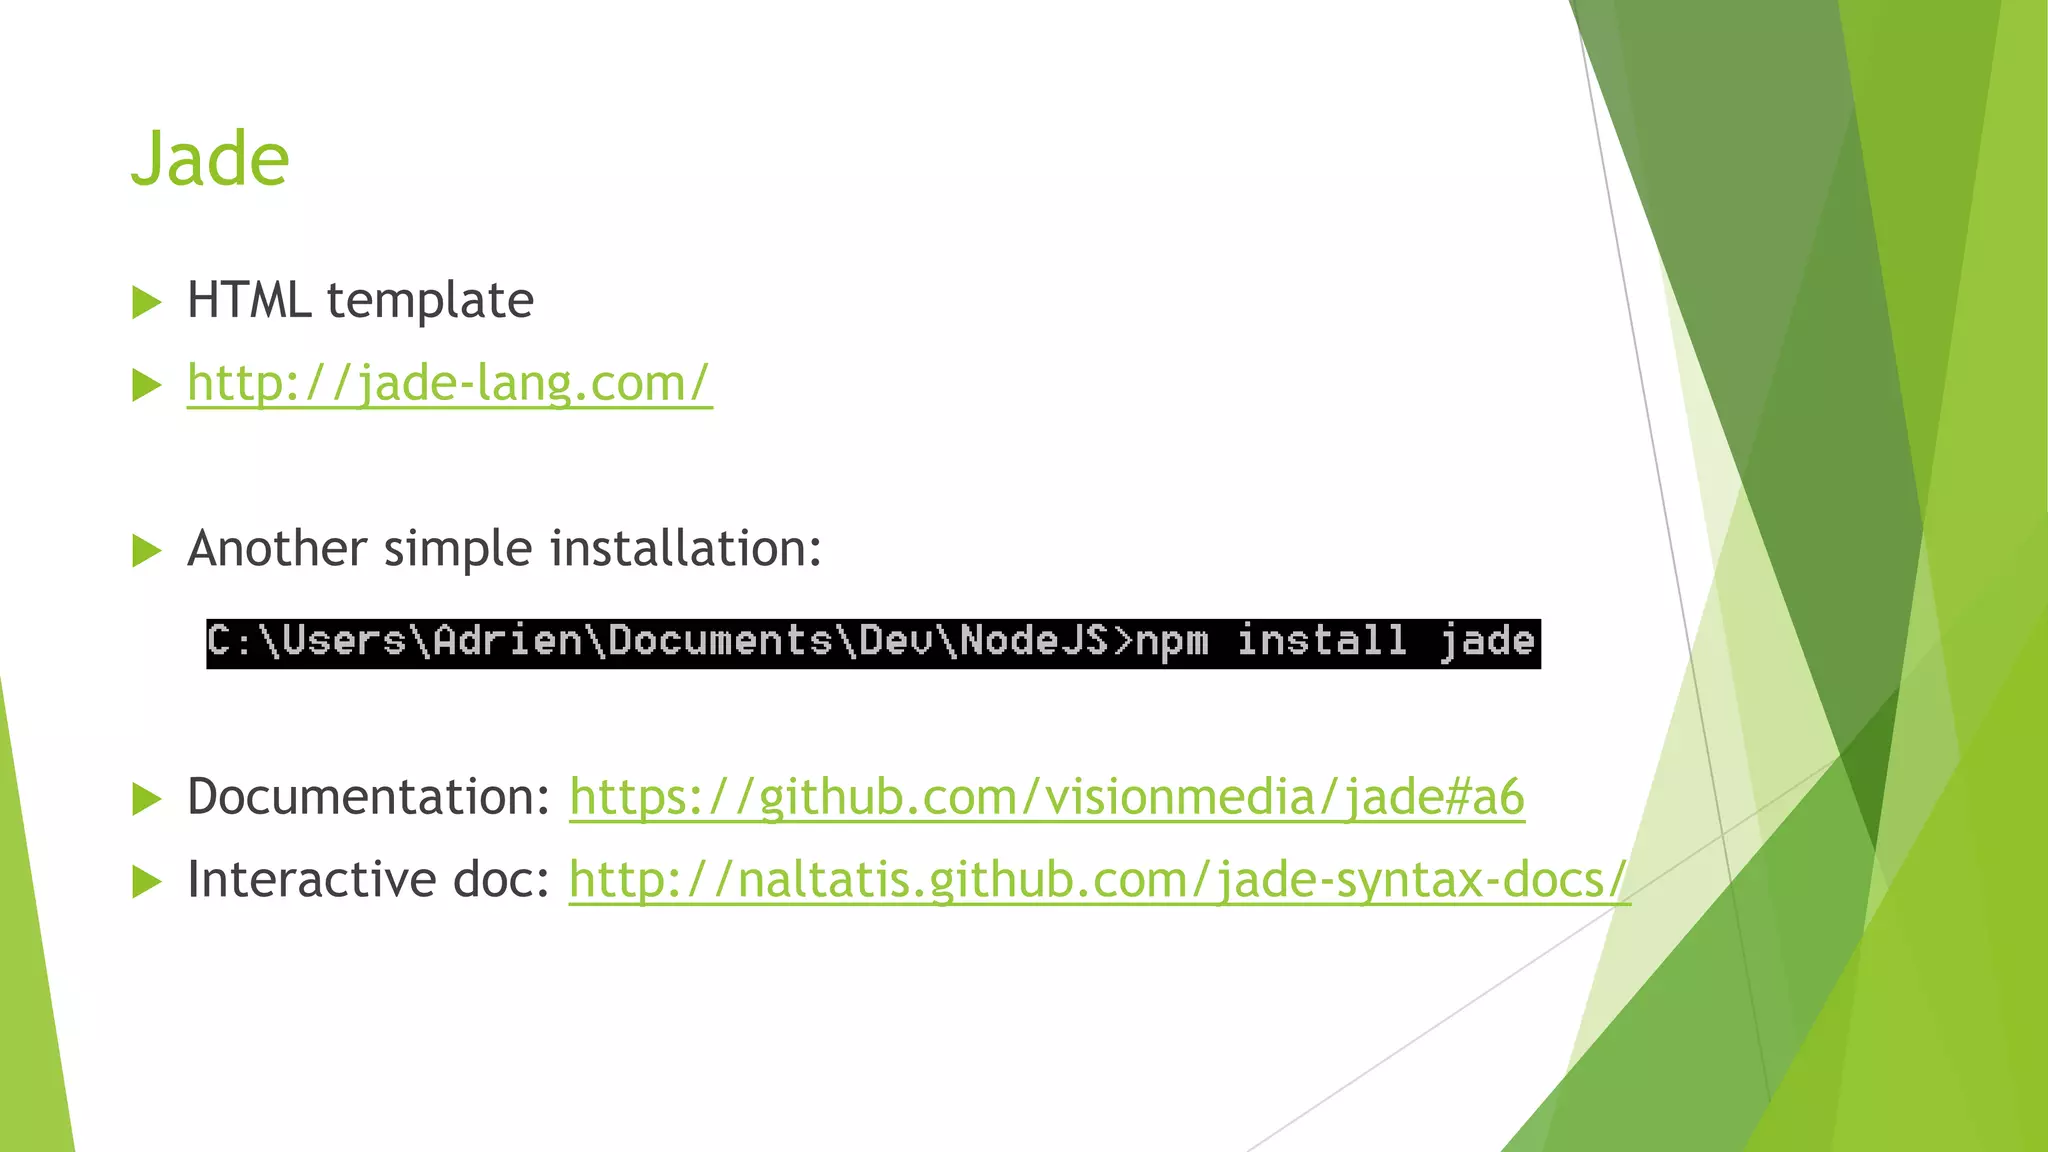
![Retrieve GET parameters
We get values thanks to req.query[parameter name]
//Listen for localhost:1337/farms/?id=X
server
.get('/farms/', function (req, res) {
res.writeHead(200, {'Content-Type': 'text/plain'});
res.end(Farm id: #' + req.query.id);
});](https://image.slidesharecdn.com/nodeen-130226181438-phpapp01/75/Introduction-to-node-js-19-2048.jpg)
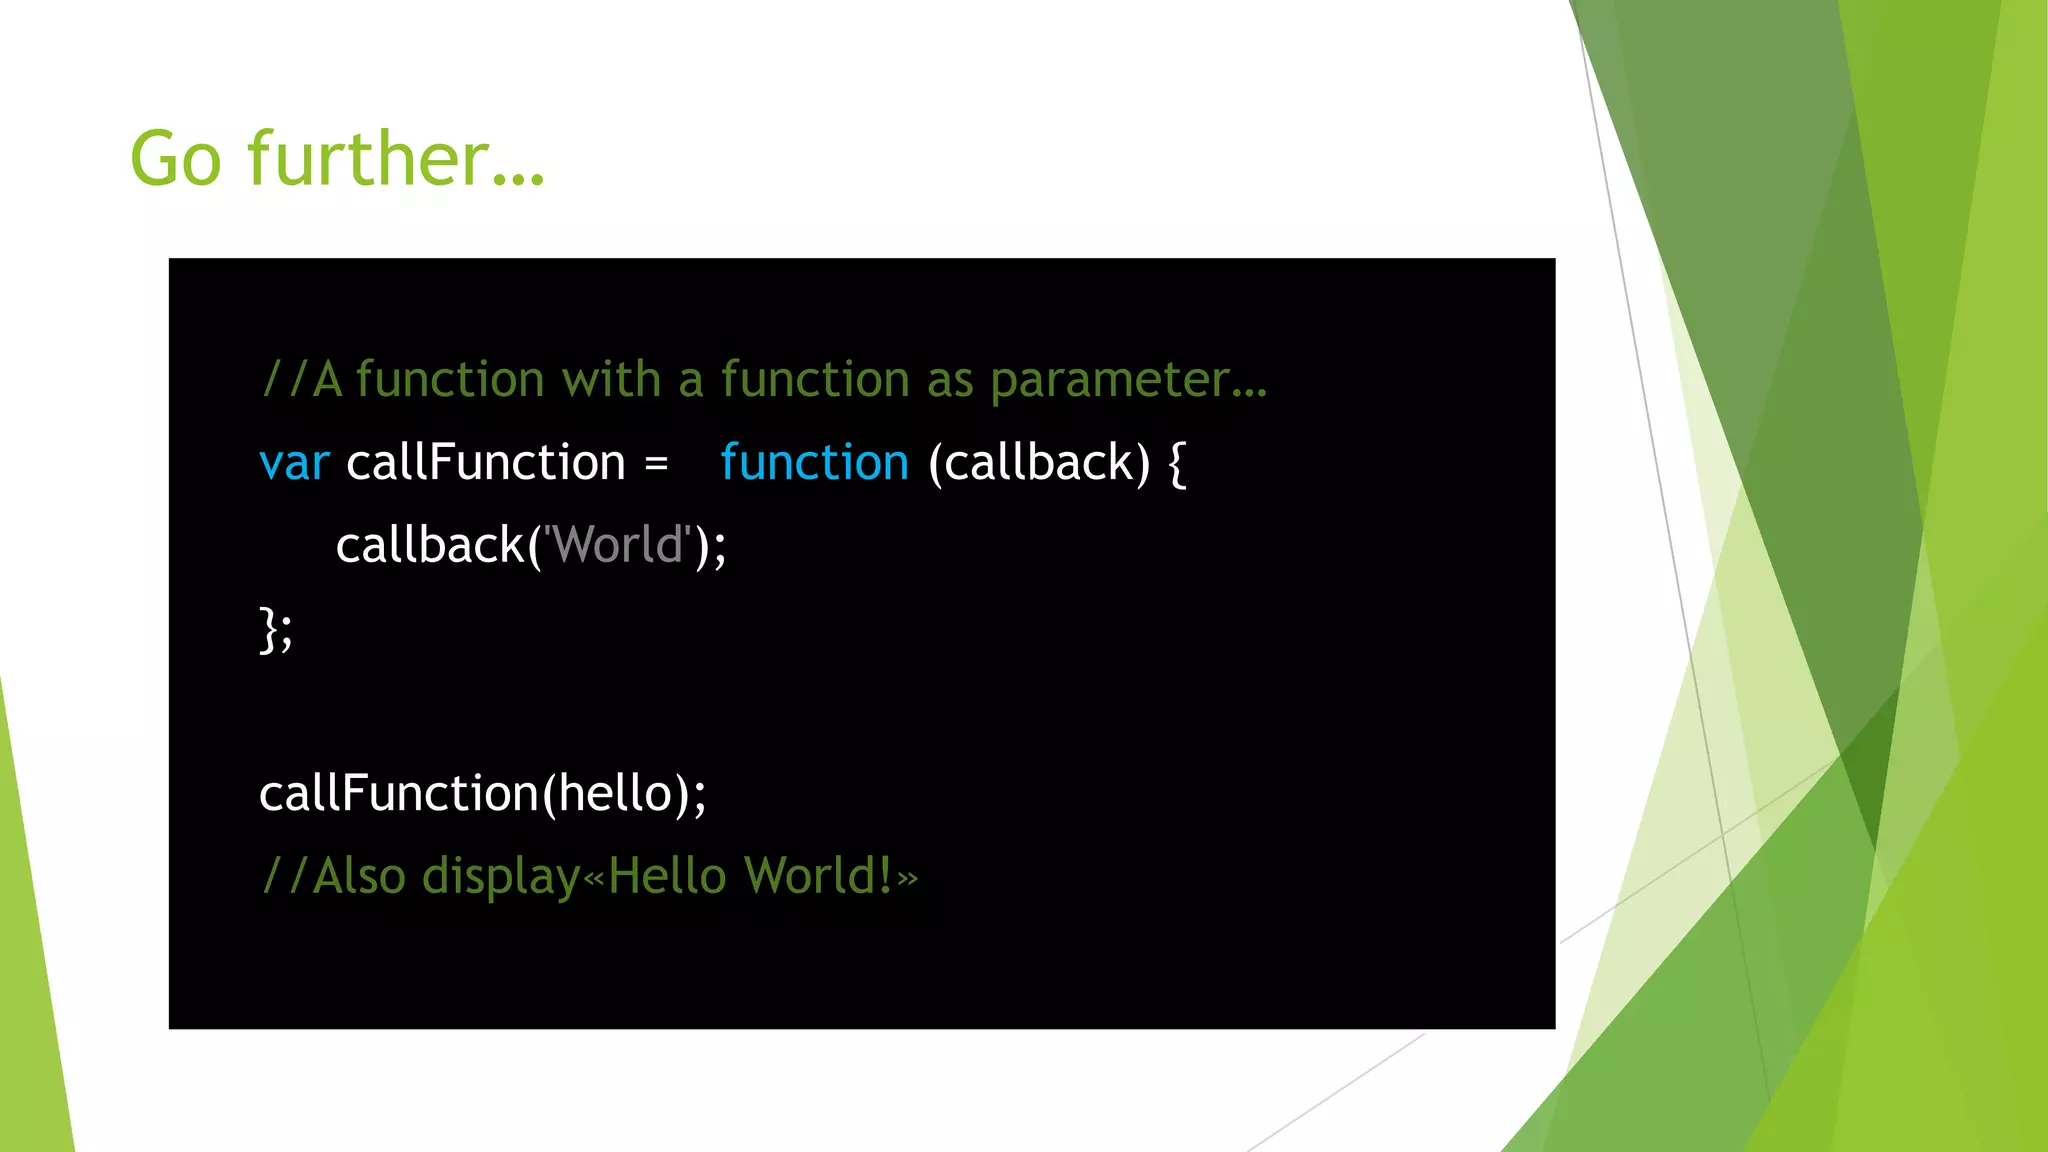
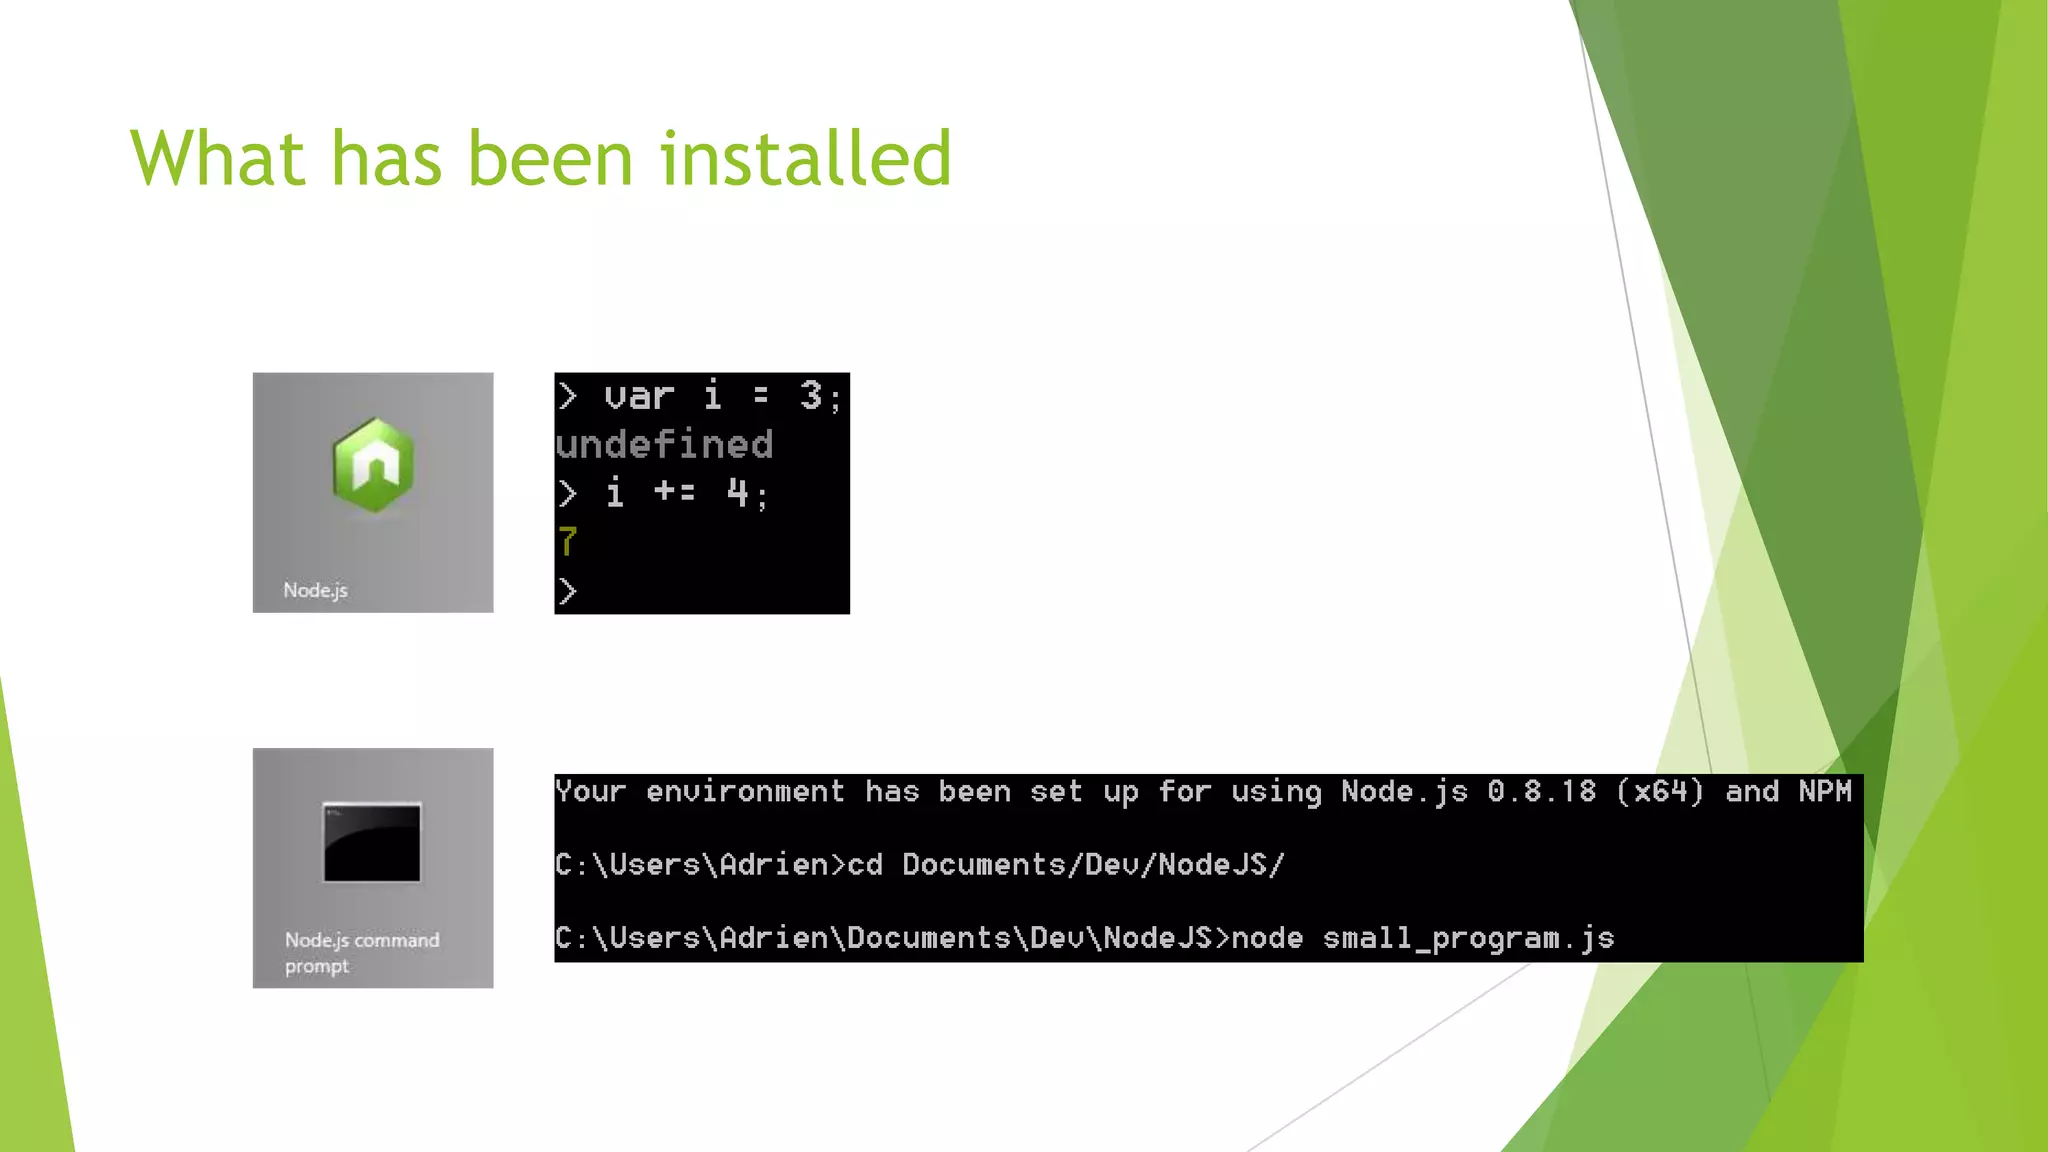
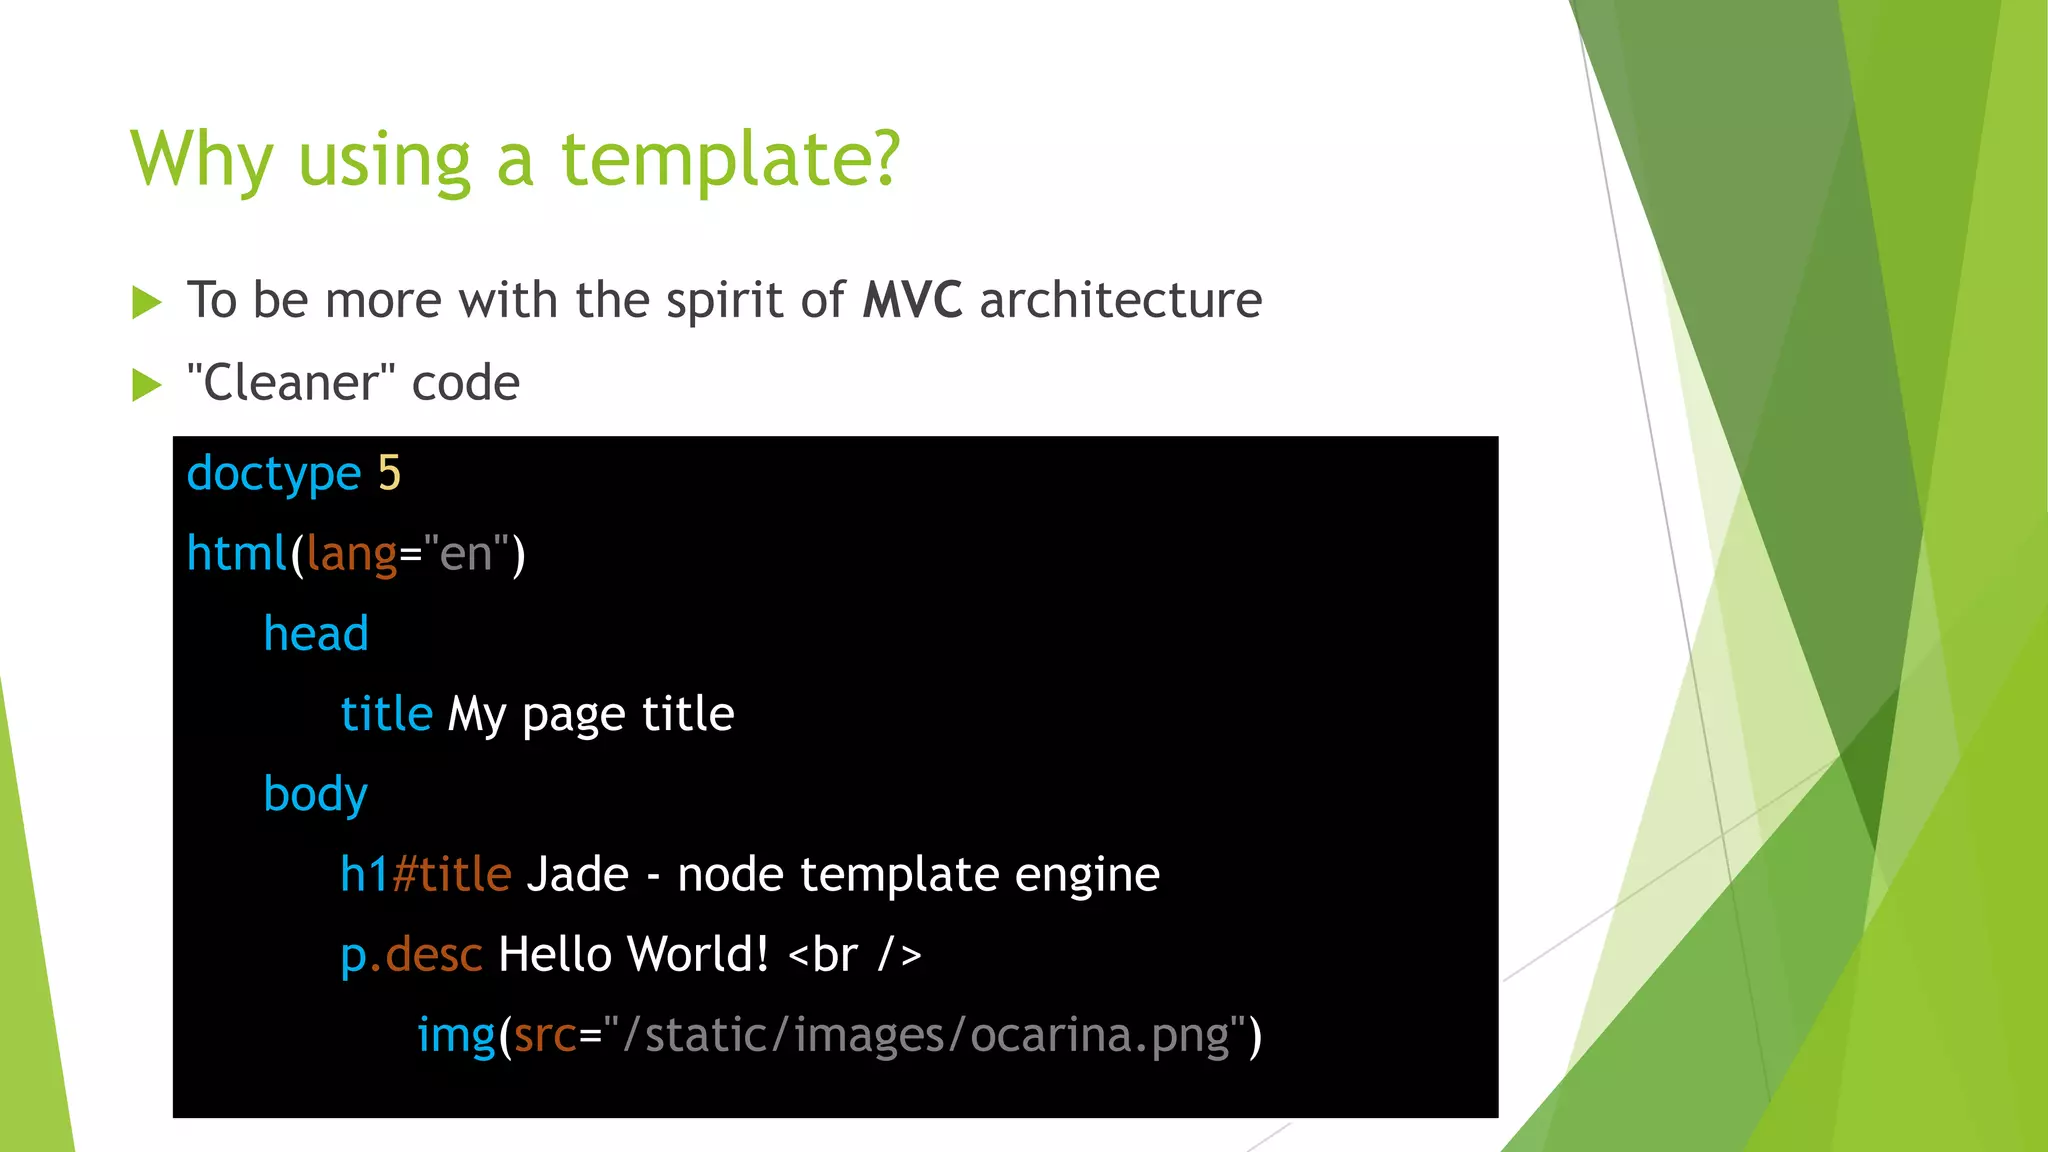
![Sexier: parameters in the URL
: + parameter name
We get values thanks to req.params[parameter name]
//Listen for localhost:1337/farms/X
server
.get('/farms/:id', function (req, res) {
res.writeHead(200, {'Content-Type': 'text/plain'});
res.end(Farm id: #' + req.params.id);
});](https://image.slidesharecdn.com/nodeen-130226181438-phpapp01/75/Introduction-to-node-js-20-2048.jpg)
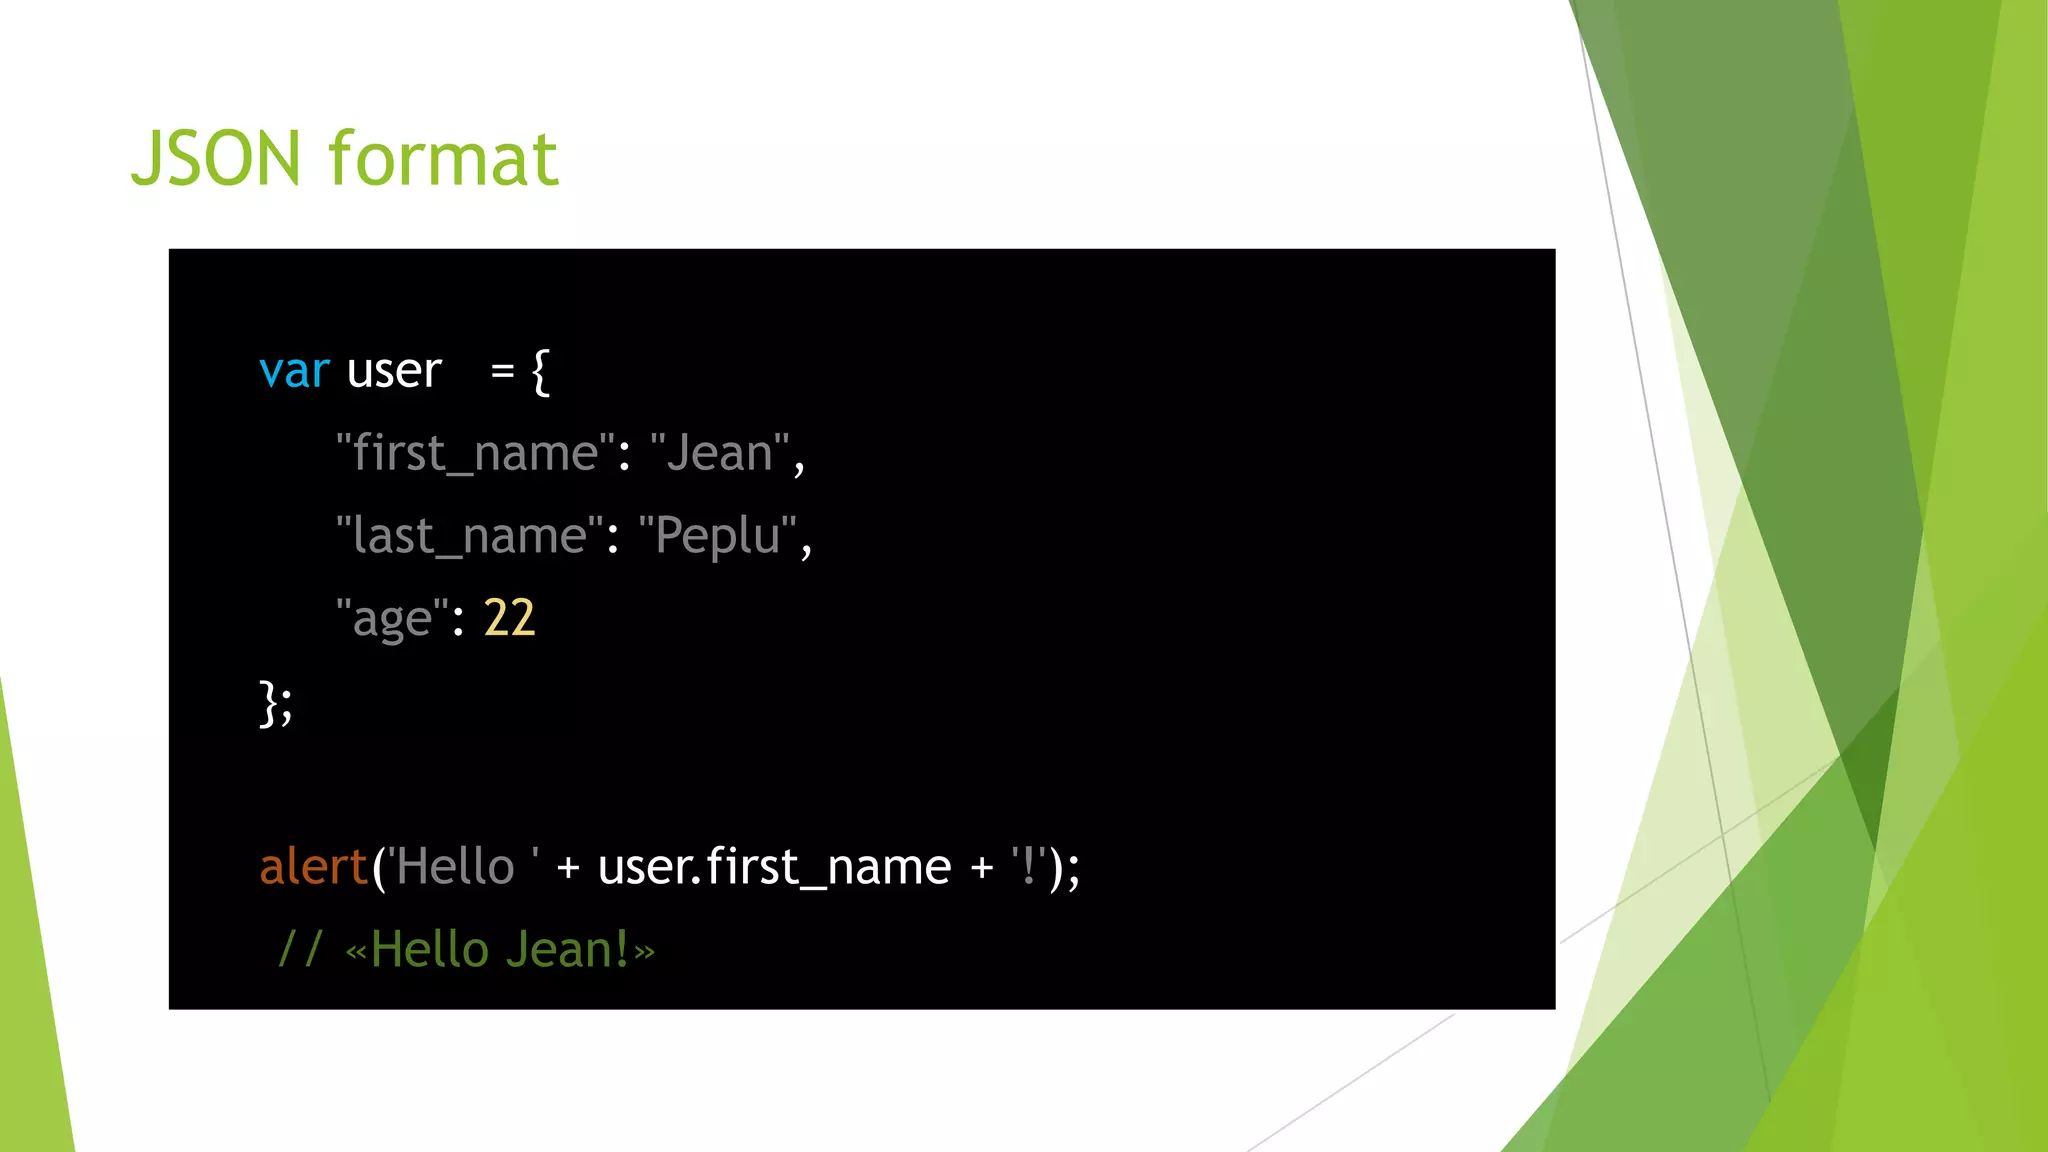
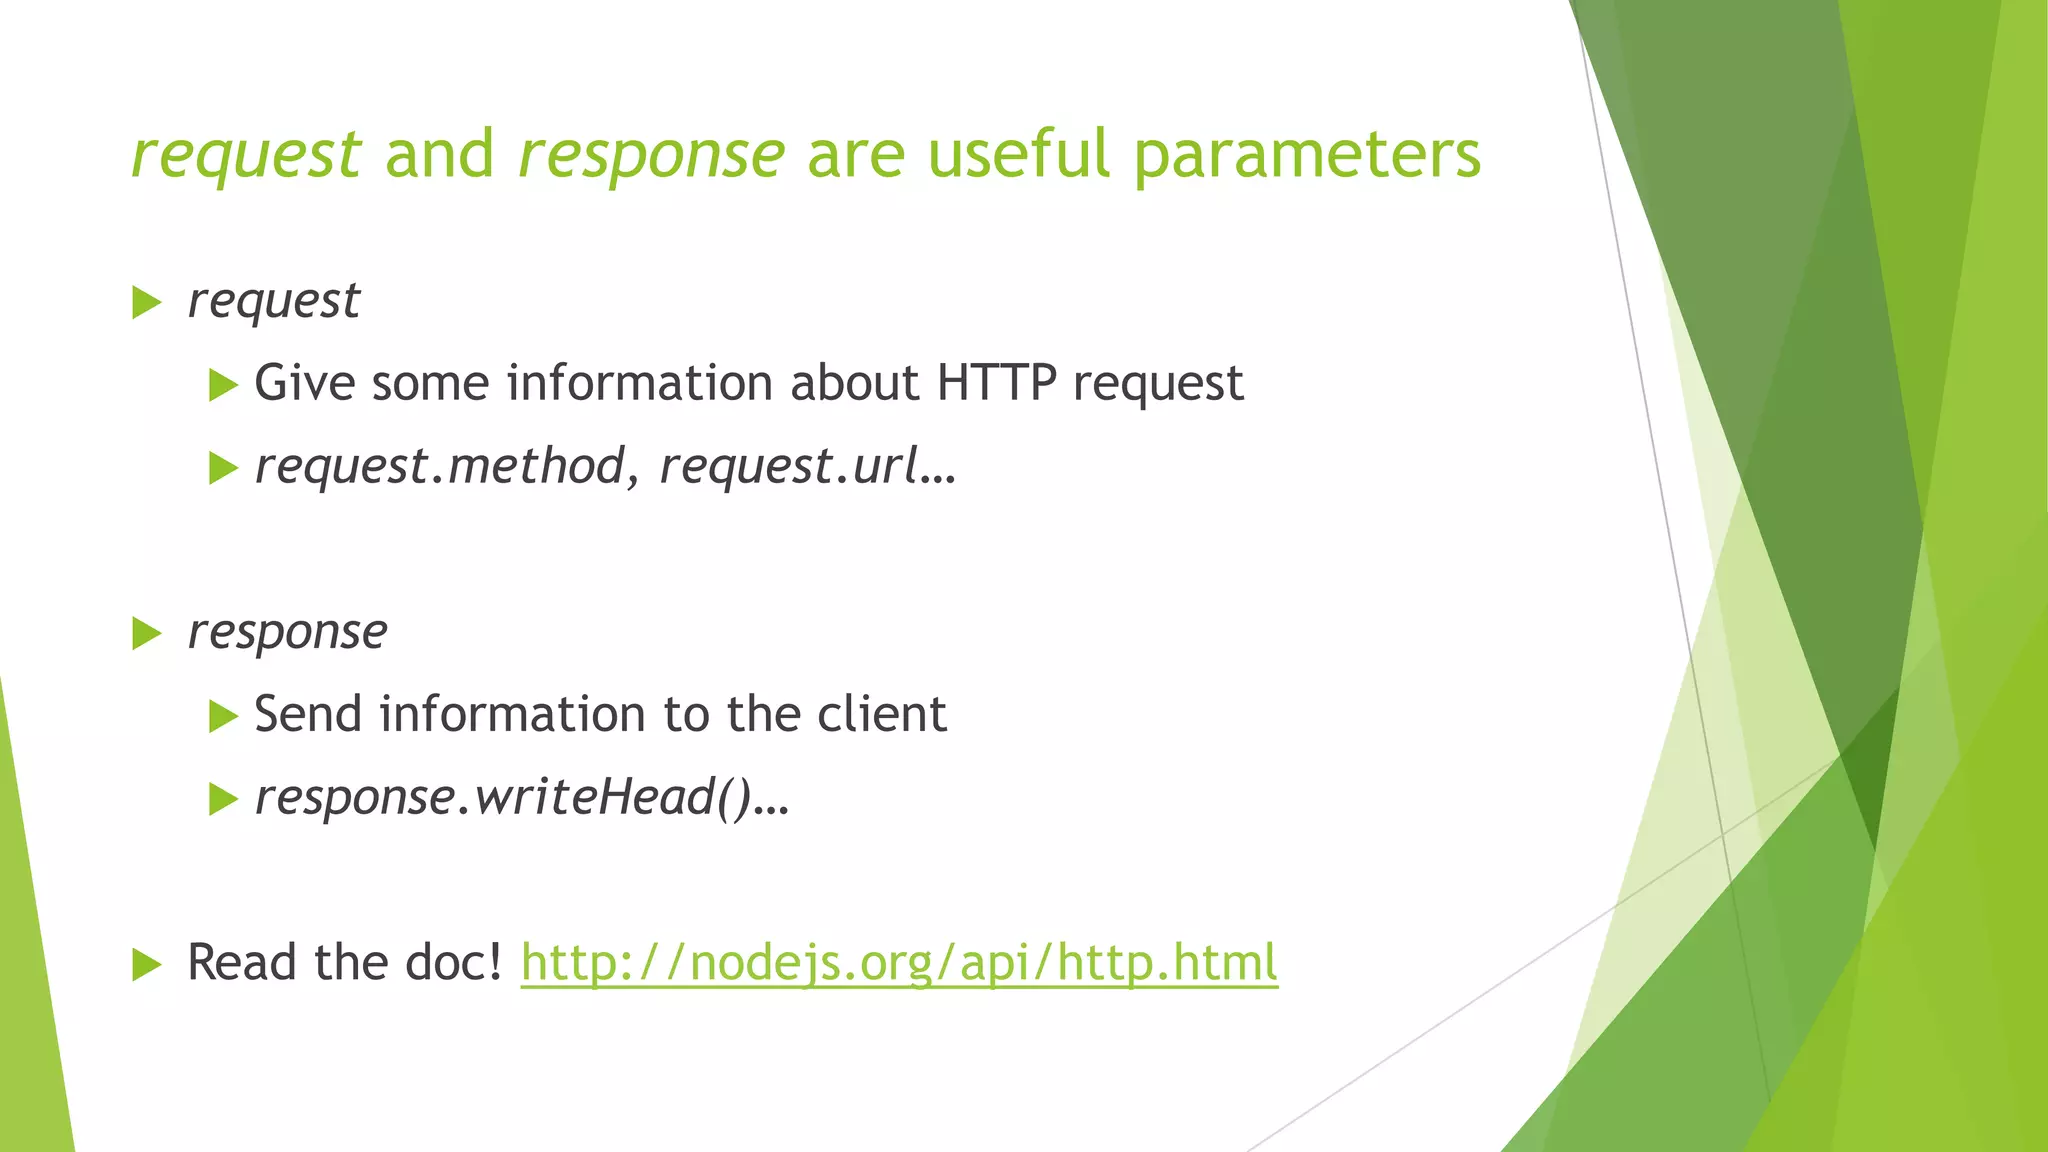
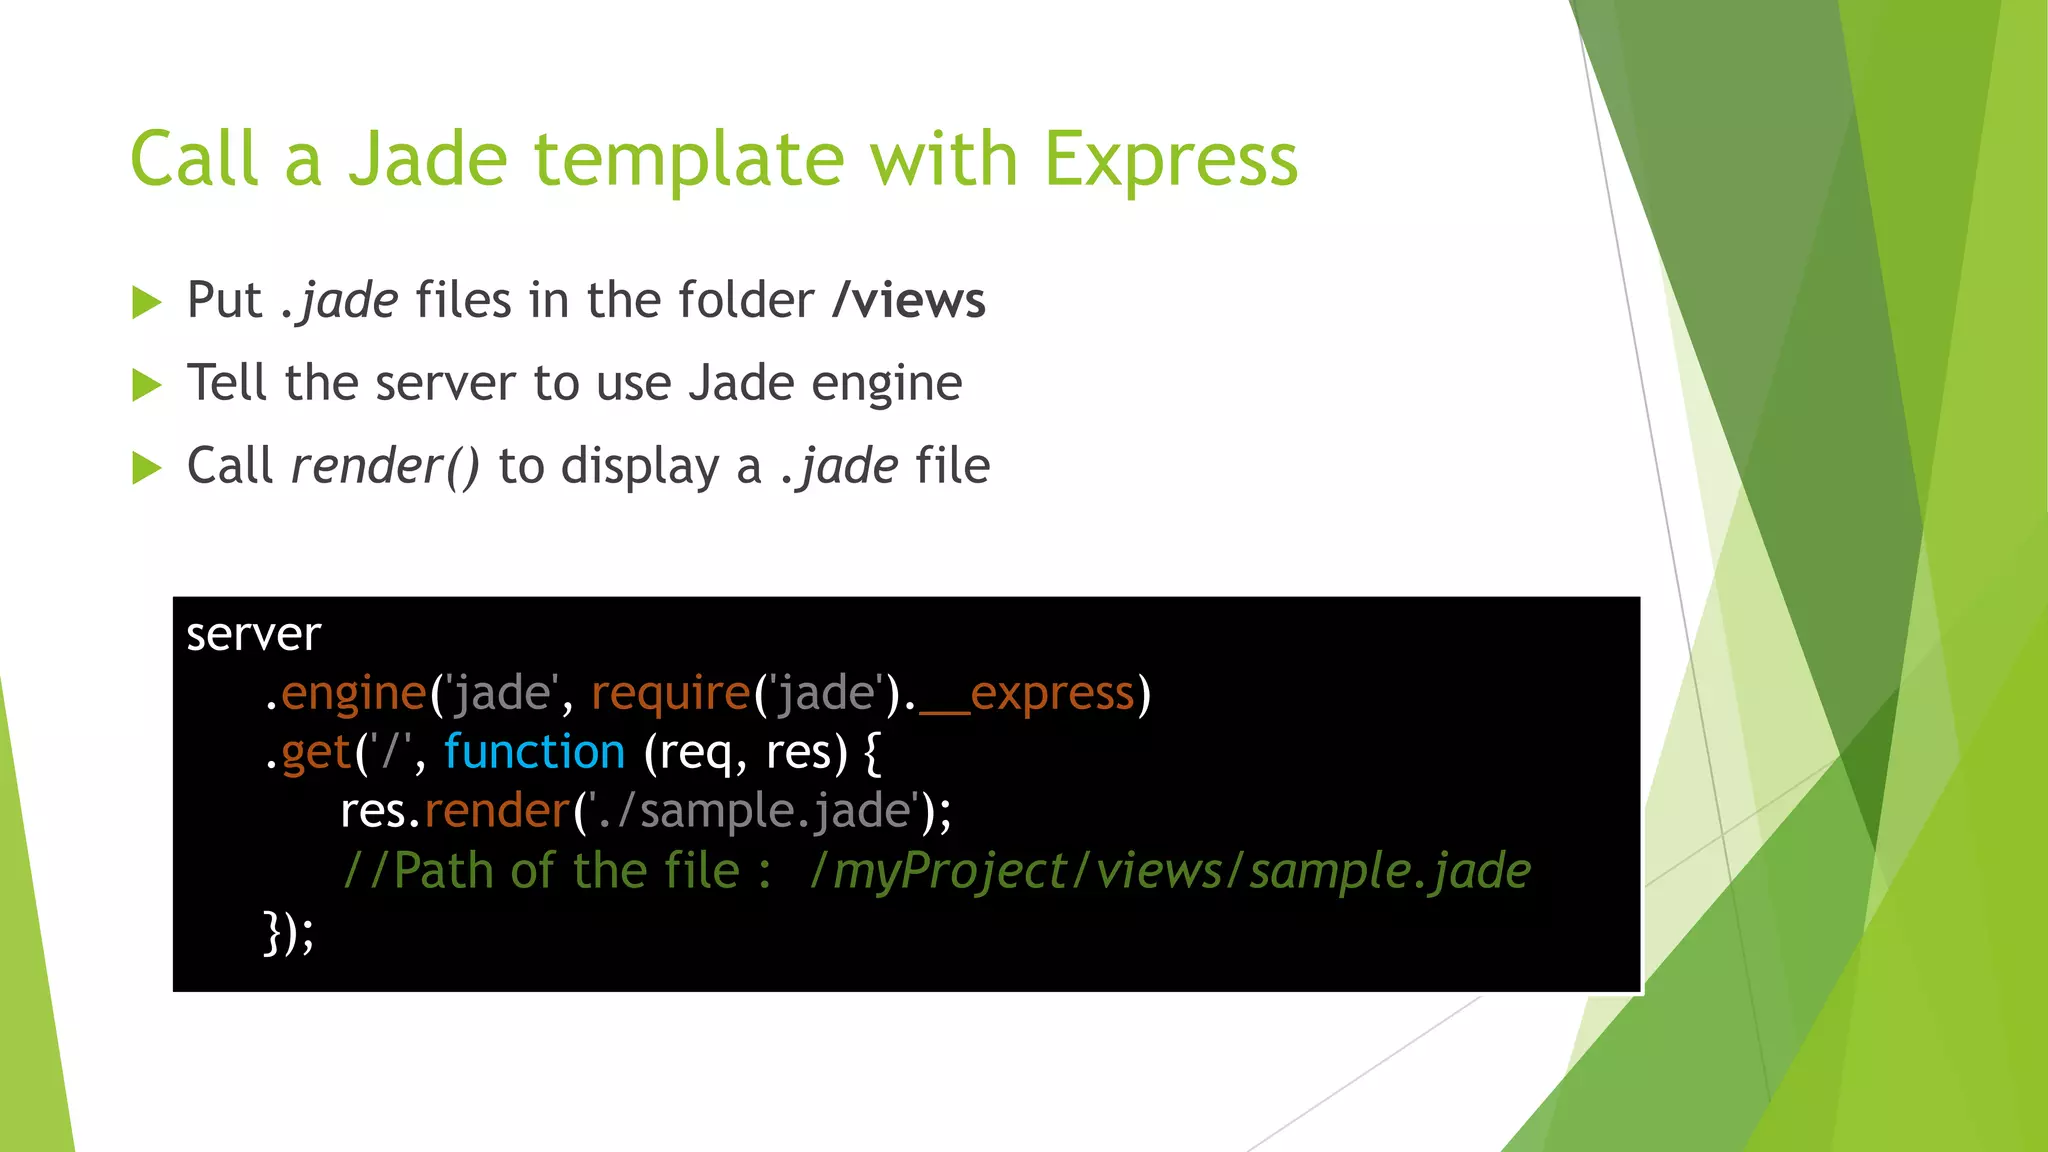
![Retrieve POST parameters
Tell the server we want to get these parameters:
server.use(express.bodyParser());
We‟ll use the post() method (no longer get())
We get values thanks to req.body[parameter name]
server
.post('/farms/add', function (req, res) {
res.send(200, 'Nom reçu : ' + req.body.farm_name);
});](https://image.slidesharecdn.com/nodeen-130226181438-phpapp01/75/Introduction-to-node-js-21-2048.jpg)

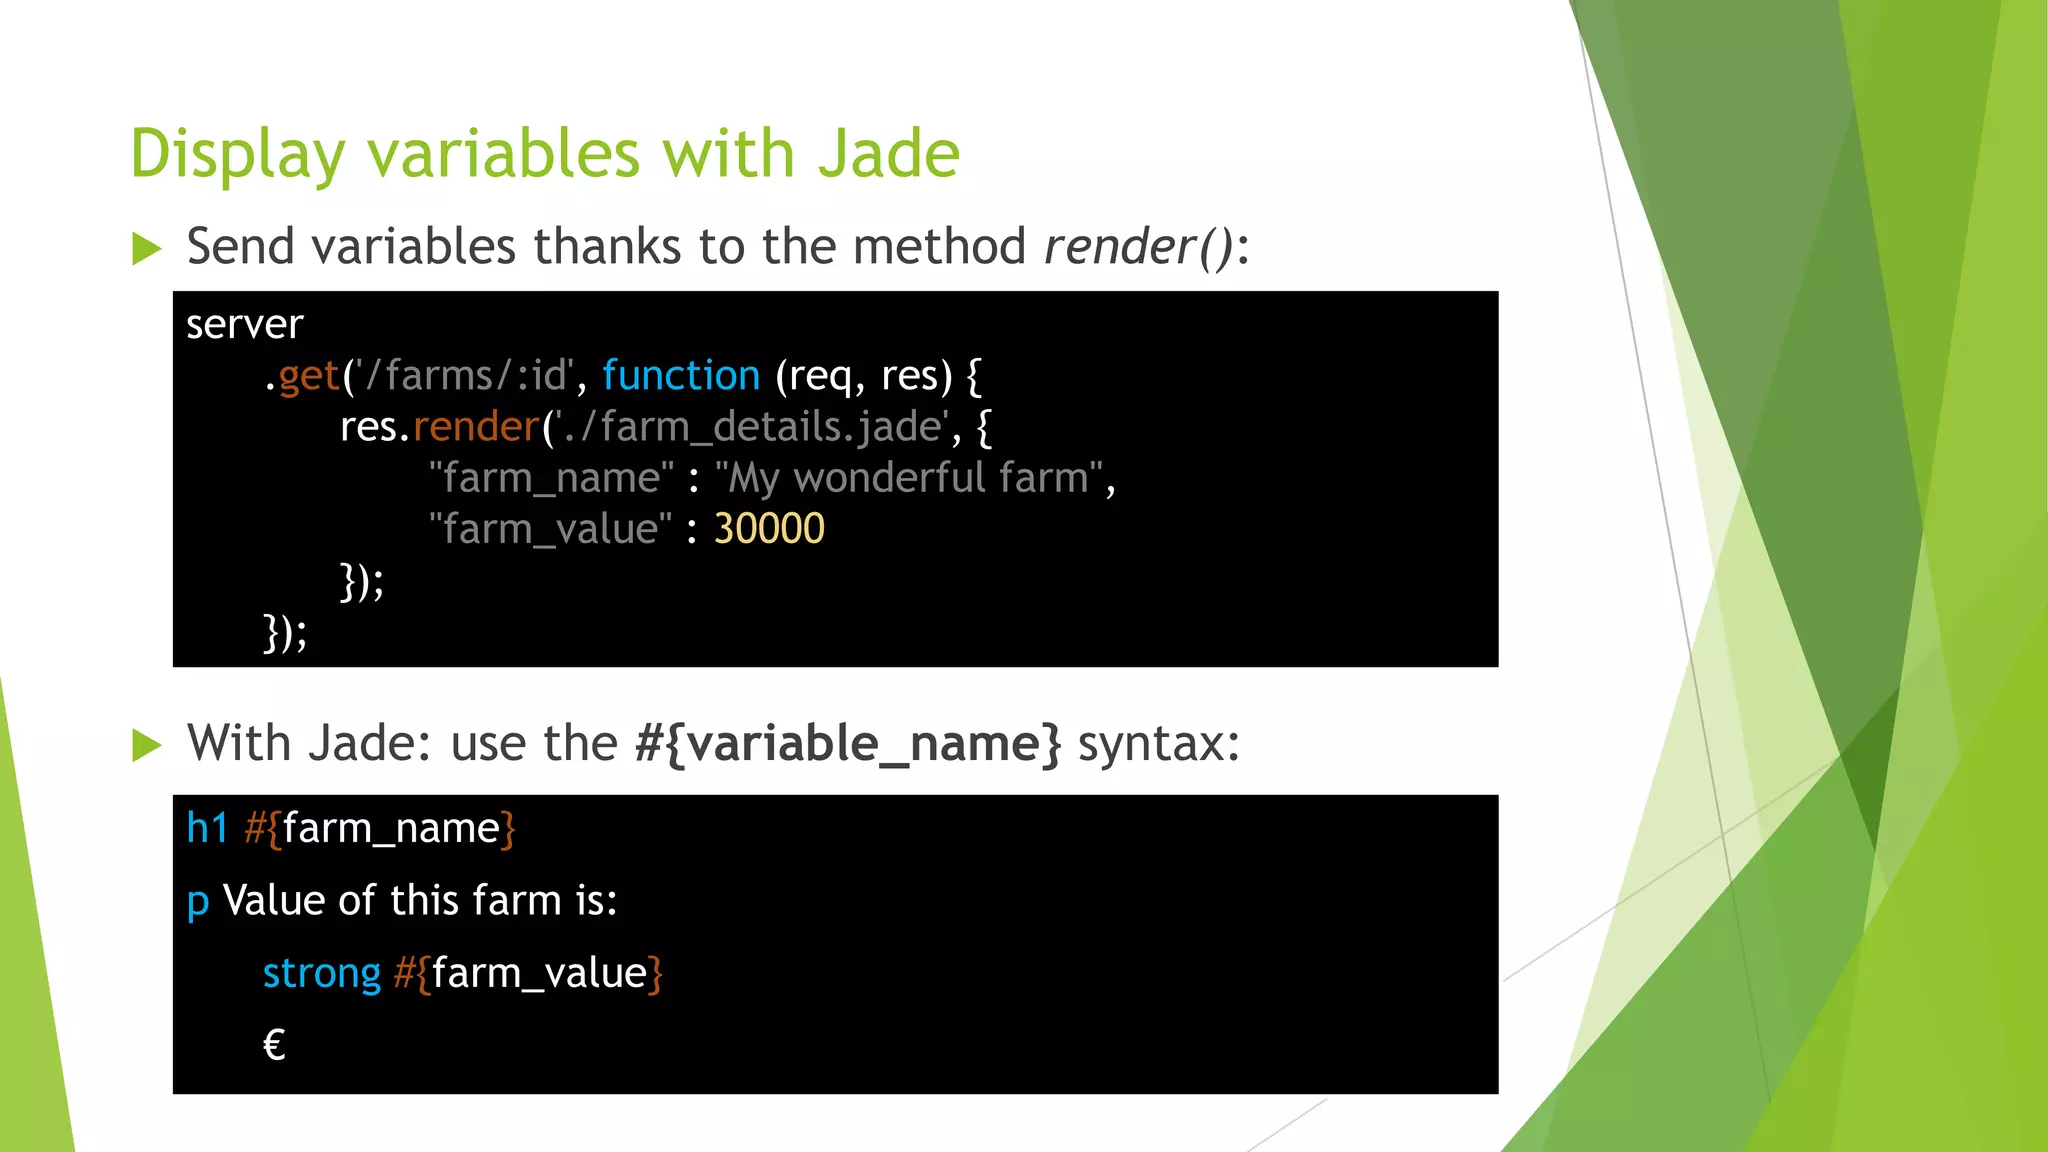
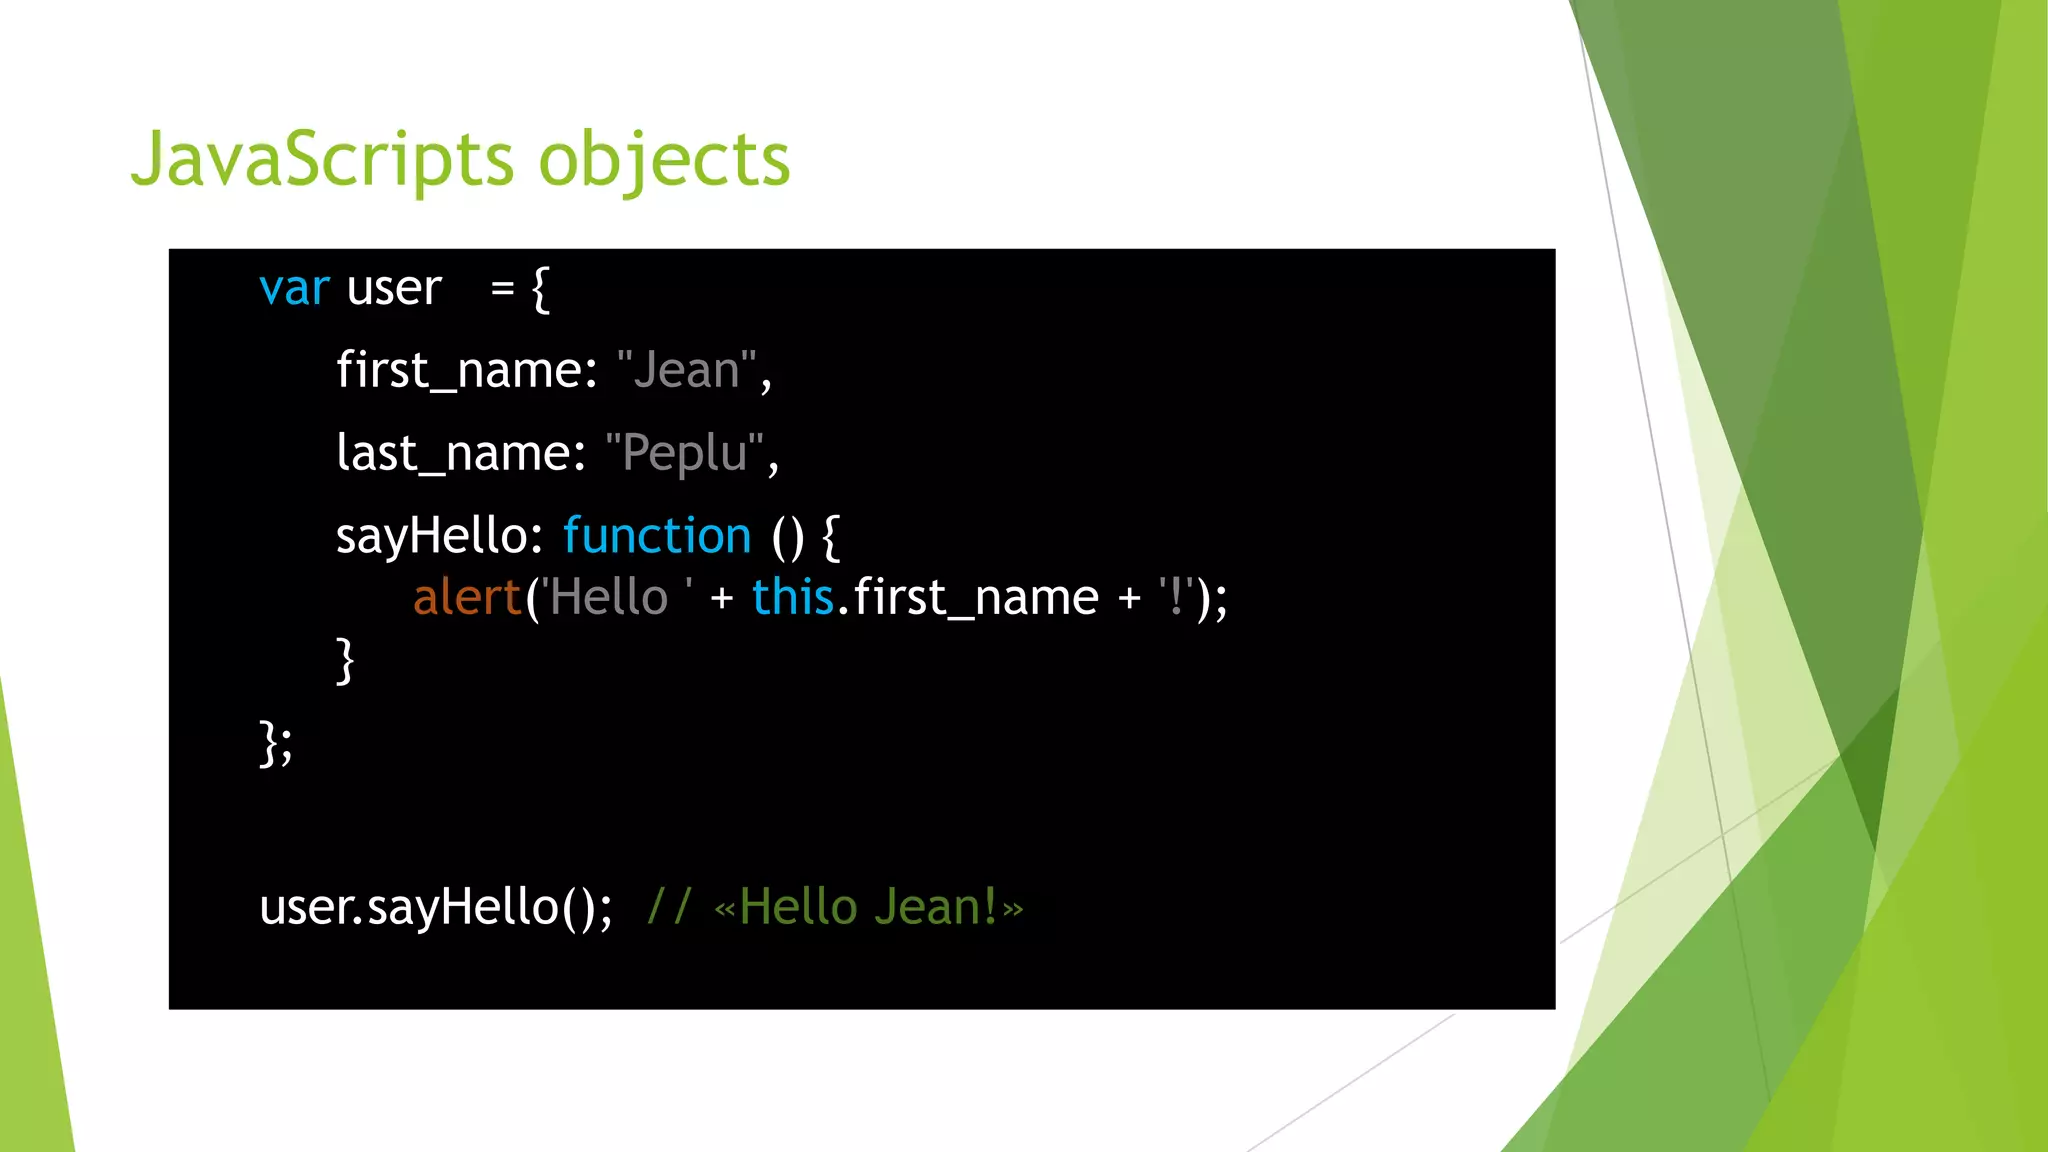
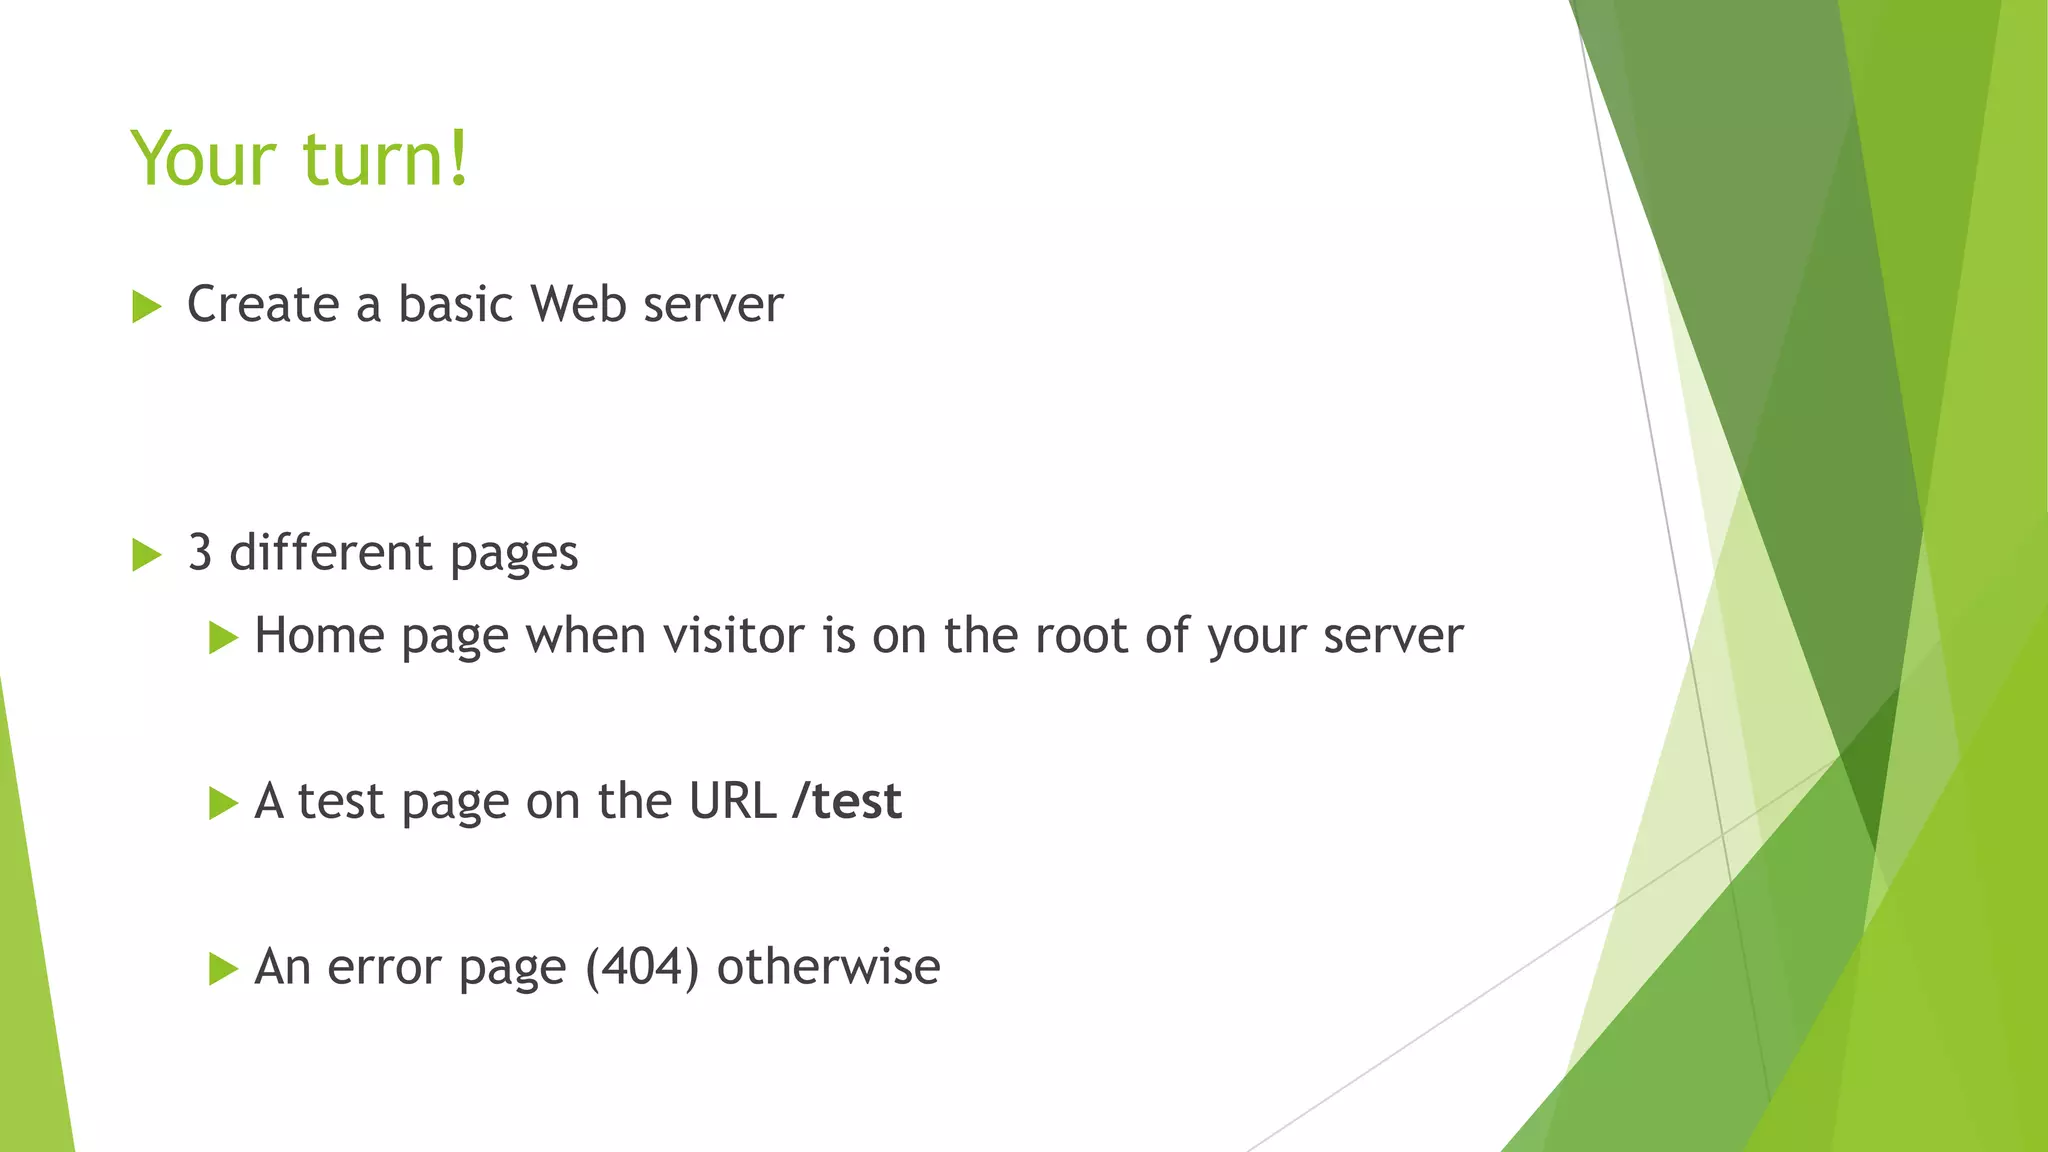
![Display a list of values
server
.get('/farms/', function (req, res) {
res.render('./all_farms.jade', {
"all_farms_id" : [1, 6, 15, 21, 34, 42, 55]
});
});
In Jade: use the each … in syntax:
ul
each farm_id in all_farms_id
li Farm ##{farm_id}](https://image.slidesharecdn.com/nodeen-130226181438-phpapp01/75/Introduction-to-node-js-29-2048.jpg)


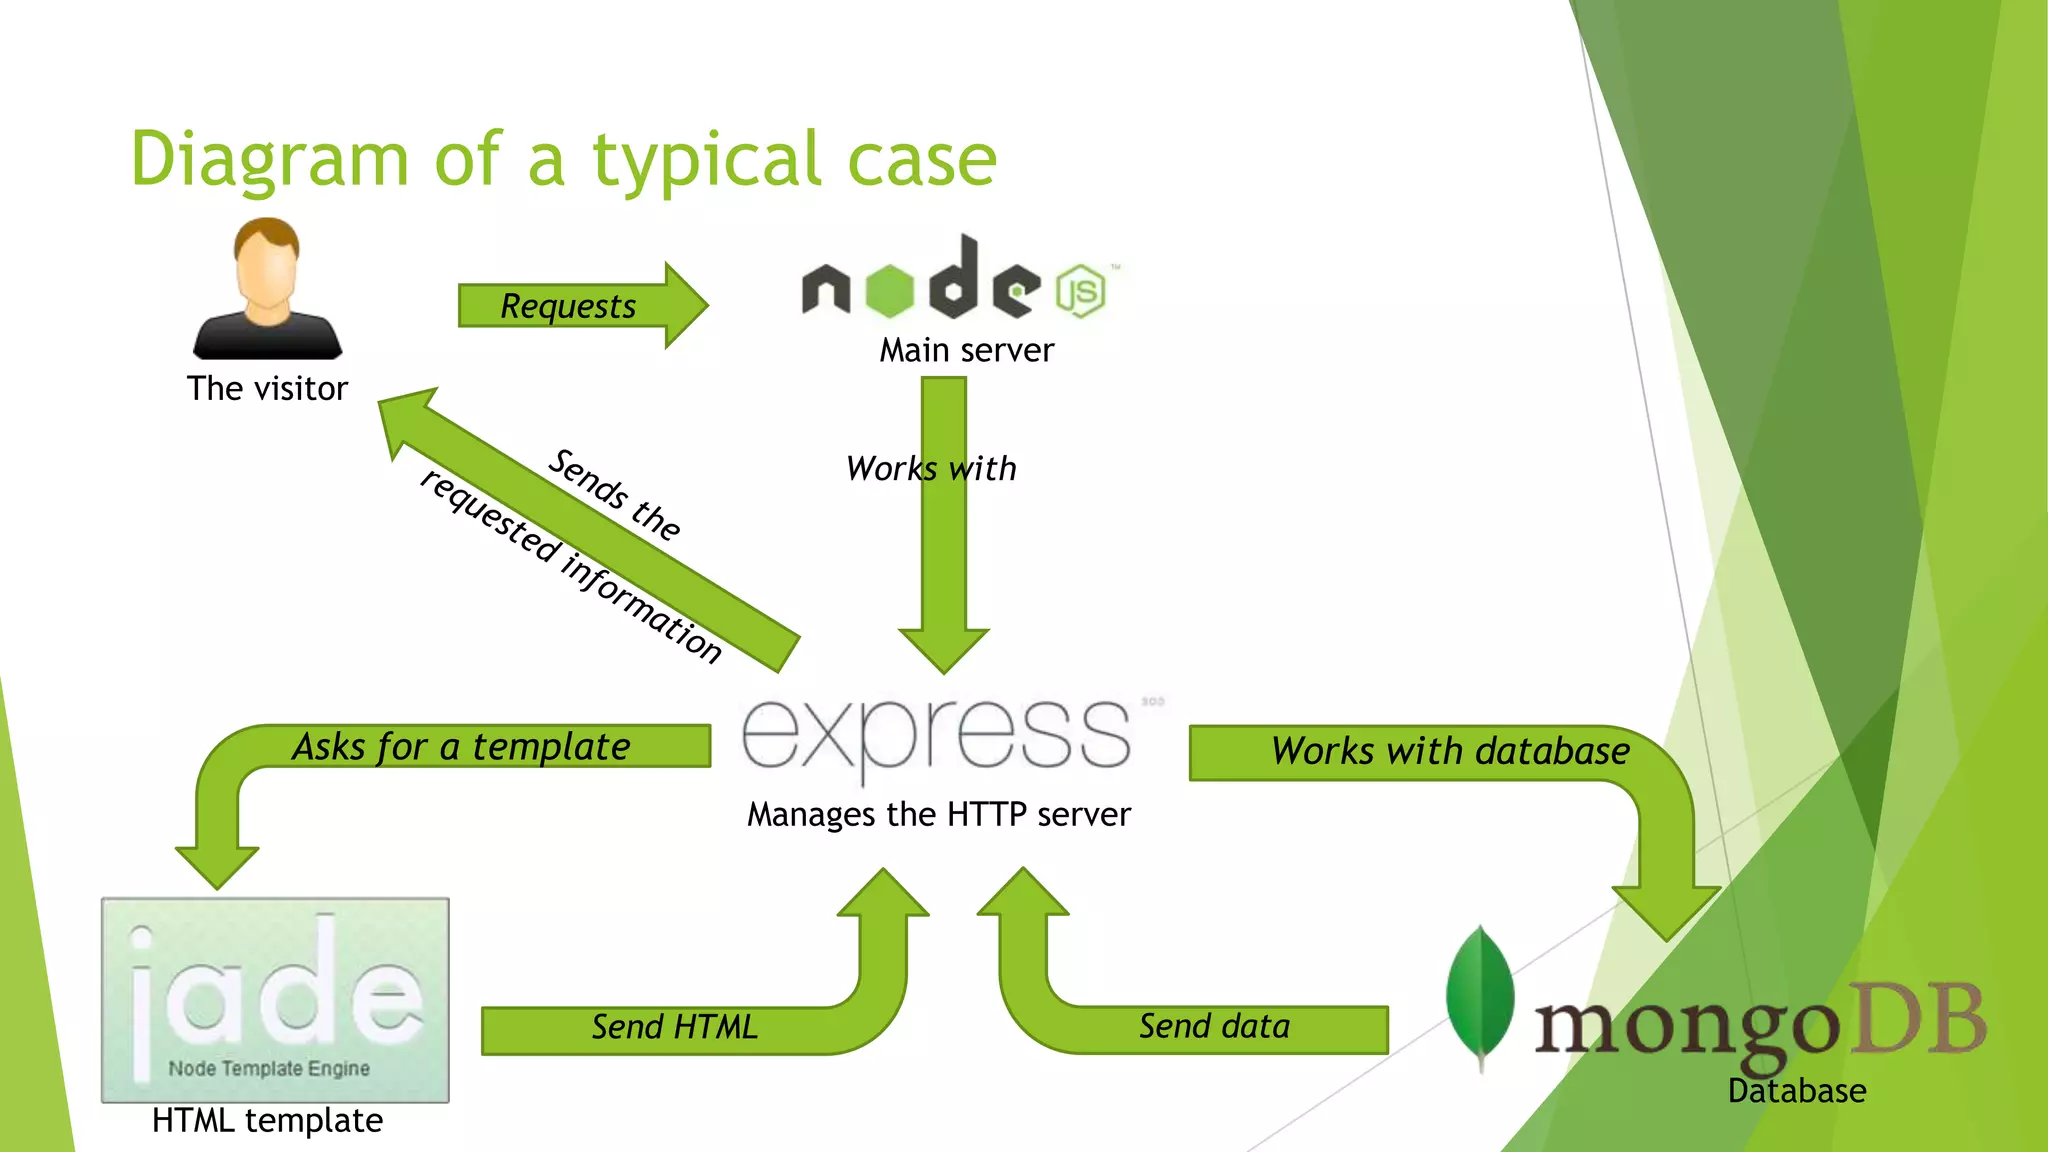
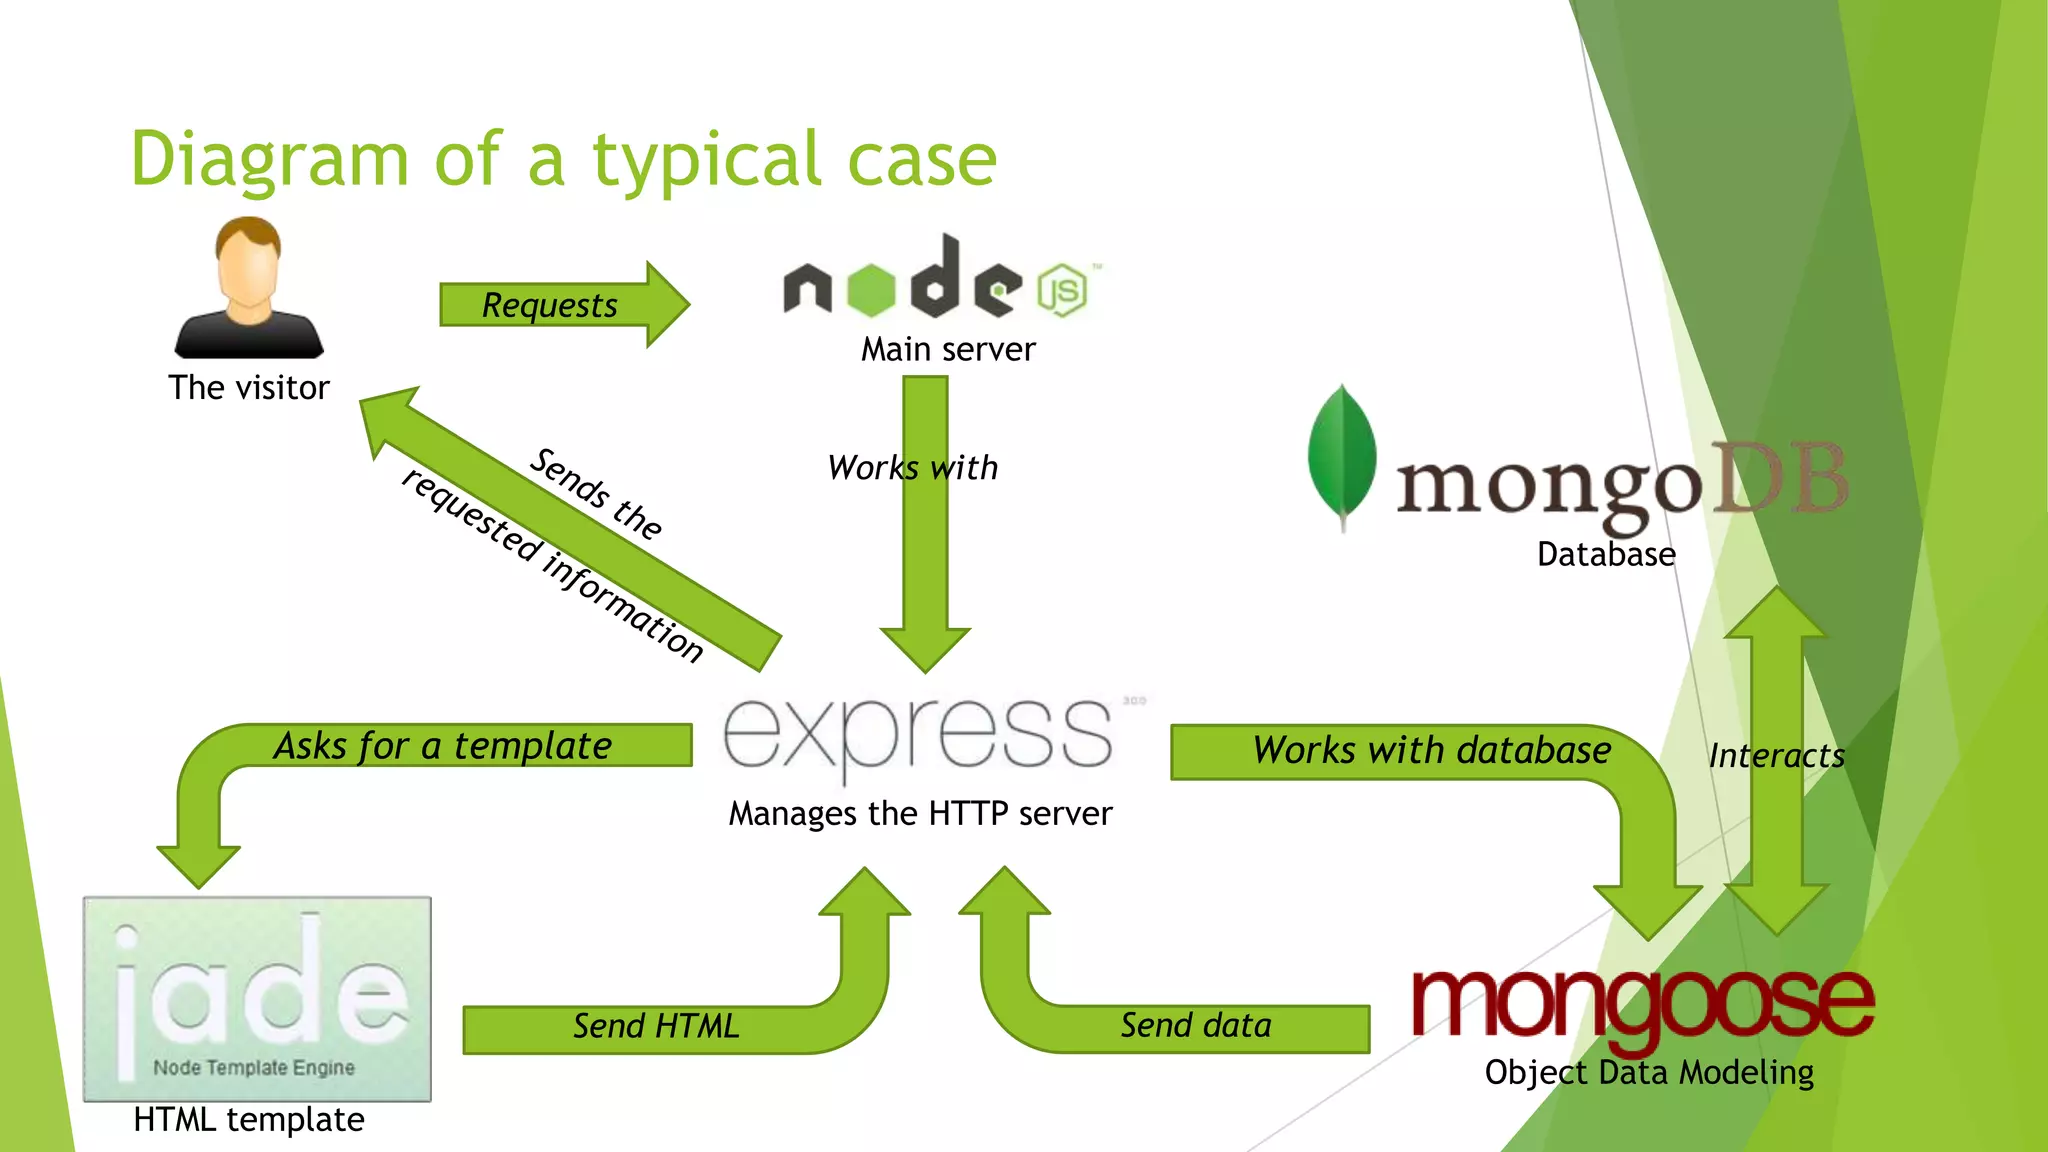


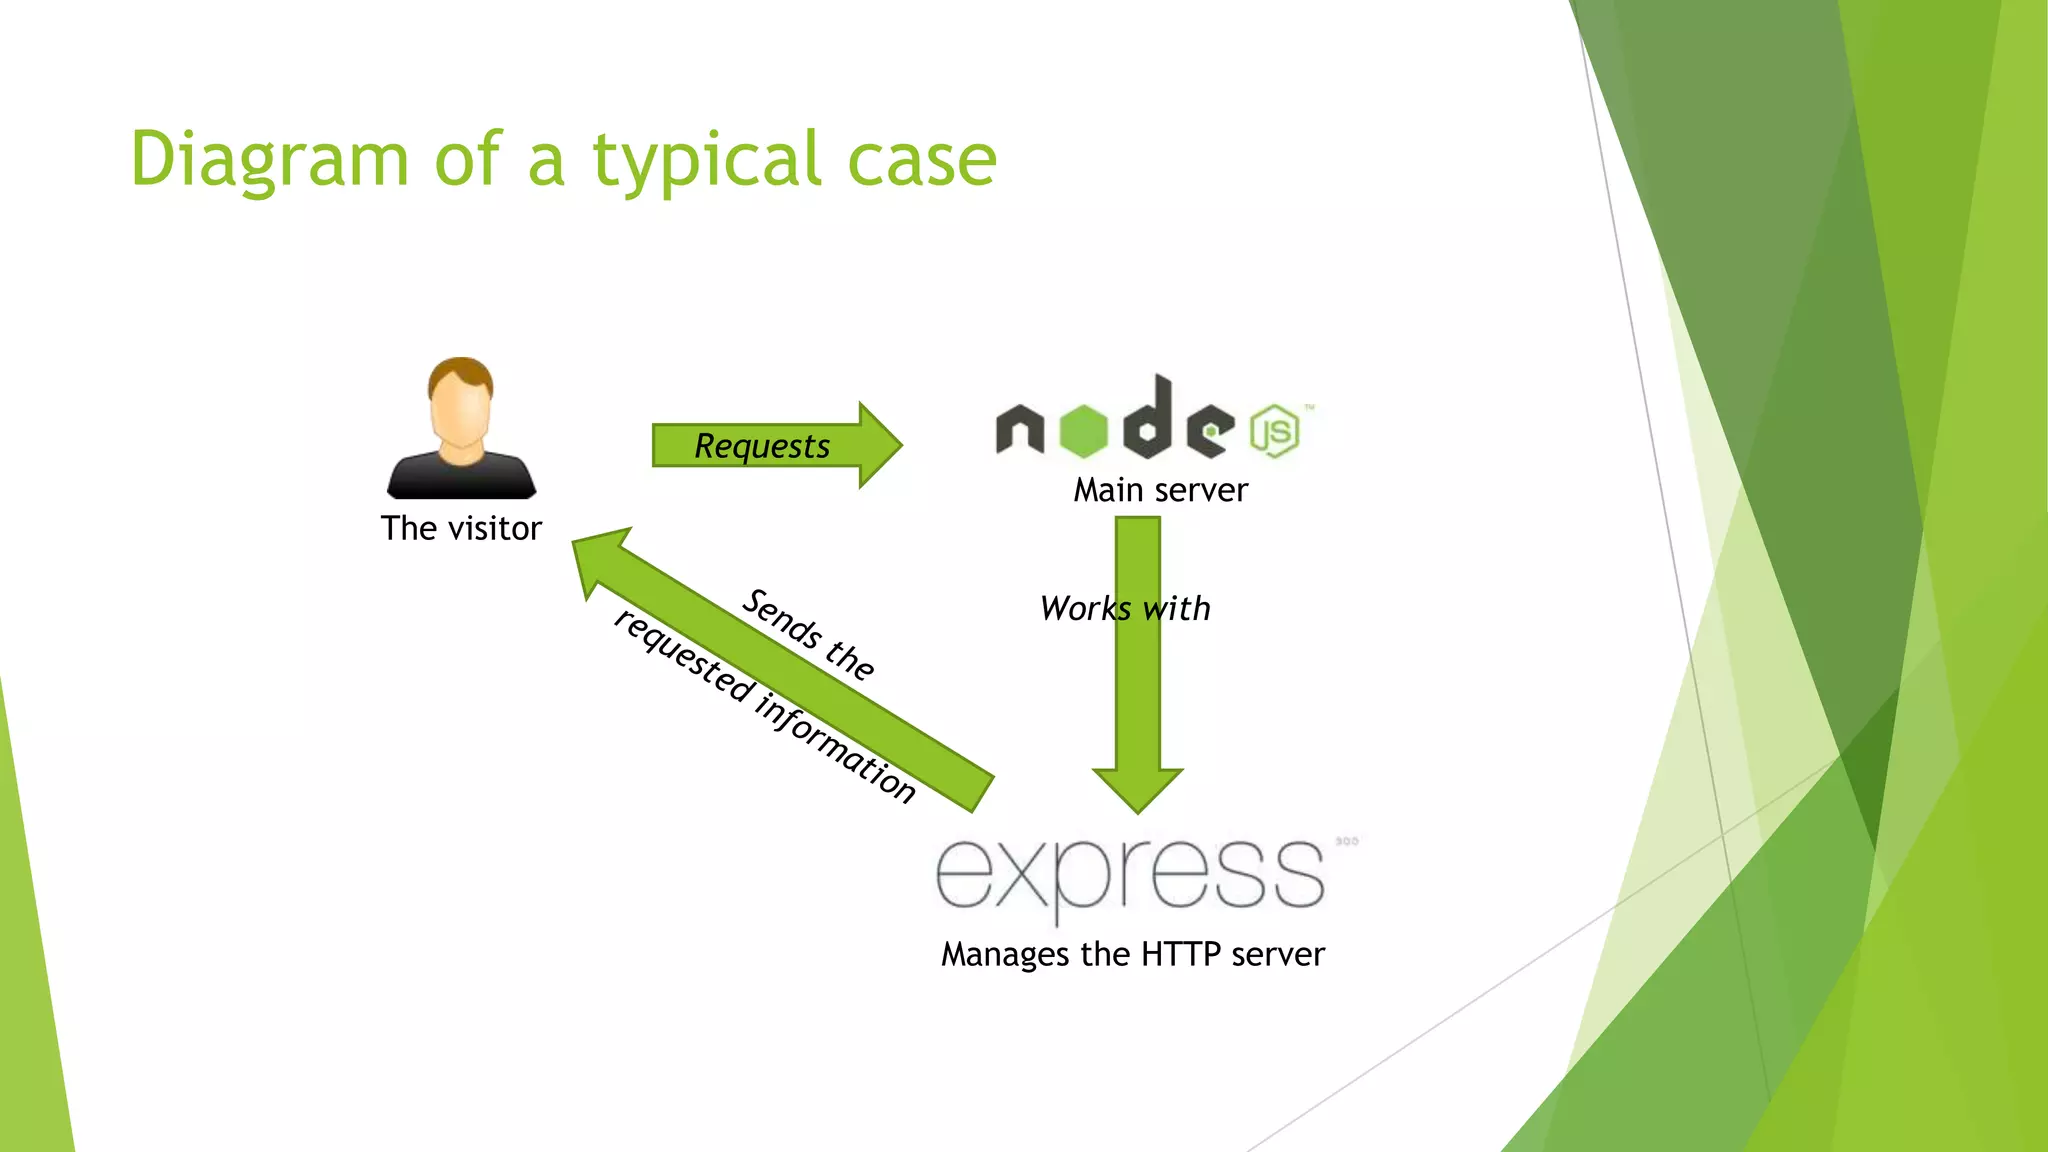
This document provides an introduction to node.js, Express, Jade, MongoDB, and mongoose. It discusses installing and using these technologies to build a web application with a backend server in JavaScript. Node.js is introduced as a way to develop server-side applications with JavaScript. Express is presented as a web application framework that can be used with Node.js. Jade is described as an HTML templating language. MongoDB is explained as a document-oriented NoSQL database, and mongoose is an ODM that provides an interface to work with MongoDB from Node.js applications.