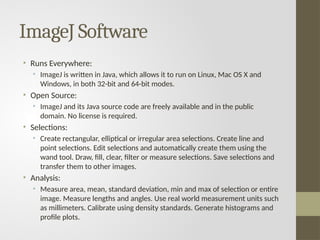
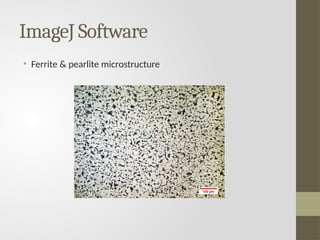
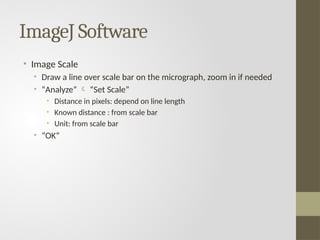
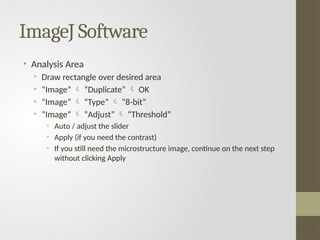
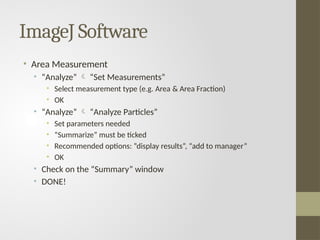
ImageJ Software for
Microstructure Analysis
ENMT604009
Wahyuaji NP
Departemen Teknik Metalurgi dan Material FTUI
Disclaimer: This lecture note is edited from different sources for the solely of teaching and learning purposes. It may contain
copyrighted materials from their respective owners, therefore, apart from teaching and learning purposes, this lecture note
should not be reproduced, stored, or transmitted in any form or by any means
ImageJ Software
• Runs Everywhere:
• ImageJ is written in Java, which allows it to run on Linux, Mac OS X and
Windows, in both 32-bit and 64-bit modes.
• Open Source:
• ImageJ and its Java source code are freely available and in the public
domain. No license is required.
• Selections:
• Create rectangular, elliptical or irregular area selections. Create line and
point selections. Edit selections and automatically create them using the
wand tool. Draw, fill, clear, filter or measure selections. Save selections and
transfer them to other images.
• Analysis:
• Measure area, mean, standard deviation, min and max of selection or entire
image. Measure lengths and angles. Use real world measurement units such
as millimeters. Calibrate using density standards. Generate histograms and
profile plots.
ImageJ Software
• Download link:
• https://imagej.nih.gov/ij/download.html
ImageJ Software
• Ferrite & pearlite microstructure
ImageJ Software
• Pearlite content calculation by ImageJ software
ImageJ Software
• Image Scale
• Draw a line over scale bar on the micrograph, zoom in if needed
• “Analyze”  “Set Scale”
• Distance in pixels: depend on line length
• Known distance : from scale bar
• Unit: from scale bar
• “OK”
ImageJ Software
• Analysis Area
• Draw rectangle over desired area
• “Image”  “Duplicate”  OK
• “Image”  “Type”  “8-bit”
• “Image”  “Adjust”  “Threshold”
• Auto / adjust the slider
• Apply (if you need the contrast)
• If you still need the microstructure image, continue on the next step
without clicking Apply
ImageJ Software
• Area Measurement
• “Analyze”  “Set Measurements”
• Select measurement type (e.g. Area & Area Fraction)
• OK
• “Analyze”  “Analyze Particles”
• Set parameters needed
• “Summarize” must be ticked
• Recommended options: “display results”, “add to manager”
• OK
• Check on the “Summary” window
• DONE!

Introduction to imageJ image analysis new

  • 1.
    ImageJ Software for MicrostructureAnalysis ENMT604009 Wahyuaji NP Departemen Teknik Metalurgi dan Material FTUI Disclaimer: This lecture note is edited from different sources for the solely of teaching and learning purposes. It may contain copyrighted materials from their respective owners, therefore, apart from teaching and learning purposes, this lecture note should not be reproduced, stored, or transmitted in any form or by any means
  • 2.
    ImageJ Software • RunsEverywhere: • ImageJ is written in Java, which allows it to run on Linux, Mac OS X and Windows, in both 32-bit and 64-bit modes. • Open Source: • ImageJ and its Java source code are freely available and in the public domain. No license is required. • Selections: • Create rectangular, elliptical or irregular area selections. Create line and point selections. Edit selections and automatically create them using the wand tool. Draw, fill, clear, filter or measure selections. Save selections and transfer them to other images. • Analysis: • Measure area, mean, standard deviation, min and max of selection or entire image. Measure lengths and angles. Use real world measurement units such as millimeters. Calibrate using density standards. Generate histograms and profile plots.
  • 3.
    ImageJ Software • Downloadlink: • https://imagej.nih.gov/ij/download.html
  • 4.
    ImageJ Software • Ferrite& pearlite microstructure
  • 5.
    ImageJ Software • Pearlitecontent calculation by ImageJ software
  • 6.
    ImageJ Software • ImageScale • Draw a line over scale bar on the micrograph, zoom in if needed • “Analyze”  “Set Scale” • Distance in pixels: depend on line length • Known distance : from scale bar • Unit: from scale bar • “OK”
  • 7.
    ImageJ Software • AnalysisArea • Draw rectangle over desired area • “Image”  “Duplicate”  OK • “Image”  “Type”  “8-bit” • “Image”  “Adjust”  “Threshold” • Auto / adjust the slider • Apply (if you need the contrast) • If you still need the microstructure image, continue on the next step without clicking Apply
  • 8.
    ImageJ Software • AreaMeasurement • “Analyze”  “Set Measurements” • Select measurement type (e.g. Area & Area Fraction) • OK • “Analyze”  “Analyze Particles” • Set parameters needed • “Summarize” must be ticked • Recommended options: “display results”, “add to manager” • OK • Check on the “Summary” window • DONE!