
Recommended
More Related Content
What's hot
What's hot (20)
Viewers also liked
Viewers also liked (20)
Similar to Internal Oak EASI-Frame System
Similar to Internal Oak EASI-Frame System (20)
Recently uploaded
Recently uploaded (20)
Internal Oak EASI-Frame System
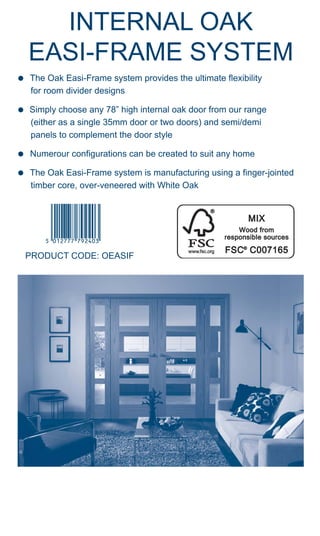
- 1. INTERNAL OAK EASI-FRAME SYSTEM The Oak Easi-Frame system provides the ultimate flexibility for room divider designs Simply choose any 78” high internal oak door from our range (either as a single 35mm door or two doors) and semi/demi panels to complement the door style Numerour configurations can be created to suit any home The Oak Easi-Frame system is manufacturing using a finger-jointed timber core, over-veneered with White Oak PRODUCT CODE: OEASIF Oak Easi-Frame Label & Instructions:Layout 1 27/06/12 11:58 Page 1
- 2. Assembling the Frame Measure the brickwork/ partition opening and decide upon a suitable opening configuration: The diagram opposite gives some common examples although there are many other potential configurations. Doors and Sidelights can be trimmed in the height and width to allow some adjustment to the required opening dimensions: Maximum trimming information is included with the relevant product. The vertical frame components are also supplied over-length to allow height reduction for different depths of floor covering. Unpack and loosely assemble the Jambs, Mullions and Frame Head on a clean flat surface: The vertical frame components are pre-cut at the top to sit in the Frame Head rebate. Use the doors and sidelights to act as a spacer between the vertical frame components: Allow sufficient clearance between all components to allow for any Pair Maker or hardware, e.g. hinges, and the unobstructed opening and closing of doors and/or sidelights. Double check that the finalised external frame dimensions suits the opening. Ensure the loosely assembled frame is square. Mark the screw positions on the Frame Head and pre-drill through the head and into the vertical members. Apply wood adhesive to the adjoining surfaces between the vertical frame components and the Frame Head, prior to screwing the jointed components together. Wipe off any excess wood adhesive with a clean cloth. Ensure the frame joints are tight and that the frame is kept square prior to installation. Install the Assembled Frame Depending on the opening configuration, the installer may permanently fix the sidelights into the vertical frame components prior to locating the frame in the opening: Ensure that the clearance at the top of the sidelights match that of the other door and sidelight components, i.e. a 3mm gap between the top of the opening doors and Frame Head should be duplicated on the adjacent sidelights to provide an even sightline. Fit the frame into the opening, ensuring it is fitted square and level in both the horizontal and vertical plane. If necessary, use packers between the frame and opening: Check that the frame diagonal tolerance is 2mm or less. Fix the frame through the Jambs and Frame Head and into the adjacent walls and ceiling: Countersink the screws so that they are below the surface of the frame. Ensure that there are no service pipes or wires near to the screws. Once the installation of the frame is finalised, hang the doors and sidelights to complete the installation. XL JOINERY OAK EASI-FRAME INSTRUCTIONS Frame Configuration Examples Note: The Oak Easi-Frame consists of 1 x Frame Head, 2 x Frame Jambs and 2 x Frame Mullions only: Doors, Sidelights, Pair Makers, Hardware and other fixing materials are not included. Pair Makers are optional for double doors. Please ensure that all components are present and in good condition prior to installation. Finishing It is important to treat the timber components with a good quality paint, varnish or wood stain: Ensure that you follow the finishing instructions supplied with the doors for all timber components. XL Joinery Limited, Bradford Rd, Batley,West Yorkshire WF17 8NE www.xljoinery.co.uk Oak Easi-Frame Label & Instructions:Layout 1 27/06/12 11:58 Page 2