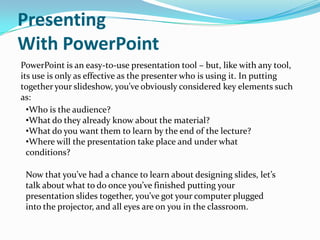
NAME:
BELÉN PAUCAR
Presenting
With PowerPoint
PowerPoint is an easy-to-use presentation tool – but, like with any tool,
its use is only as effective as the presenter who is using it. In putting
together your slideshow, you’ve obviously considered key elements such
as:
  •Who is the audience?
  •What do they already know about the material?
  •What do you want them to learn by the end of the lecture?
  •Where will the presentation take place and under what
  conditions?

 Now that you’ve had a chance to learn about designing slides, let’s
 talk about what to do once you’ve finished putting your
 presentation slides together, you’ve got your computer plugged
 into the projector, and all eyes are on you in the classroom.
Best Practices in Presenting with
PowerPoint

Here are ten simple PowerPoint best
practices to help you give a polished
               lecture.
1. Think about goals and purpose
of handouts
 . Many instructors hand out PowerPoint presentations as
     “thumbnails” before the lecture starts or make them
  available on Blackboard for students to print and bring to
  class as a note-taking tool. The handouts are useful to give
 students a structure to their note taking, but many students
    are over-reliant on the handouts and fail to write much
       down. Some students simply highlight text on the
  thumbnail. If you are distributing handouts of your slides
   before your lecture, be sure to discuss with students your
   goals for doing so and your expectations of what roles the
 handouts will serve for them. Those same goals will inform
 your decisions on how you format the pages for printing, as
                               well.
2. Minimize the number of slides.
 Beginning users of PowerPoint tend to use too much text and too
    many slides, leaving their audience dazed and confused. Don‘t
 overwhelm your students with too many slides. Each slide should be
  displayed long enough for you to discuss what is keyed there – not
   simply to read a list or block of text. To discourage yourself from
           reading slides, use fewer slides with concise text.
3. Don't parrot PowerPoint.
  It’s tempting to simply read the visual presentation to the
     class, and sometimes instructors find themselves doing
  that, particularly when they are crunched for time. But, not
  only is that redundant — almost like reading out loud from
   the textbook! — it also makes for an excruciatingly boring
    audience experience. PowerPoint is intended to provide a
  visual element to spoken remarks that augment and discuss
       what is displayed. And, keep in mind that 99% of the
       time, you should be looking at your students, not the
            projection screen or your computer screen.
4. Hold up your end.
   Many students have stronger visual skills than auditory
      skills, and so PowerPoint is effective in holding their
 attention. Unfortunately, that can be a problem. Students can
  easily “zone out” and watch your slide like a television while
  you are talking. Make sure that you are in their foreground –
      that what you are saying and how you are saying it is
 compelling enough to keep them focused on you, and no on
                           your slides.
5. Time your talk.
Keeping in mind student attention and learning styles, remember that
  another potential problem occurs when your important comments
   coincide precisely with the appearance of a fresh PowerPoint slide.
      Having the simultaneous visual and auditory input splits your
  students’ attention, and it’s likely that the visual input will win out.
  Bring up a new slide, and then give your students a chance to check
   it out before you begin verbally broadening and amplifying what's
                              on the screen.
6. Give it a rest.
  We can’t say it too often – PowerPoint is most effective as a
  visual accompaniment to the spoken word, not as the vehicle
 for all of the content of a lecture. Don’t be shy about blanking
 the screen on occasion when you need your students to focus
    on you. You’ll find that blanking the screen is an effective
    means by which to change the energy from watching and
     listening to interaction, such as a group discussion or a
                  question - and answer session.
7. Make it interactive.
 It’s easy to get into a PowerPoint rut, outlining your notes and
    adding variety by occasionally mixing up the background or
   throwing in a video or hyperlink. But PowerPoint can be used
    interactively as well. Ask students to anticipate information
  on an upcoming slide, or use PowerPoint for interactive games
                   using action buttons, for instance.
8. Mix up the media.
Putting a range of media into your PowerPoint presentations
     allows you to appeal to a wide variety of learning styles.
   PowerPoint allows you to bring in many different kinds of
   media -- including graphic images, colored and “textured”
          backgrounds, photographs, sound files, video
 clips, animations, and, of course, text. You can also hyperlink
    pages within the presentation to Web pages, as well as to
              other pages within the presentation.
9. Hide your pointer.
Since PowerPoint can easily steal the show, you want to make
  sure that you do everything you can to keep distractions to a
     minimum. Some students are easily distracted when the
     pointer (the arrow) moves across the screen during the
 presentation. (This happens when you move the mouse in the
  Slide Show View.) To circumvent this problem, use the arrow
 keys to navigate slides or hide the pointer. To hide the pointer,
     once the Slide Show View is started, press the Ctrl-L key
 combination. This hides the pointer even if the mouse moves.
   If you need to display the pointer during the presentation,
                press the Ctrl-A key combination.
10. Rehearse before presenting.
   Even if you’ve given a lecture a thousand times without
 PowerPoint, it’s going to go a little differently when you use a
 PowerPoint presentation. Practicing your presentation in the
    slideshow view in your office or at home, will help you
   anticipate any glitches that you didn’t see when you were
          focused on getting content onto your slides.
Know Your Moves
 In addition to being a smooth presenter, you’ll need to make
      sure you know the basic keyboarding techniques for
    technically moving through your presentation. Different
  presenters use different key options. Find the ones that work
         well for you, and soon they’ll be second nature.
Go to the next slide
                     • Click the mouse
                 • Press spacebar or enter
                • Click the forward arrow
  • Right-click, and on the shortcut menu, click next

                Go to the previous slide
                    • Press backspace
                 • Click the back arrow
• Right-click, and on the shortcut menu, click previous
Go to a specific slide
    • Type the slide number, and then press return
• Right-click, point to go on the shortcut menu, then
     point to by title and click the slide you want.

            See previously viewed slide
• Right-click, point to go on the shortcut menu, and
            then click Previously Viewed.

    Temporarily black out the screen during a
                    presentation
• Press the B key - This turns the audience's monitor
                         black
To resume the slide show
    • Press the B key again to return to the current slide
  • Press any of the keys listed above to move to the next
                            screen
• Press any of the keys listed above to return to the screen
                    previously displayed

Interactive power point Belen Paucar

  • 1.
  • 3.
    Presenting With PowerPoint PowerPoint isan easy-to-use presentation tool – but, like with any tool, its use is only as effective as the presenter who is using it. In putting together your slideshow, you’ve obviously considered key elements such as: •Who is the audience? •What do they already know about the material? •What do you want them to learn by the end of the lecture? •Where will the presentation take place and under what conditions? Now that you’ve had a chance to learn about designing slides, let’s talk about what to do once you’ve finished putting your presentation slides together, you’ve got your computer plugged into the projector, and all eyes are on you in the classroom.
  • 4.
    Best Practices inPresenting with PowerPoint Here are ten simple PowerPoint best practices to help you give a polished lecture.
  • 5.
    1. Think aboutgoals and purpose of handouts . Many instructors hand out PowerPoint presentations as “thumbnails” before the lecture starts or make them available on Blackboard for students to print and bring to class as a note-taking tool. The handouts are useful to give students a structure to their note taking, but many students are over-reliant on the handouts and fail to write much down. Some students simply highlight text on the thumbnail. If you are distributing handouts of your slides before your lecture, be sure to discuss with students your goals for doing so and your expectations of what roles the handouts will serve for them. Those same goals will inform your decisions on how you format the pages for printing, as well.
  • 6.
    2. Minimize thenumber of slides. Beginning users of PowerPoint tend to use too much text and too many slides, leaving their audience dazed and confused. Don‘t overwhelm your students with too many slides. Each slide should be displayed long enough for you to discuss what is keyed there – not simply to read a list or block of text. To discourage yourself from reading slides, use fewer slides with concise text.
  • 7.
    3. Don't parrotPowerPoint. It’s tempting to simply read the visual presentation to the class, and sometimes instructors find themselves doing that, particularly when they are crunched for time. But, not only is that redundant — almost like reading out loud from the textbook! — it also makes for an excruciatingly boring audience experience. PowerPoint is intended to provide a visual element to spoken remarks that augment and discuss what is displayed. And, keep in mind that 99% of the time, you should be looking at your students, not the projection screen or your computer screen.
  • 8.
    4. Hold upyour end. Many students have stronger visual skills than auditory skills, and so PowerPoint is effective in holding their attention. Unfortunately, that can be a problem. Students can easily “zone out” and watch your slide like a television while you are talking. Make sure that you are in their foreground – that what you are saying and how you are saying it is compelling enough to keep them focused on you, and no on your slides.
  • 9.
    5. Time yourtalk. Keeping in mind student attention and learning styles, remember that another potential problem occurs when your important comments coincide precisely with the appearance of a fresh PowerPoint slide. Having the simultaneous visual and auditory input splits your students’ attention, and it’s likely that the visual input will win out. Bring up a new slide, and then give your students a chance to check it out before you begin verbally broadening and amplifying what's on the screen.
  • 10.
    6. Give ita rest. We can’t say it too often – PowerPoint is most effective as a visual accompaniment to the spoken word, not as the vehicle for all of the content of a lecture. Don’t be shy about blanking the screen on occasion when you need your students to focus on you. You’ll find that blanking the screen is an effective means by which to change the energy from watching and listening to interaction, such as a group discussion or a question - and answer session.
  • 11.
    7. Make itinteractive. It’s easy to get into a PowerPoint rut, outlining your notes and adding variety by occasionally mixing up the background or throwing in a video or hyperlink. But PowerPoint can be used interactively as well. Ask students to anticipate information on an upcoming slide, or use PowerPoint for interactive games using action buttons, for instance.
  • 12.
    8. Mix upthe media. Putting a range of media into your PowerPoint presentations allows you to appeal to a wide variety of learning styles. PowerPoint allows you to bring in many different kinds of media -- including graphic images, colored and “textured” backgrounds, photographs, sound files, video clips, animations, and, of course, text. You can also hyperlink pages within the presentation to Web pages, as well as to other pages within the presentation.
  • 13.
    9. Hide yourpointer. Since PowerPoint can easily steal the show, you want to make sure that you do everything you can to keep distractions to a minimum. Some students are easily distracted when the pointer (the arrow) moves across the screen during the presentation. (This happens when you move the mouse in the Slide Show View.) To circumvent this problem, use the arrow keys to navigate slides or hide the pointer. To hide the pointer, once the Slide Show View is started, press the Ctrl-L key combination. This hides the pointer even if the mouse moves. If you need to display the pointer during the presentation, press the Ctrl-A key combination.
  • 14.
    10. Rehearse beforepresenting. Even if you’ve given a lecture a thousand times without PowerPoint, it’s going to go a little differently when you use a PowerPoint presentation. Practicing your presentation in the slideshow view in your office or at home, will help you anticipate any glitches that you didn’t see when you were focused on getting content onto your slides.
  • 15.
    Know Your Moves In addition to being a smooth presenter, you’ll need to make sure you know the basic keyboarding techniques for technically moving through your presentation. Different presenters use different key options. Find the ones that work well for you, and soon they’ll be second nature.
  • 16.
    Go to thenext slide • Click the mouse • Press spacebar or enter • Click the forward arrow • Right-click, and on the shortcut menu, click next Go to the previous slide • Press backspace • Click the back arrow • Right-click, and on the shortcut menu, click previous
  • 17.
    Go to aspecific slide • Type the slide number, and then press return • Right-click, point to go on the shortcut menu, then point to by title and click the slide you want. See previously viewed slide • Right-click, point to go on the shortcut menu, and then click Previously Viewed. Temporarily black out the screen during a presentation • Press the B key - This turns the audience's monitor black
  • 18.
    To resume theslide show • Press the B key again to return to the current slide • Press any of the keys listed above to move to the next screen • Press any of the keys listed above to return to the screen previously displayed