SlideShare a Scribd company logo
Tools & Materials
□ Groove-joint pliers
□ Hacksaw
□ Dishpan
□ Garbage disposal
□ Slotted screwdriver
□ Plumber's putty
□ Electrical supplies (as needed)
□ Plastic waste piping and fittings
□ Hose clamp for dishwasher
Install a Garbage Disposal
From www.chinadengshang.net
Garbage disposals are efficient, safe and virtually trouble-free devices that anyone who
knows how to use a screwdriver and wrench can install in a few hours. Batch-feed models,
touted for their safety, are similar to a food processor. Once it is filled with waste, it's
activated when the sink plug is twisted into the sink opening. Whereas, a continuous-feed
disposal is operated by a switch on the wall or cabinet, and runs continuously while waste
is fed into the grinding chamber.
Cold water must be kept running while a disposal is in operation. The water cools and
lubricates the grinding parts and helps to send the pulverized waste down the drain.
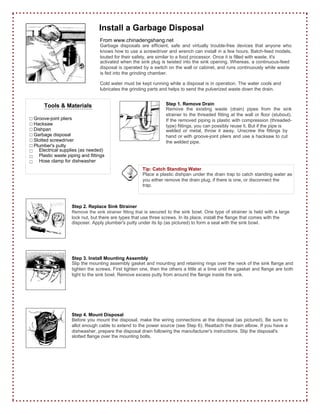
Step 1. Remove Drain
Remove the existing waste (drain) pipes from the sink
strainer to the threaded fitting at the wall or floor (stubout).
If the removed piping is plastic with compression (threaded-
type) fittings, you can possibly reuse it. But if the pipe is
welded or metal, throw it away. Unscrew the fittings by
hand or with groove-joint pliers and use a hacksaw to cut
the welded pipe.
Tip: Catch Standing Water
Place a plastic dishpan under the drain trap to catch standing water as
you either remove the drain plug, if there is one, or disconnect the
trap.
Step 2. Replace Sink Strainer
Remove the sink strainer fitting that is secured to the sink bowl. One type of strainer is held with a large
lock nut, but there are types that use three screws. In its place, install the flange that comes with the
disposer. Apply plumber's putty under its lip (as pictured) to form a seal with the sink bowl.
Step 3. Install Mounting Assembly
Slip the mounting assembly gasket and mounting and retaining rings over the neck of the sink flange and
tighten the screws. First tighten one, then the others a little at a time until the gasket and flange are both
tight to the sink bowl. Remove excess putty from around the flange inside the sink.
Step 4. Mount Disposal
Before you mount the disposal, make the wiring connections at the disposal (as pictured). Be sure to
allot enough cable to extend to the power source (see Step 6). Reattach the drain elbow. If you have a
dishwasher, prepare the disposal drain following the manufacturer's instructions. Slip the disposal's
slotted flange over the mounting bolts.
For more infomation and products,goto our www.chinadengshang.net
Step 5. Connect Plastic Waste Pipe
Connect a two-piece tubular P-trap to the drain elbow and the drain fitting at the wall (stubout). As
needed, cut the P-trap and rotate both the trap section of the P-trap and the disposal. Complete
tightening the waste pipe fittings and the disposal. Connect any dishwasher hose to the disposal's drain
fitting with a stainless steel hose clamp (as pictured).
Tip: Waste Connection
The waste connection shown in this project is typical. If yours is more complex, make a dimensioned sketch and
bring it back to your True Value store for the appropriate recommendations.
Step 6. Power Connection
If you have electrical wiring experience and plan to make the power connection to the disposal, be sure
to first turn off the power before beginning the work.
Disposals need to connect to a grounded 20-amp circuit. The steps in order to connect power differ with
each type of disposal. For example, continuous-feed disposals are wired to an on/off switch (as pictured)
located on a wall or in the sink cabinet. Whereas a batch-feed disposal has its own integral switch and is
hard-wired or plugged directly to the wall outlet. It is best to have an electrician handle this part of the job
if you are not knowledgeable about local code requirements and basic electrical wiring.
Tip: Air Vents and Disposal Jams
Once in a while you will find that the air vent on the sink will overflow when the dishwasher is running. This is
because the disposal has thrown waste into the dishwasher drain hose and has partially clogged it. When this
happens, remove the hose from the disposal, clean it out with a hanger and replace the hose.
If the disposal ever jams, quickly turn it off. Use the end of a wooden mop wedged against the opening of the
disposal to loosen the blades that are located at the bottom of the disposal. In some instances, the reset button
(usually located at the bottom of the disposal) will have to be pushed in order to return power.
Never discard rice, nut shells, pits, or fibrous waste into the disposal. And, for continuous-feed disposals, never
force large volumes of anything at one time since it could cause a drain clog.
visit us

More Related Content

Similar to how to Install garbage disposal

Fit a toilet and bidet
Fit a toilet and bidetFit a toilet and bidet
Fit a toilet and bidetZulaiha Amaria
 
Plumbing care and repair
Plumbing care and repairPlumbing care and repair
Plumbing care and repairZulaiha Amaria
 
Fit a bath and wash basin
Fit a bath and wash basinFit a bath and wash basin
Fit a bath and wash basinZulaiha Amaria
 
Install an electric shower
Install an electric showerInstall an electric shower
Install an electric showerZulaiha Amaria
 
Rain Soft Gold Series Water Treatment System Installation & Service Manual (w...
Rain Soft Gold Series Water Treatment System Installation & Service Manual (w...Rain Soft Gold Series Water Treatment System Installation & Service Manual (w...
Rain Soft Gold Series Water Treatment System Installation & Service Manual (w...miscott57
 
Whitepaper: Home Maintenance Tips for First Time Homebuyers
Whitepaper: Home Maintenance Tips for First Time HomebuyersWhitepaper: Home Maintenance Tips for First Time Homebuyers
Whitepaper: Home Maintenance Tips for First Time HomebuyersInspect-It 1st
 
Home Maintenece Tips 1st Time Home Buyers
Home Maintenece Tips 1st Time Home BuyersHome Maintenece Tips 1st Time Home Buyers
Home Maintenece Tips 1st Time Home Buyersedreeve
 
Helios Solar Systems Installation Instructions
Helios Solar Systems Installation InstructionsHelios Solar Systems Installation Instructions
Helios Solar Systems Installation InstructionsHelios Green Technology
 
Colorado Water Purification US Water Fusion Backwashing Filter Manual 1110 8 14
Colorado Water Purification US Water Fusion Backwashing Filter Manual 1110 8 14Colorado Water Purification US Water Fusion Backwashing Filter Manual 1110 8 14
Colorado Water Purification US Water Fusion Backwashing Filter Manual 1110 8 14Water Works
 
6 Steps Shower Installation DIY in Your Bathroom
6 Steps Shower Installation DIY in Your Bathroom6 Steps Shower Installation DIY in Your Bathroom
6 Steps Shower Installation DIY in Your BathroomElectric Works London
 
Hot Tips: Plumbing Tips — Advanced Aquarist
Hot Tips: Plumbing Tips — Advanced AquaristHot Tips: Plumbing Tips — Advanced Aquarist
Hot Tips: Plumbing Tips — Advanced Aquaristoceanicretort6121
 
Hot Tips: Plumbing Tips — Advanced Aquarist
Hot Tips: Plumbing Tips — Advanced AquaristHot Tips: Plumbing Tips — Advanced Aquarist
Hot Tips: Plumbing Tips — Advanced Aquaristoceanicretort6121
 
Hot Tips: Plumbing Tips — Advanced Aquarist
Hot Tips: Plumbing Tips — Advanced AquaristHot Tips: Plumbing Tips — Advanced Aquarist
Hot Tips: Plumbing Tips — Advanced Aquaristoceanicretort6121
 
Indoor environmental-quality-in-healthcare (3)
Indoor environmental-quality-in-healthcare (3)Indoor environmental-quality-in-healthcare (3)
Indoor environmental-quality-in-healthcare (3)Yong Sy
 
Build a shower cubicle
Build a shower cubicleBuild a shower cubicle
Build a shower cubicleZulaiha Amaria
 

Similar to how to Install garbage disposal (20)

Fit a toilet and bidet
Fit a toilet and bidetFit a toilet and bidet
Fit a toilet and bidet
 
Plumbing care and repair
Plumbing care and repairPlumbing care and repair
Plumbing care and repair
 
Fit a bath and wash basin
Fit a bath and wash basinFit a bath and wash basin
Fit a bath and wash basin
 
Install an electric shower
Install an electric showerInstall an electric shower
Install an electric shower
 
Fit a bath and wash basin
Fit a bath and wash basinFit a bath and wash basin
Fit a bath and wash basin
 
Changing taps
Changing tapsChanging taps
Changing taps
 
Rain Soft Gold Series Water Treatment System Installation & Service Manual (w...
Rain Soft Gold Series Water Treatment System Installation & Service Manual (w...Rain Soft Gold Series Water Treatment System Installation & Service Manual (w...
Rain Soft Gold Series Water Treatment System Installation & Service Manual (w...
 
Whitepaper: Home Maintenance Tips for First Time Homebuyers
Whitepaper: Home Maintenance Tips for First Time HomebuyersWhitepaper: Home Maintenance Tips for First Time Homebuyers
Whitepaper: Home Maintenance Tips for First Time Homebuyers
 
Home Maintenece Tips 1st Time Home Buyers
Home Maintenece Tips 1st Time Home BuyersHome Maintenece Tips 1st Time Home Buyers
Home Maintenece Tips 1st Time Home Buyers
 
Helios Solar Systems Installation Instructions
Helios Solar Systems Installation InstructionsHelios Solar Systems Installation Instructions
Helios Solar Systems Installation Instructions
 
Colorado Water Purification US Water Fusion Backwashing Filter Manual 1110 8 14
Colorado Water Purification US Water Fusion Backwashing Filter Manual 1110 8 14Colorado Water Purification US Water Fusion Backwashing Filter Manual 1110 8 14
Colorado Water Purification US Water Fusion Backwashing Filter Manual 1110 8 14
 
6 Steps Shower Installation DIY in Your Bathroom
6 Steps Shower Installation DIY in Your Bathroom6 Steps Shower Installation DIY in Your Bathroom
6 Steps Shower Installation DIY in Your Bathroom
 
Test
TestTest
Test
 
Hot Tips: Plumbing Tips — Advanced Aquarist
Hot Tips: Plumbing Tips — Advanced AquaristHot Tips: Plumbing Tips — Advanced Aquarist
Hot Tips: Plumbing Tips — Advanced Aquarist
 
Hot Tips: Plumbing Tips — Advanced Aquarist
Hot Tips: Plumbing Tips — Advanced AquaristHot Tips: Plumbing Tips — Advanced Aquarist
Hot Tips: Plumbing Tips — Advanced Aquarist
 
Hot Tips: Plumbing Tips — Advanced Aquarist
Hot Tips: Plumbing Tips — Advanced AquaristHot Tips: Plumbing Tips — Advanced Aquarist
Hot Tips: Plumbing Tips — Advanced Aquarist
 
2004 0520 Tx
2004 0520 Tx2004 0520 Tx
2004 0520 Tx
 
Indoor environmental-quality-in-healthcare (3)
Indoor environmental-quality-in-healthcare (3)Indoor environmental-quality-in-healthcare (3)
Indoor environmental-quality-in-healthcare (3)
 
Build a shower cubicle
Build a shower cubicleBuild a shower cubicle
Build a shower cubicle
 
Sample Instruction Manual
Sample Instruction ManualSample Instruction Manual
Sample Instruction Manual
 

Recently uploaded

F5 LTM TROUBLESHOOTING Guide latest.pptx
F5 LTM TROUBLESHOOTING Guide latest.pptxF5 LTM TROUBLESHOOTING Guide latest.pptx
F5 LTM TROUBLESHOOTING Guide latest.pptxArjunJain44
 
一比一原版SDSU毕业证圣地亚哥州立大学毕业证成绩单如何办理
一比一原版SDSU毕业证圣地亚哥州立大学毕业证成绩单如何办理一比一原版SDSU毕业证圣地亚哥州立大学毕业证成绩单如何办理
一比一原版SDSU毕业证圣地亚哥州立大学毕业证成绩单如何办理eemet
 
一比一原版UVM毕业证佛蒙特大学毕业证成绩单如何办理
一比一原版UVM毕业证佛蒙特大学毕业证成绩单如何办理一比一原版UVM毕业证佛蒙特大学毕业证成绩单如何办理
一比一原版UVM毕业证佛蒙特大学毕业证成绩单如何办理kywwoyk
 
NO1 Uk Amil Baba In Lahore Kala Jadu In Lahore Best Amil In Lahore Amil In La...
NO1 Uk Amil Baba In Lahore Kala Jadu In Lahore Best Amil In Lahore Amil In La...NO1 Uk Amil Baba In Lahore Kala Jadu In Lahore Best Amil In Lahore Amil In La...
NO1 Uk Amil Baba In Lahore Kala Jadu In Lahore Best Amil In Lahore Amil In La...Amil baba
 
Memory compiler tutorial – TSMC 40nm technology
Memory compiler tutorial – TSMC 40nm technologyMemory compiler tutorial – TSMC 40nm technology
Memory compiler tutorial – TSMC 40nm technologyAhmed Abdelazeem
 
一比一原版SDSU毕业证圣地亚哥州立大学毕业证成绩单如何办理
一比一原版SDSU毕业证圣地亚哥州立大学毕业证成绩单如何办理一比一原版SDSU毕业证圣地亚哥州立大学毕业证成绩单如何办理
一比一原版SDSU毕业证圣地亚哥州立大学毕业证成绩单如何办理kywwoyk
 
MATHEMATICS BRIDGE COURSE (TEN DAYS PLANNER) (FOR CLASS XI STUDENTS GOING TO ...
MATHEMATICS BRIDGE COURSE (TEN DAYS PLANNER) (FOR CLASS XI STUDENTS GOING TO ...MATHEMATICS BRIDGE COURSE (TEN DAYS PLANNER) (FOR CLASS XI STUDENTS GOING TO ...
MATHEMATICS BRIDGE COURSE (TEN DAYS PLANNER) (FOR CLASS XI STUDENTS GOING TO ...PinkySharma900491
 

Recently uploaded (7)

F5 LTM TROUBLESHOOTING Guide latest.pptx
F5 LTM TROUBLESHOOTING Guide latest.pptxF5 LTM TROUBLESHOOTING Guide latest.pptx
F5 LTM TROUBLESHOOTING Guide latest.pptx
 
一比一原版SDSU毕业证圣地亚哥州立大学毕业证成绩单如何办理
一比一原版SDSU毕业证圣地亚哥州立大学毕业证成绩单如何办理一比一原版SDSU毕业证圣地亚哥州立大学毕业证成绩单如何办理
一比一原版SDSU毕业证圣地亚哥州立大学毕业证成绩单如何办理
 
一比一原版UVM毕业证佛蒙特大学毕业证成绩单如何办理
一比一原版UVM毕业证佛蒙特大学毕业证成绩单如何办理一比一原版UVM毕业证佛蒙特大学毕业证成绩单如何办理
一比一原版UVM毕业证佛蒙特大学毕业证成绩单如何办理
 
NO1 Uk Amil Baba In Lahore Kala Jadu In Lahore Best Amil In Lahore Amil In La...
NO1 Uk Amil Baba In Lahore Kala Jadu In Lahore Best Amil In Lahore Amil In La...NO1 Uk Amil Baba In Lahore Kala Jadu In Lahore Best Amil In Lahore Amil In La...
NO1 Uk Amil Baba In Lahore Kala Jadu In Lahore Best Amil In Lahore Amil In La...
 
Memory compiler tutorial – TSMC 40nm technology
Memory compiler tutorial – TSMC 40nm technologyMemory compiler tutorial – TSMC 40nm technology
Memory compiler tutorial – TSMC 40nm technology
 
一比一原版SDSU毕业证圣地亚哥州立大学毕业证成绩单如何办理
一比一原版SDSU毕业证圣地亚哥州立大学毕业证成绩单如何办理一比一原版SDSU毕业证圣地亚哥州立大学毕业证成绩单如何办理
一比一原版SDSU毕业证圣地亚哥州立大学毕业证成绩单如何办理
 
MATHEMATICS BRIDGE COURSE (TEN DAYS PLANNER) (FOR CLASS XI STUDENTS GOING TO ...
MATHEMATICS BRIDGE COURSE (TEN DAYS PLANNER) (FOR CLASS XI STUDENTS GOING TO ...MATHEMATICS BRIDGE COURSE (TEN DAYS PLANNER) (FOR CLASS XI STUDENTS GOING TO ...
MATHEMATICS BRIDGE COURSE (TEN DAYS PLANNER) (FOR CLASS XI STUDENTS GOING TO ...
 

how to Install garbage disposal

  • 1. Tools & Materials □ Groove-joint pliers □ Hacksaw □ Dishpan □ Garbage disposal □ Slotted screwdriver □ Plumber's putty □ Electrical supplies (as needed) □ Plastic waste piping and fittings □ Hose clamp for dishwasher Install a Garbage Disposal From www.chinadengshang.net Garbage disposals are efficient, safe and virtually trouble-free devices that anyone who knows how to use a screwdriver and wrench can install in a few hours. Batch-feed models, touted for their safety, are similar to a food processor. Once it is filled with waste, it's activated when the sink plug is twisted into the sink opening. Whereas, a continuous-feed disposal is operated by a switch on the wall or cabinet, and runs continuously while waste is fed into the grinding chamber. Cold water must be kept running while a disposal is in operation. The water cools and lubricates the grinding parts and helps to send the pulverized waste down the drain. Step 1. Remove Drain Remove the existing waste (drain) pipes from the sink strainer to the threaded fitting at the wall or floor (stubout). If the removed piping is plastic with compression (threaded- type) fittings, you can possibly reuse it. But if the pipe is welded or metal, throw it away. Unscrew the fittings by hand or with groove-joint pliers and use a hacksaw to cut the welded pipe. Tip: Catch Standing Water Place a plastic dishpan under the drain trap to catch standing water as you either remove the drain plug, if there is one, or disconnect the trap. Step 2. Replace Sink Strainer Remove the sink strainer fitting that is secured to the sink bowl. One type of strainer is held with a large lock nut, but there are types that use three screws. In its place, install the flange that comes with the disposer. Apply plumber's putty under its lip (as pictured) to form a seal with the sink bowl. Step 3. Install Mounting Assembly Slip the mounting assembly gasket and mounting and retaining rings over the neck of the sink flange and tighten the screws. First tighten one, then the others a little at a time until the gasket and flange are both tight to the sink bowl. Remove excess putty from around the flange inside the sink. Step 4. Mount Disposal Before you mount the disposal, make the wiring connections at the disposal (as pictured). Be sure to allot enough cable to extend to the power source (see Step 6). Reattach the drain elbow. If you have a dishwasher, prepare the disposal drain following the manufacturer's instructions. Slip the disposal's slotted flange over the mounting bolts.
  • 2. For more infomation and products,goto our www.chinadengshang.net Step 5. Connect Plastic Waste Pipe Connect a two-piece tubular P-trap to the drain elbow and the drain fitting at the wall (stubout). As needed, cut the P-trap and rotate both the trap section of the P-trap and the disposal. Complete tightening the waste pipe fittings and the disposal. Connect any dishwasher hose to the disposal's drain fitting with a stainless steel hose clamp (as pictured). Tip: Waste Connection The waste connection shown in this project is typical. If yours is more complex, make a dimensioned sketch and bring it back to your True Value store for the appropriate recommendations. Step 6. Power Connection If you have electrical wiring experience and plan to make the power connection to the disposal, be sure to first turn off the power before beginning the work. Disposals need to connect to a grounded 20-amp circuit. The steps in order to connect power differ with each type of disposal. For example, continuous-feed disposals are wired to an on/off switch (as pictured) located on a wall or in the sink cabinet. Whereas a batch-feed disposal has its own integral switch and is hard-wired or plugged directly to the wall outlet. It is best to have an electrician handle this part of the job if you are not knowledgeable about local code requirements and basic electrical wiring. Tip: Air Vents and Disposal Jams Once in a while you will find that the air vent on the sink will overflow when the dishwasher is running. This is because the disposal has thrown waste into the dishwasher drain hose and has partially clogged it. When this happens, remove the hose from the disposal, clean it out with a hanger and replace the hose. If the disposal ever jams, quickly turn it off. Use the end of a wooden mop wedged against the opening of the disposal to loosen the blades that are located at the bottom of the disposal. In some instances, the reset button (usually located at the bottom of the disposal) will have to be pushed in order to return power. Never discard rice, nut shells, pits, or fibrous waste into the disposal. And, for continuous-feed disposals, never force large volumes of anything at one time since it could cause a drain clog. visit us