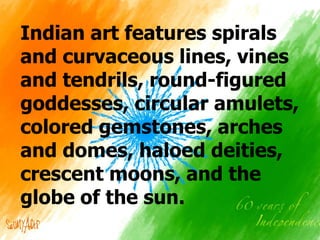
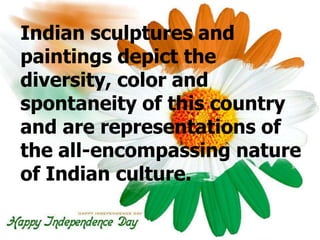
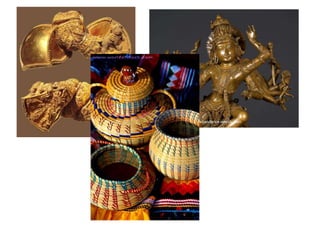
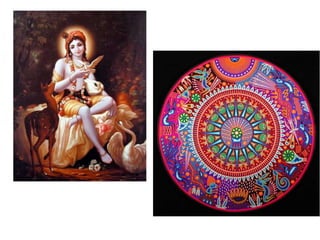
Indian
Arts
The story of Indian art
is also the story of the
oldest and the most
resilient culture on
earth. It is seen as an
amalgamation of
indigenous and outside
Indian art features spirals
and curvaceous lines, vines
and tendrils, round-figured
goddesses, circular amulets,
colored gemstones, arches
and domes, haloed deities,
crescent moons, and the
globe of the sun.
Indian sculptures and
paintings depict the
diversity, color and
spontaneity of this country
and are representations of
the all-encompassing nature
of Indian culture.
Materials:
• Brown Clay
• Paint
• Chipboard
• Fork
• gemstones
Roll the clay into a ball about the size of
your fist or a little smaller, depending
on how large you want the lamp to be.
Using your thumb, press an indent
into the middle of the ball. This will
make it hollow.
Shape the hollow with your fingers to create a bowl
with evenly sized edges all the way around. Check
that the tea light candle can fit into the hole; if not,
keep shaping.
Create a rim edge.
• For a round lamp, leave the shape
as it is but raise the rim edge with
more clay in a circle around the
top.
• For a star shaped lamp, pinch the
sides of the top of the bowl with your
forefinger and thumb. This will indent
the top, creating a star shape.
• Six indents will create a six-sided star,
five indents will create a five-sided
star
Using a fork, press down around the
rim edge to create a pretty
finishing. Try to keep this as even as
possible.
Make holes in the side of the clay bowl. These
allow the light to shine through. Decide where
you will place the holes evenly around the bowl,
marking each spot with a small nick in the clay
to check for evenness all the way around the
bowl. Then press the holes out with the end of a
paintbrush or pencil. Use the tool to make each
circle evenly rounded.
Allow the lamp to dry as
instructed by the clay type that
you've used.
Once dry, paint on decorative designs. Glue costume gems,
sequins, tiny decorative mirrors and glitter in place. The rim
can be painted a different color from the decorative designs
on the side, such as gold or silver, to help increase the glow
of the candlelight.
Allow the paint to dry. Once dried, the tea
light candle can be placed inside and the
lamp is ready to use.

Indian arts Diwali Lamp!

  • 1.
  • 2.
    The story ofIndian art is also the story of the oldest and the most resilient culture on earth. It is seen as an amalgamation of indigenous and outside
  • 3.
    Indian art featuresspirals and curvaceous lines, vines and tendrils, round-figured goddesses, circular amulets, colored gemstones, arches and domes, haloed deities, crescent moons, and the globe of the sun.
  • 4.
    Indian sculptures and paintingsdepict the diversity, color and spontaneity of this country and are representations of the all-encompassing nature of Indian culture.
  • 8.
    Materials: • Brown Clay •Paint • Chipboard • Fork • gemstones
  • 9.
    Roll the clayinto a ball about the size of your fist or a little smaller, depending on how large you want the lamp to be.
  • 10.
    Using your thumb,press an indent into the middle of the ball. This will make it hollow.
  • 11.
    Shape the hollowwith your fingers to create a bowl with evenly sized edges all the way around. Check that the tea light candle can fit into the hole; if not, keep shaping.
  • 12.
    Create a rimedge. • For a round lamp, leave the shape as it is but raise the rim edge with more clay in a circle around the top. • For a star shaped lamp, pinch the sides of the top of the bowl with your forefinger and thumb. This will indent the top, creating a star shape. • Six indents will create a six-sided star, five indents will create a five-sided star
  • 13.
    Using a fork,press down around the rim edge to create a pretty finishing. Try to keep this as even as possible.
  • 15.
    Make holes inthe side of the clay bowl. These allow the light to shine through. Decide where you will place the holes evenly around the bowl, marking each spot with a small nick in the clay to check for evenness all the way around the bowl. Then press the holes out with the end of a paintbrush or pencil. Use the tool to make each circle evenly rounded.
  • 16.
    Allow the lampto dry as instructed by the clay type that you've used.
  • 17.
    Once dry, painton decorative designs. Glue costume gems, sequins, tiny decorative mirrors and glitter in place. The rim can be painted a different color from the decorative designs on the side, such as gold or silver, to help increase the glow of the candlelight.
  • 18.
    Allow the paintto dry. Once dried, the tea light candle can be placed inside and the lamp is ready to use.