Downloaded 59 times


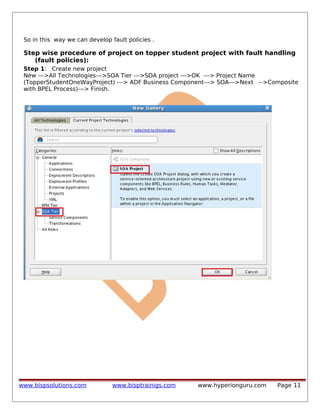
![Step 3: Open Composite.xml & observe BPEL Process
Step 4: Click on TopperStudentOnewayProcess.xsd & it is automatically generated xsd for one
way bpel process .
Step 5: Go to Home ---> open jdeveloper ---> my work ----> SOAApplication --->
TopperStudentproject---> xsd----> copy [Error.xsd, Student.xsd,StudentList.xsd]
www.bispsolutions.com
www.bisptrainigs.com
www.hyperionguru.com
Page 13](https://image.slidesharecdn.com/getting-started-with-oracle-soa-10-131120083630-phpapp01/85/Getting-started-with-oracle-so-a-10-13-320.jpg)
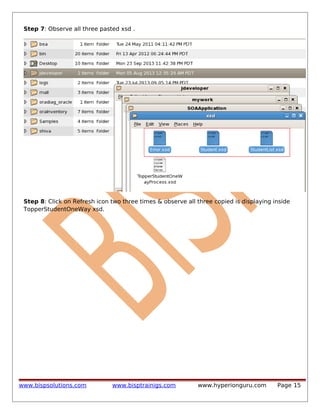
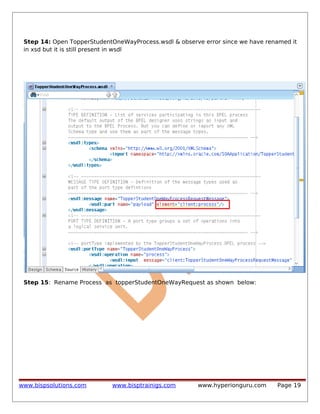
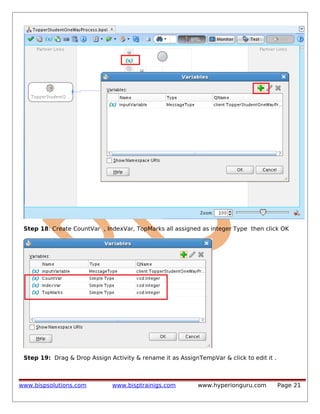

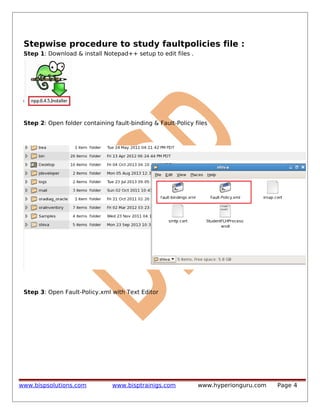
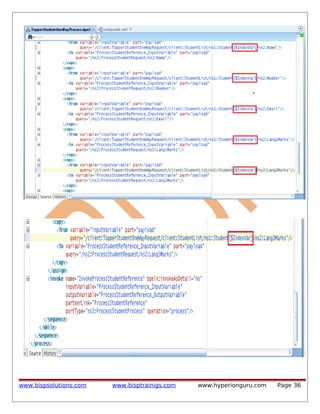
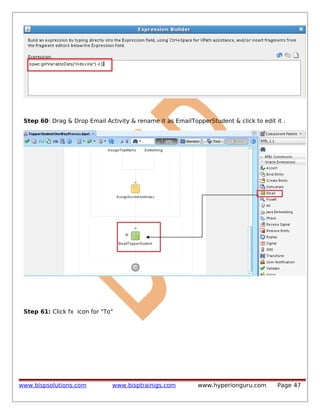
![Step 42: Also make changes on TopperStudentOneWayProcess.bpel in source mode & add
[$IndexVar] after Student everywhere as shown below :
www.bispsolutions.com
www.bisptrainigs.com
www.hyperionguru.com
Page 35](https://image.slidesharecdn.com/getting-started-with-oracle-soa-10-131120083630-phpapp01/85/Getting-started-with-oracle-so-a-10-35-320.jpg)
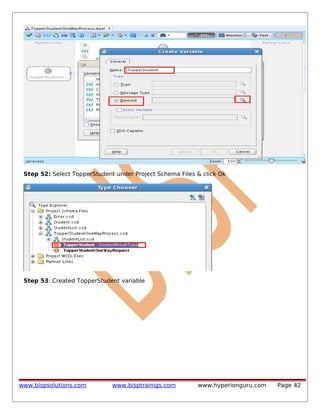
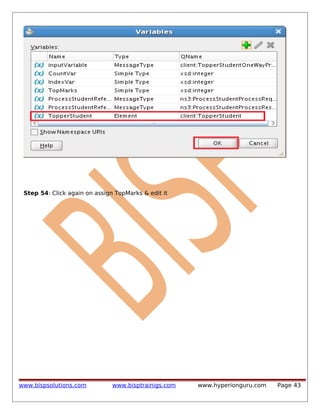
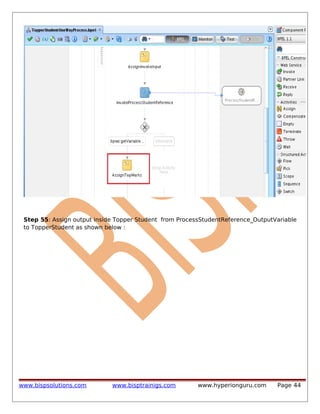
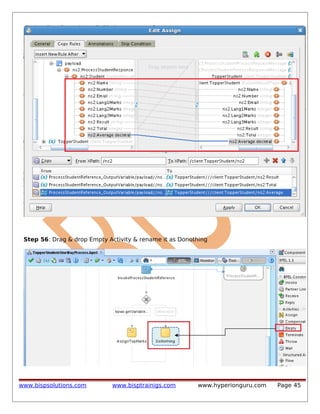
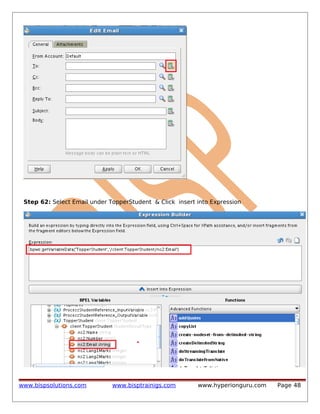
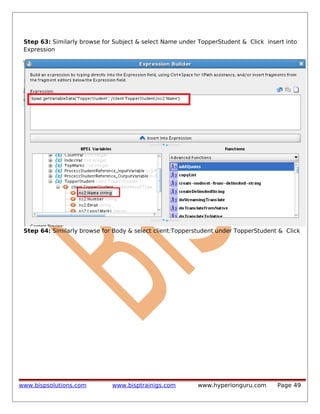

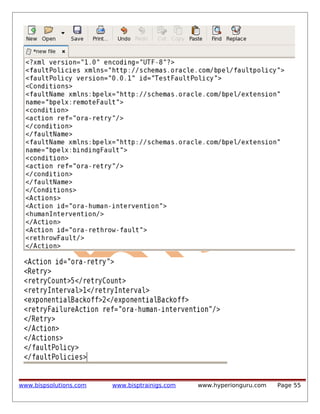
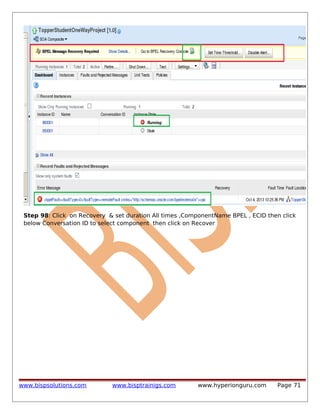
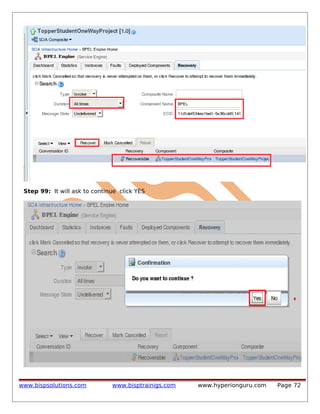
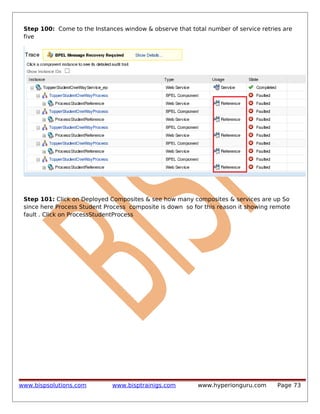
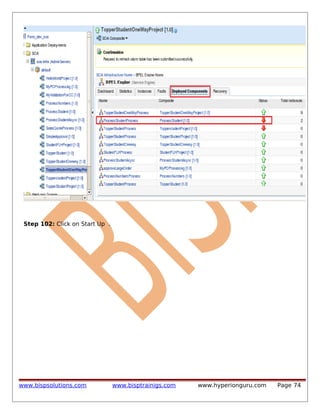
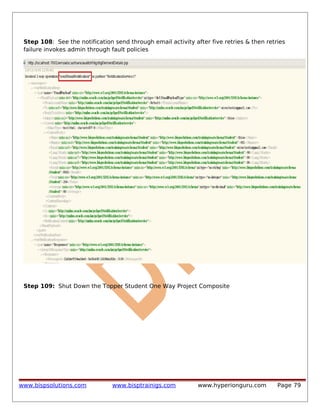
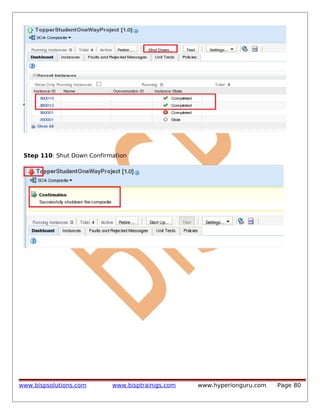

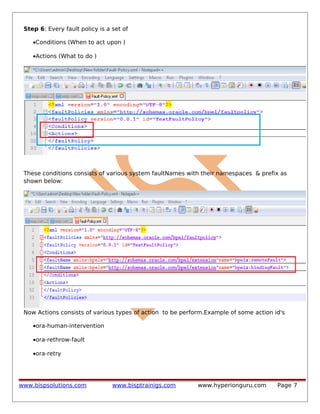
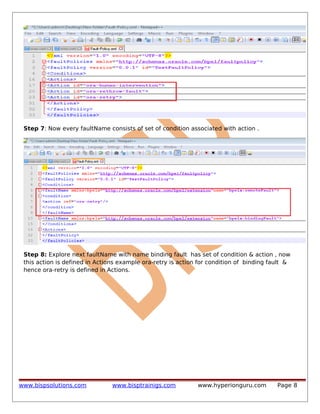
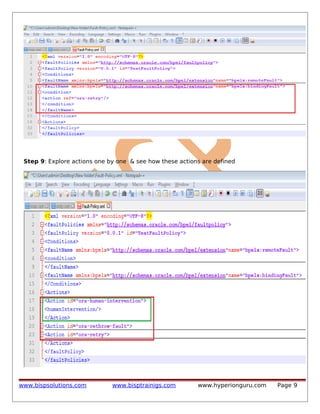
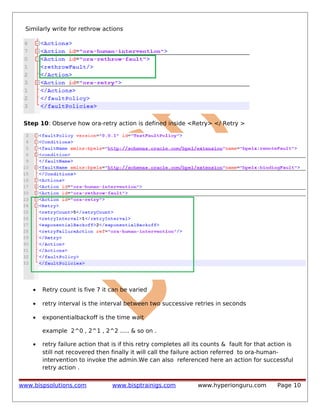
This document provides steps to create a fault handling project in Oracle SOA using fault policies. It involves creating an SOA project with a BPEL process that calls an external web service. Variables are used to store processing data. A while loop iterates through student records, invoking the web service. Based on the response, the top student is identified and an email is sent. Fault policies are defined to specify retry logic for failures. The steps show how to define the BPEL process, integrate the external service, add logic for record processing and fault handling.