Download to read offline


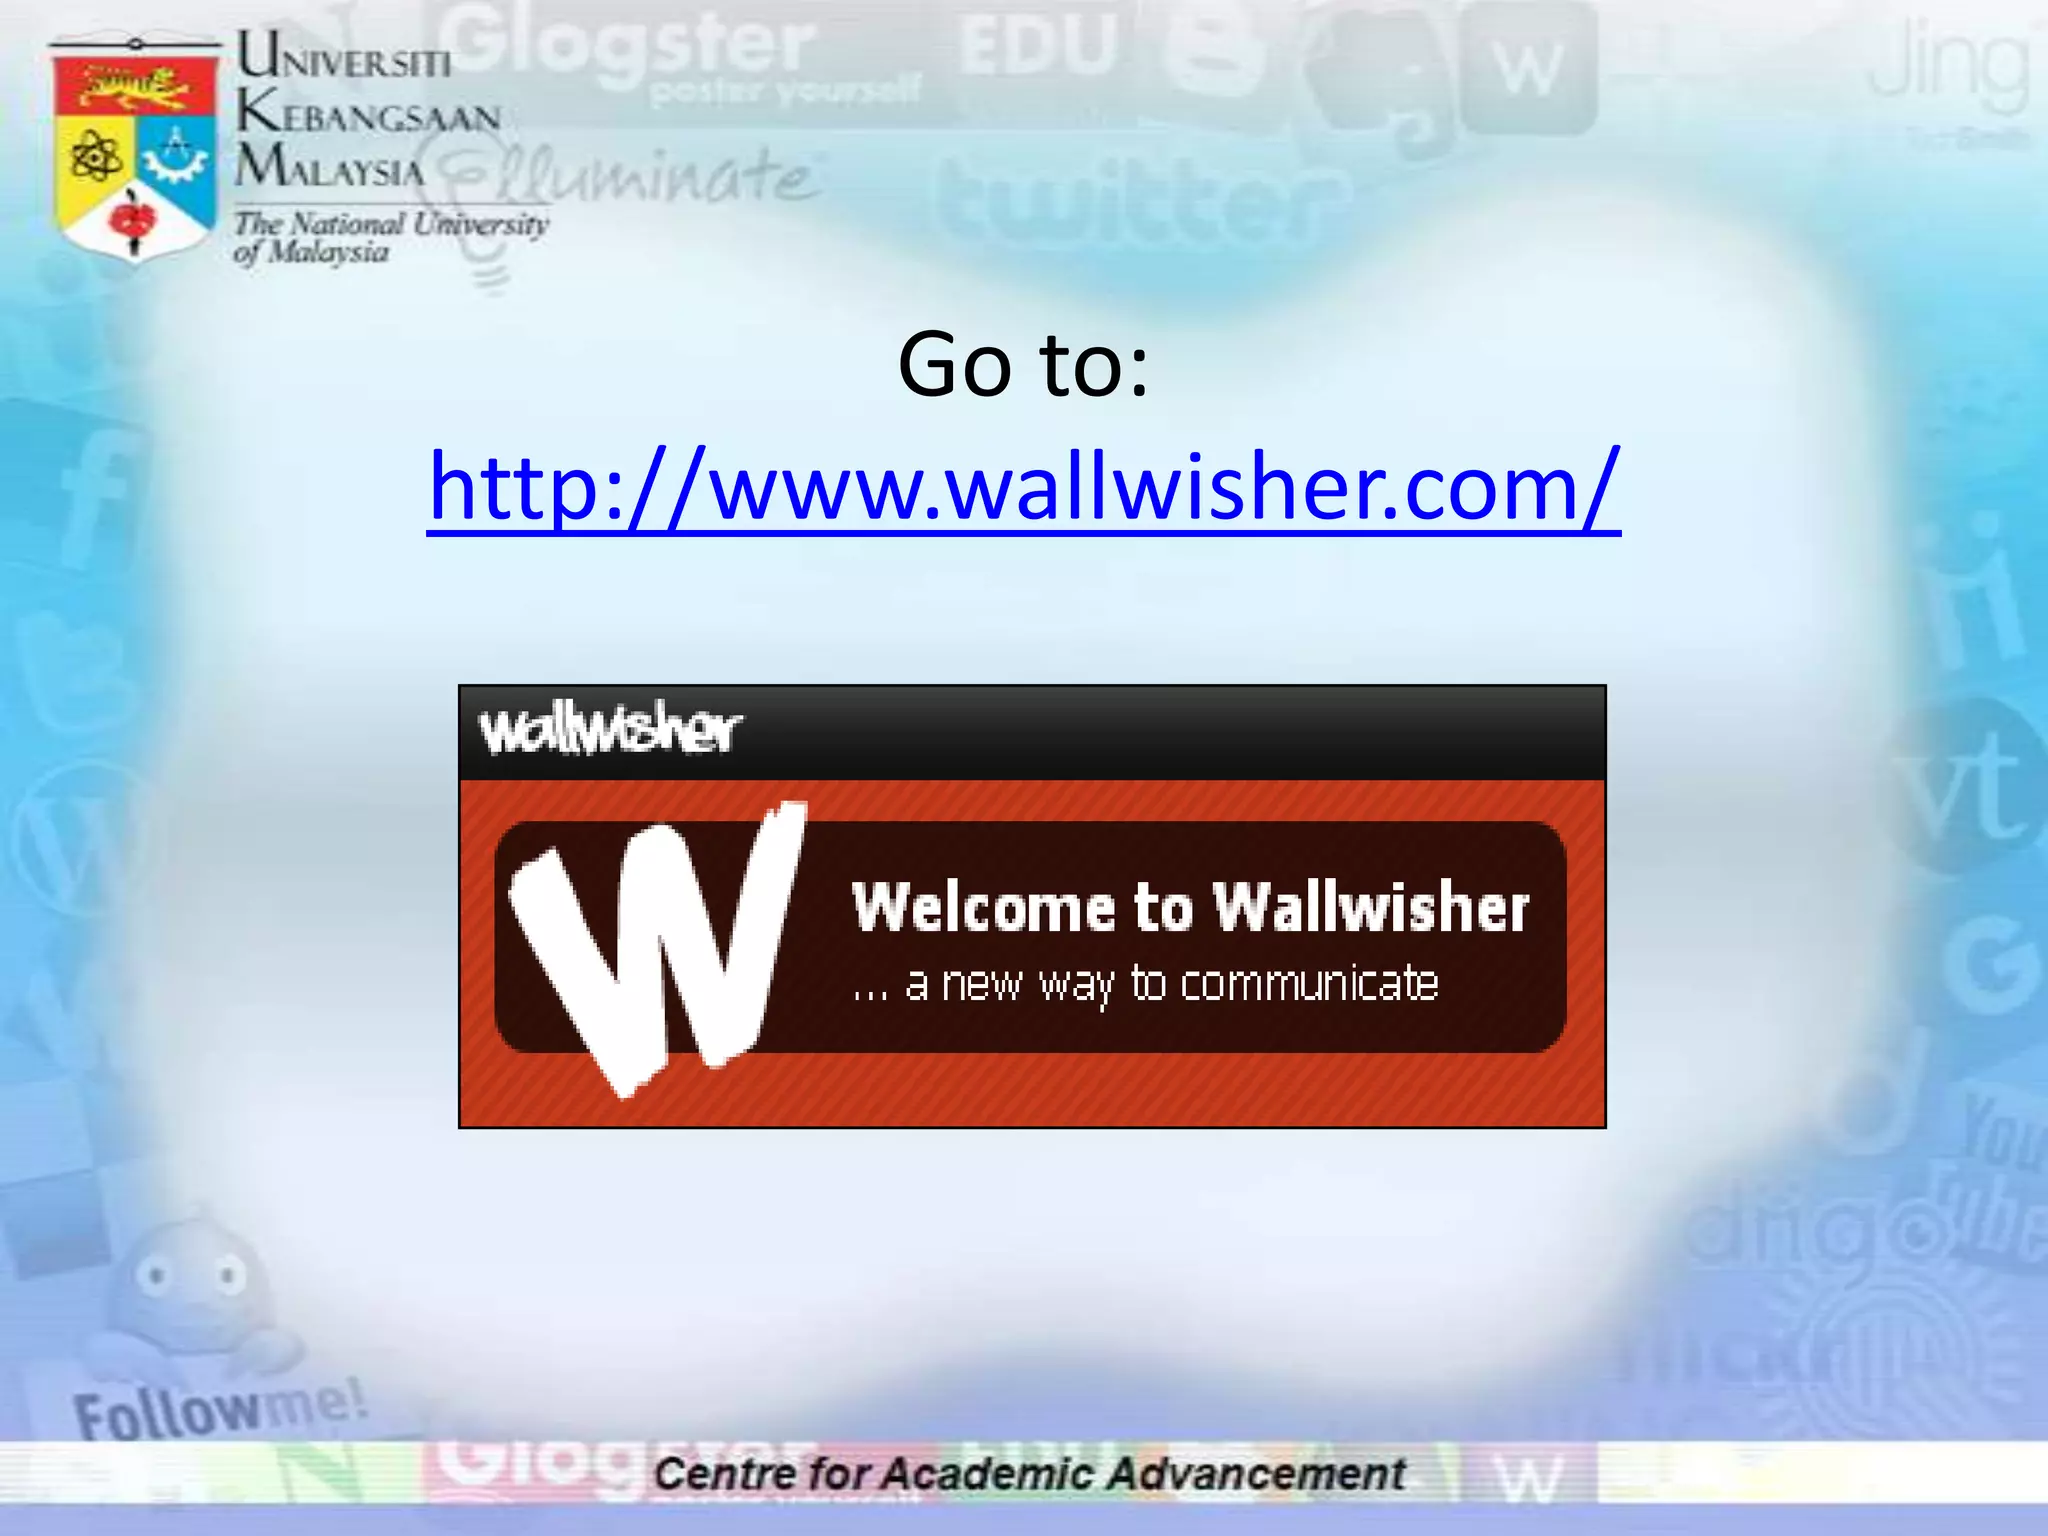
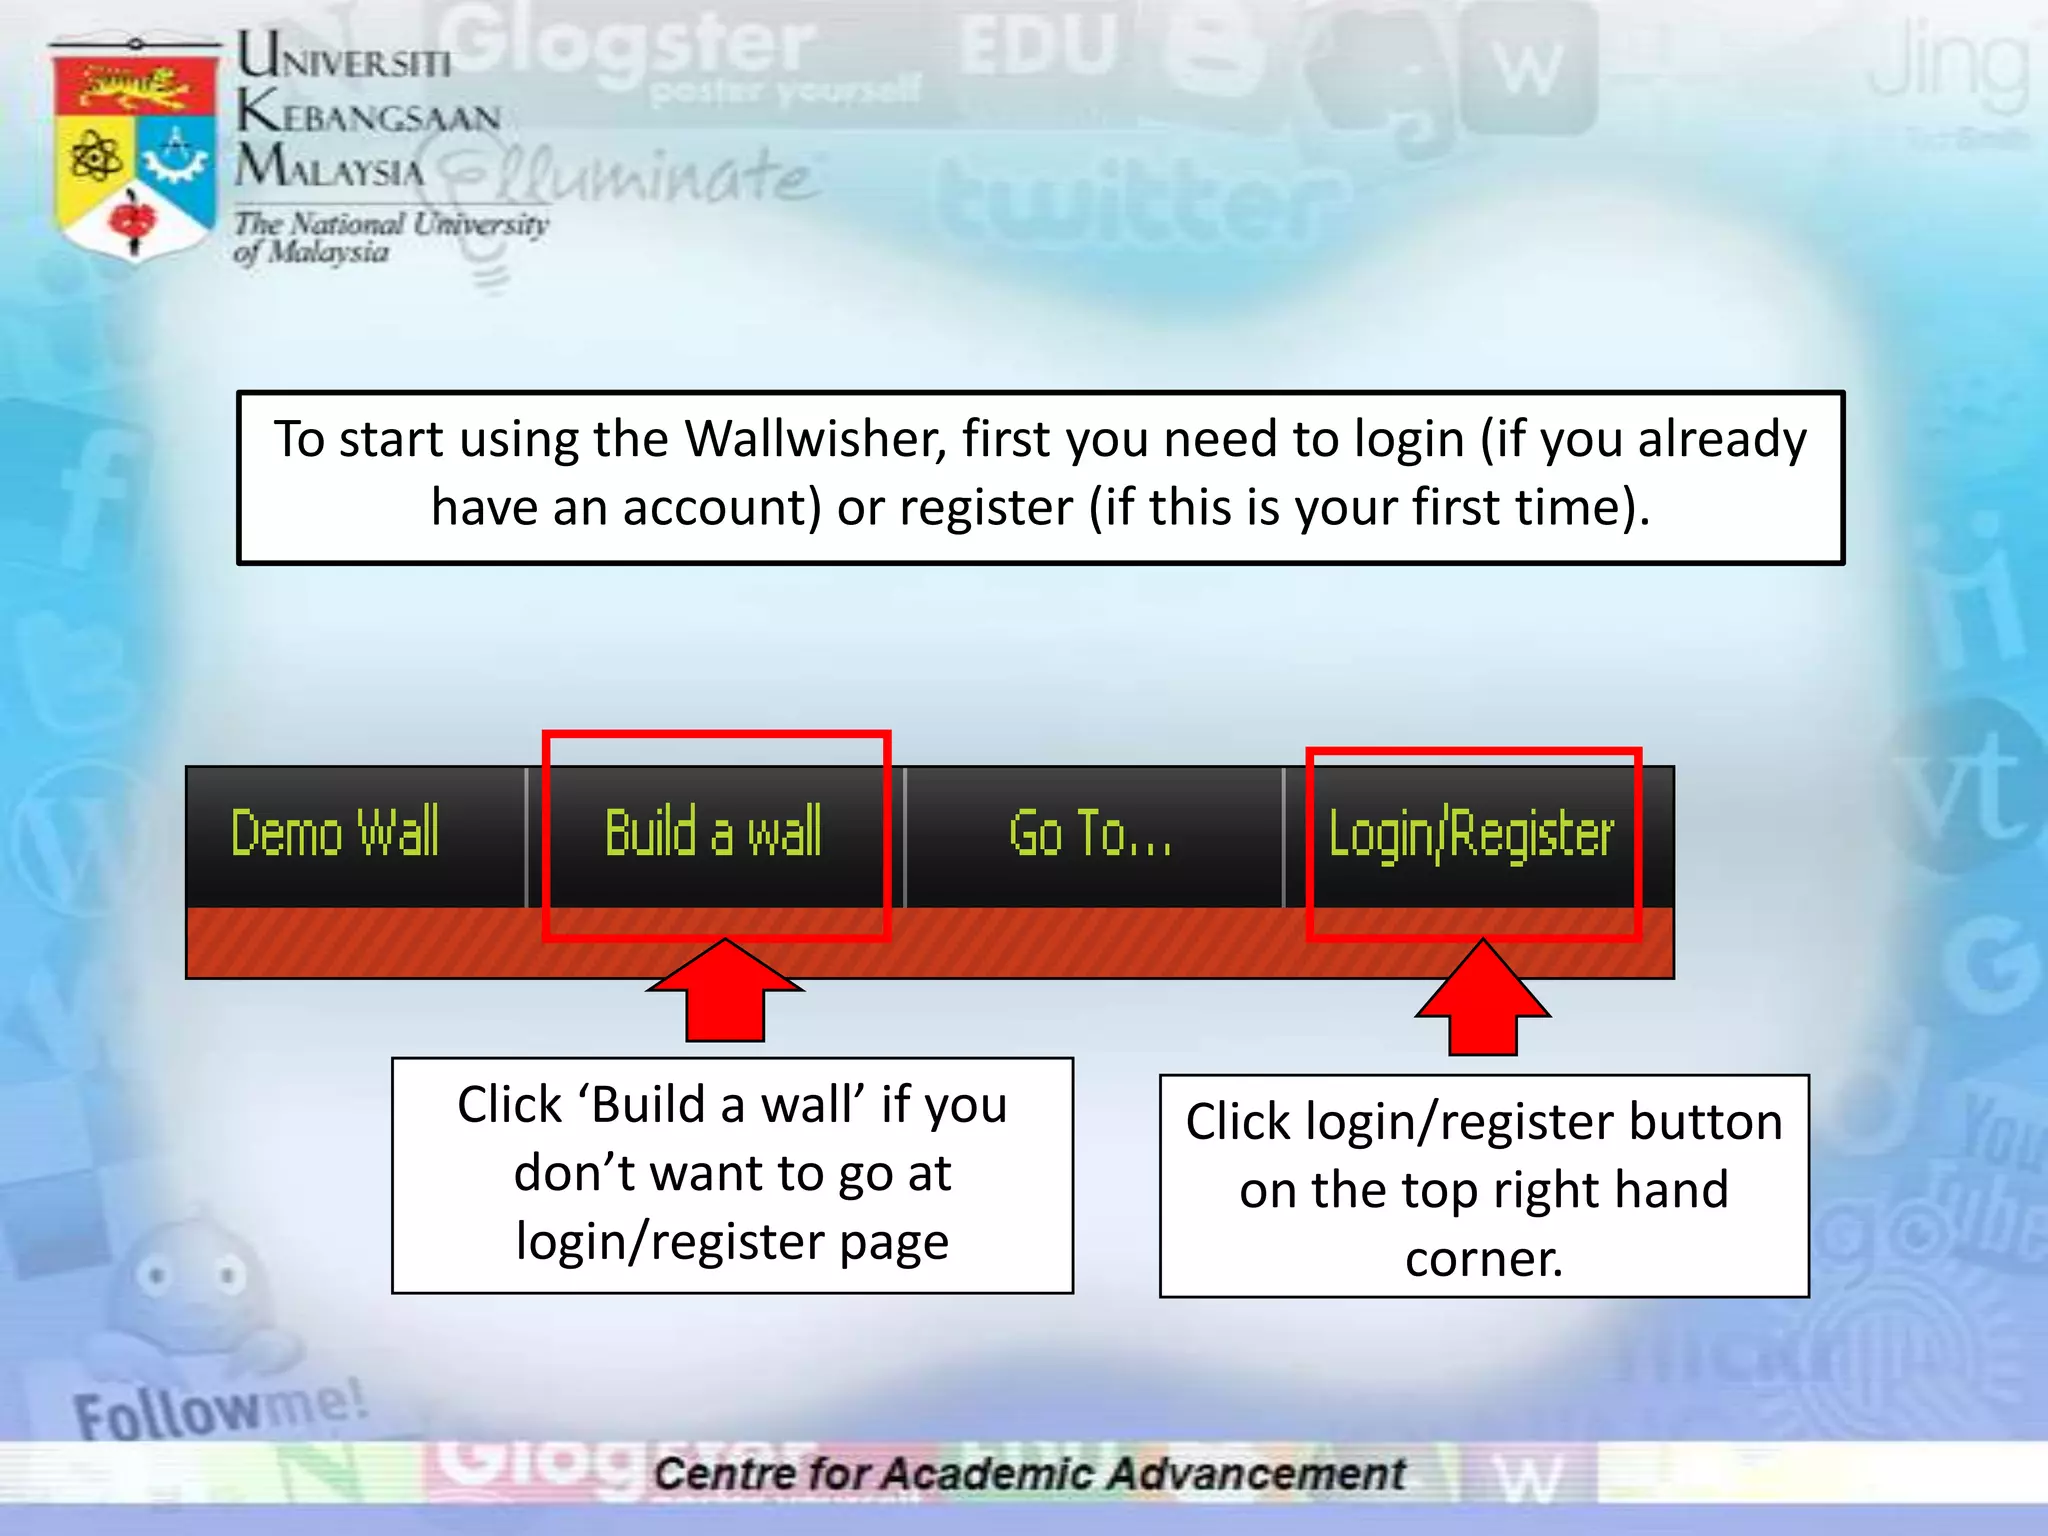
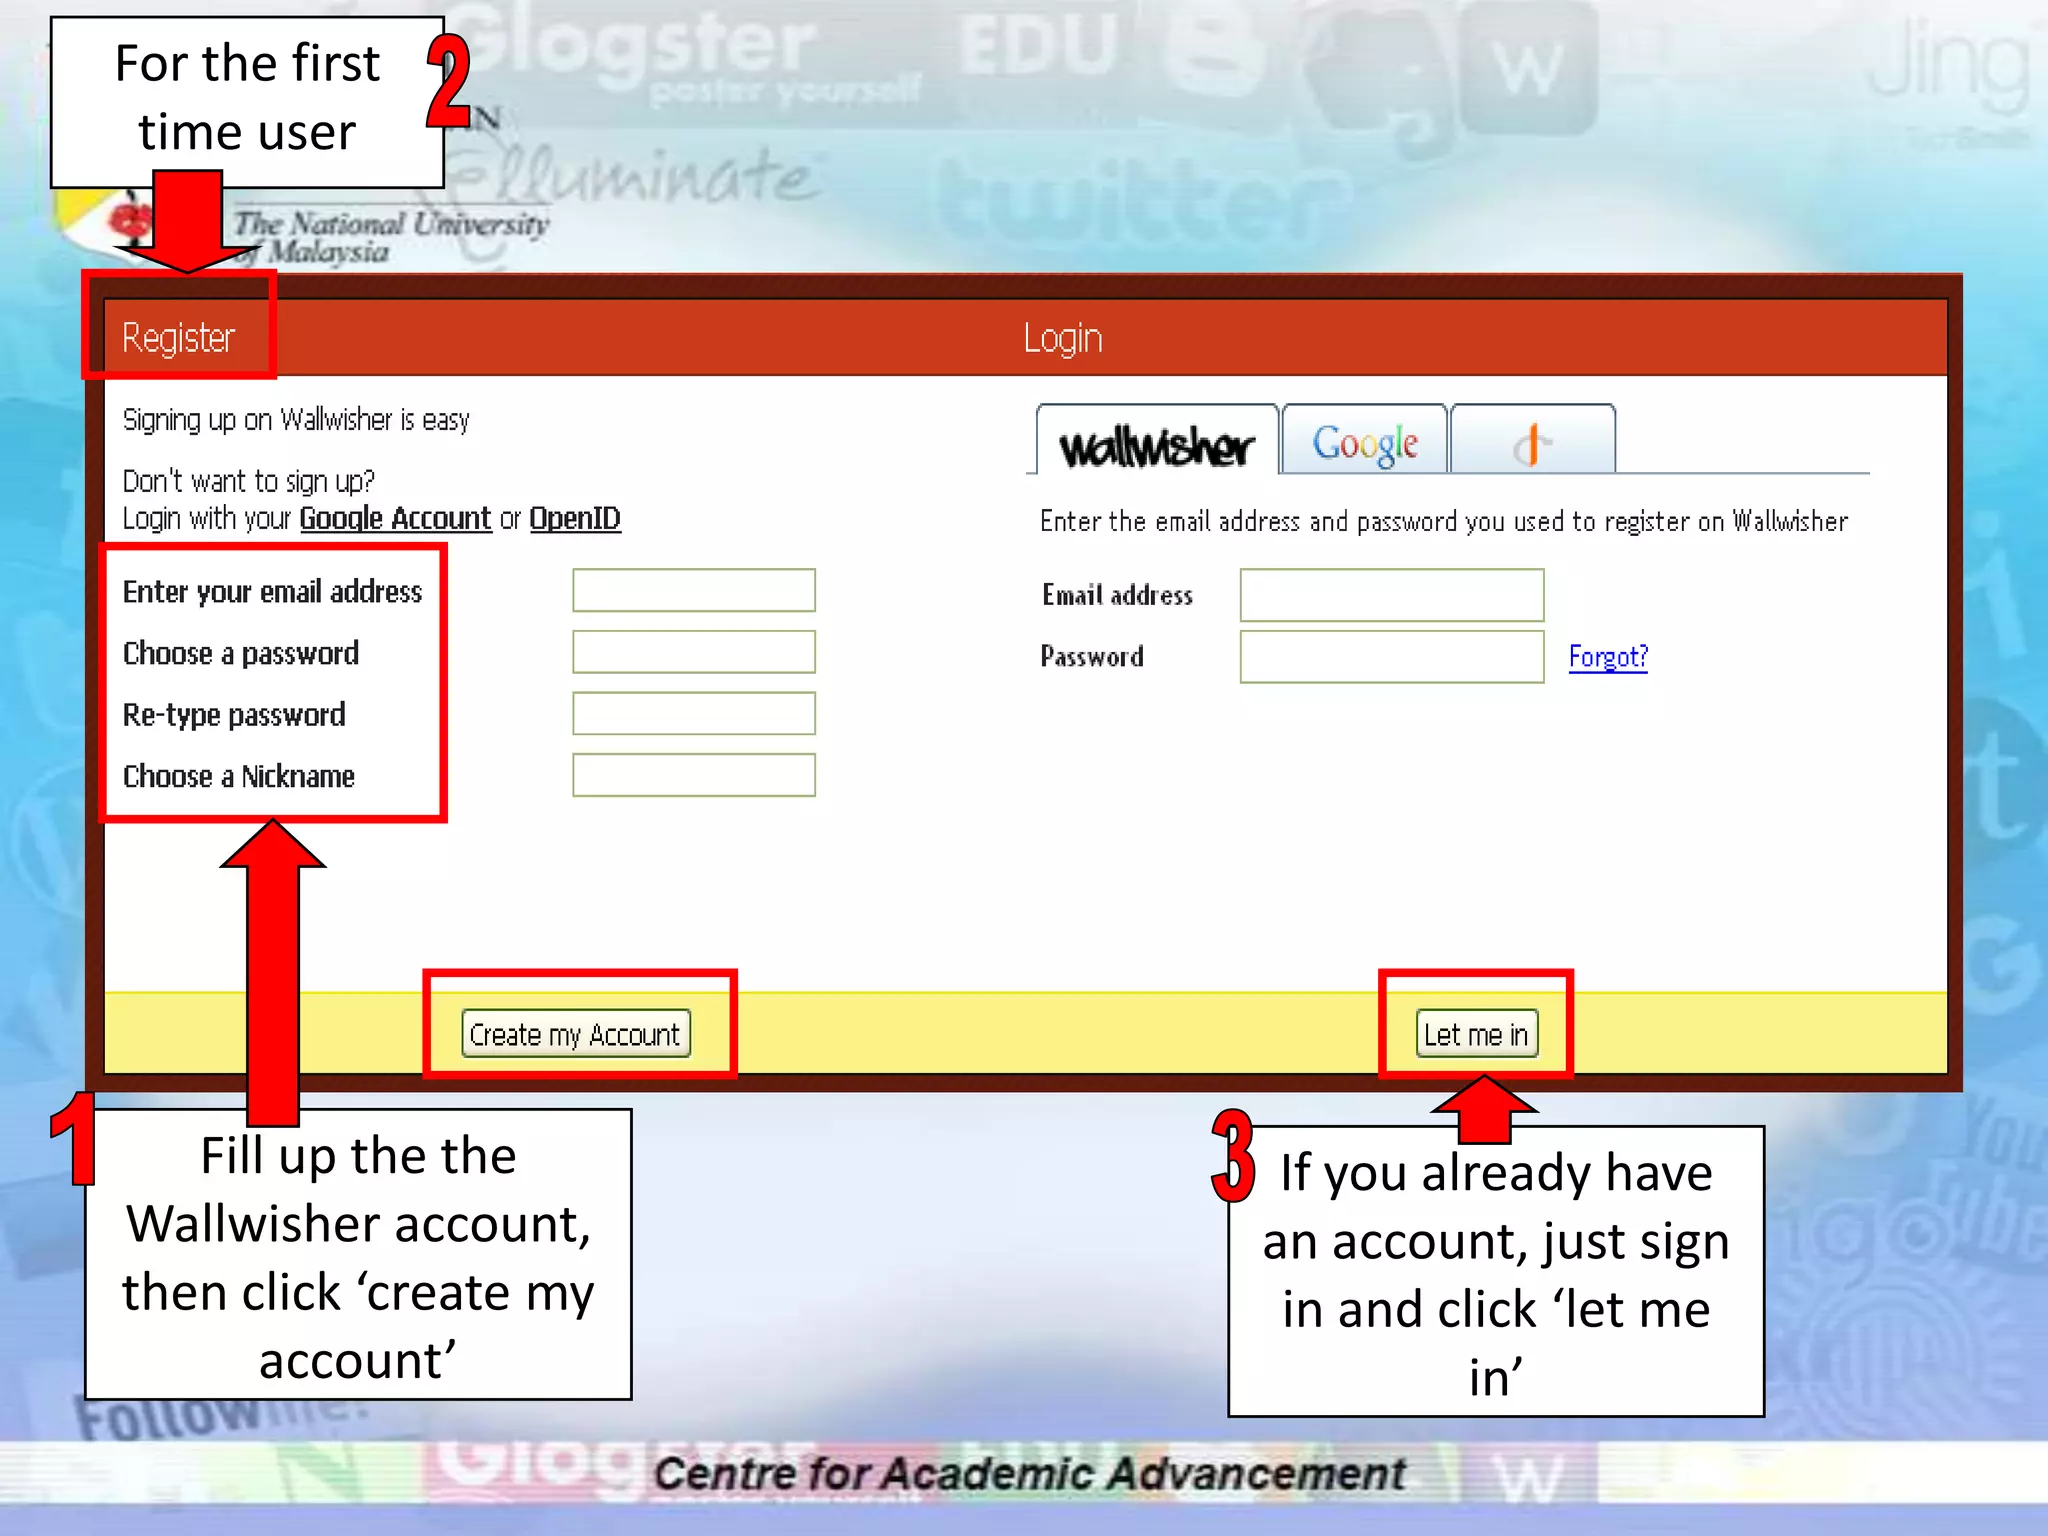

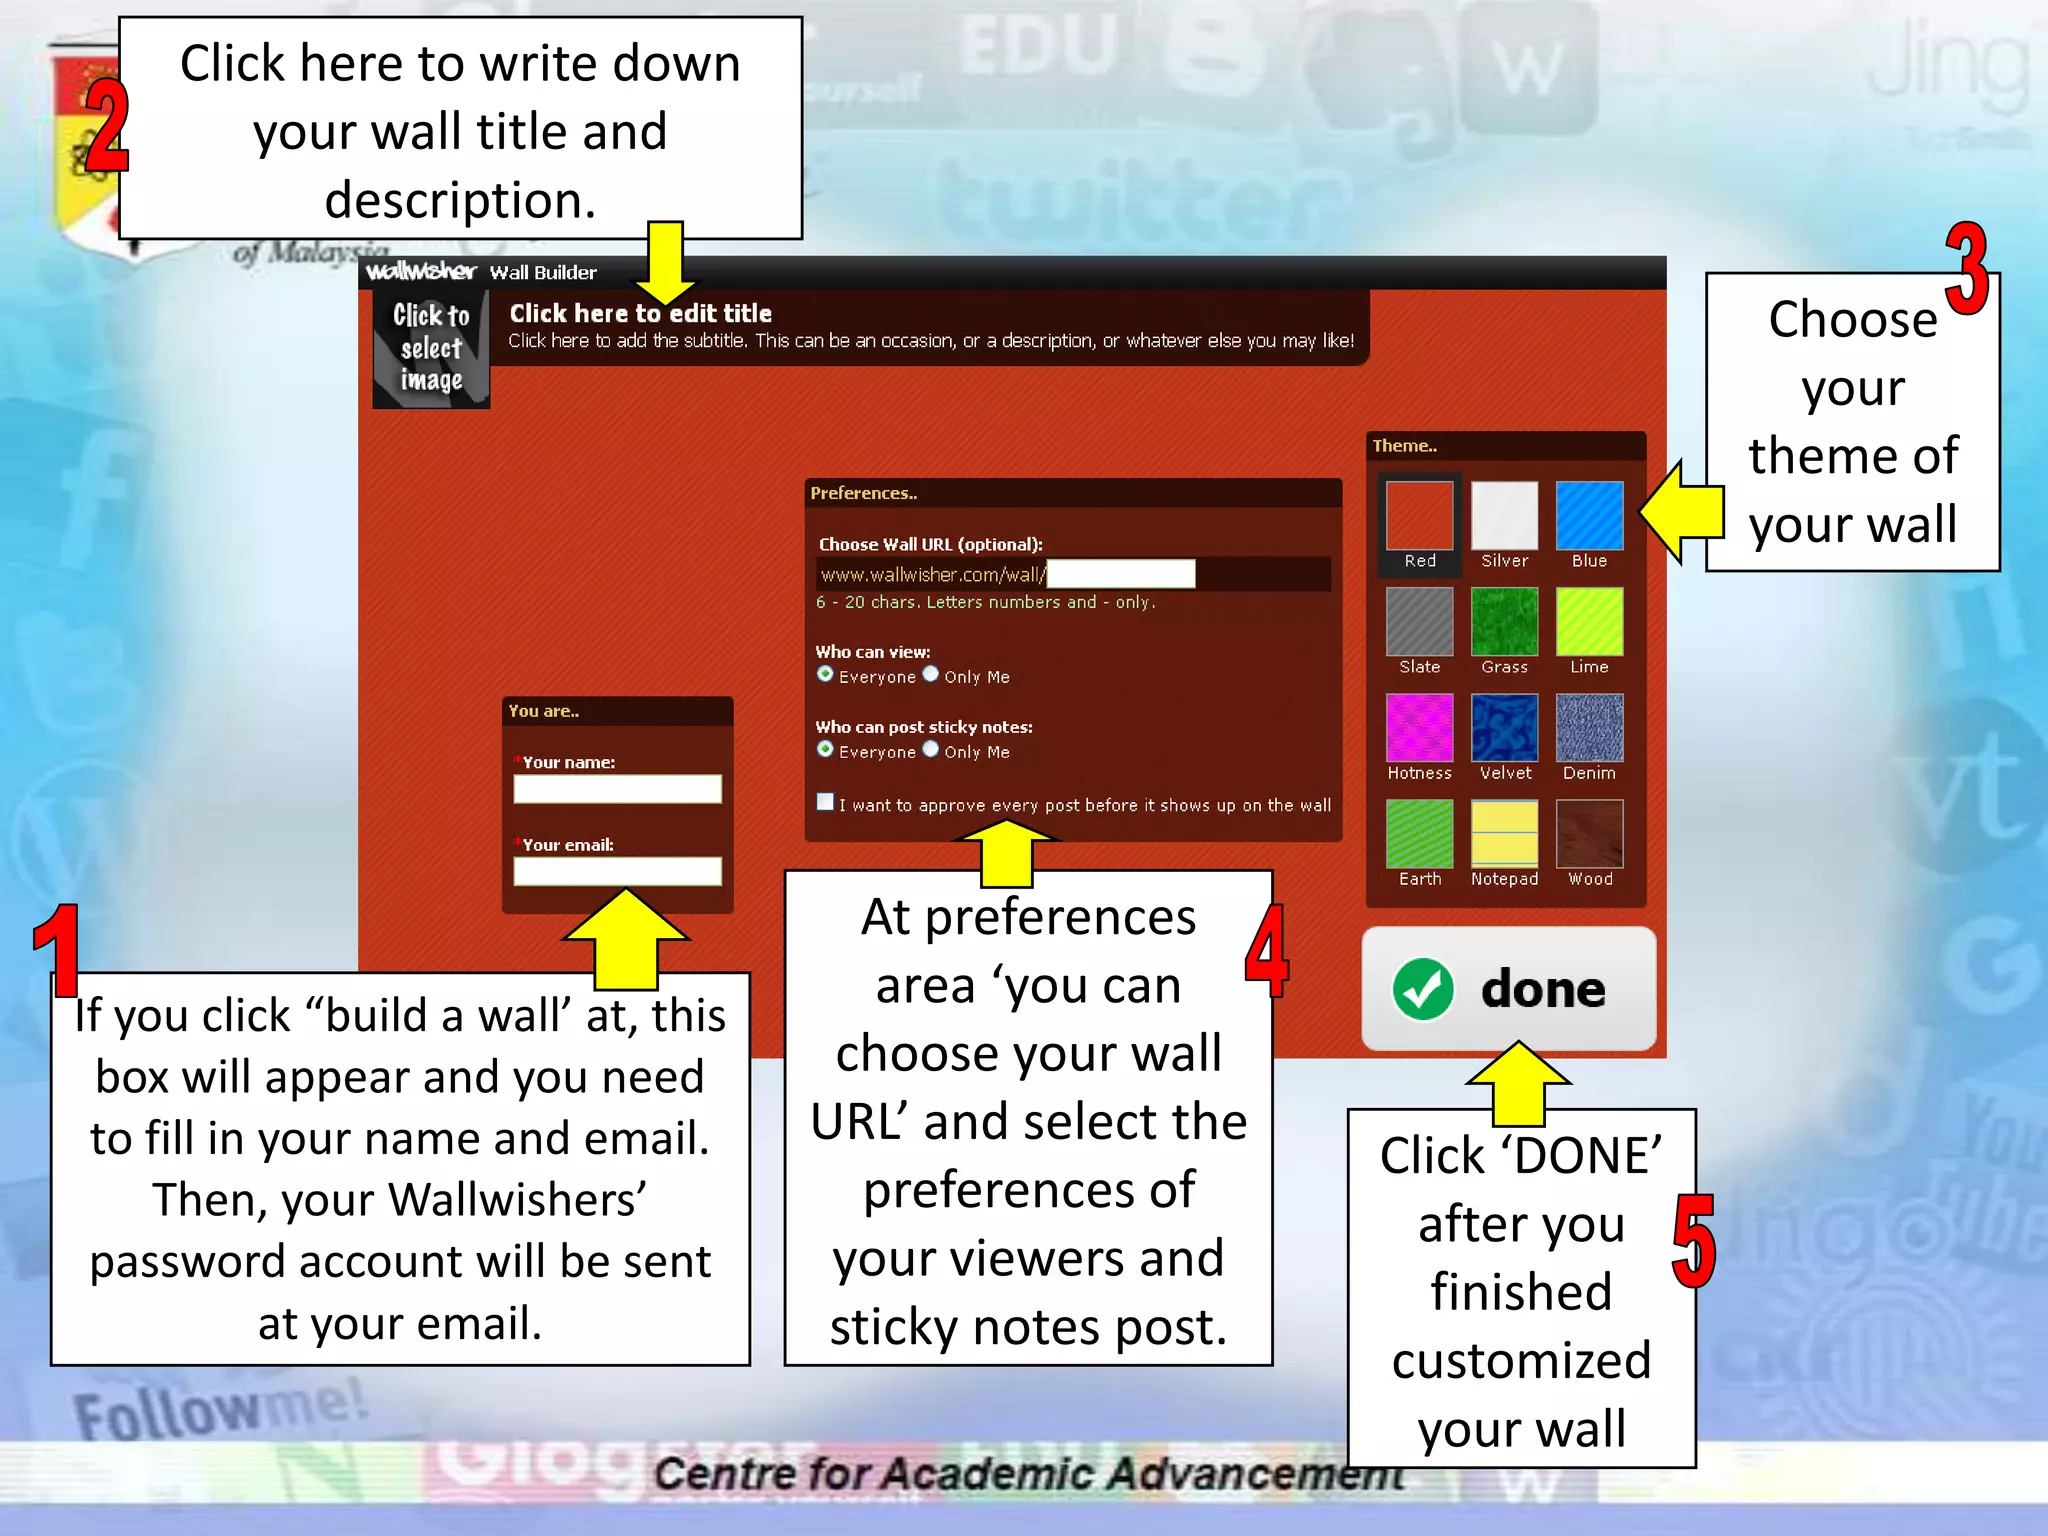

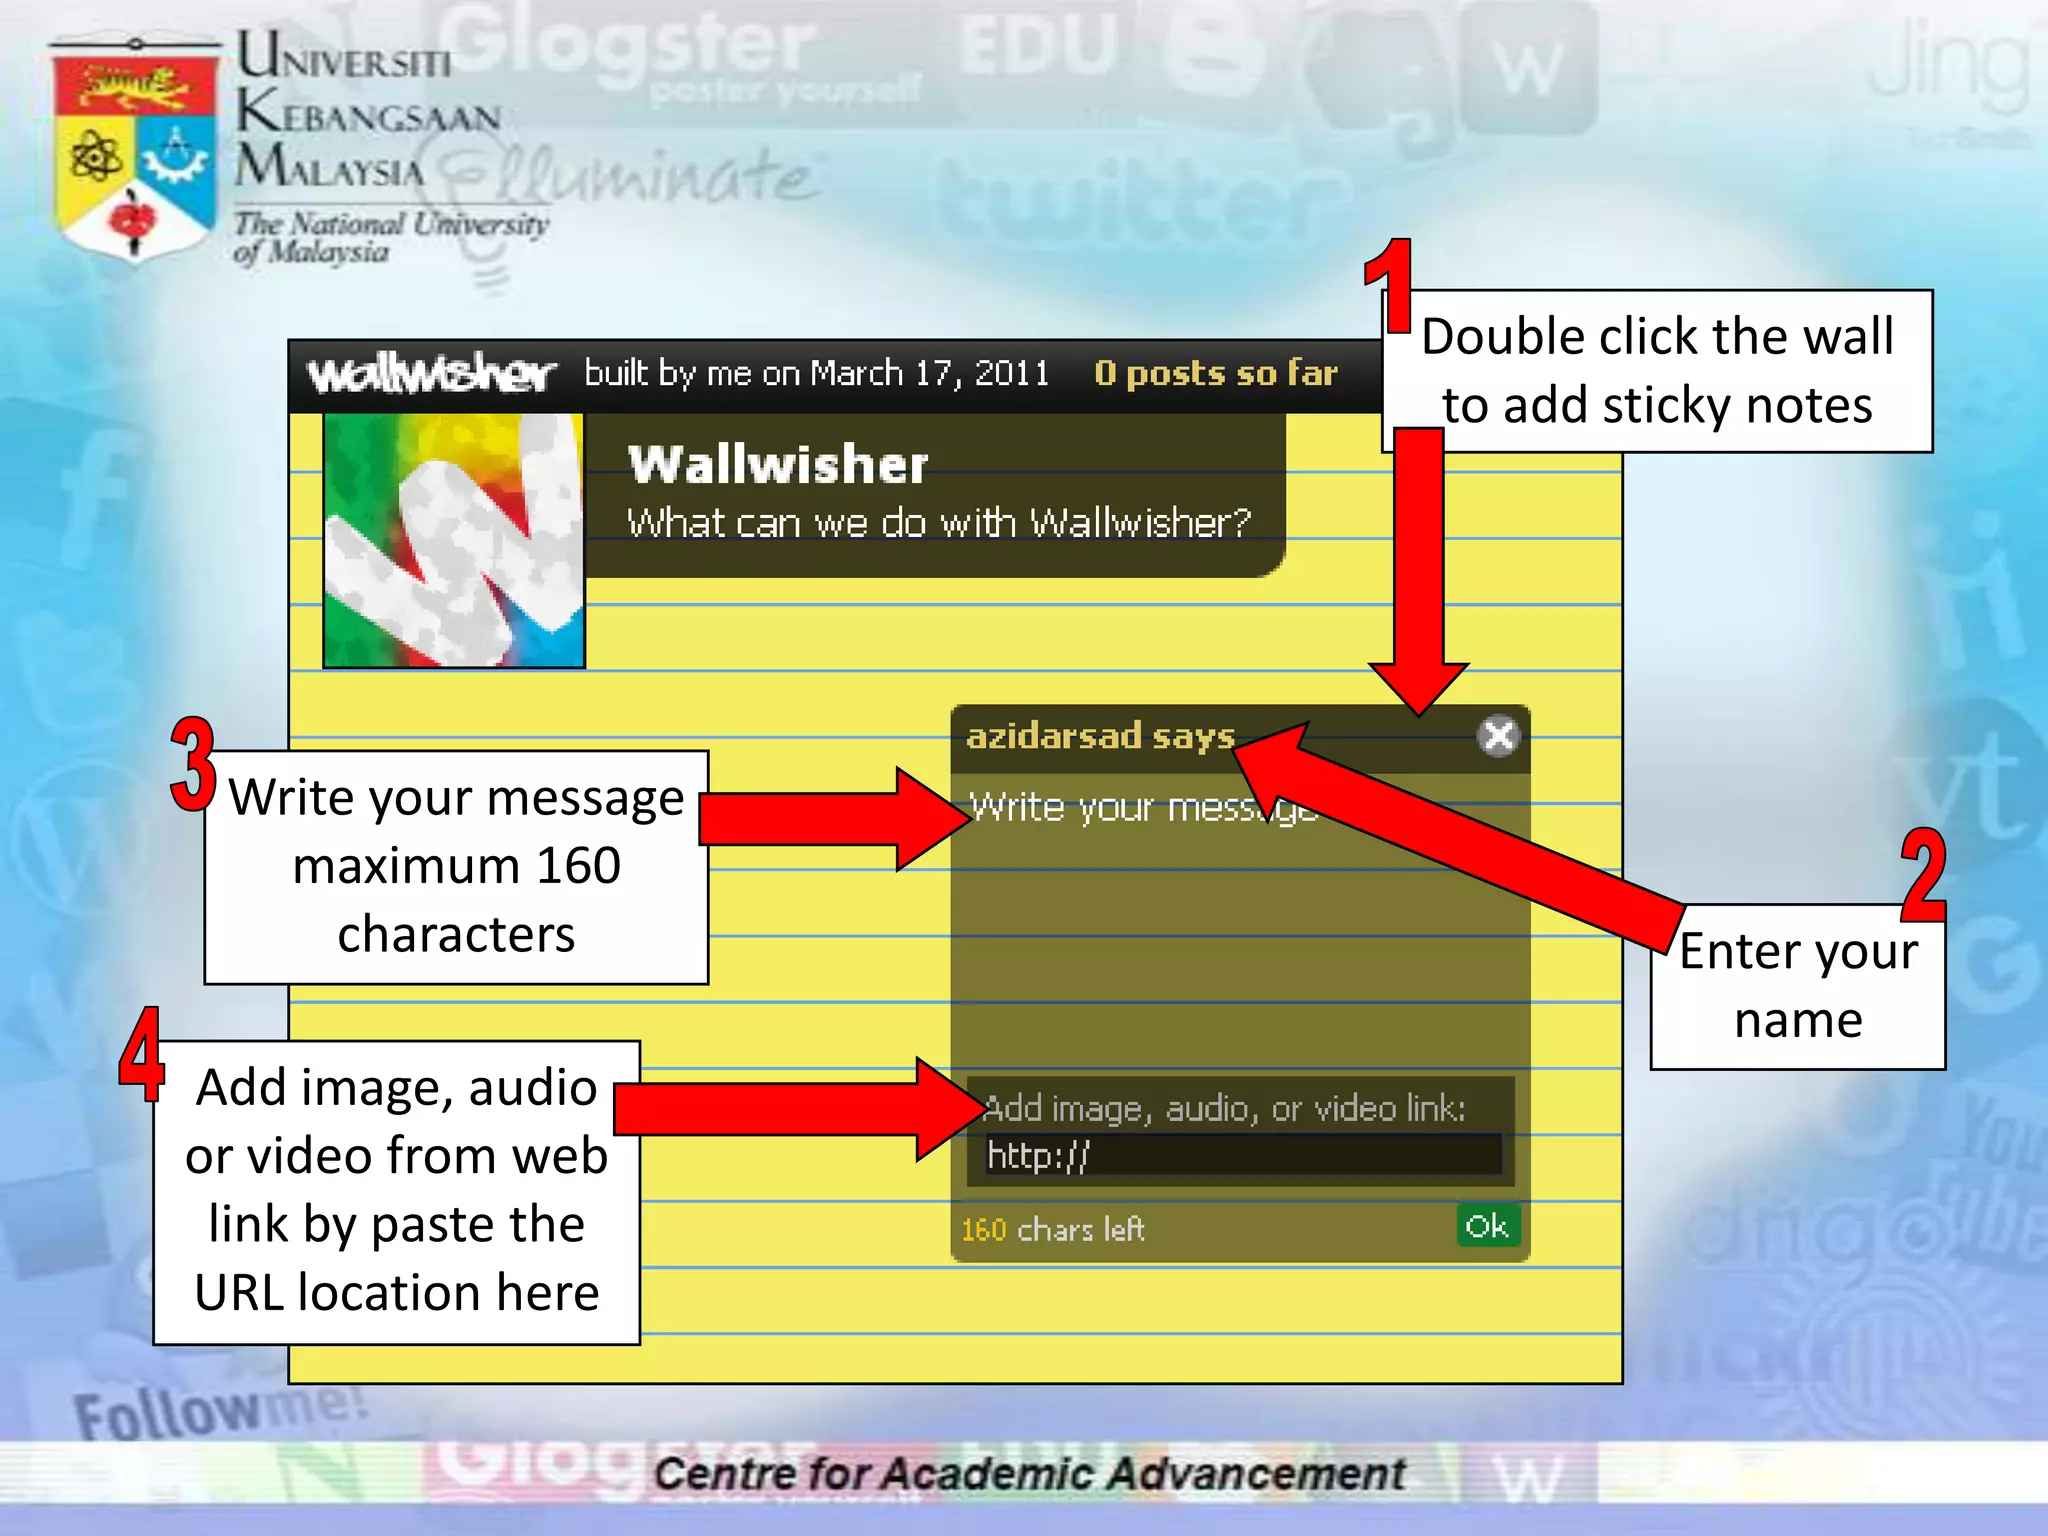

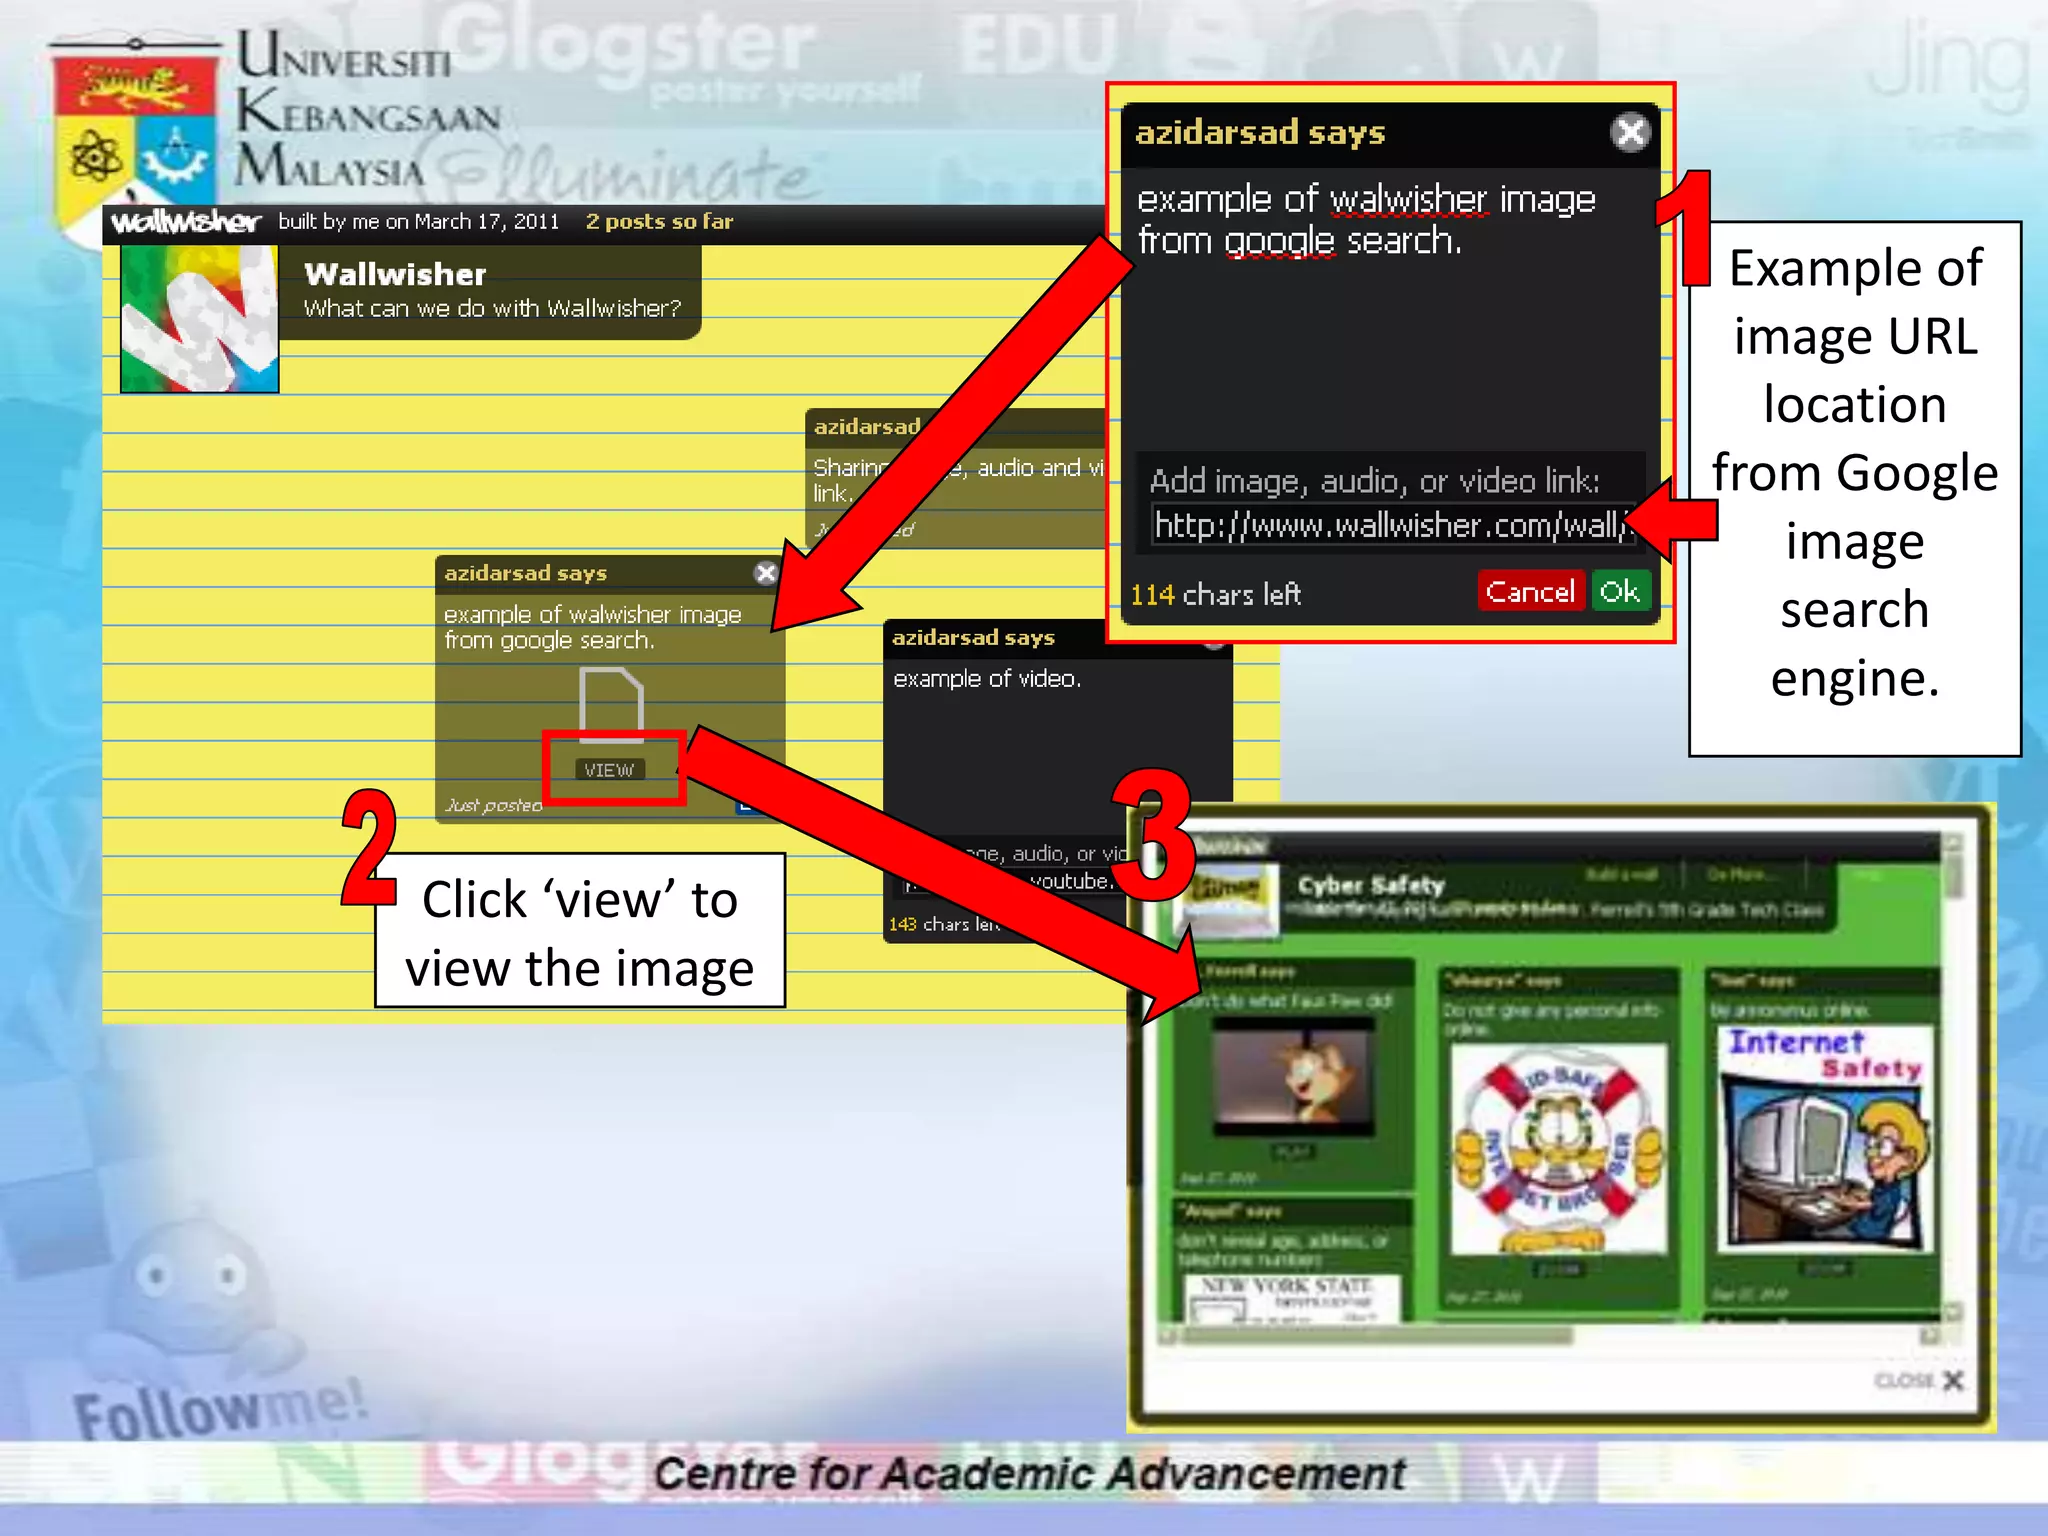

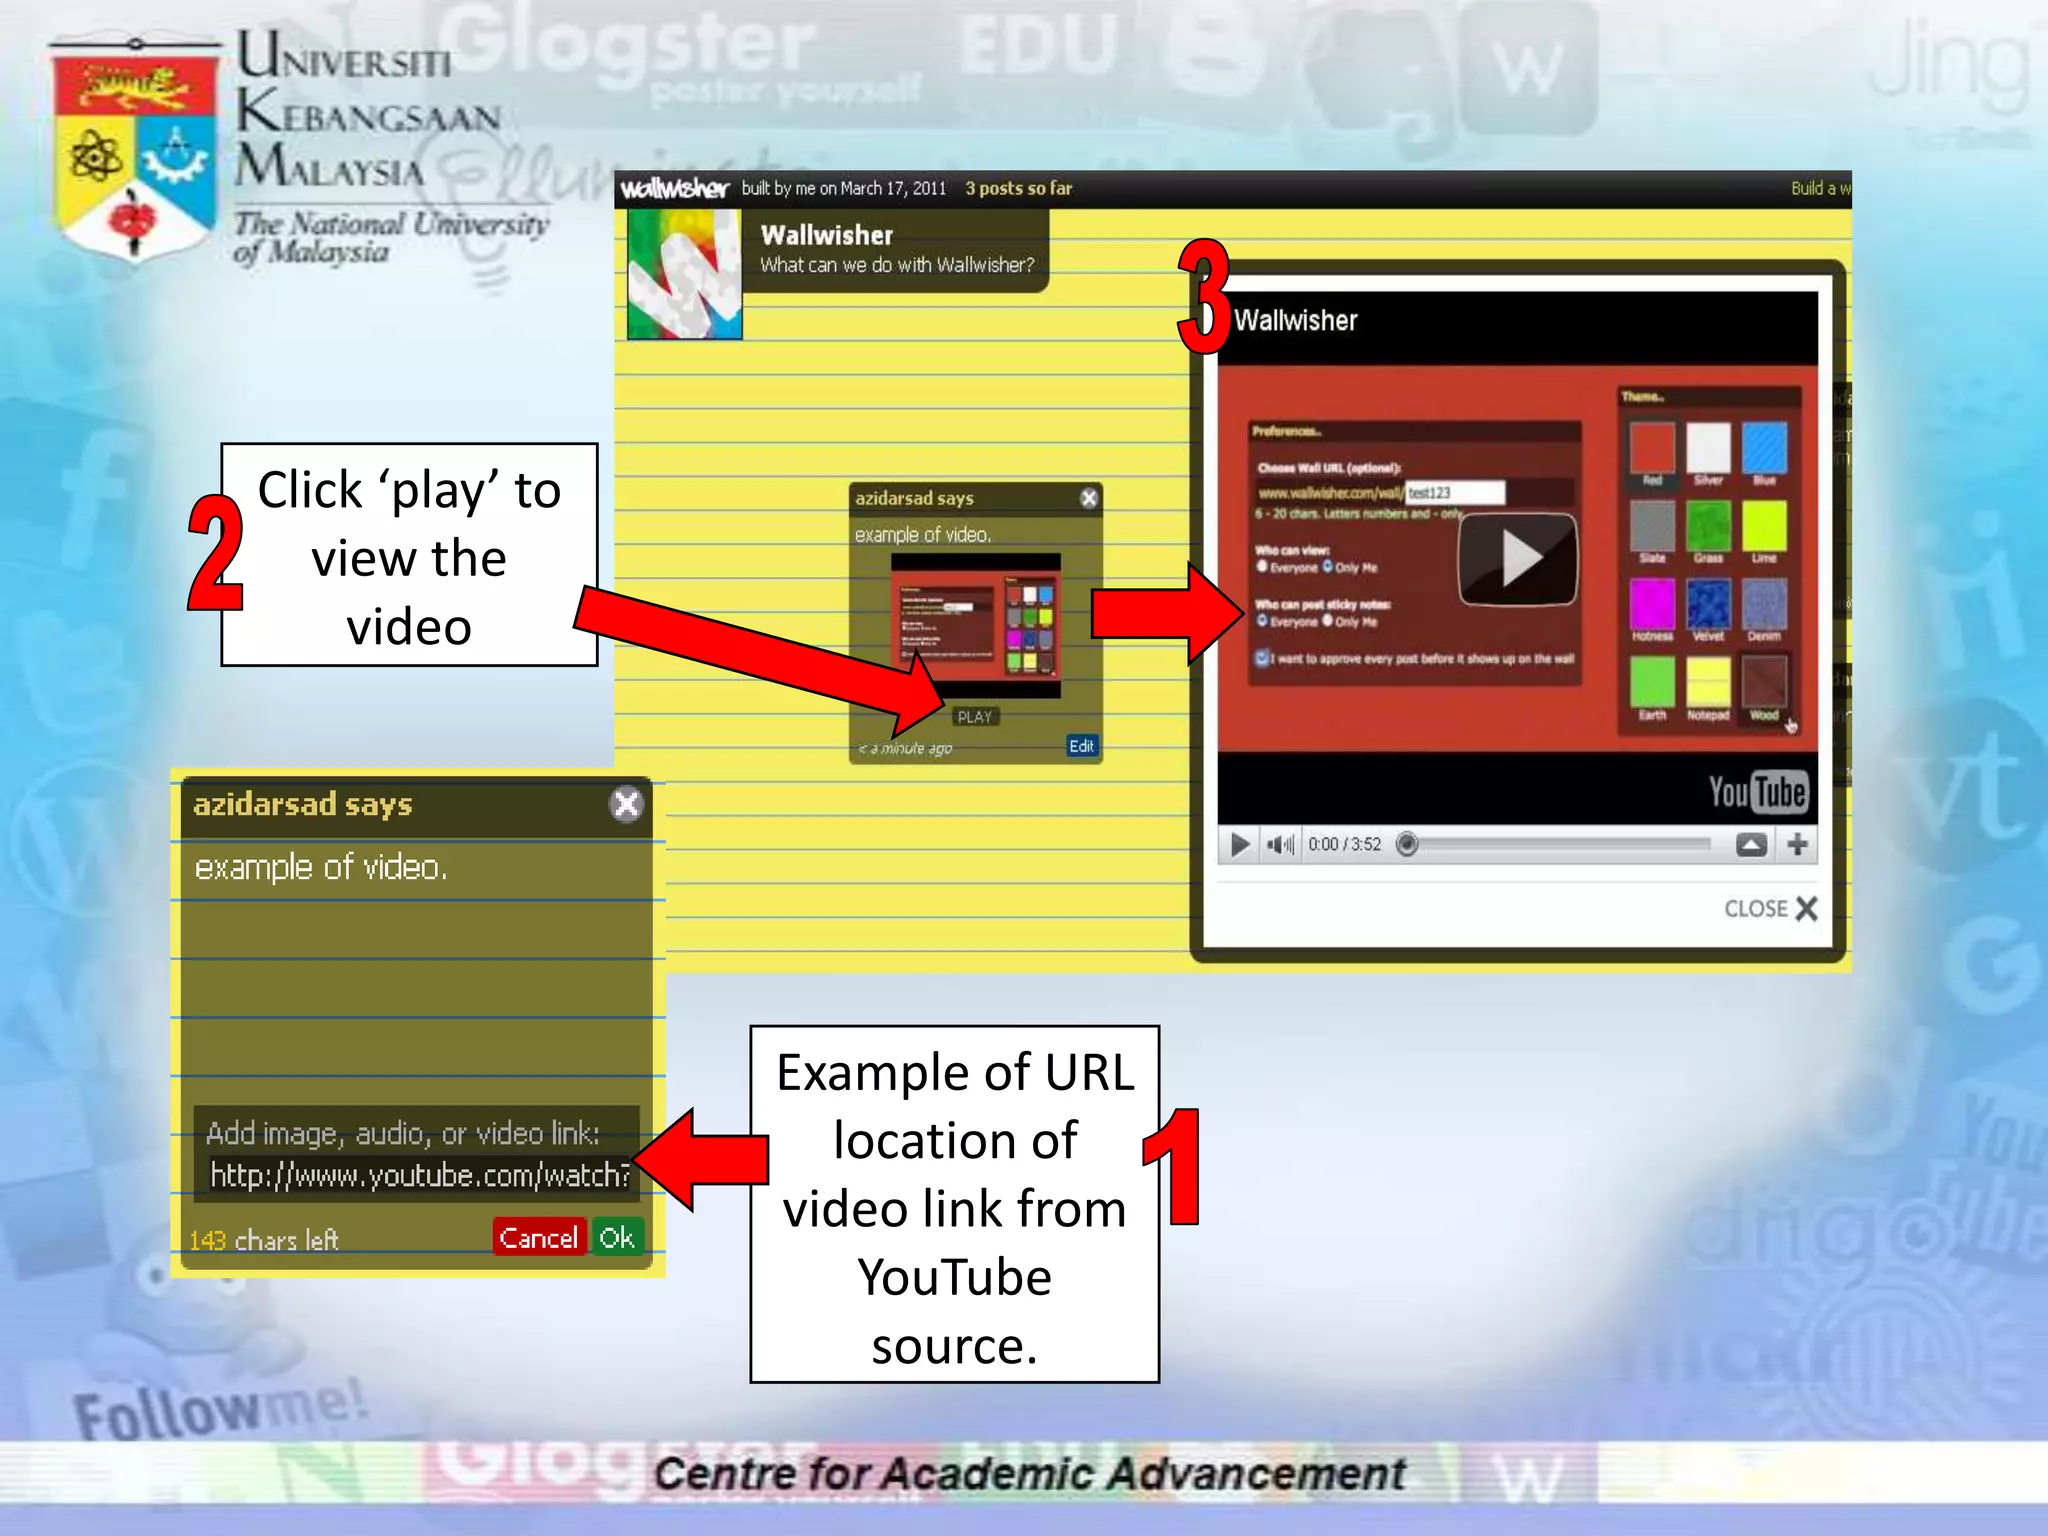

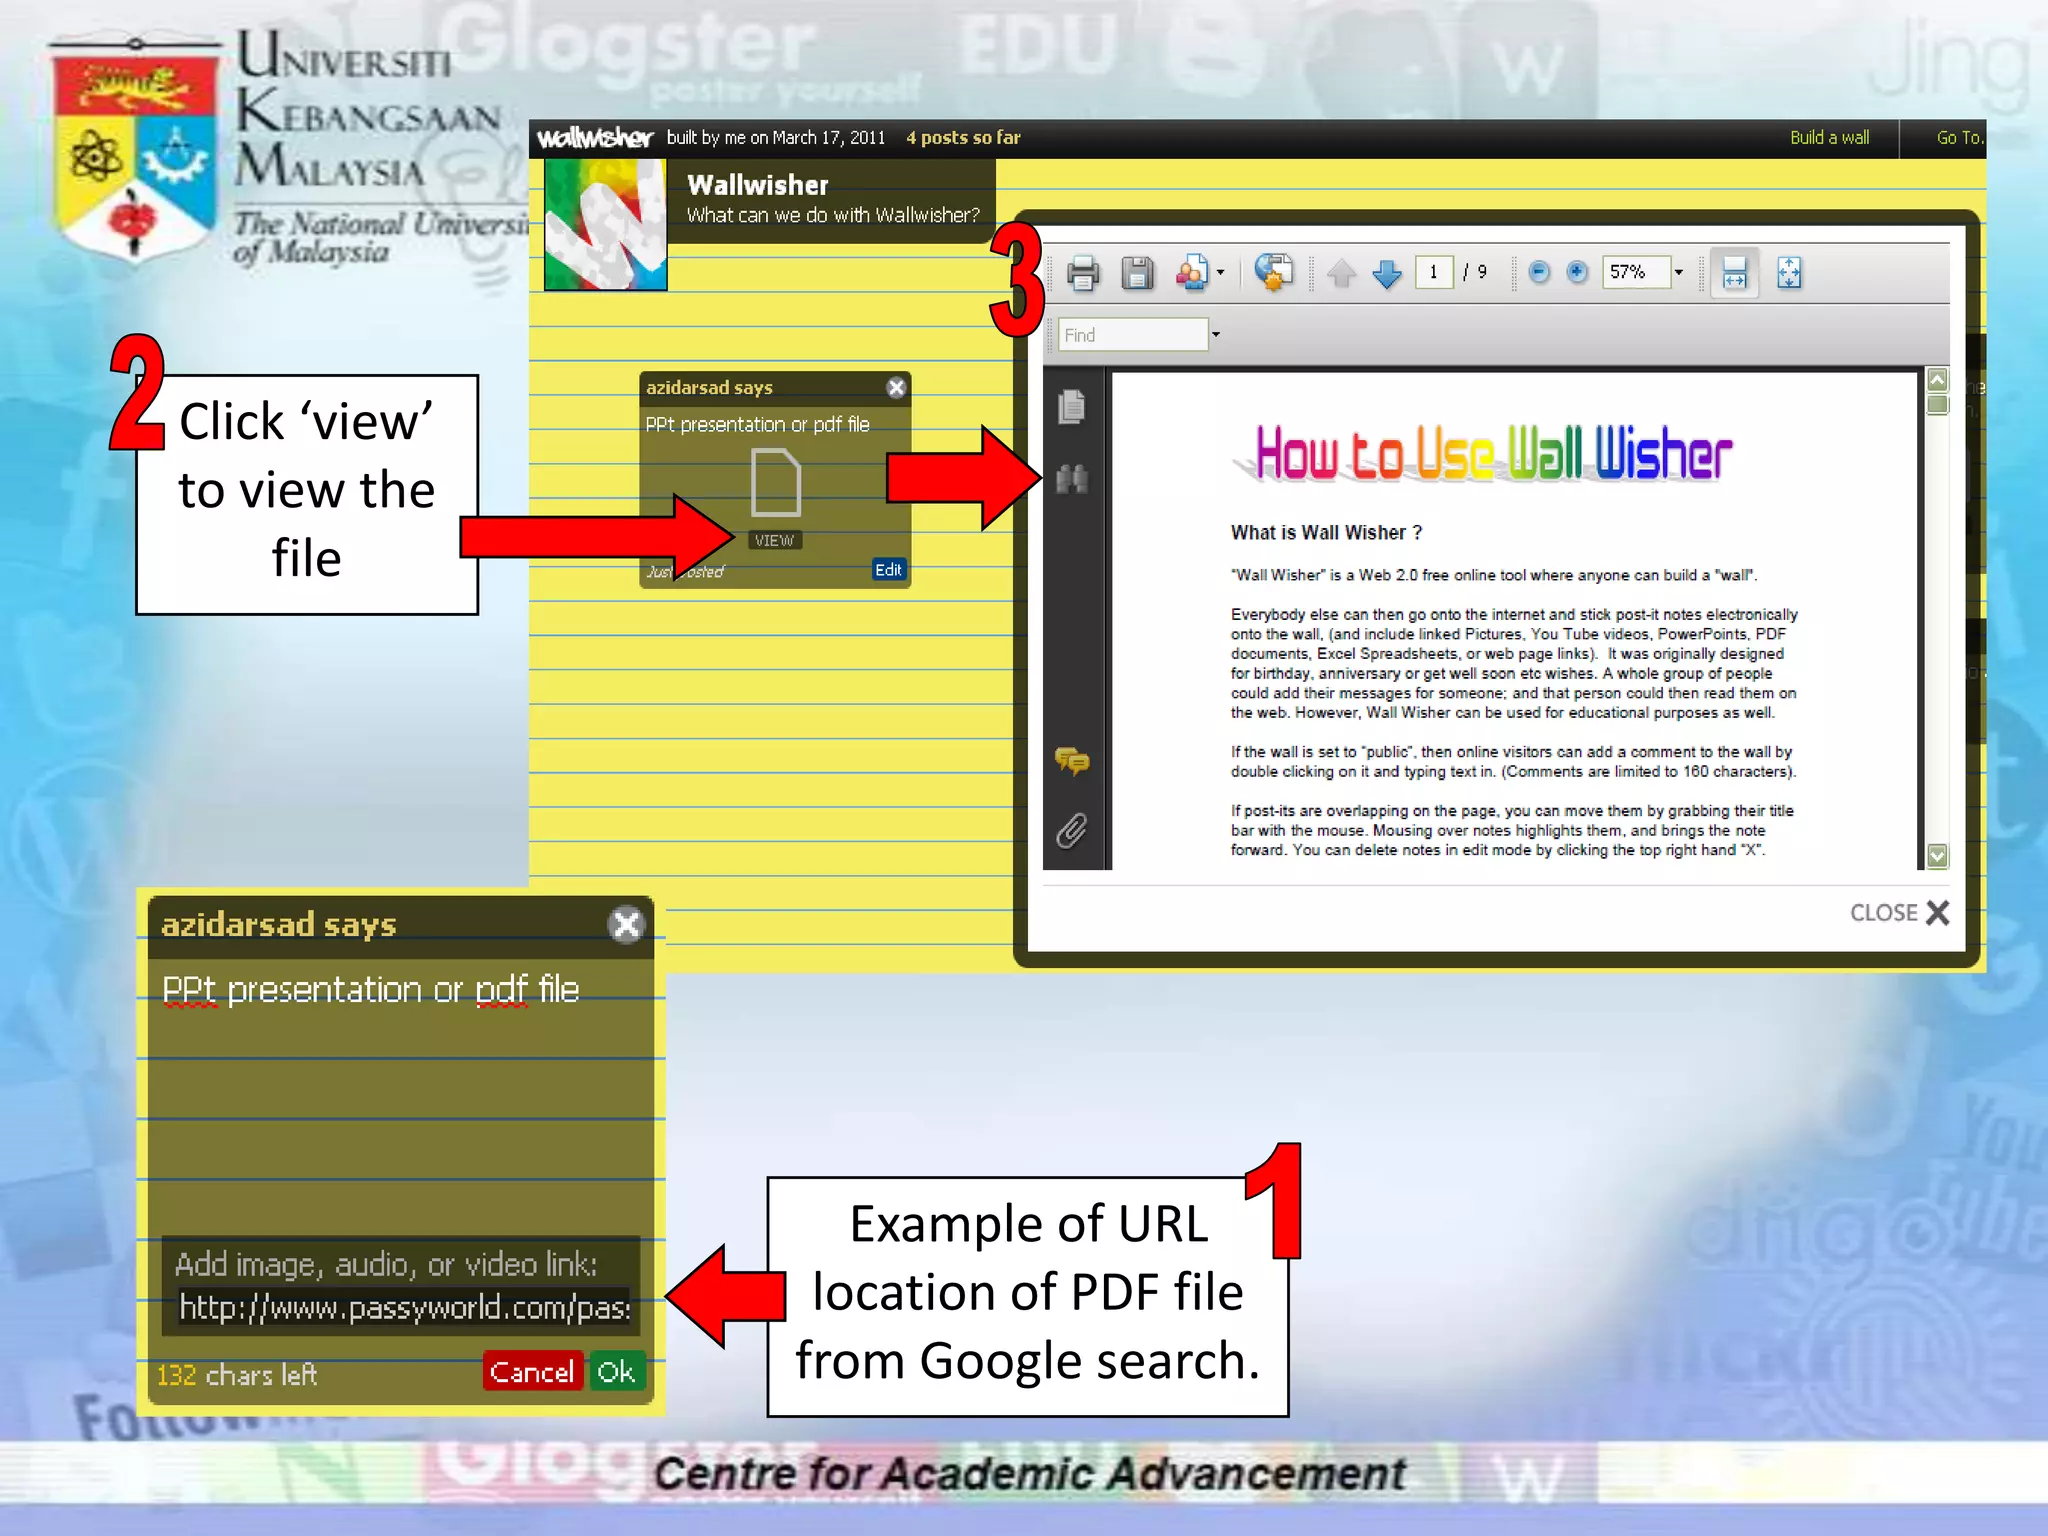


To use Wallwisher, users first register for an account or log in if already registered. They then build and customize their wall by adding a title, description, and choosing a theme. Users can add sticky notes by double clicking the wall and writing a message, and they can insert images, videos, or documents by pasting the URL link. The wall can then be shared with others by sending the published Wallwisher URL.