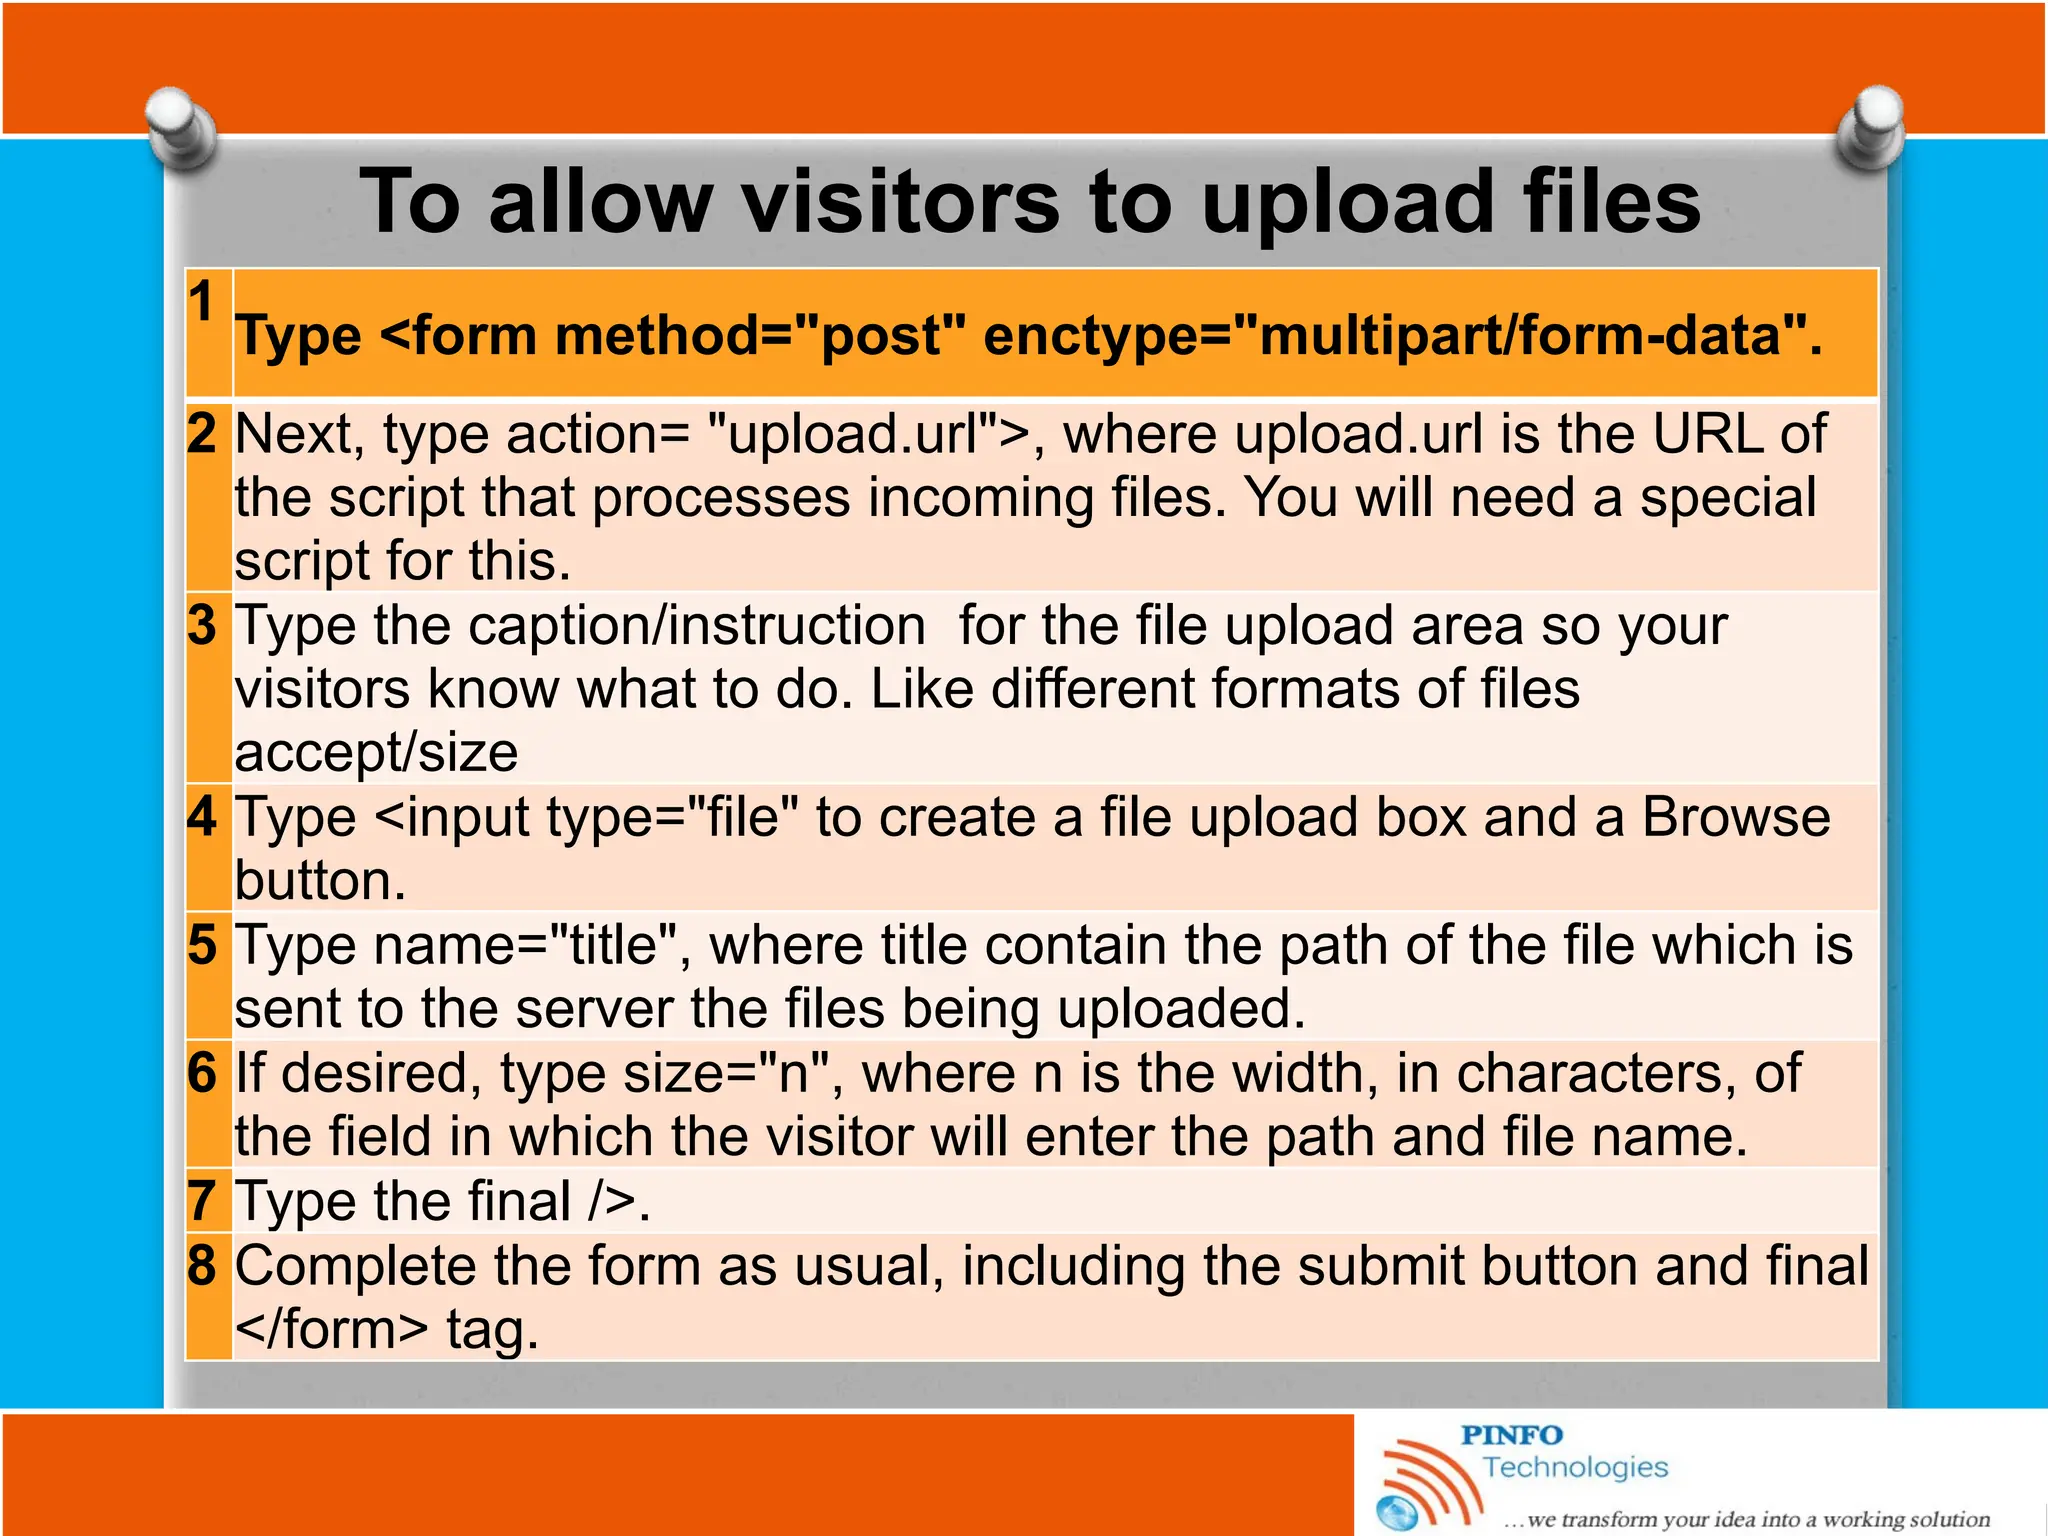
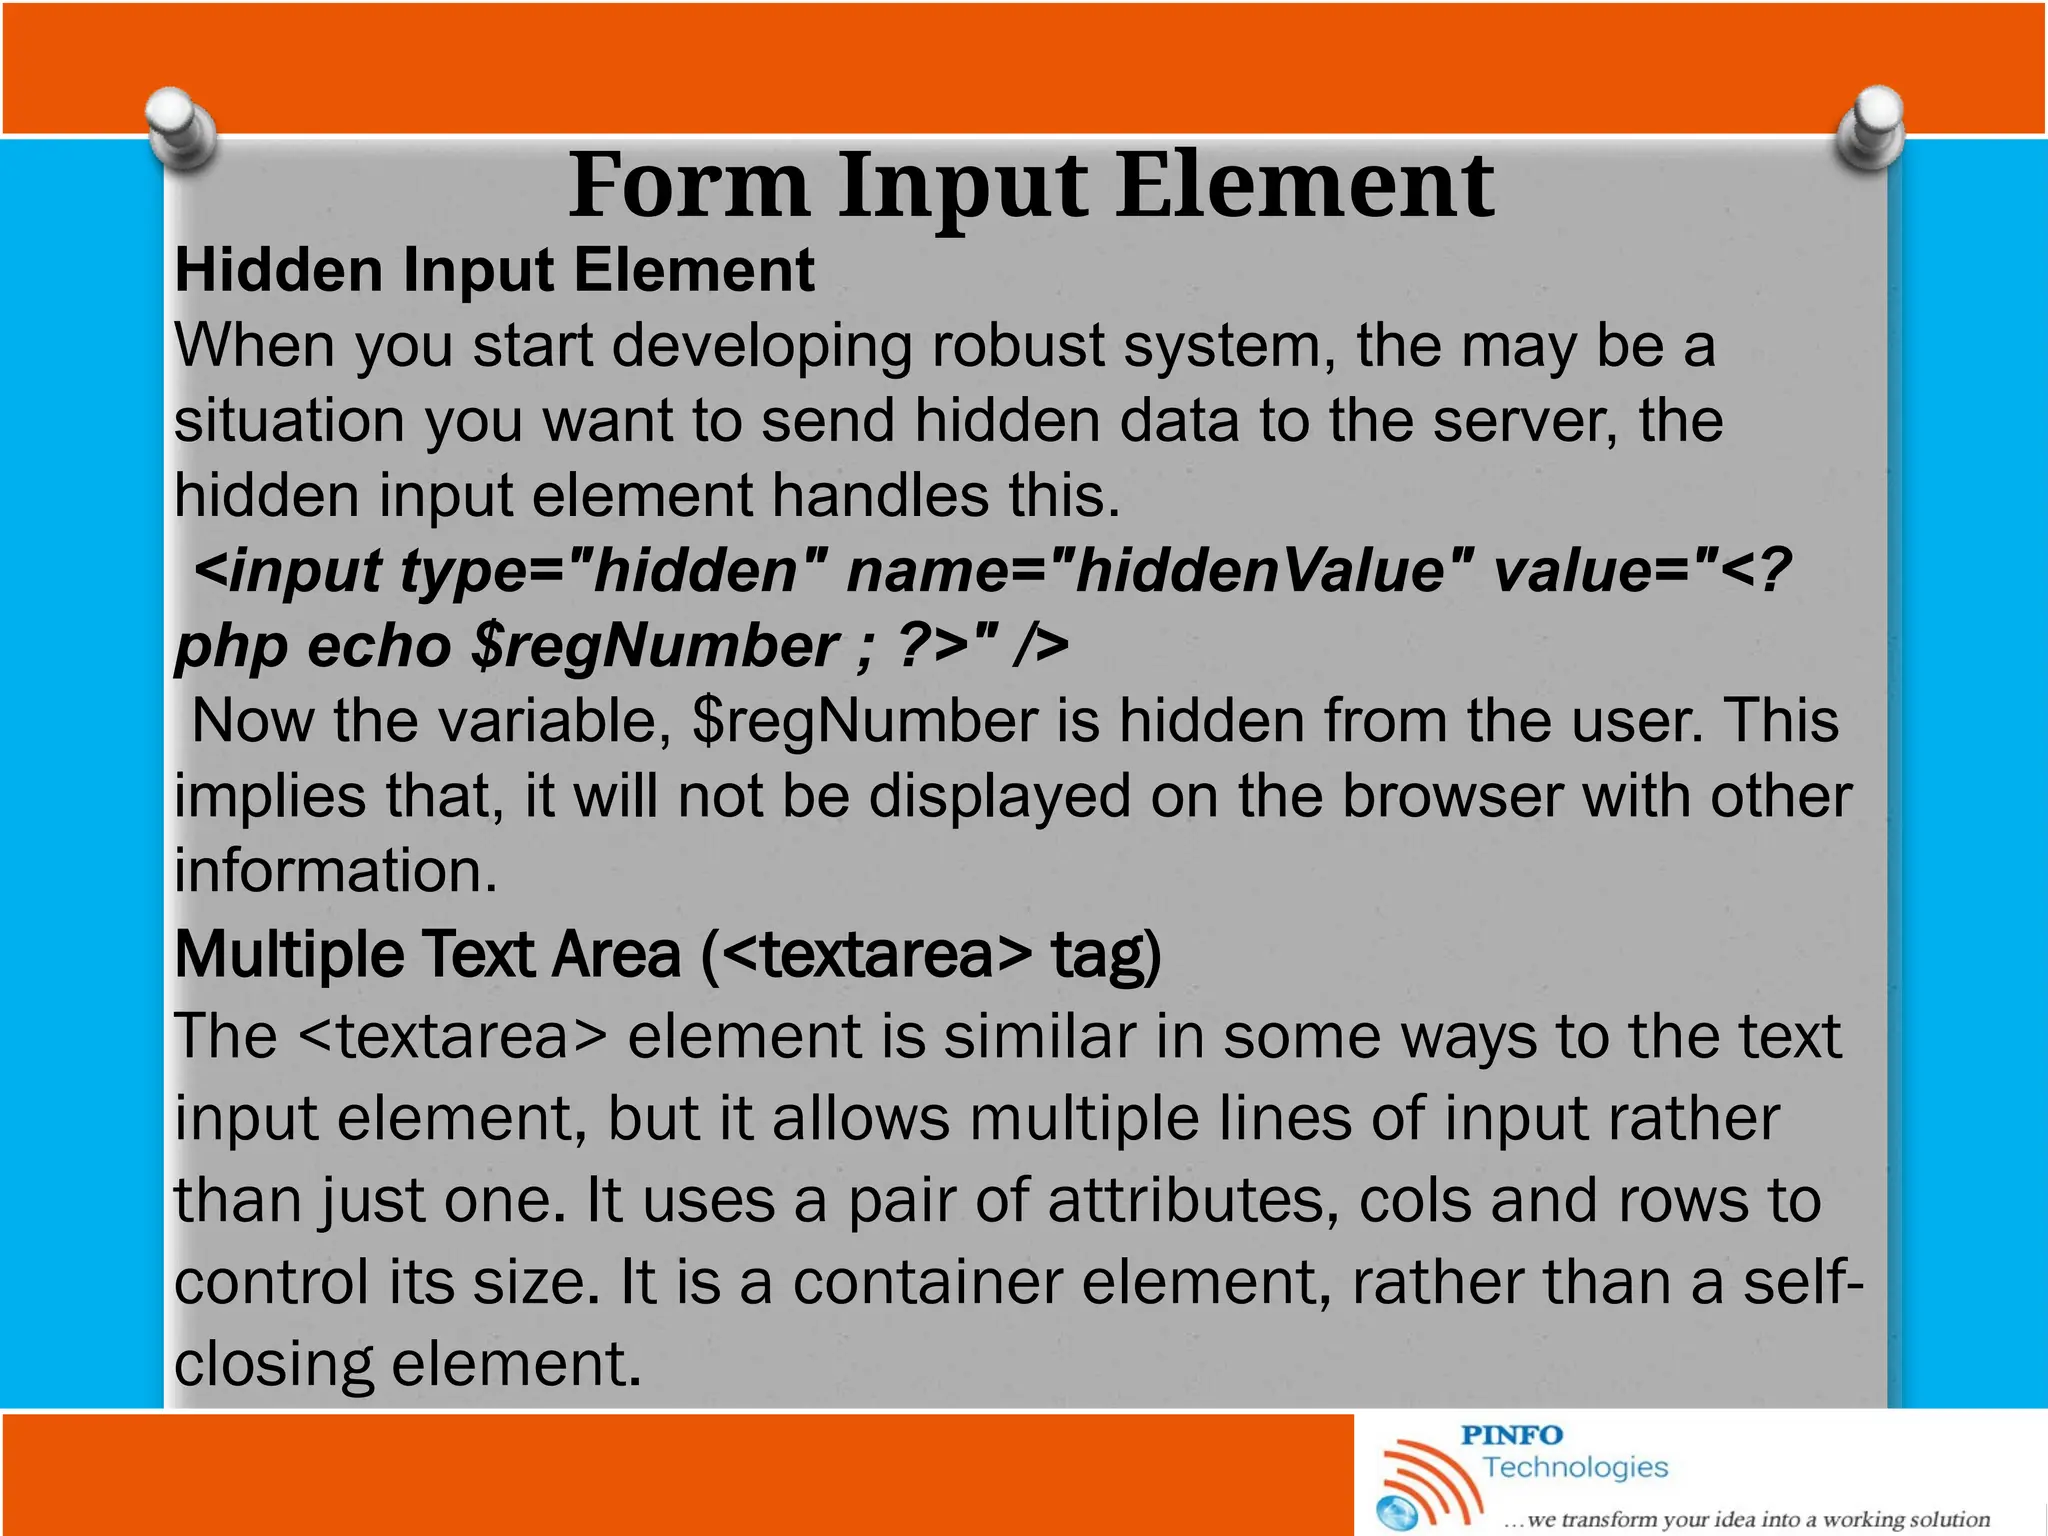
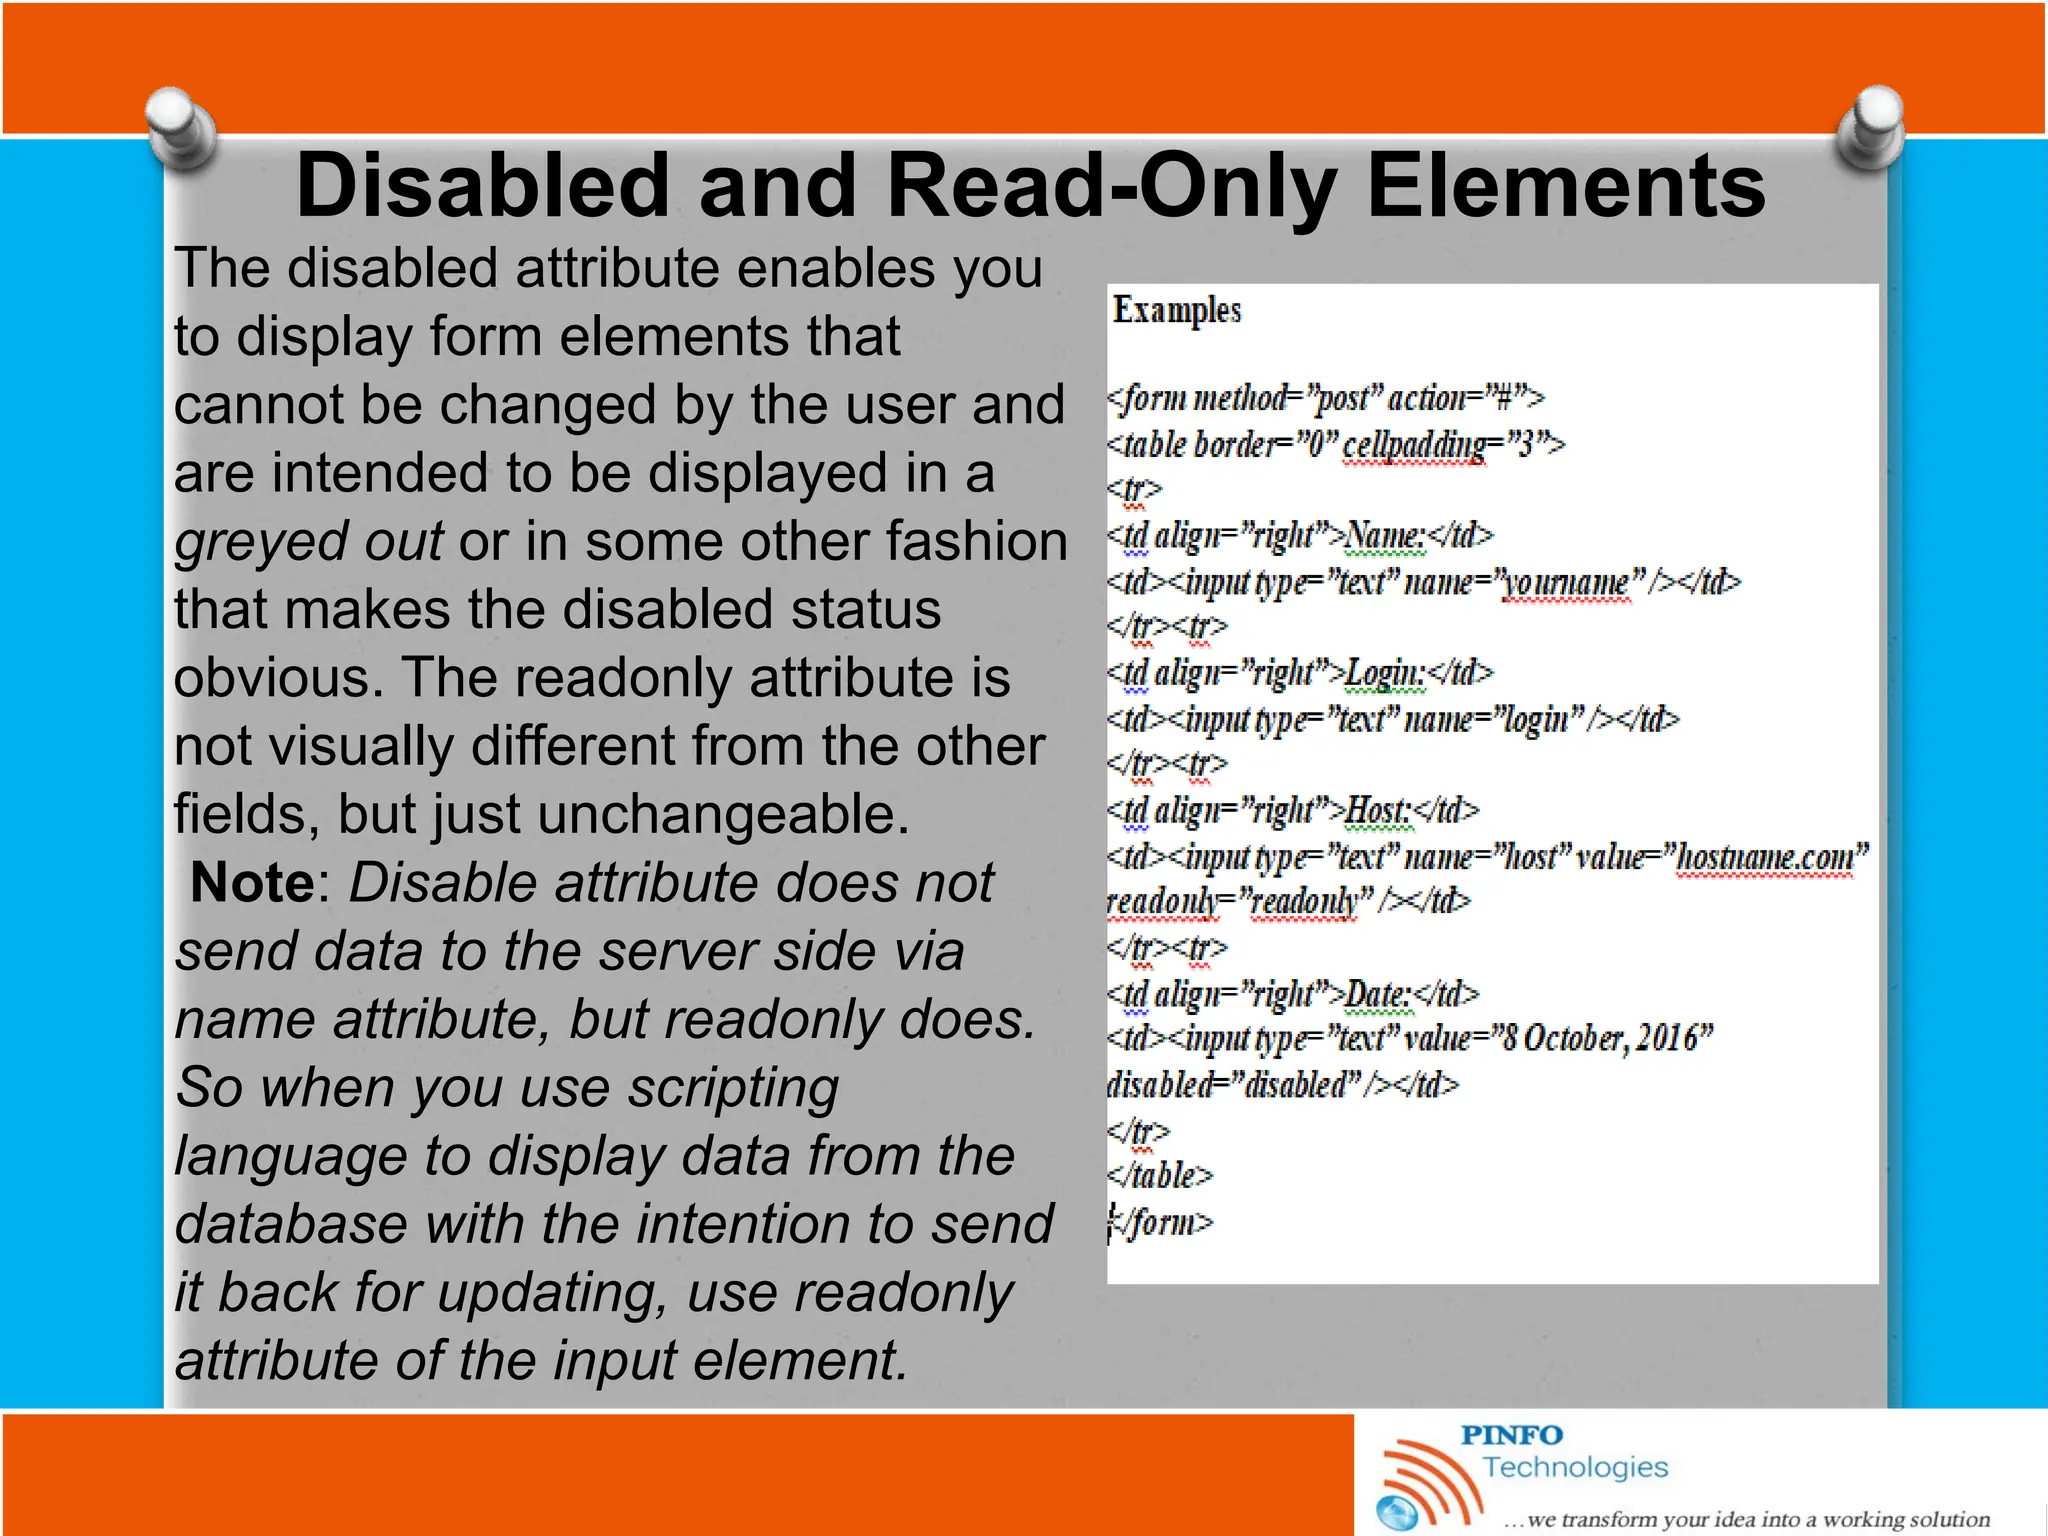
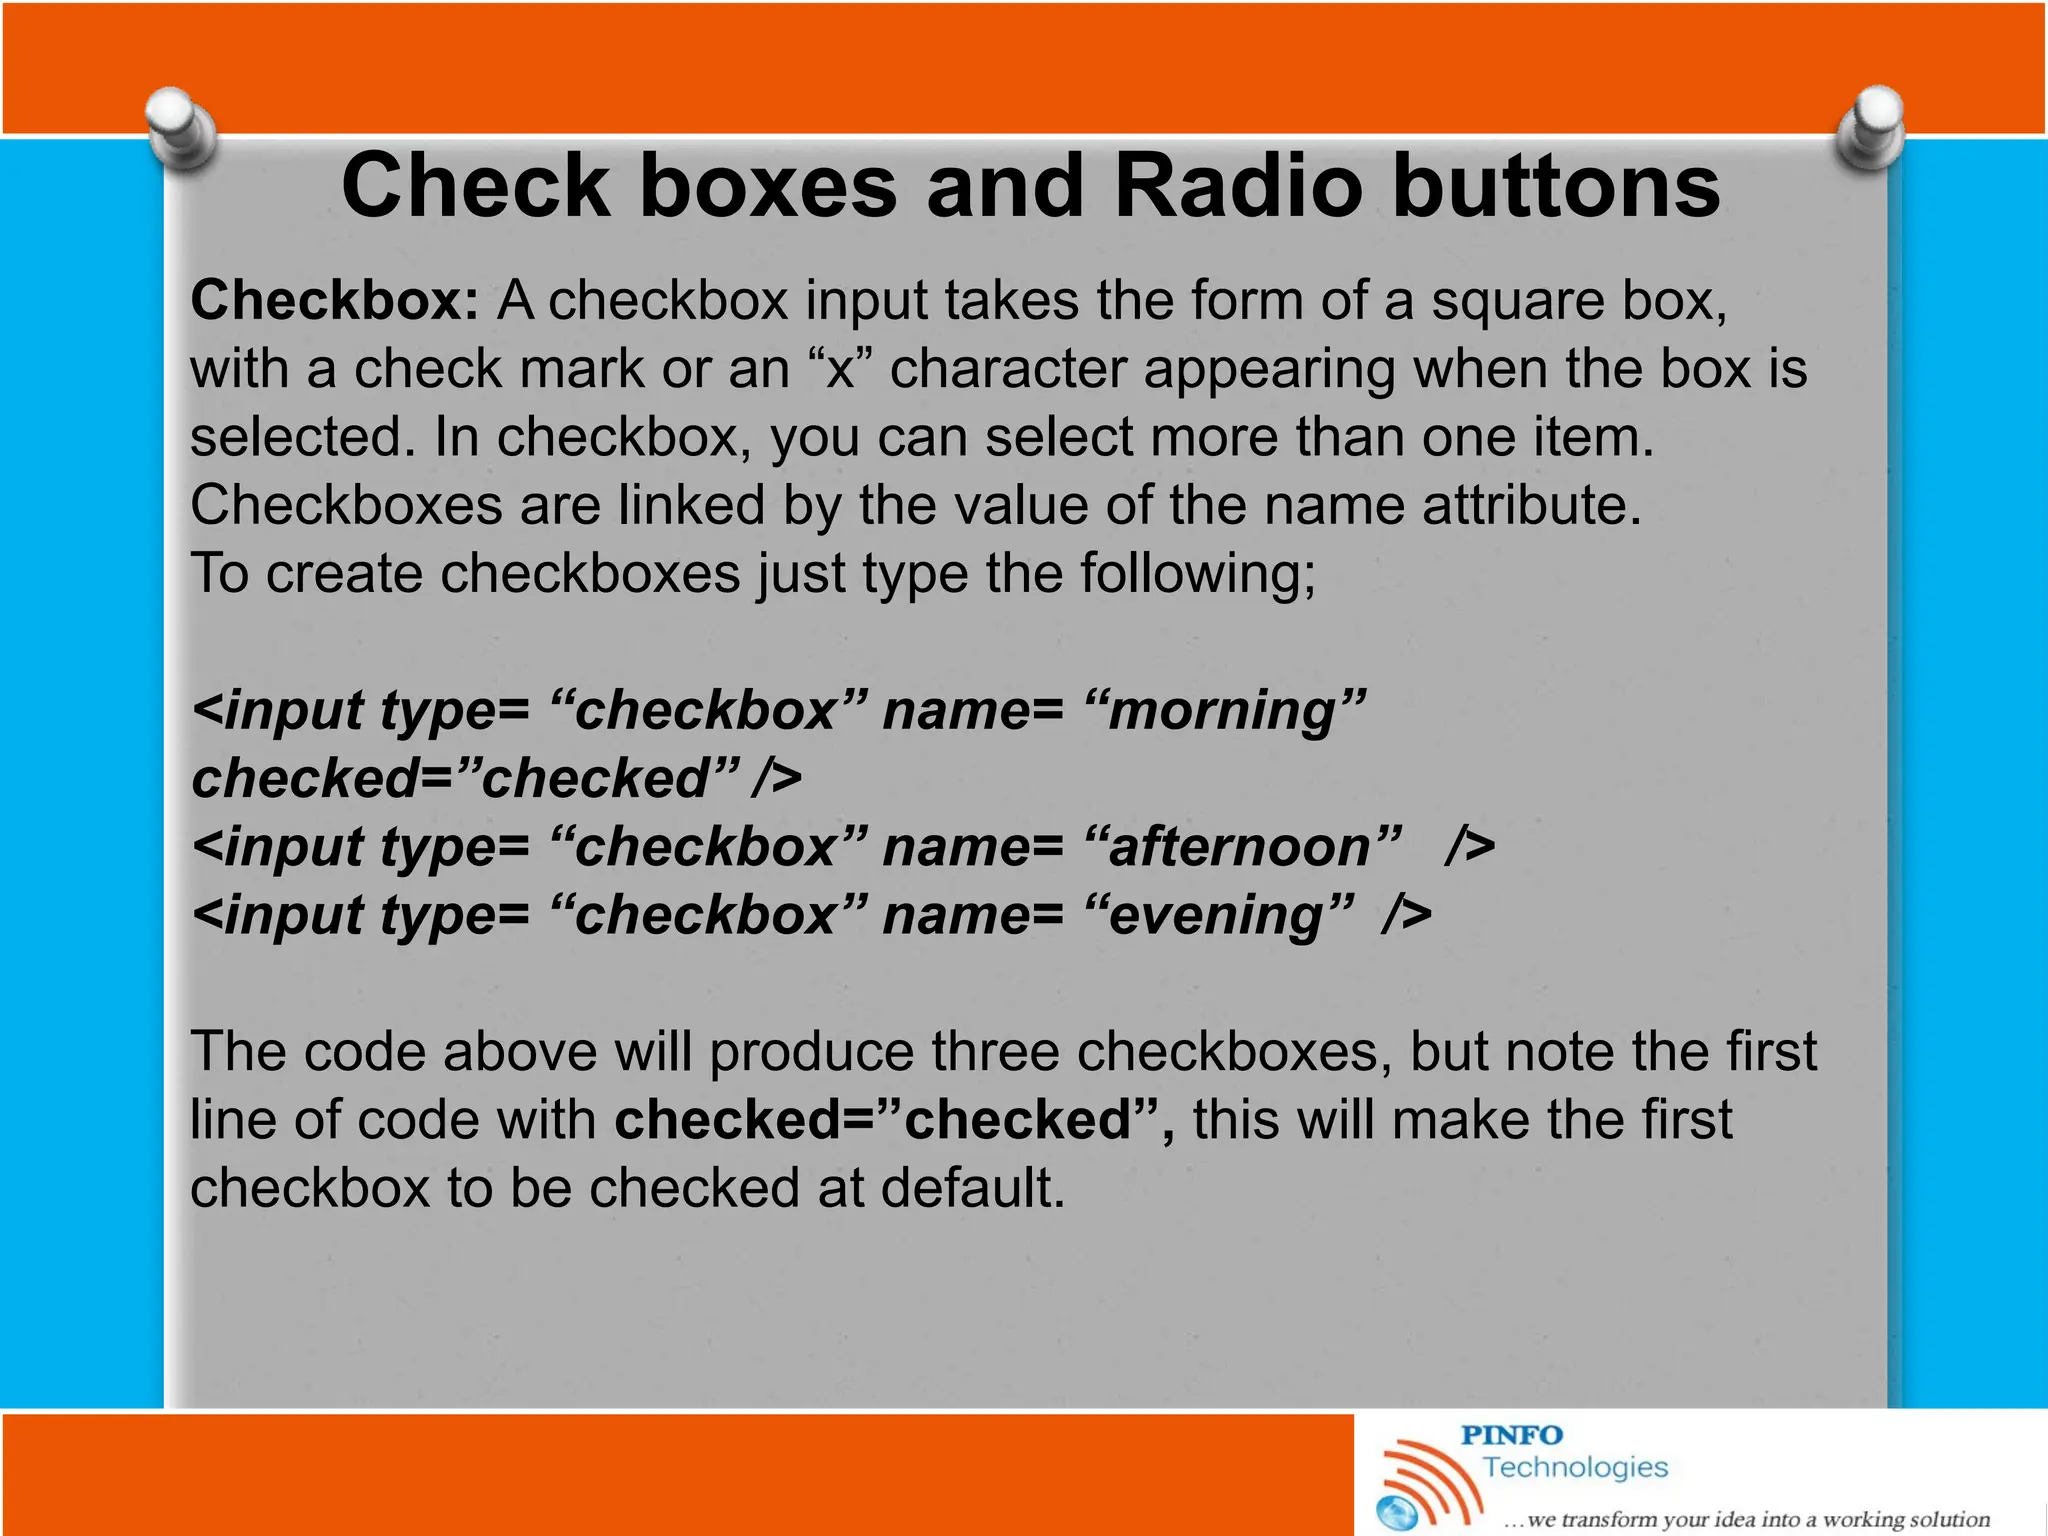
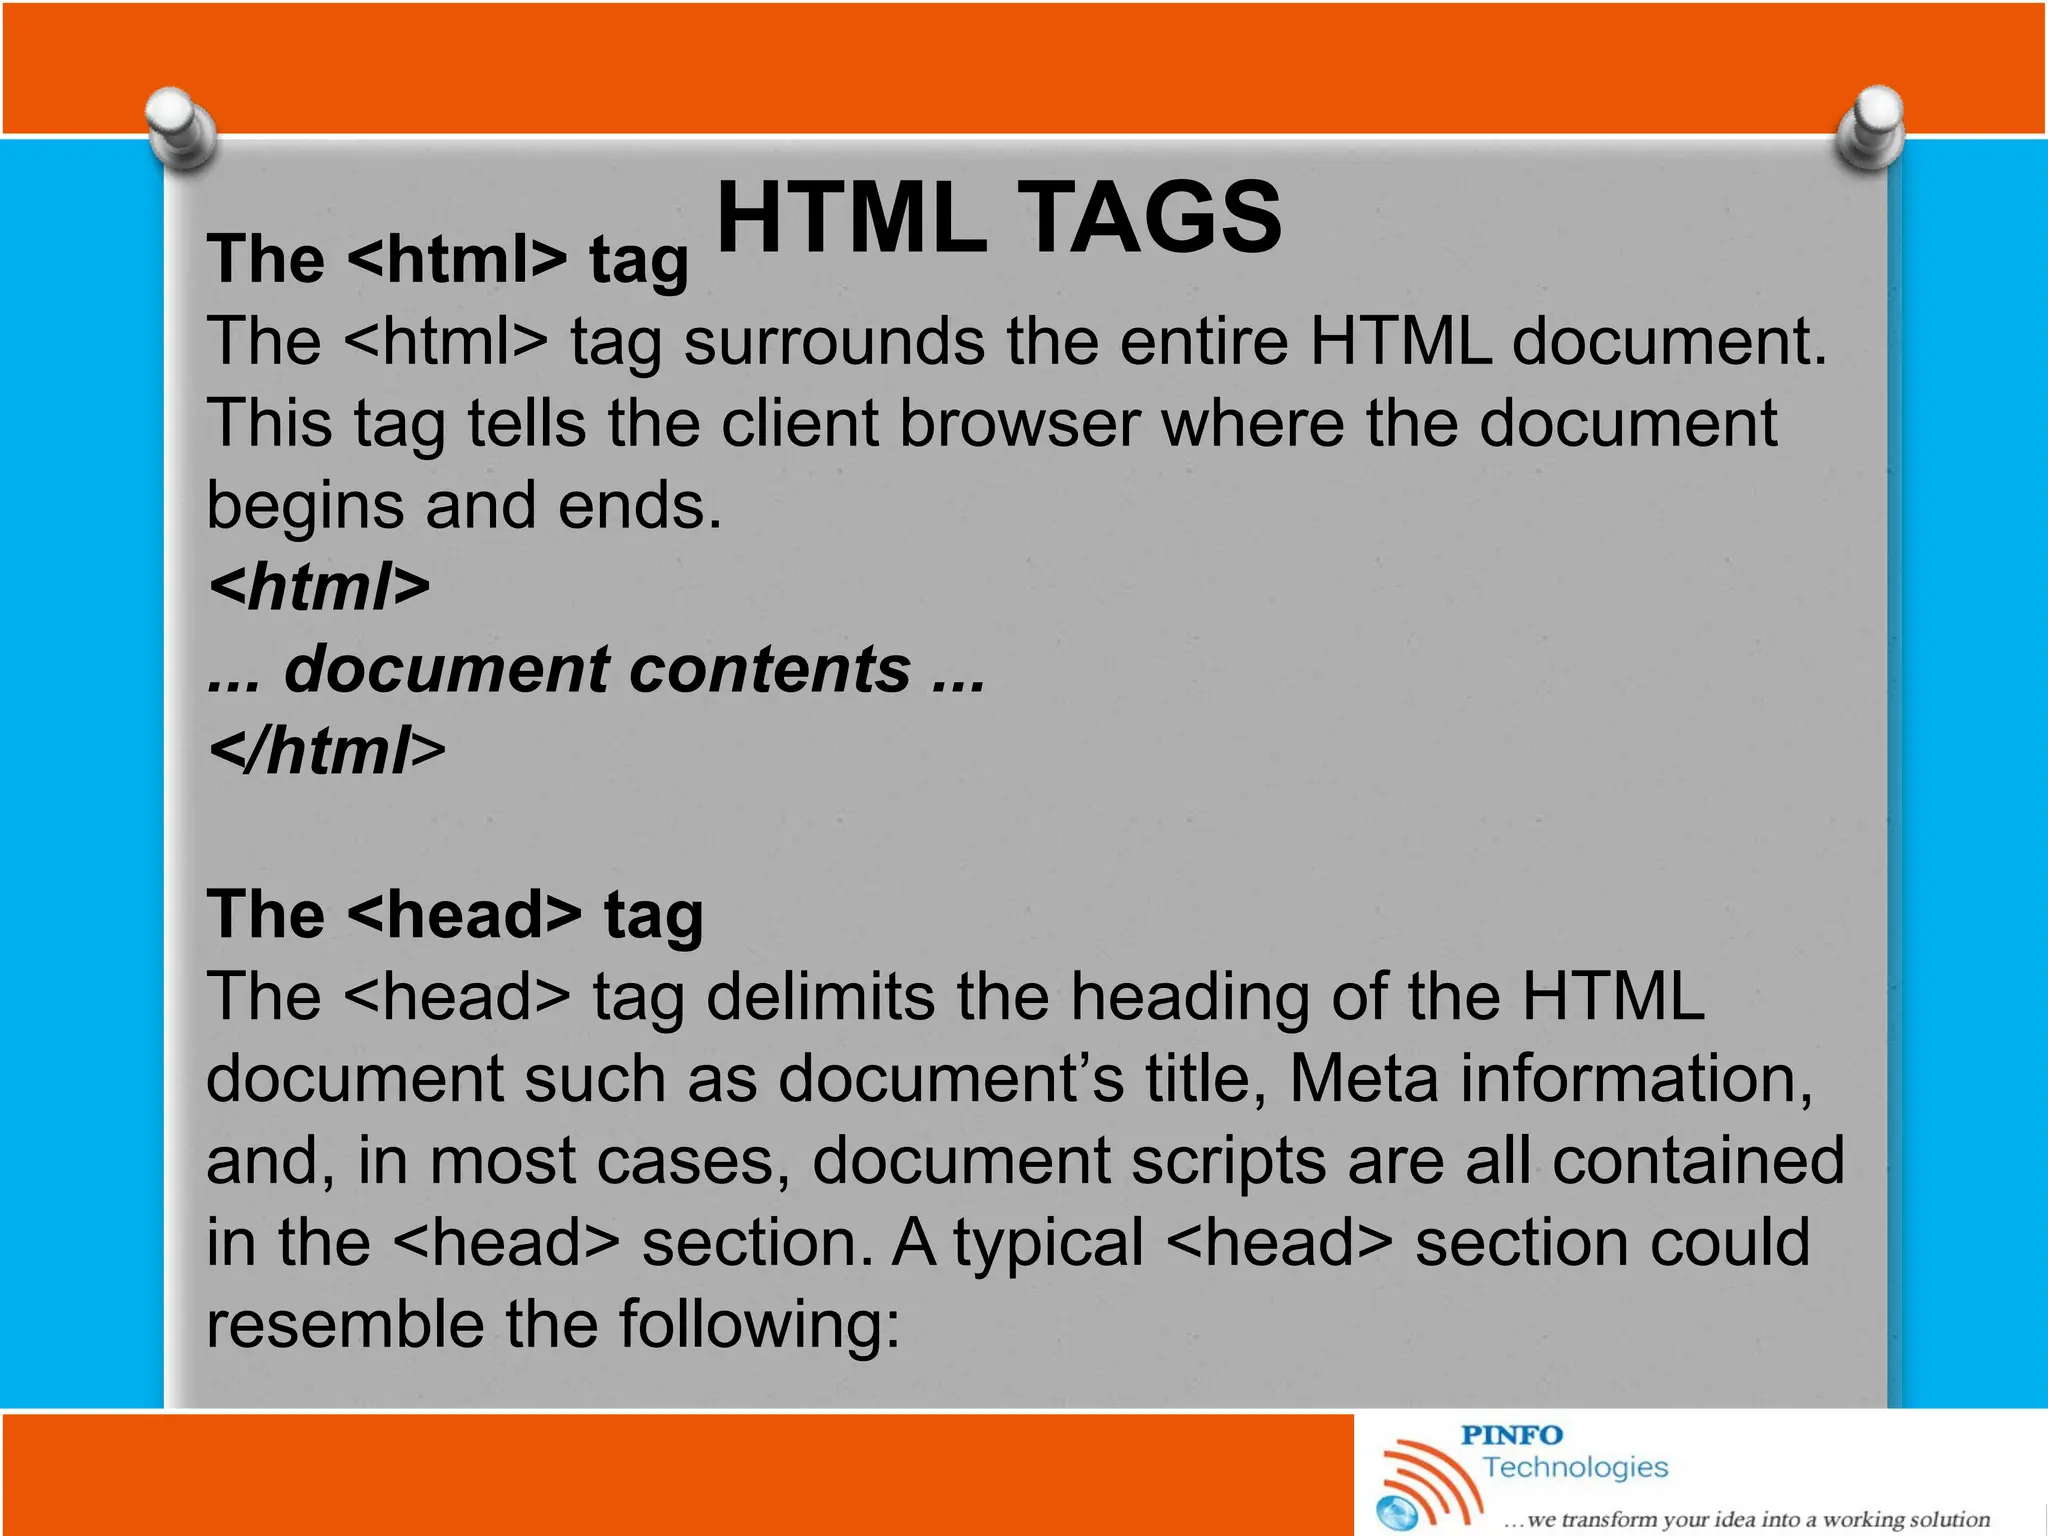
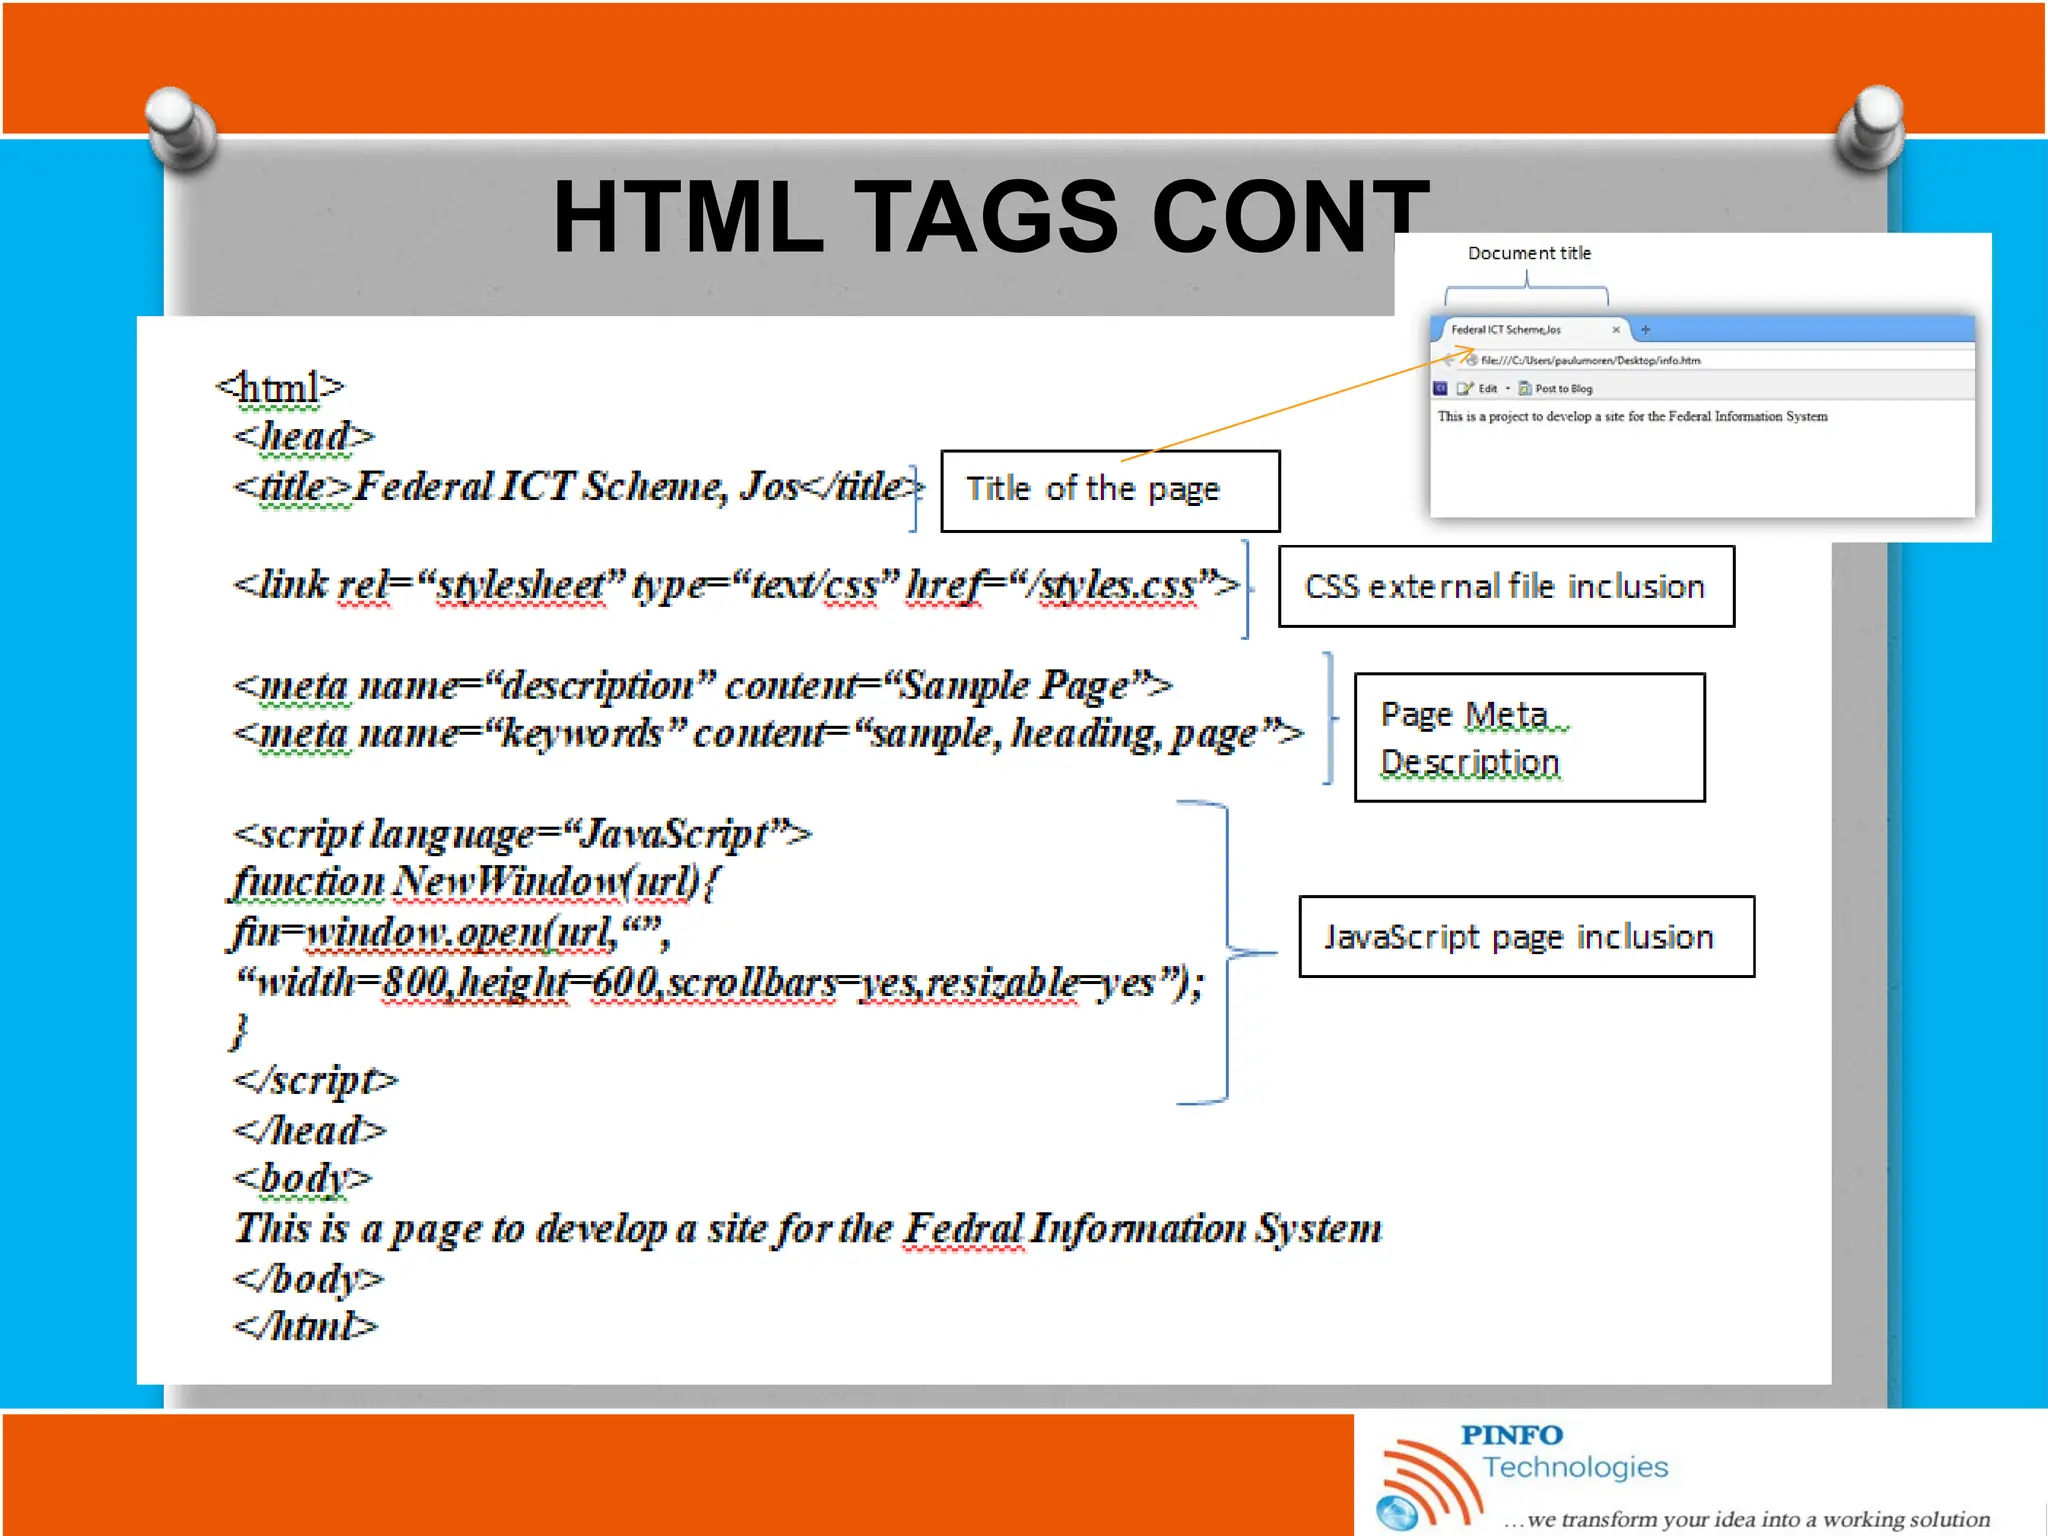
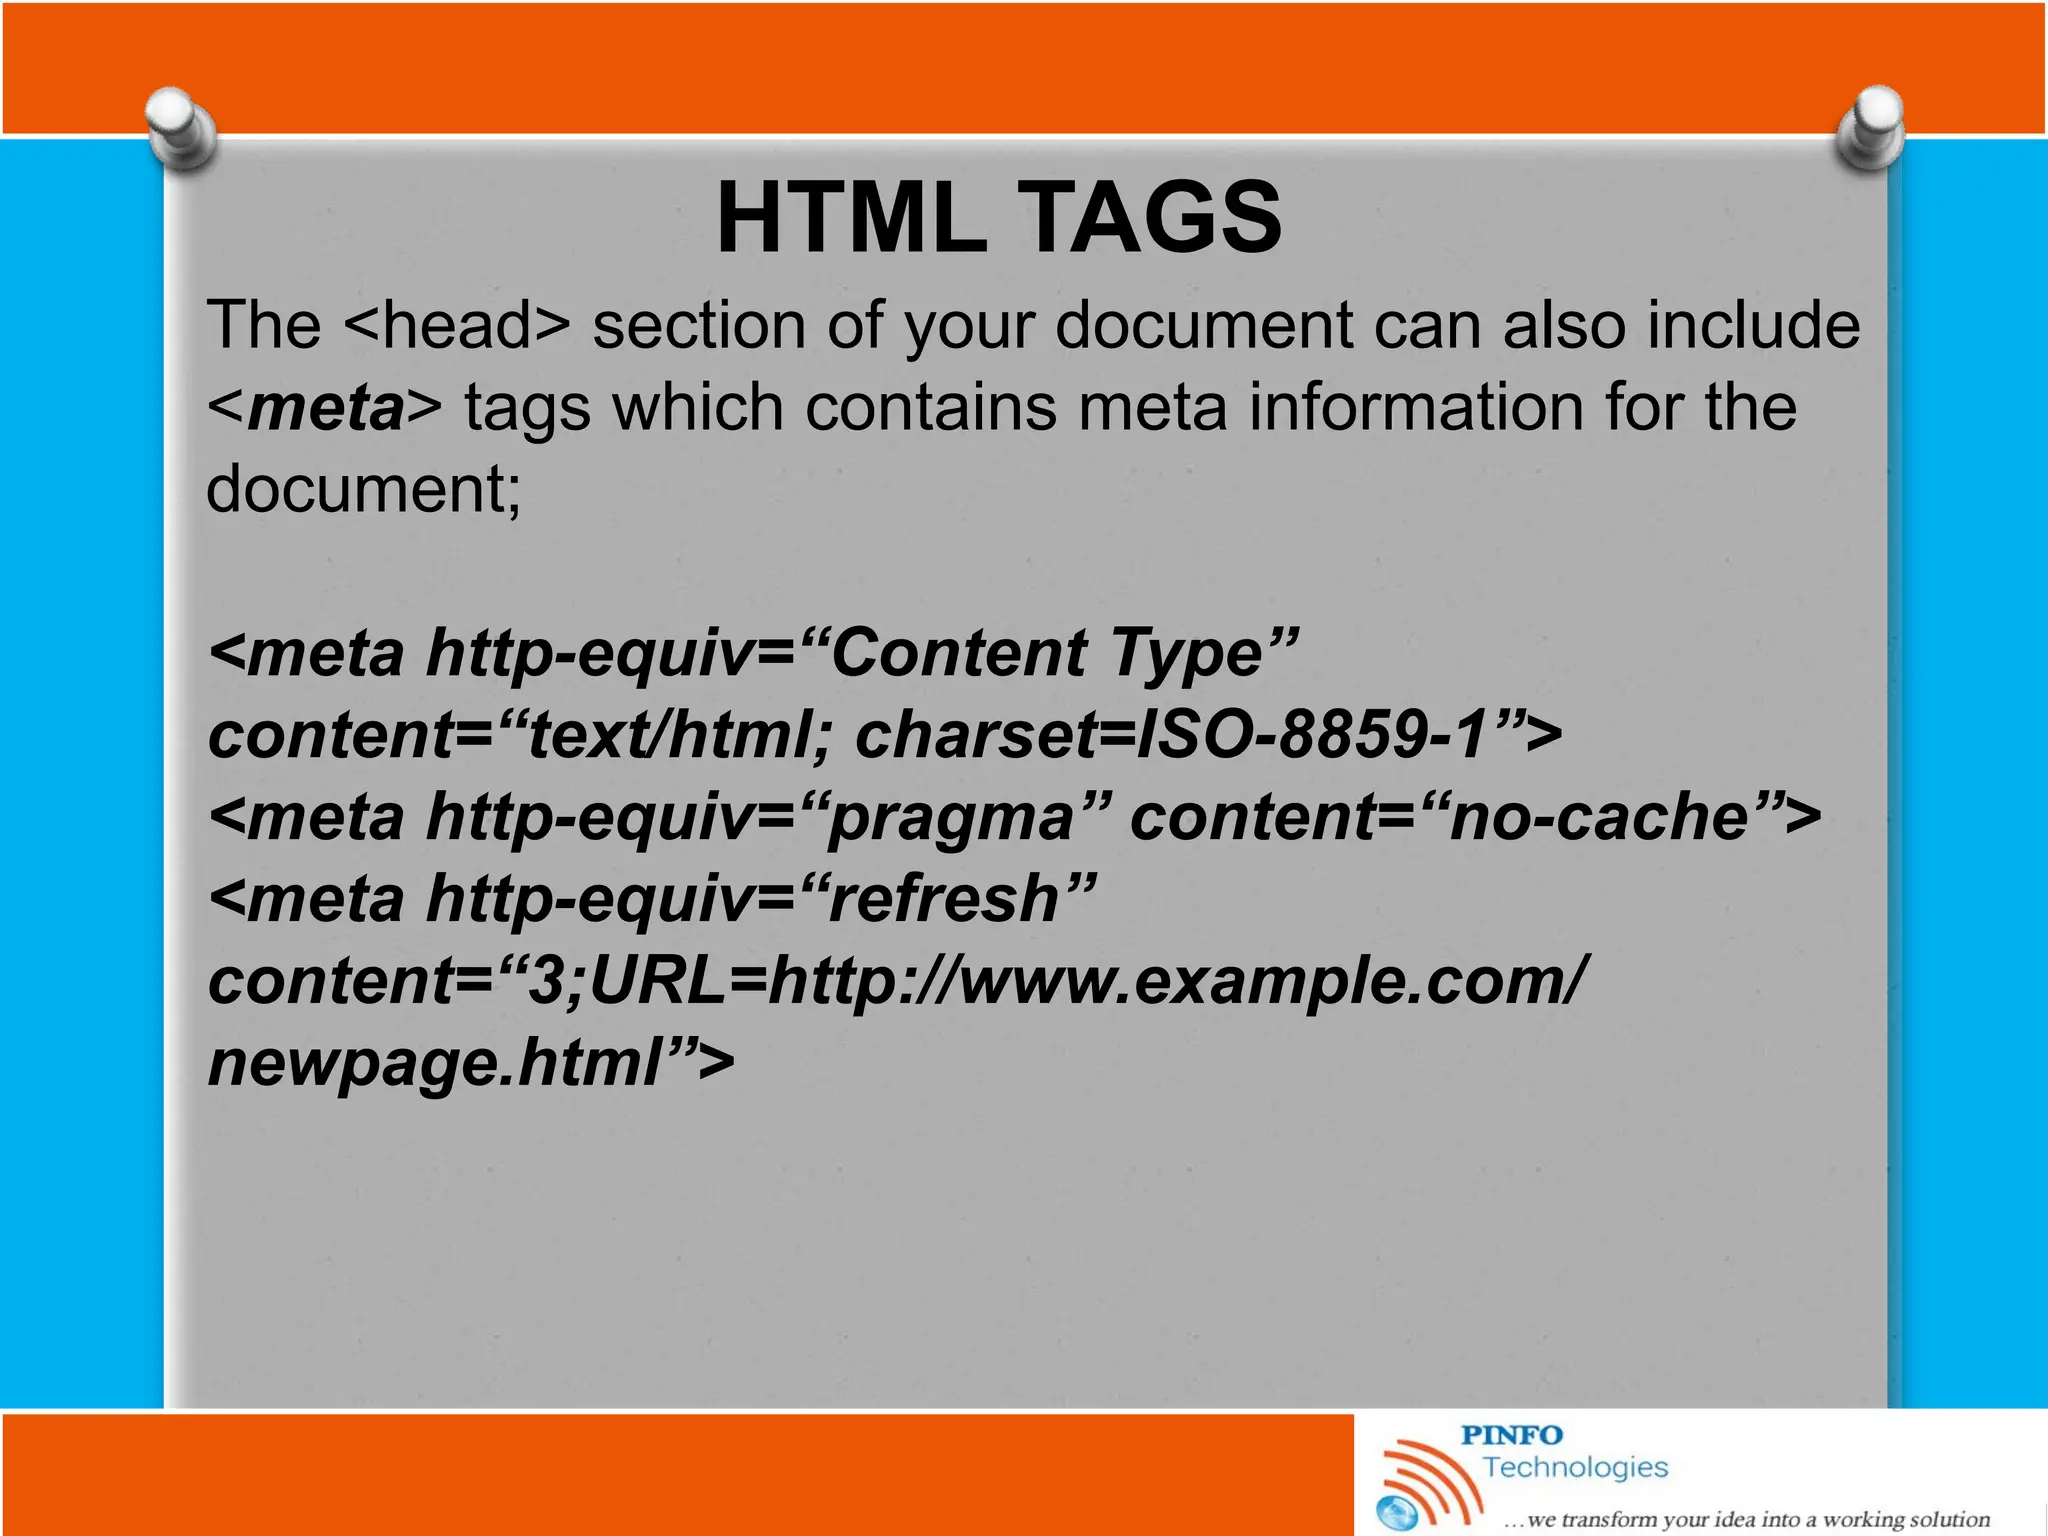
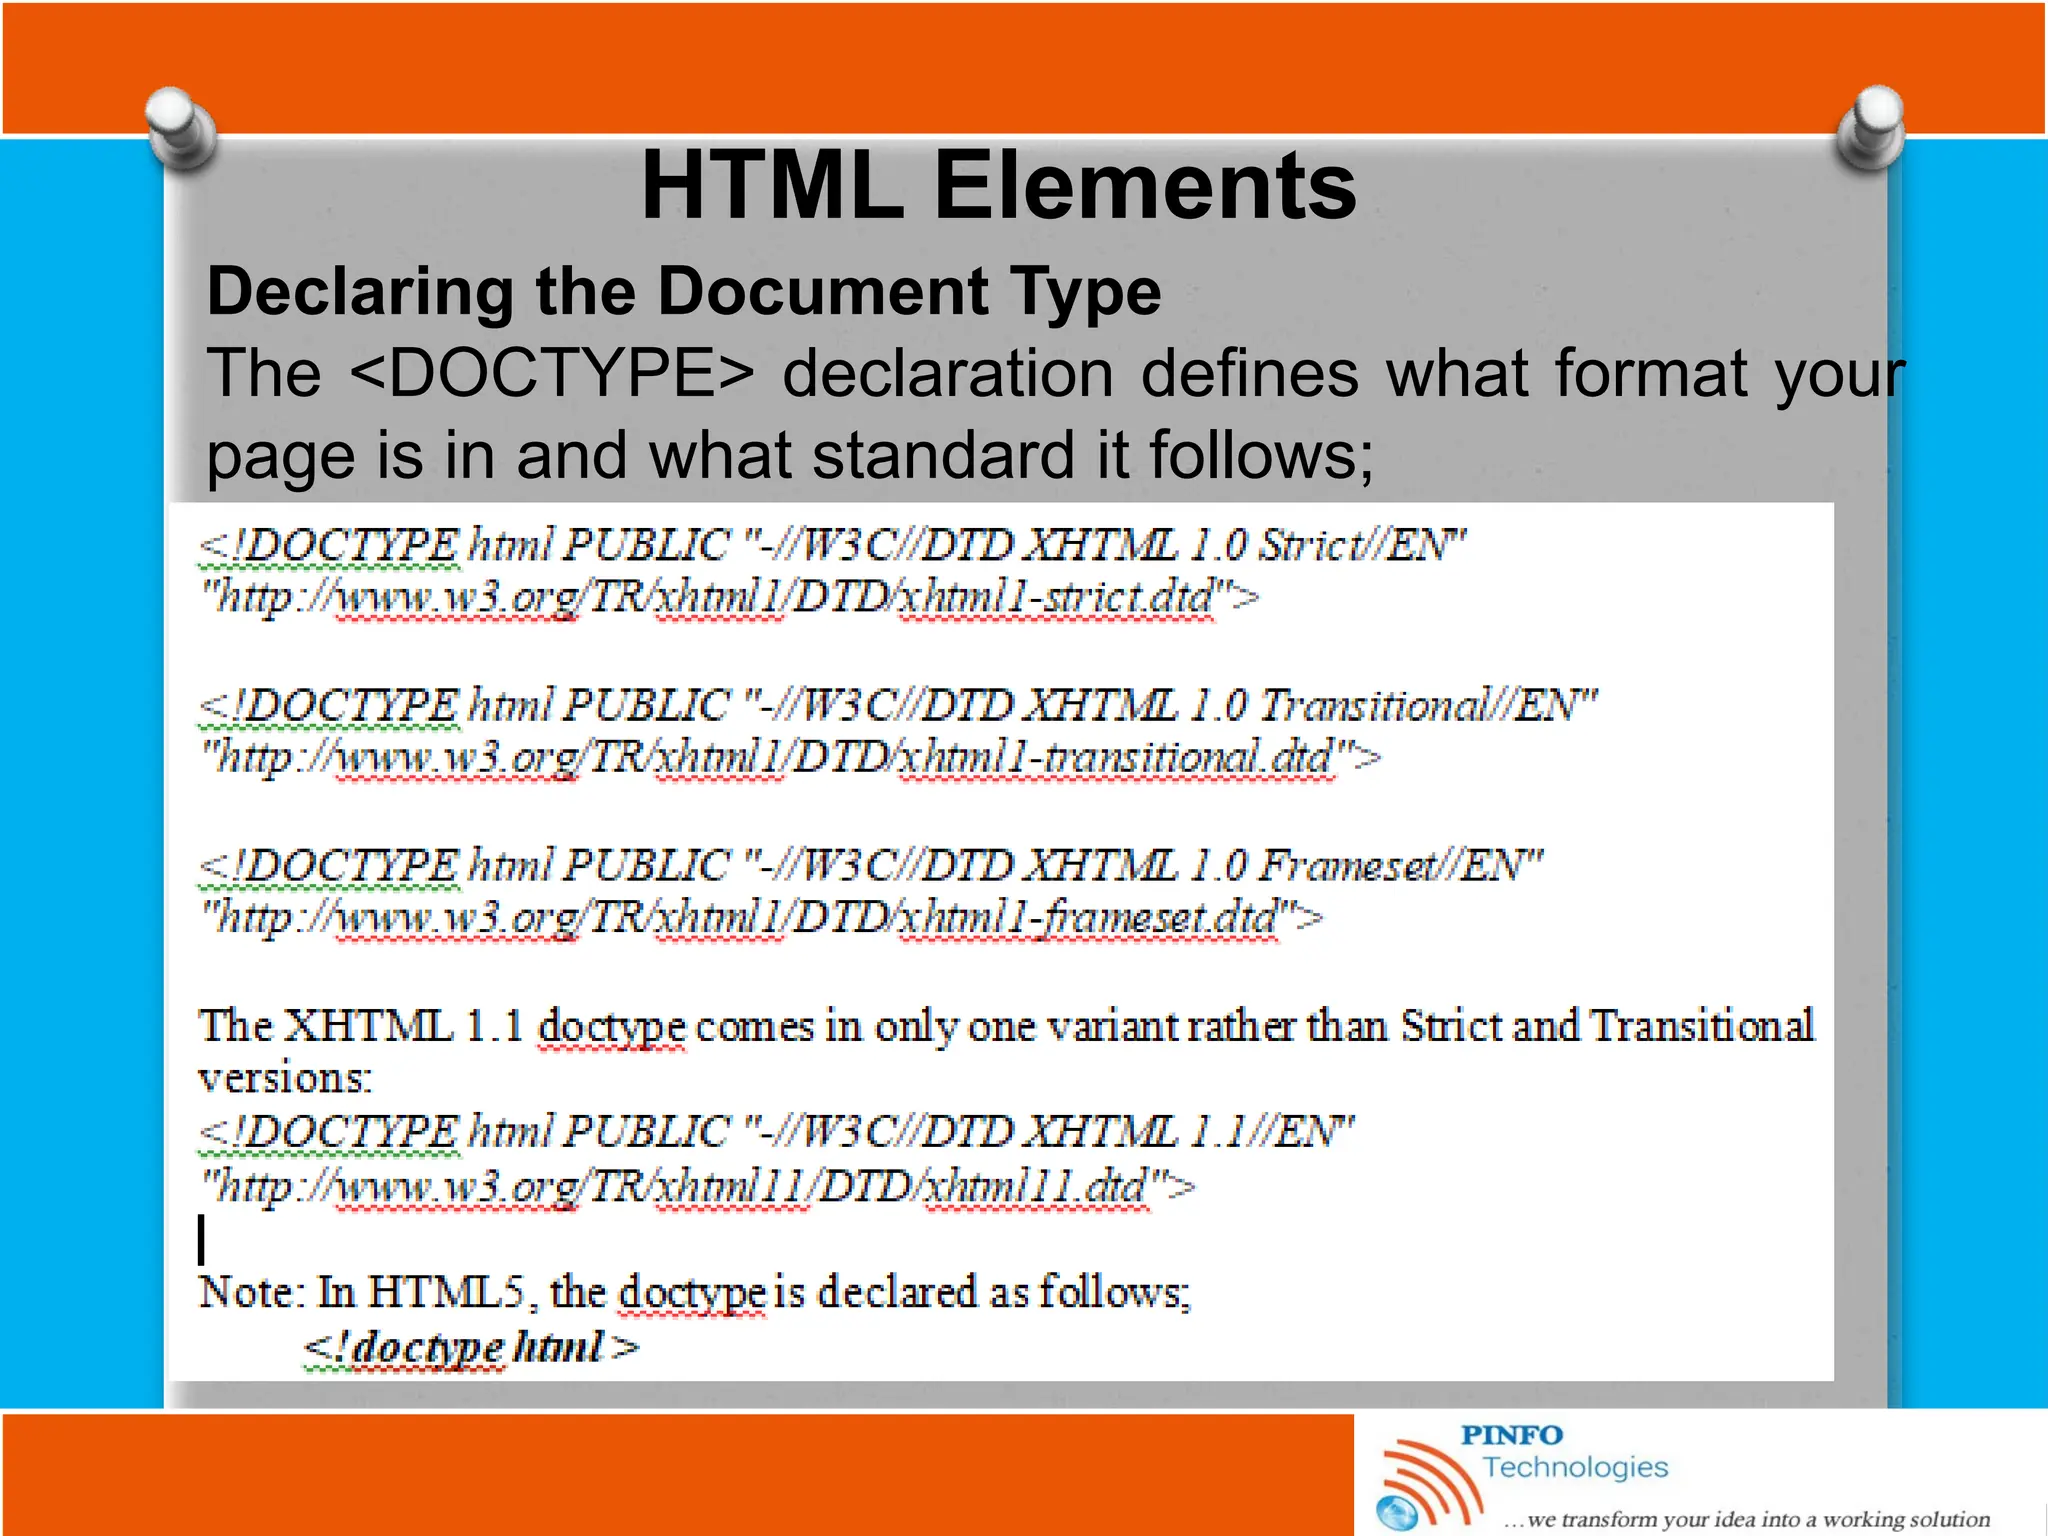
This tutorial by Paul Umoren provides a comprehensive overview of website development and design, covering essential programming tools such as HTML, CSS, JavaScript, and Bootstrap. It discusses web-related concepts, terms, and basic HTML structures, including elements for formatting, lists, images, and multimedia. The document aims to prepare individuals for a career in ICT by laying a solid foundation in web programming techniques.

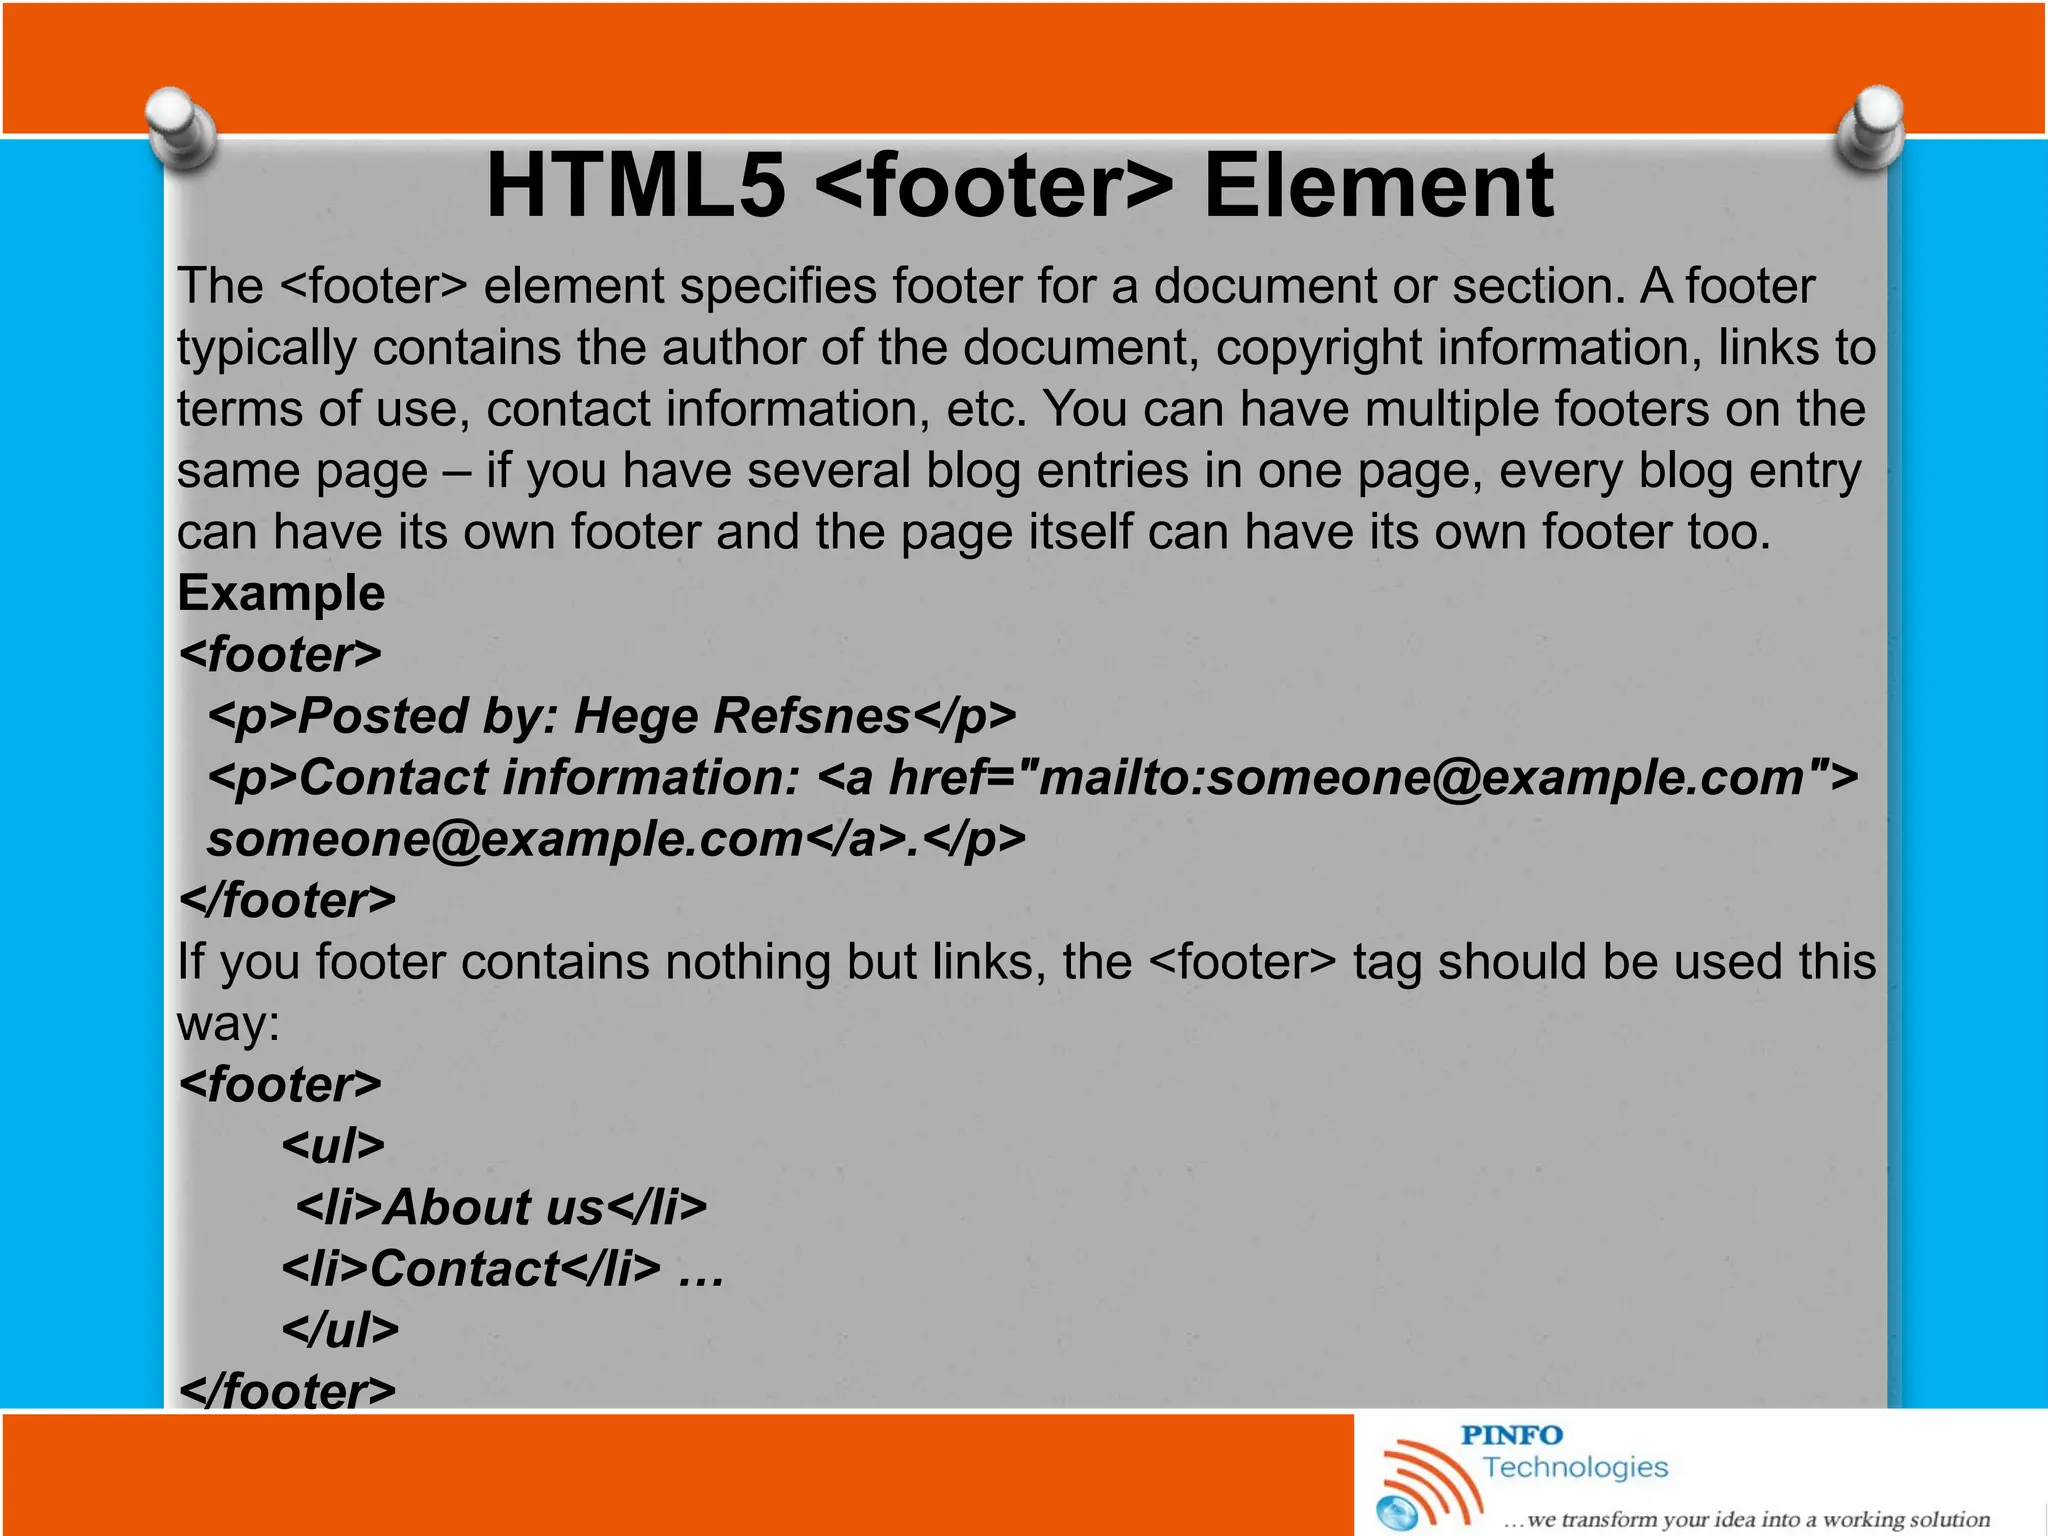
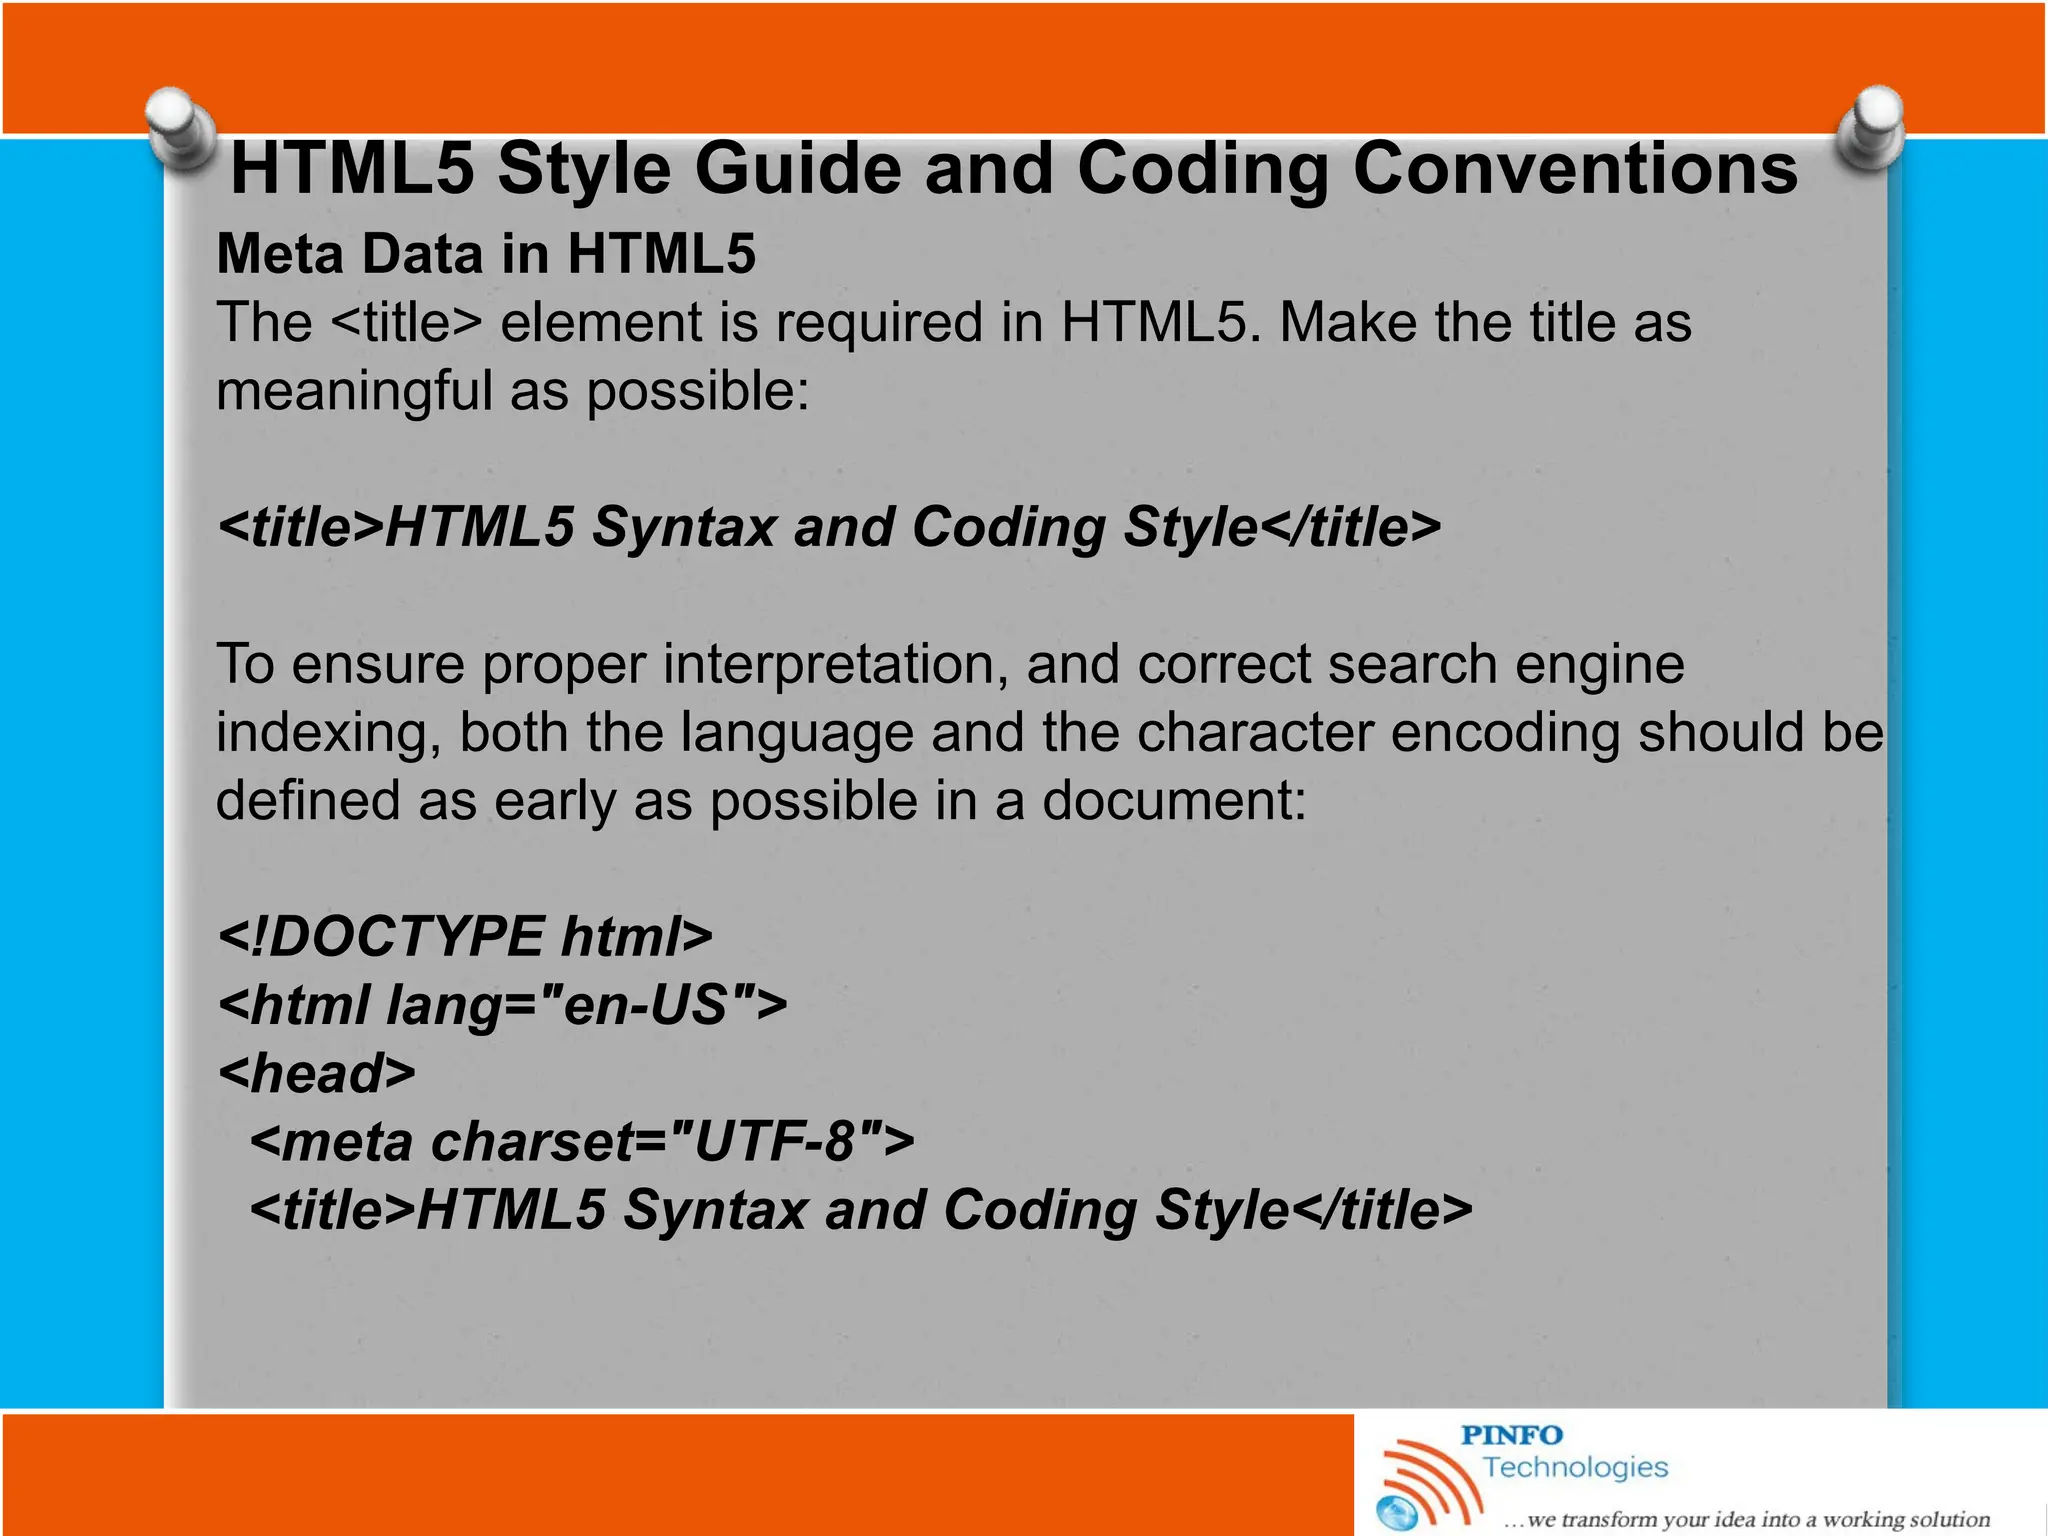
![Basic HTML Tags/Attributes CONT.
The <pre> Tag
The HTML standards' <pre> tag and its
required end tag (</pre>) defines a
segment inside which the browser
renders text in exactly the character
and
line spacing written in the source
document.
The <center> Tag (deprecated)
This tag is used to centered web page
contents such as text, graphics, tables,
and so on inside the browser's window.
The <center> alignment remains in
effect until it is cancelled with its
corresponding end tag </center>
<body>
The processing program is:
<pre>
main(int argc, char **argv)
{
FILE *f;
int i;
if (argc != 2)
fprintf(stderr, "usage: %s <file>n",
argv[0]);
<a
href="http:process.c">process</a>(argv[1]);
exit(0);
}
</pre>
</body>](https://image.slidesharecdn.com/fundamentalofwebdevelopmenttutorialsbypinfotechnologies-241027223249-6f23b314/75/Fundamental-of-Web-Development-Tutorials-by-PINFO-Technologies-pptx-23-2048.jpg)