Feature satip1
•
0 likes•208 views

1. The document discusses using IPTV (Internet Protocol Television) to distribute digital TV signals over a home network rather than using coaxial cables. IPTV allows TV signals to be streamed to laptops, smartphones, tablets, and other devices wirelessly. 2. Setting up a basic IPTV system can be done using a Linux receiver, a computer with a TV tuner, and the VLC media player. The receiver obtains TV signals and streams them into the network, then VLC can be used to receive and view the streams on other devices on the network or locally on the same computer. 3. There are two methods for transmitting TV streams over the network: unicast, where each stream

Recommended
More Related Content
What's hot
Viewers also liked
Similar to Feature satip1
Similar to Feature satip1 (20)
More from TELE-audiovision eng
Feature satip1
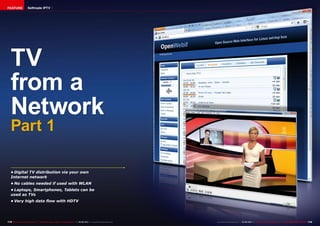
- 1. 118 119TELE-audiovision International — The World‘s Largest Digital TV Trade Magazine — 05-06/2013 — www.TELE-audiovision.com www.TELE-audiovision.com — 05-06/2013 — TELE-audiovision International — 全球发行量最大的数字电视杂志 TV from a Network Part 1 • Digital TV distribution via your own Internet network • No cables needed if used with WLAN • Laptops, Smartphones, Tablets can be used as TVs • Very high data flow with HDTV FEATURE Selfmade IPTV
- 2. 1 2 120 TELE-audiovision International — The World‘s Largest Digital TV Trade Magazine — 05-06/2013 — www.TELE-audiovision.com Vitor Martins Augusto FEATURE Self-made IPTV 1. Open the IP address of your Linux receiver in the Firefox browser. Depending on the installed firmware, a receiver’s web frontend should open in which you can, among other things, have a look at the EPG of various channels. In most cases you’ll see a small TV symbol on the right side. Click on it. 2. Either VLC will open directly or you’ll be given a file to download. Open the file in VLC so that the desired channel will be streamed in its original picture quality to your PC. That’s how simple IPTV can be even with this huge limitation: only one can receive the stream on their TV. It’s actually quite nor- mal to use Coax cable to distribute digital TV sig- nals to a TV; it doesn’t matter if it’s a satellite signal from an LNB, a ter- restrial signal or a cable signal. This method of distribution has one dis- advantage: a coax cable must be routed to each and every TV and for each TV a matching re- ceiver for digital signals is needed. An alternative to this is IPTV. It has been avail- able for quite some time now but up until now it has only rarely been used in a private setting. With IPTV, digital signals are distributed via a com- puter network. Data is sent in small packets whereby the various network adapt- ers are connected to a switch. The purpose of this switch is to route the data packets from a broadcast- er to the attached TVs. A switch handles this task in an intelligent way; it routes the data packet to only one TV. To that end, all of the at- tached TVs have to link to the switch. Although most of the switches used in the private setting come with only 4 to 16 inputs, more than one switch can be connected in series. In this way up to 254 receivers can be provided for (actually, the identifica- tion numbers 0 – 255 are available although they are usually reserved for special uses). The group of up to 254 receivers forms a sub- net. If a broadcaster’s data packet in one subnet is to be routed to a TV in another subnet, then a router would be needed. A router han- dles the communications between different subnets. Private users, for example, use a router to access the Internet so that the com- puter in the home network (that itself forms a subnet)
- 3. 1 2 3 4 5 122 123TELE-audiovision International — The World‘s Largest Digital TV Trade Magazine — 05-06/2013 — www.TELE-audiovision.com www.TELE-audiovision.com — 05-06/2013 — TELE-audiovision International — 全球发行量最大的数字电视杂志 can link to the Internet (to all the other available sub- nets). In order to feed TV signals into the home network, an IPTV server is needed that would receive the digital satellite, terrestrial or ca- ble TV signals, demodulate them and feed them into a network as an IPTV pack- et. But it’s easier said than done as there are several problems. For one thing it has to be determined how these TV packets are to be transmitted in the network. For that there are two choic- es: Unicast and Muilticast. With Unicast, a TV device (for example, a computer, a tablet or an IPTC compat- ible TV) requests a specific TV channel from the serv- er. This TV channel is then isolated from the transport stream (that typically car- ries multiple TV channels), inserted into the IPTV pack- age and then sent directly to the TV via the switch. This solution has the ad- vantage that the generated data traffic only takes place between the broadcaster and the TV; other TVs in the same subnet are not 1-5. VLC Installation If you’re interested in checking out the world of IPTV, you won’t need any special hardware – a digital USB receiver and a VLC (Video LAN Client) is enough for initial experi- ments. This great program can not only play back almost any multimedia format, it can also, among other things, stream multimedia data into the network as well as receive and display a network stream. It’s actually very simple to do and can be tested using just one comput- er. The idea behind this is that the built-in network card can also be ac- cessed via the IP address 127.0.0.1. This IP address represents the so-called Local Host and means that you can test the client directly on the same server. For example, you can test a web server on the same PC if you enter in “localhost” or 127.0.0.1 in the browser’s address line. The PC never has to be connected to the network. First VLC must be installed. This multimedia talent can be down- loaded free of charge from its official website (www.videolan.org). If you already have an older VLC version installed, it would be a good idea to upgrade to the current version for security reasons. In order to stream TV, you would, of course, need a corresponding re- ceiver on your PC. VLC can be used with a variety of BDA compatible tuners; in our case we are using a DVB-T receiver. The first hurdle is to get VLC into reception mode. For start- ers, though, you might first want to try receiving a transponder with VLC without streaming. For this you select “Media” in the menu and then “Open Capture Device”. Under “Capture Mode” you should select “TV (digital)” and for the “Delivery System” you should chose the cor- rect tuner, in our case it’s DVB-T. Now the reception parameters can be entered into the Options. For our setup the frequency of 754MHz must be entered in VLC in KHz – 754000KHz! This little detail has already caused problems for many. The bandwidth in our case is 8MHz. The “Play” button starts the TV playback. If everything worked, then there’s nothing stopping us from streaming. If it didn’t work, simply double-check your entries; some- times an extra “0” found its way into the settings or some other small er- ror has popped up. Tip: to switch between the differ- ent transponder channels, you can click on the right mouse button and then under “Playback – Program” you should find the channels. If you now select “Stream…” under the “Media” menu heading, you can reconfigure the TV receiver, only this time instead of clicking on “Play” you can click on “Stream”. The reception parameters in this second go-around should now be correctly filled in so that you can click directly on “Stream”. An Assistant will now guide you through three steps. In the first step the reception pa- rameters are shown all together in a row. These can be used in configura- tion files or as start parameters and are very helpful for more advanced applications. In the second step the receiver is specified. With Unicast the stream is sent to only one receiver. First the protocol is selected – for the first at- tempts use the RTP/TS protocol; it is supported by the most clients. Con- figure the IP address with 127.0.0.1. The port can be set to 5004. Deac- tivate the Transcoding option. This would unnecessarily load down the PC and, aside from that, we want to maintain the best possible picture quality. In the third and last step the op- tion “Stream all elementary streams” should be selected so that the entire stream from the tuner can be in- serted into the network. This would make even videotext available on the TV. Clicking on the “Stream” but- ton starts the process. At this point though, nothing exciting will hap- pen as yet. The VLC won’t show the stream locally and nothing can be seen in the window; only the “Play” button is replaced with a “Pause” button. Now open up a second VLC window and select the entry “Open Network Stream…” in the “Media” menu. A new window will open in which you must enter in exactly this address: rtp://127.0.0.1:5004. After confirming the entry, a window will instantly open for each channel and the resulting chaos resembles what you might see in a TV studio. All of the channels are shown simultane- ously with video and audio in sepa- rate windows. What happened? The second VLC window accessed the transport stream from the first VLC window via the local host address on port 5004 with the help of the RTP protocol. It routed the stream correctly to the second VLC window and showed each channel in its own window. If you now were to use a second computer that would be linked to the first PC via the network, then you could pass the transport stream from one computer to the other via that network. For this to work you’d need to enter in the IP address of the sec- ond computer into the first computer instead of the Local Host IP address mentioned above. With the second computer you would enter the IP address of the first computer – once again this would be instead of the Local Host IP address. And that’s it! The IP address of the computers can be read in the Windows Network Assistant or through the command “ipconfig-all” entered into a DOS shell that can be accessed by typing in “cmd” in the Windows Start Menu. Last but not least, a few tips: 1) Don’t try right away to stream over the Internet. For that purpose the stream needs to be transcoded in order to significantly reduce the bandwidth. 2) Streaming in your own network can load it down quite heavily; find out first if other users need the network. 3) The Internet offers quite a few tips and tricks regarding streaming. The VLC forum is especially occupied with this subject. Have fun with your first streaming experiments! Entering the World of IPTV
- 4. 6 7 8 9 124 TELE-audiovision International — The World‘s Largest Digital TV Trade Magazine — 05-06/2013 — www.TELE-audiovision.com involved and which means they can be used in the net- work with full bandwidth. But Unicast has one prob- lem: what happens when two, thee or even more us- ers request the same TV channel? The server has to then route the channel individually to the various TVs which will in turn put a load on the network’s band- width. It could happen that the network connection be- tween the server and the switch could easily be over- loaded by the vast amount of data such that the video output at the TV might be- come intermittent or stop altogether. In cases like this Multi- cast would be much more elegant. With Multicast the data packets are sent in parallel to all of the con- nected TVs and if you want to, you can receive the data stream, and if you don’t want to, you simply don’t access the data stream. The server only needs to send the data packet through the switch one time. The switch in turn routes the data pack- et to not just one TV, but all of the connected network adapters. But even this technique has its drawbacks; just like that all of the network con- nections have to deal with a heavy amount of data traffic. When two non-par- ticipating computers want to exchange data between themselves, a portion of the network bandwidth is no longer available. Even though these two comput- ers are not being used to watch TV, the line will still be occupied with IPTV data. Additionally, with Multi- cast it’s typical for rout- ers that are not specifically configured to not pass on these data packets. If you allow the router to config- ure itself at home, Multicast streaming over the pub- lic Internet usually doesn’t work because the routers from nearly every Internet provider can’t pass on these packets. That’s why stream- ing via the Internet for pri- vate users only works with Unicast. But wait! That fact that it does work is proven by all of the IPTV providers that can be found in the In- ternet: they are definitely using Multicast to route TV channels to an IPTV receiv- er; they have special access to the Internet. Putting it all together, we can say this: for private IPTV applications Unicast is in most cases the cor- rect solution; if you want to serve multiple users with IPTV, such as in hotels or apartment blocks, then Mul- ticast is the way to go. If you want to take part in IPTV at home, you really don’t need all that much: a Linux receiver or a PC with an integrated reception card would be the server and a normal computer or laptop would be the TV device. In most cases, Linux receivers already have a web front- end installed in the firm- ware. If you call up the IP ad- dress of the Linux receiver in the computer’s browser, you can choose a chan- nel and watch it on the PC. To do this you click on the small TV symbol to load an m3u stream file. This is then opened for example with VLC and just like that you can watch a live stream on your PC. This functions quite well although with a Linux re- ceiver it is always one user that can watch a specific channel. Through Unicast streaming, only one user6-9. VLC Installation
- 5. 10 11 12 126 TELE-audiovision International — The World‘s Largest Digital TV Trade Magazine — 05-06/2013 — www.TELE-audiovision.com is served; a single tuner couldn’t even process chan- nels from different tran- sponders at the same time anyway. The solution is multiple tuner server boxes so that, for example, the four levels of a satellite position can be received independently from each other and so that the parallel streaming of different transponders be- comes possible. But even here there’s a little calcu- lation that shows that this 10-12. VLC Installation might not always be prac- tical. A single HD channel typically needs a bandwidth of around 12MBPS. If you want to stream four of these channels to four different TVs, then it quickly adds up to 48MBPS and this would be too much for older WLAN routers or Access Points that can only handle up to 56MBPS. You also have to take into account that a transport stream with a single HD channel and an audio track needs about 12MBPS, but when it’s converted into an IPTV packet, this rate actu- ally bloats somewhat and then there’s all the entire headers that are required for all the data packets that need to be considered as well. Another alternative is available if you can deal with reduced picture and audio quality. Instead of insert- ing the original transponder stream into the network, the received channels can be recompressed whereby a stronger compression is used. In this way the bandwidth of a channel can be reduced to a more reasonable 1MBPS but unfortunately, you’ll see this in the picture: all of a sudden the resolution will be greatly reduced and be- cause of this compression typical artifacts will become visible such as blocks in the video and sloppy colors. A newly compressed stream like this though can be streamed in Unicast via the Internet. The advantage of IPTV is its incredible flex- ibility: a large assortment of devices can be used for re- ception such as computers, laptops, game consoles, tablets, Smartphones and, of course, IPTV compatibles TVs. And let’s not forget how WLAN solves the prob- lem regarding the otherwise needed cabling.